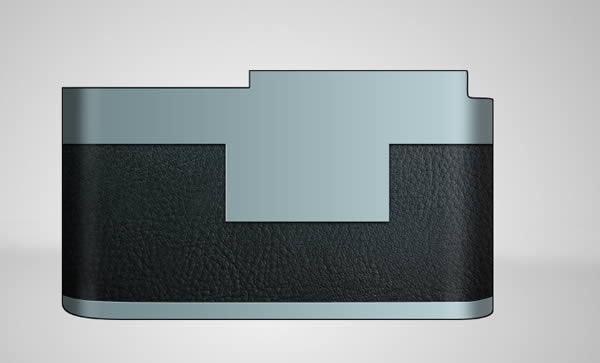
Leica is considered one of the most prestigious camera brands. In this tutorial, we will draw one of the most notable Leica cameras in Photoshop, the Leica M1. Let’s get started!
Step 1: Background and Floor
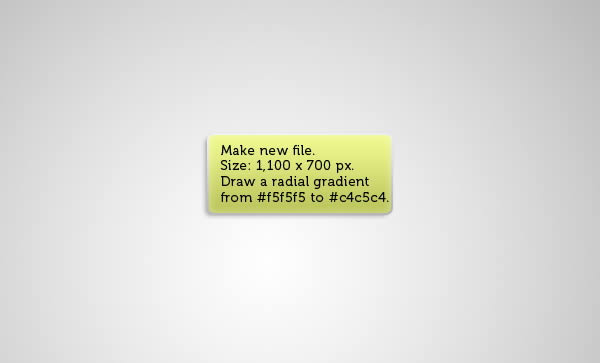
Make new file (Command/Ctrl + N) and set its size to 110 × 700 px. Activate gradient tool. Set its mode to radial from #f5f5f5 to #c4c5c4.
Step 2
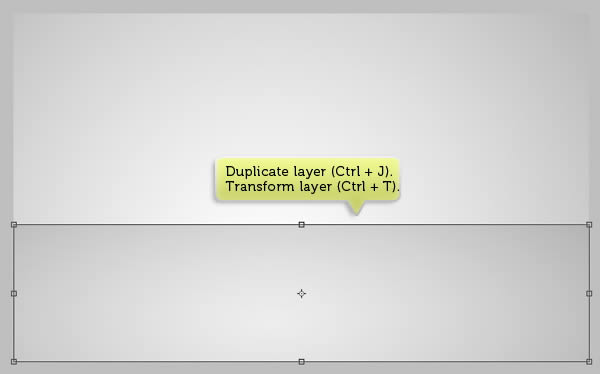
Duplicate layer by pressing Command/Ctrl + J. Hit Command/Ctrl + T to transform it. Pull upper handle down to convert it into a floor.
Step 3
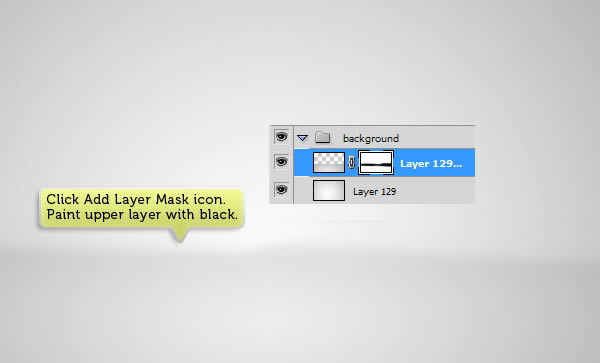
On layers panel, click Add Layer Mask icon to add layer mask. Paint upper mask with black until it fades onto the background.
Step 4: Basic Shape
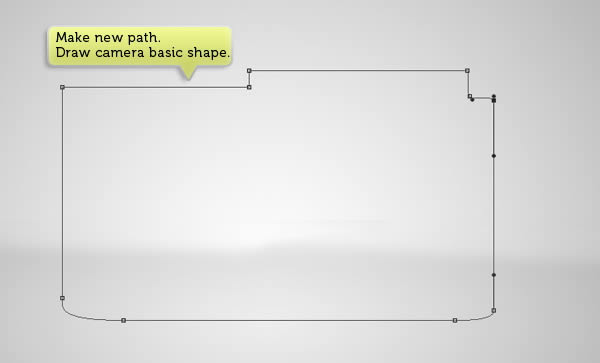
Open Paths panel. Click new path icon. Use pen tool to draw camera basic path.
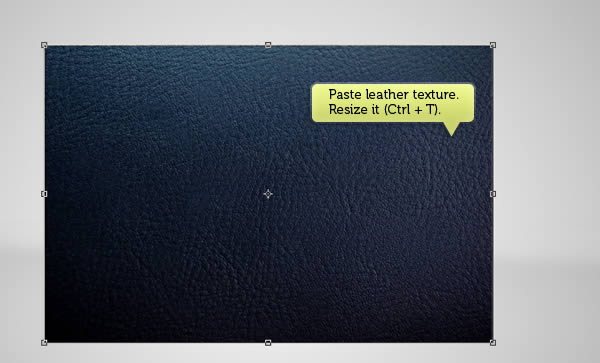
Step 5
Grab a leather texture from Design Instruct freebies section. Below, we use Leather Texture 04 from the collection.
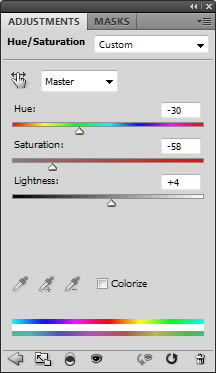
Step 6
Current leather color doesn’t fit the camera appearance. We need to change its color to gray. Add new adjustment layer Hue/Saturation and use below settings.
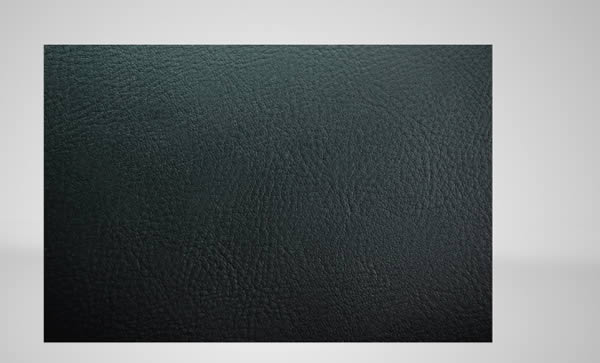
This is the result after we add Hue/Saturation.
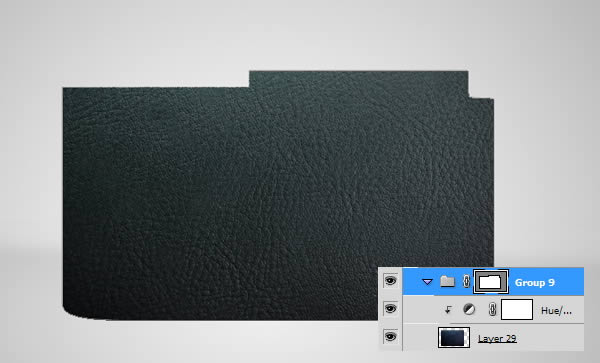
Step 7
Copy basic camera path and place it on top of the leather texture.

Step 8
Select leather texture and adjustment layer. Hit Command/Ctrl + G to place them inside a group layer. Click Layer > Vector Mask > Current Path. The leather texture is now goes inside the path. From this point onward until Step 29, make sure to place all new layer inside this group layer.
Step 9: Metal Parts
Duplicate camera path. Click Layer > New Fill Layer > Solid Color. Select color #9ebec5. Add a rectangular path on middle of the path. Modify its bottom side to turn it into a curve. Set its mode to Subtract. Add a rectangular path and set its mode to Add to Shape. See picture below to see the shape that you need to make.
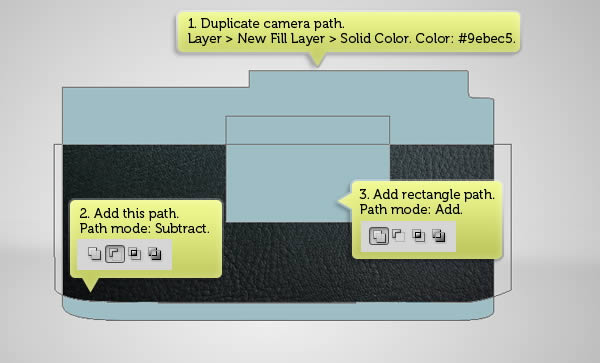
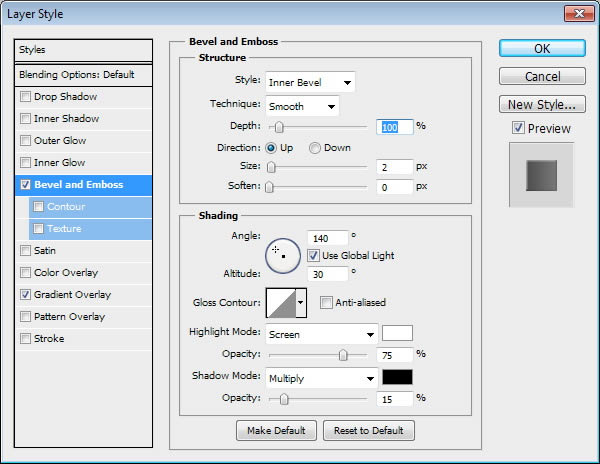
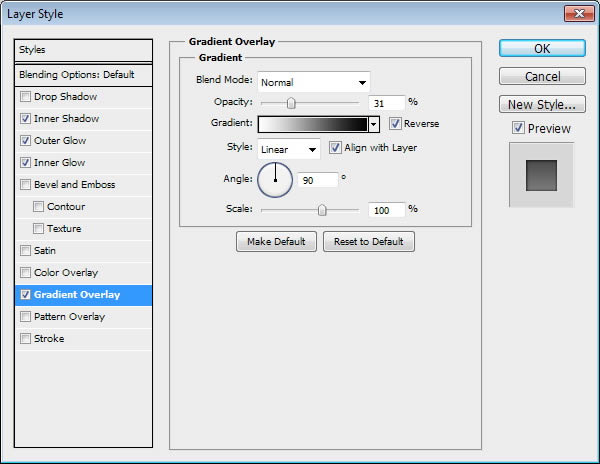
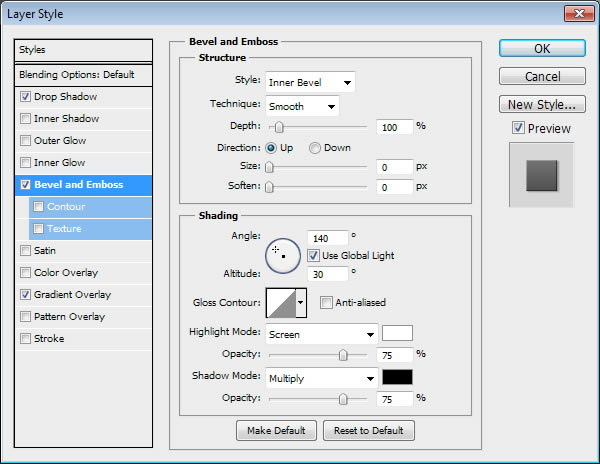
Add Layer Style Bevel and Emboss and Gradient Overlay.

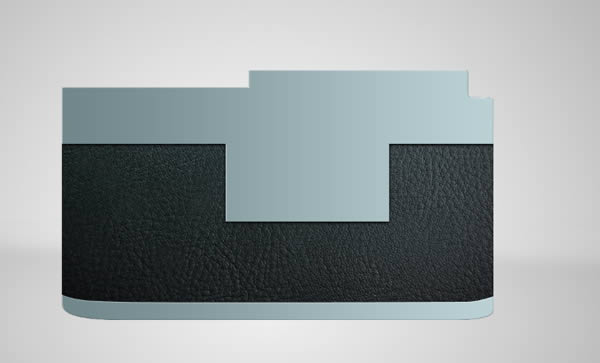
This is the result we have. This shape is going to be metal part of the camera.

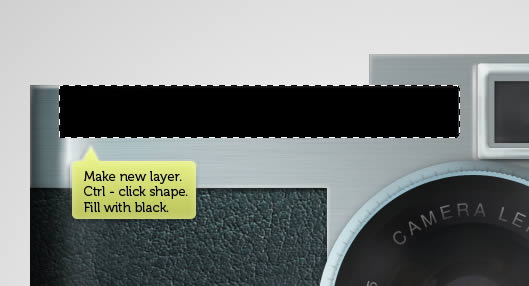
Step 10
In Layers panel, Command/Ctrl-click layer shape to make new selection based on its shape.

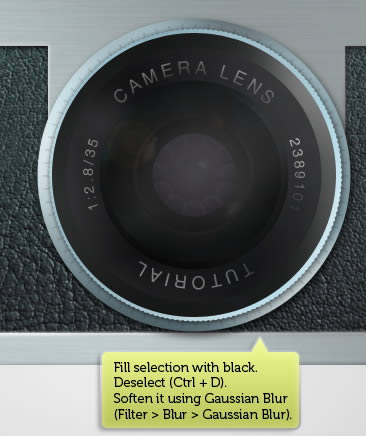
Step 11
Make new layer. Fill selection with black.

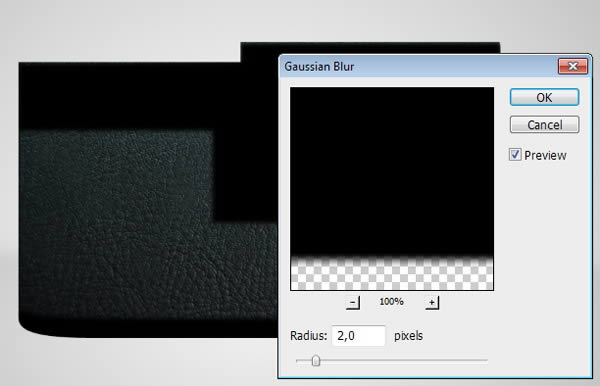
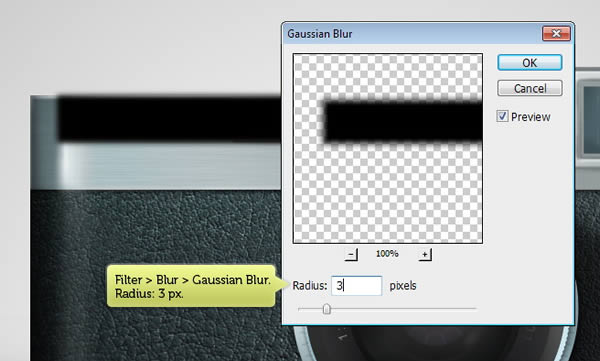
Step 12
Soften it by adding Gaussian Blur (Filter > Blur > Gaussian Blur).
Step 13
Hit Command/Ctrl + [ to place the layer under previous layer shape. Move the shadow down a few pixel.
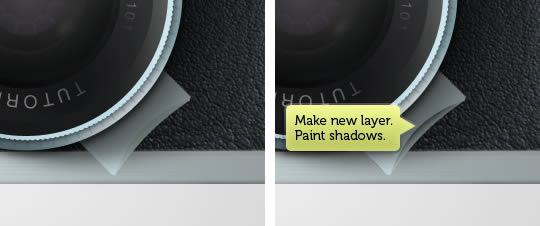
Step 14
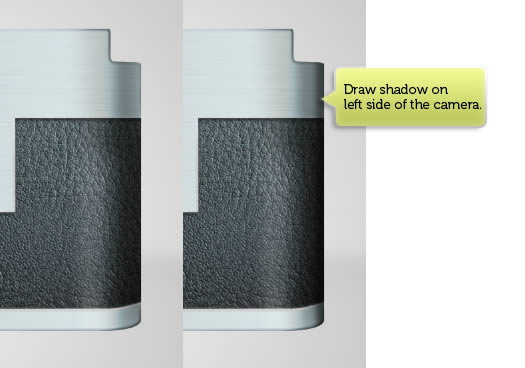
Make new layer and then activate brush tool. Manually, paint black as shadows on left and right side of the camera.

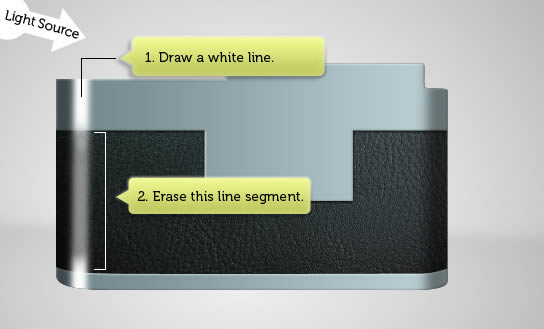
Step 15
Repeat previous step, this time use white for highlights. We want to place the source light on left side of the camera. So, draw a white line on left side of the camera. Use eraser tool with 0% hardness and 20% opacity to erase highlights on its leather texture.
Step 16
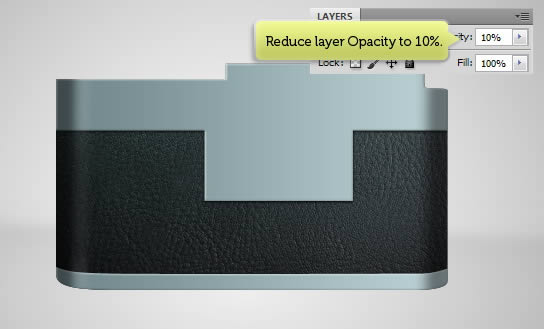
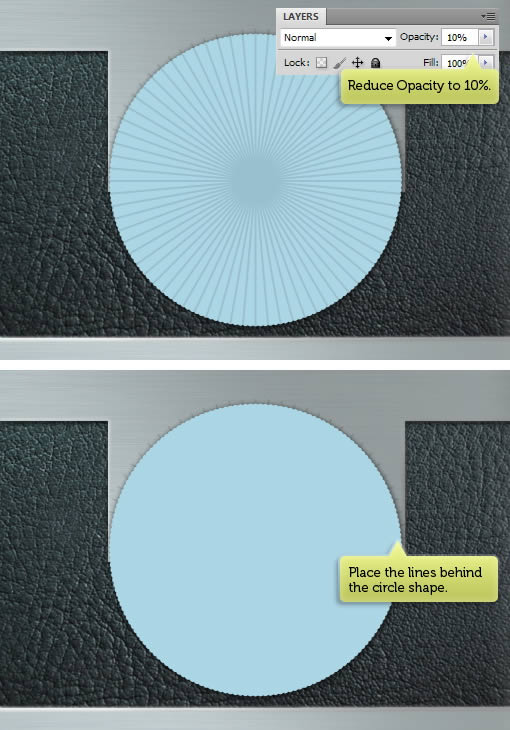
Reduce layer Opacity to 10%. This is enough to add subtle highlight onto the camera.
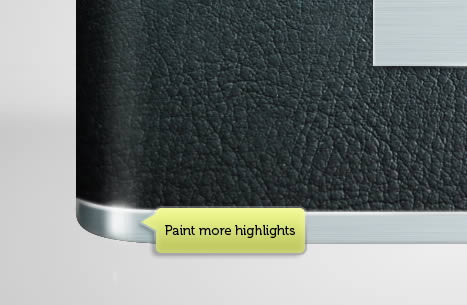
Step 17
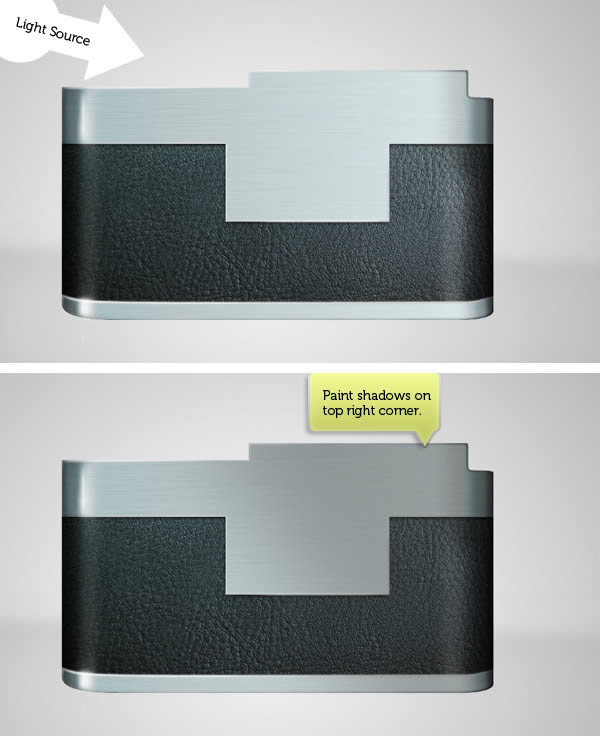
Add another highlight on right side of the camera using same technique. This time set its Opacity to lower than 10%. Remember that highlight on left side needs to be more stronger because the light source is placed on top left side too.

Step 18
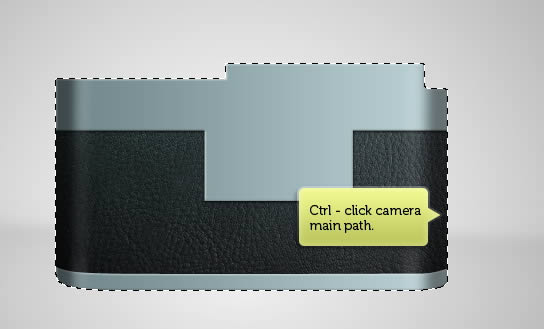
Command/Ctrl-click camera main path to make new selection based on its shape.
Step 19
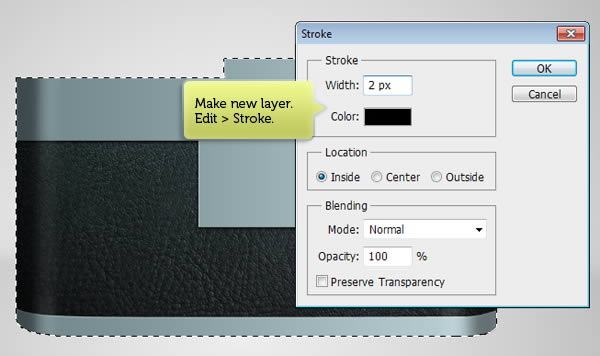
Make new layer. Click Edit > Stroke. Select black as its color with width 2 px.
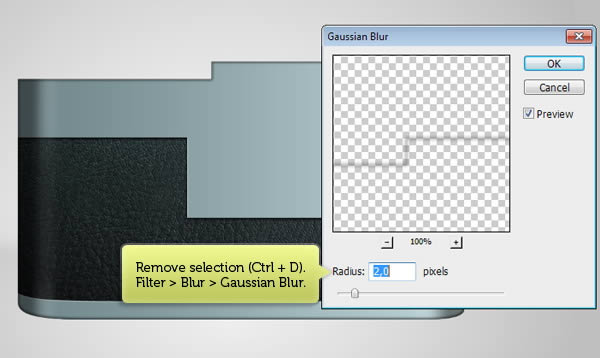
Step 20
Deselect by pressing Command/Ctrl + D. Click Filter > Blur > Gaussian Blur to soften the line. Use soft eraser to erase parts of the line. This line will be shadows on camera’s edge.
Step 21
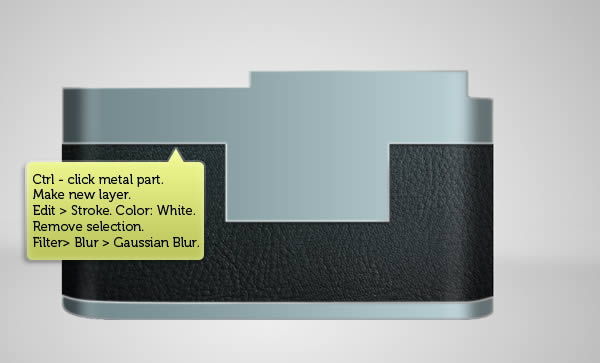
Let’s repeat previous, but this time for highlight on the metal part. Command/Ctrl-click metal part layer to make new selection. make new layer. Click Edit > Stroke and choose white color. Remove selection and then soften it using Gaussian Blur.
Step 22
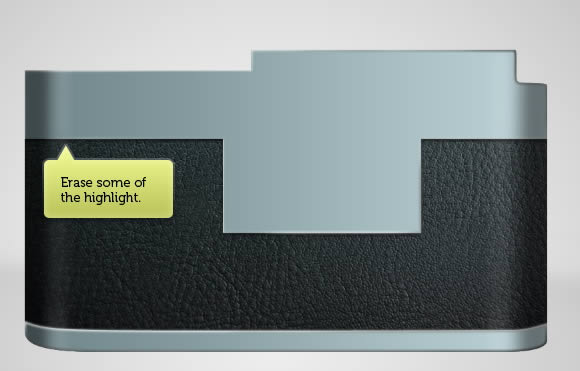
Use Eraser tool to erase some part of the highlight line.
Step 23: Add Metal Texture
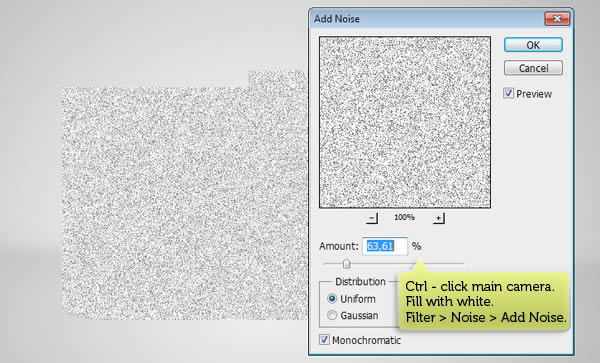
Make new layer and then fill it with white. Click Edit > Fill, select white color and then click OK. Click Filter > Noise > Add Noise.
Step 24
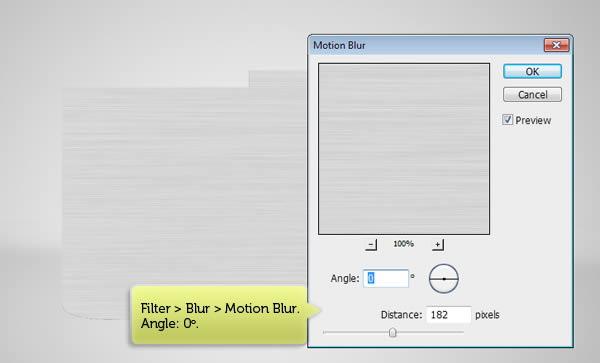
Click Filter > Blur > Motion Blur. Set angle to 0° with very big distance size.
Step 25
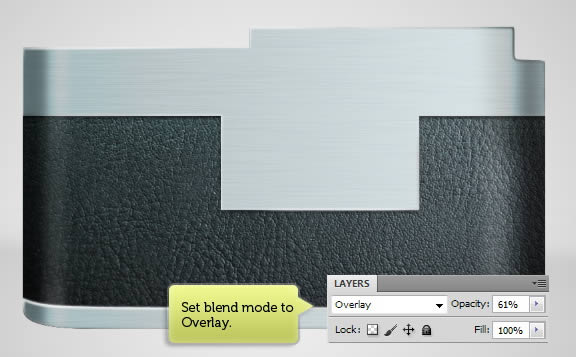
Change layers blend mode to Overlay and reduce its Opacity.
Step 26: Add Highlights
Let’s add some soft highlights onto the camerea. Activate Brush tool and set its Opacity to 40%. Change background color to white. Make new layer and then draw small highlights on top left of the camera. Don’t worry if the result looks too rough. Soften it by applying Gaussian Blur (Filter > Blur > Gaussian Blur).
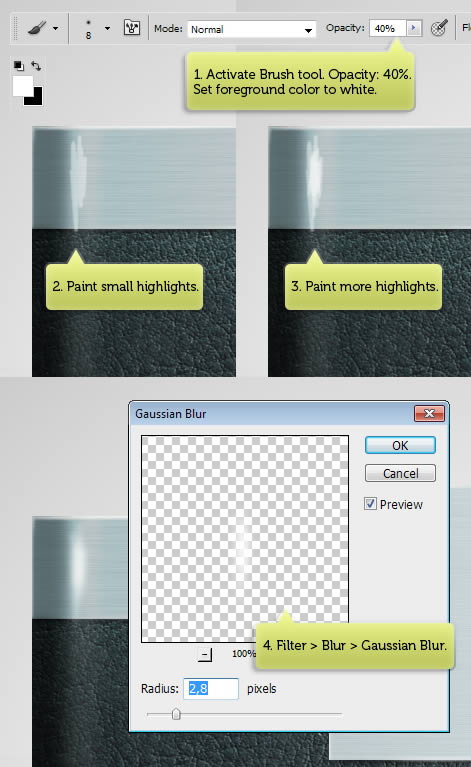
Repeat this steps on other areas of the camera.
Step 27
Make new and paint shadow on left side of the camera. Make sure to use a big and soft brush.
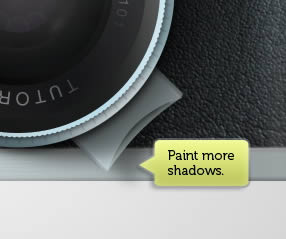
Step 28
Make new layer. Draw big shadow on right side of the camera. Reduce layer Opacity until the result is natural.
Step 29: Lens
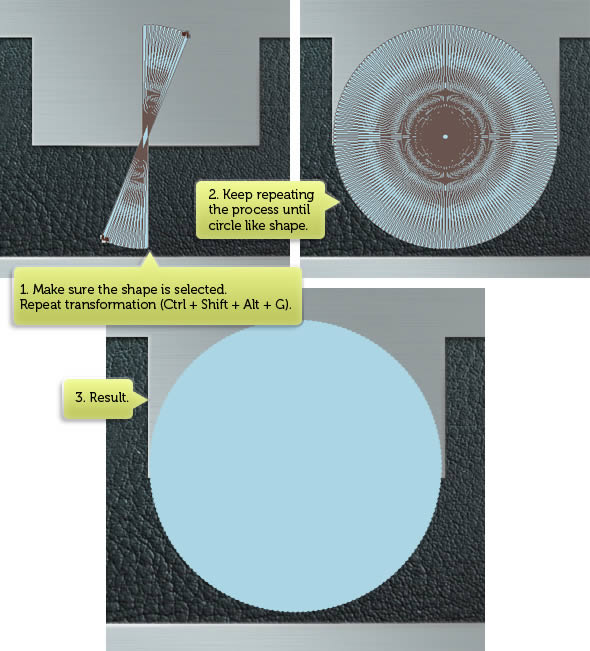
Make a new separate group for drawing lenses. Draw a thin rounded rectangle with color #add9e7. Select shape using Path Selection tool and hit Command/Ctrl + Alt + T to duplicate and transform it. In the option bar, set angle to 2°.
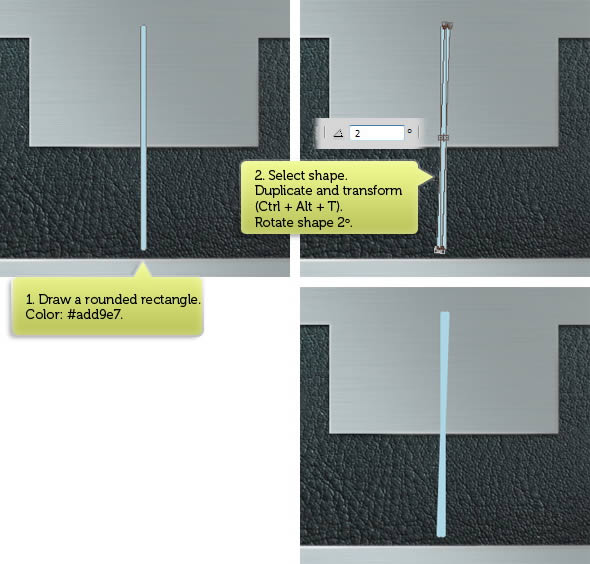
Make sure the new path is selected. Hit Command/Ctrl + Shift + Alt + G to repeat the transformation. Keep doing this until we have a full circle shape.
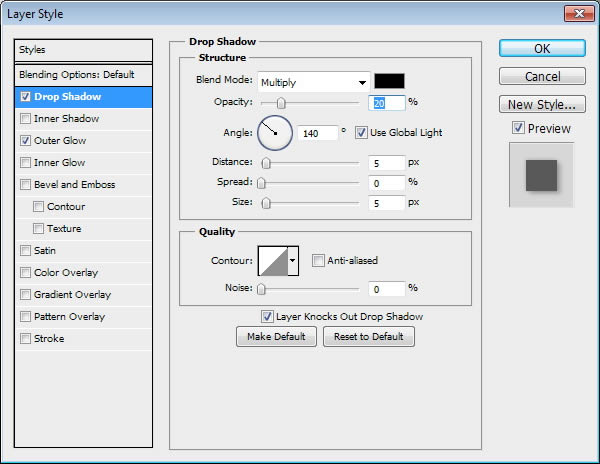
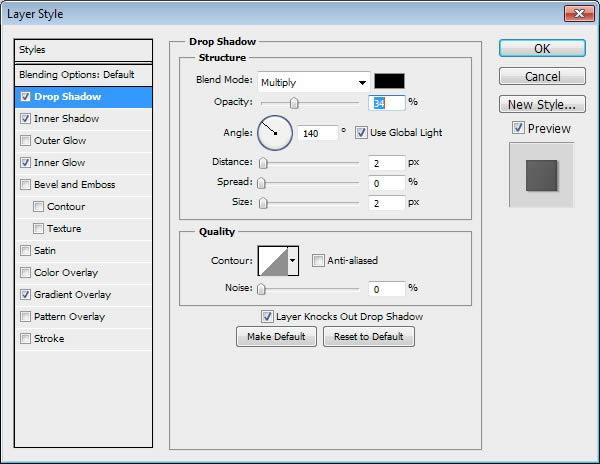
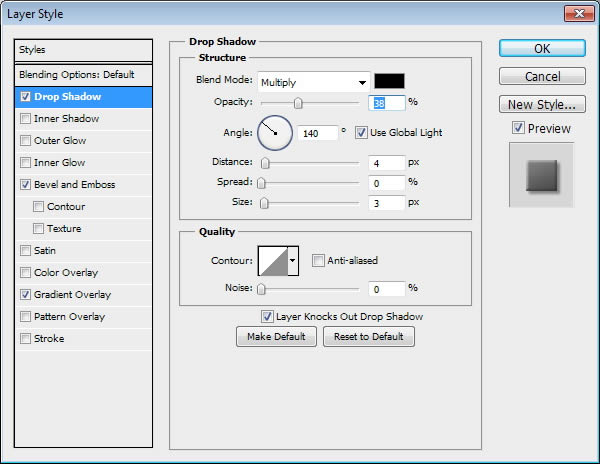
Add Drop Shadow and Outer Glow with following settings.
Step 30
Repeat previous steps, but this time draw a black rectangle with angle 5°.
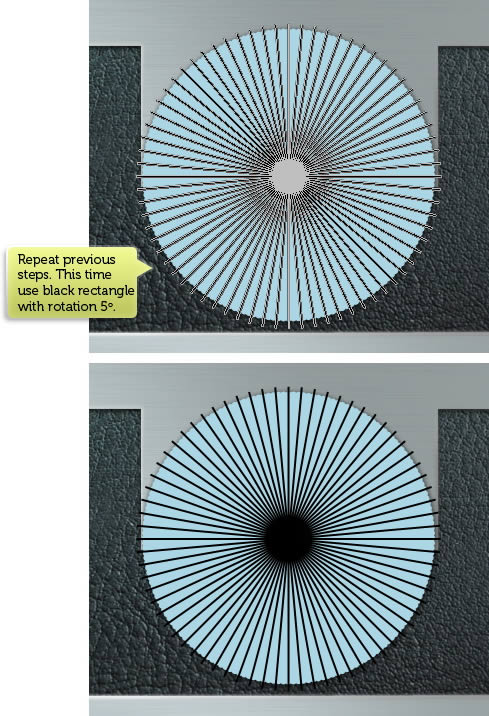
Reduce layers Opacity to 10%. Hit Command/Ctrl + [ to move the layer down and place it under previous circle shape.
Step 31
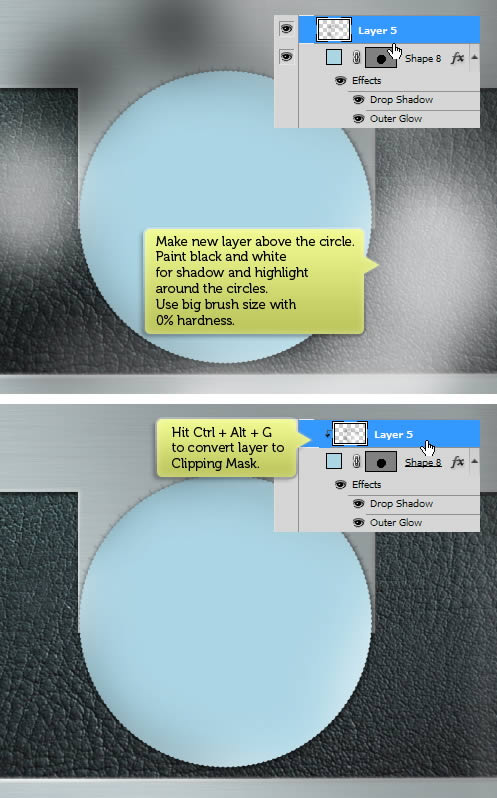
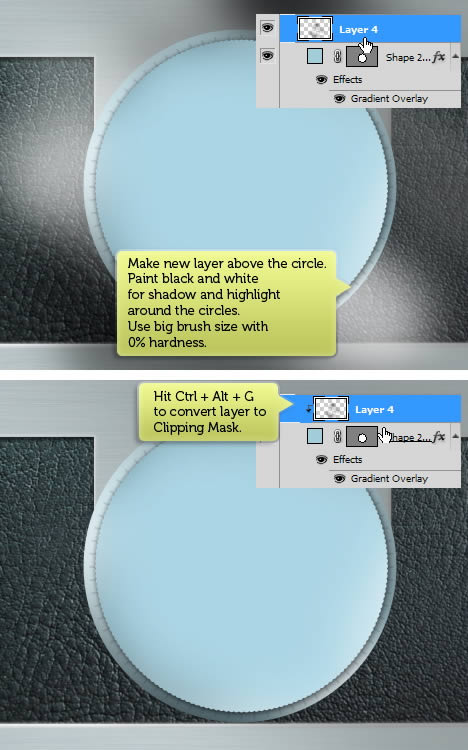
Make new layer on top of circle shape. Dab white and black on its edge using a soft big brush. Hit Command/Ctrl + Alt + G to convert the layer into a Clipping Mask. This way, the pixels will goes inside the shape.
Step 32
Draw bigger circle behind the lens and lines. Use #a2cedc for its color.
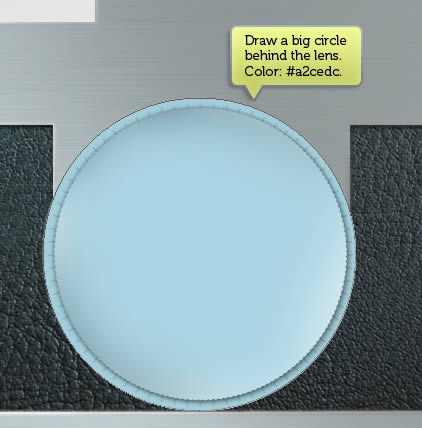
Douible click layer and activate Gradient Overlay with following settings.

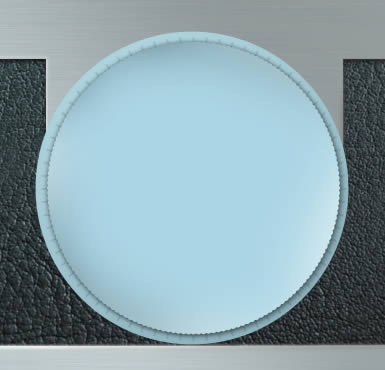
Step 33
Make new layer right above the circle and dab white and black using soft big brush. Convert the layer to Clipping Mask (Command/Ctrl + Alt + G).
Step 34
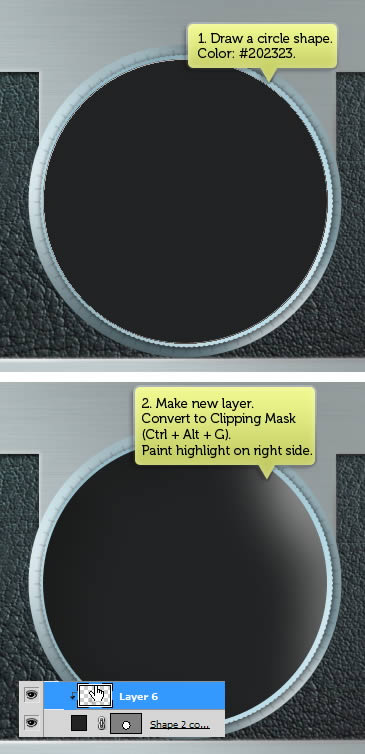
Draw a circle shape with color #202323. Make new layer and dab white on its right side. Convert layer to Clipping Mask by pressing Command/Ctrl + Alt + G.
Step 35
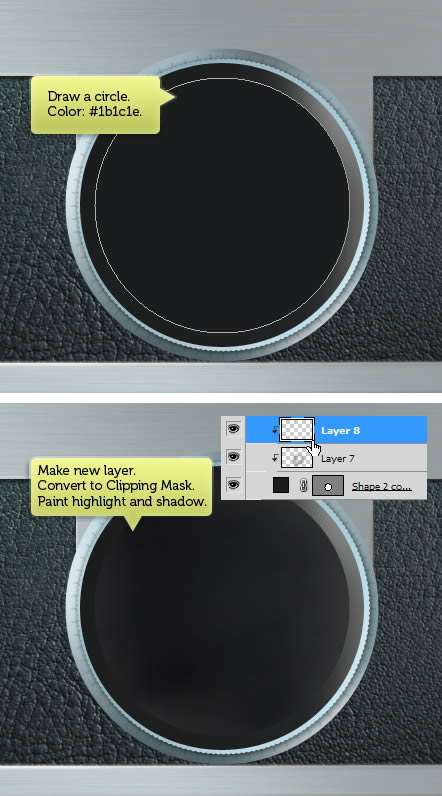
Draw smaller circle with color #1b1c1e. Make new layer, convert it to Clipping mask and then dab black and white on its edge.
Step 36
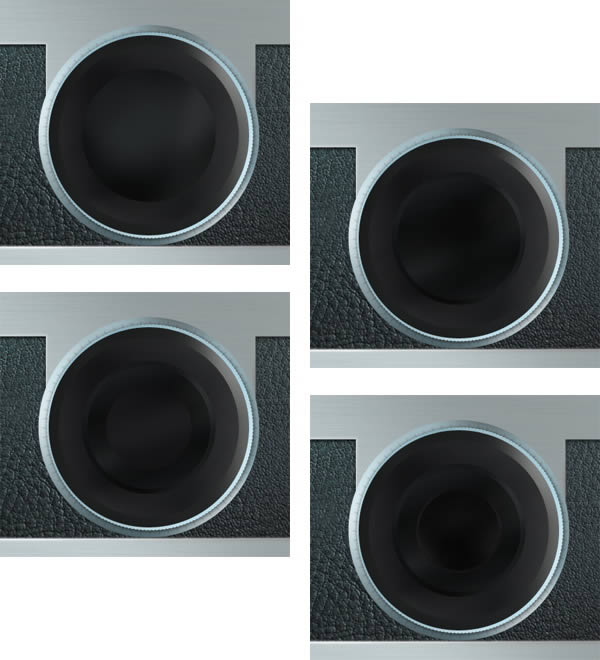
You should now understand the process. Repeat this a few times until we get a complete set of circles inside the lens.
Step 37
Draw smaller circle again with color #0f0c14.

Add subtle Gradient Overlay.

Step 38
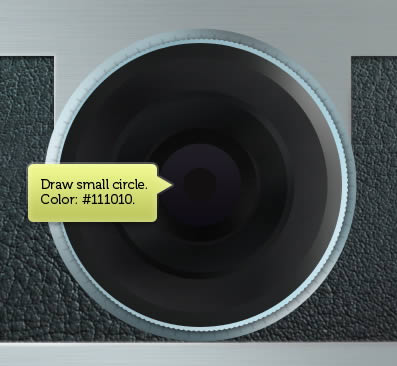
Draw a small circle with color #111010.
Step 39
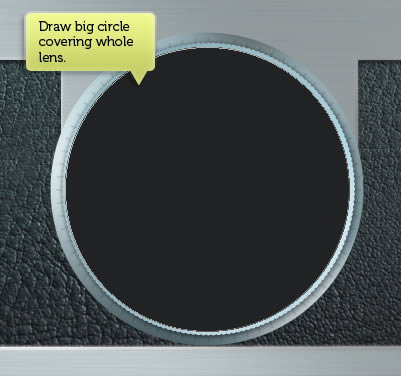
Draw a big circle covering whole lens. You can use any color for this shape.
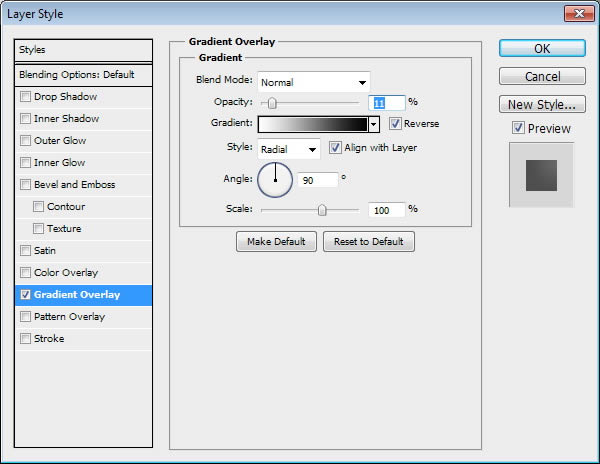
Double click layer shape and add subtle Gradient Overlay with Opacity 11% from black to white.
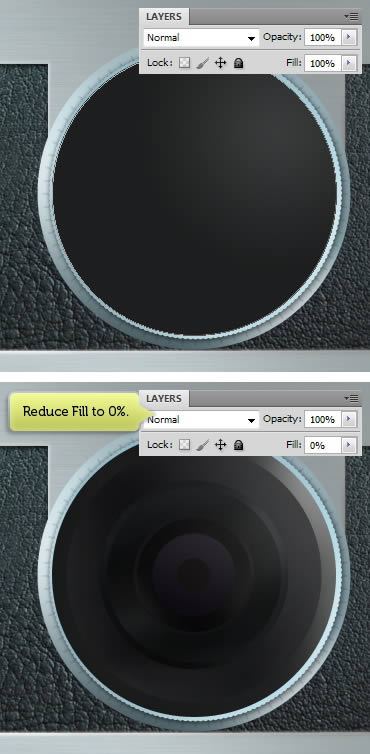
Reduce Fill layer to 0%. This way, we can reveal the lens and add subtle gradient on top of it.
Step 40
Draw a rounded rectangle. Select the path using Path Selection Tool. Hit Command/Ctrl + Alt + T to duplicate and transform the shape. Alt-drag transformation reference point and place it on center of the lens. Rotate the shape for 30°.
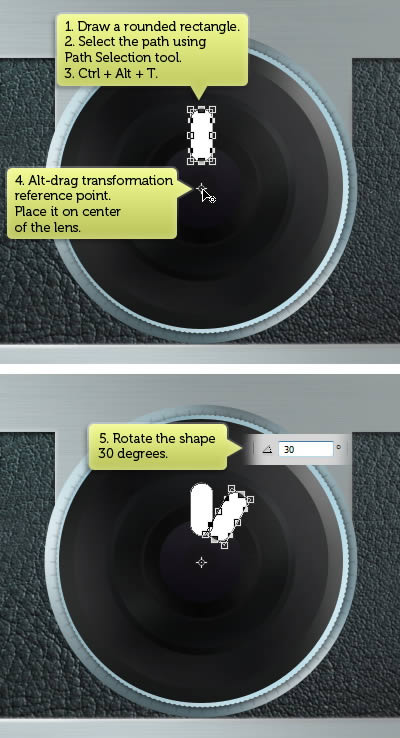
Step 41
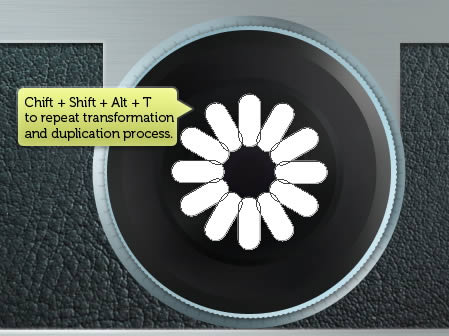
Repeat the process by pressing Command/Ctrl + Shift + Alt + T. See picture below to see the result.
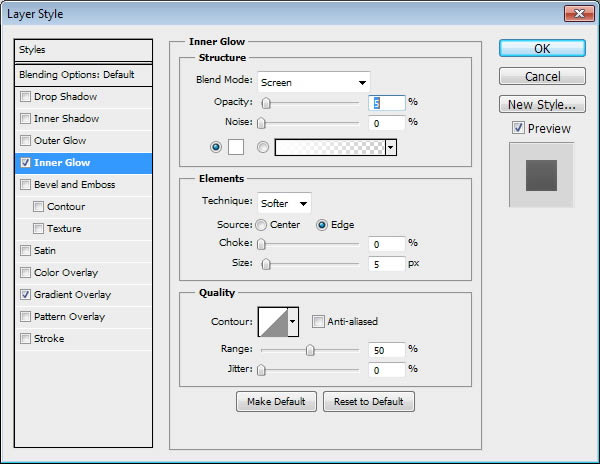
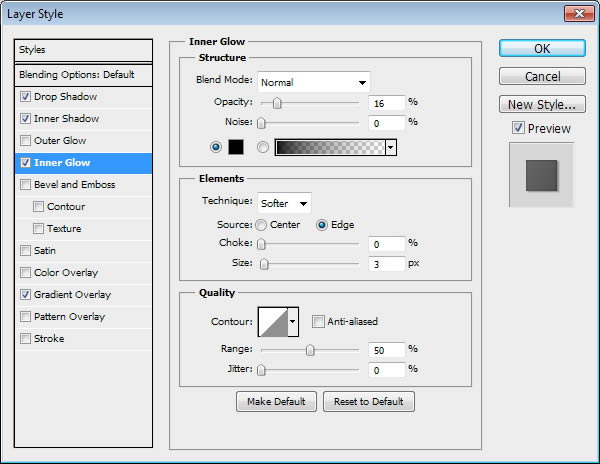
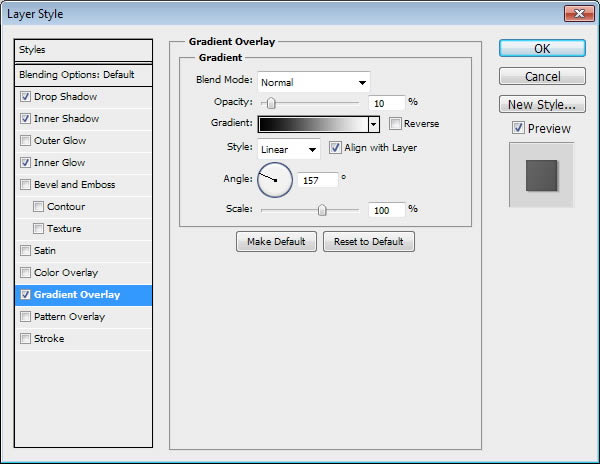
Add layer style Inner Glow and Gradient Overlay.

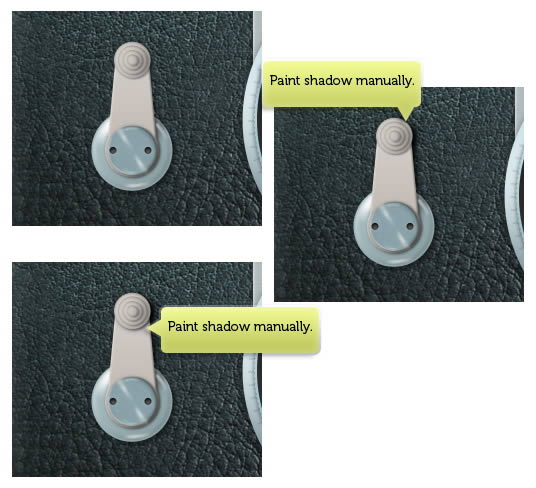
Step 42
Reduce Opacity to 40% and Fill to 0%.

Step 43
Place the layer on top of small circle shape we made in Step 37. Convert layer to Clipping Mask by pressing Command/Ctrl + Alt + G. Split each path into separate layers.
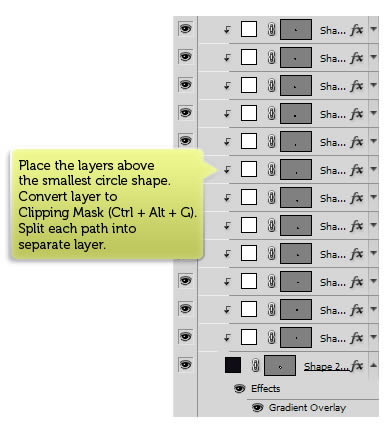
This what we will have after we split each path into separate layer shape.
Step 44
Let’s add highlights inside the lens. Make new layer and place it above all layers. Use soft brush to draw white spot on the lens. Don’t worry is the result is very harsh, we can fix it easily.
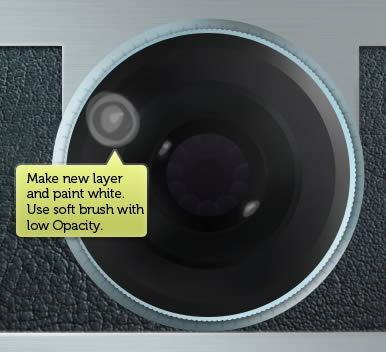
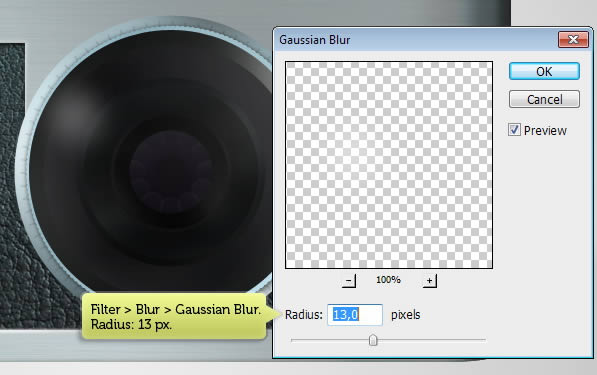
Step 45
Add Gaussian Blur to soften the highlight we have just manually drawn.
Step 46
Draw a circle shape covering the lens.
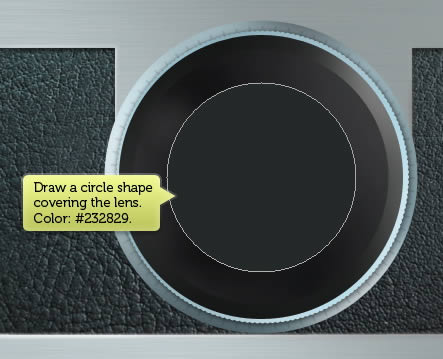
Add layer style Gradient Overlay. Set its mode to radial from black to white.

This is the result. Change Fill layer to 0% to reveal the lens underneath the shape.
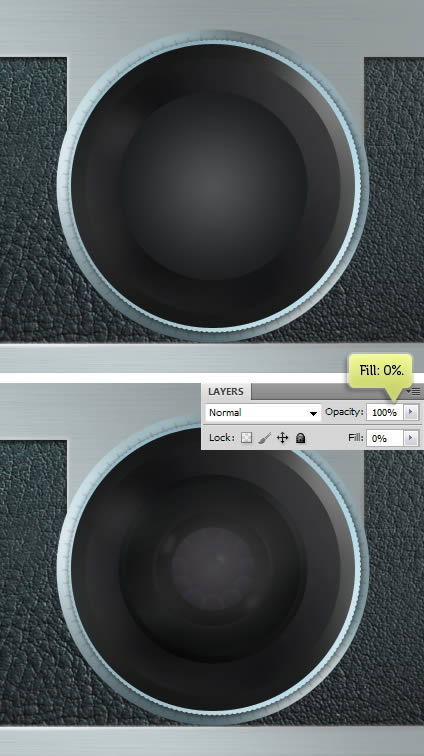
Step 47
Make a new layer. Draw a circular selection on venter of the lens and fill it with black.

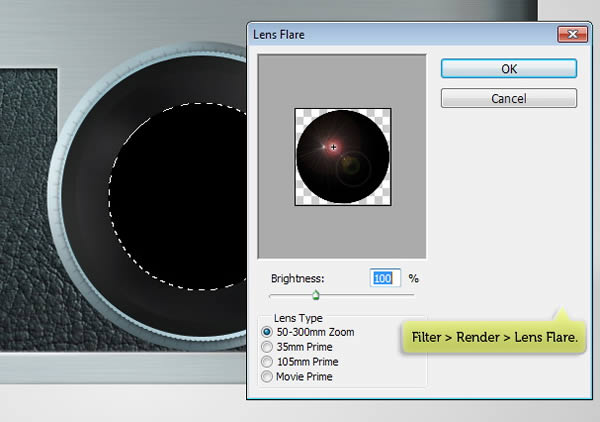
Step 48
Click FIlter > Render > Lens Flare.
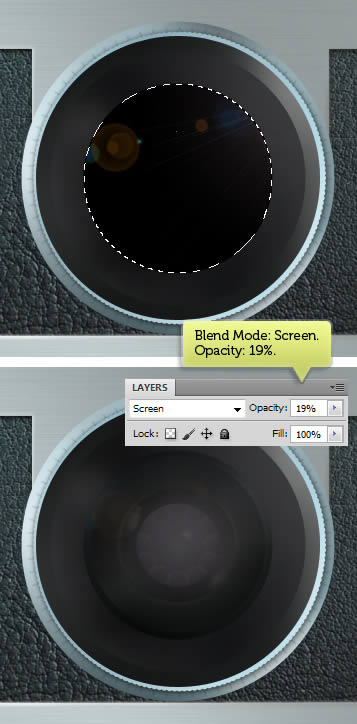
Change layer’s blend mode to Screen and reduce Opacity to 19%.
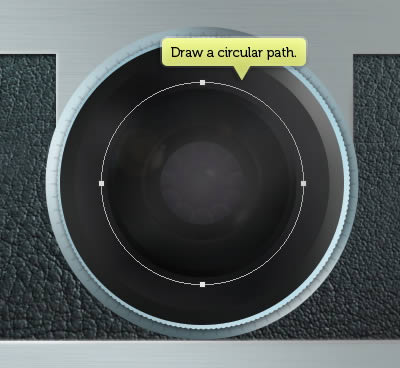
Step 49
Draw a circular path using ellipse tool.
Step 50
Activate Type tool and click right on the path. Remember to do it exactly on the path, not inside or outside the path. If you do it correctly, your text direction will follow the path curvature.
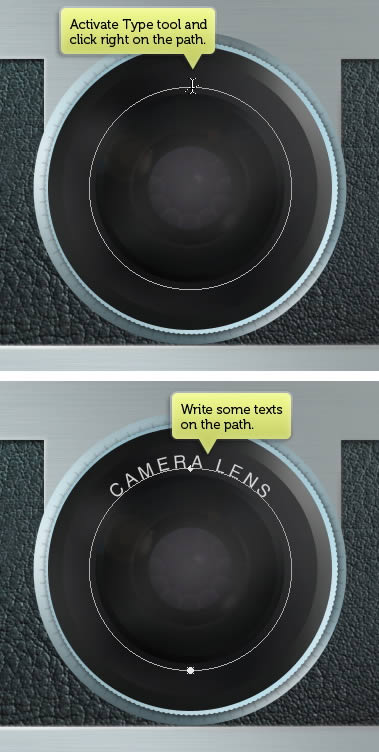
Step 51
Make new layer above the text and then paint some shadows. Erase unneeded shadow using Eraser tool.
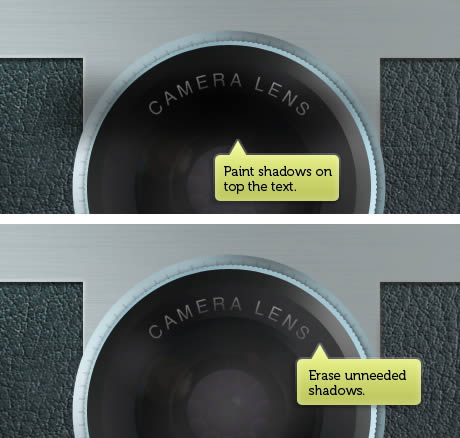
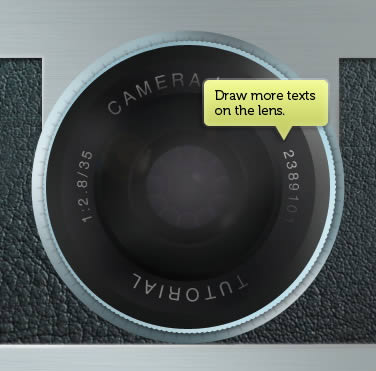
Step 52
Repeat the steps above to add more texts on the lens.
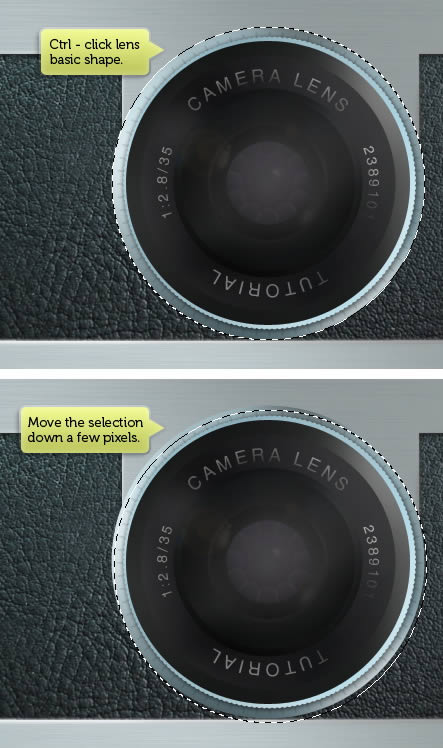
Step 53
The lens is currently appears flat. We need to add shadow to give it depth. Command/Ctrl-click lens basic shape to make new selection based on its shape. Make sure marquee tool is selected and then hit down a few times to move the selection down.
Step 54
Make new selection and place it under the lens. Fill selection with black. Deselect (Command/Ctrl + D) and then soften it using Gaussian Blur.
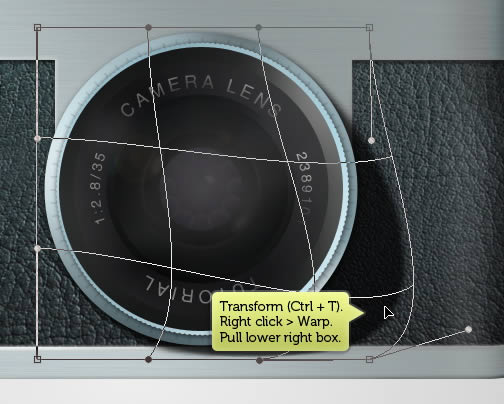
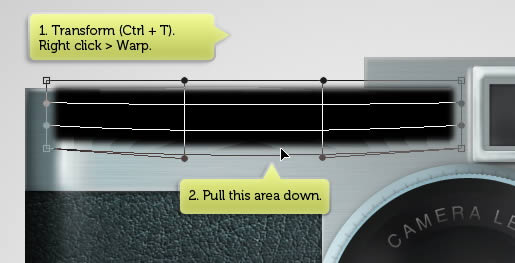
Step 55
Hit Command/Ctrl + T to perform transformation. Right click and select Warp. Pull lower right box.
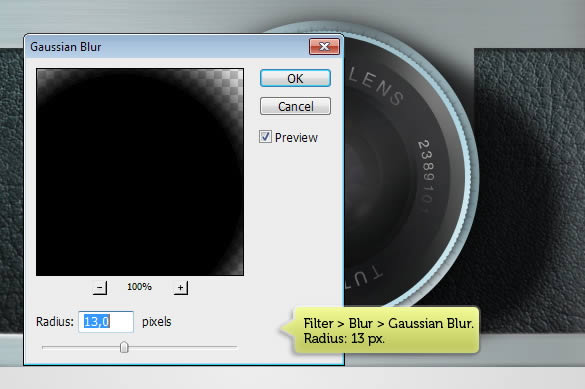
Step 56
Warp transformation sometimes add rough edges. To fix it, we need to soften it again using Gaussian Blur. This time use bigger radius.
Step 57
Add layer mask and then paint lower right corner of the shadow with black until it fades onto the camera base.

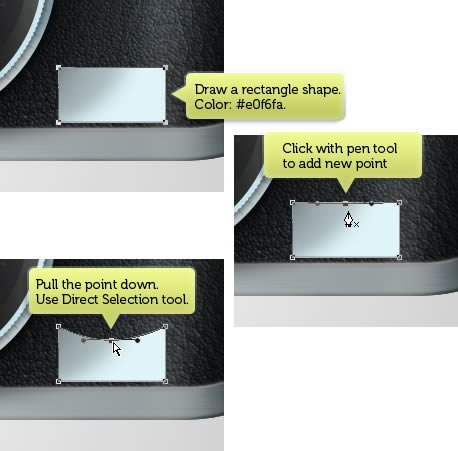
Step 58
Draw a rectangle shape on lower right of the lens with color #e0f6fa. Activate pen tool then click and drag its middle top side to add new point. Use Direct selection to select it and drag it down until we get a curve.
Step 59
Add some circles on left and right side of the shape. Make sure to set its mode to Add to Shape in the Option Bar.
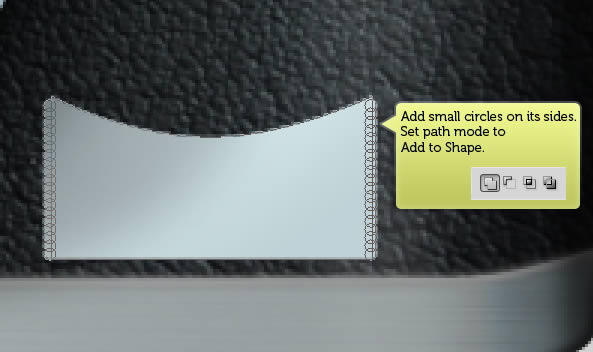
Add Gradient Overlay onto the layer shape.

Step 60
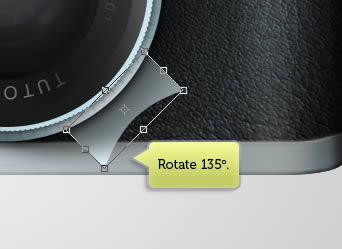
Rotate the shape 135°.
Step 61
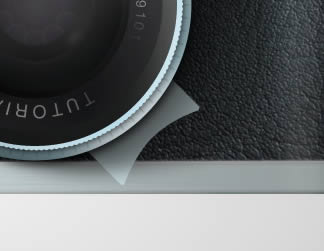
Duplicate shape by pressing Command/Ctrl + J. Place it behind the original shape. Pull its middle point down. See picture below to see the result.
Step 62
Make new layer and then paint shadows on top of the duplicated shape.
Step 63
Make new layer again and put it behind the lens. Paint our previous shape shadow on the camera.
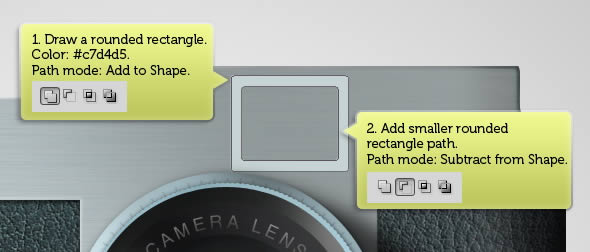
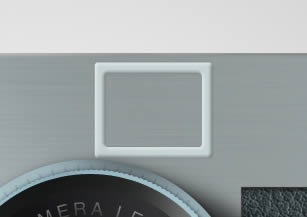
Step 64: View Finder
Draw a rounded rectangle with color #c7d4d5. Inside the shape, draw smaller rounded rectangle and set its mode to Subtract from Shape.
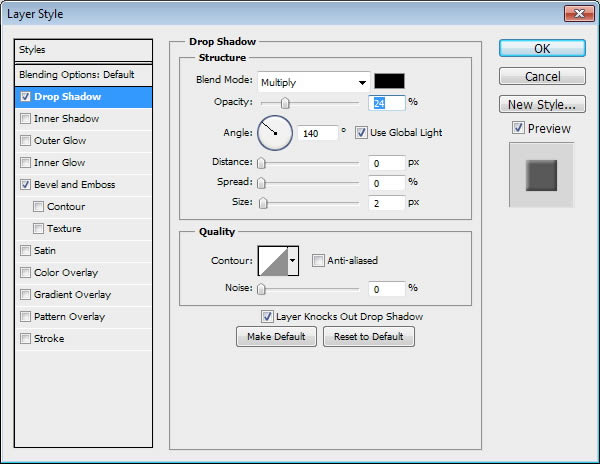
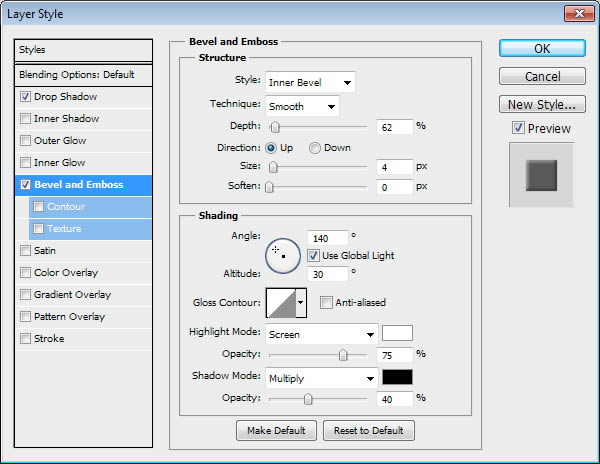
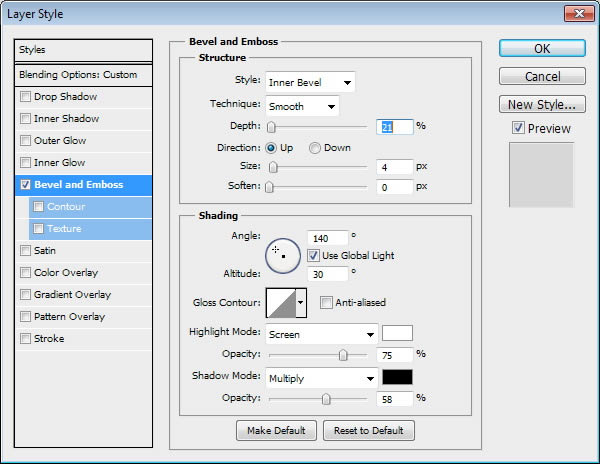
Double click layer to open Layer Style dialog box. Add Drop Shadow and Bevel and Emboss.
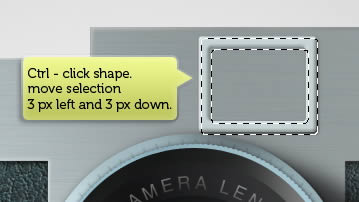
Step 65
Command/Ctrl-click shape and move the selection 3 pixels left and down. Make new layer and place it under the shape. Fill selection with black.
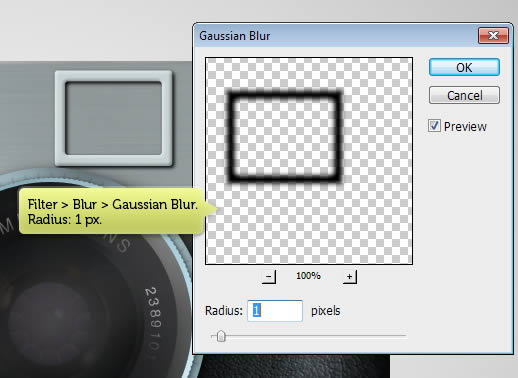
Step 66
Click Filter > Blur > Gaussian Blur to soften it.
Step 67
Make new layer again. Activate brush tool with small brush size. Paint needed highlights and shadows. While painting this, make sure to remember that our light source is in upper right corner of the canvas.
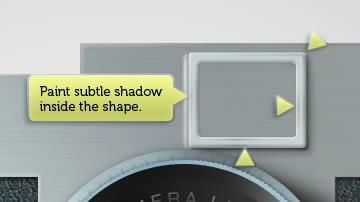
Step 68
Make new layer, this time place it on top of the shape. Paint subtle shadow inside the shape.
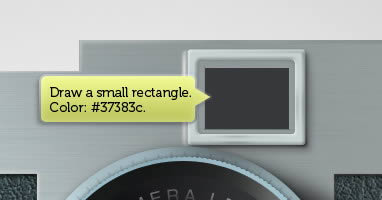
Step 69
Draw a small rectangle inside the frame. Set its color to #37383c.
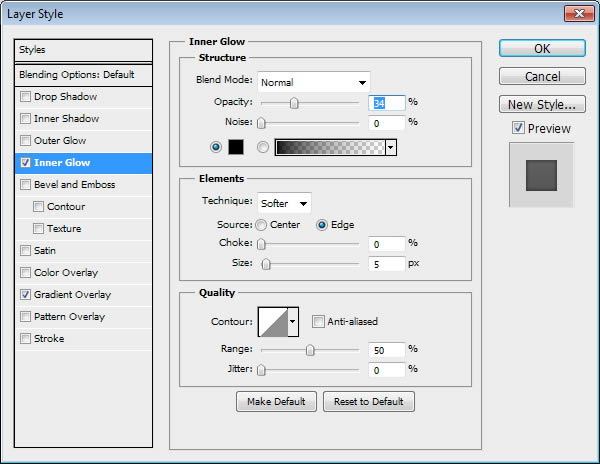
Add layer style Inner Glow and Gradient Overlay.

Here’s the result.
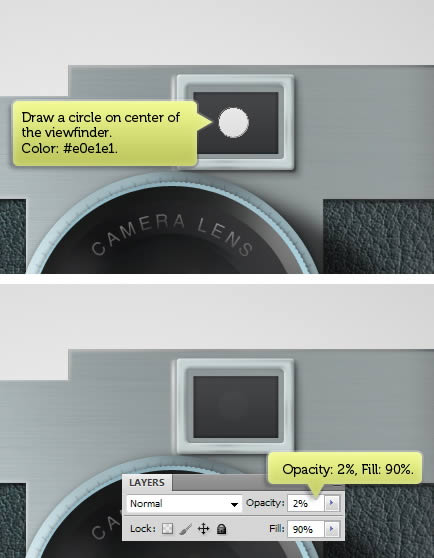
Step 70
Draw a small circle on center of the viewfinder with color #e0e1e1. Reduce its Opacity and Fill to 2% and 90%. With these settings, the circle seems to be inside the viewfinder glass.
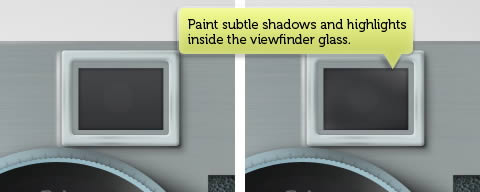
Step 71
Make new layer. Paint subtle shadows and highlights inside the viewfinder glass. Use very soft brush with low Opacity, no more than 5%. Remember, we want it to be very subtle.
Step 72
Activate the viewfinder glass. In Layers panel, double click it to open Layer Styles dialog box. Activate Bevel and Emboss and Gradient Overlay.


Step 73
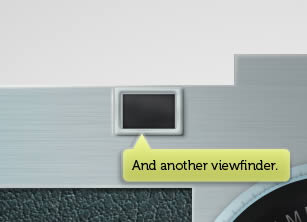
Use same technique to draw another viewfinder on left and right side of the camera.
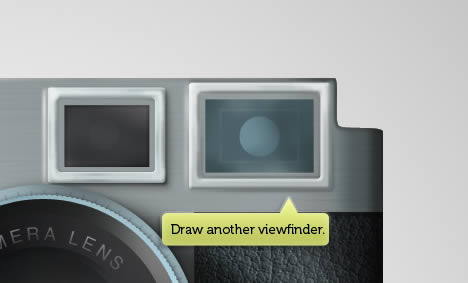
For the left side, you can simply duplicate the first viewfinder and resize it.
Step 74
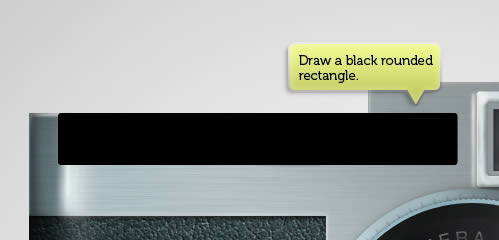
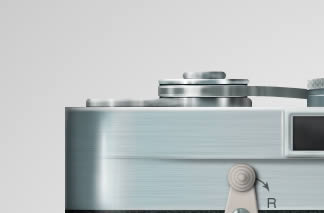
Draw a black rounded rectangle on top of the small viewfinder.
Add Bevel and Emboss.
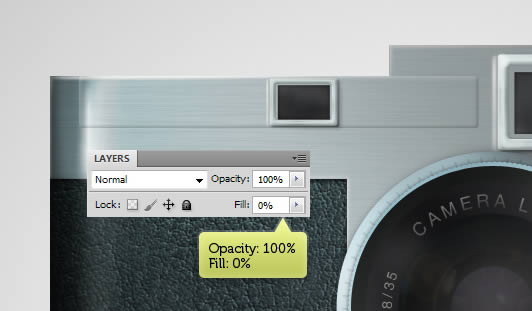
Reduce Fill layer to 0%.
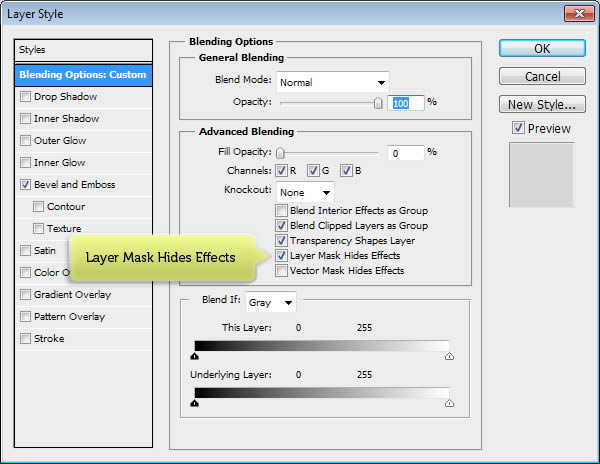
Step 75
Double click layer to open Layer Style dialog box again. Activate Layer Mask Hides Effects.
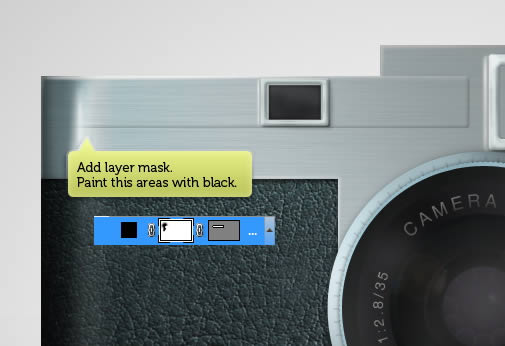
Step 76
Click Add Layer Mask icon to add layer mask and then left side of the shape with black. We want the Bevel effect fades onto left side of the camera body.
Step 77
Make new layer. Command/Ctrl-click shape to make new selection based on its shape. Fill it with black.
Step 78
Hit Command/Ctrl + D to deselect. Click Filter > Blur > Gaussian Blur to soften the black pixels.
Step 79
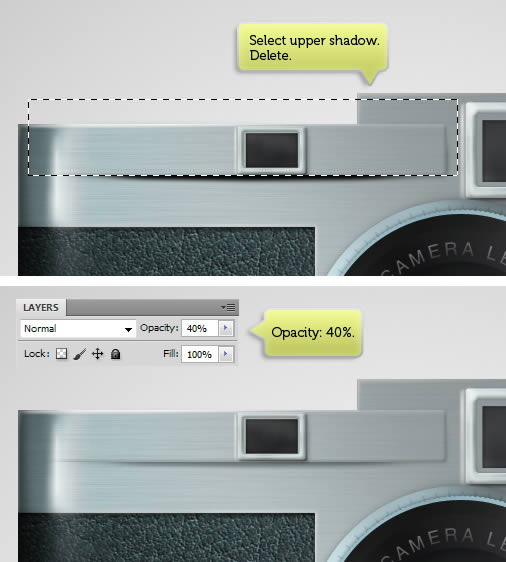
Hit Command/Ctrl + T to transform the shadow. Right click and select Warp. Pull down lower area.
Step 80
Select upper shadow and then hit Delete key. Reduce its Opacity to 40%.
Step 81
Command/Ctrl-click shape we have made in Step 74. Make new layer and then click Edit > Stroke. Set its color to white.
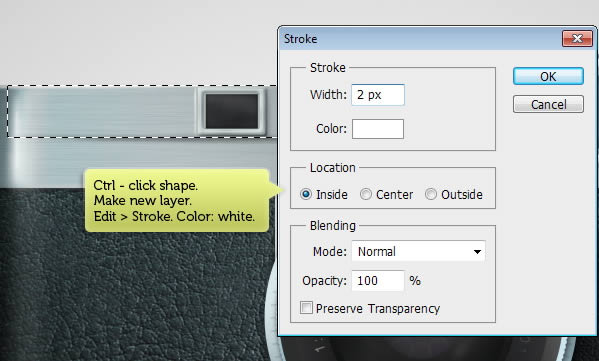
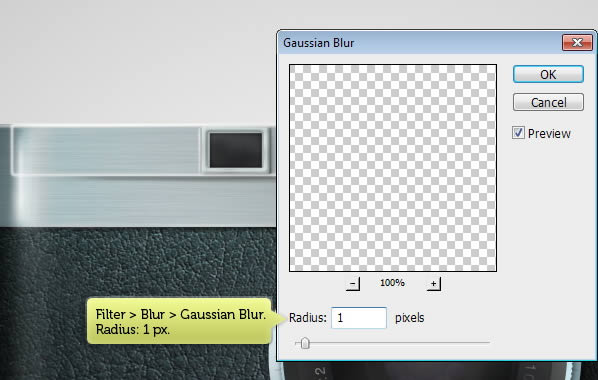
Step 82
Soften the stroke by applying Gaussian Blur.
Step 83
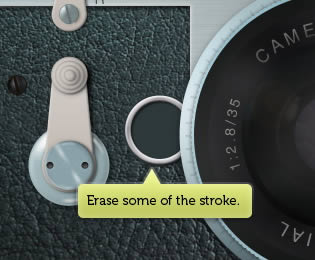
Erase some of stroke line.

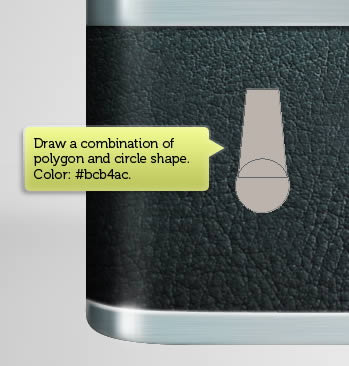
Step 84: Draw Switch
Draw a circle shape with color #bcb4ac. Add a polygon path on top of it with mode Add to Path.
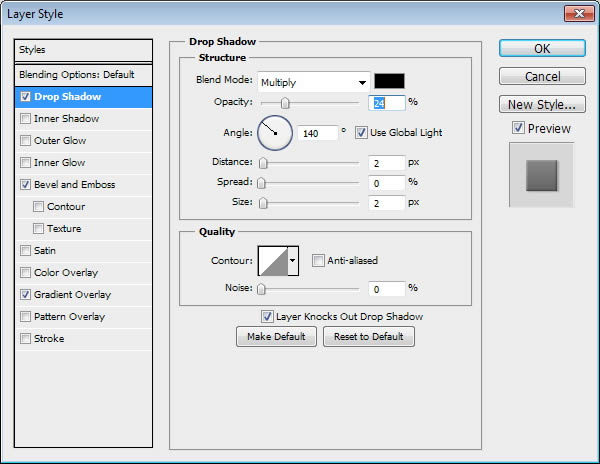
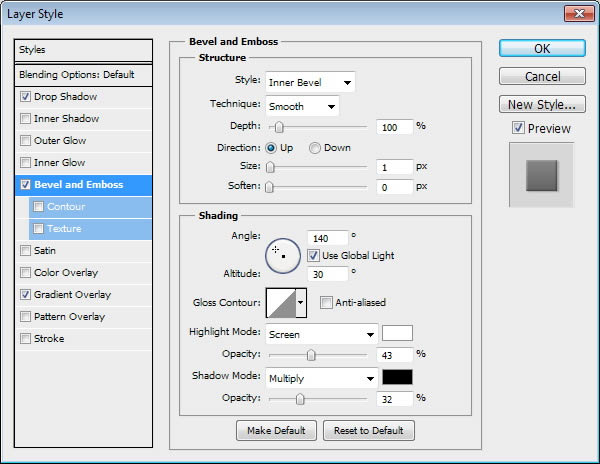
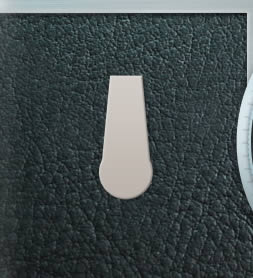
Add Layer Style Drop, Bevel and Emboss, and Gradient Overlay.

Step 85
On top of the shape, draw a circle with color: #87a0a8.
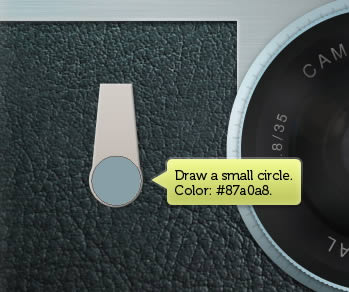
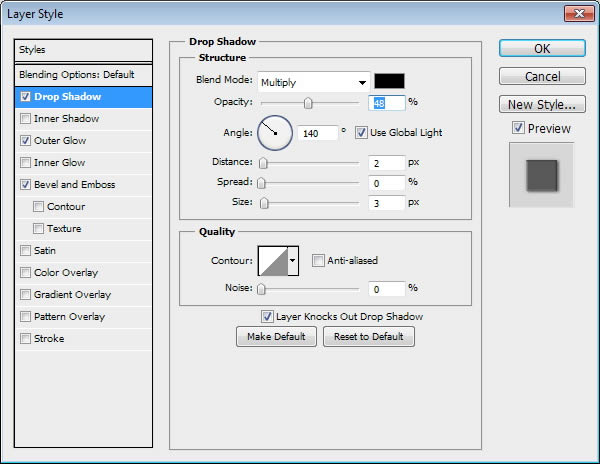
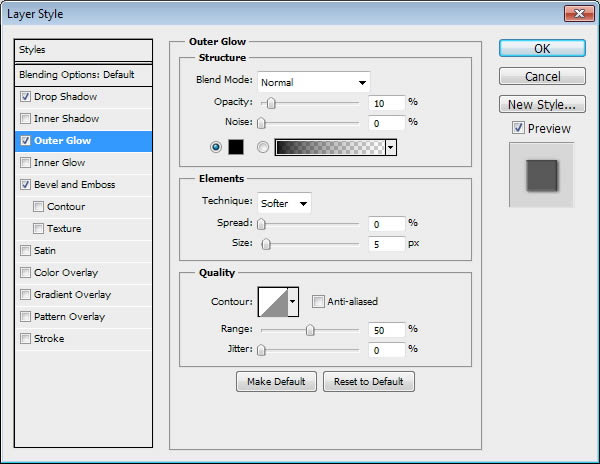
Add Drop Shadow, Outer Glow, and Bevel and Emboss with following settings.

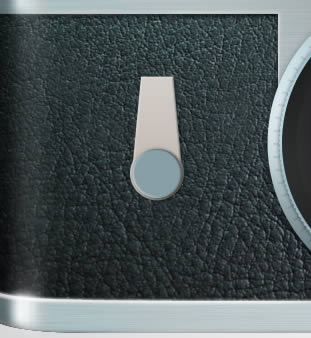
Step 86
Draw bigger circle, this time with color #9eb8bd. Place behind both previous shapes.

Double click layer shape to open Layer Style dialog box. Activate Drop Shadow and Gradient Overlay.


Step 87
Make new layer and paint subtle shadow behind the dial.
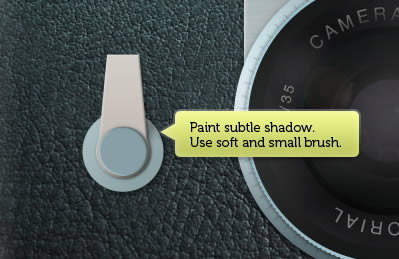
Step 88
Draw a circle, smaller than the previous one.
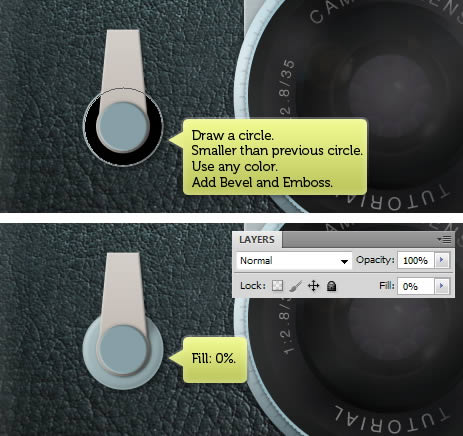
Add Bevel and Emboss

Step 89
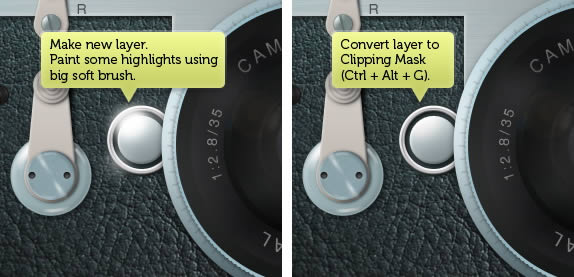
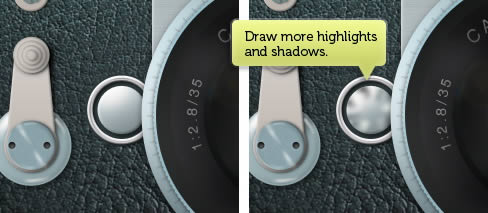
Make new layer and then manually paint highlights on the circle.
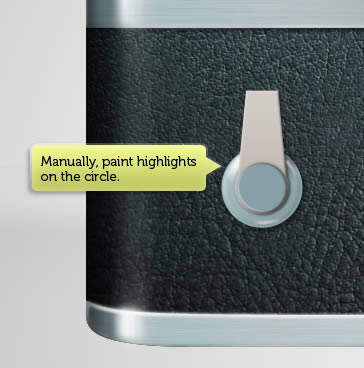
Draw another highlight on the smaller circle.
Step 90
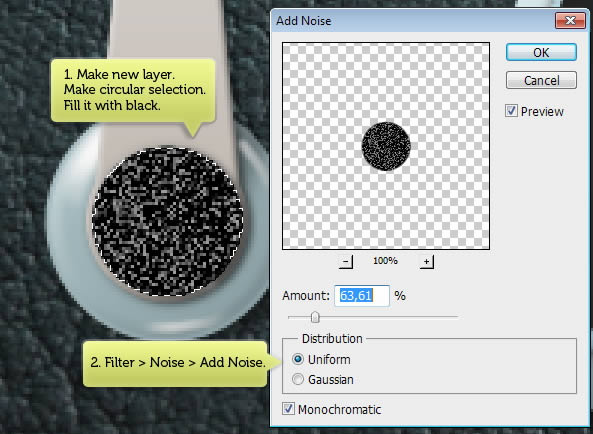
Make new layer and make circular selection covering top of the circle shape. Fill it with black and then click Filter > Noise > Add Noise.
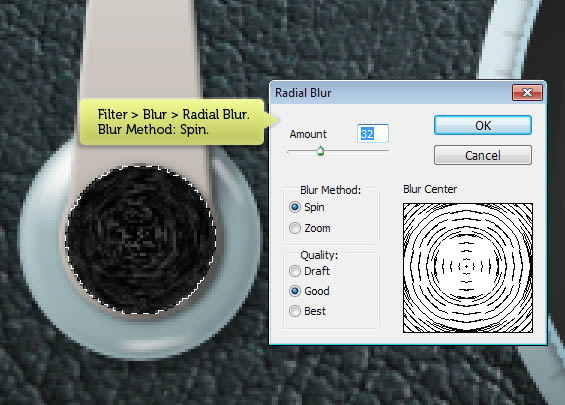
Click Filter > Blur > Radial Blur and select Spin for its blur method.
Step 91
Change layer’s blend mode to Screen and reduce its Opacity.
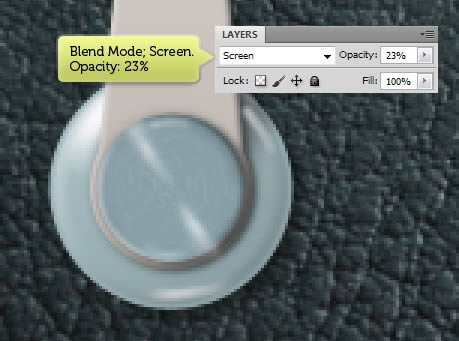
Below is the result in 100% magnification.

Step 92
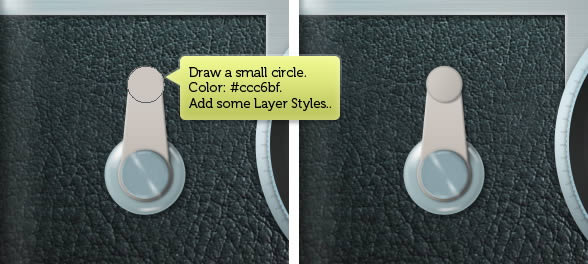
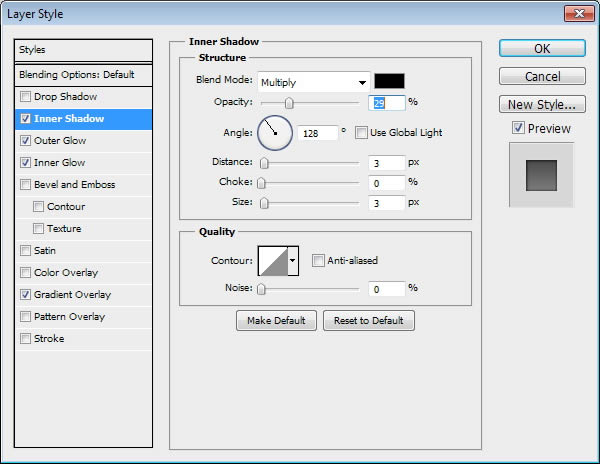
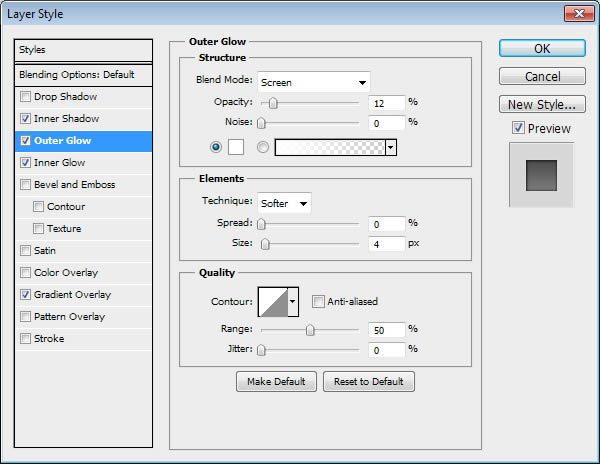
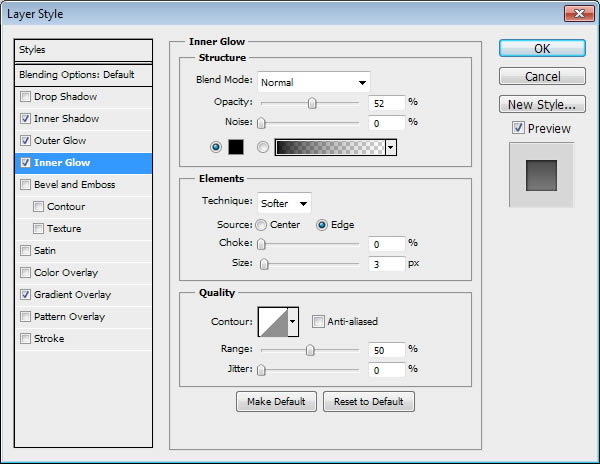
Draw a small circle with color #ccc6bf. Add Drop Shadow, Inner Glow, Inner Shadow, and Gradient Overlay with following settings.

Step 93
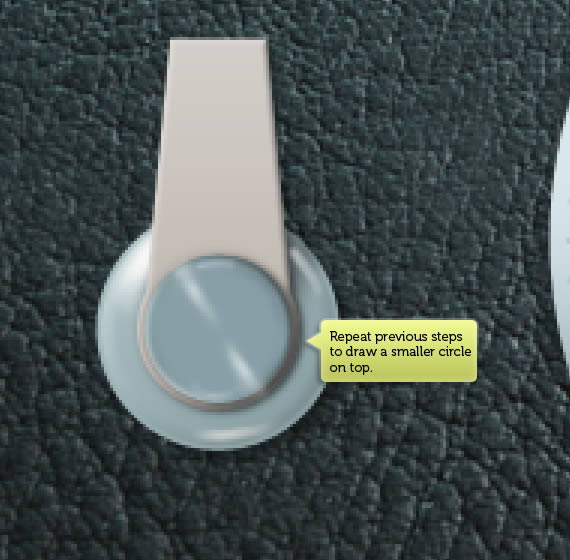
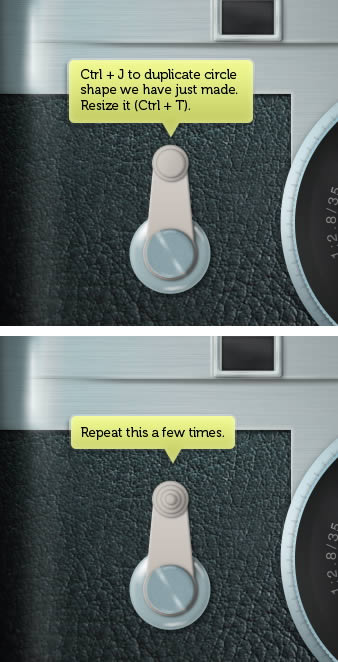
Duplicate the shape by pressing Command/Ctrl + J. hit Command/Ctrl + T to resize it. Repeat this process a few times.
Step 94
Draw two small dark circles shape on the dial. Add following Layer Styles.
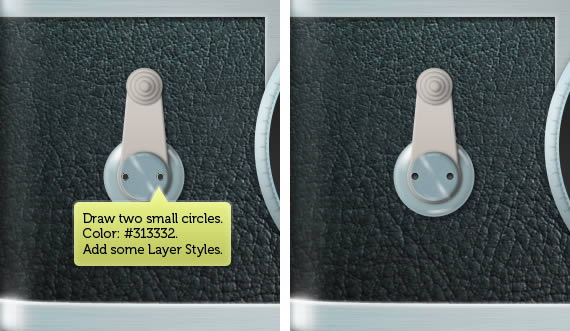
Step 95
Make new layer and place it under the set of circles. Use soft brush tool to paint soft shadow on the camera body.
Step 96
Repeat this process to draw another switch on the camera.
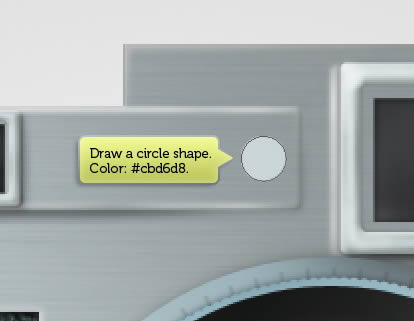
Step 97: Screw
Draw a small circle shape with color #cbd6d8. Add Inner Shadow.


Step 98
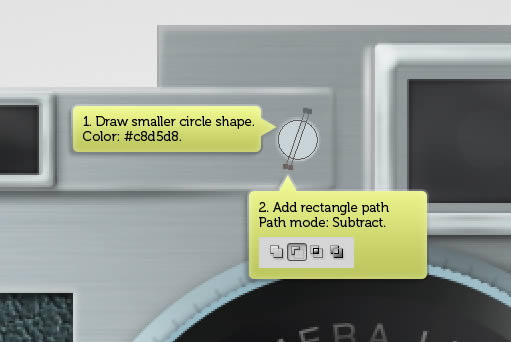
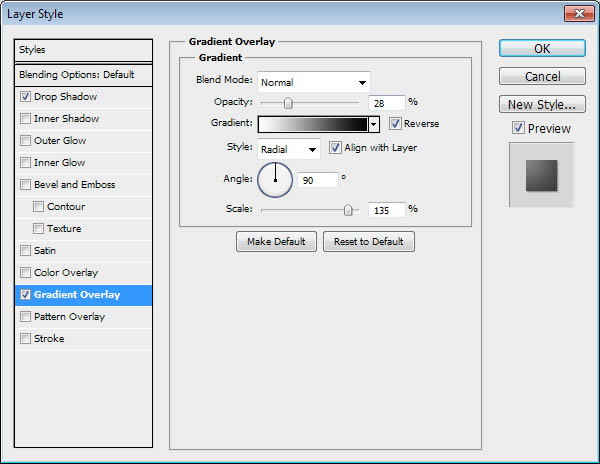
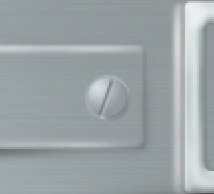
Draw smaller circle shape with color #c8d5d8. Add rectangle path with path mode Subtract. To convert it into a screw we need to add following Layer Styles.

Step 99
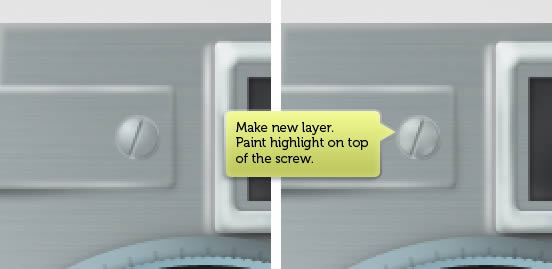
Make new layer and then manually paint subtle highlight on the screw.
Step 100
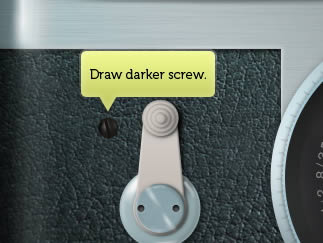
Use same techniques to draw a dark screw.
Step 101
Make below switch using combinations of techiques that we have learnt earlier.
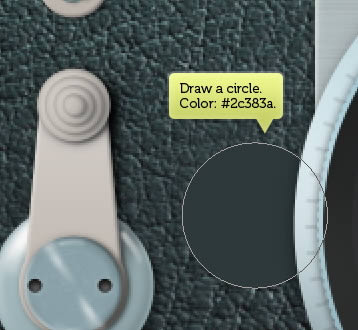
Step 102
Draw a circle with color #2c383a.
Step 103
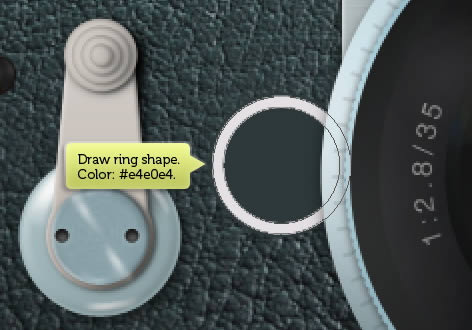
Draw a ring shape with color #e4e0e4. To do this, you just need to draw a circle and add smaller circle inside it and set its mode to Subtract. Add Drop Shadow and Bevel and Emboss with following settings.


Step 104
Command/Ctrl-click ring shape to make a new selection based on its shape. Click Select > Modify > Contract to reduce the selection size.
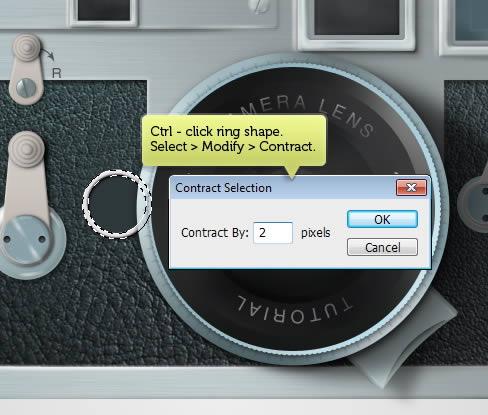
Step 105
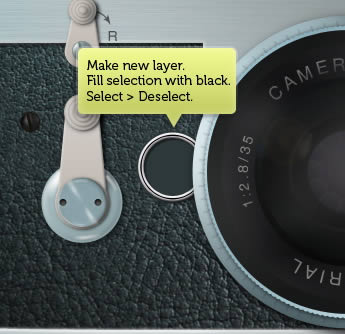
Make new layer and then fill selection with black. Hit Command/Ctrl + D to deselect.
Step 106
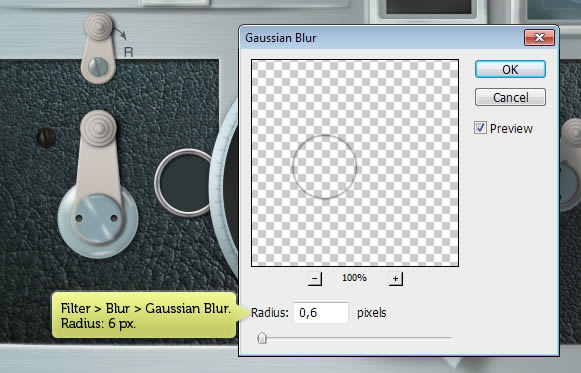
Add Gaussian Blur filter to soften it.
Step 107
Erase some of the line stroke using soft eraser tool.
Step 108
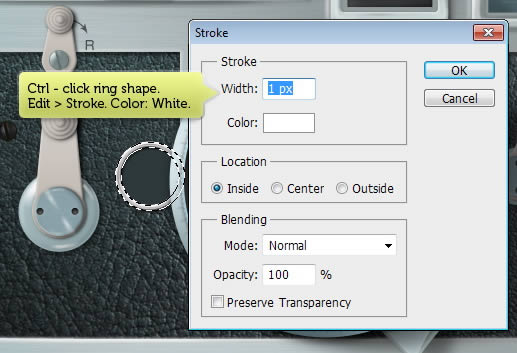
Make new layer. Command/Ctrl-click ring shape and click Edit > Stroke. Set its color to white.
Step 109
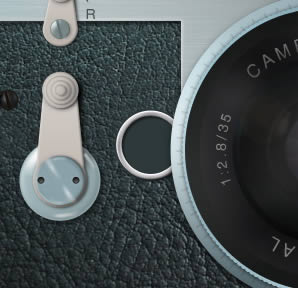
Erase some of the white lines.
Step 110
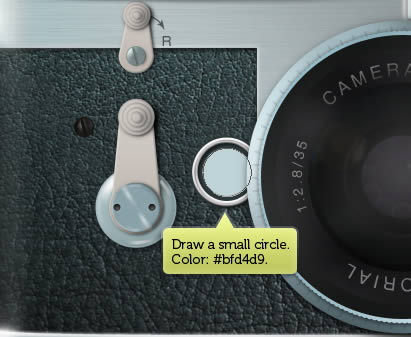
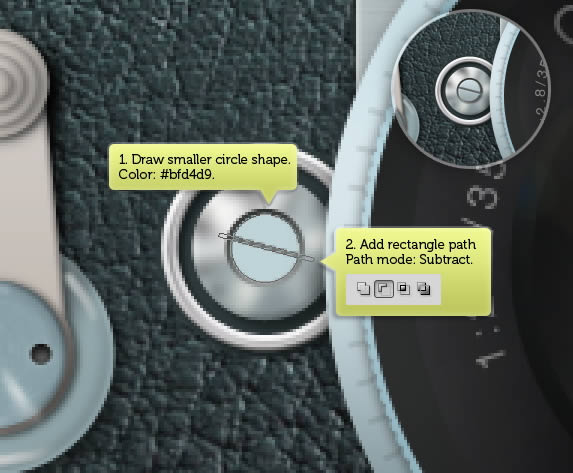
Draw a small circle inside the ring shape. Set its color to #bfd4d9. Add following Layer Styles.


Step 111
Make new layer and then paint highlight on the shape. Convert layer to Clipping Mask by pressing Command/Ctrl + Alt + G.
Step 112
Make new layer and paint some highlights and shadows on top of the shape.
Step 113
Draw a small circle shape with color #646a68. Add Gradient Overlay and Inner Shadow.


Step 114
Draw smaller circle shape with color #bfd4d9. Add a rectangle path on its center and set its mode to Subtract. Add Drop Shadow, Bevel and Emboss, and Gradient Overlay.


Step 115: Draw Speed Dials
Draw a rounded rectangle behind the camera and add Gradient Overlay.
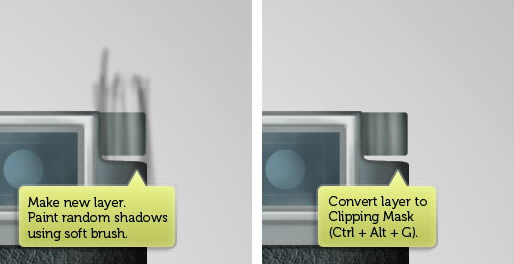
Step 116
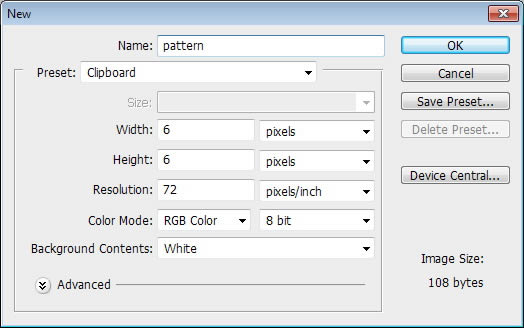
Make new layer on top of the shape. Set foreground color to black and then paint random shadow using soft brush. Convert layer to Clipping Mask.
Step 117
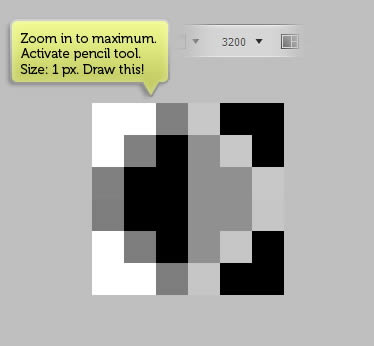
Make a new file with canvas size 6 × 6 pixels.
Step 118
Zoom in to maximum using zoom tool. Activate pencil tool with brush size 1 px. Draw below pattern using only black, white, and gray color.
Step 119
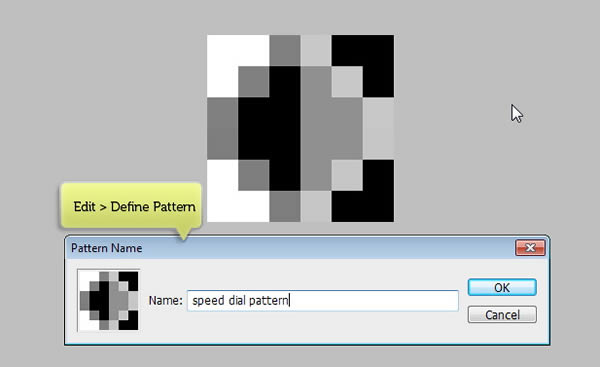
Click Edit > Define Pattern to save the image as a pattern.
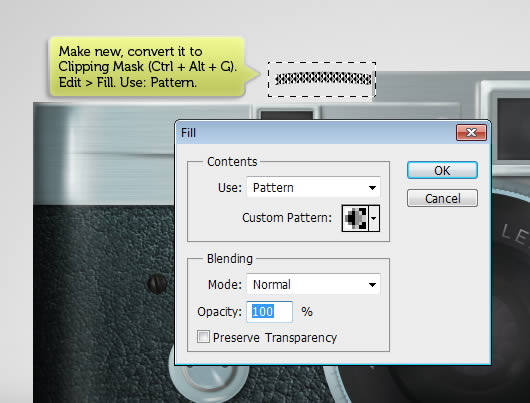
Step 120
Make new layer. Place layer right above the dial shape. Draw a selection covering the camera dial. Click Edit > Fill. Activate Use: Pattern. Select pattern we have just made earlier.
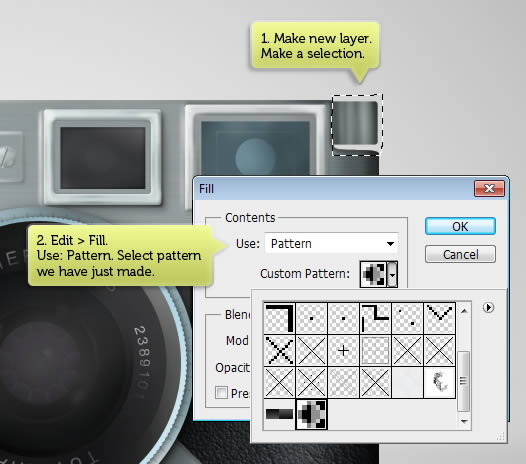
Step 121
Convert layer to Clipping Mask by pressing Command/Ctrl + Alt G. Change layers blend mode to Overlay and reduce its Opacity.

Step 122
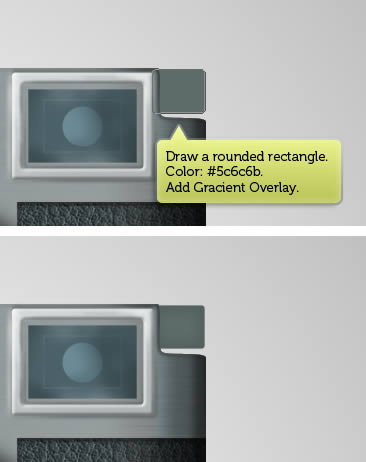
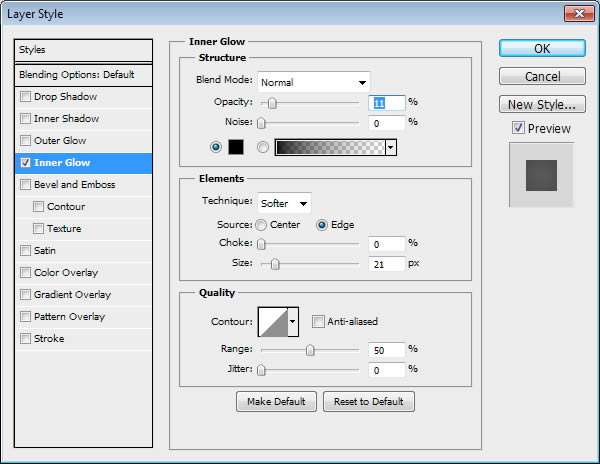
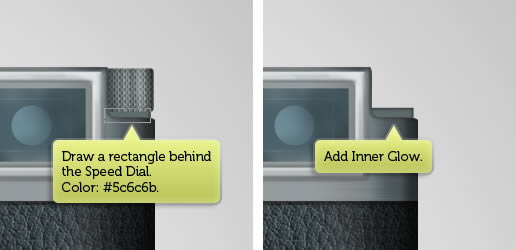
Draw a rectangle behind the Speed Dial with color #5c6c6b. Add Layer Style Inner Glow.

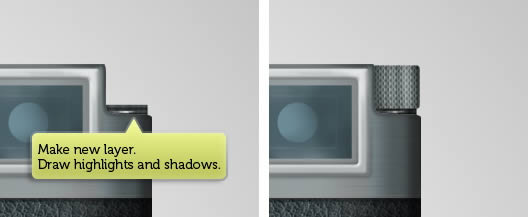
Step 123
Make new layer. Draw some highlights and shadows on new layer.
Step 124
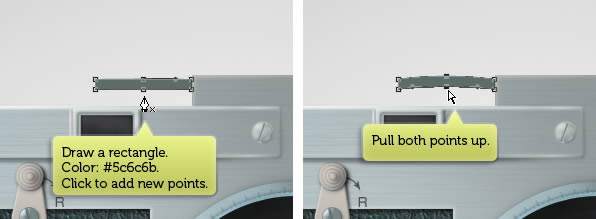
Draw a rectangle with color: #5c6c6b. Click the middle its upper and lower side to add new points. Select both new points and move them up.
Step 125
Make new layer and then convert it to Clipping Mask. Click Edit > Fill, select Use: Pattern and select pattern we have made earlier.
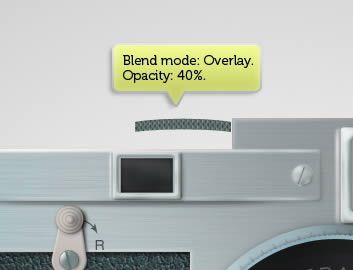
Step 126
Set blend mode to Overlay with Opacity 40%.
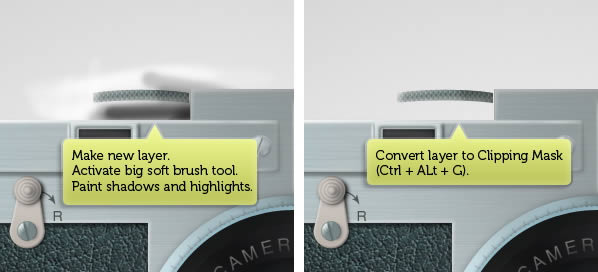
Step 127
Make new layer. Activate big brush tool and then paint some highlights and shadows. Convert layer to Clipping Mask. This way, all the highlights and shadows go inside the shape.
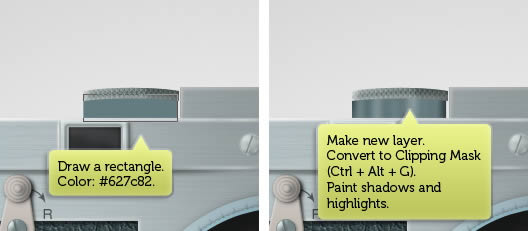
Step 128
Draw a rectangle behind previous shape with color #627c82. Make new layer and then convert it to Clipping Mask. Paint some highlights and shadows.
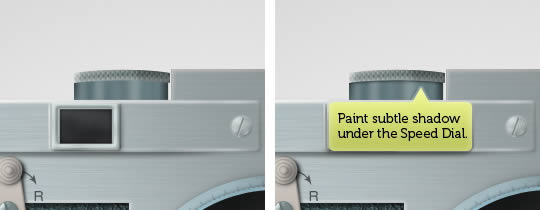
Step 129
Paint subtle shadow under the speed dial.
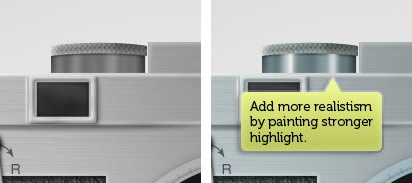
Step 130
Add more realism to the shape by painting stronger highlight.
Step 131
Draw a thin rectangle. Make new layer and paint small highlight and shadow inside the shape. Convert the layer into a Clipping Mask.

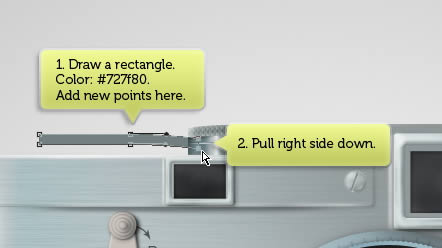
Step 132: Shutter
Draw a rectangle with color #727f80. Click half of its upper and lower side to add new points. Pull the right side down using Direct Selection tool. See picture below for reference.
Step 133
Make new layer and then activate a small soft brush with Hardness 0%. Draw some black lines on top of the shape. Soften the lines by adding Gaussian Blur. Convert the layer to Clipping Mask by pressing Command/Ctrl + Alt + G.
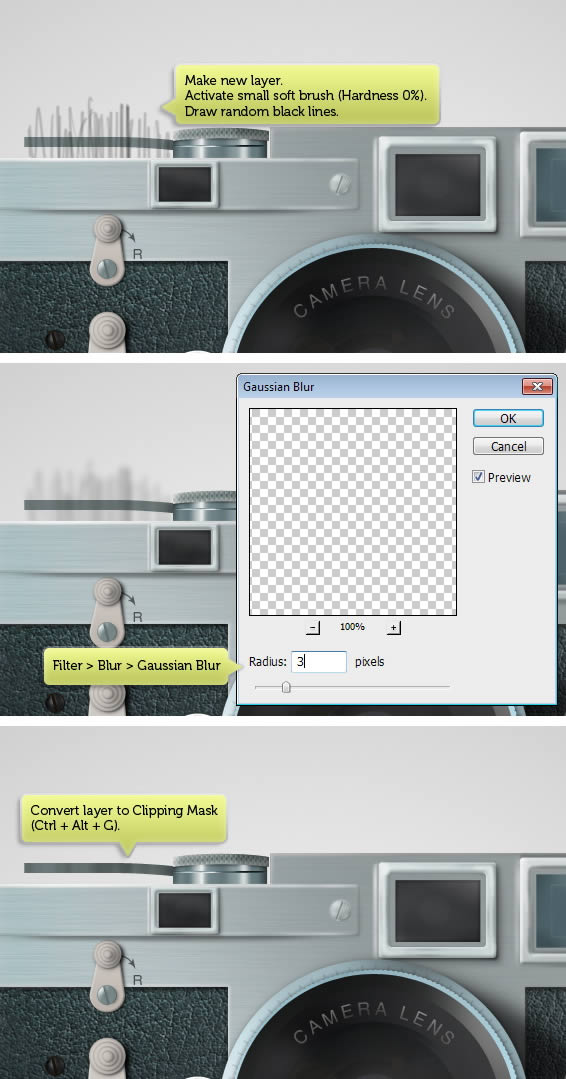
Step 134
Earlier, we have paint shadows. Now, let’s working on its highlight. Do the same thing, but this time use white for the color.
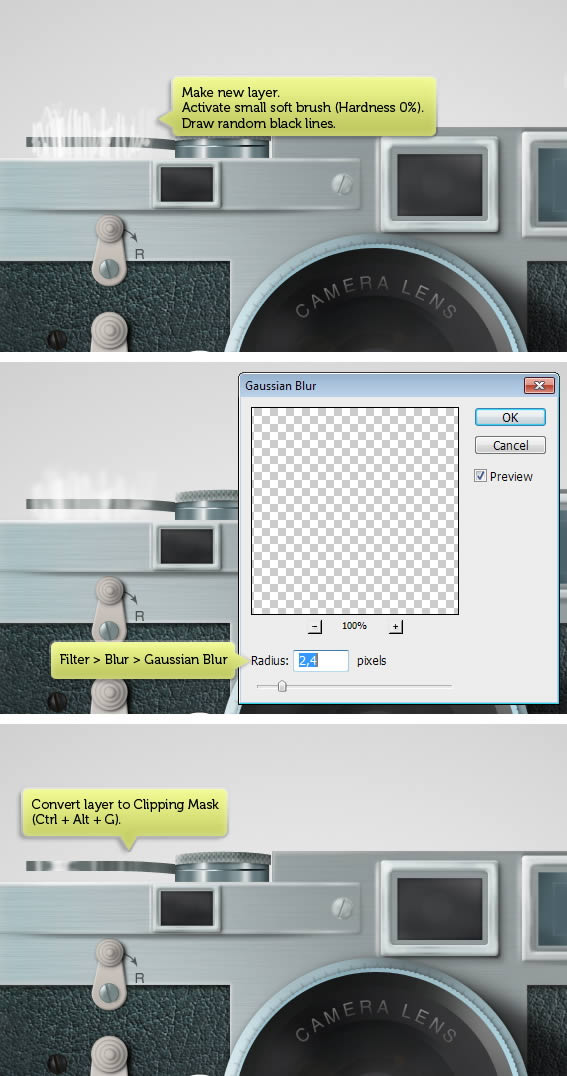
Step 135
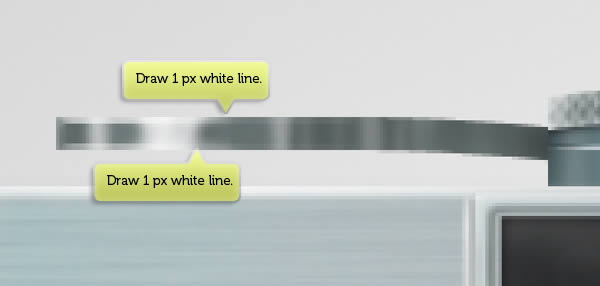
Zoom closer and draw 1 px white line on upper and lower side.
Step 136
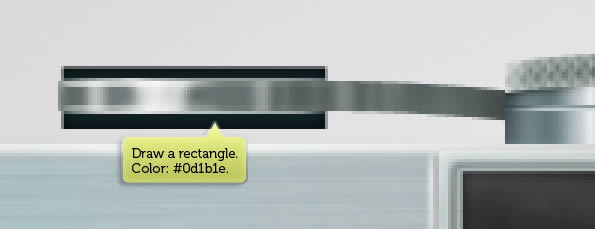
Draw a dark rectangle behind the shape.
Step 137
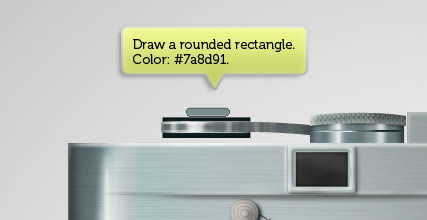
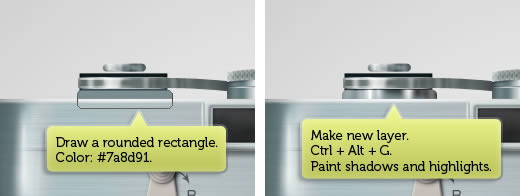
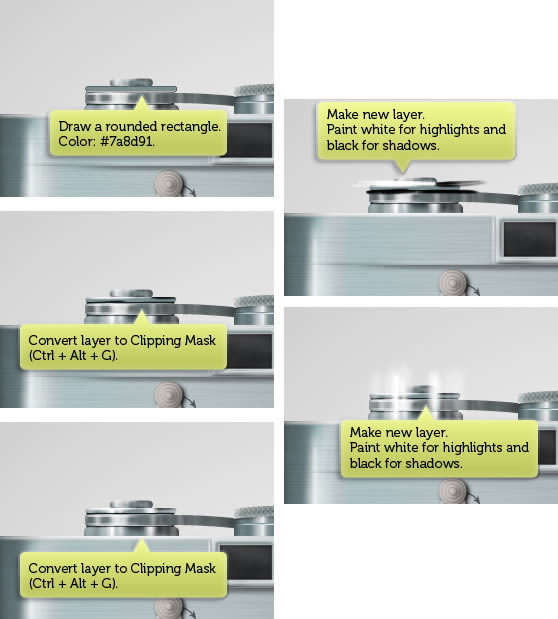
On its top, draw a rounded rectangle with color #7a8d91 to be used for the camera shutter.
Step 138
Make a new layer and then paint white random lines. Soften them using Gaussian Blur. Convert layer to Clipping Mask.
Step 139
Draw a rounded rectangle. Use same techniques to add highlight and shadows onto the shape.
Step 140
Draw another rounded rectangle, this time thinner, and then make new layer. Paint its highlight and shadow.
Step 141
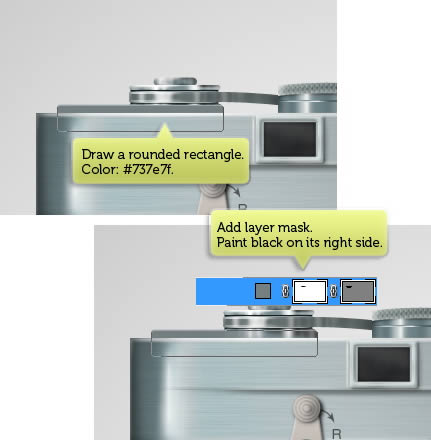
Draw a rounded rectangle with color #737e7f. Add layer mask and then paint black on its right until it fades onto the shape behind it. See picture below for reference on its position.
Step 142
Repeat techniques we have learnt earlier to paint its highlight and shadow.
Step 143: Add More Highlights
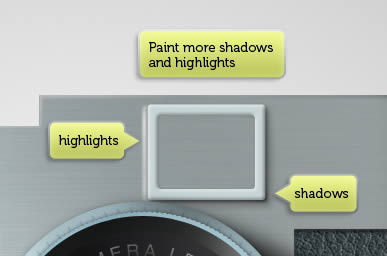
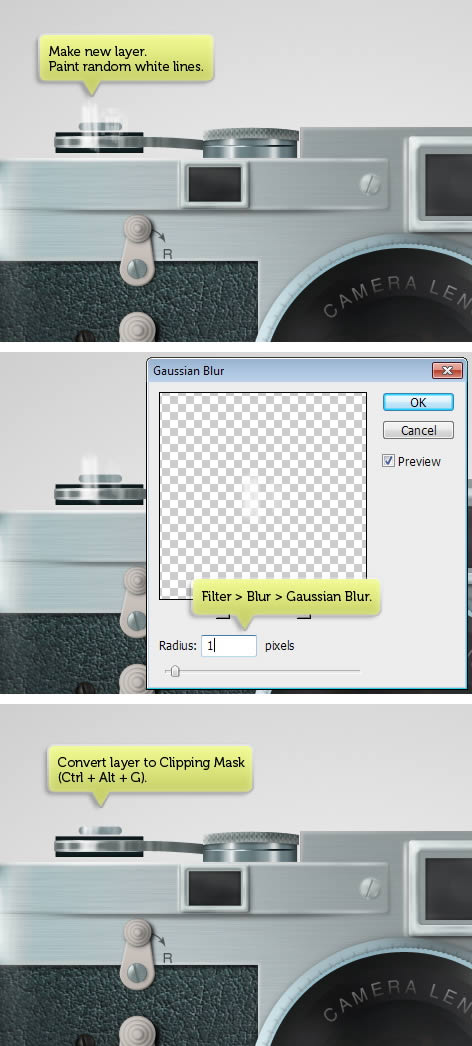
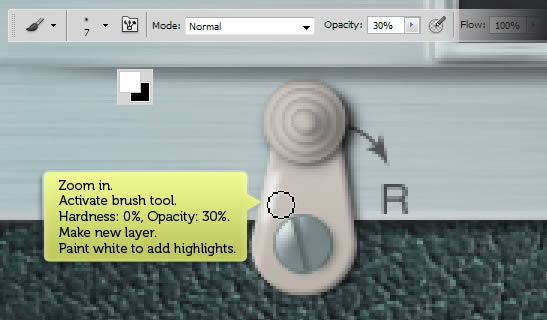
Our current camera is still too flat. If you look everything closely, you will notice that there is no perfect lighting in real life. There are always random light reflections everywhere. So, that’s what we’re going to do. Add highlight onto our camera. Make new layer and then activate brush tool with 0% Hardness. Manually paint white highlight on some elements on the camera.
Below you can see the difference before and after adding the highlights. You can see this subtle difference really adds more realism onto the object.

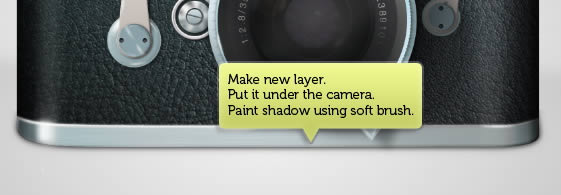
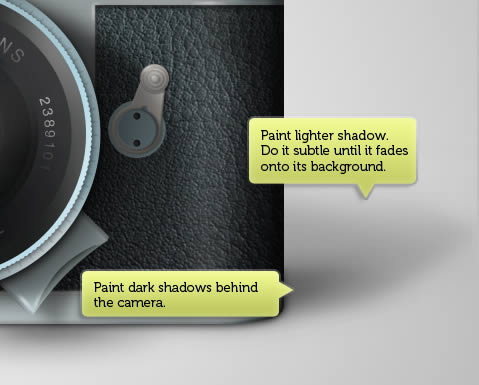
Step 144: Shadow
Make new layer and then put it under the camera. Use soft brush to draw camera shadow on the floor.
Step 145
Remember that we need more shadow under the lens.
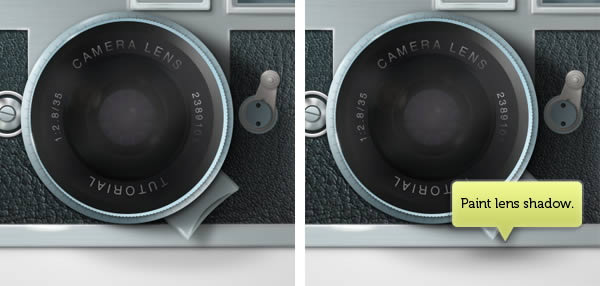
Step 146
Paint dark shadow right behind the camera. Make sure to match its direction with our light source position. Paint lighter shadow further away from the camera. Make sure to do this patiently until the shadow fades perfectly onto the floor.
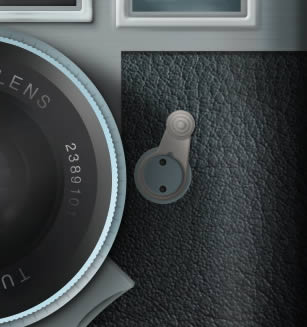
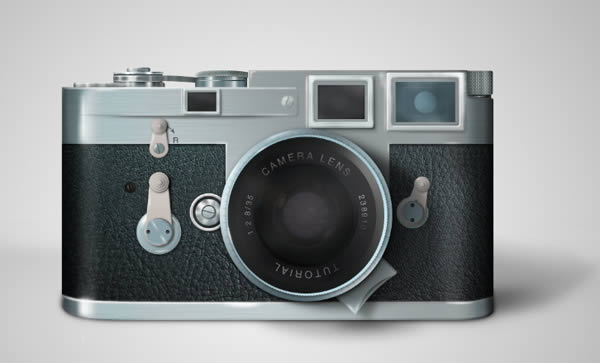
Final Image
Below is the final result. I hope you learn something new from this tutorial. If you have any questions, feel free to ask in the comment form below. I’d be glad to help you.
{excerpt}
Read More