In this 3ds Max/AE combo tutorial, you will learn how to make a stream of raining bullets using PF source in 3DS Max and then combine all the elements together in AE to give a stunning “Matrix-like” effect.
Preview
Want access to the full AE project files and assets for every tutorial on Aetuts+, including this one? Join Ae Premium for just $9/month. You can view the final effect preview video below.
Tutorial
Step 1
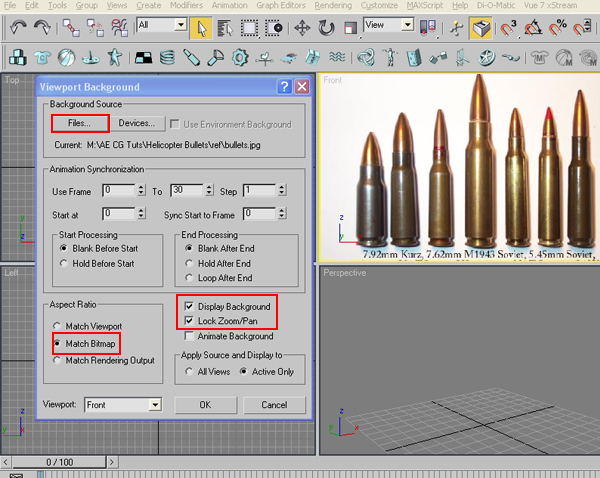
First of all launch 3DS Max and selecting the front view hit “ALT+B” on the keyboard to get “View port Background” appeared. While selecting “Match Bitmap”, “Display Background” and “Lock Zoom/Pan” , click on “Files” and browse for the reference image of the bullet.
Step 2
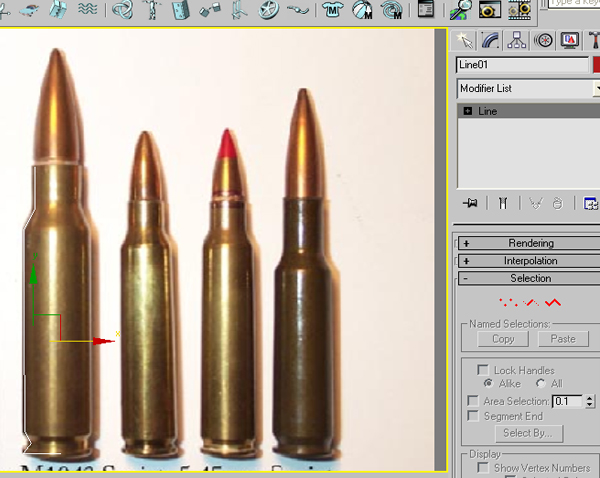
Pick the Line tool and draw the shape according to the middle bullet.
<img
Step 3
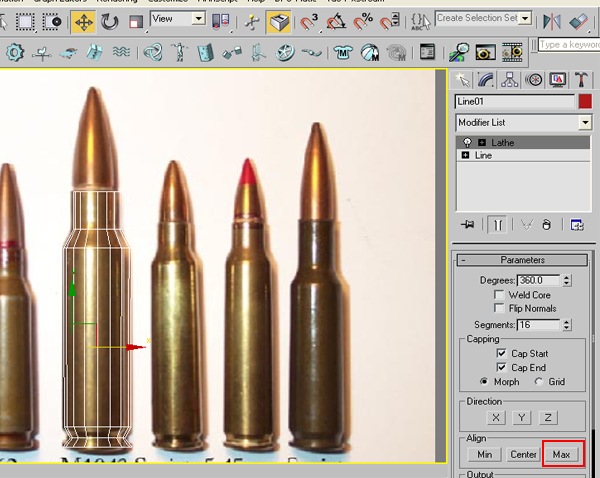
Apply “Lathe” modifier on the spline and click on “Max”.
Step 4
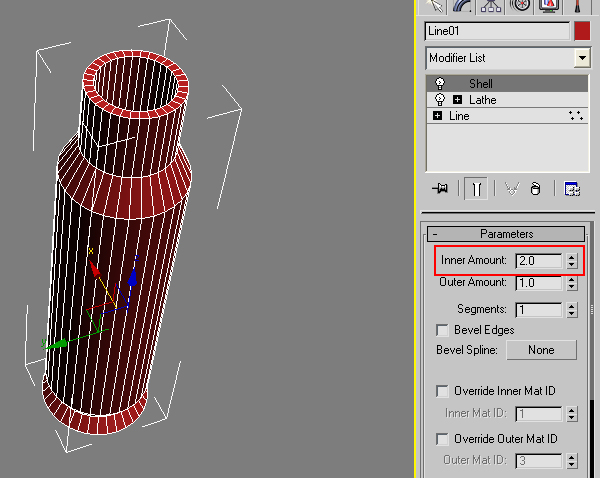
Apply a “Shell” modifier on it and increase the inner amount to something like 2.0 to give some thickness to the shell.
Step 5
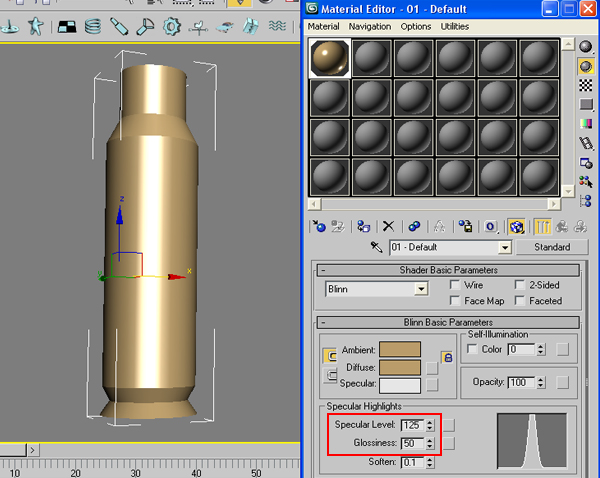
Press “M” on the keyboard to open Material Editor. In the diffuse channel choose the color as something like brass, give the Specular level as 125 and the Gloss value as 50. And apply it to the shell.
Step 6
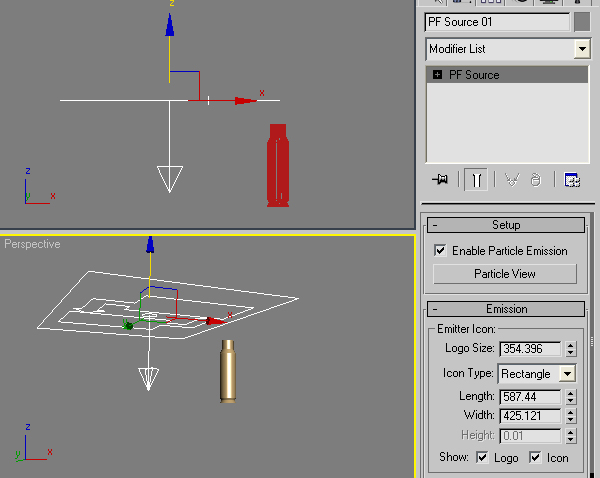
Now drag a PF source icon in the view port.
Step 7
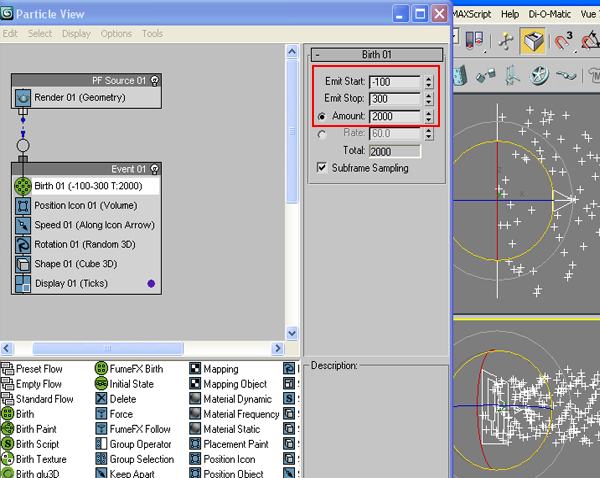
Hit “6” on the keyboard to open the Particle View window. Adjust the values of Birth > Emit Start, Emit Stop and Amount as shown in the figure.
Step 8
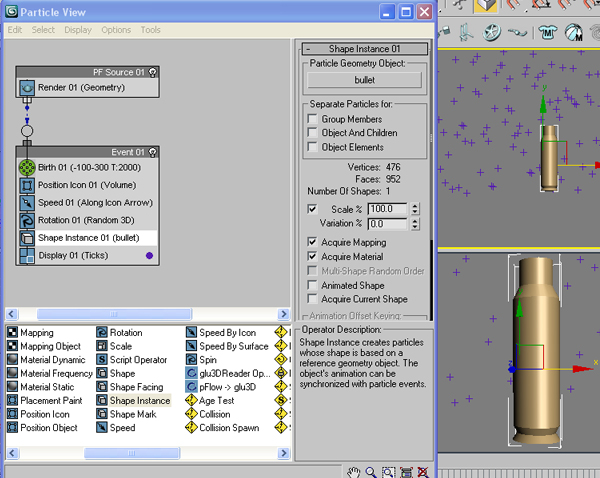
Put “Shape Instance” in the event instead of “Shape”, and pick the bullet from the scene as Particle Geometry Object.
Step 9
Now, if you choose the Display type as “Geometry”, you will see that all the particles have taken the shape of bullet.
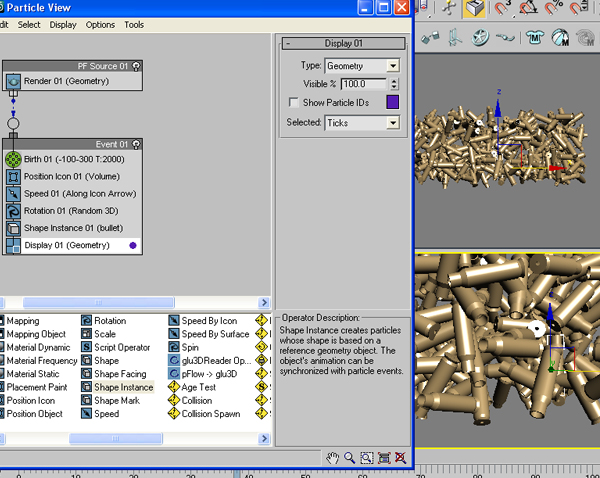
Step 10
Drag a Gravity force in the view port. Put a Force operator in the event and choose the gravity in “Force Space Warp” section. By doing this you will see the bullets going downwards.
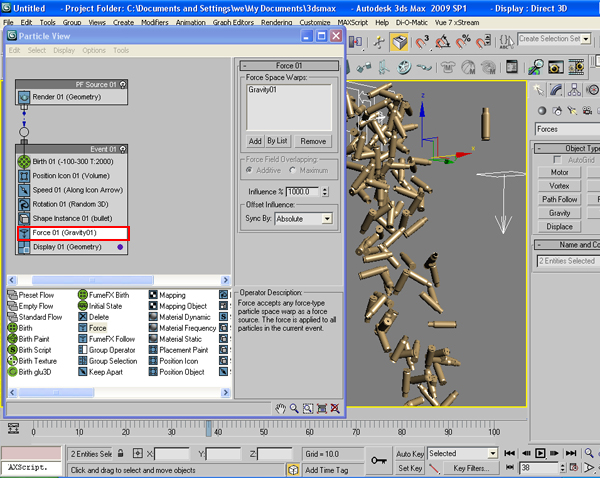
Step 11
Again go to “Shape Instance” operator and down the scale to 25%.
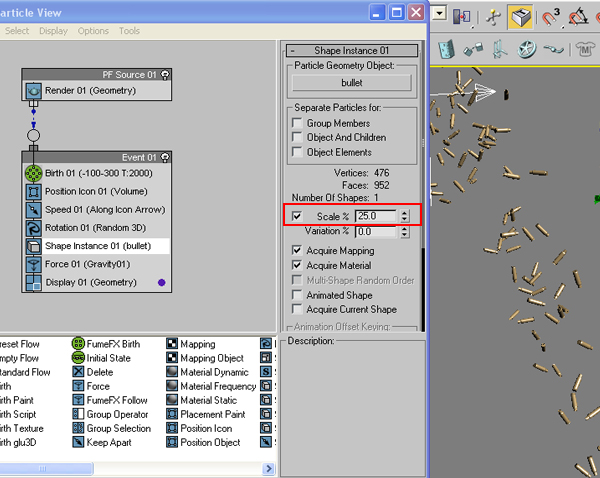
Step 12
Draw a Box in front of the PF source icon to make a building .
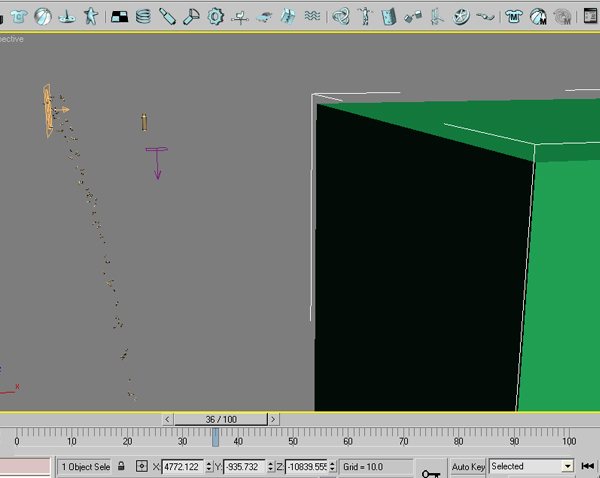
Step 13
Make a camera and place it on the ground level so that the scene should look like this. Add some lights also to lit the scene and the bullets.
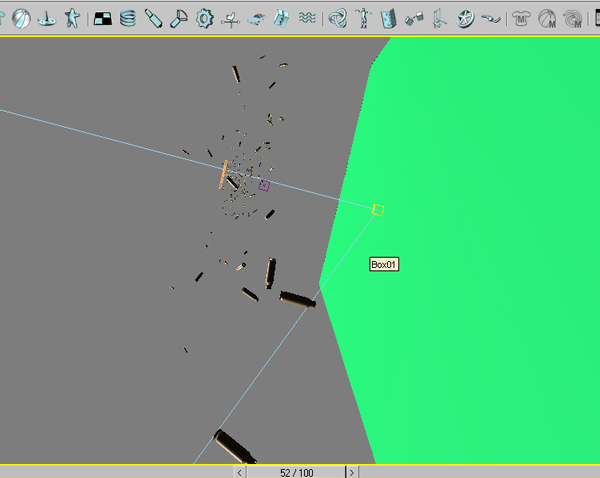
Step 14
Press “M” on the keyboard and apply this kind of texture to the building.
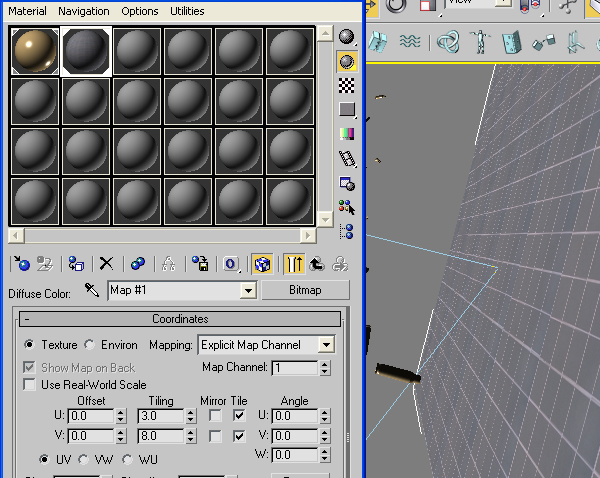
Step 15
Give “Raytrace” in the Reflection tab and put the value to 20. In this way some reflection of the bullets would come on the building.
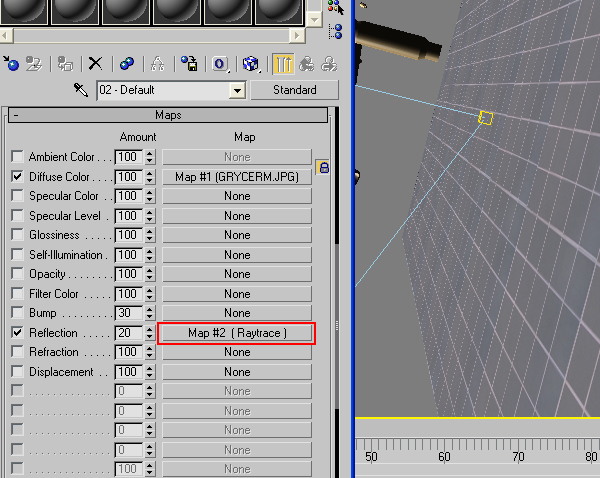
Step 16
Now go to Time Configuration and choose 100 frames per second, since we need it in slow motion.
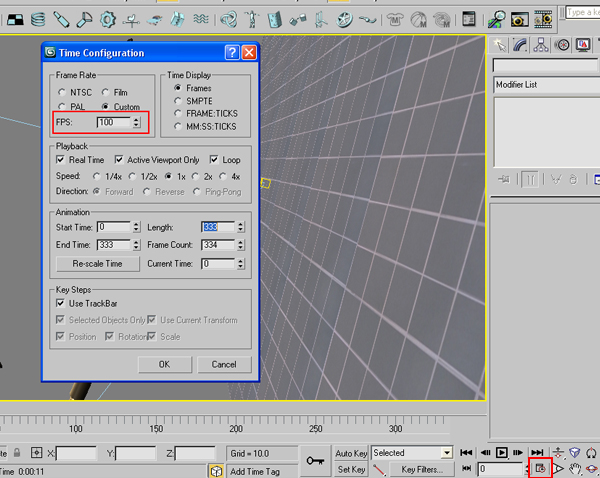
Step 17
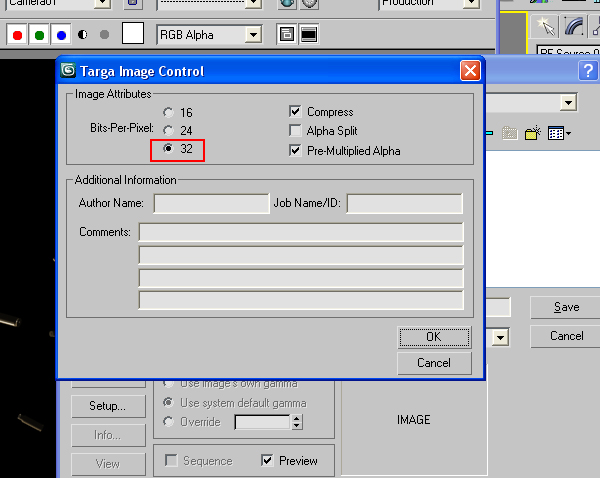
Now this is the time to render the scene. Hide everything except the bullets and then save the animation in .TGA format with alpha channel. Same would be done with the building also.
Step 18
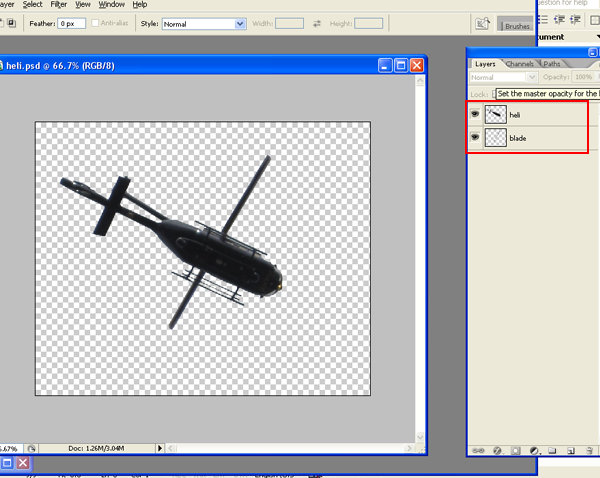
Next, in Photoshop, I took an image of helicopter from internet and then separated its blades and the body in two different layers as “Heli” and “blades”, so that later I could use it separately. I hope, the readers know the technique how to do that, since this is a very basic procedure in Photoshop. If not, then I would recommend you to visit www.psd.tutsplus.com to watch some basic as well as advance tutorials on Photoshop.
Step 19
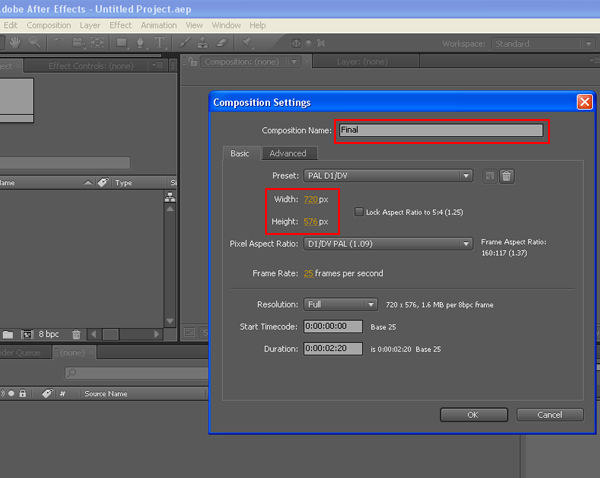
Now lets move to After Effects. Make a new composition as “Final” with 720/576 dimension.
Step 20
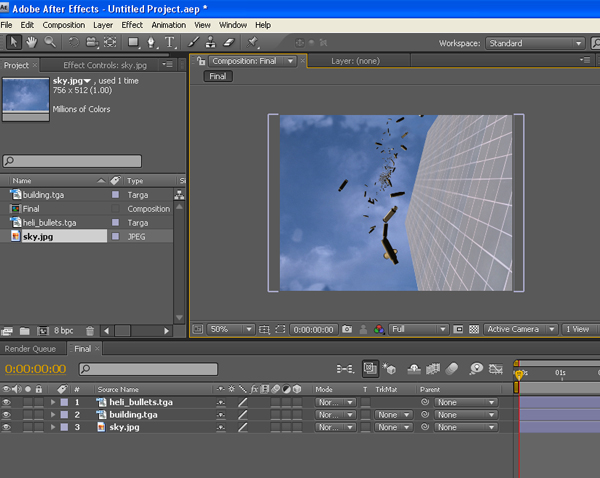
Import the Building and the Heli_Bullets files and drag these into the Final Comp. Import a Sky footage also and put it beneath all the layers.
Step 21
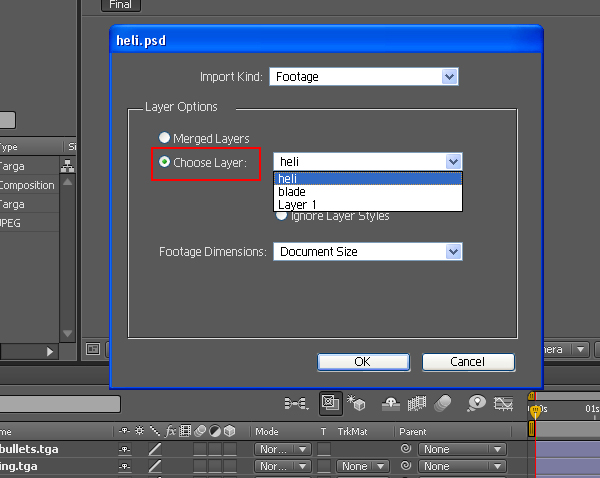
Now import the “Heli.Psd” file which has been separated in two different layers in Photoshop. While importing it at the first time, choose the “heli” layer which is the body of the helicopter and then drag it into the Final Comp.
Step 22
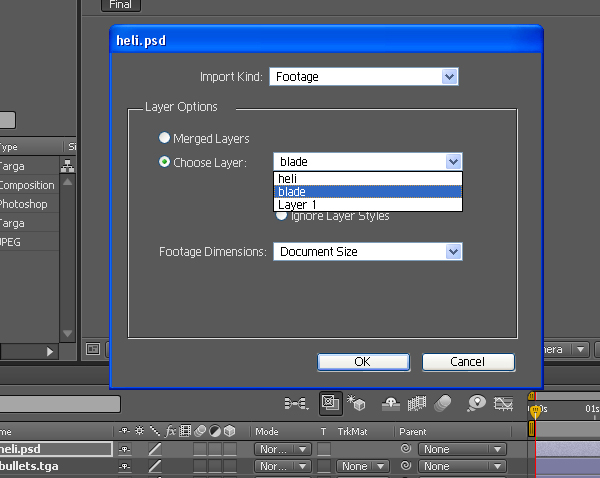
Do the same again and choose “blade” this time.
Step 23
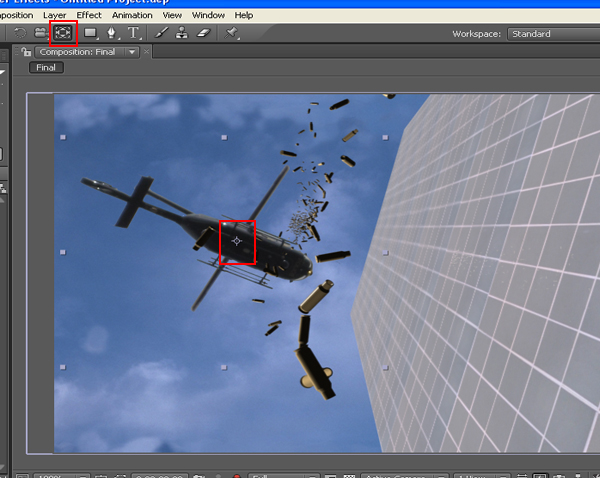
Select the “Pan Behind Tool” and move the pivot of the blade to the center of the Helicopter. By doing this the blades will rotate around its right axis.
Step 24
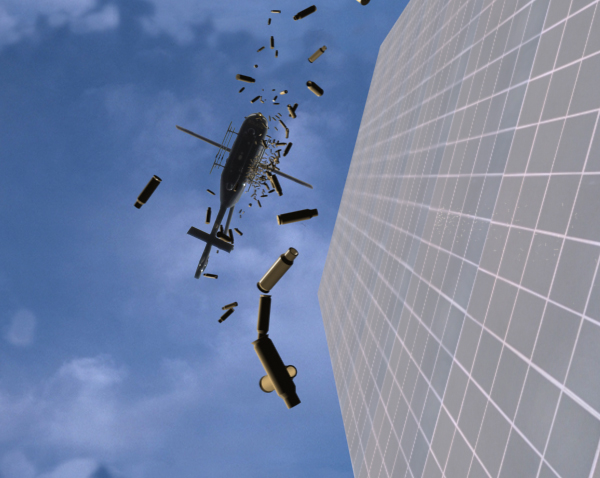
Select both of the layers of “heli” and “blade” and adjust these parallel to the building.
Step 25
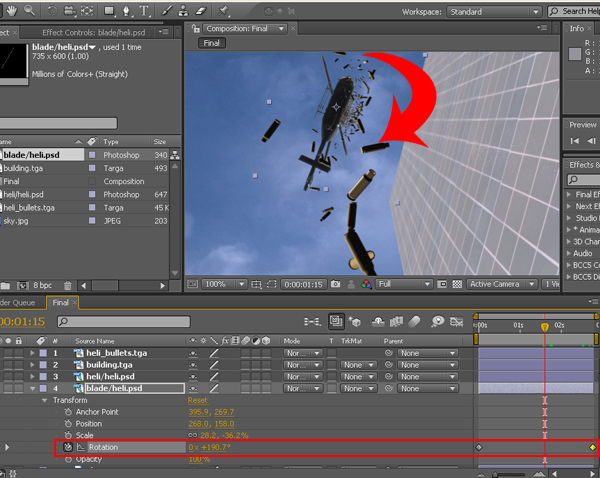
Select the “blade” layer, open its rotation and animate the rotation of the blade in clockwise direction.
Step 26
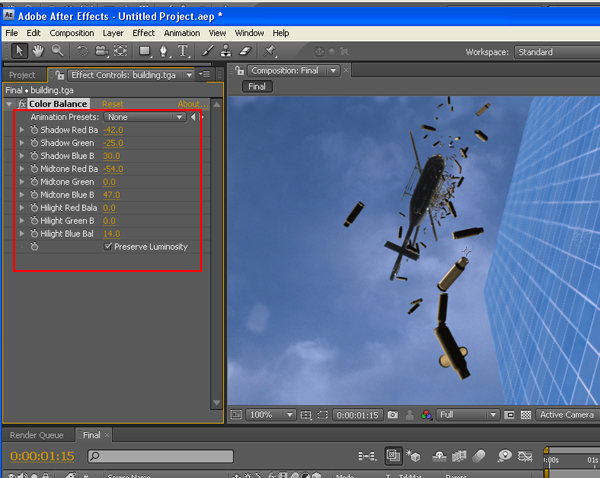
Now select the “Building” layer and apply color balance effect on it. Adjust the color to match with the scene.
Step 27
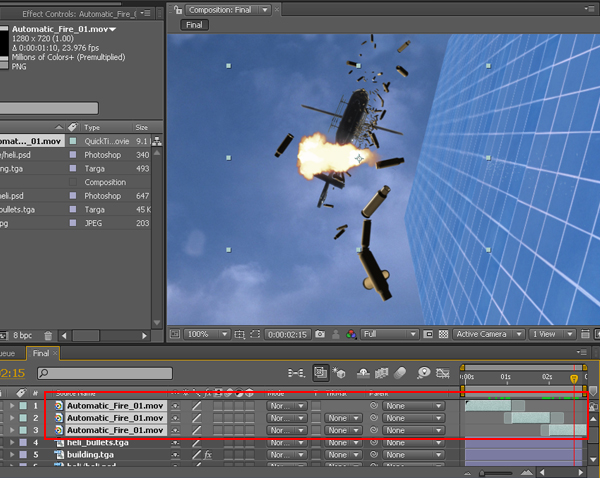
Now its time to make muzzle flash. I used one of the suitable muzzle flashes from VideoCoPilot’s action essential 2. You can buy it from www.videocopilot.net.
I duplicated the muzzle flash layer several times by pressing “Ctrl+D” and lined these up so that it could give the feel of continuous fire rounds.
Step 28
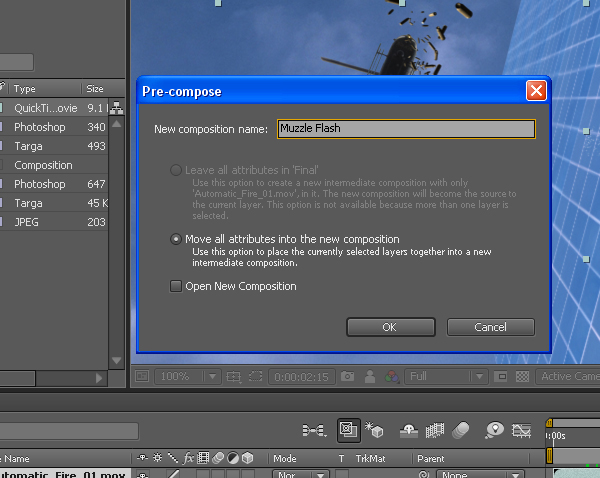
Select all these muzzle flashes layers and goto Layer>Pre-Compose. And rename the Pre-Composed layer as “Muzzle Flash”.
Step 29
Put the Pre Composed “Muzzle Flash” layer beneath Bullets, Building and Helicopter layers. Adjust the rotation of Muzzle Flash layer a bit.
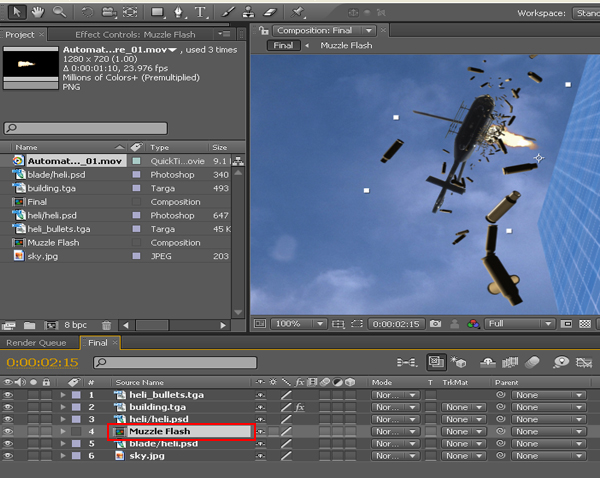
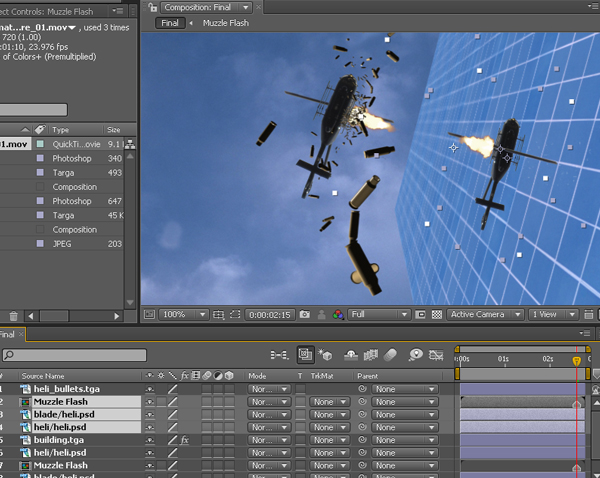
Step 30
Make the duplicate layer of Muzzle Flash, Helicopter and Bullets layer and mirror these layers so that the reflection of these layers could appear on the Building.
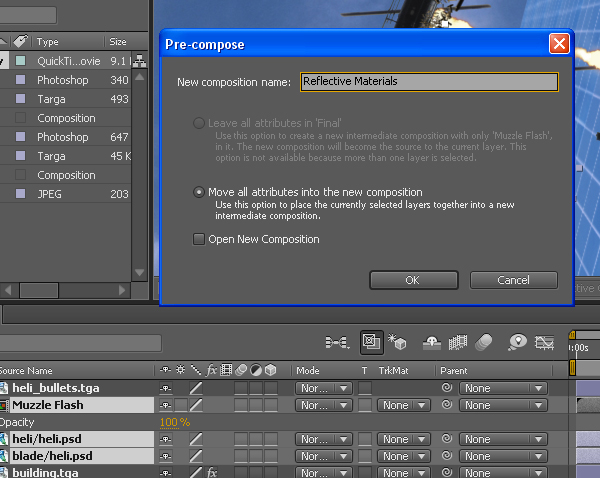
Step 31
Select these duplicated layers and pre compose them as Reflective Materials.
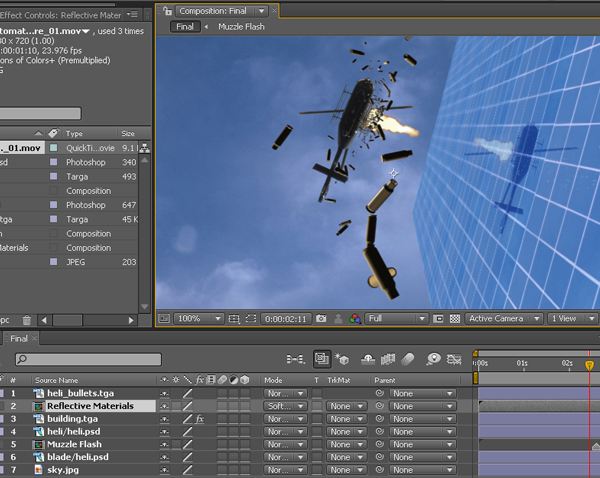
Step 32
Now select the Reflective Materials layer, right click > blending mode> soft lights. Now it gives a cool reflection on the building.
Step 33
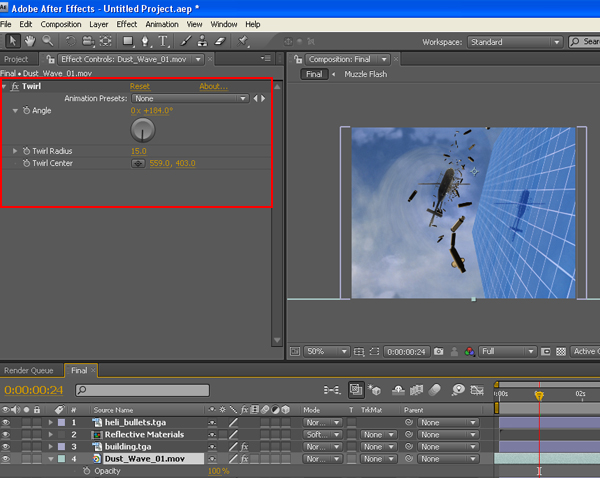
I used some dust elements taken from again Action essentials 2, but in a different manner. First simply import the dust element in the Final Comp, and apply Distort > Twirl effect on it . It gives a cool effect of wind simulation due to fan blade of the helicopter.
Step 34
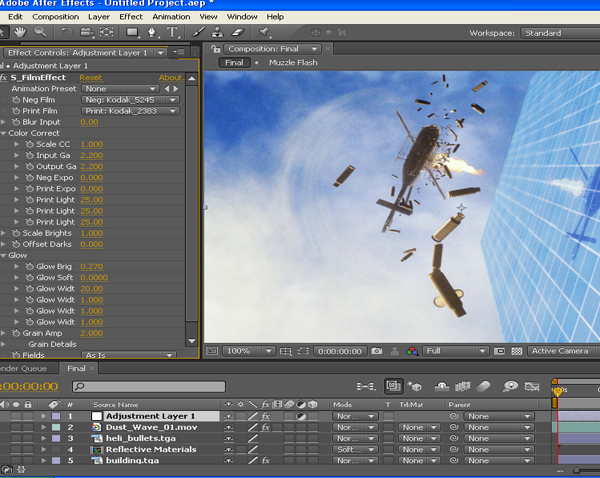
Now make an Adjustment Layer at top of the all layers and apply Effect> Sapphire Stylize> S_film Effect. This effect gives some glow and grain on the footgae with overall color corrected effect. You can get the plugin from www.genarts.com.
The End
Now render the scene and see the effect. You can always play with the values and options of the effects to get desired result.