In this tutorial I am going to show you an easy and great way to record a professional electric guitar solo for your production. The tutorial is geared towards guitarists that already have some experience playing the guitar but are not so technically trained so they can play a fast guitar solo. I am going to be using Ableton Live 8.0.9 but the technique can easily be applied in other DAWs. The technique can also be applied to an acoustic guitar pass or solo.
Step 1: Setting Up
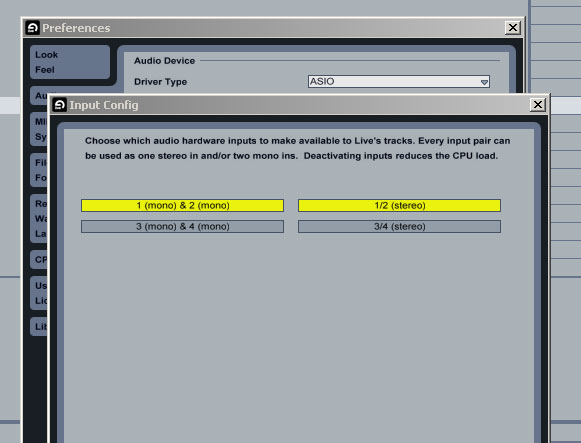
First, we need to setup the Input Configuration of our sound card. In Ableton Live, go to Options->Preferences in the Audio tab. Click on the Input Config button in the Audio Device area. We need at least two separate pairs of mono inputs to be activated so that we can select one of them later on for the guitar input signal.
Of course, you can also select a stereo input signal if you plan to record a stereo instrument. In the screenshot, the stereo input track that I have selected can also be used as two separate mono tracks. Just click the necessary input tracks to activate them. Bear in mind that the more inputs activated the more the CPU load. Finally, plug your guitar into the physical input of your soundcard.
Step 2: Load Up Your Reference Track
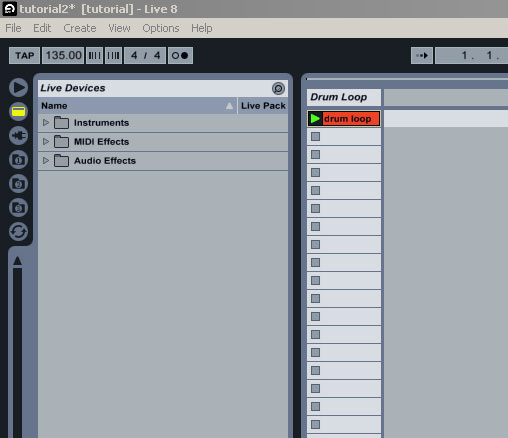
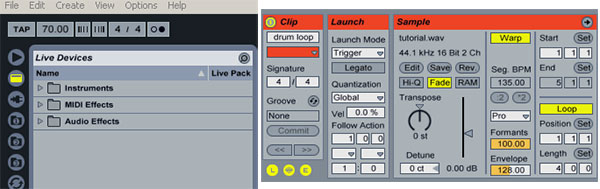
First, we need to load our drumloop into an audio channel as a reference. You can use any loop you want or just have you composition up and running and take it from there. I have created a loop myself. It’s a drum loop with an added baseline. The master tempo is set at 135 bpm and we are currently working at Ableton Live’s session view.
Listen to the drumloop:
Download audio file (drumloop.mp3)
Step 3: Add the Guitar Track
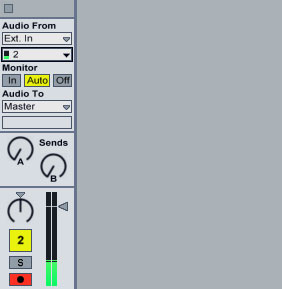
Insert another audio channel, name it Guitar and set the first dropdown box underneath Audio From to Ext. In. Click in the dropdown box underneath to display the available sound card inputs and strum the guitar. You should see a green metering indication appearing to one of the two mono channels available. (Had a stereo pair been selected from Step 1, the indication should also appear for that input channel.)
At this stage, you should adjust your volume levels from your sound card’s hardware or software interface to avoid clipping and distorting the input signal coming from your guitar to the audio interface. Set it so that when you strum the guitar hard, the Guitar’s channel volume metering indication doesn’t go past 0 dB.
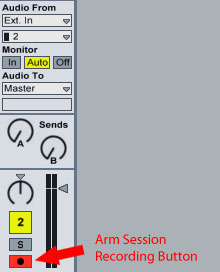
It’s better to be on the safe side, you can adjust the volume gain later on during the mixing stage. Select the mono channel corresponding to your guitar’s input. Finally, arm the track for recording by activating Arm Session Recording button.
Step 4: Add a Guitar Effect
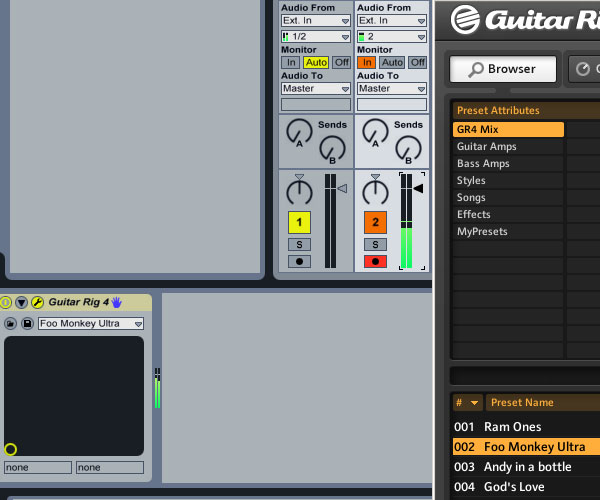
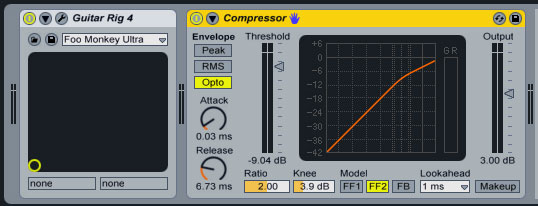
The guitar that I am using is an electric guitar with a clean tone, meaning I haven’t used any external distortion effect. If you have already plugged in an external distortion effect or plan to use external processing, you can skip to the next step. I used Native Instrument’s Guitar Rig 4 with the Foo Monkey Ultra preset to add a nice distorted effect always checking and adjusting my volume metering level so that it won’t clip (go beyond 0 dB) once the distorted effect has been added.
Step 5: Slow the Tempo Down
We are ready for recording. Fire the drum clip in loop mode. The loop plays too fast, doesn’t it? Especially for a beginner guitarist like you!
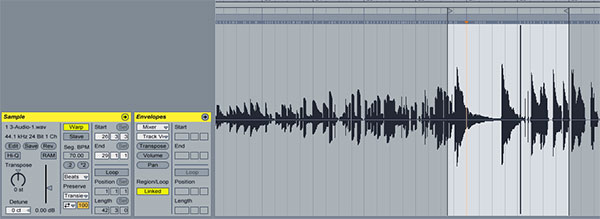
Set the master tempo to about half of it’s original value, around 70 bpm. The default Beats Warping Mode value that is currently being applied to the drumloop makes it play in half its speed without changing its pitch but it sounds terrible. Just set the Warping Mode to Complex Pro or Complex for best results.
Depending on the composition you use as a reference, you might not need to adjust any Warping Mode settings. The goal here is to make the song play much slower so that we can start experimenting with the guitar.
Step 6: Recording
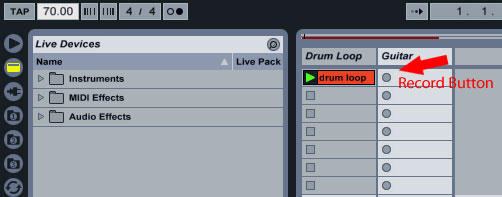
We are still in Session View. Activate the Arm Session Recording button for the Guitar track if you haven’t done already. By now, you must have an idea of what you want to record. It could be different parts of a solo you have in your mind or various passes that you can consolidate later on.
As the playback progresses with half the speed, hit the Record button in one of the slots inside the Guitar channel to start recording. It’s better to start playing something when the drum loop hits a beat of a bar, since that will help you later on when you are editing. Activate the Metronome if it helps.
Play slowly different parts of what could later one be edited into a complete solo. Don’t worry if you make any mistakes. Just start again in sync with the metronome or the drumloop.
Your resulting pass is going to be edited and played back in double the speed. Be aware that for instance any tremolo finger picking effect you execute will have to be performed slower since we will increase the playback speed afterwards.
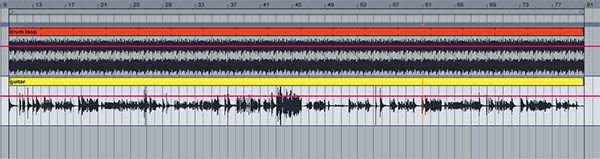
You can hear my resulting unedited audio clip here:
Download audio file (guitar-edit1.mp3)
Step 7: Preparing the Recording
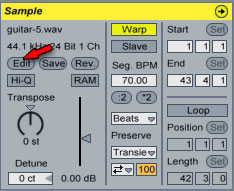
Leave the guitar track’s Warping Mode to the default (Beats), or set it to Beats if your default Warping Mode is different. At this point, we can further clean up the guitar track if we feel that the signal we recorded is not clean enough by using an external editor.
To set a default external audio editor go to Options->Preferences in the File/Folder tab, click Browse next to the Sample Editor and choose the executable file of your desired audio editor. The way we would go about doing it is to click on the guitar clip, switch to the Sample Editor from the bottom right of the application and click Edit in the Show Sample Display to launch the Sample Editor of our choice thus being able to edit the audio file externally.
After processing the file to an editor of your choice, clicking save will also update the file in Live’s Sample Display window.
Now, we need to switch to the Arrangement view by hitting tab key on your keyboard. First, though, while in Session view, click and hold the clip you just recorded, then hit tab and drop it to the Guitar audio track in the Arrangement view.
Unless you already use your arrangement as your reference track, do the same thing with the drumloop, move it over the Arrangement view and activate the loop function for that clip if it’s not already activated. Extend the drumloop clip to the right occupying the same length as the guitar track you just recorded.
Step 8: Editing the Recording
Work on the guitar loop. Start chopping and deleting areas that you don’t want to keep or that contain silent areas. With the Guitar track unfolded so you can see the waveform, you can select a portion of the clip then once highlighted drag that portion anywhere you want. Hit Del to delete it or CTRL (or CMD for Mac) + E to split the clip.
Continue as such, chopping the audio clip and moving around the recorded guitar phrazes. You can also individually adjust the volume of each clip you create this way. For instance, I realized that during a legato passage, the volume needed to be increased to match the previous passage.
Since each recording phraze was played at the beginning of a beat, it should be easy to move phrazes around as they would snap to the grid easily. You can also consolidate parts of the main clip by SHIFT selecting the parts and going to Edit->Consolidate or hit CTRL (CMD) + J.
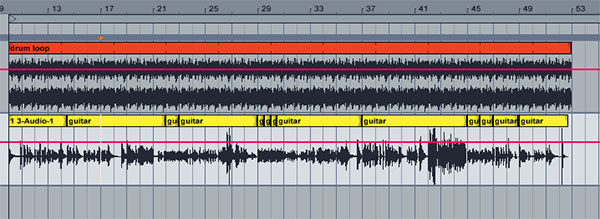
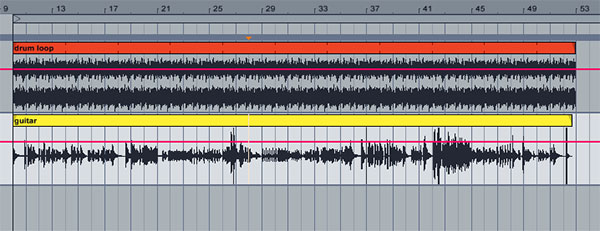
Once you are done editing, select all the chopped up clips by selecting the first, holding SHIFT then selecting the last one. Go to Edit->Consolidate or hit CTRL (CMD) + J. Now all your changes are consolidated into one clip. Rename the resulting clip guitar by right clicking and choosing Rename or alternatively hit CTRL (CMD) + R.
Bear in mind that Consolidating clips in the Arrangement View creates new audio files, which are non-neutral in comparison to the original audio data. Specifically, the new files will be normalized, with their clip volumes adjusted to play back at the same volume as heard prior to consolidation. Also, the new files will be created at the sample rate and bit depth set in Live’s Preferences window, which may differ from those in the original audio files.
Step 9: Warping the Recording
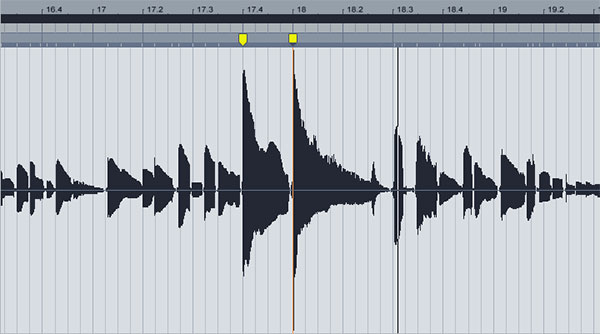
Still in the arrangement window, we may need to quantise parts of the guitar part to correct any timing issues. We may keep some uncorrected parts as is since it’s a good idea to keep the human feeling in the performance but some other parts might need correcting.
Click on the guitar part and go into the Sample Display Editor and create warp markers accordingly to correct any timing issues.
It may be necessary to re-chop parts of the clip and correct timing that way or treat them individually if you want, for instance, to adjust the volume of individual clips. Once you are done, consolidate all clips again and rename the resulting track to guitar.
Set the master tempo back to 135 bpm. Set the drumloop’s Warp method to Beats again and listen to your recording.
Here is the file so far.
Download audio file (guitar-edit2.mp3)
Step 10: Control the Dynamics
It’s a good idea to add a compressor to the guitar track to balance the dynamics so that it will be easier to mix in to our arrangement and compress any unnecessary volume spikes. I have added Live’s native Compressor device. Take a look at the setting on the screenshot below. Your setting might differ, though, according to your style of playing.
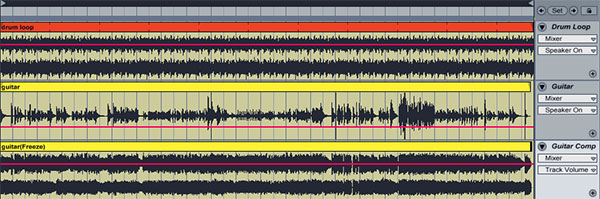
I have also flattened the compressed result and dropped it in a new created audio channel so that I can show you the effect the compressor had on the resulting waveform.
Step 11: Adding Effects
The guitar sounds a bit sterile so I added a native Ping Pong delay device on the guitar track to add a bit more interest and movement. I also dropped a native Reverb device with the default setting to add depth and atmosphere.
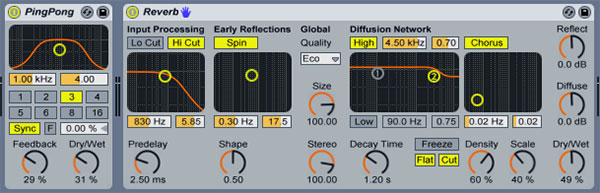
Finally, I automated the Ping Pong delay’s Dry/Wet control to create a dreamy and psychedelic effect. I activated the Global Record button, hit play and recorded the automation as the arrangement was playing. Throwing a native Limiter device with the default values in the Master channel can take care of any peaks that might clip our signal.
Listen to the complete file:
Download audio file (drum-guitar-complete.mp3)
I hope this tutorial was clear and that you found it useful. It should give you a basic idea on how you go about recording a guitar solo following some basic steps.
As you can see the key concept here is that we are working in half the tempo so that we will be able to add more control to our performance, edit it as we like then use our DAWs audio warping algorithms to bring the tempo up to it’s original value. You can also extend what we did here by adding more effects or rearrange and recomposing the guitar loop creating more original and unheard sounds.
Thank you for your time and if you have any question, I would be happy to help.