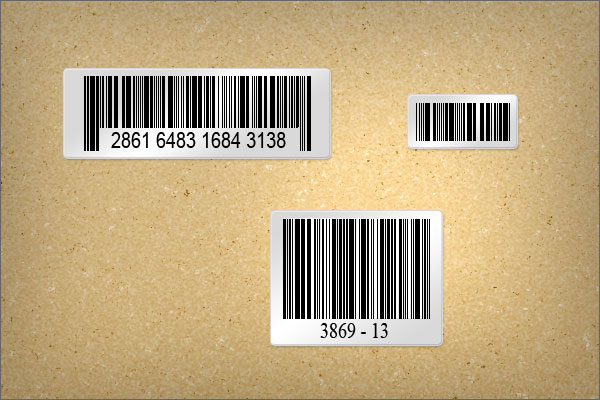
In today’s quick tip tutorial you will learn how to create a barcode sticker and a paperboard background texture. Let’s get started!
Step 1
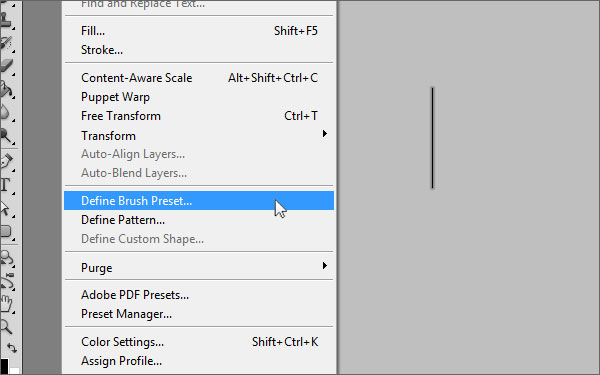
First, we will set up our brush preset for the barcode. Create a new document with a width of 1 px and a height of 100 px. Now pick the paint bucket tool and fill the document with black. Go to Edit > Define Brush Preset, choose a name for your brush and click OK.
Step 2
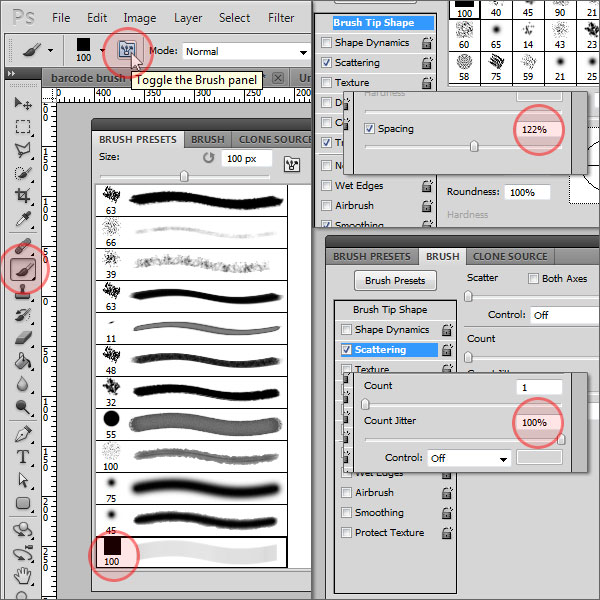
Create another new document, I chose 600 x 400 px for width and height. Select the brush tool and open the brush preset panel. Scroll down and select the brush preset you just created. Switch to the brush panel, make sure "Brush Tip Shape" is selected on the left-hand side and change the "Spacing" value to about 120 %. (Tip: By changing the spacing value you can determine how close the lines of the barcode will be together) Next, click on "Scattering" just below "Brush Tip Shape" and increase the count jitter value to 100%.
Step 3
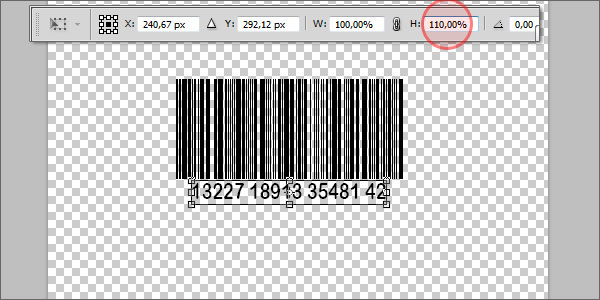
Now make sure the foreground color is set to black, and paint from left to right while holding the shift key, which straightens your barcode line automatically. Select the text tool and add some random numbers below the barcode. Press Cmd + T and increase the vertical scale just a little bit.
Step 4
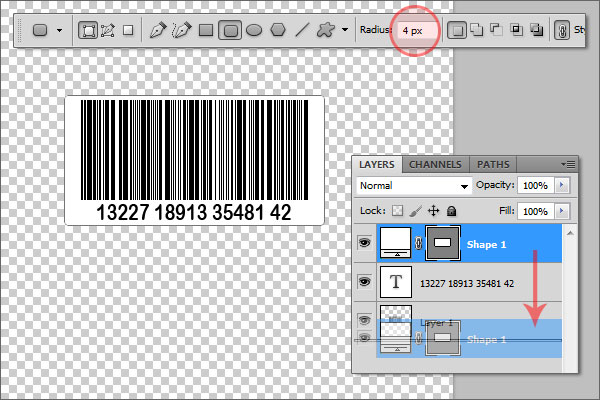
Switch the foreground color to white, pick the rounded rectangle tool with a radius of 4 px and draw a sticker-like shape around the barcode. Drag this shape layer behind the text and the barcode.
Step 5
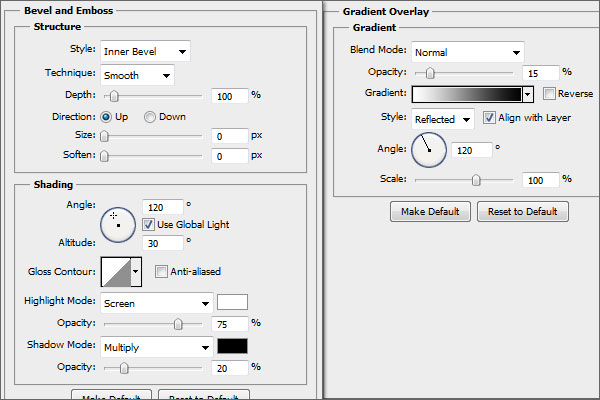
Double-click on the shape layer and add the following layer styles (leave unmentioned parameters at defaults):
- Drop Shadow: Opacity: 25%, Distance: 2px, Size: 3px;
- Bevel and Emboss: settings see image;
- Gradient Overlay: settings see image;
- Stroke: Size: 1px, Color: #d6d6d6;
Step 6
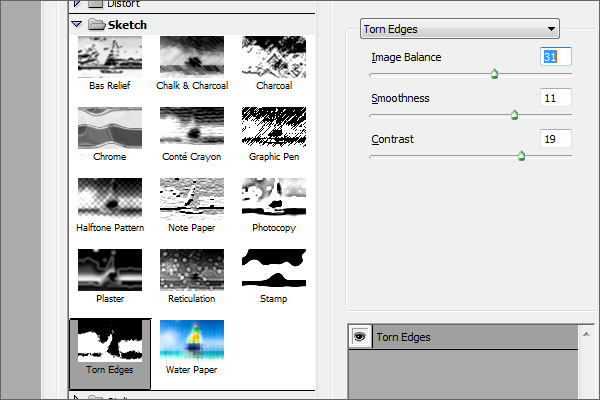
Now we are going to create the paperboard texture. Create a new layer, drag it behind the others, and fill it with black. Go to Filter > Noise > Add Noise with an amount of about 65% and check "Monocromatic". Then, make sure that the foreground color is set to white and the background color to black, go to Filter > Sketch > Torn Edges and apply it with the settings as seen on the image below.
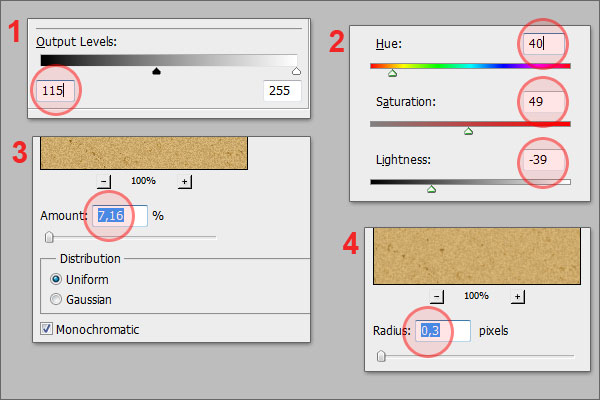
Press Cmd + L to access the levels adjustments and drag the left handle of the "Output Levels" to about 115. Press Cmd + U, make sure "Colorize" is checked and apply the following values: Hue: +40, Saturation: +49, Lightness: -39. Then, apply the "Add Noise" filter again with an amount of about 7%. Go to Blur > Gaussian Blur and apply it with a radius of 0.3 px.
Step 7
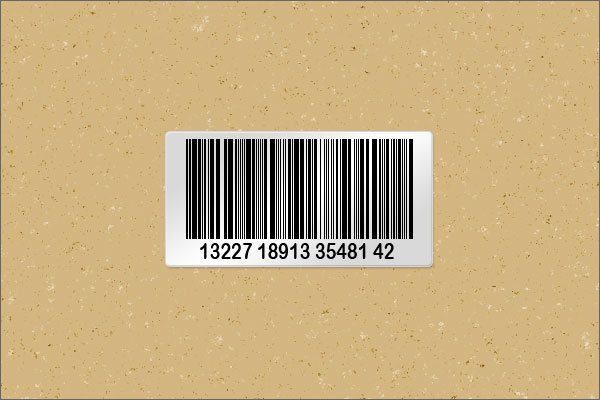
Create another new layer filled with black, change the foreground and background color to white and black again, and apply the "Add Noise" filter with an amount of 120%, then again the "Torn Edges" filter with the following settings: Image Balance: 1, Smoothness: 11, Contrast: 19. Set the layer’s blending mode to "Screen" and lower the opacity to about 50%. So far, you should have something like the image below.
Step 8
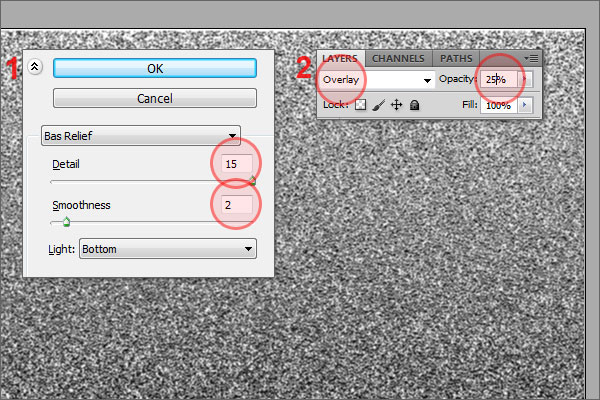
To add a little bit more depth, create another new layer, fill it with white and apply the "Add noise" filter with an amount of about 120%. Go to Filter > Sketch > Bas Relief and apply it with the settings as seen on the image. Set the blending mode to "Overlay" and lower the opacity to 25%.
Conclusion
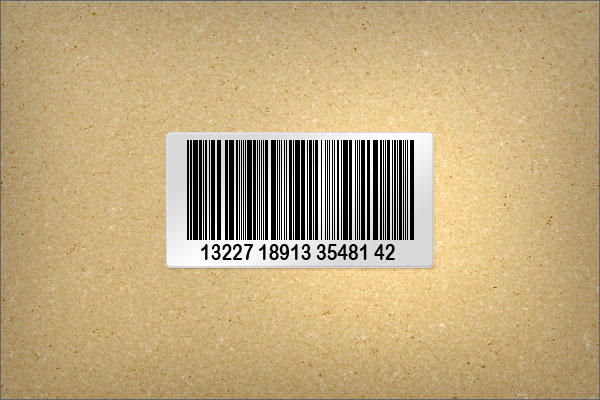
Congratulations, you are done! I added a simple vignette effect to my final result as you can see here.
Here are some additional examples that I created using this technique.
