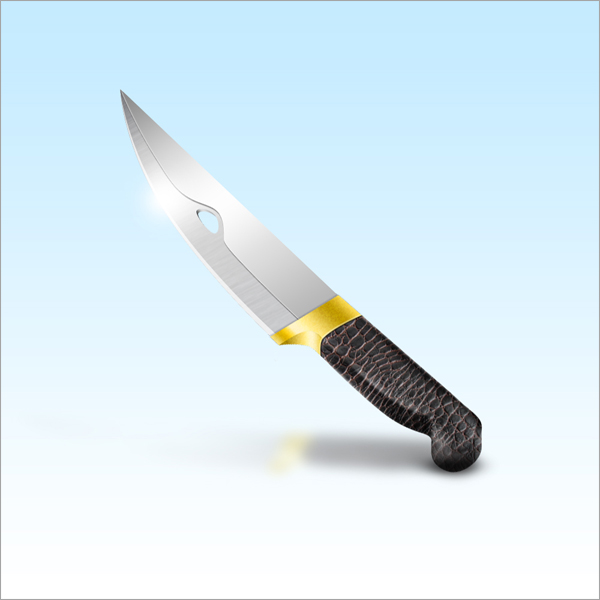
Photoshop is a fantastic app to use to manipulate photos but it is also a great app to use to illustrate still life objects. In today’s tutorial we will demonstrate how to create a semi-photo-realistic knife in Photoshop using vector drawing tools, layer styles, textures, and effects.
Step 1
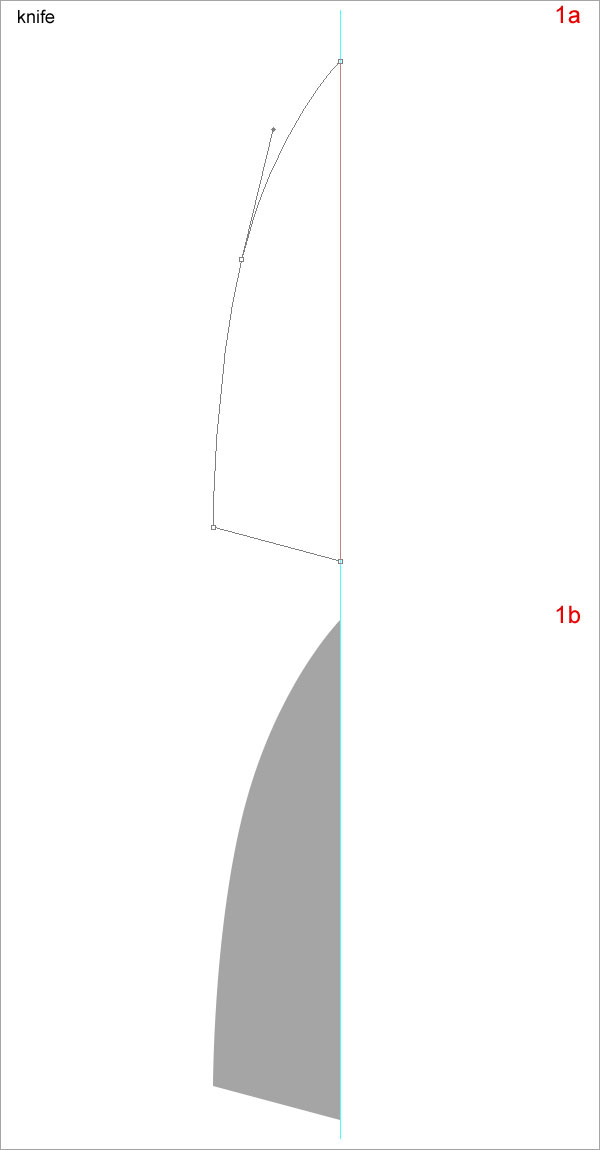
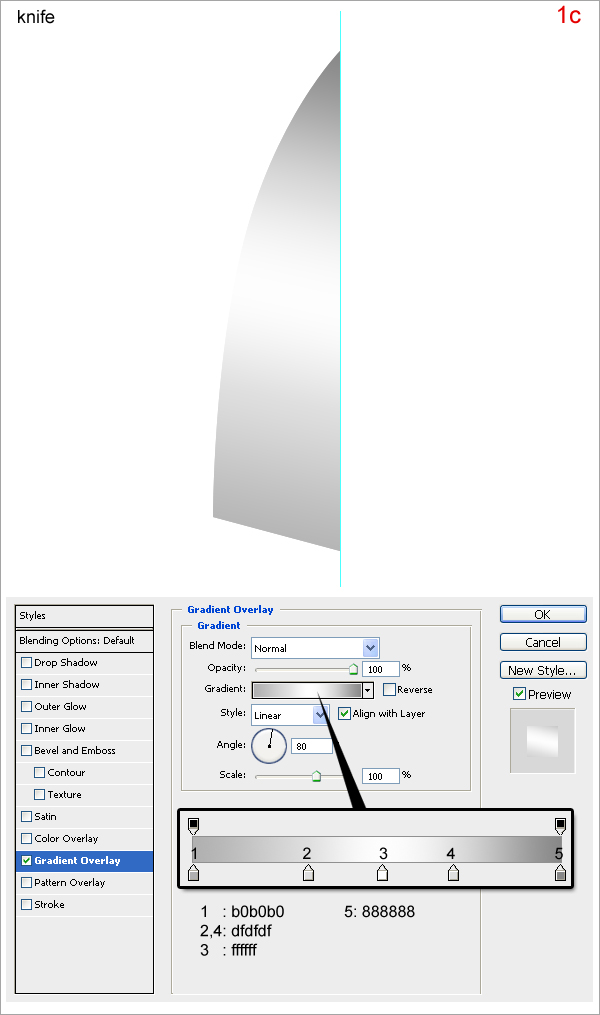
In new document (size 1000px x 1000px), create a new layer and call it “knife”. Use the Pen Tool and draw a shape as in (1a) and fill it with any color (1b). Then apply the layer styles as shown in (1c).
Step 2
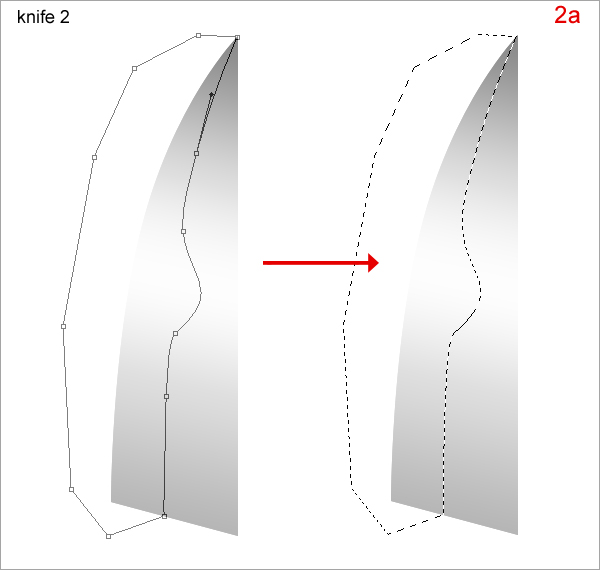
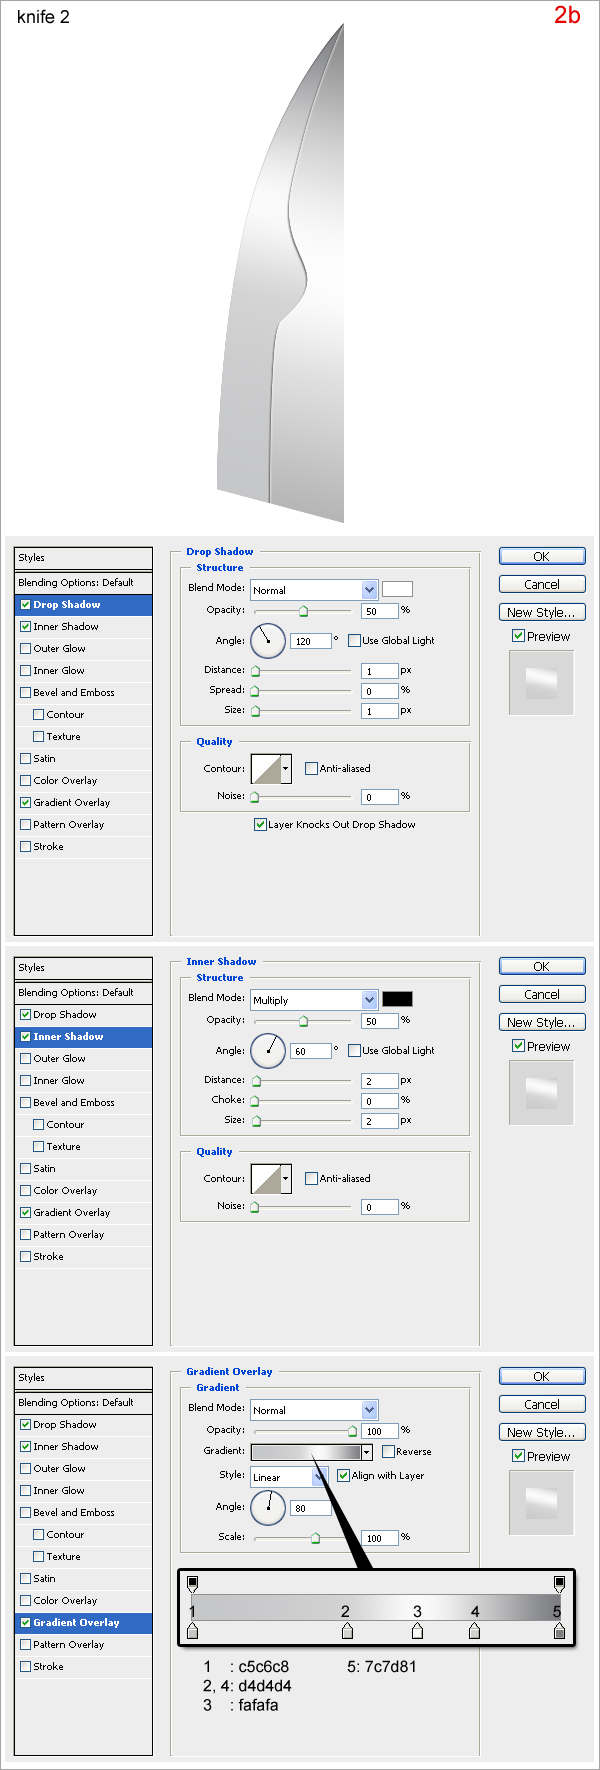
On the “knife” layer, use the Pen Tool and draw a shape as in (2a). Press Command + Enter to make the selection. Press Command + J to duplicate this selection. Rename the new layer “knife 2” then apply a layer style as shown in (2b).
Step 3
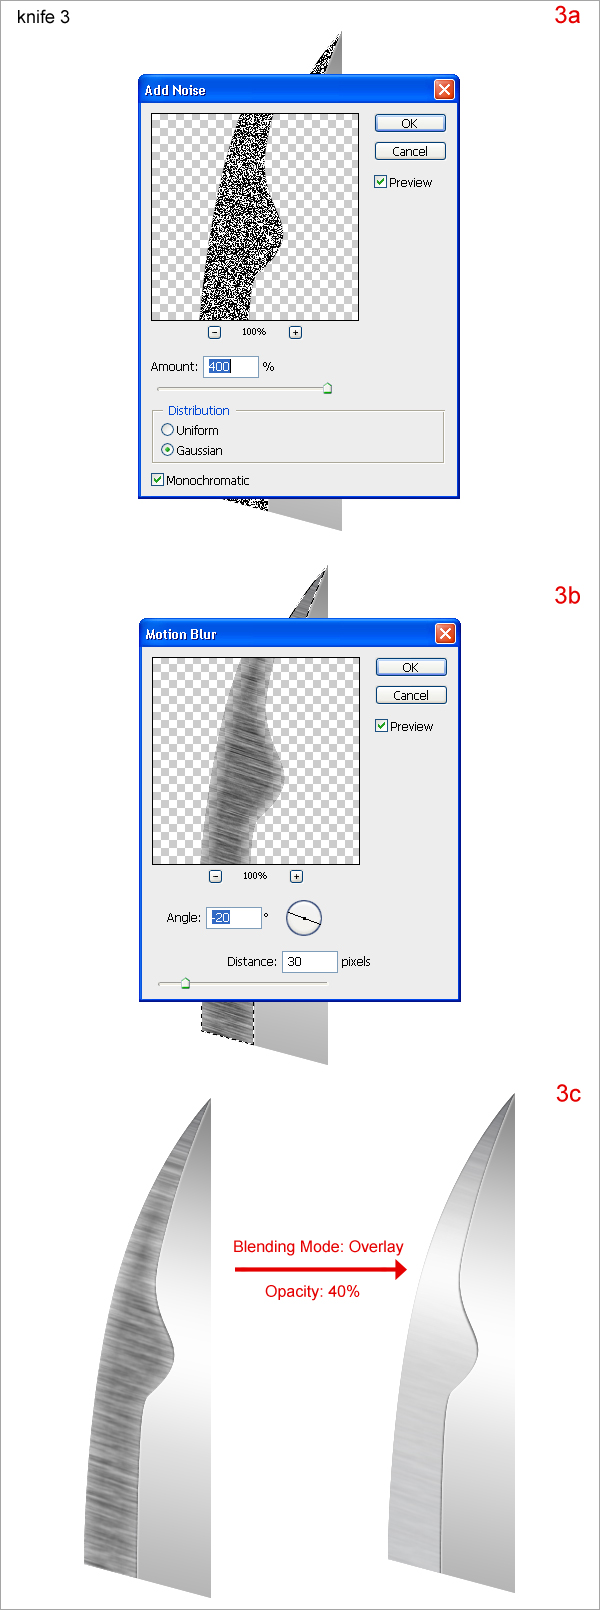
Press Command + J to duplicate “knife 2” and delete its layer style and rename this new layer “knife 3”. While holding down “Command” click on “knife 3” to obtain its selection. Go to Filter > Noise > Add Noise, set as in (3a). Go to Filter > Blur > Motion Blur and set as in (3b). Then change its Blending Mode to Overlay and reduce Opacity to 40%.
Step 4
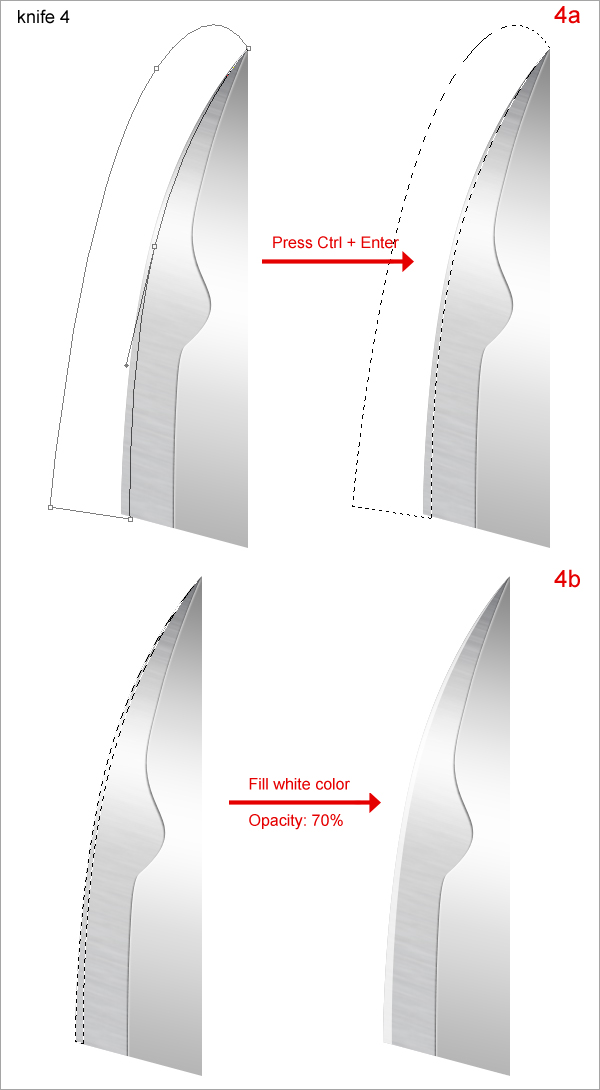
On “knife 2”, use the Pen Tool to draw a path as in (4a). Press Command + Enter to make the selection. Press Command + J to duplicate this selection and delete its layer style. Rename this new layer “knife 4” then move it on top of “knife 3”, fill with white color and reduce its Opacity to about 70% (4b).
Step 5
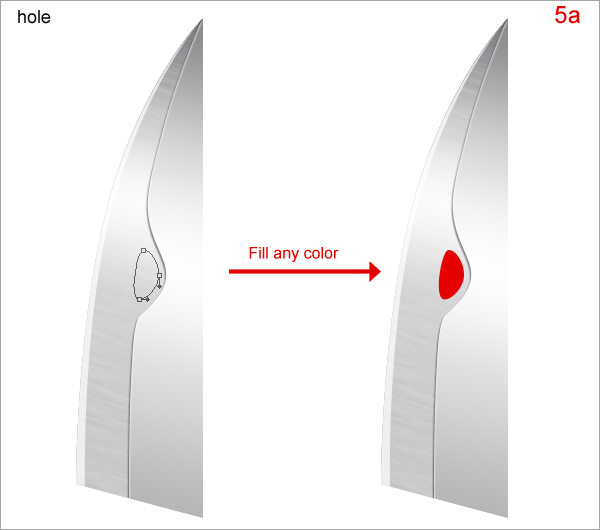
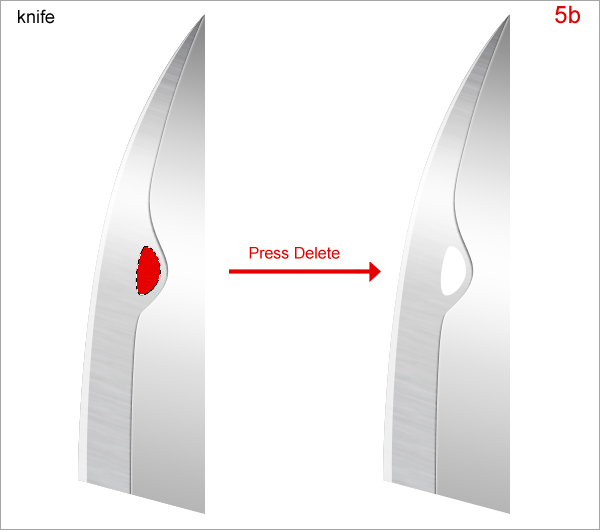
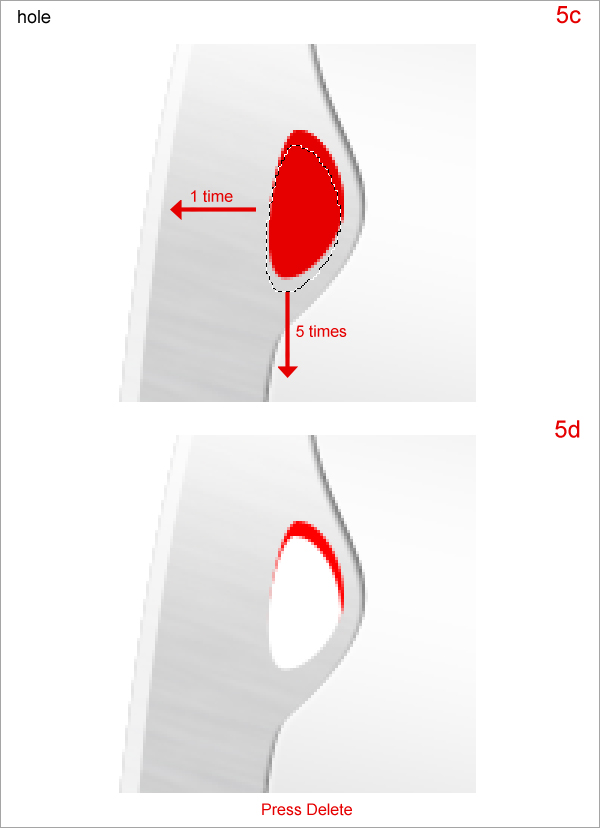
Select “knife”, “knife 1”, “knife 2”, “knife 3” and “knife 4”, press Command + E to merge these layers into one layer. Rename this new layer “silver knife”. Create a new layer on top and call it “hole”. Use Pen Tool to draw a shape as in (5a) and fill it any color. Keep the selection of “hole”, choose “knife” and press Delete (5b). Select Rectangular Marquee Tool then press the down arrow key 3 times and press left arrow key 1 time to move the selection as in (5c). On “hole”, press Delete (5d).
Step 6
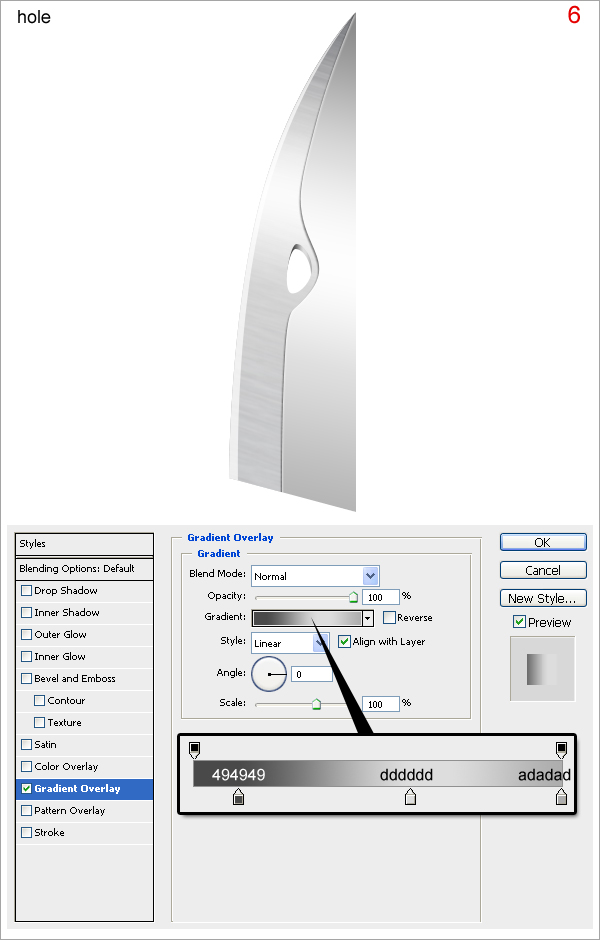
Open the layer style menu for “hole” and adjust the settings as shown below.
Step 7
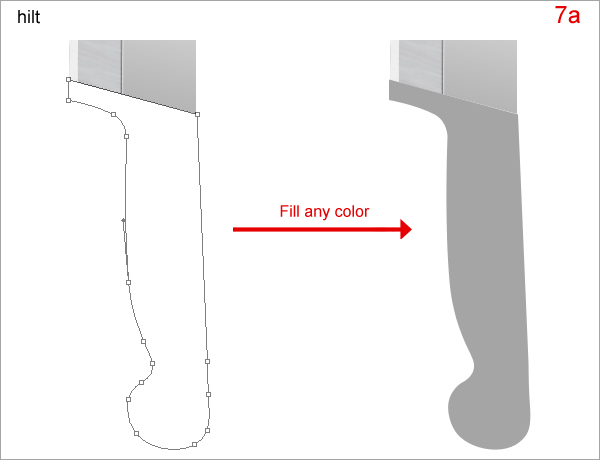
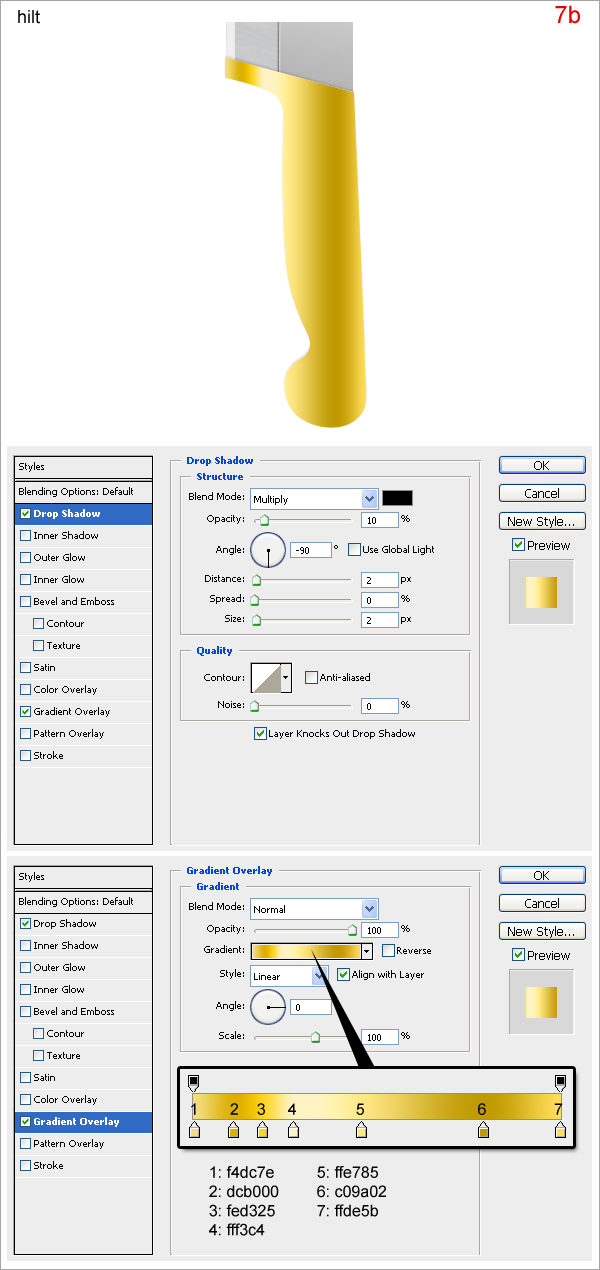
Create a new layer on top, call it “hilt”. Use Pen Tool to draw a shape as in (7a) and fill it with any color. Then open its layer styles and use settings as shown in (7b).
Step 8
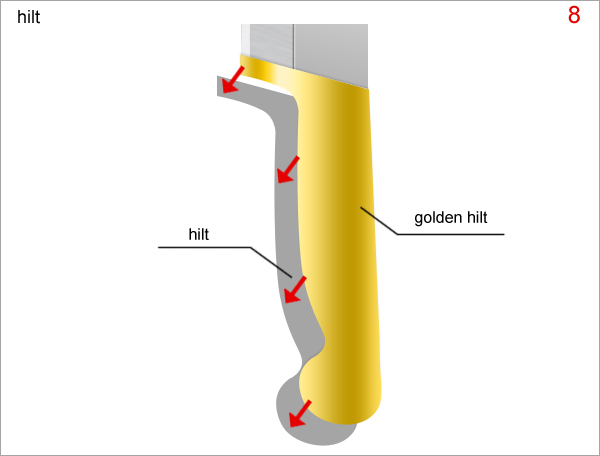
Press Command + J to duplicate “hilt”, rename the new layer “golden hilt”. Delete layer style “hilt” and place as shown below.
Step 9
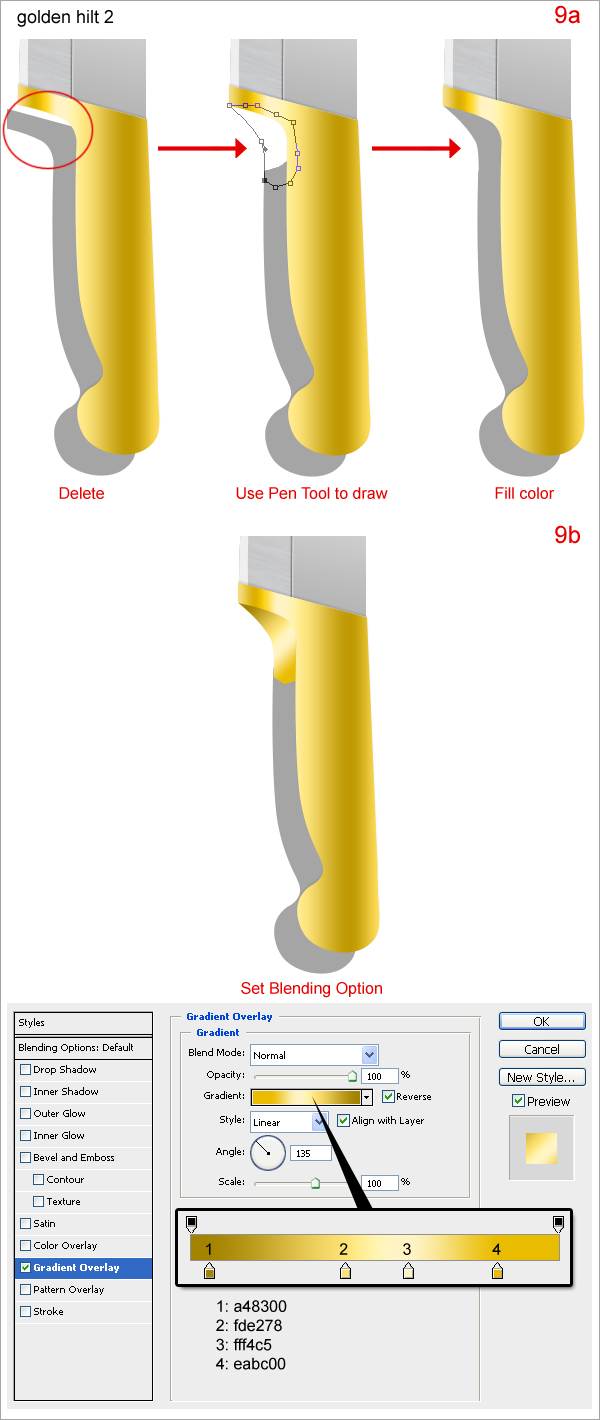
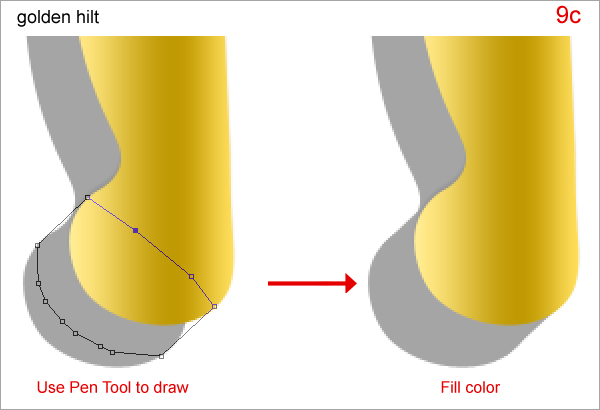
Create a new layer between “hilt” and “golden hilt”, call it “golden hilt 2”. Use the Pen Tool to draw a shape as shown below.
Step 10
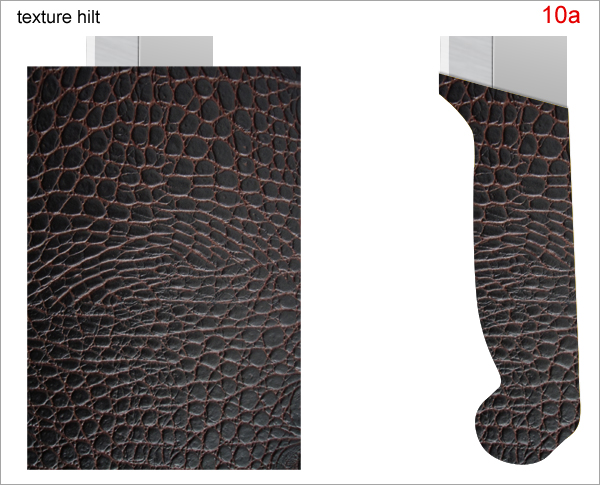
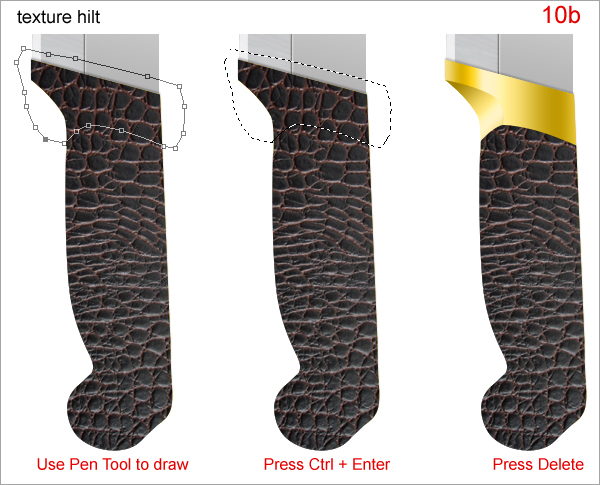
Merge “hilt” “golden hilt” and “golden hilt 2” into one layer, rename new layer “golden hilt”. Place texture on top of “golden hilt”. While holding “Command” down click on “hilt 2” to obtain its selection. On the texture layer, press Command + J to duplicate this selection. Rename new layer “texture hilt”.
Step 11
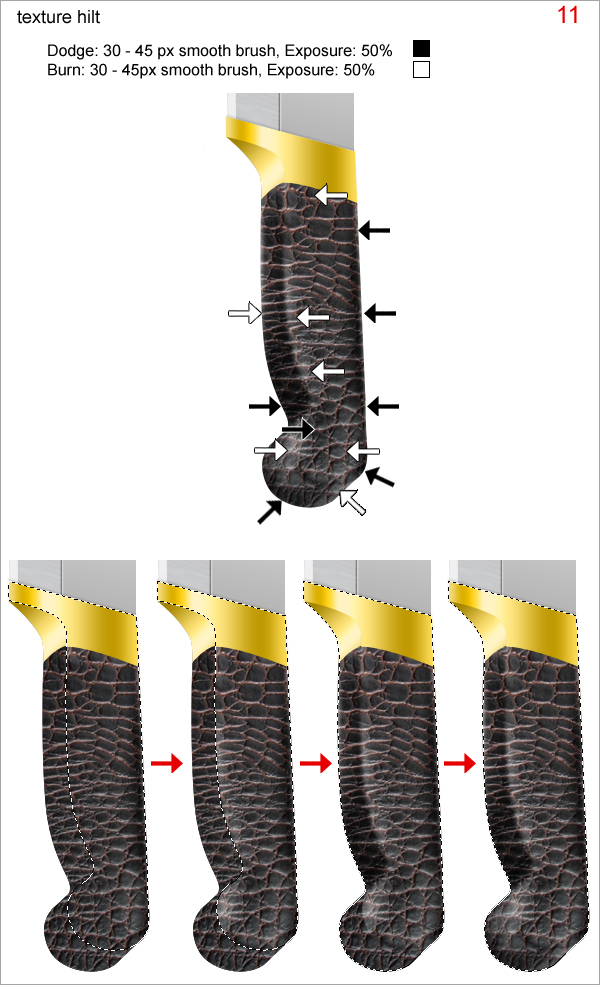
Use Dodge Tool and Burn Tool with smooth brush to add shading to the hilt.
Step 12
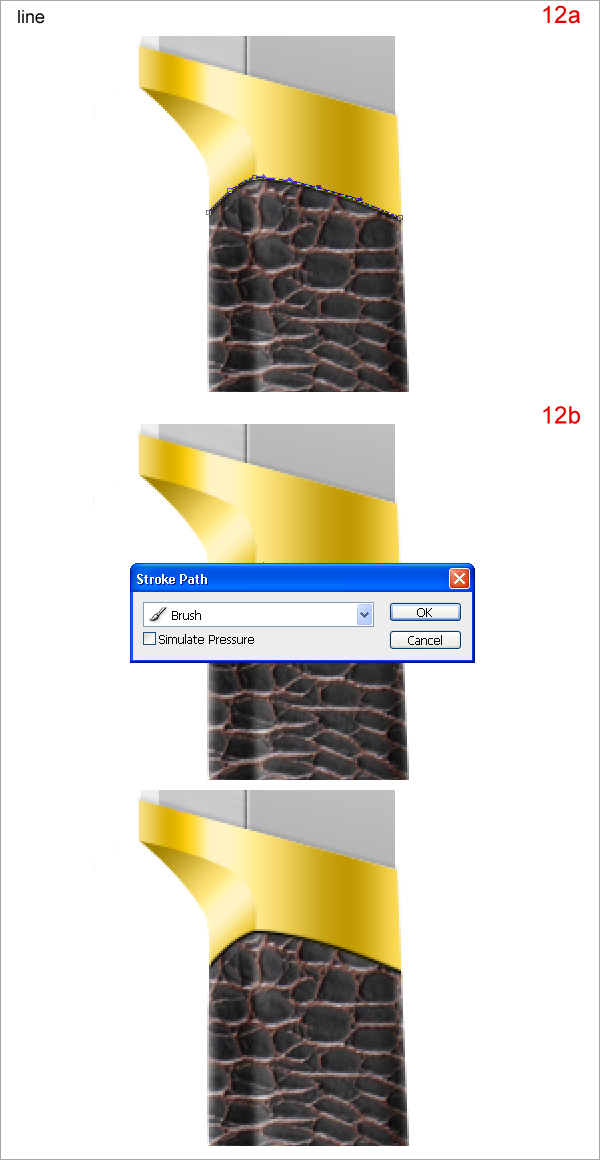
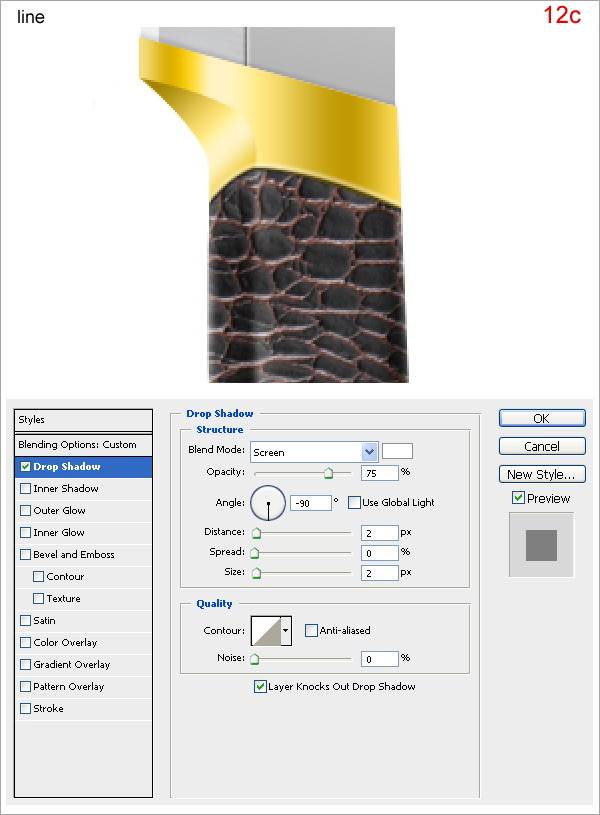
Create a new layer on top of “texture hilt”, call it “line”. Use Pen Tool to draw as shown in (12a). Set a hard 2 px brush then select the Rectangle Tool, right click on path, choose Stoke Path with Brush to draw the black line (12b). Apply layer styles as shown in (12c).
Step 13
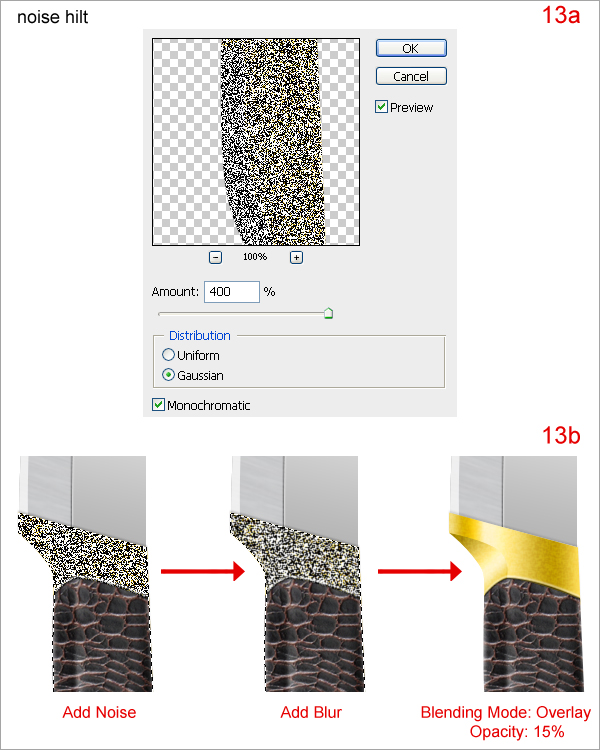
Press Command + J to duplicate “golden hilt”, rename the new layer “noise hilt”. While holding down “Command” click on “golden hilt” to obtain its selection. Go to Filter > Noise > Add Noise, set as in (13a). Go to Filter > Blur > Blur. Then change its Blending Mode to Overlay and reduce Opacity to 15%.
Step 14
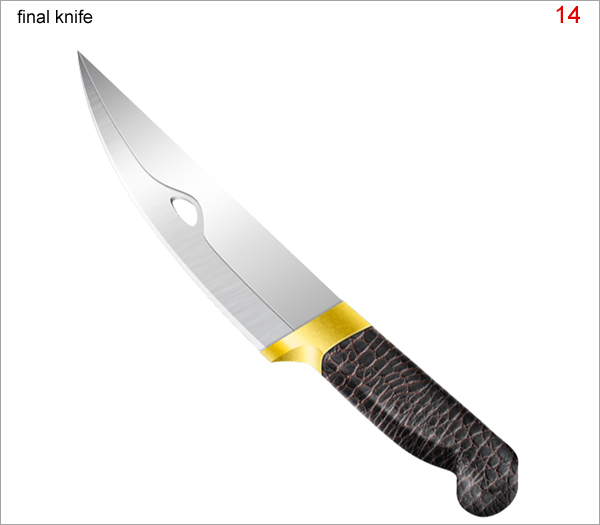
Merge all layers (except background layer), rename new layer “final knife”. Then press Command + T to transform it as shown below.
Step 15
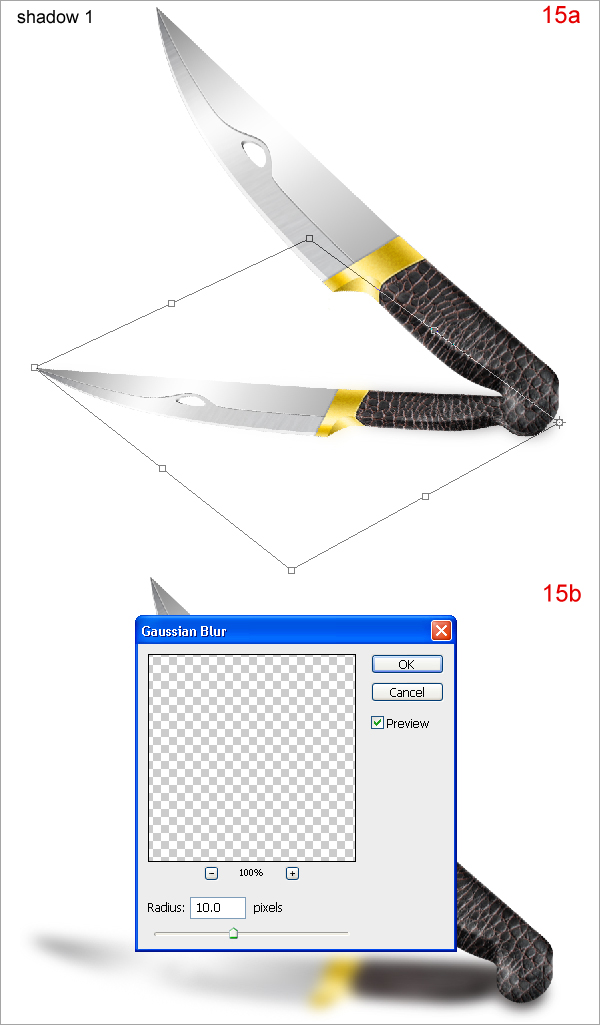
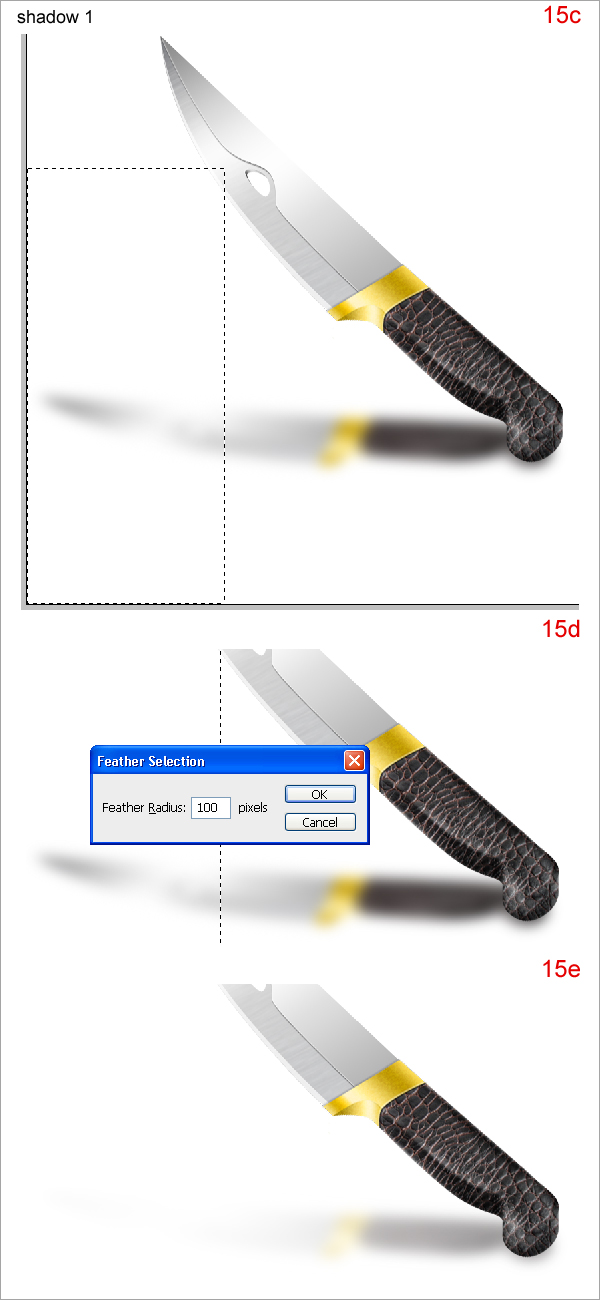
Press Command + J to duplicate “final knife”, rename the new layer “shadow 1” and transform it as shown in (15a). Go to Filter > Blur > Gaussian Blur, set as in (15b). Use Rectangular Marquee Tool to make the selection as in (15c). Press Command + Alt + D, set Feather Radius as in (15d) and press Delete. Then reduce Opacity to 60% (15e).
Step 16
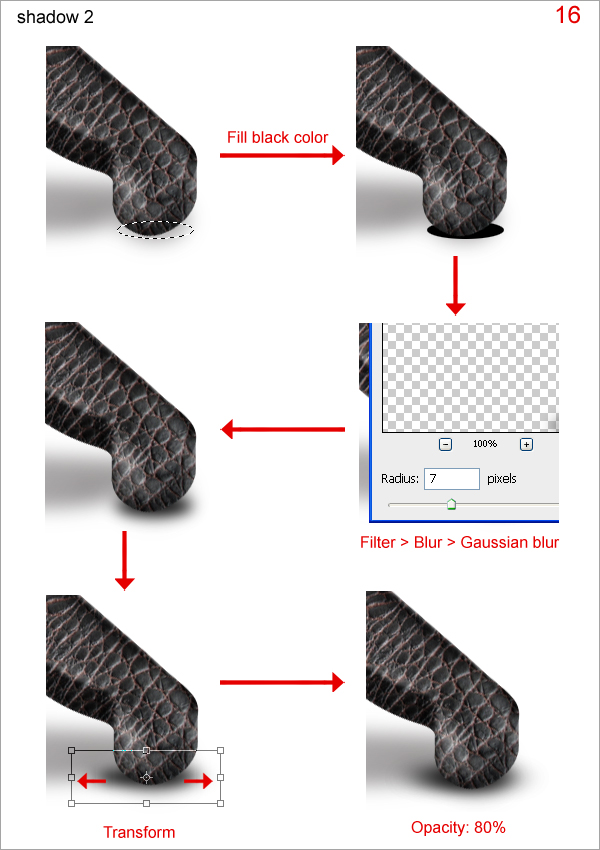
Create a new layer on top of “shadow 1”, call it “shadow 2”. Perform the following steps.
Final Image
Your final design should look similar to the image below. Hope you learned something new and fun!
