This week we are celebrating the launch of PhotoDune, Envato’s new stock photography website with a series of photo effect and photo manipulation tutorials that showcase the images from our new marketplace. In this tutorial we will learn how to apply a color effect to a photo. The photo used in this tutorial is available for free for Psd Premium Members. Let’s get started!
Tutorial Assets
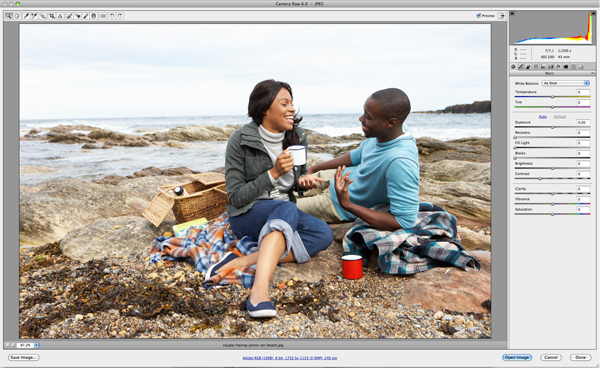
The following photo was used during the production of this tutorial. We have granted a complimentary personal license to Psd Premium Members for the stock photos used in this tutorial. They can be accessed in the source files of your premium download. If you are not a premium member, you can download the images used in this tutorial below.
Step 1
Open your image with Photoshop.
Step 2
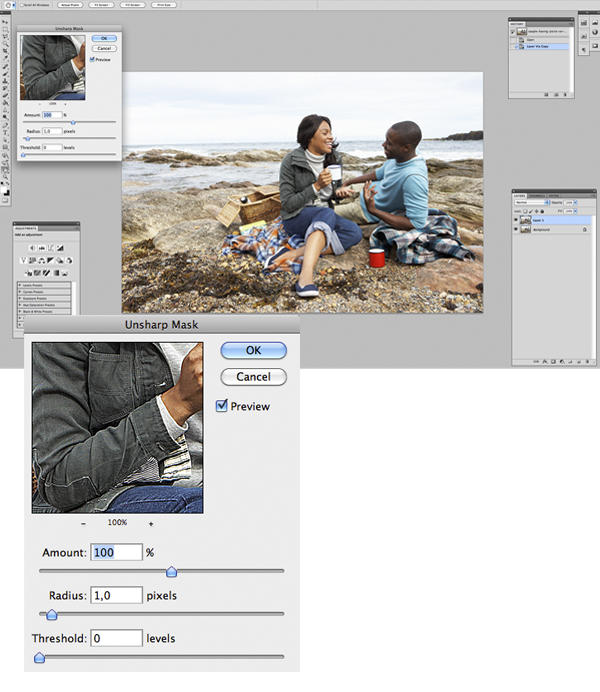
Duplicate the image layer and apply an Unsharp Mask by going to Filter > Sharpen > Unsharp Mask. Apply the following settings: Amount: 100, Radius: 1.0, Threshold: 0. Layer should be set to Normal at 100% opacity.
Step 3
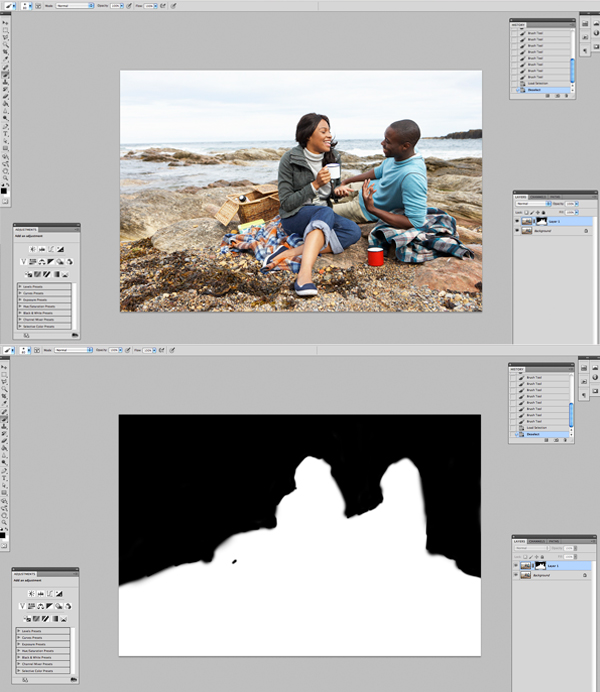
Now we have the image sharpened, but we only want our subject in focus, so let’s make a layer mask and paint in some places to add depth and remove the sharpen.
Step 4
Now let’s work on the lights and shadows of our characters, raising the level of these to get more dramatic and more interesting effect. To do this we will go to New Layer > Image > Apply Image and press OK with the default settings.

Step 5
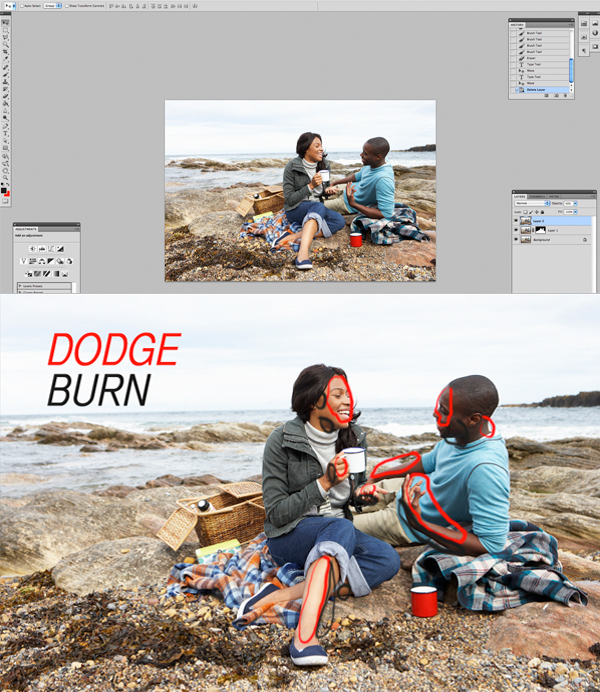
Use the Dodge and Burn tools to highlight the lights and shadows of our subjects. When you are finished, set the opacity of the layer to 40%.
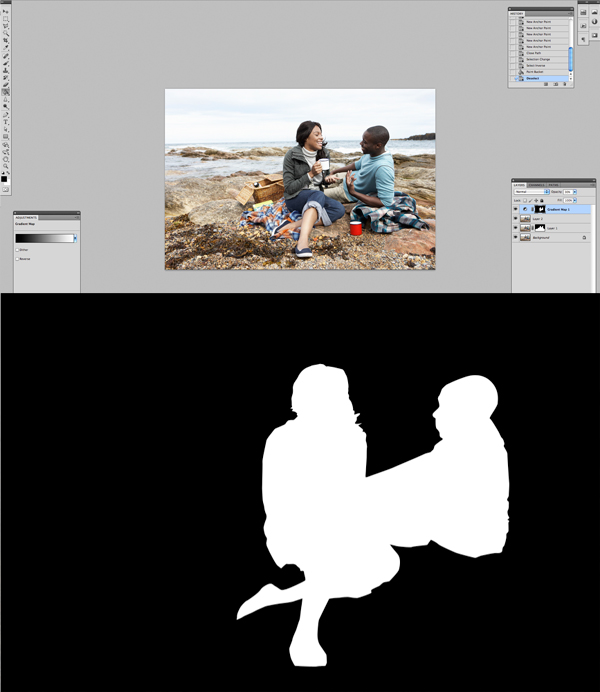
Step 6
Go to Layer > New Adjustment Layer and apply a gradient map from black to white. Set the opacity to 30%. With the pen tool, draw a mask as shown so that the gradient map only applies to our characters.
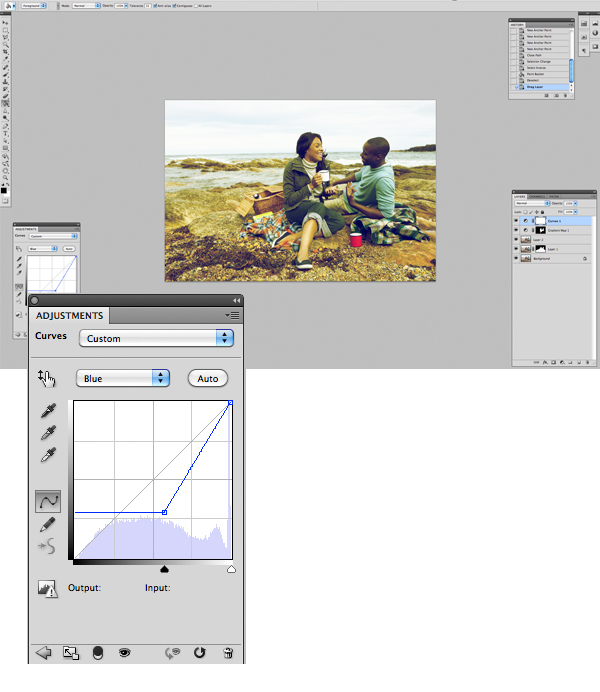
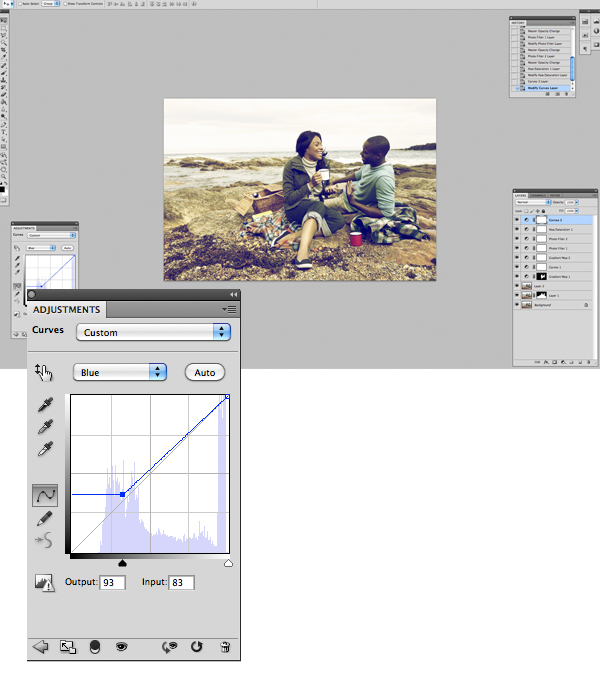
Step 7
Let’s start working the color, create a new adjustment layer of Curves and we are going to work in the Blue channel instead the RGB one. My settings are the ones in the picture, but do not be afraid to change it until you are happy with the result. This layer is in normal mode at 100% of opacity
Step 8
Add another Gradient Map from Black to White to slightly lower the saturation of the previous curves. The layer will be in normal mode at 40% of opacity.
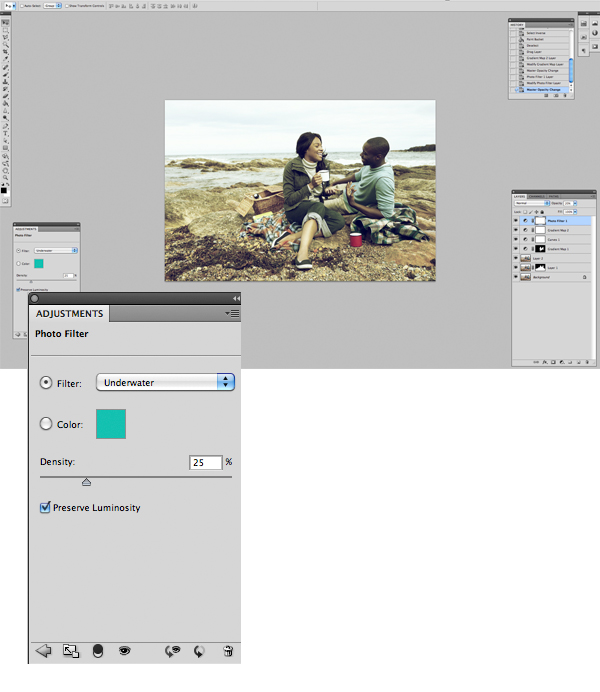
Step 9
To keep playing with the colors we are going to add a Photo Filter by going to Layer > New Adjustment Layer > Photo Filter. Apply the Underwater filter at 25% density. Set the layer to 20% opacity.
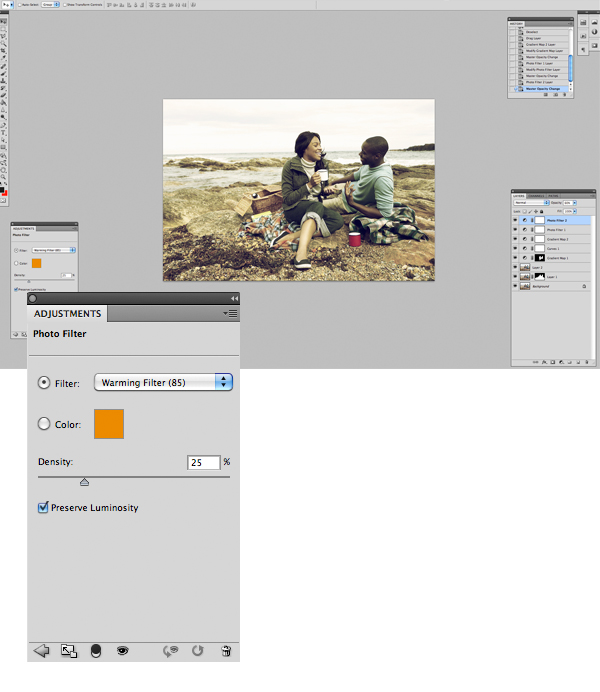
Step 10
Go to Layer > New Adjustment Layer > Photo Filter > Warming Filter (85) at 25% density. Set the layer to 60% opacity.
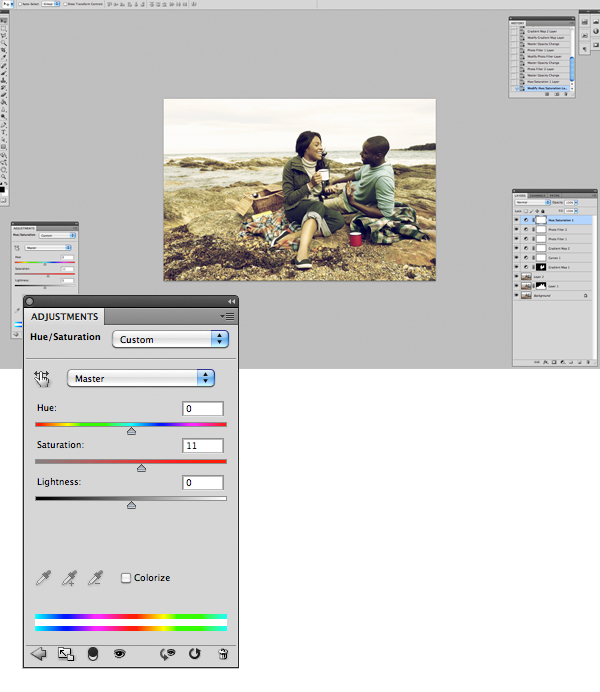
Step 11
Go to Layer > New Adjustment Layer > Hue/Saturation and adjust the saturation to +11. Set the layer to normal at 100% opacity.
Step 12
Go to Layer > New Adjustment Layer > Curves. Select the blue channel and set the parameters as shown or until you are happy with the result.
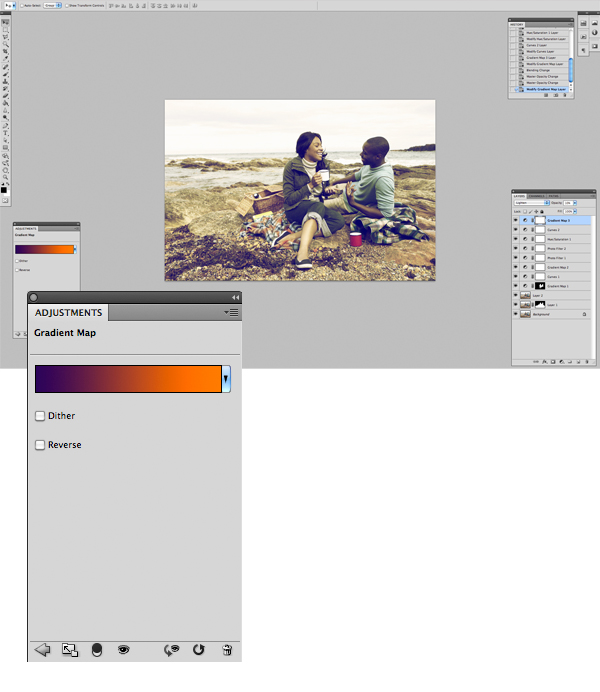
Step 13
Go to Layer > New Adjustment Layer > Gradient Map and apply a Violet to Orange in Light mode at 10% opacity.
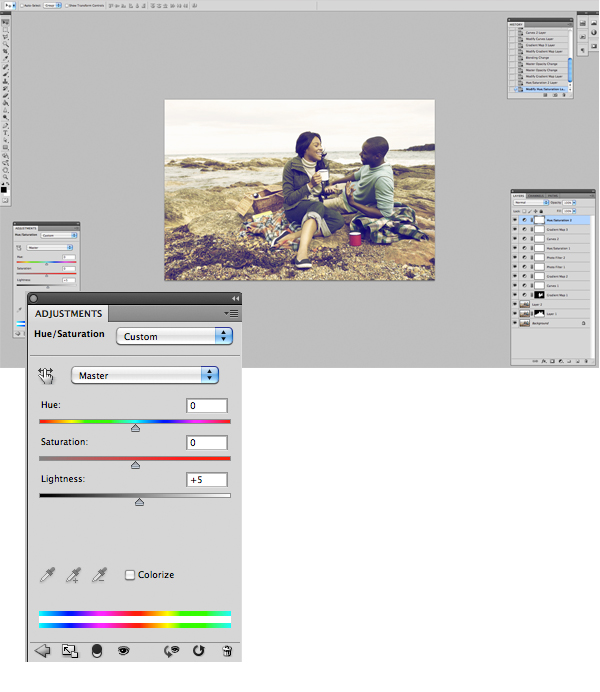
Step 14
Go to Layer > New Adjustment Layer > Hue/Saturation. Adjust the lightness to +5. Set the layer mode to normal at 100% opacity.
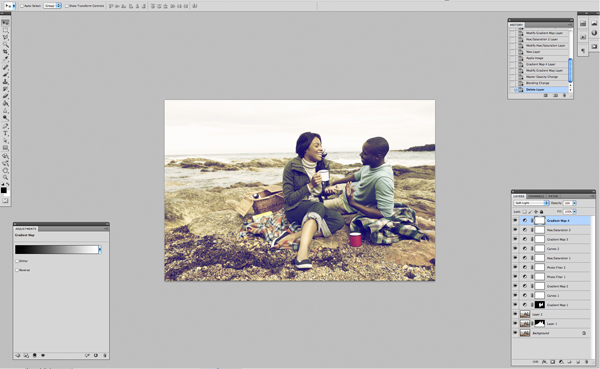
Step 15
Go to Layer > New Adjustment Layer > Gradient Map and add a new gradient map from black to white. Set it to soft light mode at 16% opacity.
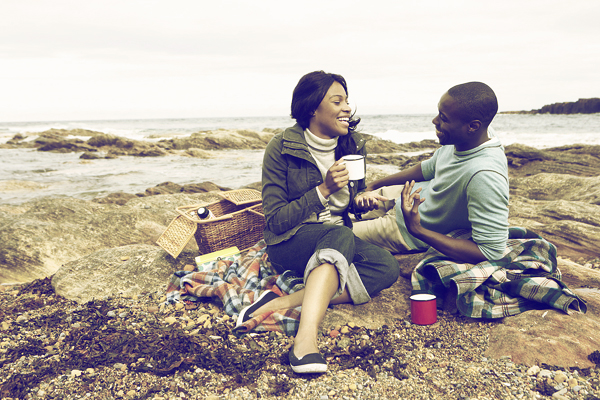
Final Image
{excerpt}
Read More