In the following tutorial you will learn how to create an easy animal print text effect using Adobe Illustrator’s default jaguar and cheetah patterns. You will also learn how to add with multiple fills and effects to further enhance the text.
Step 1
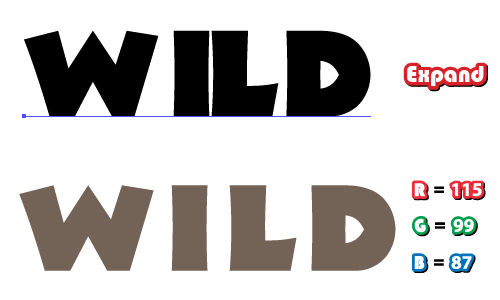
First take the Type Tool (T) and type your chosen text using the font "JungleFever" that you can find here. The font size is 180 pt. When you are done go to the Object menu and Expand then Ungroup and change the fill color to brown.
Step 2
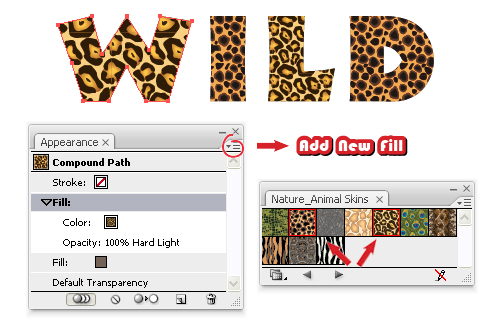
Next open the Swatch Libraries menu from the Swatches Panel, navigate to Patterns > Nature > Nature_Animal Skins and find Jaguar and Cheetah. Now in the Appearance Panel open the drop-down menu, select Add New Fill and use these two patterns to fill the letters. Change the Blending mode to Hard Light.
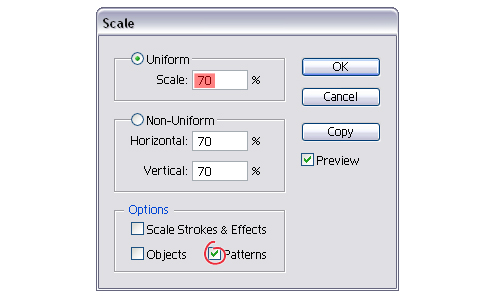
At this point you can scale the pattern 60 – 70% because it looks too big. Go to Object menu > Transform > Scale, set the value and make sure you check only the Patterns options.
Step 3
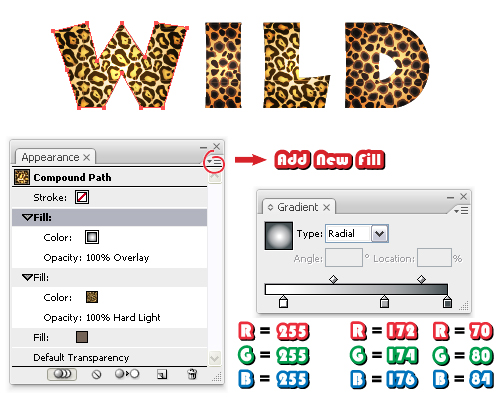
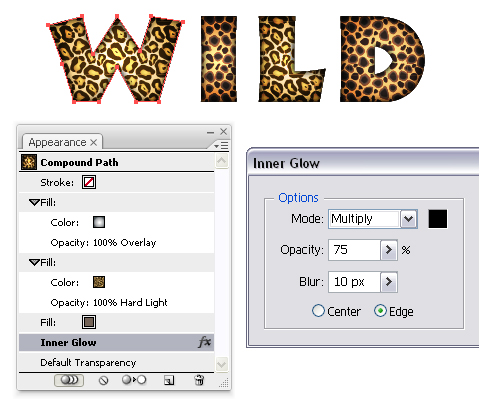
Again, select Add New Fill and this time use the radial gradient shown in the image to fill the letters. Change the Blending mode to Overlay.
Step 4
Now go to Effect menu > Stylize > Inner Glow and set the values like below then make sure the effect is placed under the three fills in the Appearance Panel and if not drag it at the bottom.
Step 5
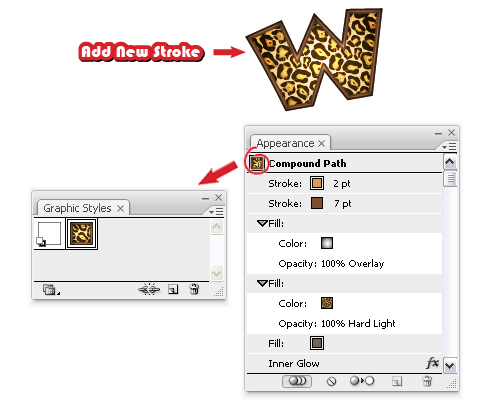
Optional: At this point you can choose Add New Stroke from the drop-down menu and play with multiple strokes, colors and different weights to create the border around then drag the thumbnail into the Graphic Styles Panel to save it. You can now use it for any other shape. This step can’t be made later because you will use the Blend Tool (W) for the border and for that you need two separate stroked paths.
Step 6
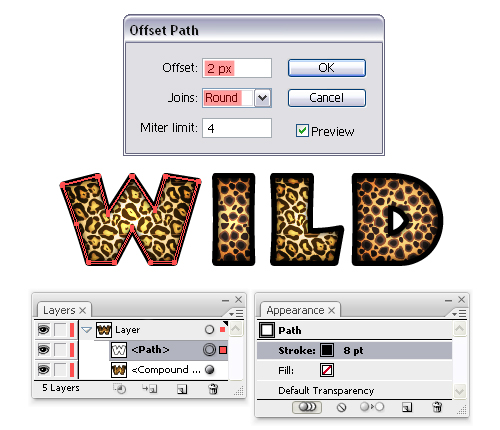
Let’s continue the effect. Copy and Paste in front the W path and delete all the attributes from the Appearance Panel. Go to Object menu > Path > Offset Path and apply a 2 px Offset value to obtain a bigger W path. Give it an 8 pt black Stroke. Do the same for the rest of the letters.
Step 7
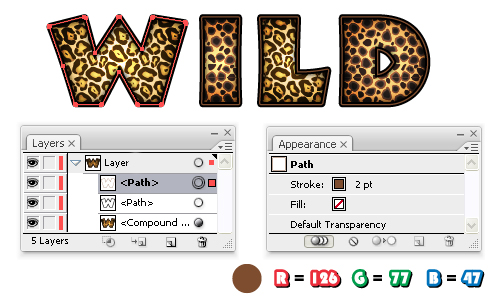
Copy and Paste in front the bigger letter paths obtained above then change the Stroke color to brown and the weight to 2 pt.
Step 8
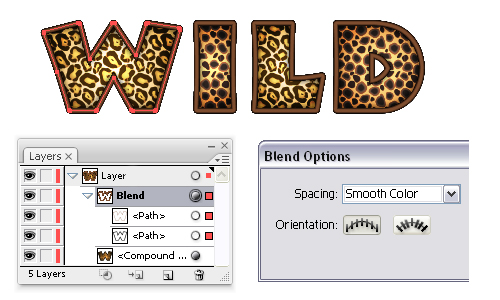
Select the two stroked paths for the W letter first, go to Object menu > Blend > Blend options and choose Smooth Color then go back to Object > Blend and select Make. Continue with the rest of the letters.
Step 9
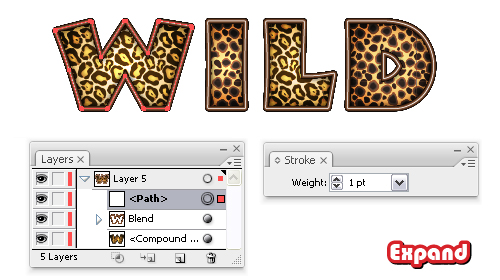
Copy and Paste in front one of the bigger W paths and drag it out of the Blend group above it. Give it a 1 pt Stroke using any color then go to the Object menu and Expand.
Step 10
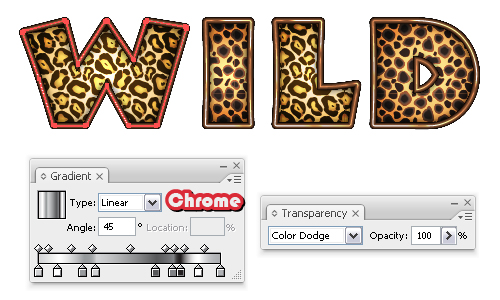
Fill the obtained shape with Chrome that you can find in the Swatch Libraries menu under Gradients > Metals. Set the angle value to 45 degrees and the Blending mode to Color Dodge. Do the same for all the letters.
Step 11
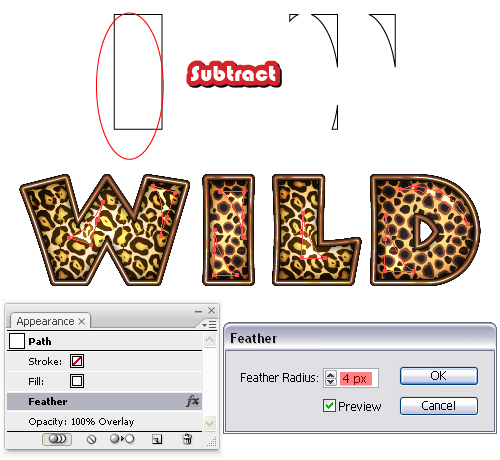
Let’s make the letters look shinier. For that draw a rectangle and an oval using the Rectangle Tool (M) and the Ellipse Tool (L). Place them like in the image (the oval is on top) then select them both and click Subtract from shape area > Expand from the Pathfinder Panel. You will obtain a compound path but go to Object menu > Compound Path > Release and delete the two small shapes that you don’t need. Now fill this shape with white then multiply it and place them like in the image below. Go to Effect menu > Stylize > Feather and apply a 4 px Radius value. Change the Blending mode to Overlay.
Step 12
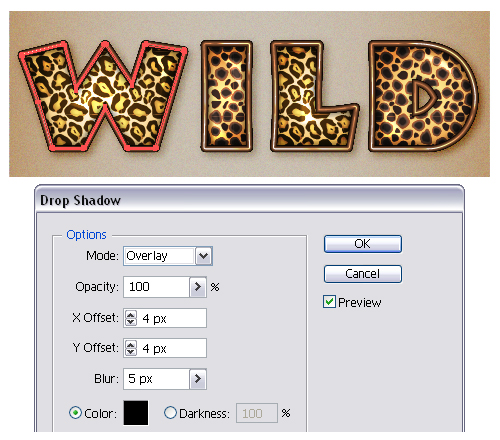
Each letter has the Drop Shadow effect applied. For that first group all the shapes for each letter except for the shiny shapes on top then go to Effect > Stylize > Drop Shadow and set the values like shown in the image.
Final Image
You should now have a pretty wild looking type treatment. Play around with different styles and effects to see what you can come up with. Have fun!

{excerpt}
Read More