In Part 1, we examined one way of preparing a mix for Disc-at-once gapless CD authoring. We exported our mix from Ableton Live. Then, we imported the mix into Sony Sound forge 10 and used the software’s professional tools to author a professional CD ready for sending it as a premaster to a duplication house, to record labels or even your friends.
In Part 2, we are going to use Sony CD Architect 5.2d software to author our CD. CD Architect provides very precise audio CD mastering and burning tools and it also produces results that are fully compatible with Red Book specification.
Adjusting Preferences
Open up CD Architect and go to Options->Preferences. Click the General tab. Check the Use strict Red Book specification checking option, if it’s not already checked. Click the Editing tab. Select 0 as Default time between CD tracks (seconds) since we are aiming for a gapless playback. Set Default CD length (minutes) to whatever value you desire. If you remember, my mix was almost 80 minutes long. The Normalize peak level (dB) value can range from -12dB to 0dB. Set that accordingly.
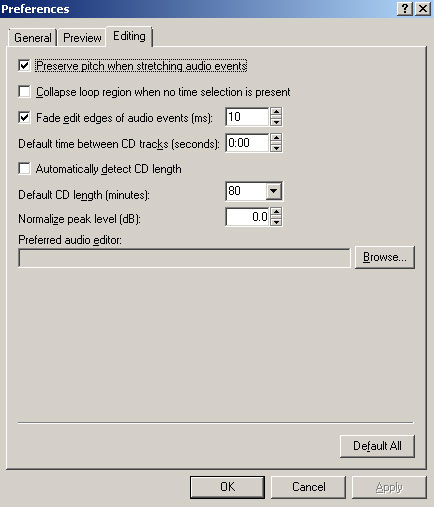
CD Architect’s Preferences dialogue box
Authoring – Method 1
Select File->Open Media. Navigate to the folder with your audio files and select them all(CTRL+A). Further down the dialogue box, put a check mark on Add to timeline and Create tracks options and click Open.

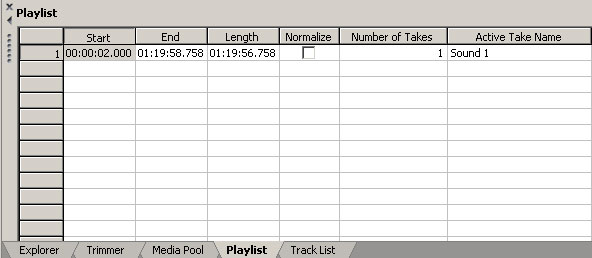
All audio files appear as tracks. Also tabs at the bottom reveal valuable information about our playlist and track list. On the Playlist tab, we can normalize each track and rearrange the playlist order. On the Track List tab we can rearrange the tracklist, enter Title and Artist name as CD Text, enter ISRC information and adjust Pause time amongst other things.
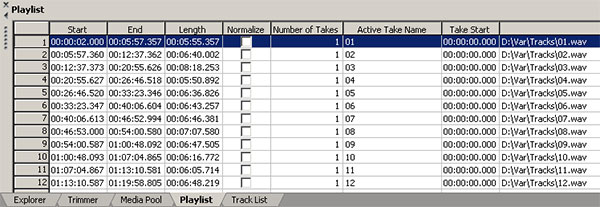
Playlist tab
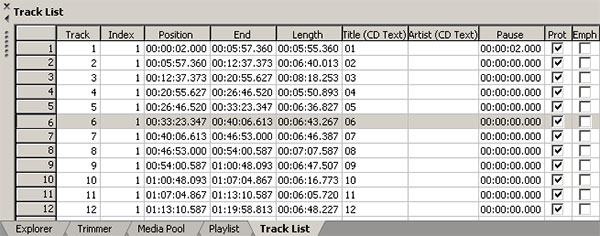
Track List tab
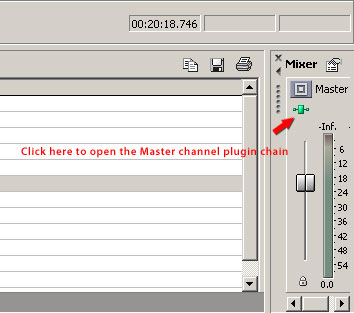
Of course, 16 bit dither needs to be also applied. CD Architect attaches a dither plugin by default on the Master channel located at the bottom right of the application with a Quantization Depth of 16 bit but you can open the plugin chain and attach a plugin of you own liking.
Authoring – Method 2
One of the downsides of the method I’ve just described is that we are only able to adjust normalization on a per track basis. What if we wanted to normalize the whole mix as one? In order to do that, we need to do some simple adjustments in Sound forge.
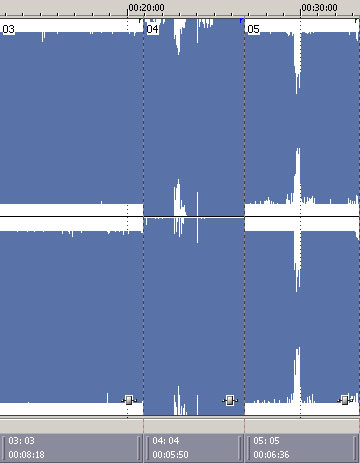
Track 4 normalized independent of other tracks
Back in Sound forge load up your tracks as described in Part 1 of this tutorial. Now select Edit->Track List->Create Regions from CD Tracks. Region markers are created on the crossover points of each track. Sow select File->Save As and save the whole mix as a wav file on your hard drive.
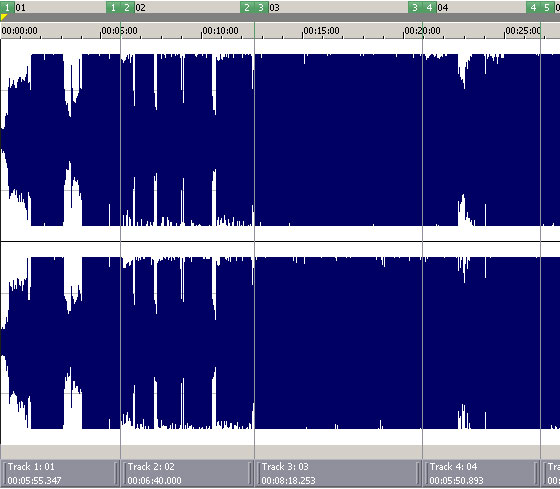
Region markers created between CD tracks
Back in CD Architect, select File->Open Media and select the file you just saved in Sound forge. Further down the dialogue box, put a check mark on Add to timeline, Create tracks and Create tracks from media regions boxes. Click Open.
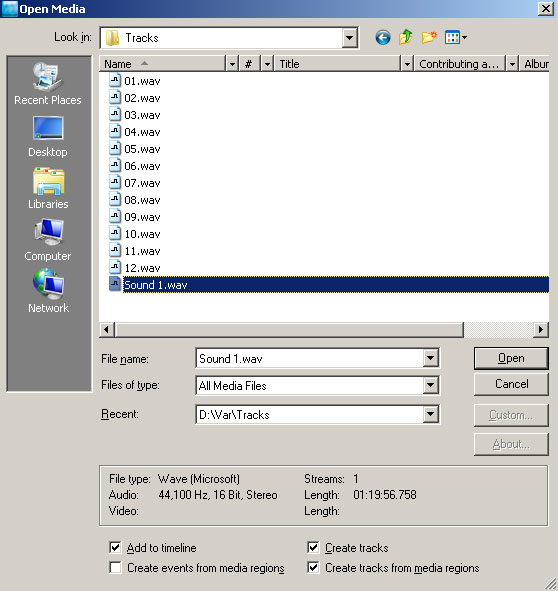
Open Media dialogue box
The mix loads up as before with a Track List generated but this time on the Playlist tab, there is only one file that can easily be normalized as a whole by putting a check mark on the box under the Normalize column.
Burning
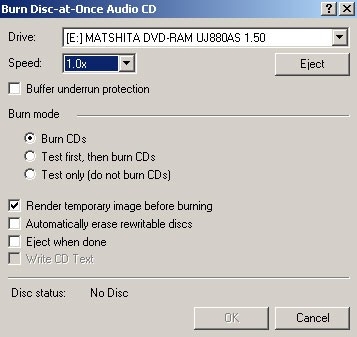
We can proceed on burning our compilation now. Insert a blank CD and click the Burn CD icon at the top of the application window.

Again, if your disc length exceeds 74 minutes you will get a warning saying just that. Click Write CD. On the new dialogue box, set Speed to the smallest value available to avoid burning errors in higher speeds. The Buffer underrun protection can also be selected but ONLY if you plan to do a one off burning. If you plan on sending the CD as a premaster to a duplication plant or make further copies of it, it’s best not to activate this option since it’s possible that it will introduce a small amount of errors. Another great and recommended option to choose, though, is to Render a temporary image before burning since the software will first render an image on your hard drive before starting to burn the disk thus taking the strain off your processor during the burning process. You can also test the burn before burning it or just test it without burning it to disk. Hit OK when you are done!
And that concludes the tutorial. I hope you got something out of it and realized how easy it is to professionally author an audio CD-ROM utilizing all these great tools available to us!