In the following Quicktip you will learn how to create a colorful neon text effect. By first using a thick font and the Round Any Corner Script you will create the letter shapes. Next, using a calligraphic brush, basic techniques along with some Pathfinder options and masks you will create your own neon text effect.
Step 1
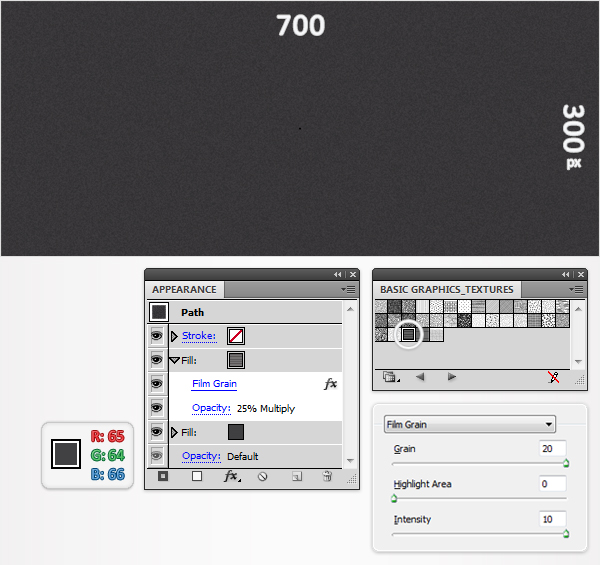
Create a 700 by 300px, RGB document and start with the background. Using the Rectangle Tool (M) create a shape the size of your artboard and fill it with R=65 G=64 B=66. Next, go to the Appearance panel, open the fly-out menu and click on Add New Fill. Obviously, this will add a second fill for your shape. You will need a built-in pattern for this new fill.
Open the fly-out menu of the Swatches panel and go to Open Swatch Library > Pattern > Basic Graphics > Basic Graphics_Textures. This will open a new window with some nice patterns. Re-select that second fill and use the USGS 7 Vineyard pattern. Lower its opacity to 25%, change the blending mode to Multiply then go to Effect > Artistic > Film Grain. Enter the data shown below then click OK. In the end your shape should look like in the following image. Re-select it and lock it. That way you won’t select or move the shape accidentally.
Step 2
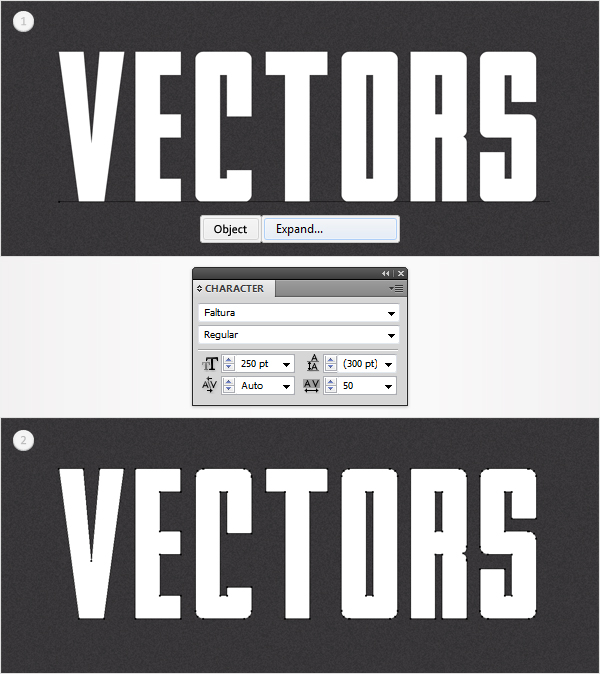
Select the Type Tool (T), click on your artboard and add your text. I’ve used the Faltura font with a size of 250pt and a tracking of 50. Set the color at R=255 G=255 B=255 then re-select the entire text and go to Object > Expand. This will turn your text into a group of shapes. Select it and press Control + Shift + G to ungroup it.
Step 3
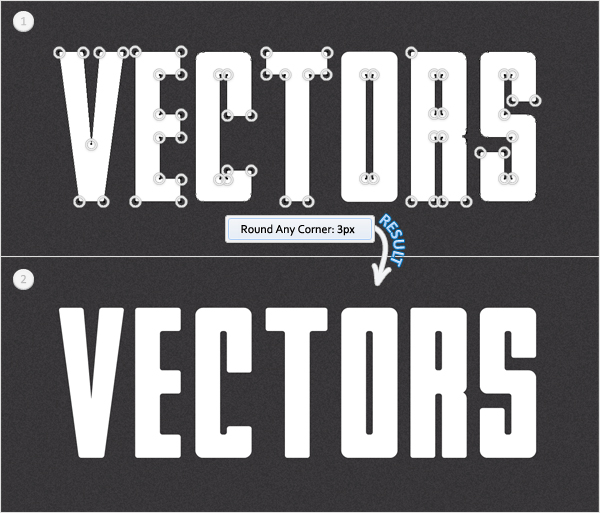
Next, you need to add a nice roundness effect for all these shape. You will need the Round Any Corner Script, which can be found in the Vectortuts+ article 20 Free and Useful Adobe Illustrator Scripts. Save it to your hard drive then pick the Direct Selection Tool (A). Select the sharp anchor points (highlighted in the first image) and go to File > Scripts > Other Script. Open the Round Any Corner Script, enter a 3px Radius and click OK. In the end your shape should look like the ones in the second image.
Step 4
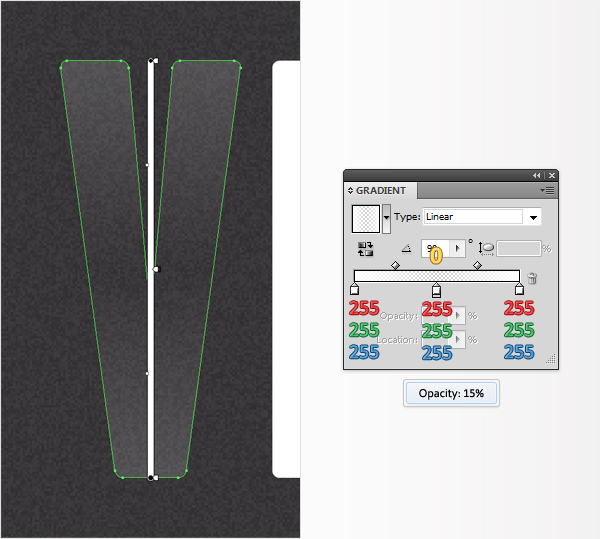
Let’s focus on the first letter. In this case the "V". Fill it with the linear gradient shown below and lower its opacity to 15%. The yellow zero from the gradient image stands for opacity.
Step 5
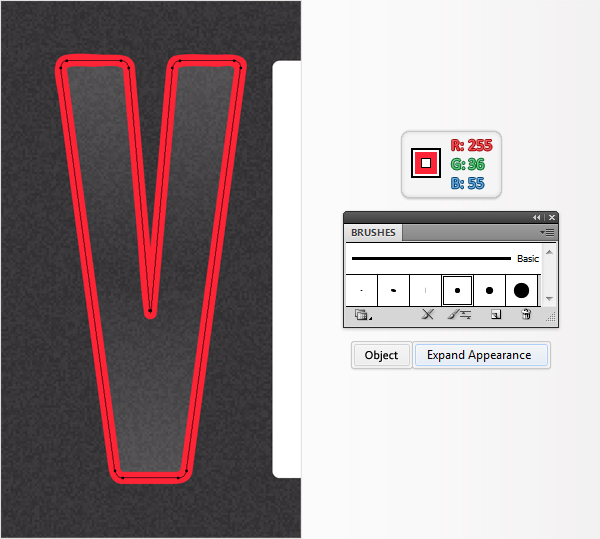
Re-select the V shape and make a copy in front (Control + C > Control + F). You will need the 5pt, calligraphic brush for this new shape. You should find it in your Brushes panel (Window > Brushes). If it’s not there, here is how you can make it. Open the fly-out menu of the Brushes panel and click on New Brush. Check Calligraphic Brush and click OK. Next, enter 0 in the Angle box, 100 in the Roundness box and 5 in the Diameter box then click OK. Re-select the fresh V copy. First, raise its opacity to 100% and set the fill color at none. Next, add the 5pt brush, set the color at R=255 G=36 B=55 then go to Object > Expand Appearance.
Step 6
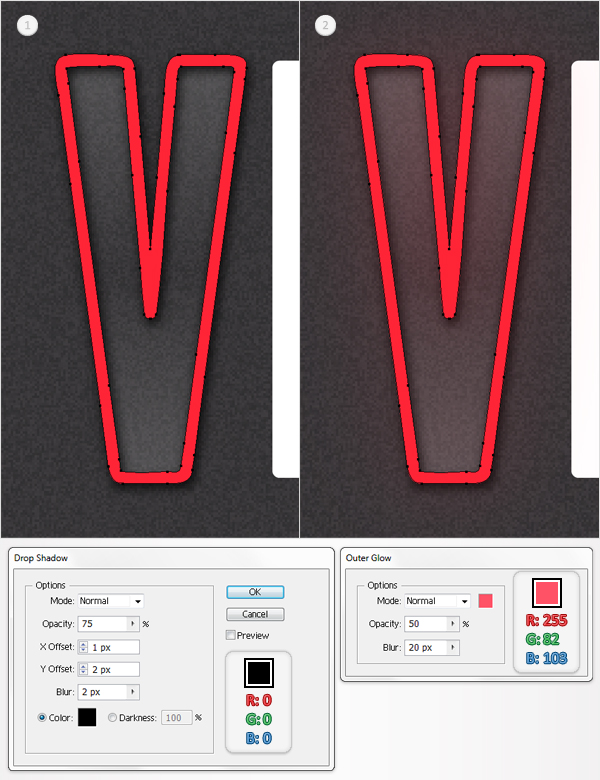
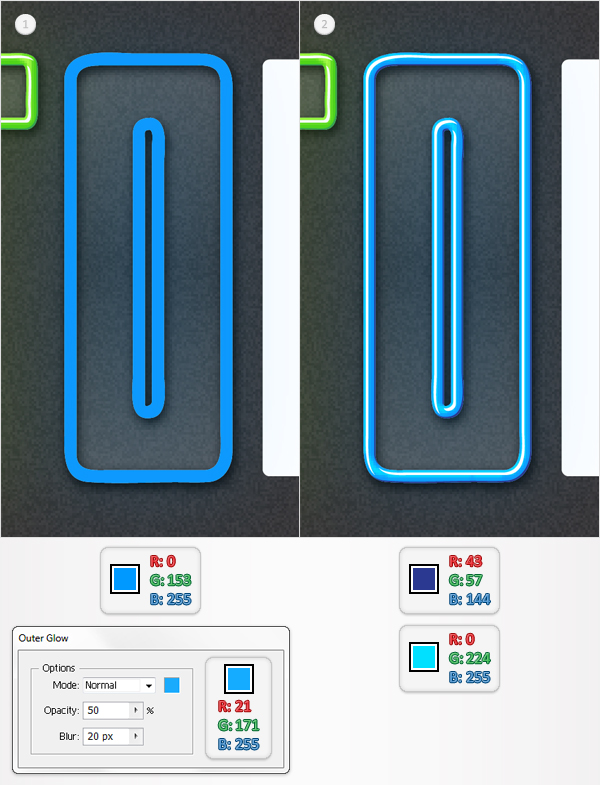
Select the shape made in the previous step and make a copy in front (Control + C > Control + F). Select the original shape and go to Effect > Stylize > Drop Shadow. Enter the data shown below image #1, click OK then select the copy and go to Effect > Stylize > Outer Glow. Enter the data shown below image #2 and click OK.
Step 7
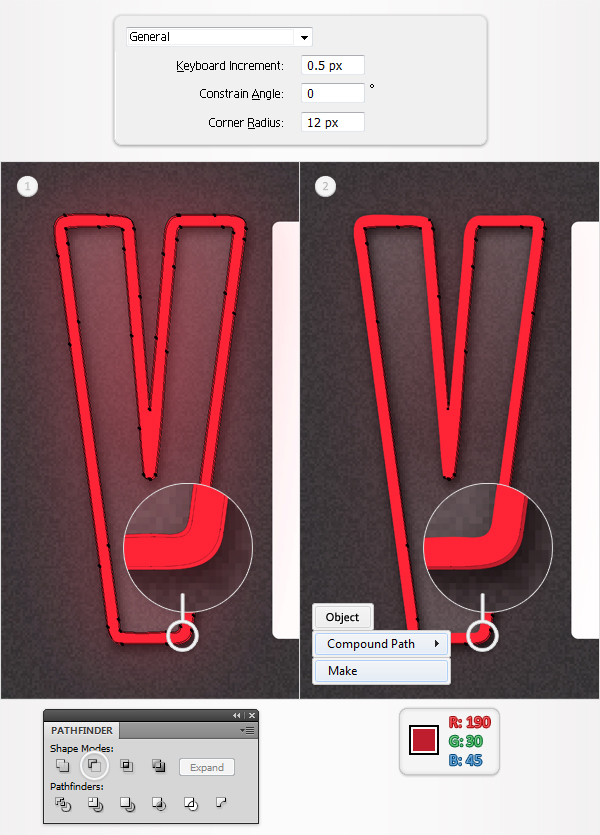
Go to Edit > Preferences > General, enter 0.5 in the Keyboard Increment box then click OK. Select the top red shape and make two copies in front (Control + C > Control + F > Control + F). Select the top copy then press the up arrow then the left arrow once. Re-select both copies and click on the Minus Front button from the Pathfinder panel. You will get a group of really thin shapes. Fill them all with R=190 G=30 B=45, remove the Outer Glow effect (from the Appearance panel) then go to Object > Compound Path > Make.
Step 8
Select the top red shape and go to Object > Path > Offset Path. Enter a -2px Offset and click OK. Fill the resulting shape with R=255 G=148 B=150, remove any existing Outer Glow effect then go to Effect > Blur > Gaussian Blur. Enter a 0.5pt radius then click OK.

Step 9
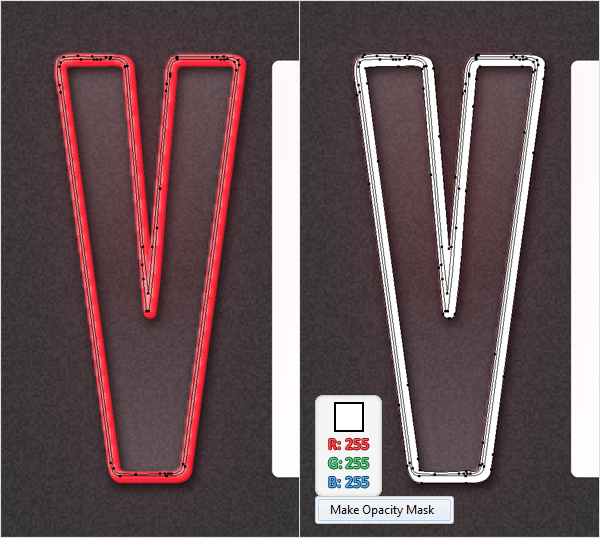
Select the shape made in the previous step then press the left arrow then the up arrow twice. Re-select the top red shape, make a new copy and Bring it to the Front (Control + Shift + Right Square Bracket) Fill it with white and remove the Outer Glow effect. Now, select it along with the shape made in the previous step and go to the Transparency panel (Window > Transparency). Open the fly-out menu and click on Make Opacity Mask.
Step 10
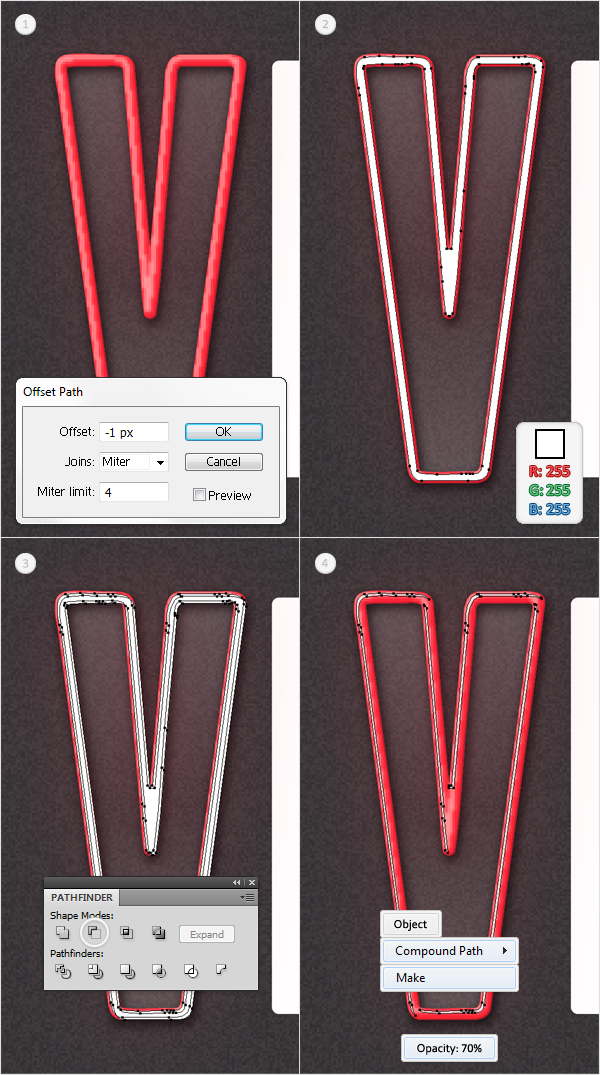
Once again, select the top red shape and go to Object > Path > Offset Path. Enter a -1 Offset then click OK. Fill the resulting shape with white, remove the Outer Glow effect then make a copy in front. Select it then hit the left arrow then the down arrow twice. Re-select these two, white shape and click on the Minus Front button from the Pathfinder panel. Select the resulting group of shape and go to Object > Compound Path > Make then lower its opacity to 70%.
Step 11
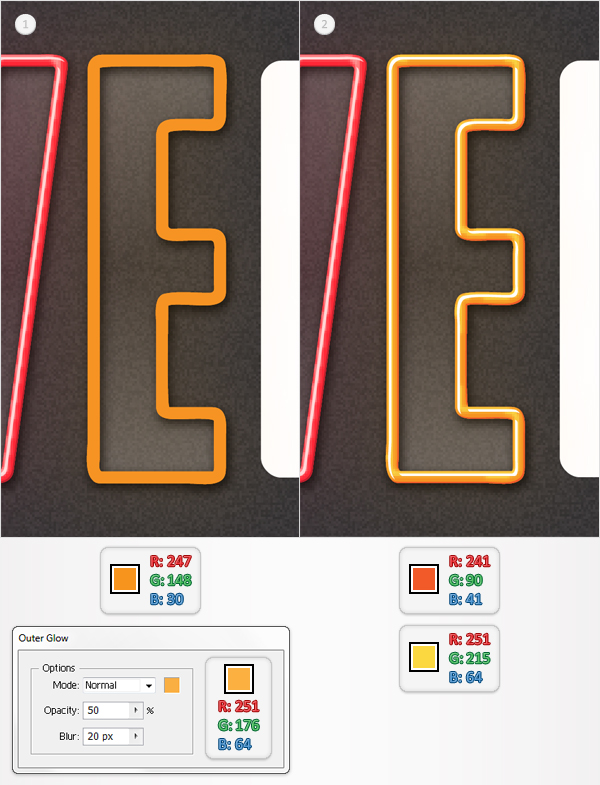
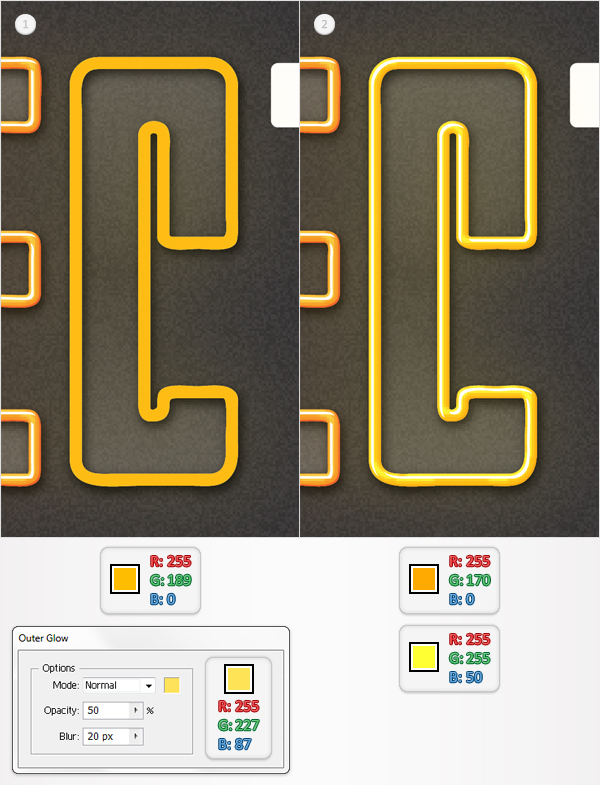
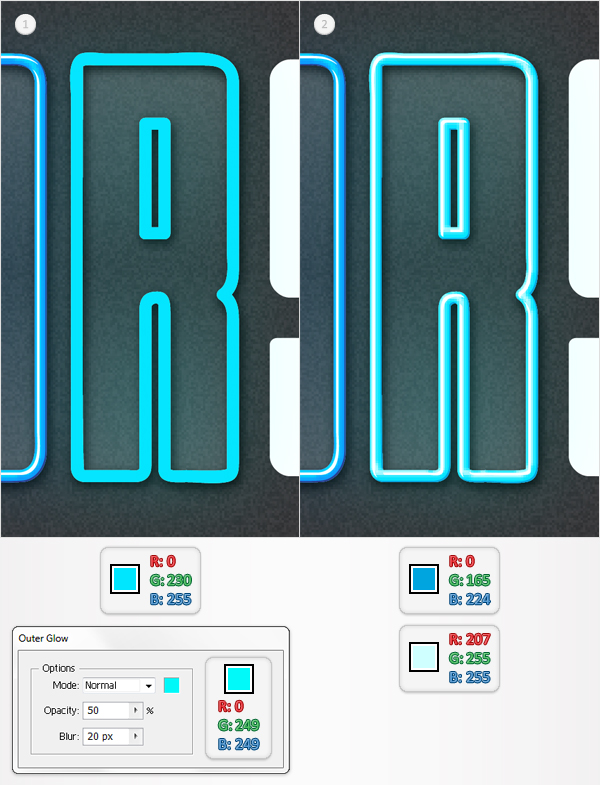
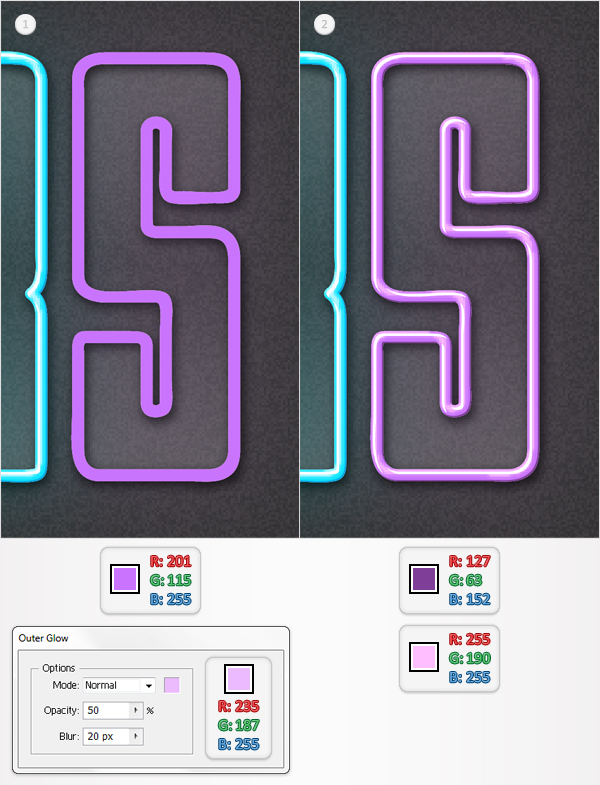
Now, let’s add some color for the remaining letter shapes. Basically, you need to repeat the same techniques and effects, but with different sets of colors. Below you have all the colors that must be changed. First, use the color below image #1 instead of the red and replace the color for the Outer Glow effect. Next, use the colors below image #2 for the thin shape (made in Step 7) and the blurred shape (made in Step 8). For the final, white path (made in the previous step) you can leave the opacity at 100%.

Step 12
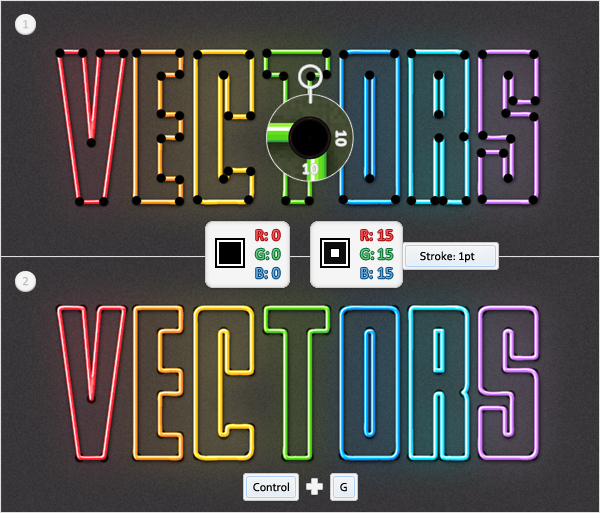
Finally, pick the Ellipse Tool (L) and create a 10 by 10px shape. Fill it with black then add a 1pt stroke and set its color at R=15 G=15 B=15. Multiply this shape and spread the copies as shown in the first image. Select all these circles and group them (Control + G). Finally, go to the Layers panel and drag this fresh group below the letter shape, just above the locked background.
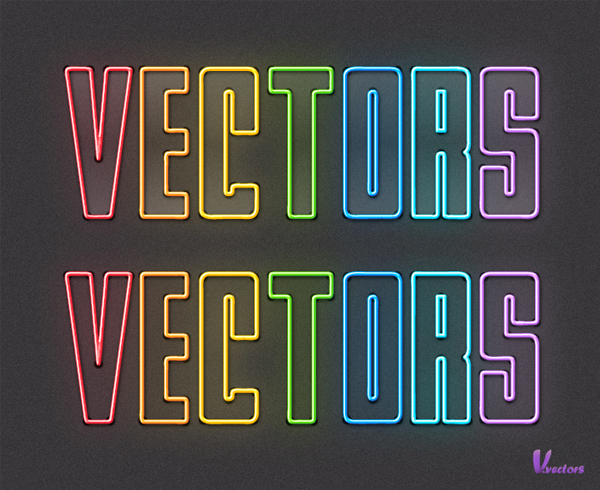
Conclusion
This is how your final text effect should look. Remove or turn off the visibility for the shapes filled with the linear gradient and your final text will look like the second version below. Naturally, you can use different fonts or different sets of colors, you can increase the radius for the outer glow effect or the size of the starting calligraphic brush. There are countless possibilities, see what you can come up with!