Today we have a collection of useful InDesign tips will help or enhance your operating skills. Perfect for beginner users in InDesign, there’s plenty of tips here to get you started. Let’s begin!
1. InDesign the Calculator
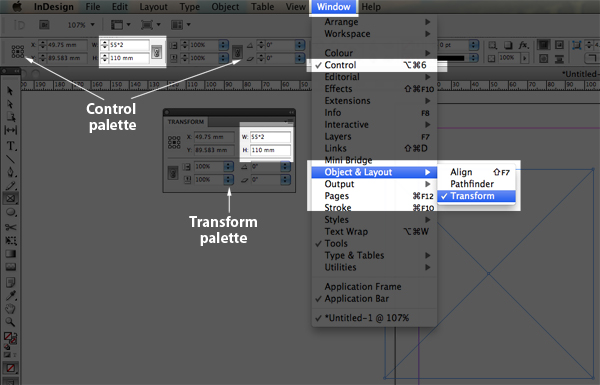
Within the Control or Transform Palette it is possible to calculate and resize objects. The control palette can be found by going to Window > Control, and the Transform palette is found under Window > Object & Layout > Transform. Simply use your number keyboard as you would when using a calculator. For example, to double size of a frame, select the frame and in the width or height option input 55*2 > and hit enter. This will size the frame at 110mm. Remember to active "Constrain Proportions for scaling" option if you require scaling.
2. Perfect Center
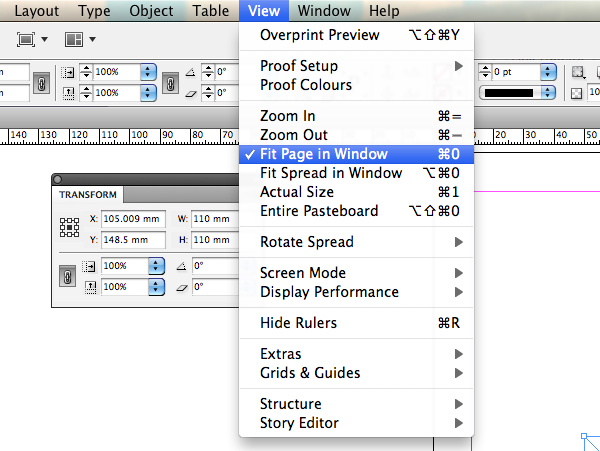
To place an object in the absolute center of the page, select your object using the selection tool, cut (Command + X), go to View > Fit Page in Window (Command + 0) and then Paste (Command + V).
3. Live Corners
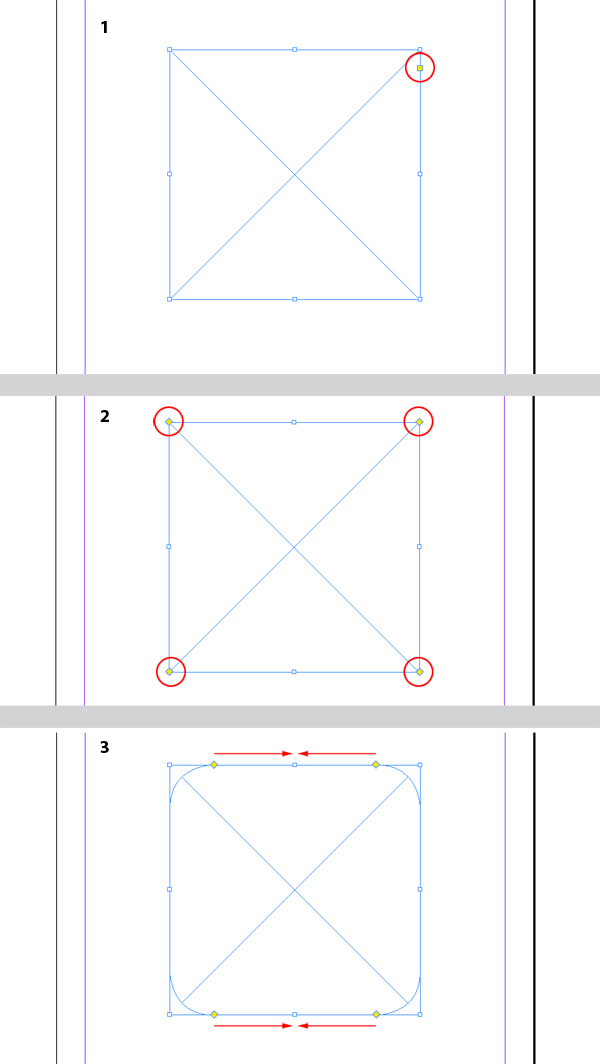
InDesign CS5 has a new feature where you can add rounded corners instantly. Draw a rectangle or square frame, click on the yellow box attached to the frame, this will activate four new yellow boxes at each corner. Click on one of them and drag horizontally into the center of the frame, as you do this the four corners will form curves. If you want to isolate one corner hold down Shift before you click and drag. Detailed options for adding corner affects can also be found by going to Object > Corner Options.
4. Ignore Text Wrap
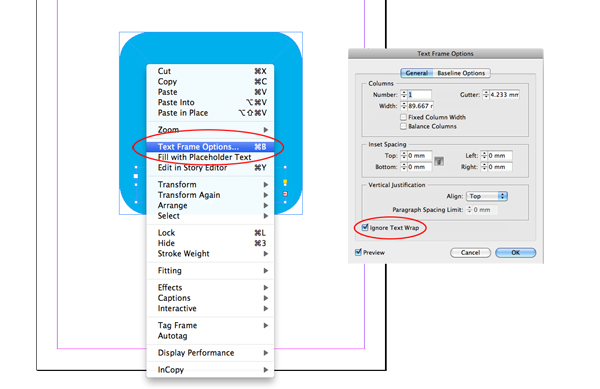
If you have a body of text that needs to sit on a image that has text wrap applied, do the following so the copy doesn’t disappear. Select the text frame, right click and go to Text Frame Options, tick Ignore Text Wrap box. This tip can be useful for placing captions or photo descriptions.
5. Eyedropper
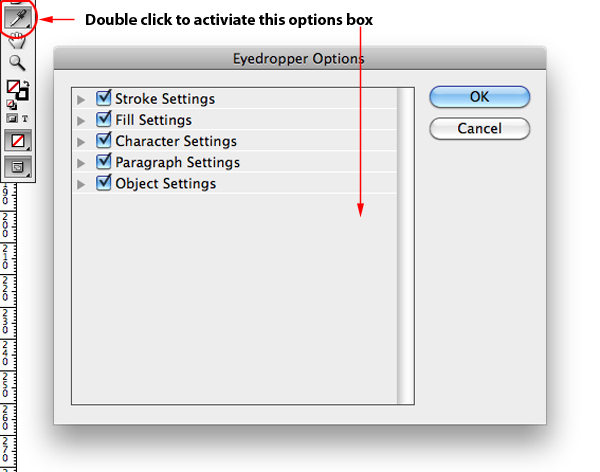
Use the eyedropper tool to mimic settings from existing copy, fills, strokes or colors within your document. Select or highlight the element you want to affect, pick the eyedropper tool and click on the original source. Select any other tool within the Toolbox to finish the process. Also if you double click on the eyedropper tool InDesign will present you with an options box. Here you can select and deselect various options.
6. Tabs Within Tables
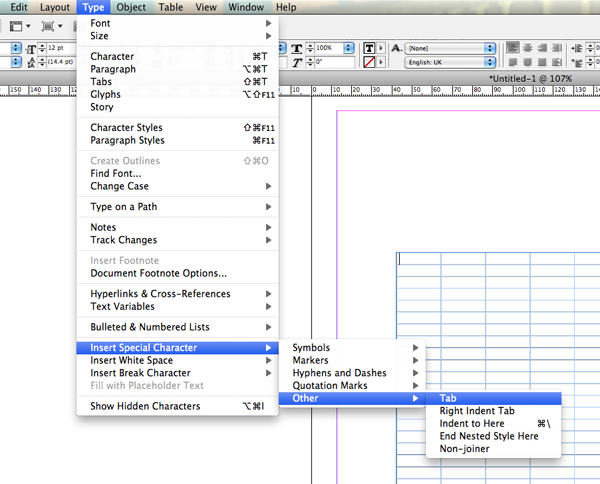
Every tried adding a tab within a table? Trying to use the tradition tabbing method will cause the cursor to jump to the next available cell. To add a tab go to Type > Insert Special Character > Other > Tab. Or simply use shortcut Alt + Tab.
7. Find / Change
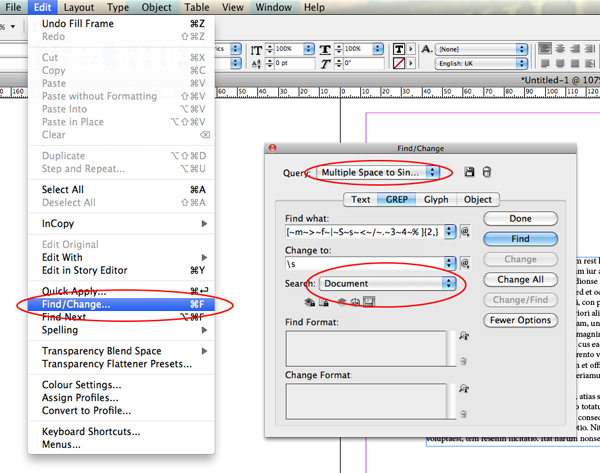
As well as using the Find/Change palette to replace words, you can use it to find and amend unwanted typos, for example deleting double spaces or changing minus symbols to hyphens. Go to Edit > Find/Change, select the Query drop down menu and choose your amendment, select your search options in the drop down box and hit the Done button.
8. Switching Units Quickly
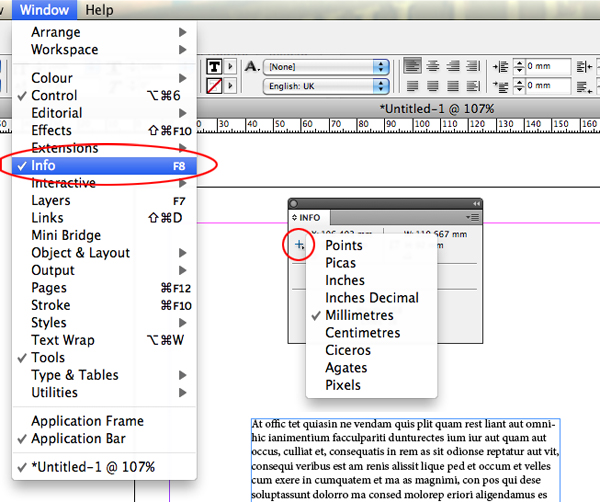
Instead of going through InDesign’s preferences to change units, go directly to the info palette. If it is not already open go to Window > Info. On the palette you will see a little triangle symbol next to the cross-hair. Click this and select your preferred unit.
9. Distribute Objects Evenly
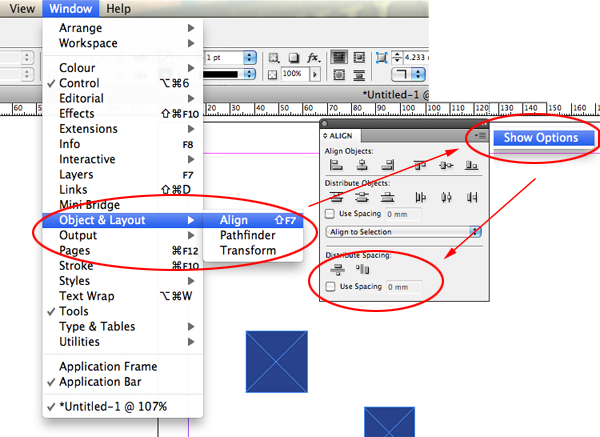
Open the Align palette by going to Window > Object & Layout > Align. In the top right hand corner of the
palette click on the triangle button and select Show Options. A extra panel will appear titled Distribute Spacing. Now select the objects you want to distribute with the selection tool and hit either the horizontal or vertical option. It is also possible to define the amount of space in-between the objects.
10. Placeholder Text
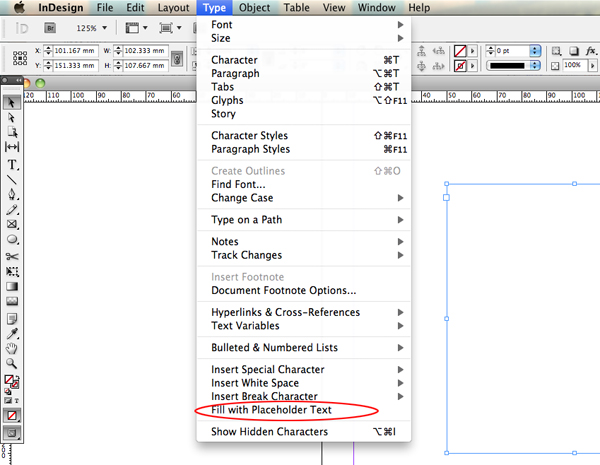
When adding placeholder text turn on the caps lock to add a different version of latin. To add placeholder text select your Type tool, draw a text frame and go to Type > Fill with Placeholder Text.
11. Stacked Frames
If you have a load of text / image frames on top of each other you can move through them one by one. To do this hold down Command and click until you reach the element needed. InDesign will select the top frame and work its way down to the bottom frame.
Conclusion
Hopefully new users to InDesign should have some new tricks up their sleeve and the more seasoned InDesign’s users might have learned something new.