In this tutorial, you will learn how to create an illustration of a gamepad using the Pen Tool, Gradients and Filters. You can use this illustration as the basis of an icon or for a decorative element on a larger design.
Step 1: First Shape
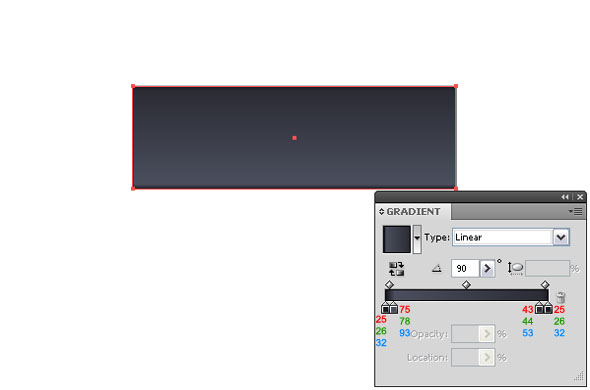
Open a new RGB document with the dimensions 600px by 400px. Pick the Rectangle Tool and create rectangle with dimension 328px by 105px, set outline to a dark color (R:0, G:0, B:0), and fill it with a similar gradient as shown below.
Step 2: Adding Shapes
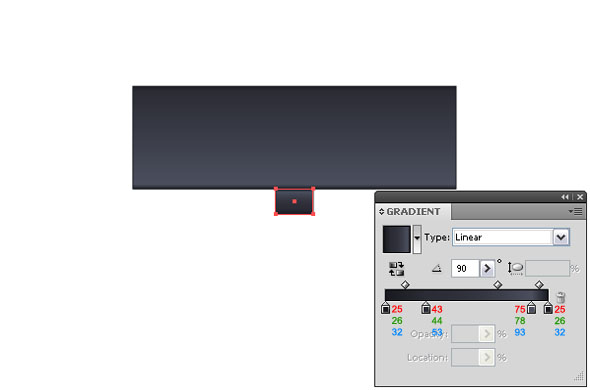
Using the Rectangle Tool create the next shape with the dimensions 38px by 26px, set the outline to a dark color (R:0, G:0, B:0), and fill it with a similar gradient.
Step 3: More Shape Construction and Gradients
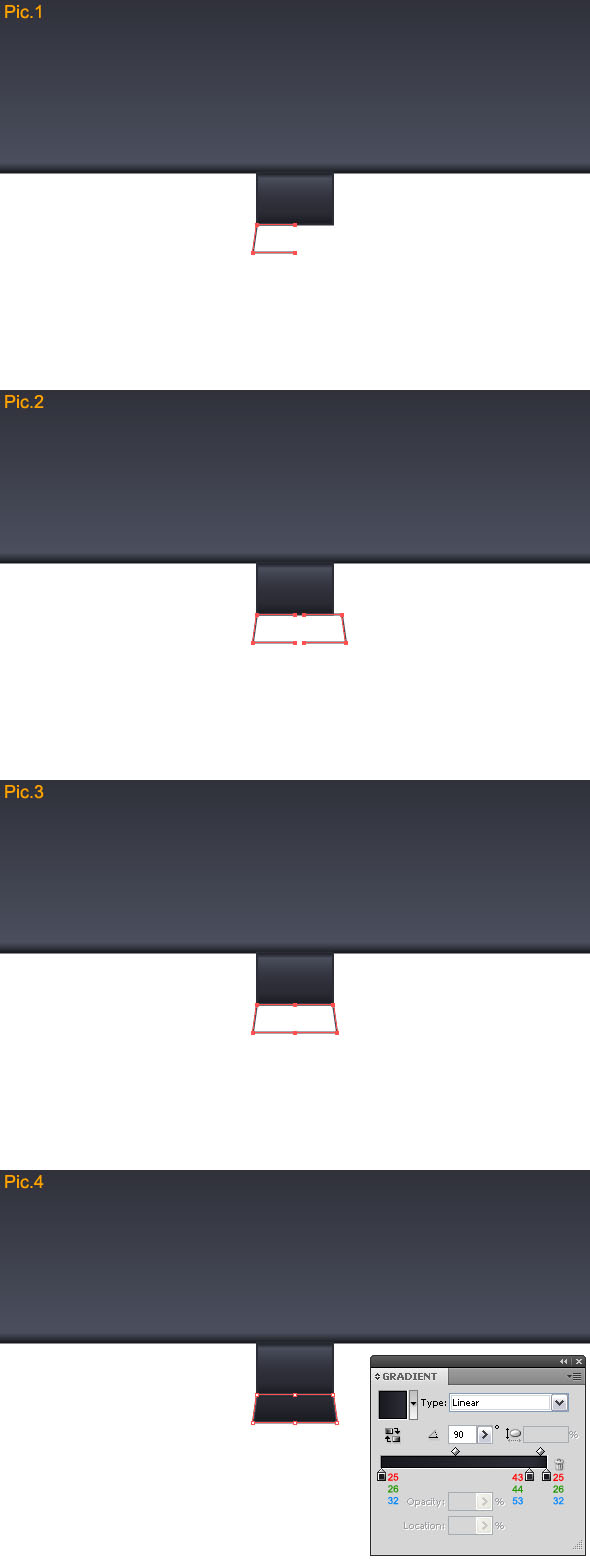
Create a shape like below and set the outline to a dark color (R:75, G:78, B:93) [Pic.1]. Mirror the just created shape [Pic.2]. Move the two shapes together, select the end points on top with the Direct Selection Tool, and then Join them. Repeat the same for the bottom points [Pic.3]. Fill the new shape with a gradient [Pic.4].
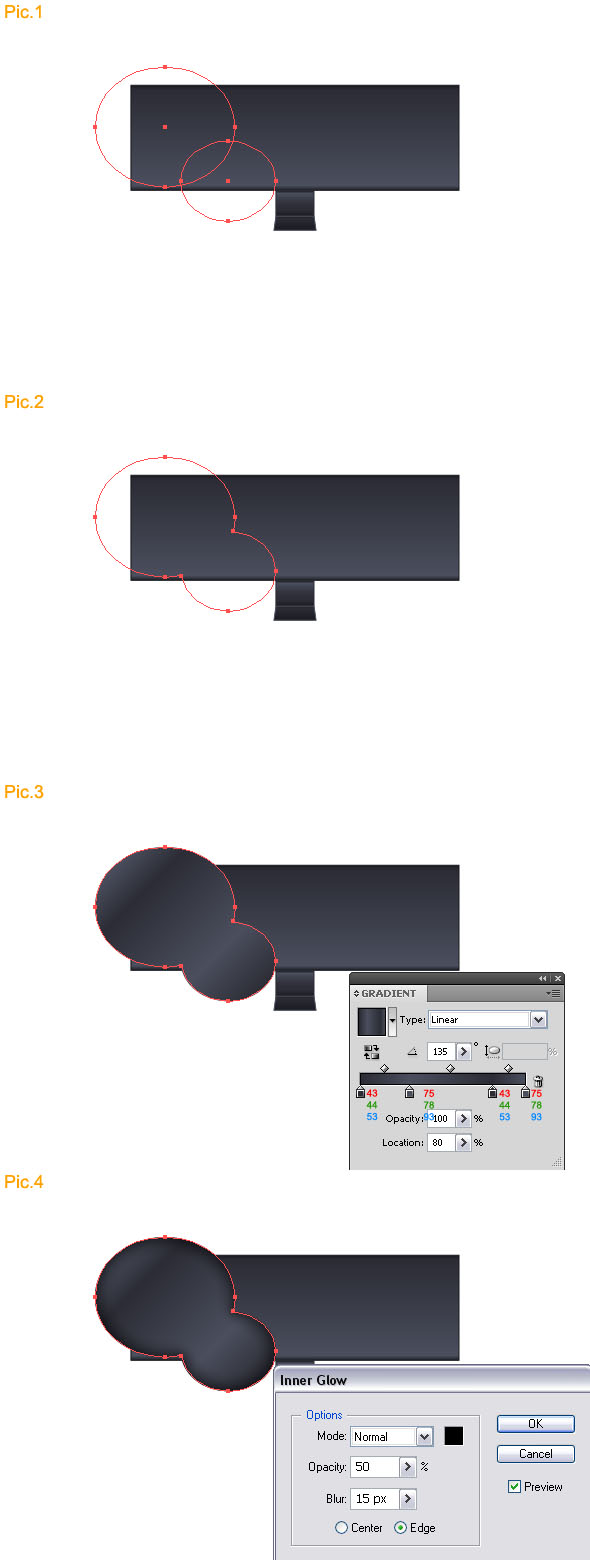
Step 4: Working with Ellipses and Inner Glow
Pick the Ellipse Tool and create two ellipses with dimensions: 140px by 120px and 95px by 80px [Pic.1]. Open a Pathfinder Panel, select both of these ellipses and click the Unite button [Pic.2]. Fill the new shape with a similar gradient [Pic.3]. Now go to Filter > Stylize > Inner Glow [Pic.4].
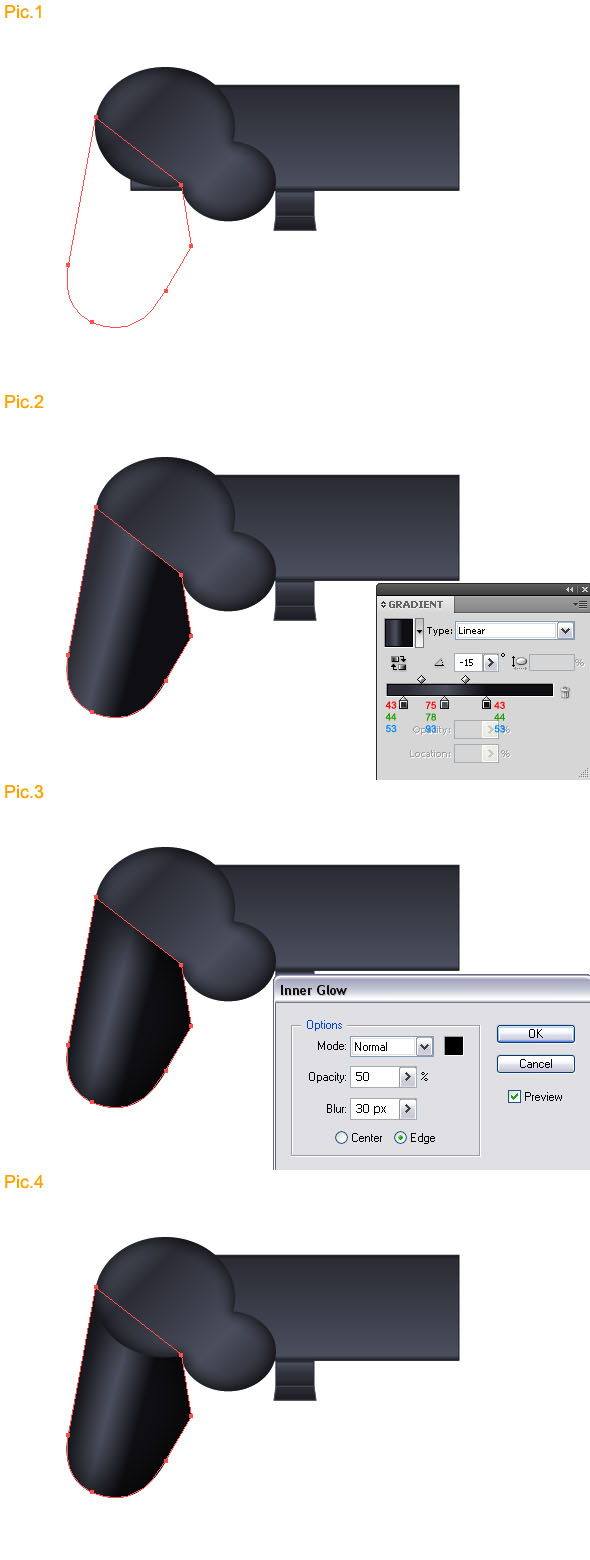
Step 5: Create the Left Controller Area
Create a shape like below [Pic.1] and fill it with a linear gradient [Pic.2]. In next step go to Filter > Stylize and use Inner Glow [Pic.3]. Now click on this shape with right mouse button and go to Arrange > Send Backward [Pic.4]
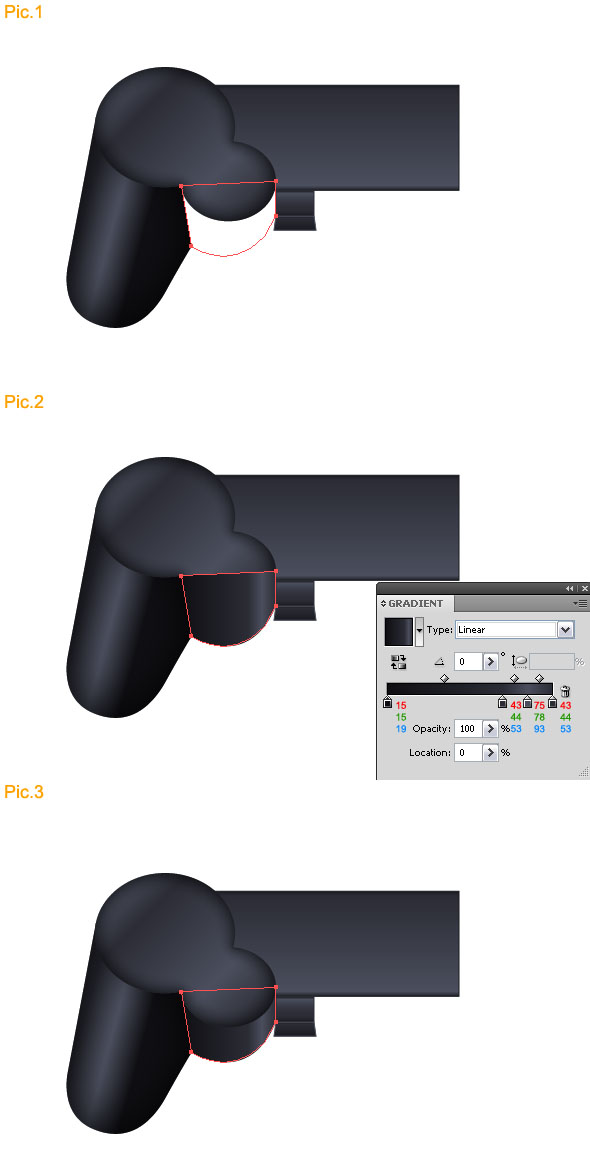
Step 6: Add Another Larger Shape
Create a similar shape [Pic.1], fill it with a linear gradient [Pic.2] and go to Arrange > Send Backward [Pic.3]
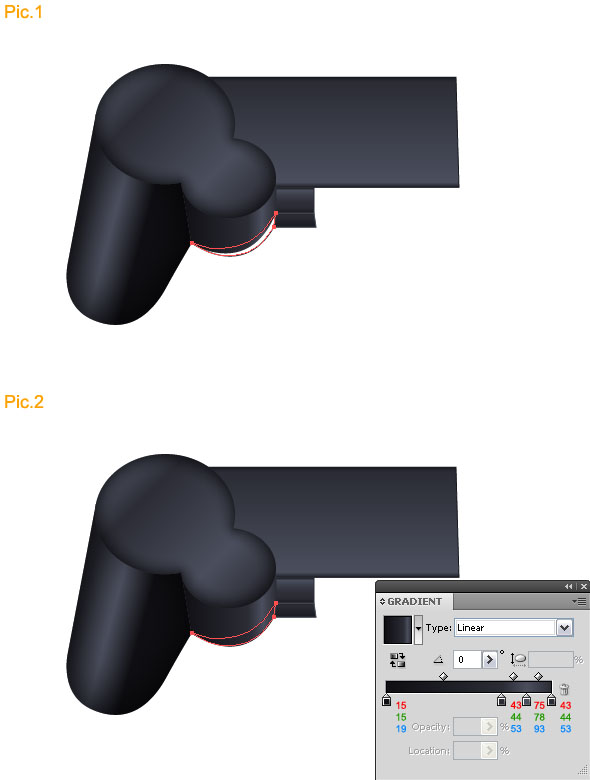
Step 7: Add Shape Details
Create the next similar shape [Pic.1], set the outline to black (R:0, G:0, B:0), and fill it with a gradient [Pic.2]
Step 8: Create a Top Button
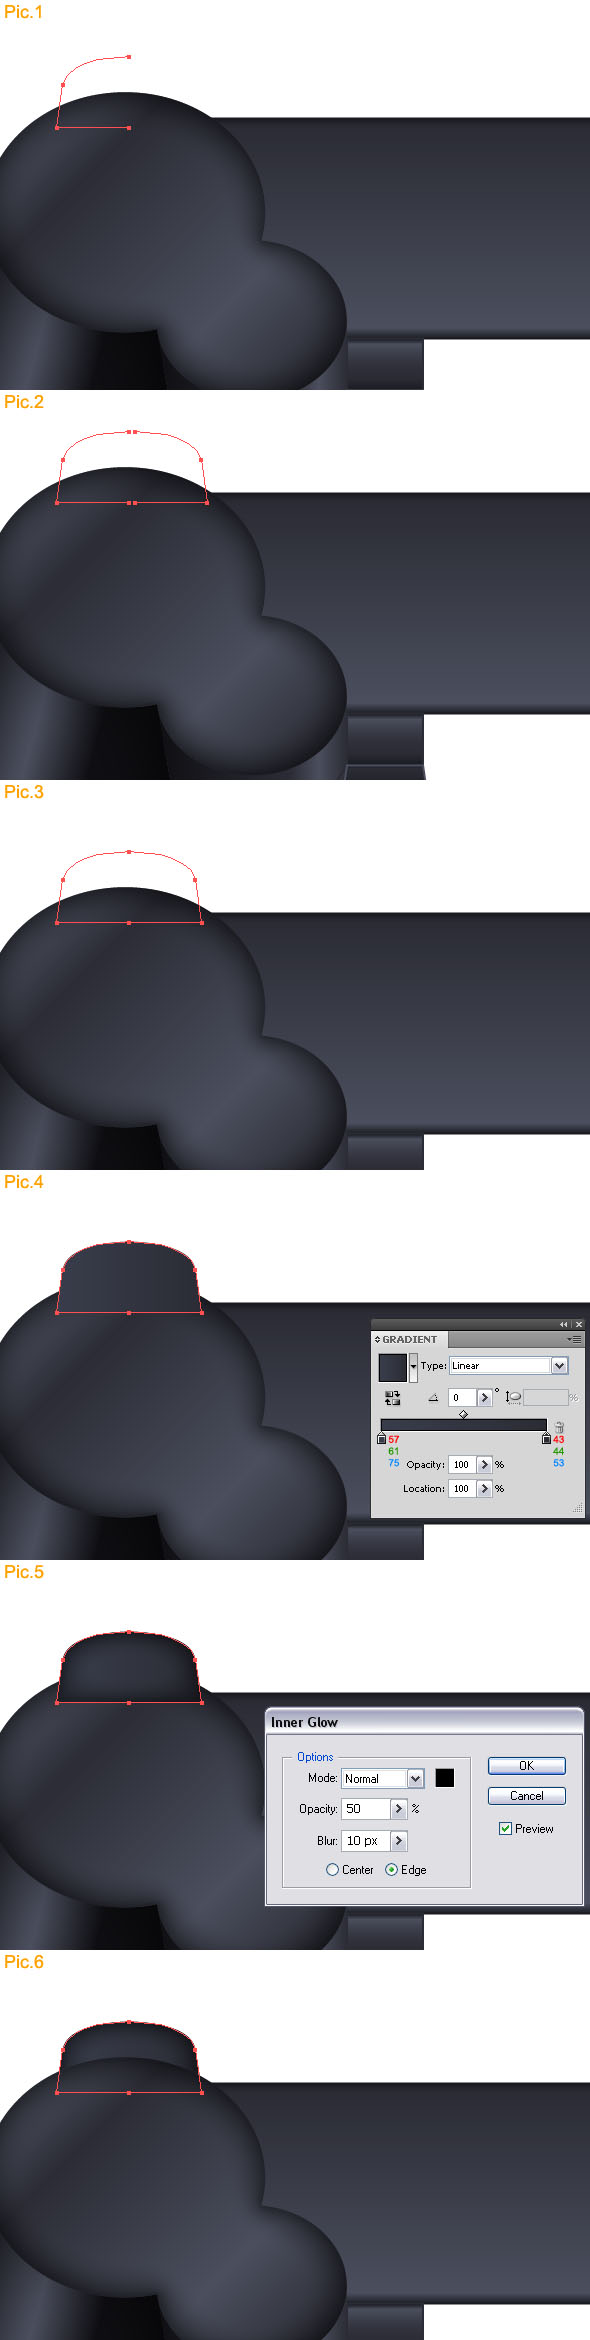
Create a shape like below [Pic.1]. Mirror the just created shape [Pic.2]. Move the two shapes together and select the end points on top with the Direct Selection Tool, and then join them. Repeat the same for the bottom points [Pic.3]. Fill the new shape with a gradient [Pic.4], then go to Filter > Stylize > Inner Glow [Pic.5], and go to Arrange > Send Backward [Pic.6]
Step 9: Adding a Soft Roundness
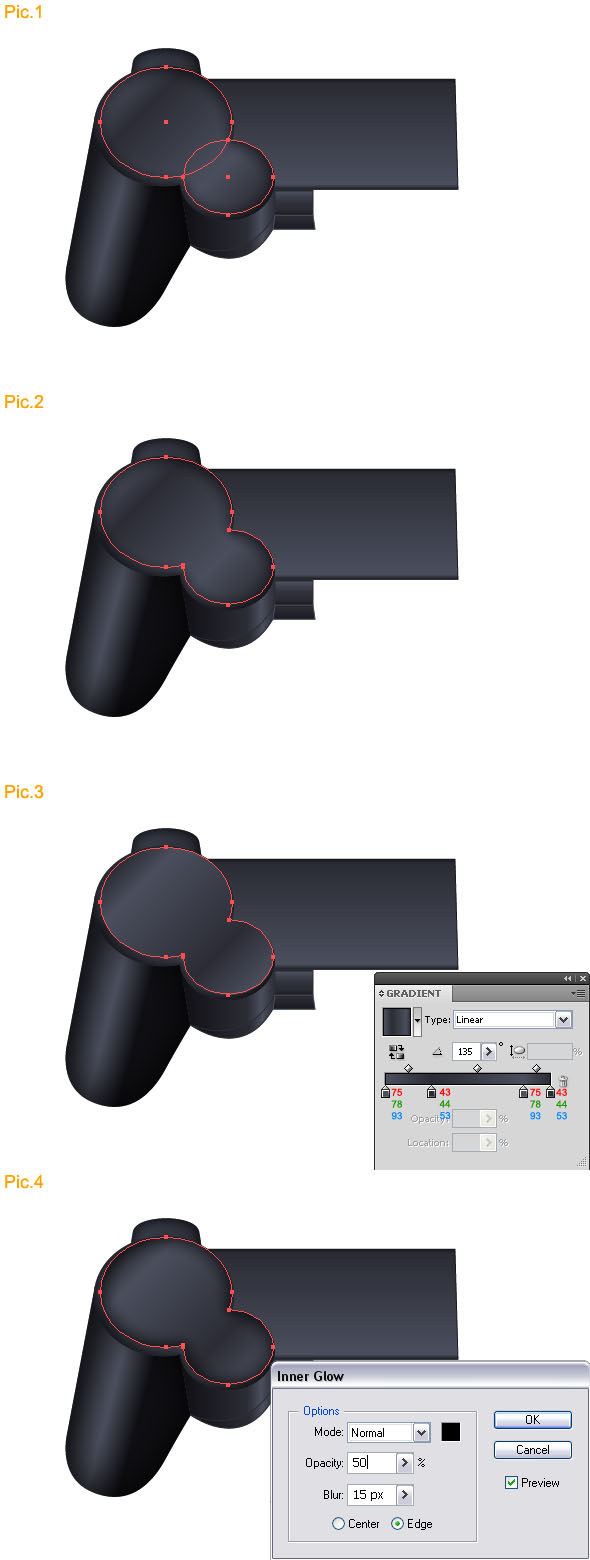
Pick the Ellipse Tool and create two ellipses with dimensions: 132px by 110px and 90px by 75px [Pic.1]. Open the Pathfinder Panel, select both of these ellipses and click the Unite button [Pic.2]. Fill the new shape with a similar gradient [Pic.3] and then Go to Filter > Stylize > Inner Glow [Pic.4].
Step 10: Add a Left Controller
Pick the Ellipse Tool and create an ellipse with the dimensions 60px by 50px and fill it with black [Pic.1]. Then crete another ellipse with the dimensions 55px by 45px and fill this shape with a dark color (R:75, G:78,0 B:93) [Pic.2].

Step 11: Crossed Area
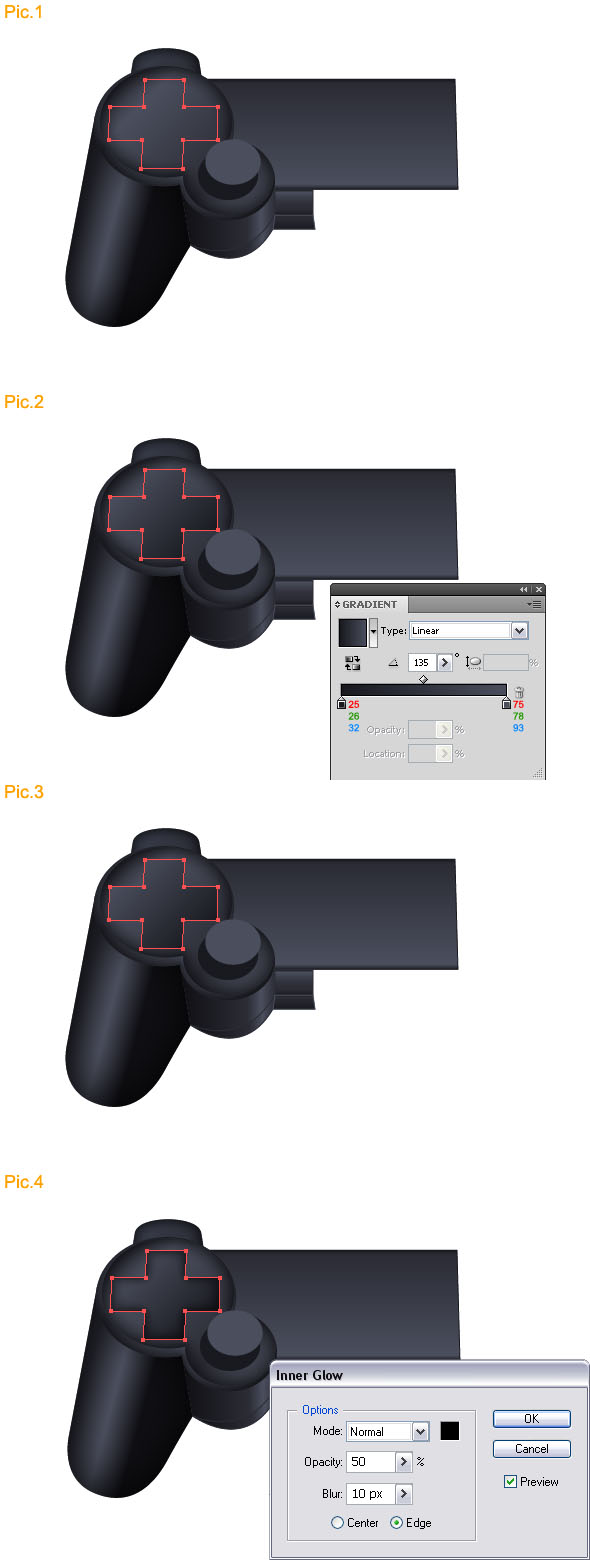
Pick the Pen Tool and create a cross shape like below [Pic.1] and fill it with a Linear Gradient [Pic.2]. Go to Effect > Stylize > Round Corners and set the radius to 3px [Pic.3], and then go to Effect > Stylize > Inner Glow [Pic.4]
Step 12: Reflect Right
Pick the Selection Tool and select these shapes [Pic.1], and duplicate them [Pic.2]. Then go to Transform > Reflect (vertical) [Pic.3] and place them on the right as shown [Pic.4].
Step 13: Start Adding Button Details
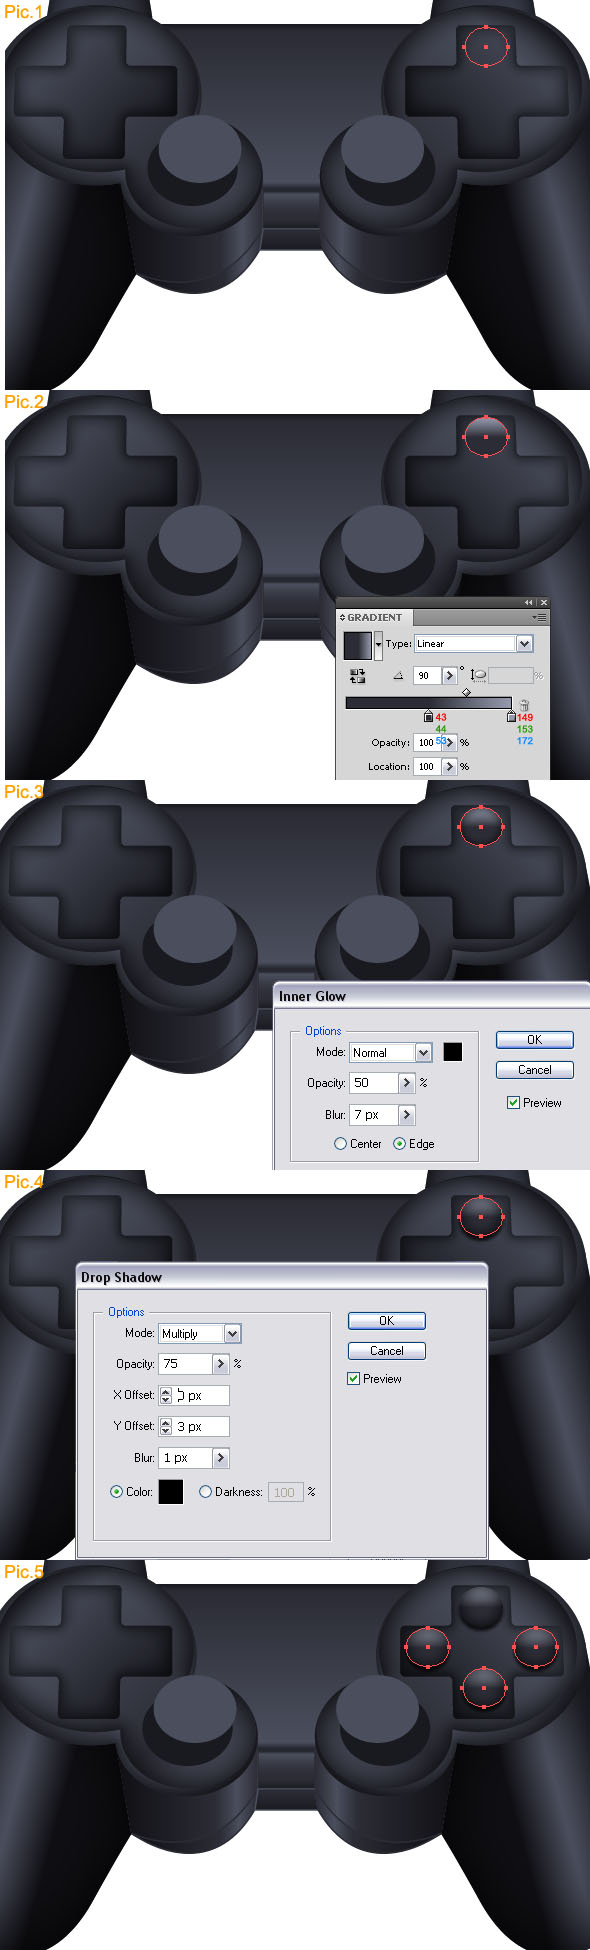
Create an ellipse with the dimensions 29px by 26px [Pic.1], and fill it with a Linear Gradient [Pic.2]. In the next step go to Effect > Stylize > Inner Glow [Pic.3], and go to Effect > Stylize > Drop Shadow [Pic.4]. Then duplicate this modified ellipse three times and place as shown [Pic.5].
Step 14: Adding Button Details on the Left
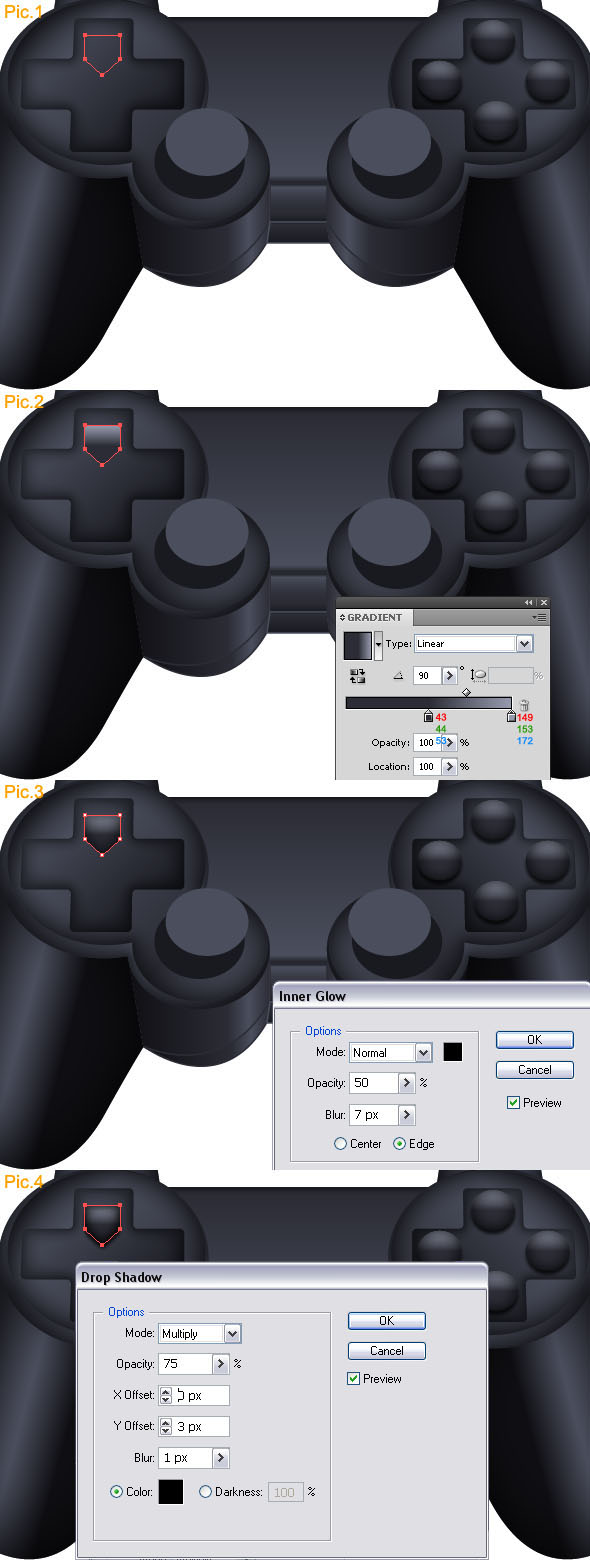
Pick the Pen Tool and create the shape shown [Pic.1], fill it with a Linear Gradient [Pic.2], and add Inner Glow [Pic.3] and Drop Shadow [pic.4] effects.
Step 15: Add an Arrow
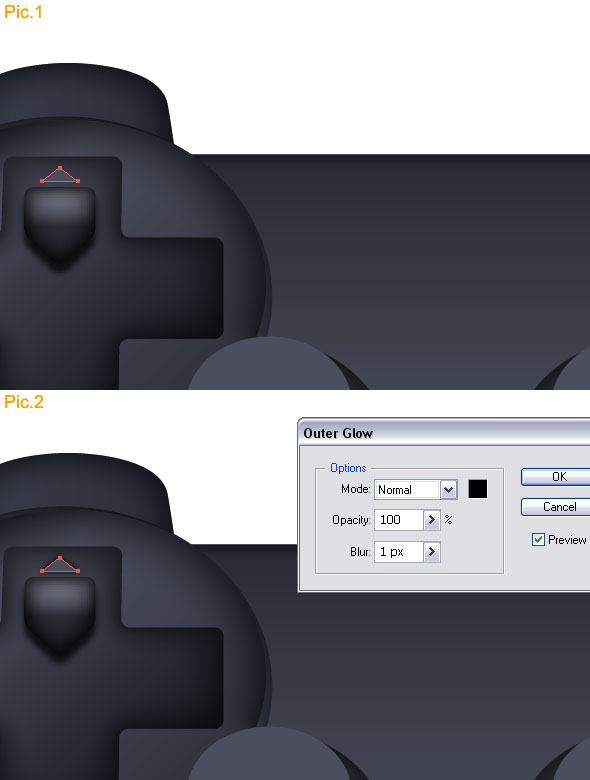
Create a triangle using the Pen Tool, fill it with a color (R:75, G:78, B:93) [Pic.1], and go to Effect > Stylize > Outer Glow [Pic.2]
Step 16: Duplicate the Game Controls
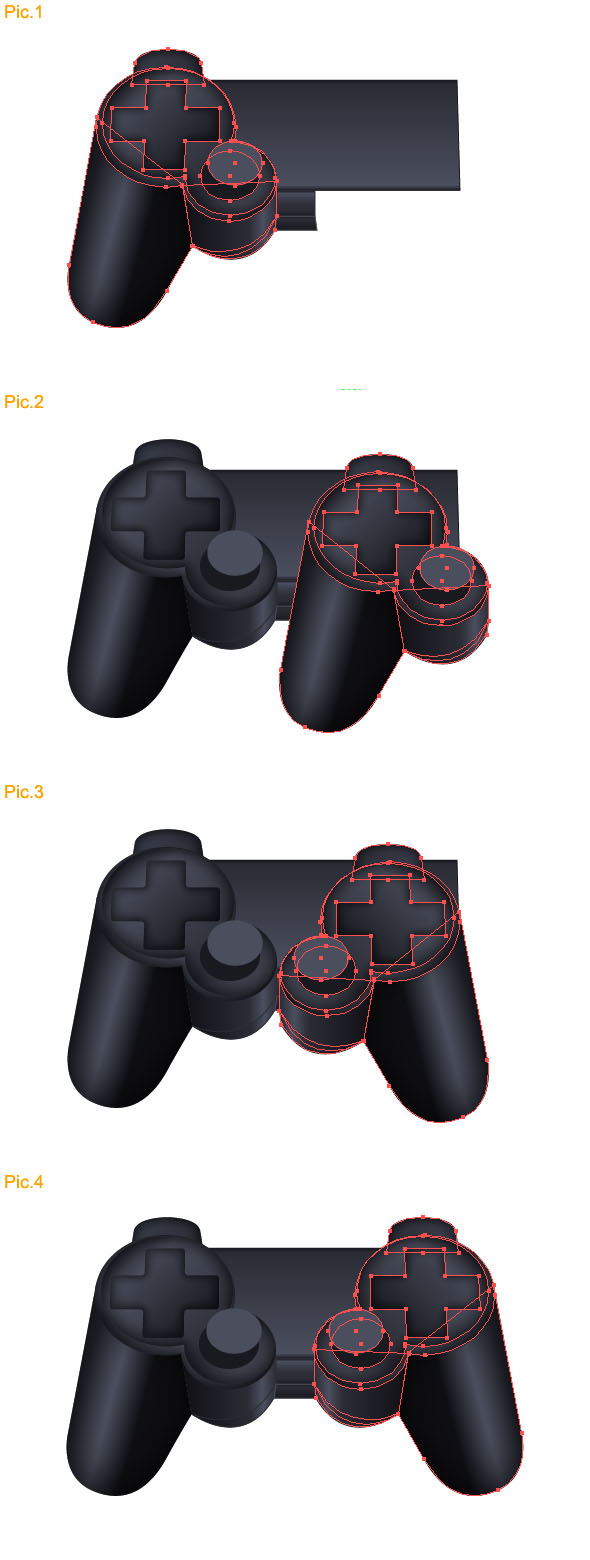
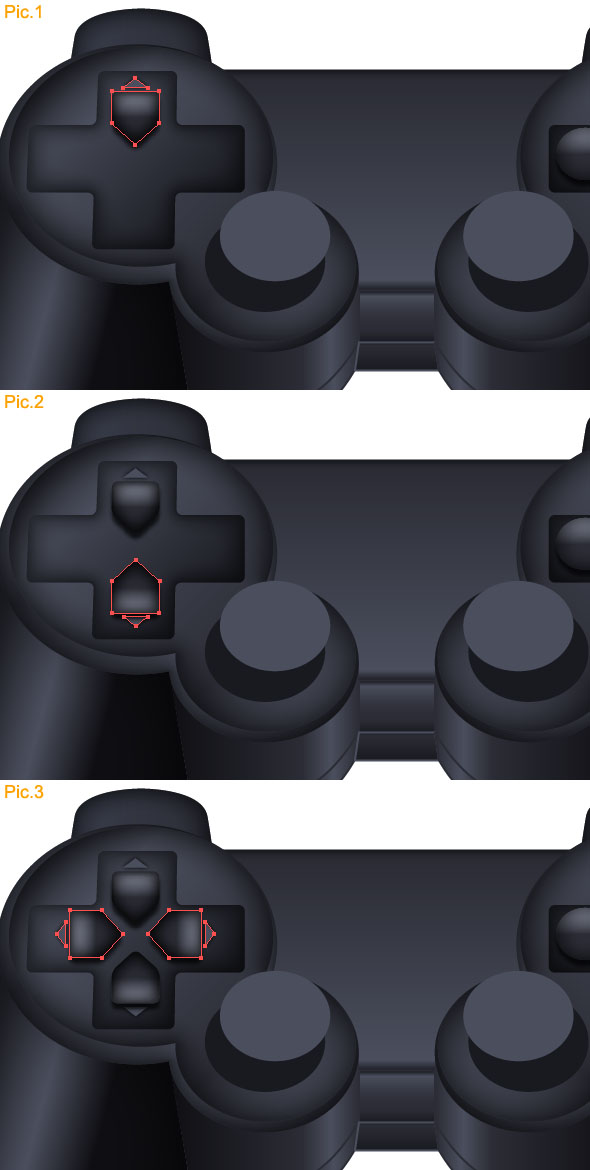
Pick the Selection Tool and select these shapes [Pic.1], and duplicate them. Then click on a right mouse button and go to Transform > Rotate and set the angle to 180 degrees [Pic.2]. In the next step select these shapes, duplicate them, and rotate copies as shown (set angle to 90 degrees) [Pic.3]
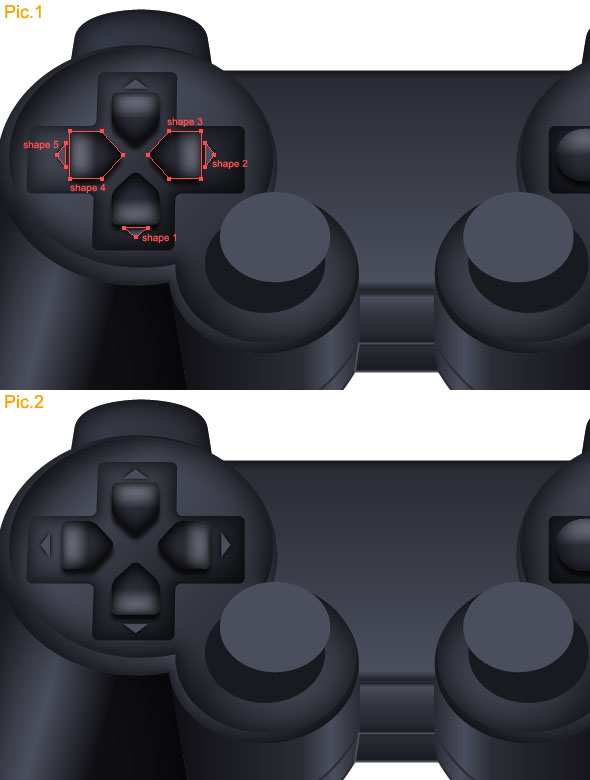
Step 17: Rearranging Shapes
Pick the Selection Tool and select “shape 1″ [Pic.1], and move it 3px down, then select “shape 2″ [Pic.1] and move it right by 8px. Move “shape 3″ to the right by 3px, “shape 5″ to the left by 8px, and “shape 4″ to the left by 3px. It should look similar to this picture [Pic.2].
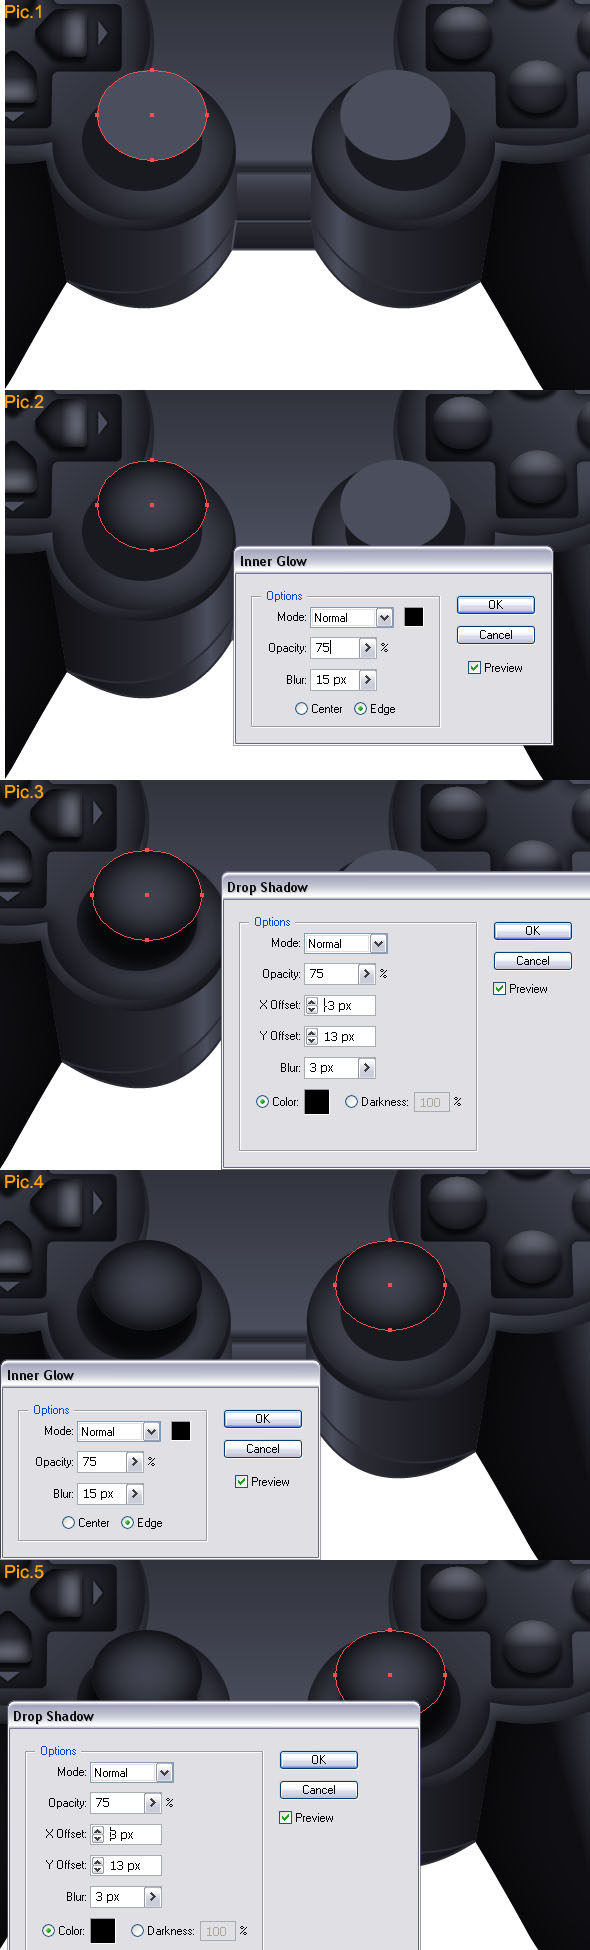
Step 18: Add Inner Glow to Bottom Controls
Pick the Selection Tool and select the ellipse [Pic.1], use Inner Glow [Pic.2] and Drop Shadow [Pic.3] effects. Then select the next ellipse and add Inner Glow [Pic.4] and Drop Shadow [Pic.5].
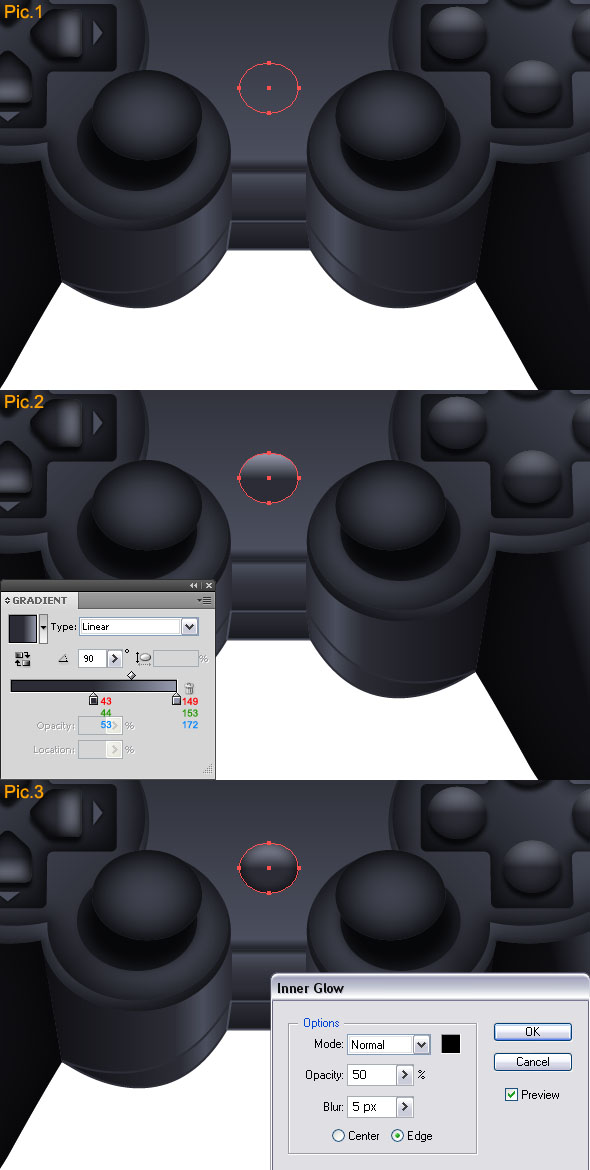
Step 19: Add Another Ellipse
Pick the Ellipse Tool and create an ellipse with dimensions 30px by 25px [Pic.1], fill it with a Linear Gradient [Pic.2] and add an Inner Glow effect [Pic.3].
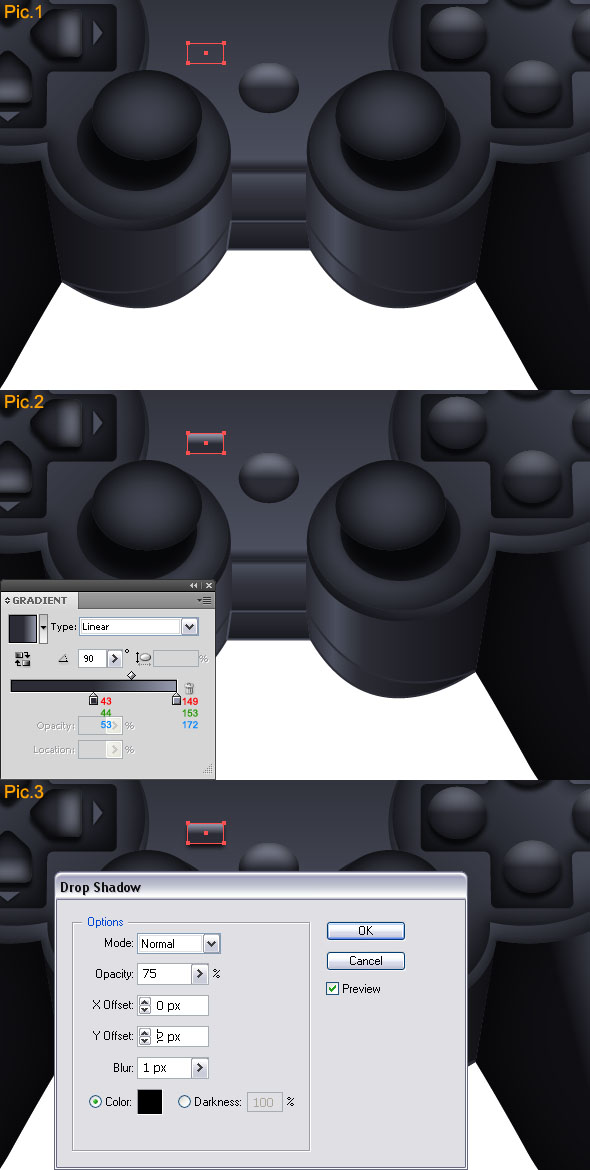
Step 20: More Small Details
Pick the Rectangle Tool and create a rectangle with dimensions 18px by 10px [Pic.1], fill it with a Linear Gradient [Pic.2] and add a Drop Shadow Effect [Pic.3].
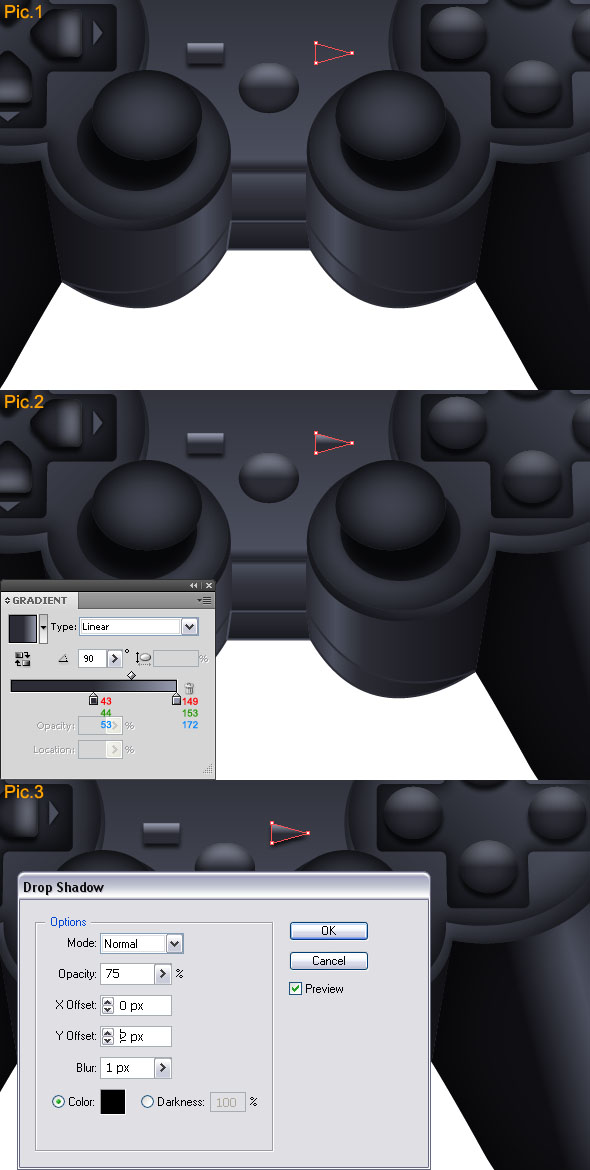
Step 21: Add a Small Triangle
Pick the Pen Tool and create similar shape [Pic.1], fill with it with a Linear Gradient [Pic.2] and add Drop Shadow Effect [Pic.3].
Conclusion
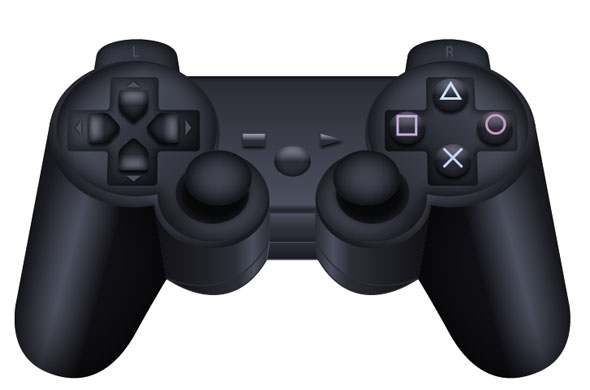
As you can see, I’ve added some symbols. With a little bit of editing this illustration can be used for a range of designs including websites, posters and much more. I hope you enjoyed this tutorial.