When it comes to MIDI orchestration, the string section is probably the most difficult to emulate. That is because it, even though the strings are probably one of the most homogenous sections of the orchestra, it has some characteristics that are extremely hard to produce via samples.
First of all, the strings are bowed instruments. This means that the musicians use a bow to produce the tones. The bow can be moved either up or down and this creates different aspect of the sound. Secondly the players are always slightly out of tune, mostly in the beginning of the note – especially when they change positions very quickly and therefore produce a slurred tone. And last, but not least, a violin player for example can play a single tone on different strings and therefore create a specific sound. If you look through various types of classical scores, you can see that the composer intentionally wrote “Sul D” on top of the violin section solo. This can create a specific effect or emphasize certain feeling.
As you have probably guessed, most of the work on MIDI orchestration goes for string melodies. So how exactly can we capture that unique sound? Is it possible to get that violin melody sound as perfect as it would sound when played live? In my opinion, computers still can’t replace the actual feeling that the strings can give us. It takes a lot of time and work to get things sound precise – and even then something is just not right! I want to open a bracket here and I want to tell you that I don’t have the financial resources to try out the most expensive orchestral libraries out there – for example LASS and EWQL Hollywood Strings. I’m sure they will be a lot easier to deal with, when it comes to string melodies.
So before we continue to the actual tutorial, I’d like to offer you some things that you should consider, observe and watch.
-
Go to classical concerts. I know that some of you would hate that particular phrase, but in classical music you can observe how composers used the string section, what types of articulations they used and how the musicians play them. Try answering questions like “How do you achieve the pizzicato effect?”, ”How often do players change their bow directions?” etc.
-
Listen to classical music and analyze. You can’t notice visually when the players change their bows, but you can hear what the strings sound like. For example listen to Paganini’s “La Campanella” – first of all listen to the solo violin and then to the backing strings. Imagine how exactly you can achieve that legato sounds in your orchestrations.
-
And my final advise would be to buy some orchestral scores and to look through all the articulations and melodies included in the score. I’d suggest Maurice Ravel’s orchestration of Mussorgsky’s “Pictures of an Exhibition”. Look closely to legato lines, accents and so on. After you have listened to a lot of classical music, try making some mock-ups of classical pieces and always compare your work with the original. You can take the melody of Sergei Prokofiev’s “Montagues and Capulets” from “Romeo and Juliet” and try capturing that emotion via samples.
Step One: Creating the Melody
Enough talking for now – let’s head to the main part of the tutorial – creating a nice melody in strings that can sound realistic. I’ll try to explain some tips and tricks in achieving that.
Download audio file (Strings1.mp3)
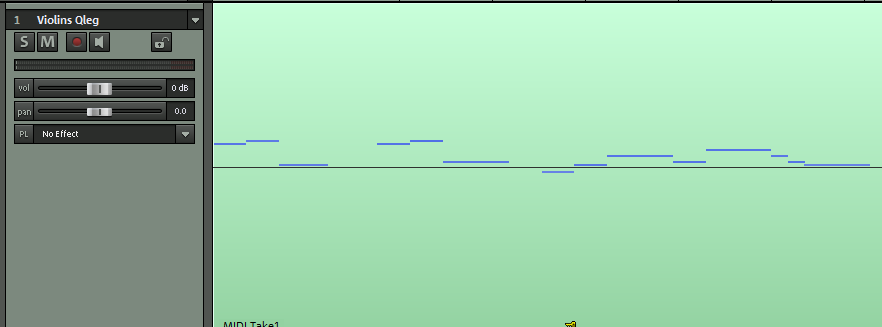
This is the melody we will be using. As you can hear, I have loaded a single violin patch from my EastWest Quantum Leap Symphonic Orchestra (the actual patch name is 18V QLeg). I’ve placed a slight harmonic changes in the piano for you just to get some idea of the music.
We’ll be making a legato line this time (in a previous quick tip I showed some ideas on using short articulations, like staccato or pizzicato).
Step Two: Combine Different Patches
Okay, we have a melody that doesn’t sound convincing at all. If we go back to the beginning of the tutorial, we can see that there are these specifics when playing a string instrument – bow direction, position and slight off-tune at the beginning (from time to time, not on every note).
There are also other characteristics – beginning tones would have a long attack, some of the middle tones would have less vibrato than the other ones. Therefore I’ll load other samples – one for a beginning (something with a slow attack), something with a vibrato and something lyrical (because our melody is the loving-sort). Just remember that everything has to be from the exact patch – this means you must not use for one tone a 18-violin-patch and for another tone – a 11-violin-patch.
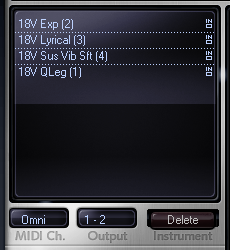
I have loaded these patches:
- 18v QLeg, our main violin patch
- 18v Exp – an expressive tone, good for starting notes
- 18v Lyrical – very similar to the expressive one, but this has more passion in it
- 18v Sus Vib Soft – sustained tones with a slight add of vibrato in them. Good for combining with 18v butter legato.
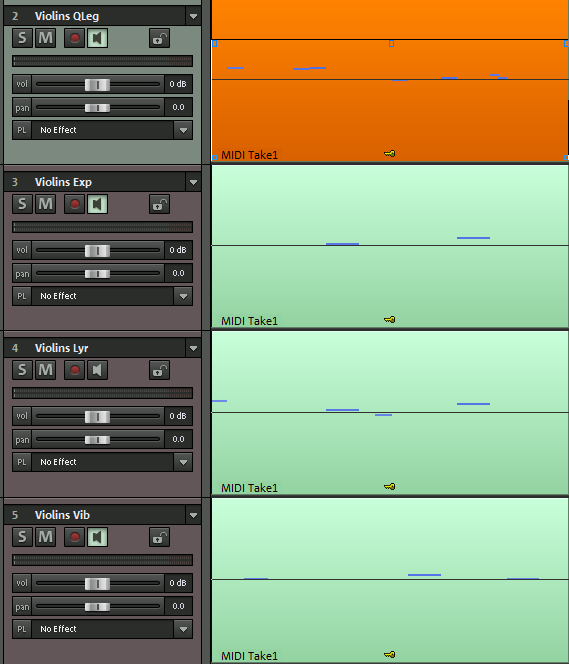
I’ve divided some of the tones to different patches. Listen now to this demo and hear how different our violin section sounds now.
Download audio file (Strings2.mp3)
Step Three: Edit Velocity and Notes
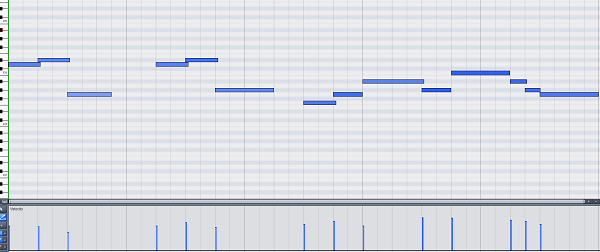
Now comes one of the most difficult and annoying things – note editing. We have to make sure that 1) our violins don’t sound flat and even, 2) all the tone transitions are fluent and subtle, and 3) the melody becomes a whole musical sentence.
In my DAW I have the possibility to group different channels and edit them together; if you can’t use a tool like that, it will take some time, but rest assured – it won’t be pointless.
I’ll start with velocity changes. I want most the transition between the tones to be smooth. Also, I’d like to make a legato feeling of the music, so I’d make slight overlaps of notes by hand. Please note that I will not be using the built-in “legato” script, that can be found in EWQL SO.
Download audio file (Strings3.mp3)
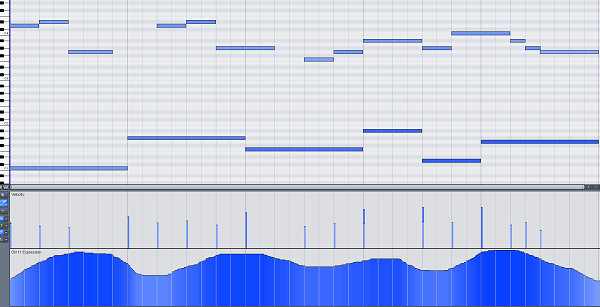
Step Four: Volume (CC#7) and Expression (CC#11) Curves
Volume and expression curves can help you achieve that flowing sound of a string section. You can change the volume in such a way that your sample would stop being flat and dull and will have some character.
The difference between volume and expression is that expression’s limits depend on the volume controller. This means that the expression controller can be very precise, especially when it comes to slight dynamic changes. To illustrate this statement with numbers, you can remember this: if our volume is at its maximum (127), then the expression can vary from 1 to 127. And if the volume is at around 73, expression still varies from 1 to 127. This means that with expression you can add very subtle changes within your volume range.
Let us examine the problems in the last demo: 1) our final notes are very even and 2) surely the 18 Violin Qleg patch sounds aweful in the way I made it. I’ll try editing some curves and we’ll see what will happen next.
Download audio file (Strings4.mp3)
First I edited the Qleg Patch, because it presented most of the problems in our melody. One interesting thing is that I dublicated some of the expression notes with the Qleg patch and turned the notes down quick via the volume curve.

Step Five: Pitch and Portamento (CC#65)
Editing pitch can be either the cherry on top of your musical cake, or the complete disaster of everything we’ve done so far. First of all, remember that in our case “18v Qleg” means that 18 violin players have been playing legato tones in a top-notch studio. This definitely means that we’ll be having some very subtle tuning differences.
But apart from that we can use some slight pitch curve changes in our melody – especially when it “jumps” to G and Ab, because if we imagine the musicians, they will be moving their hand on the strings and therefore create a subtle “slurred effect”. We’ll do that in both ways – in using pitch and portamento (portamento means that the musician is making a quick glide from one tone to another).
The new East West engine, PLAY, has its own Portamento script that can be triggered via the CC#65 controller.
Download audio file (Strings5.mp3)

Step Six: Sample Doublings
One of the best books I’ve read on the topic is “The Guide to MIDI Orchestration” by Paul Gilreath.
He suggests that a contemporary MIDI orchestrator should have at least two string libraries and he should duplicate melodies from both types of samples. For people like me, who can’t afford having two libraries at that time, there is always a solution – double the melody with woodwinds and even other string instruments. In our case, I’ll do both.
First, load a nice flute patch. It would be best if the flute has some slight vibrato in it. Place it the the same range with the violins and turn the volume down drastically. The flute is not a solo, it just gives more size of the sound.
Download audio file (Strings_fluteonly01.mp3)
And finally, we will use the help of another string instrument. I chose cello, but actually there is no difference here. I made some bass notes of the cello, but the important thing is that I actually put the melody on the cello too, placing it (again) in the same range as the violins. Then I’ll turn its volume down till it can’t be heard. Actually at that time you can feel the cello – the listener won’t hear it playing in that range, but he will sense a certain richness in the sound.
Download audio file (Strings_celoOnly.mp3)
I hope this helps you. I am looking forward to reading your comments. You can hear the final result from our tutorial in this demo:
Download audio file (Strings_Before_and_After.mp3)
Good luck!