Importing type into Indesign can seem like a straight forward process, either copy and paste or use the place option. It is definitely a process designers take for granted. This tut will illustrate the capabilities InDesign offers when importing type using the "Show import options" feature. In turn this will give insight on how you – the designer – can take full control over importing and placing type.
Methods of importing type
Here are some common methods of placing type within InDesign.
- Direct input. Select the Type Tool, draw a text box, select your typeface, size, color etc and start typing.
- Copy and paste. Content can be copied and pasted from a variety of sources (PDFs, text documents and the internet to name a few)
- Importing a word processor file (Word, OpenOffice etc). A file can be added using the Place option (File > Place)
For the purpose of this tut we are going to focus on method 3.
Step 1
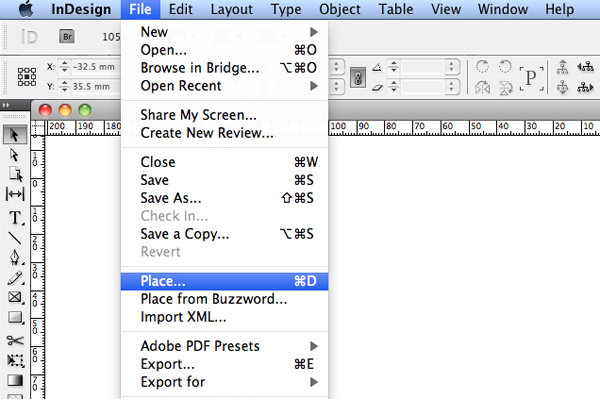
OK, lets start by importing a text document. In my case I am importing an Word doc. Go to File > Place and navigate to where your file is located. Select it but don’t hit the "Open" button just yet.
Step 2
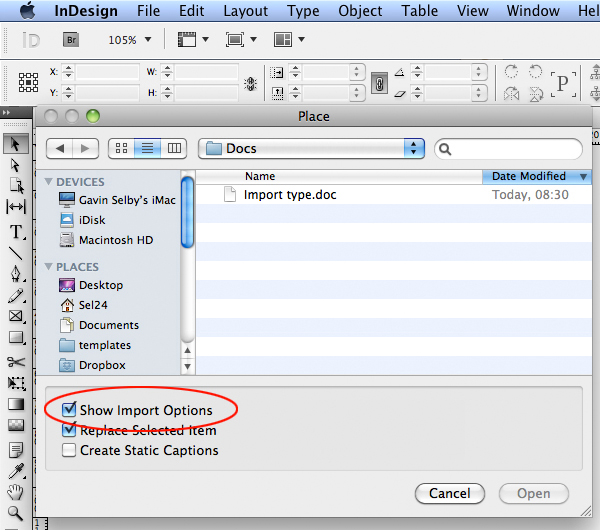
To the bottom left of the "Place" floating window you will see a tick box titled "Show Import Options". Tick this box, then press "Open". InDesign will then present you with a new window.
Step 3
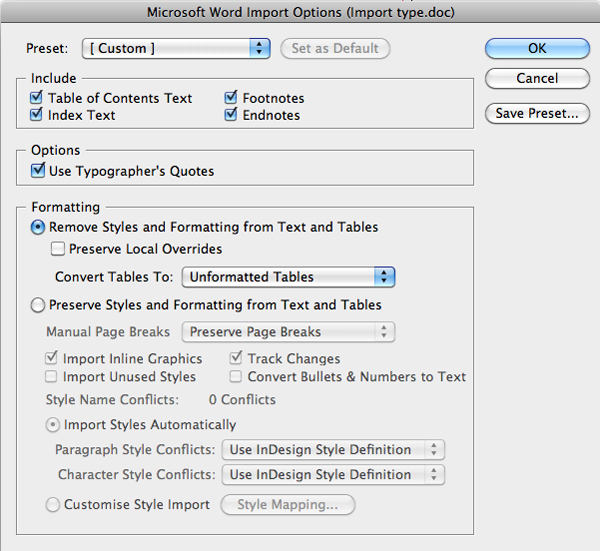
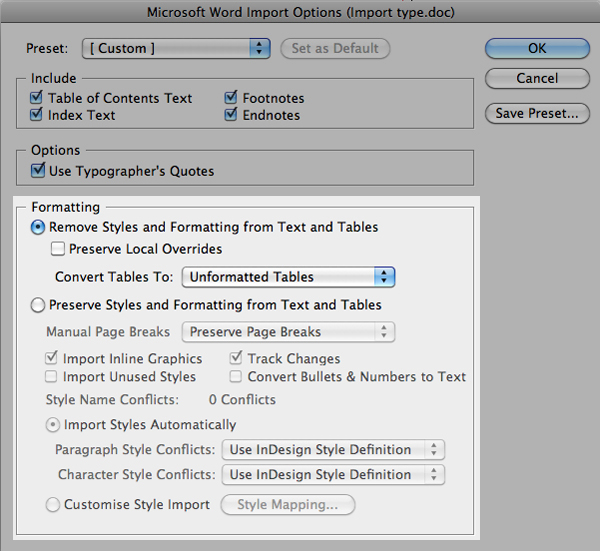
The "Import Options" box is divided into three sections, Include, Options and Formatting. The Include box is pretty self explanatory and here you can choose to omit or include various formatting. The option to omit Footnotes has proved to be helpful on a number of occasions.
Step 4
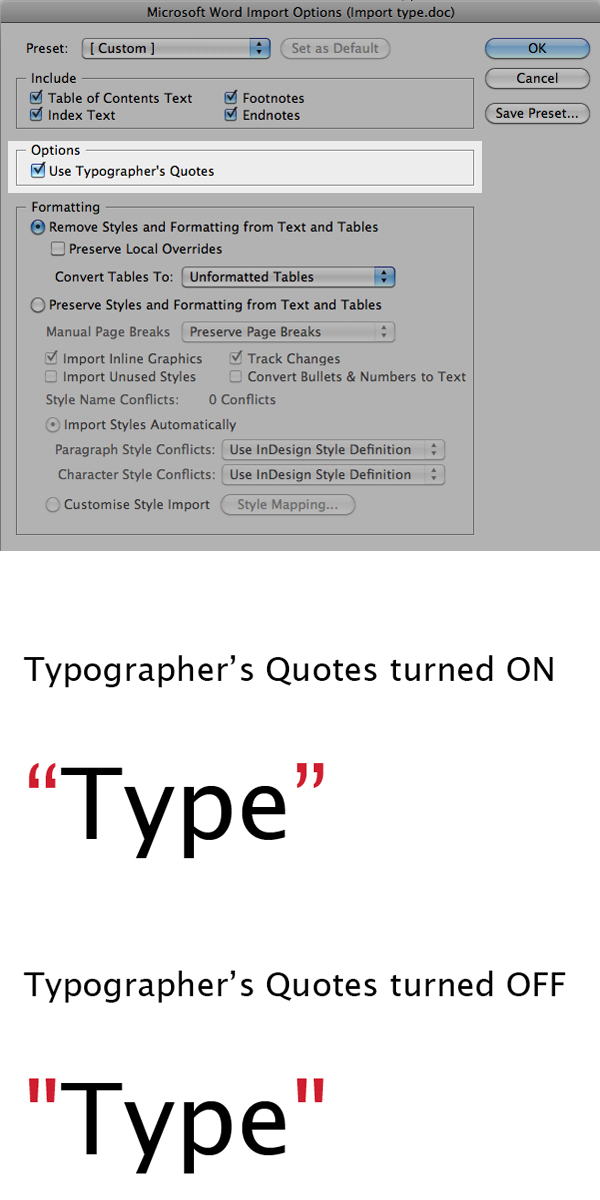
The options box contains just one tick box, "Use Typographer’s Quotes". Here you can choose to use curly quotes or use straight quotes, a choice that has caused great debate among designers.
Step 5
The formatting box is a bit more daunting. However the gem here is the "Remove Styles and Formatting" option. As many designers will have experienced, word docs can cause unusual and unwanted formatting when importing into InDesign. Within this box you can take full control over the text or simply import unformatted type. Do this by selecting / unselecting the tick options.
Step 6
Now the next time you go to import an element (image or type) using "Place", the Import Options box will appear automatically by default. Indesign remembers that you have ticked the "Show Import Options" box before and for some reason keeps it selected until you unselect. This can become annoying if you don’t want to be presented with this option every time you import. A way of avoiding this is to do the following: Repeat step 1, however instead of ticking the "Show Import Options" box hold down shift and then press "Open". By doing this the "Show Import Options" box will only appear on this import and not subsequent imports unless of course you hold down shift again.
Step 7
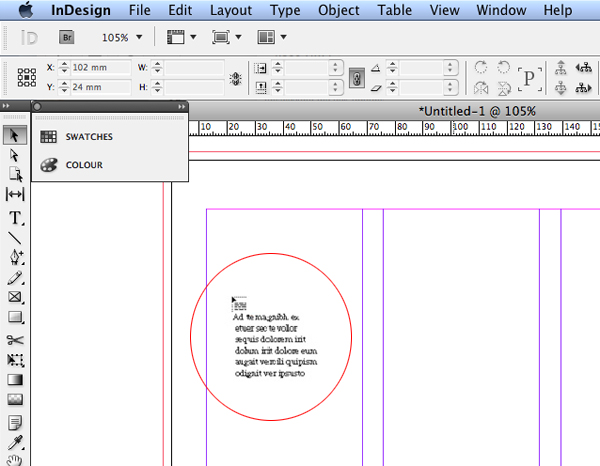
Once you have clicked "Open" your cursor will be loaded with the text from the document. Click once within the InDesign document to place the content.
Step 8 – Extra Tip!
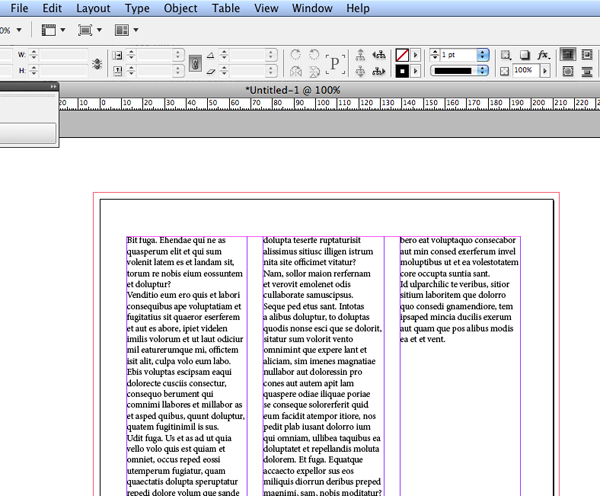
If you click your loaded cursor on a column structure, the width of the text frame will mimic the width of the column. But make sure that your guides are turned on View > Grids and Guides > Show Guides. You can see from the example below that my text frame automatically split across the 3 column structure.
Conclusion
You now have the basic knowledge on controlling the text you import. I recommend that you use these techniques as a starting point to developing your skills further by experimenting with the different options available within the Import Options box.