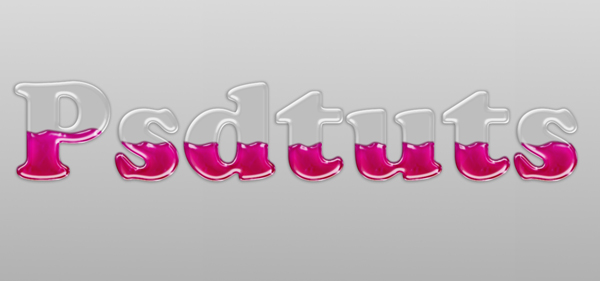
Layer styles are a powerful tool in Photoshop that allow you to quickly create effects that you can then apply to additional objects. Today, we will demonstrate how to use layer styles to create a liquid filled text effect in Photoshop. Let’s get started!
Step 1
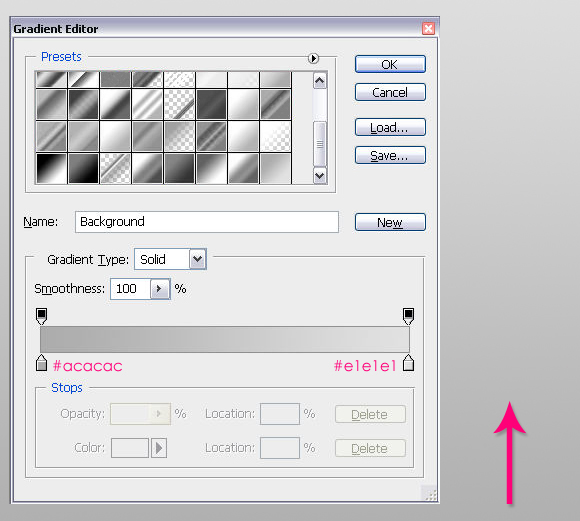
Start by creating a new document, 1500px by 1000px. Fill the Background with a Linear Gradient using the color #acacac as the Foreground color, and #e1e1e1 as the Background color. Start from the bottom of the file and go upwards.
Step 2
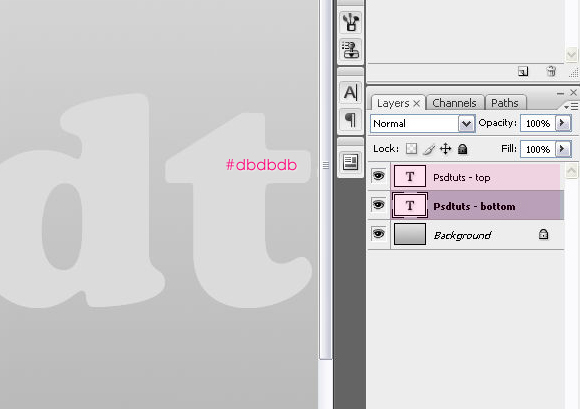
Now, type the text you want to apply the effect on, using the color #dbdbdb, the size 300px, and the font type is “Cooper Std”. Any bold font would be fine, just make sure it is bold.
Duplicate the text layer, and rename both layers as shown in the image below.
Step 3
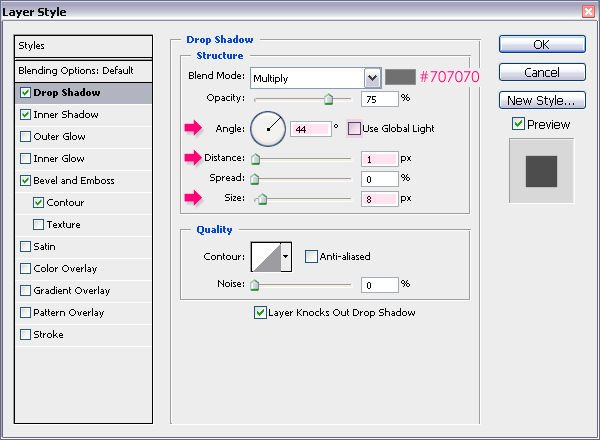
Double click on the bottom layer (Psdtuts – bottom), and apply the following layer styles:
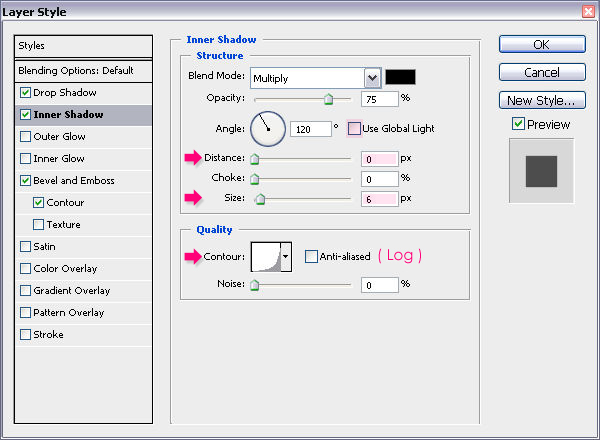
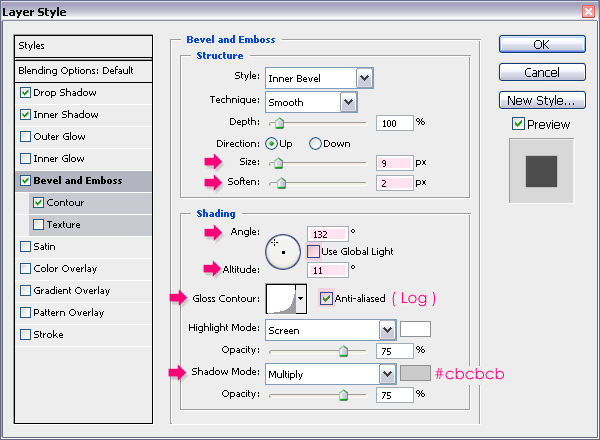
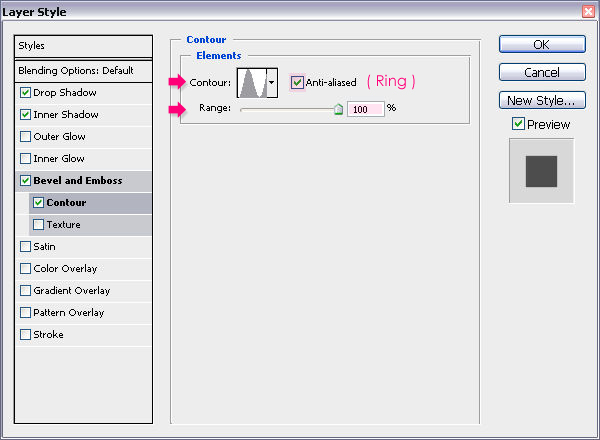
Step 4
Now, change the Fill value of the top layer (Psdtuts – top) to (0%), then double click on it, and apply the following layer styles:
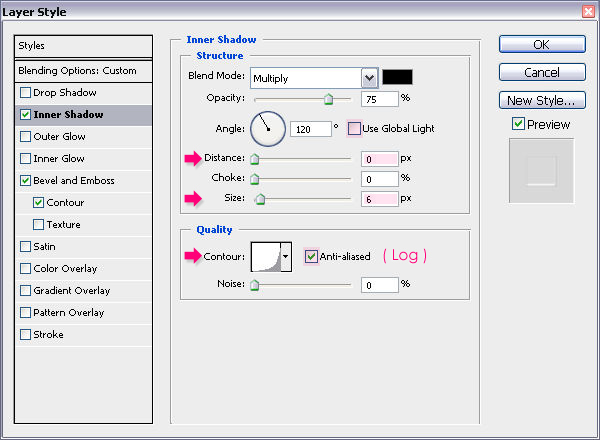
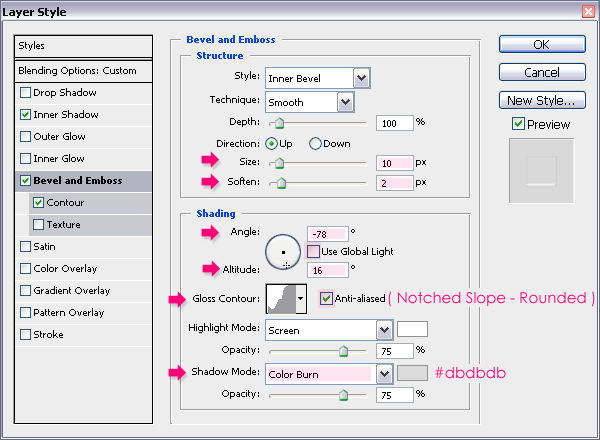
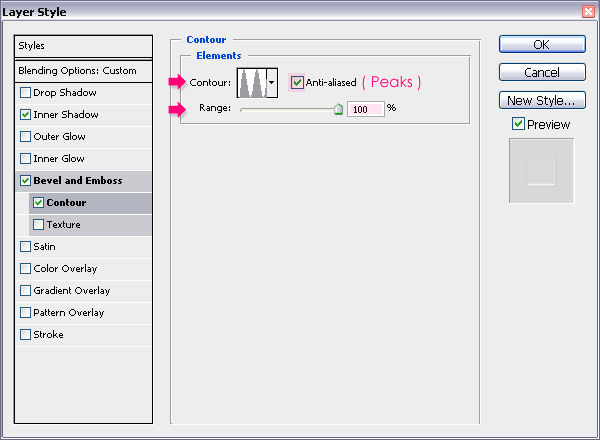
Step 5
Using the “Rectangle Tool”, draw a rectangle shape that covers the lower half of the text, the color should be #aa4280. Make sure that the rectangle shape layer is between the two text layers (‘Psdtuts – bottom’ and ‘Psdtuts – top’).
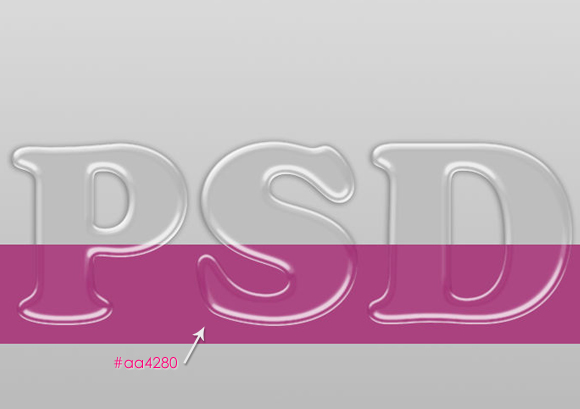
Step 6
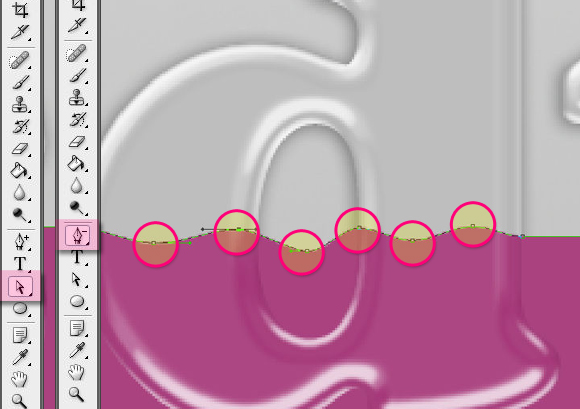
Select the “Add Anchor Point Tool”, and start adding points at the edges of the letters, where they intersect with the rectangle.
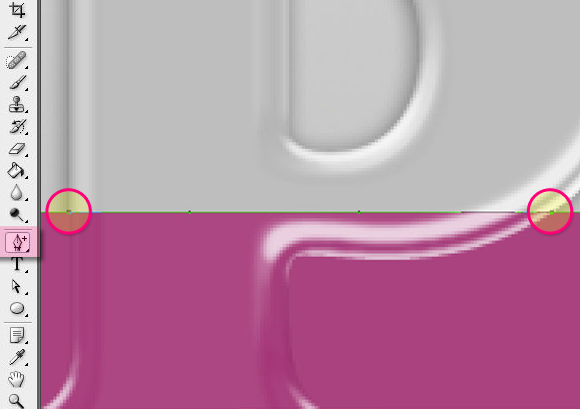
Step 7
Once you’re done, begin adding points in between the edges, these will determine the tops and bottoms of the liquid. After adding the points, use the “Direct Selection Tool” to select those points and move them up and down. You can also use the “Delete Anchor Point Tool” to remove any unwanted points. Continue modifying the points until you’re satisfied with the result.
Step 8
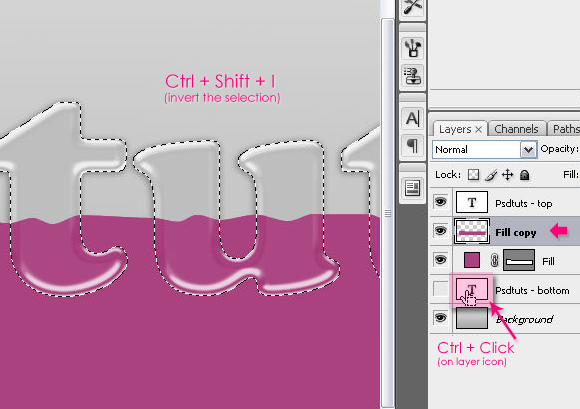
We are going to rasterize the rectangle shape layer, so make a duplicate of the shape layer, then Right Click on the copy, and choose “Rasterize Layer”.
Press the Cmd/Ctrl key, and while you’re still pressing it, Right Click on the icon of one of the text layers to create a selection, then, press Cmd/Ctrl + Shift + I to invert the selection, and hit Delete.
Step 9
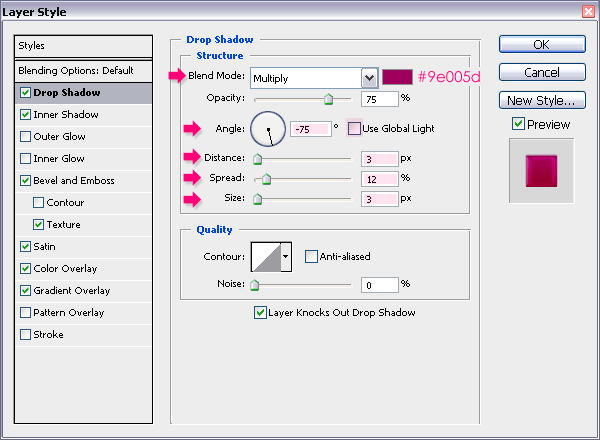
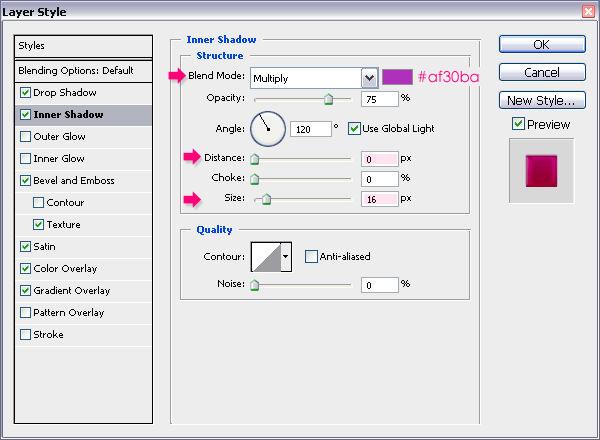
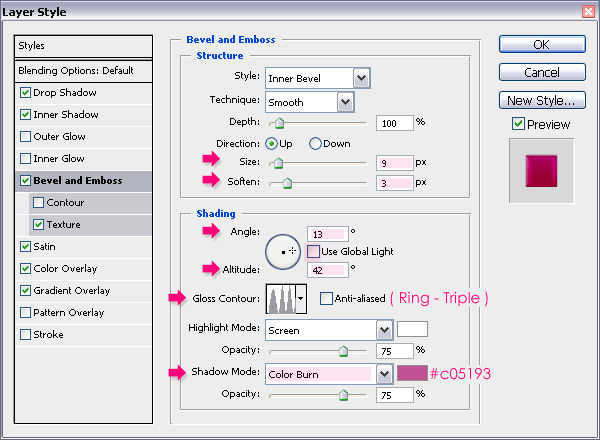
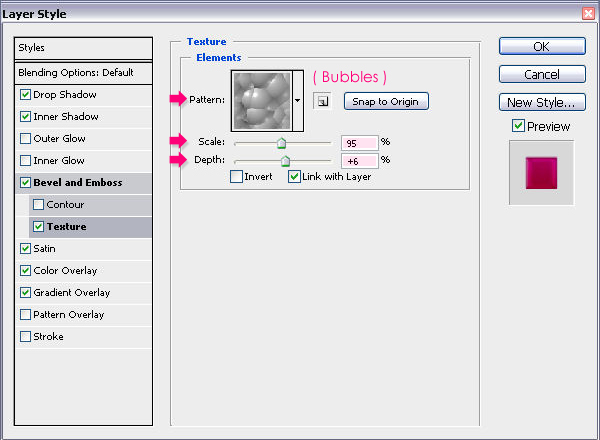
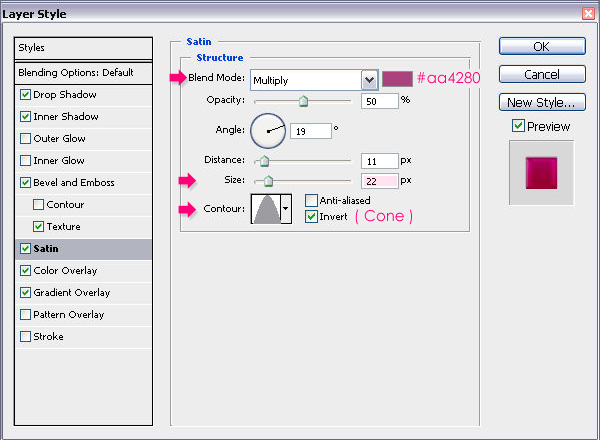
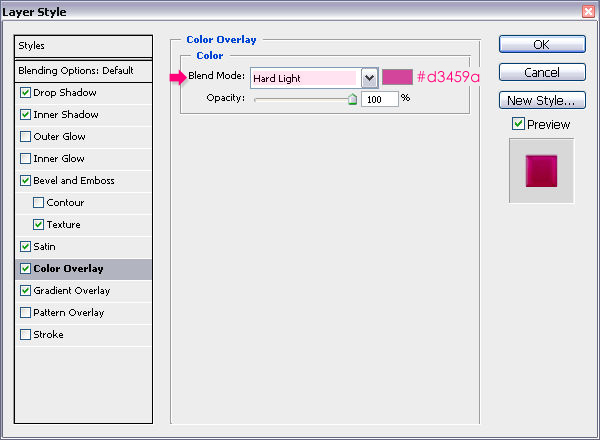
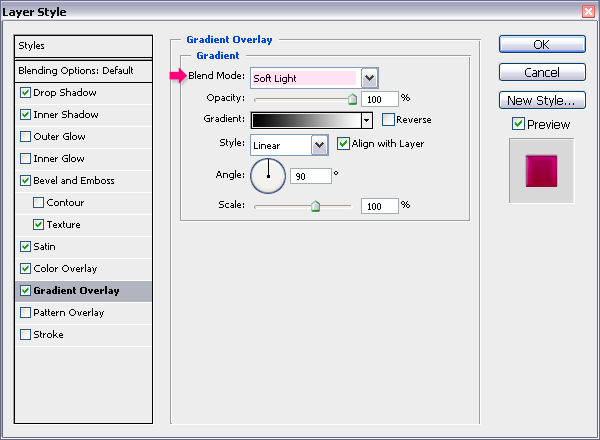
Double click on the rasterized shape layer, and apply the following styles.
Step 10
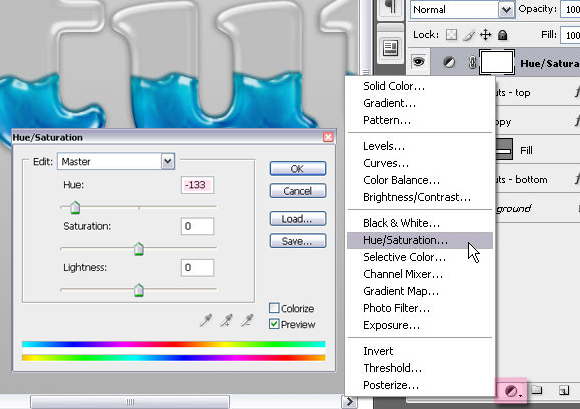
Now we’re done, but you can still change the color of the fluid fill simply by adding a Hue and Saturation adjustment layer, and choose the color you like!
Final Image
This is the final result. Hope you enjoyed this tutorial.
