The new Shape Builder Tool in Illustrator CS5 has really made me happy. This tool has similar properties as the commands from the Pathfinder palette, but it is easy to use and is more user-friendly. Besides, the Shape Builder Tool includes other useful features. Let’s see how it works, and compare it to the commands from the Pathfinder palette. After the theory, we will proceed to the practical training. Let’s get started!
The Shape Builder Tool and Pathfinder palette are used for construction of various complex objects obtained from the intersection of simple or complex shapes. Let’s compare these tools on the example of the most common cases.
Step 1
Unite (Add) from the Pathfinder palette. To unite two or more intersectional objects you have to select them and click on Unite (Add) from the Pathfinder palette. Once united, the new object will have the same color as the object, which lies in the upper layer or under-layer.
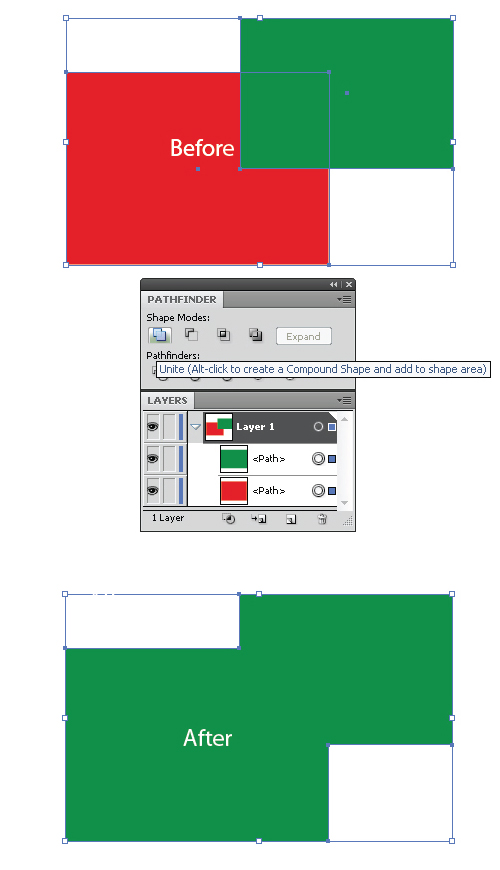
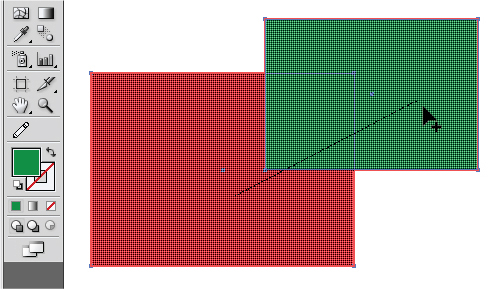
To unite the objects using the Shape Builder Tool, you have to select these objects, and then take the Shape Builder Tool and holding down the mouse button draw a line that passes through both objects.
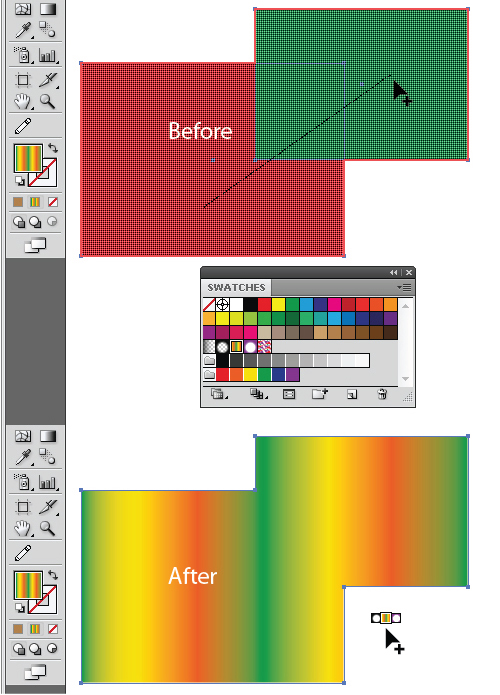
The color of the new object will be up to your choice. That means that after the objects are selected and the Shape Builder Tool is chosen, you can set the necessary color by picking it from the Swatches palette or by setting it in the Color palette. This may be a gradient fill as well.
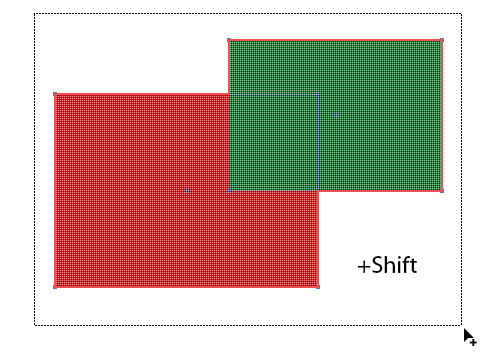
Everything that was mentioned about the fill color also refers to the stroke, except to the gradient of course, a stroke cannot be a gradient. If you hold down Shift when uniting, you can form a rectangle around the merged objects, the same as when you select objects using the Selection Tool (V) or the Direct Selection Tool (A).
Step 2
Minus Front from the Pathfinder palette. This command deletes the upper object and a part of the lower object, which lies below the upper one.
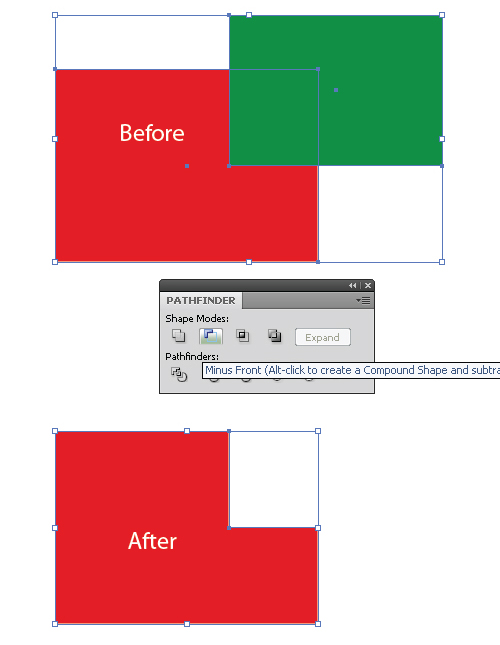
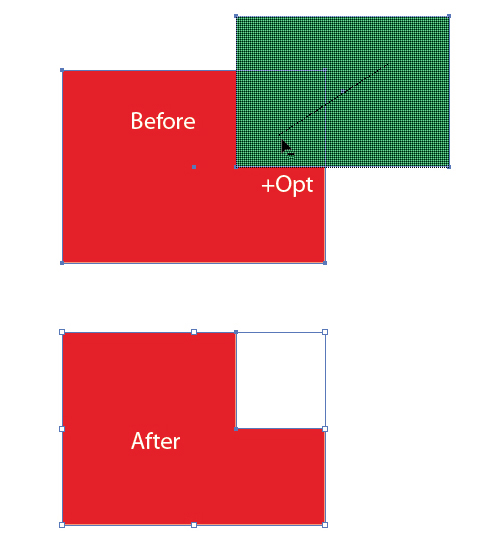
For the same procedure with the help of the Shape Builder Tool select the crossing objects and hold down Option (Alt for Windows) and with the mouse button drag along the upper object to include the crossing part.
Once we are using the Shape Builder Tool, we do not need to worry about what the upper-lying object, we can perform the same operation with the lower object.
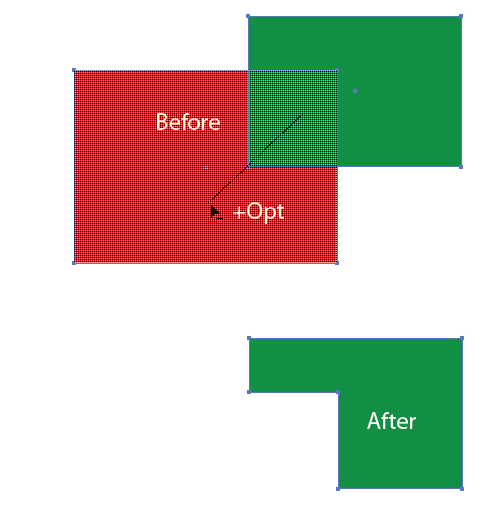
By default, the Shape Builder Tool is in combine objects mode, although when holding down the Option key (Alt for Windows) the properties of the tool change to subtraction. As you understand, the selected color does not matter in this operation.
Step 3
Intersect from the Pathfinder palette. This operation only leaves the spot of intersection from the objects and deletes the remaining parts.
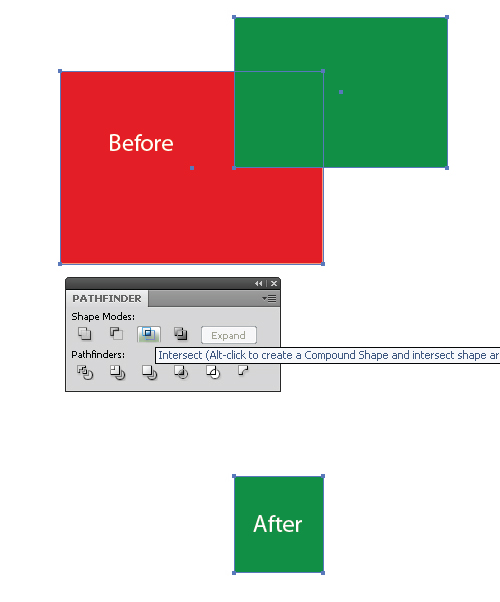
Let’s achieve the same effect by using the Shape Builder Tool. Take this tool and holding down Option (Alt for Windows), click on the pieces of the intersecting shapes, which are located beyond the intersection.
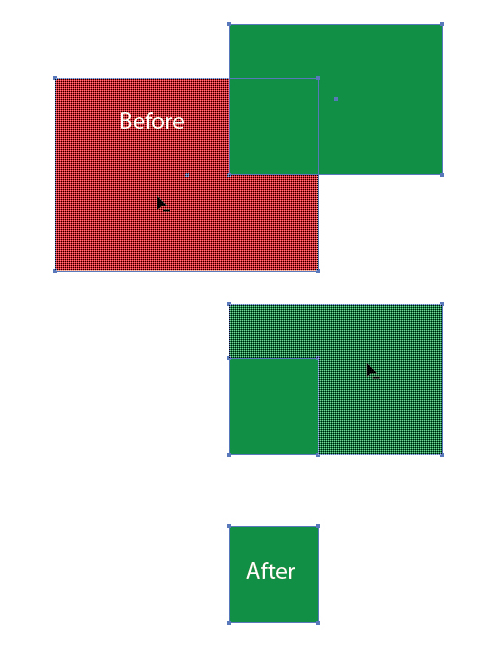
One click more than when you are using the Pathfinder palette. I do not remember when I used this operation alone. Basically, this operation is used to create shadows and highlights on objects, and here the Shape Builder Tool has an obvious advantage. Let’s see.
Create a shadow on an object using the Pathfinder palette. The picture below shows the conditional object in red and the shape of the shadow in burgundy.
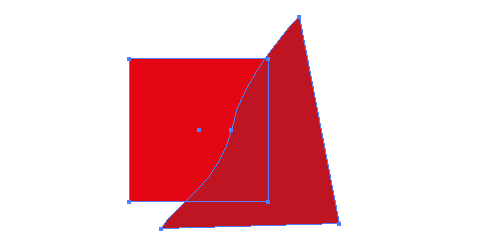
The shadow shape cannot go beyond the paths of the object meaning that it is trimmed along its path. To do this, copy the object and paste it in front, select the copy of the object and the shape of the shadow and then click Intersect from the Pathfinder palette. Objects must be placed correctly in the layers palette.
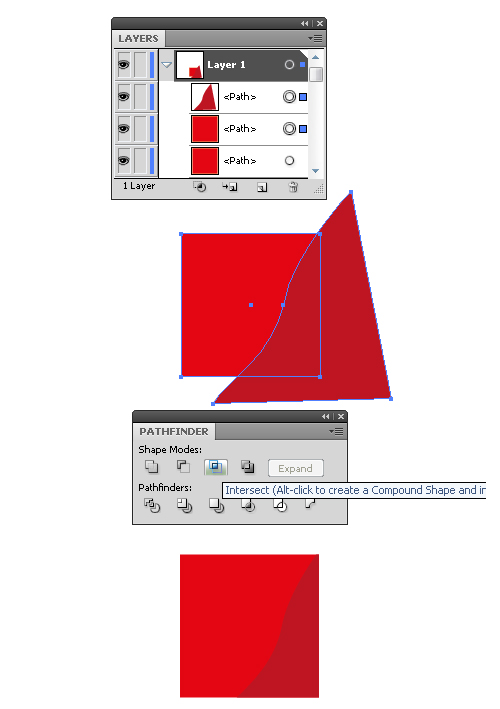
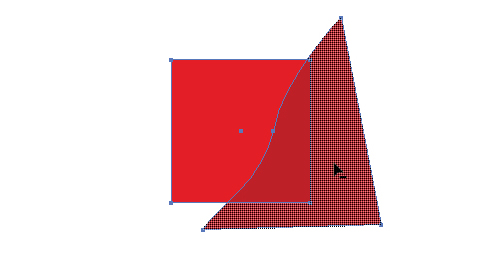
Create a shadow on an object using the Shape Builder Tool. It is much easier to perform this operation using the Shape Builder Tool. There is no need to duplicate the shape of the object, just click on the protruding part of the shadows, holding down the Option key (Alt for Windows). When creating complex objects you will need to complete dozens or even hundreds of these actions, think how much of your working time can be saved?
Step 4
Divide from the Pathfinder palette. This operation divides the crossing objects into parts, at the same time the created objects will be located in the same group.
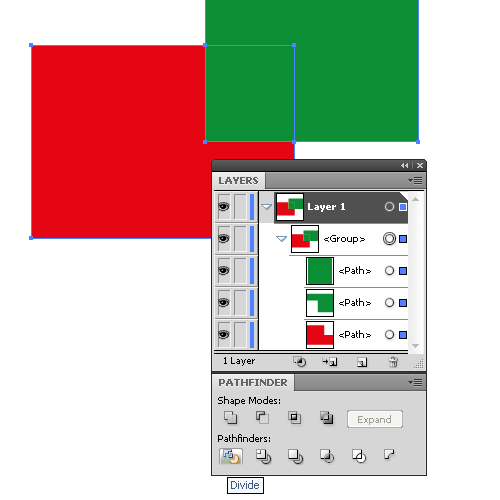
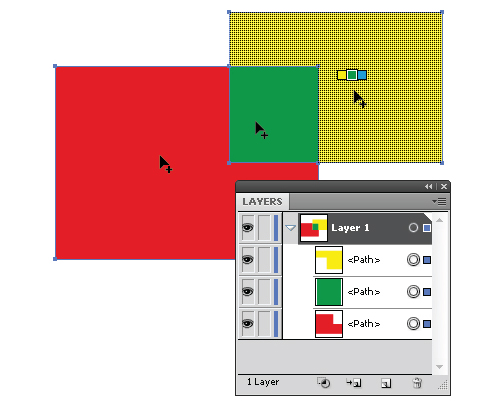
Divide with the Shape Builder Tool. Click with this tool on the areas off the intersection and at the intersection (3 clicks), and moreover the resulting objects will not be grouped.
Step 5
Crop from the Pathfinder palette. This operation allows you to trim objects along the upper path. I often use this operation in the final part of the work when I need to crop the composition. Create the path that has to be trimmed along, in our case it is a rectangle with no fill, select all the items and click the Crop button from the Pathfinder palette. At the same time all the lower objects are trimmed by the shape of upper objects and extra Paths which are better to be removed are formed.
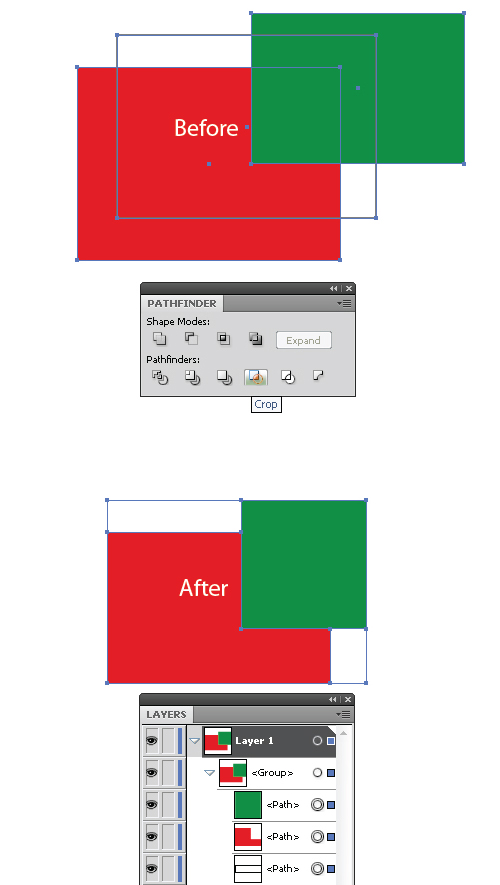
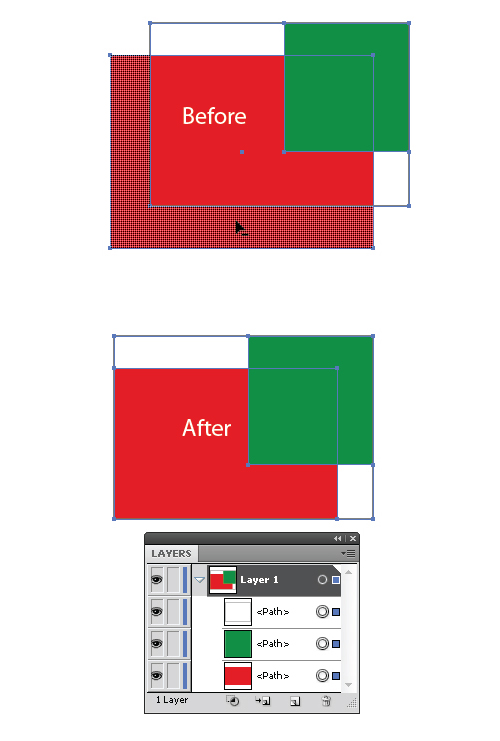
Using the Shape Builder Tool, you just need to remove some of the objects that go beyond the shape, along which the trimming should be performed — click on the protruding parts, while holding down the Option key (Alt for Windows). In this case, no extra forms are made and nothing should be trimmed.
I don’t use all the other operations from the Pathfinder palette quite often. The principles of this tool are fairly clear. Let’s see how it works in practice, and learn a few more interesting properties that it possesses.
Step 6
When creating new shapes using the Shape Builder Tool, you can use objects with closed and open paths. To create the shape of the puzzle, take the Pen Tool (P) and create a curved line, then take the Ellipse Tool (L) and create a circle, as shown in the figure below.

Step 7
Take the Direct Selection Tool (A) and holding down Shift, move the lower point of the ellipse vertically down.
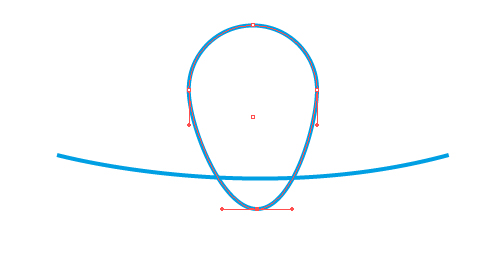
Select both objects, take Shape Builder Tool and holding down the Option key (Alt for Windows), remove part of the ellipse, which is located below the curved line.
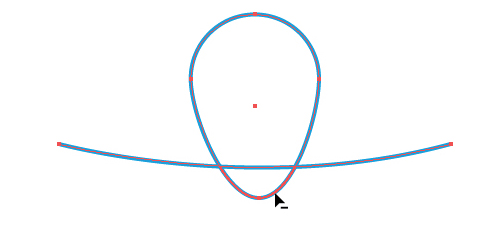
Using the same technique, remove the middle part of the curve bounded by the ellipse path.
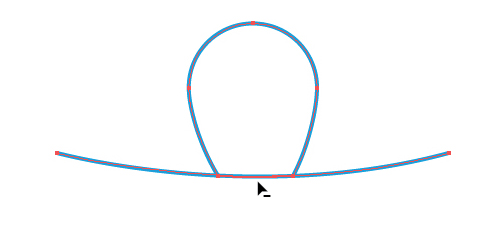
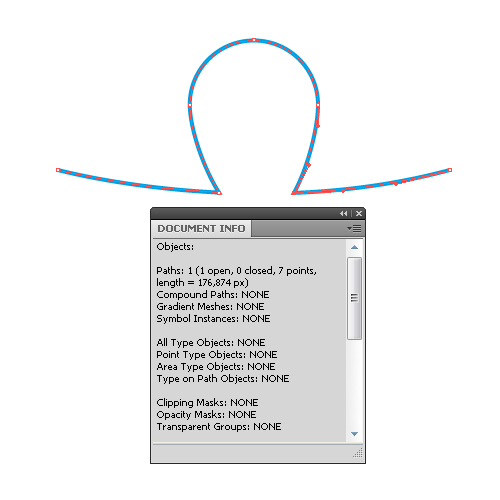
As a result, we have three open curves, turning them into one. Select the break point using the Lasso Tool (Q), now go to Object > Path > Join.
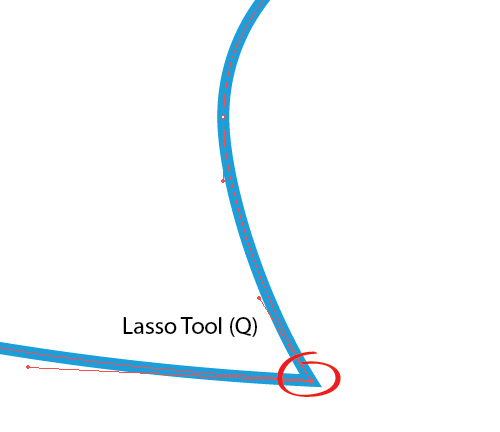
Perform the same operation with another break point.
Step 8
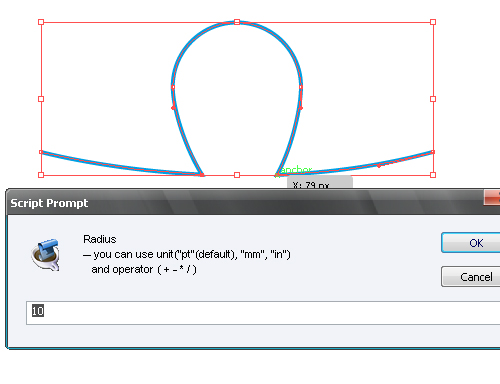
Round the junctions of two curves. Perform this action with a great script – Round Any Corner. You can download this script and many other useful scripts from a previous article I wrote, 20 Free and Useful Adobe Illustrator Scripts. So select the anchor points, that are supposed to be rounded and open the script, and set the radius of curvature in the open dialogue box.
Step 9
Select the curve and go to Object > Transform > Rotate and set the angle to 90 degrees and click Copy.
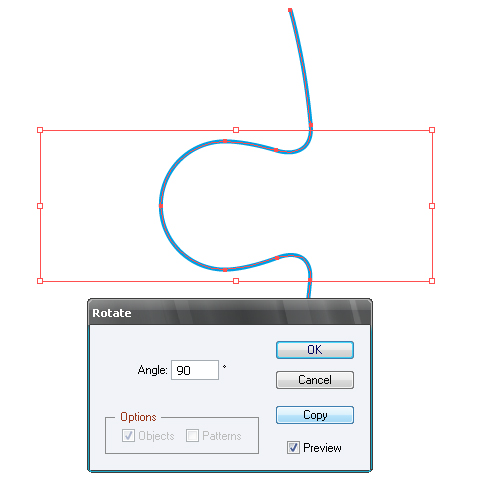
Take the Selection Tool (V) and place the created curve, as shown in the picture below.
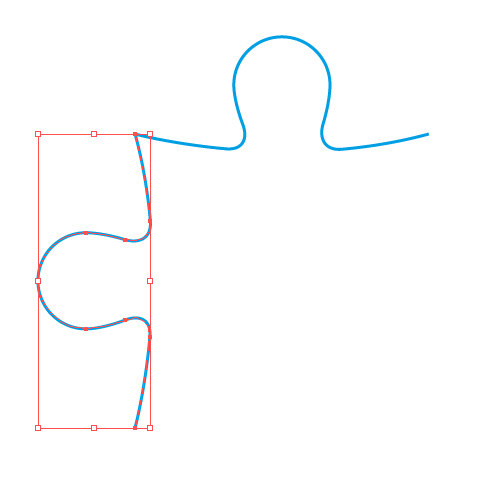
Using this technique, create two more curves, and place them to get the shape of a puzzle.

Step 10
Puzzles are different in shape, which represent different variations of from the newly created one. Duplicate all the elements of the shape several times and create multiple versions of puzzles.
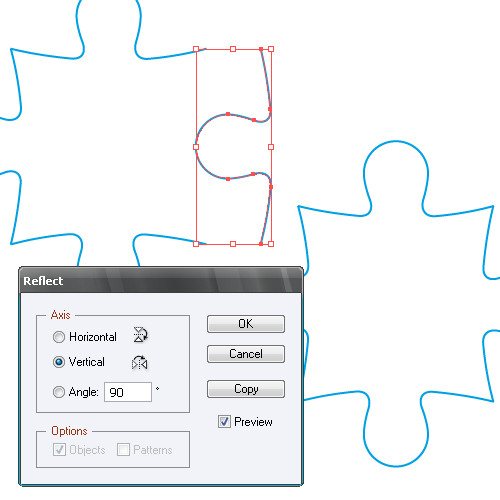

Step 11
Now the shape of our puzzle represents four curved lines, transform the puzzles in one closed object. Select puzzle, take the Shape Builder Tool and click inside the shape of the puzzle.
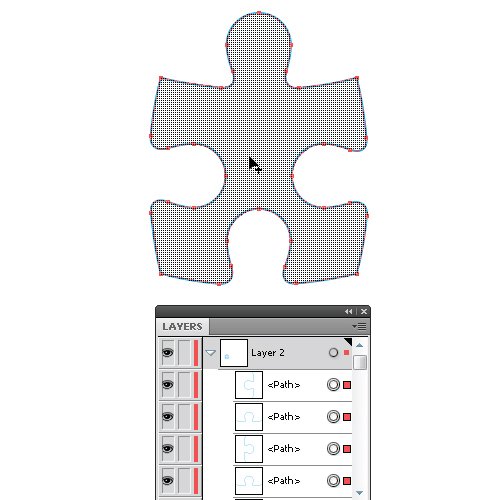
If the area inside the puzzle is not highlighted when the pointer is directed to it that means the tool should be adjusted in a different way. The reason is in the size of space between the curves, we can set the tolerance of this value so that Illustrator knows that it is a close path in front. To adjust the Shape Builder Tool double click on its icon to open the dialog box. Set the required value of the Gap Length.
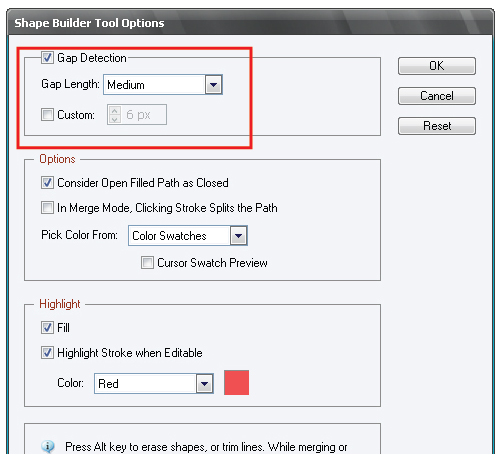
Now Illustrator will be able to see the path. So we have one closed path, there is only puzzle stroke from four curves, it should be turned off.
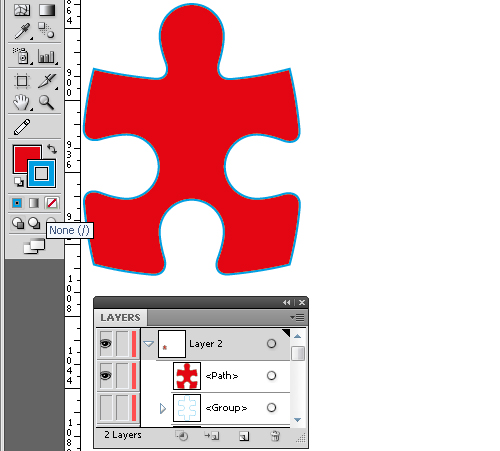
Step 12
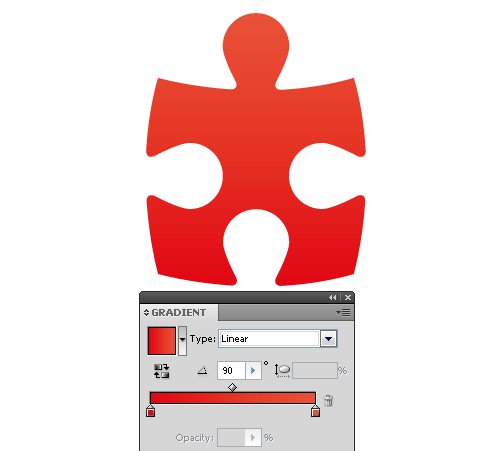
Fill the shape of the puzzle with a linear gradient in a shade of red color.
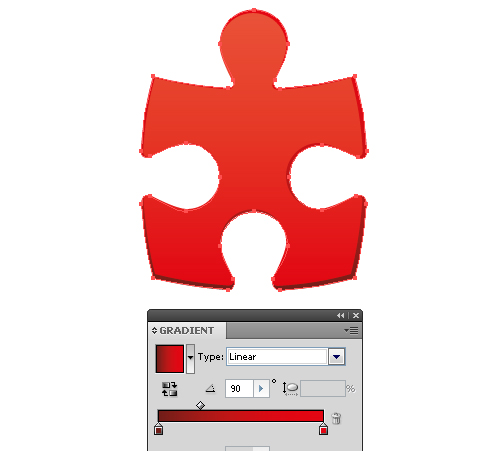
Copy and paste the puzzle back, move the copy a little bit to the right and down and fill it with a linear gradient with shades of dark red color.
Step 13
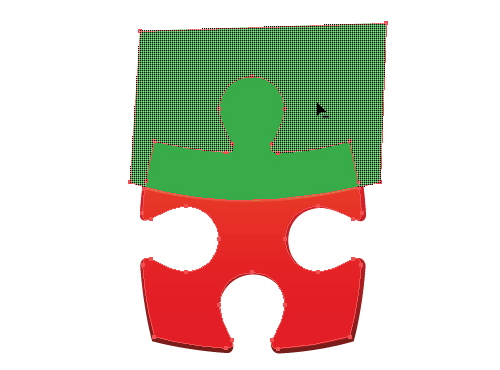
Create a highlight on the surface of the puzzle. Take the Pen Tool (P) and create the shape of highlight, select the shape of light and the front shape of the puzzle, take the Shape Builder Tool and holding down the Option key (Alt for Windows), remove the unnecessary part of the shape of highlight.
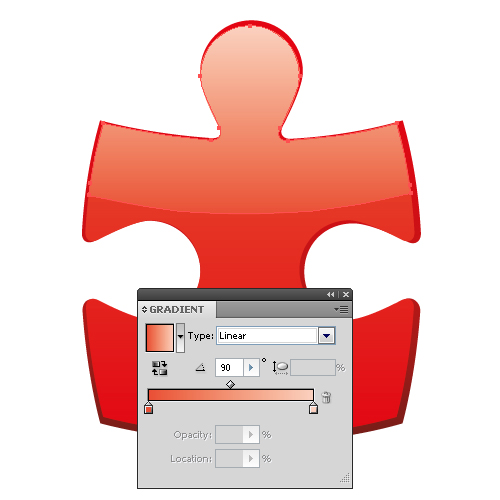
Fill the highlight shape with linear gradient of the shades of light red color.
Step 14
Puzzles are quite popular in design and are sometimes used for creating icons. I believe that possessing the knowledge of this tutorial, you will easily create such a composition.
Conclusion
Well, the new tool has proved its convenience. Stay open-minded to new knowledge, and as one famous historical figure said: "Learn, learn and learn". By my estimates I can save up to 50% of my time, using the Shape Builder Tool when creating complex objects.