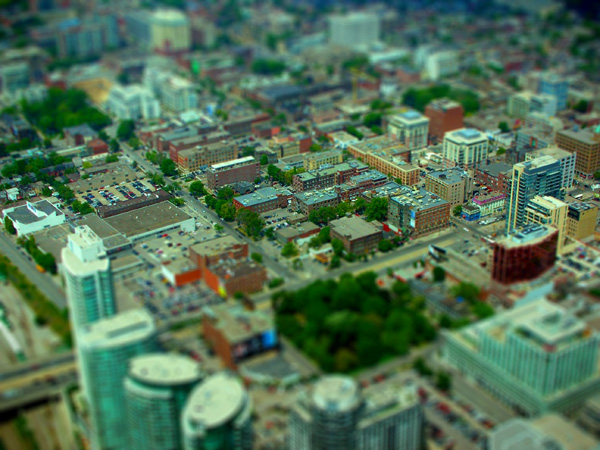
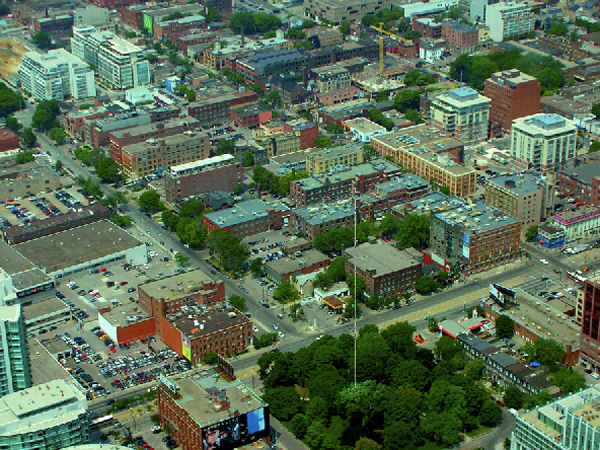
Miniature faking is a great way to spice up an otherwise dull shot. This effect is sometimes referred to as a “tilt-shift effect” because of how the finished product resembles a photograph taken with a tilt-shift lens. In this tutorial we will examine this interesting effect and outline how to achieve it without spending money on a new lens.
Final Image Preview
Step 1. How Does It Work?
Miniature faking tricks the eye into perceiving a life-size image as a miniature model. The miniature feeling of the photo is present because of the illusion of a shallow depth of field. This shallow depth of field is normally encountered in macro (close-up) photography, giving the photo’s subject the feeling of being much smaller than it actually is.
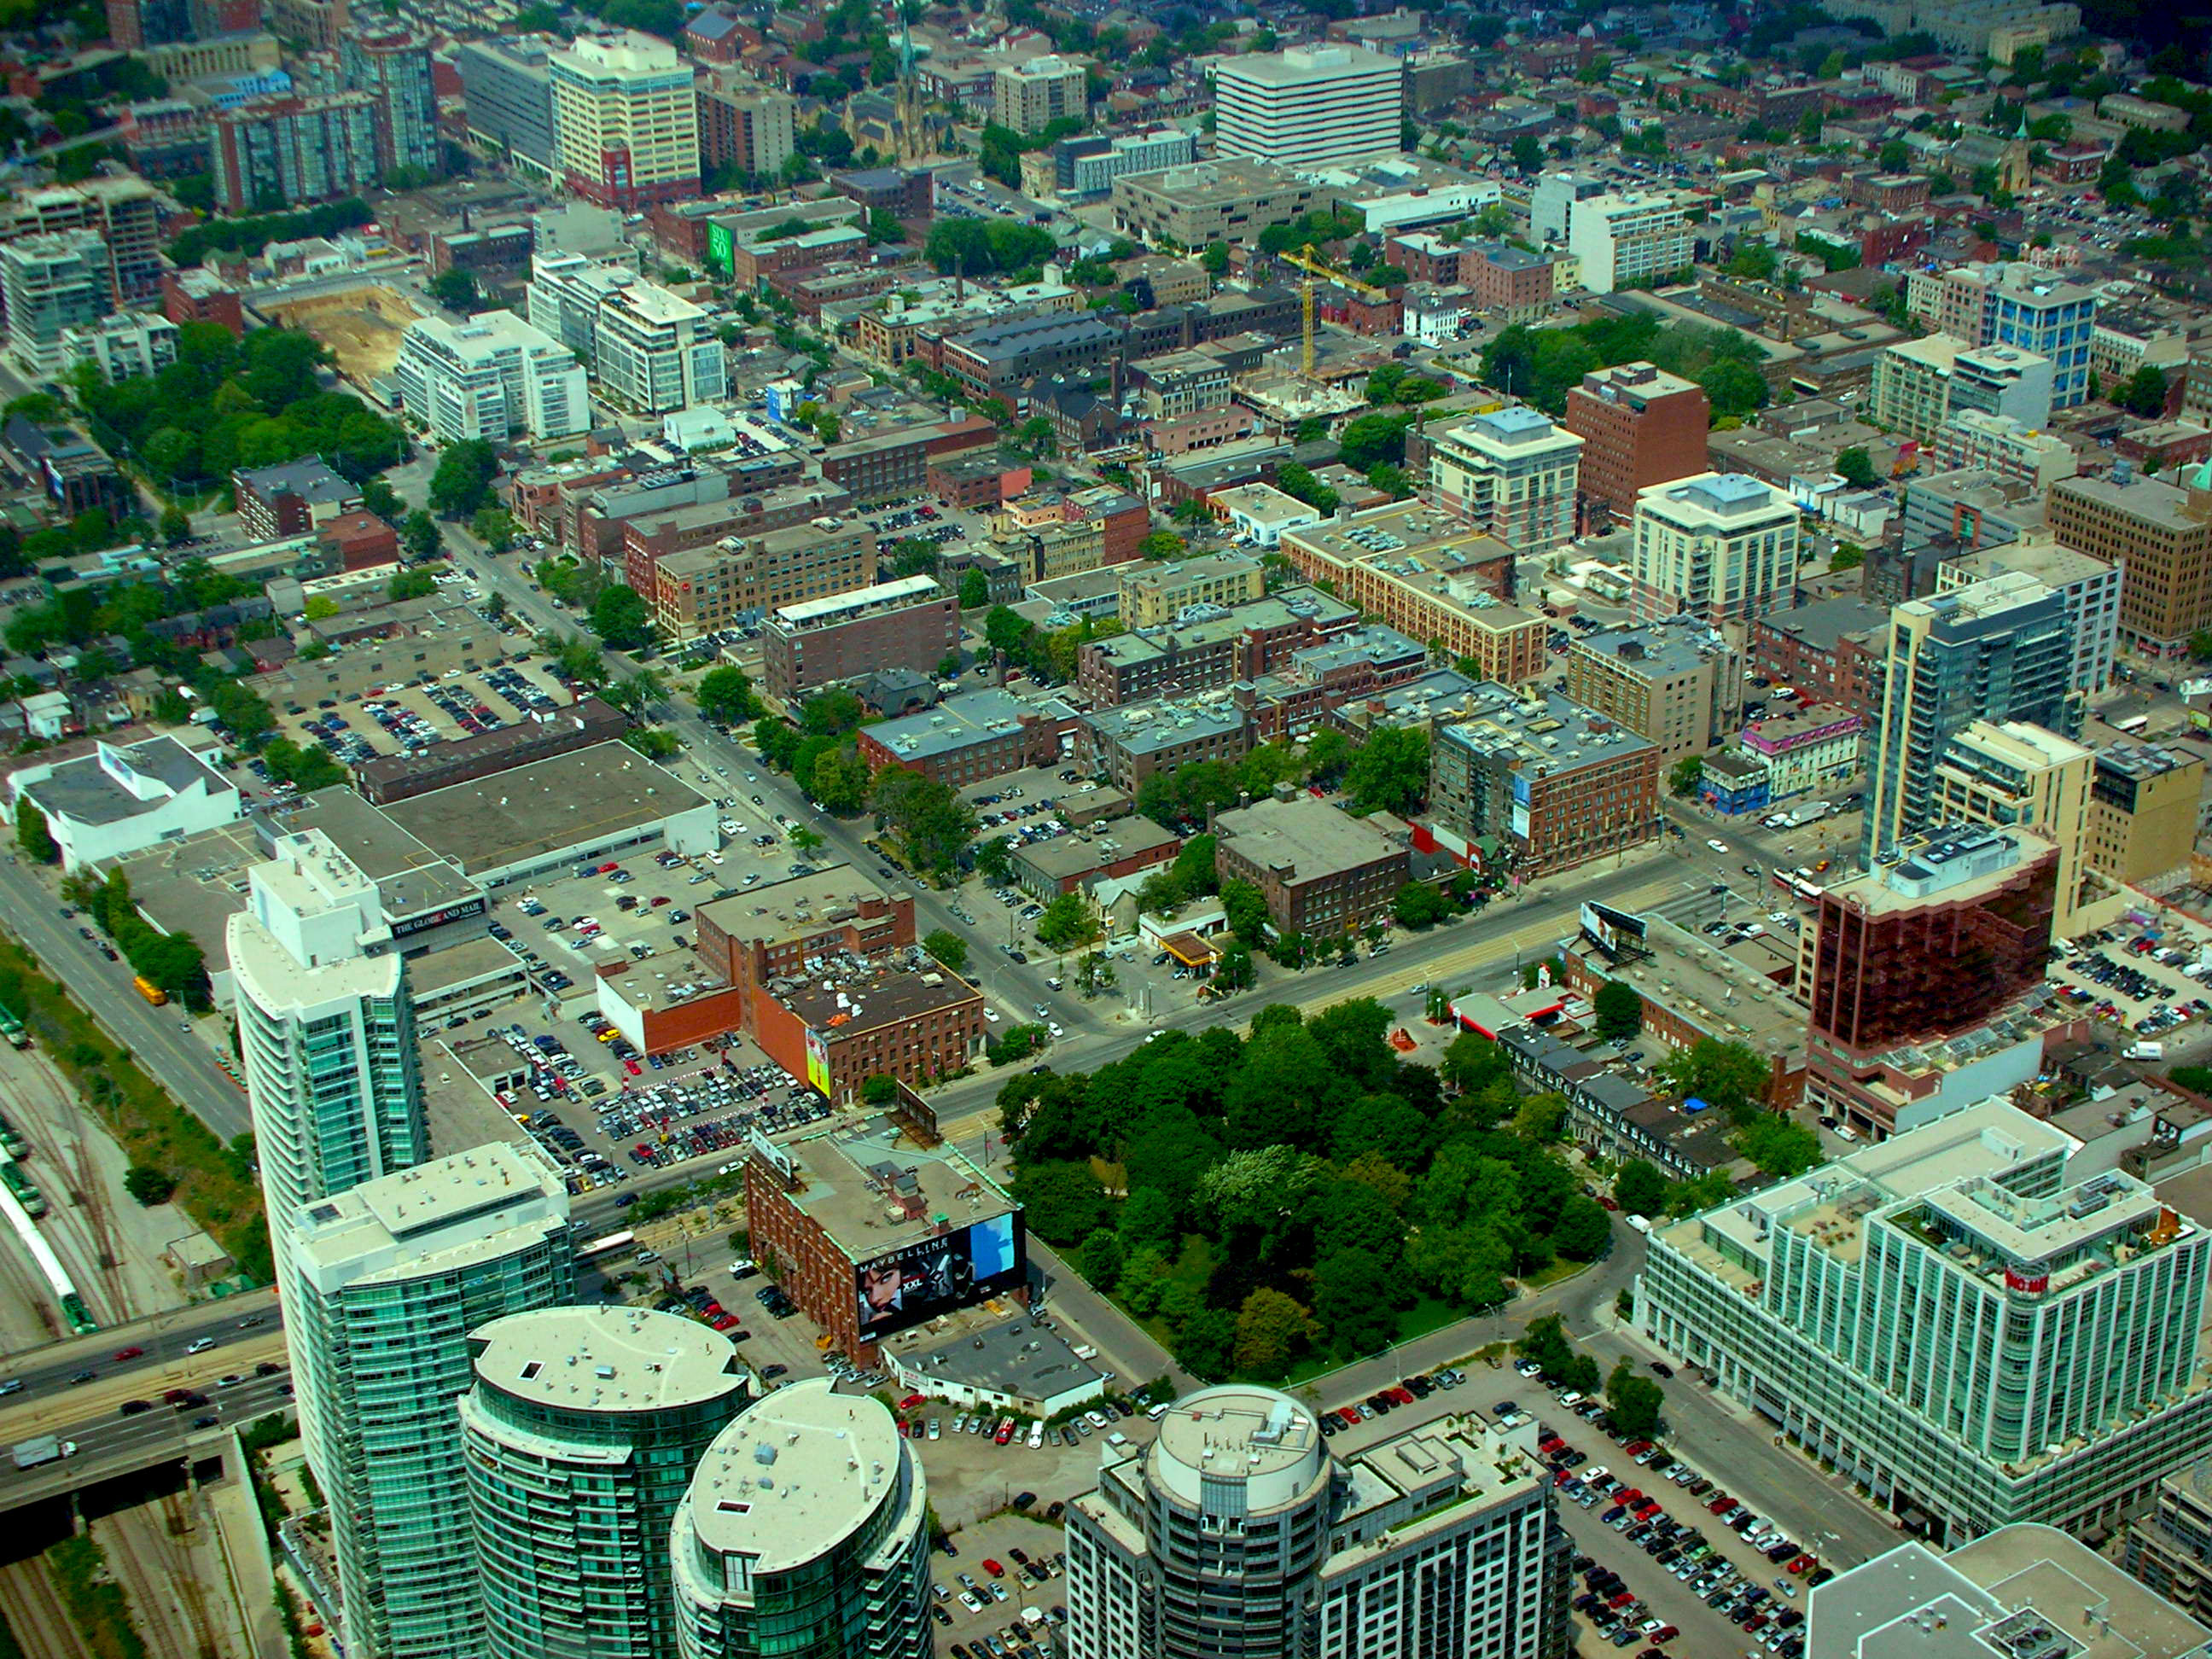

Step 2. Taking the Right Shot
The best shots for miniature faking are ones taken at a high vantage point. Usually, the larger the angle between you and the ground, the better. Lower angle shots are not useless, but the higher angled shots have the best results. This is because the higher angled shots emulate a shot looking down at a miniature model.
Take your time deciding the best location to get the effect you want. If available, venture into a city near you and go to an observation deck. This high vantage point makes for extremely interesting miniature photographs. In more rural locations, higher ground such as hills should do just fine in capturing a shot high enough to display the miniature effect well. Another key to taking a good shot for miniaturization is shooting in the daytime. Unless your night shot is extremely well lit, the effect of the shallow depth of field won’t be as obvious as it would in a day shot.
Step 3. Getting Started in Photoshop
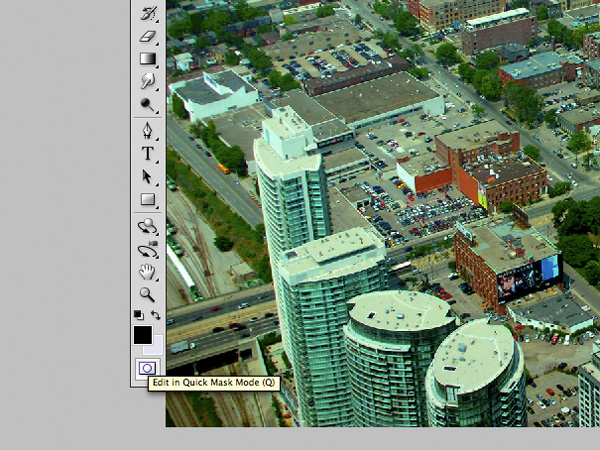
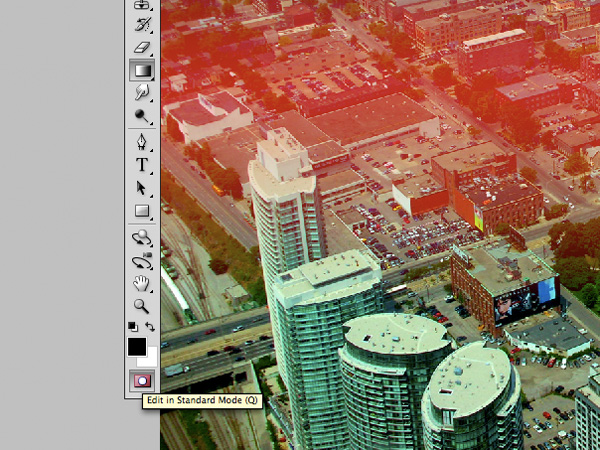
The first step in miniaturizing your photo is by switching into Quick Mask Mode in Photoshop by pressing “Q” or selecting the icon on your tool palette. Quick Mask Mode can also be found by going to Select -> Edit in Quick Mask Mode. The mask will enable us to lay the groundwork for which areas of the image will be in or out of focus.
Step 4. Choosing the Gradient Tool
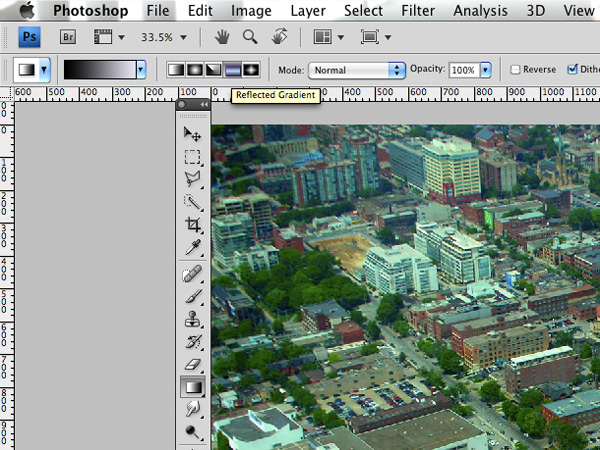
The next step is to choose the Gradient Tool by either pressing the icon on the tool palette, or by pressing “G” on your keyboard.
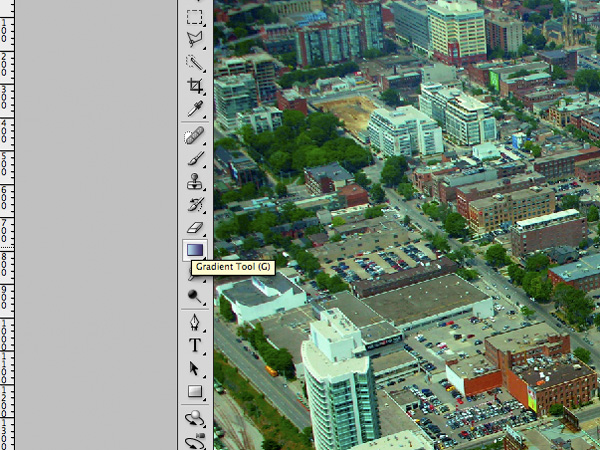
Make sure that the reflected gradient (icon fourth from the left) is selected and the gradient is moving from black to white.
Step 5. Drawing your Focus Line
This step will probably take the most time in the process and requires a lot of trial and error to get it perfect. When drawing the line, position the anchor point where you want the sharpest focus to be. The gradient will fill different depending on whether you drag the line up or down from the anchor point. Try either way to figure out which works best for you.
It is essential that you don’t make this long too long, as it will eventually decide the depth of field in your image. Don’t be concerned that your gradient turns out red even though we selected black to white as our gradient fill; it is totally normal!
Take heed not to make your gradient too thin, or else the blurred portion of the image will obscure the little part that is in focus. Also, making the gradient too thick will cause the depth of field to be too large, therefore taking away from the effect we’re trying to accomplish.
A perfect gradient should have a nice band of solid color where the sharpest focus will be, but also enough fade away that the lens blur will look believable when it is applied.
Step 6. Return to Standard Mode
When you are happy with your red masking area, return to Standard Editing Mode by pressing “Q” or by clicking the icon shown in Step 3. After returning to Standard Mode, you will see a rectangular marquee representing the gradient that you drew in the last step.
Step 7. Add the Lens Blur Effect
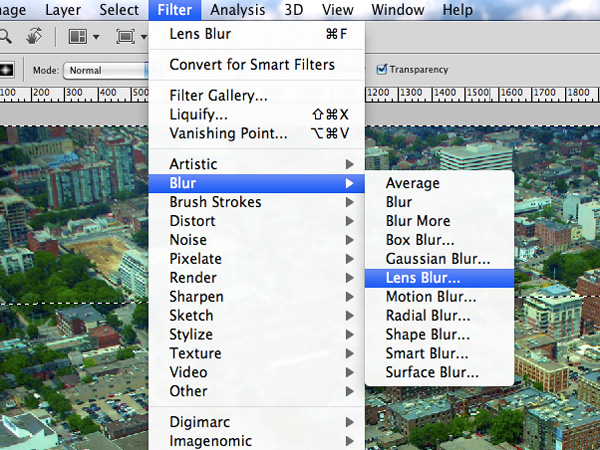
The next step is add the lens blur effect that will make the depth of field shallow. Go to Filter -> Blur -> Lens Blur.
Step 8. Adjusting the Lens Blur
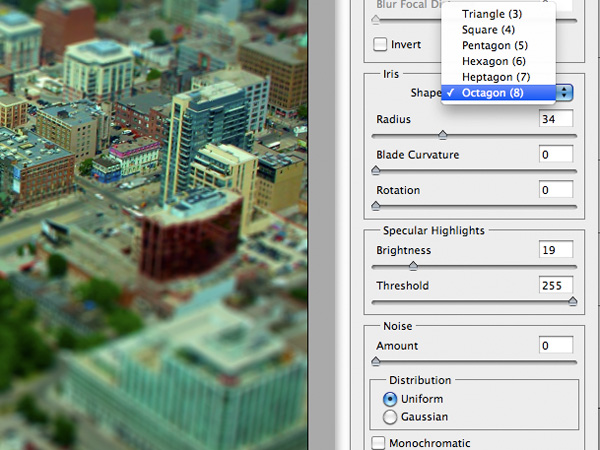
In the Lens Blur editing screen, you will see the preview of what your image will look like, as well as options on the right side. Many of the default settings are sufficient for the effect we are going for.
I like to change the Iris shape from Hexagon to Octagon, but the decision is yours. Fool around with the options to get the effect you desire. When you are satisfied, hit OK at the top right of the screen.
Step 9. Remove the Selection Marquee
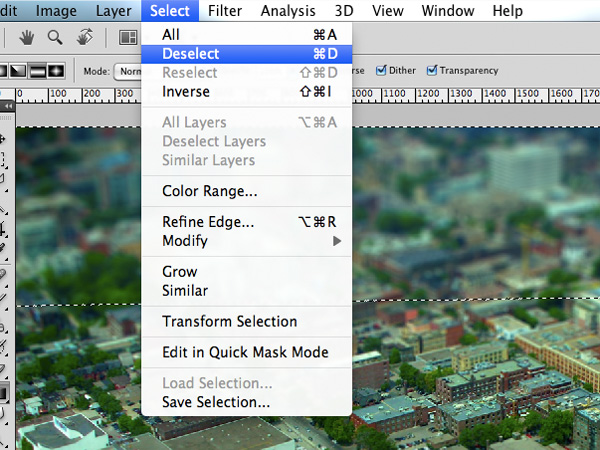
After applying the Lens Blur, press Control+D (Command+D on Mac) to deselect the marquee. Or go to Select -> Deselect.
Step 10. Boost Saturation
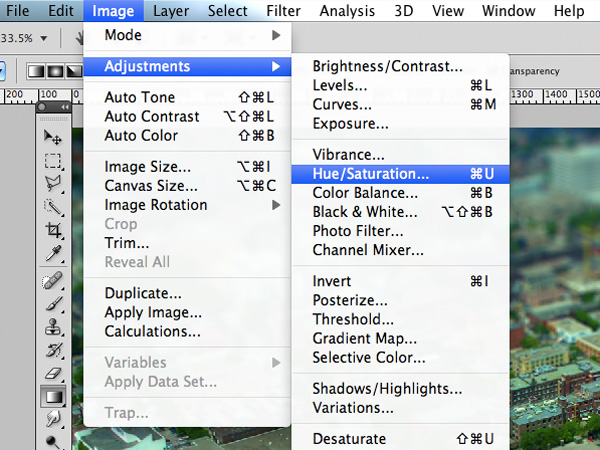
To get the feel of a small model, we will boost the saturation a bit to give the photo more of a “toy” feel. Open up the Saturation Adjustment Panel either by pressing Control+U (Command+U on Mac) or by going to Image -> Adjustments -> Hue & Saturation.
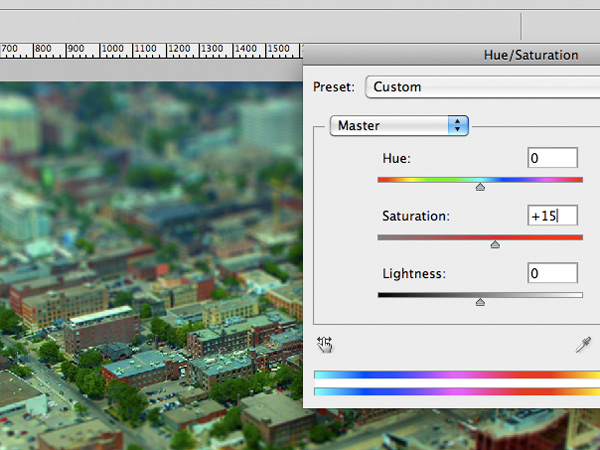
With the window open, move the saturation slider to the right to increase it. Don’t go overboard with the saturation, but just add enough to give the image the feel of a toy model. Finished!
Final Result

Conclusion
Miniature faking is a great technique that you can employ on many landscape photos. This process is most easily done the way you have just learned using Photoshop. This tutorial just touches the basics of miniature faking, but there is so much more that can be done using this technique! More advanced techniques can use selective focus and separate layers to create an even more realistic effect.
Miniature faking is a interesting topic to explore should you have the free time. I hope you learned a thing or two about depth of field and miniature faking and I can’t wait to see some of your results!
Further Reading and Inspiration
Miniature faking has really found it’s stride in photography, and many artists are using it to create captivating effects that catch the viewer’s attention. Here’s some more information on the techniques employed in this tutorial as well as some inspiration for your own miniature fakes.
Some more info on Wikipedia:
Inspiration:
- 100+ Terrific Tilt-Shift Photographs
- Keith Loutit’s Miniature Time-Lapses
- Tilt-Shift Miniature Fakes on Flickr
Have fun experimenting, and feel free to share a link to your finished image in the comments below!