This is for a e-book only publication of a short story about private detectives attempting to serve legal documents on a big shot who has been avoiding them. It takes place after midnight at the newsstand at Hollywood and Vine… (Budget: $30-250, Jobs: Illustration, Typography)
26 Videos Filled With Stop-Motion Goodness
-

Eco-bumpers: Aluminum
This is one of a series of bumpers used to raise awareness recycling and ecosustainable development. There are a couple more of these types of videos by the same user, (Fabio Liguori) over on Vimeo after the jump.
-

Yarn City by MusicID (Stop motion animation)
This is a very beautiful spot made with fluorescent yarn and some intricate sets for an app that can identify music just by hearing it through your phone’s microphone.
-

Clean It Up
Orbit is a gum brand that has a reputation for “cleaning up” a mouth. This stop motion piece shows a bunch of mouths cleaning up a rundown house.
-

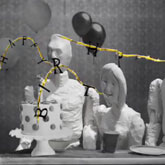
Morgan Freeman: The Power of Words
Very interesting piece with a forward by Morgan Freeman, it shows some paper mache looking people with words flying out of mouths and phone on a yellow line to illustrate “the power of words.”
-
-

Bad Apple!! – Stop Motion PV
6500 frames, printed out onto paper, and switched out every frame for the duration of the entire music video, completely animated and possibly partially green screened. Very cool concept, but insanely tedious to create, I am sure.
-

Zeus “Marching Through Your Head”
Another very elaborate looking music video with some amazing sets, great visual effects, and the camera work is fantastic.
-

Sperrholzpiraten/Plywoodpirates
This 17 minute final project by Stefan Schomerus at the Filmakademie Baden Wurttemberg in Germany is absolutely brilliant. Amazing looking claymation characters, expressions, environments, and basically everything else in this video really take show the hard work that went into this piece.
-

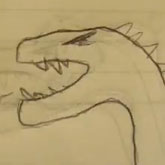
A Brief History of Pretty Much Everything
Doodles FTW! I love flipbook animation type of videos. They make me feel like I could possibly make something this awesome. There is some great sound effects and characters in this piece, and it is really a great looking piece of art… educational too… kinda.
-
-

T-SHIRT WAR!!
I watch a lot of Youtube, and I saw this video from Rhett and Link a while ago, and as you can see it gave rise to a lot of ideas in advertising in recent months including the video below.
-

T-SHIRT WAR 2!!
As previously mentioned, these guys got lucky and McDonalds picked up this concept from Rhett and Link for their advertising campaign. Directed by another filmmaker on this list Joe Penna (MysteryGuitarMan), this is a great execution of a really ingenious concept.
-

Couchzone – Stop-Motion Commercial
One of my favorite HDSLR filmmakers that I follow on a daily basis, Nino Leitner, has this cool stop motion piece with a ton of furniture going a bit nuts in a room and eating a girl.
-

Lego – The Force Unleashed
Usually when we feature Star Wars videos, its usually in a visual effects inspirational roundup, but this one, created with Lego characters, is a great example of creating a really fluid movie with when using very tiny pieces, and very close quarters.
-

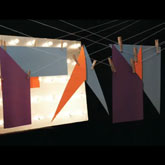
F.an / TWO MINUTES by Maxime Bruneel
This is a really interesting concept using objects hanging by clotheslines to create images, shapes, and words by positioning them at different distances from the camera.
-

CUT IT OUT
Joe Penna aka MysteryGuitarMan, previously mentioned for directing the McDonalds commercial earlier, created this great video, where he cuts out every frame of video, printed out on paper and lines them on a piece of string around his apartment and makes an amazing music video out of it.
-
-

AJIQ
Another great print out of every frame in the piece, and after laying it out into a notebook you get this great stop motion piece by Soulgrafix.
-

Light Warfare
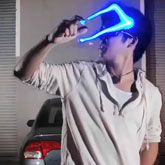
FreddieW is another Youtuber that continually produces amazing visual effects videos. With this video he uses long exposure and LED lights to create an action scene with light guns, ammo, blood, and explosions.
-

ARDZDFundSIE_WM2010
Yet another T Shirt madness video, used pretty cleverly in many different scenarios and scenes to create a rally awesome looking spot for German public TV.
-

My Paper Mind
This video uses a technique devised by Javan Ivey called Stratastencil based on Stratacut to remove material to reveal another layer. He spaces tons of paper out in Z Space and frame by frame, moves back, and adds more paper to create the animation technique.
-

Light Love
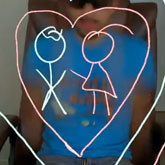
Another from Joe Penna, similar to the Light Warfare video above, this one uses the light to express some love rather than war and gore.
-

Awards Wall
This is a cool little stop motion/timelapse video of Digital Kitchen showing off the various awards that they have won over the years. Hint: its a lot.
-

Badenova Stimmen Trailer
This is another long exposure light writing video created for a a music festival in Germany. Shot on the 5D MKII and 7D, this spot by qu-int.com is sure to amaze you.
-
-

Rex The Dog ‘Bubblicious’
Really interesting concept here with a character being created out of paper, and multiple versions being created so that he can move his mouth and sing with the music. Very cool spot with everything created in someway with paper.
-

OFFF Paris 2010 Sponsors titles
OFFF always has amazing titles to show off their the different companies and organizations that will be showing work. Not all of this is stop motion but there are some pieces that you will see that are fantastic and fit into that genre.
-

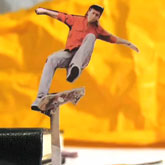
Skateboardanimation
Kind of the same concept as MysteryGuitarMan’s above, this one takes practical effects and household object of normal sized scale and makes these paper cutouts of skaters shred it up.
-

THE MACHINE
This is a great tale of a man-made machine that becomes self aware, and ends up with a thirst for conquering the world. Sounds like Terminator or The Matrix, but in medieval times. This one has a really cool looking puppet show type of feel to it.
-

AT-AT Afternoon
Have you ever noticed that the Star Wars AT-AT death machine is kind of… well… dog shaped? One of my favorite stop motion creators, Patrick Boivin brought that huge thing down to a non-deadly scale, and showed us what it would be like to have one as a pet. (on a side note, there are TONS more Patrick Boivin vids on his Youtube… perhaps we will feature more in the next stop motion roundup?)
Whenever I see a stop-motion video, it never ceases to blow my mind when I think of the time, effort and skill that went into making it. They are probably the most tedious types of videos created, and sometimes they just don’t get the recognition they deserve. I got you 26 videos to check out today, and make sure your explore a bit into some of these artists other videos on their channels. You will find a lot more that what is just in this list.
How to Create a Simple Cardboard Box Icon
In this tutorial you will learn how to create a simple cardboard icon using 3D Extrude & Bevel and basic gradient fills. It’s a great starting point for budding icon designers or people who have previously used Photoshop for their creations and will teach you a few useful techniques to get you started with Adobe Illustrator.
Continue reading “How to Create a Simple Cardboard Box Icon”
Everything You Were Scared to Ask About Autotune
Autotune is everywhere. It is found on countless albums, and with the help of iPhone apps, the rest of the world are getting in on the act as well. What is Autotune, and why is it so popular?
Autotune is huge on Audiotuts+. This may surprise you, but our most popular tutorial ever is How to Autotune Your Vocals Like T-Pain, Cher or Daft Punk by Nic Bertino, which was published way back in July 2008. Even today it brings in three times as much traffic than any other tutorial. Also popular is Ryan Leach’s tutorial How to Use Pitch Correction for Vocal Effects which explains how he created one of the tracks for the soon-to-be-released short film I.D.
But Autotune is also a controversial subject, as you’ll discover by reading the comments to those tutorials. Many despise it as much as others love it. Some see it as cheating, feeling that if a person can’t sing in tune, they shouldn’t be making albums.
In this article we’ll have a look at what Autotune is, whether it is only used by pitchy or untalented singers, and how it is being used by the average Youtube poster. And I’d love to hear your thoughts about it in the comments.
What is Autotune?
While I’m sure you understand basically what Autotune is, and what it sounds like, we’ll start with a video that demonstrates just how widely it is being used.
If you’d like to get a bettle handle on exactly what Autotune is, no one explains it as creatively as “Weird Al” and the Know Your Meme team.
So, how do you create a track with Autotune? Herbert Midgley explains how to use it with software just about anyone can get their hands on – GarageBand.
And finally, if you were to ask T-Pain himself about Autotune, whether he thought it would become successful, about those who despise it, and why it has become popular, what would he say? Here’s what he said when DJ Skee asked.
Is It Only Used By the Untalented?
As I said, people despise Autotune. They feel that if you can’t sing in tune you shouldn’t be making albums. No one said it clearer than Alex in a comment to our first Autotune tut:
The person who invented auto tune must hate music. I am a blues rock and jazz musician and i love the classics. I have respect for the very few bands left that play there own instruments and sing and can write a song. If you can’t sing you shouldn’t try there many people out there that are born with a talent to sing, and auto tune is like saying that talent is useless.
So, is it true? Let’s have a look at four examples of Autotune users:
1. Eduard Khil, Mr. Trololo
While I wouldn’t call Mr. Trololo “The Russian T-Pain”, he did find new fame last year by the release of the following heavily autotuned track which went viral on Youtube.
Another version of the track was let loose on Youtube, but this time without Autotune. See if you can listen to it right through without flinching.
That’s terrible. Really terrible. But my grandmother told me not to believe everything I see on Youtube. Khil had a successful singing career for most of his life. Maybe he was having an off day, or clowning around, or perhaps the video is a fake. What are your thoughts?
2. The Autotune King 77
So if Mr. Trololo leaves us in some doubt that Autotune is used to mask a singer’s lack of talent, The Autotune King 77 puts us out of our misery. He freely confesses:
Alright, I can’t sing for my life, which is why I use Autotune, and this video completly shows how badly I sing without it. But hello Autotune, help me!
I’ll let him explain and demonstrate himself.
3. Miley Cyrus
In the album version of Miley’s song Party in the USA you can clearly hear the Autotune at work. Someone thought it would be fun to find out what she sounds like without Autotune, and posted this live version of the song on Youtube.
As hilarious as that is, it is clearly an overdubbed fake. Miley, like any singer worth their salt, has genuine talent. (Whether she got it from her dad is another issue.) She is sometimes known to give impromtu concerts at restaurants and other public places, and some of these have been captured on mobile phones and posted to Youtube. Here’s Miley totally unplugged:
Well, that sounds nothing like the fake video earlier. If you enjoyed it, here’s another one.
4. T-Pain
So that begs the question of whether T-Pain started using Autotune because he can’t sing. This video clears that question up once and for all.
So, is Autotune used to make untalented people famous? I doubt it. The only clearly untalented singer in the list is someone you’ve never heard of.
Should Autotune be used to fix the odd bum note? Absolutely. Should it be used as an effect to make a song sound more modern? Well, I’ll leave that to you to answer.
Everyone’s Using It – The Autotune Parody
With iPhone apps and software plugins, Autotune is no longer restricted to professional musicians. Everyone’s getting in on the act. Autotune has become a Youtube phenonemon. It is so widely used it has become a parody of itself.
The iPhone app “I Am T-Pain” put the effect in the hands of millions. Here is T-Pain playing with the app with his famous mates.
One of the most fun applications of Autotune on Youtube is to set politicians to music. I’ve always thought of politics as an opera! The best in the business are “Auto-Tune the News”, and here is an example of their best work.
But if you’re totally sick of Autotune (and if you’ve made it this far through the article, I’m sure you are), this one’s for you.
Finally, we have to finish this article with Ellen, who will try anything once. Or twice. Including Autotune.
Well, that brings us to the end of our article. What do you think about Autotune? Love it or hate it? Let us know in the comments. And keep your eyes open for more Autotune tutorials in the coming months.
Quick Tip: Smart Mixing in Ableton Live
During a traditional DJ mixing session we need to be able to keep an even volume level during a transition and also keep a good spectral balance by utilizing EQ. I am going to show you a quick method of setting up a set in Ableton Live to achieve just that using sidechain compression.
We will be also utilizing the EQ3 device to split the signal between low and mid-high frequencies. As you will see, the technique described here is quite straightforward and can also be applied to other sequencing software. Source files included were made in Ableton Live 8.0.9.
Setting Up
Create two audio tracks that will hold your tunes. Drag an audio effect rack on the first track, rename the rack to Low. Drag an EQ3 device on the first chain. Leave the default values but deactivate the Mid and High band. Set FreqLow crossover to 200Hz. Drag a Compressor device after the EQ3, activate sidechain select the second audio track from the drop-down list as an external source, then Post Mixer from the External tapping Point. Set values as follows:
- Gain: 8.00dB
- Dry/Wet: 100%
- Envelope: RMS
- Attack: 0.01ms
- Release: 20.0ms
- Threshold: -28.0dB
- Ratio: 2.8
- Knee: 8.0dB
- Model: FF1
- Lookahead: 1ms
- Output: 0.00dB
You can try out different values later on to see if they work better with your set.

Next, create a second rack, rename it Mid/High and drag a copy of the previously created EQ3 device. Deactivate the Low band and activate the other two.

Drag the copy of the resulting audio effect rack to the other track. The only thing you need to change is the compressor’s sidechain external source. It needs to come from Track 1 this time. Also External Tapping Point must be set on Post Mixer, as well.
MIDI Mapping
Map a keyboard or a midi key to the Audio Effect Device Activator for both tracks. You can also map a midi slider to the main Crossfader. Assign the Crossfader Switch to A for the first track and B for the second.

In Action
Load up two beats on both tracks hit play and drag the main Crossfader to the left so that only the first one is heard. For this method to work the Audio Effects rack of the first track needs to be activated with the second track’s Audio Effect Rack Device Activator deactivated.

Now, as the tracks play, drag the Crossover to the right to mix in the second track and notice how the low-end of the first track gets compressed to make space for the low-end frequency range of the second beat. If you don’t need to use the Live Crossover, you can just bring up the volume level of the second track. In this case, though, make sure the Crossover Assign switch of the second track is properly set.
Once the second track has been fully introduced and the first track is not heard anymore, hit the key you had assigned to the previous step to switch on the Audio Effect Rack of Track 2, which will automatically switch off the Audio Effect Rack for Track 2. Then mix in another track from Track 1 and notice again the sidechained effect.
By repeating the above process Live makes the necessary volume adjustments allowing you to concentrate into more creative decisions. I inserted a Spectrum device on the first track to illustrate the spectral change on the signal once the second track is introduced.
Spectral Graph of first track before introduction of the second track.
Spectral Graph of first track after second track has been mixed.
Further adjustments
We could also use a Multiband Dynamics device instead of an EQ3 one to achieve a similar effect. If we wanted to mix in a vocal or any other medium or high frequency sound into the mix we could split the signal to three frequency ranges (using chains) adding three separate sidechain compressors to each range then MIDI map each compressors’ Device Activator button so we could select which spectral range we need to compress. I have included such a device on the 3rd audio channel inside the Project File.
Finally, I am sure that once you understand the concept, you will be able to apply it to your setup inc case you are working with any other sequencing software.
So, there you go, thanks for your time, I hope you find the technique useful!
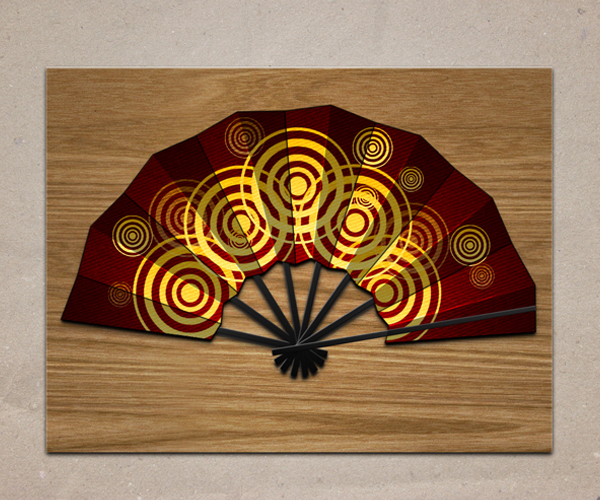
Create an Illustrated, Japanese Style Hand Fan in Photoshop
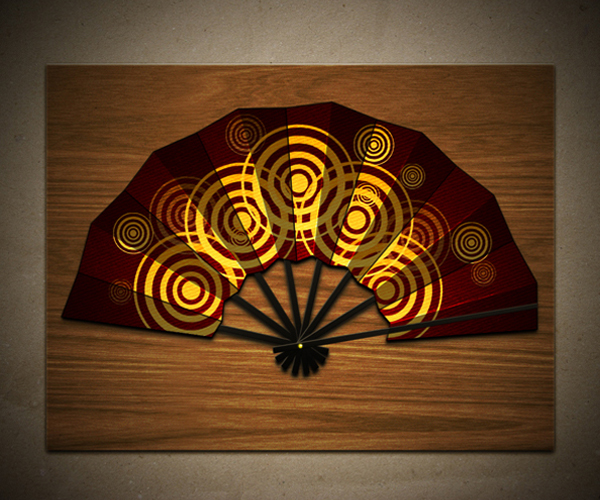
Before air conditioning and the electric box fan the only means that most people had to cool themselves on a hot day was a hand-held fan. Today, we will demonstrate how to illustrate a realistic, Japanese-style folding fan in Photoshop. Let’s get started!
Resources Used
The following resources were used during the production of this tutorial. To download them, just sign up at CG Textures. They are free!
Step 1
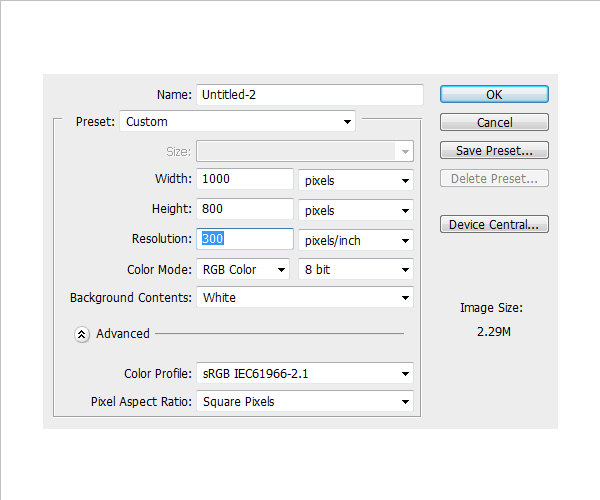
Let’s start this project by creating a new file 1000 x 800 px with a resolution of 300 ppi.

Step 2
Using the Paint Bucket tool, fill the entire layer with #b8b8b8.

Step 3
Next, open the file Paper.jpg and place it over the "Background" layer. Rename this layer "Wallpaper" then set its blending mode to Overlay.
Note: Paper.jpg is a large image, so press Cmd (Ctrl) + T to activate the resizing handles and adjust its size.

Step 4
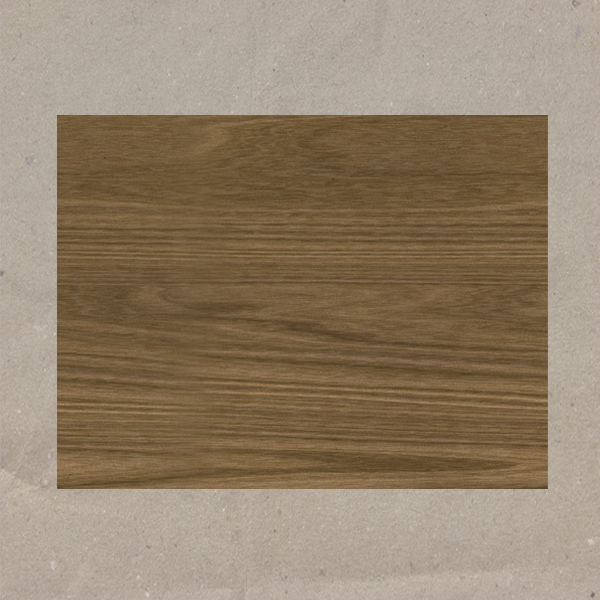
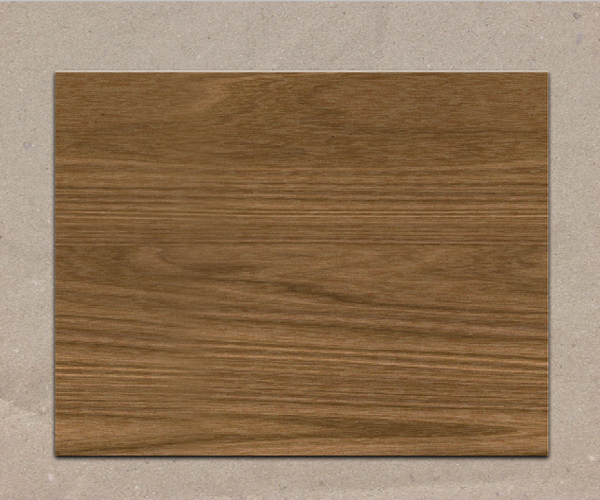
Next, open Wood.jpg and place it over the "Wallpaper" layer. Rename this layer "Wood." Press Cmd (Ctrl) + T to resize the image. Resize it to make it smaller and place it in the middle of the canvas as shown.
Note: While resizing, hold down the Shift key to constrain the image both vertically and horizontally.

Step 5
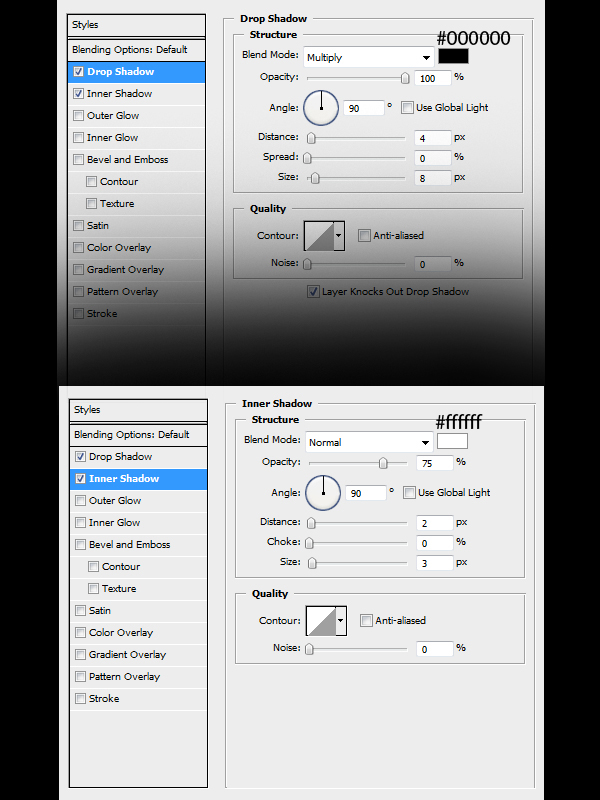
Next, we’ll add a 3D effect for the "Wood" layer to make it as if it is a wood plank. To do this, double-click the "Wood" layer to open its Layer Style window then apply the settings below.


Step 6
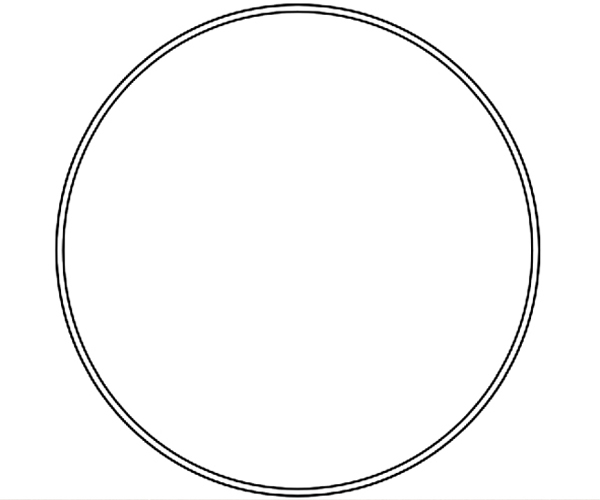
Now we’ll make guidelines for the fan. To do this, add a new layer and name it "Outer Circles." Using the Elliptical Marquee tool (M) make two circles as shown below.

Step 7
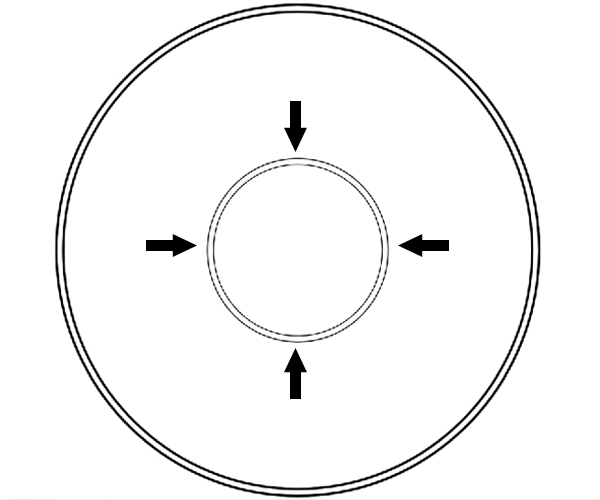
Next, duplicate the "Outer Circles" layer by pressing Cmd (Ctrl) + J. Press Cmd (Ctrl) + T to resize the image as shown.
Note: While resizing, hold down the Shift + Alt key to evenly resize the image both vertically and horizontally on both sides.

Step 8
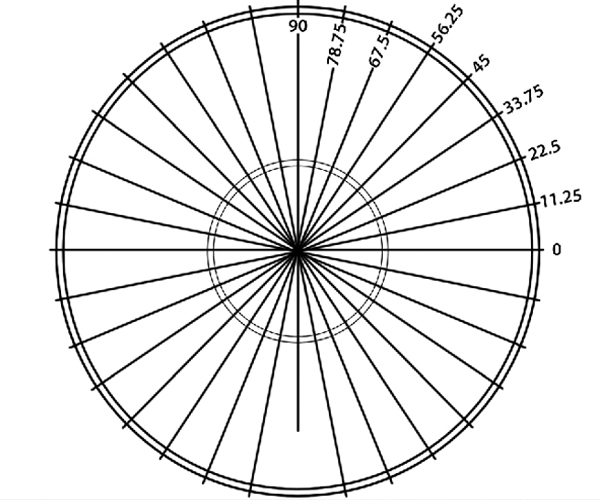
Using the Pen tool (P) make a set of lines (make sure to put every line on a new layer) following the indicated degrees, making a pizza-like diagram like as shown below.

Step 9
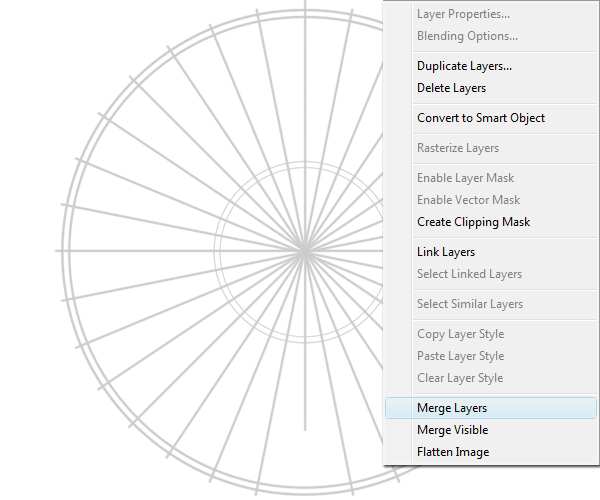
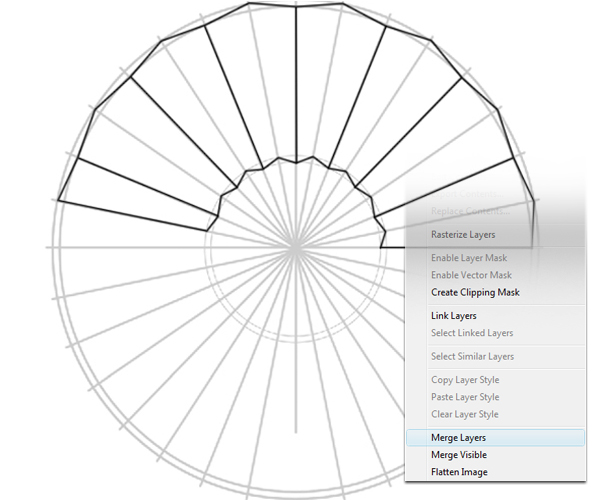
Merge the "Outer Circles," "Outer Circles copy" (duplicated layer of the "Outer Circles"), and the layers of all the lines by Cmd (Ctrl) + clicking the layers then right-clicking on it and selecting Merge Layers from the drop-down menu. Rename this layer as "Guidelines" and decrease its Opacity level to 50%.

Step 10
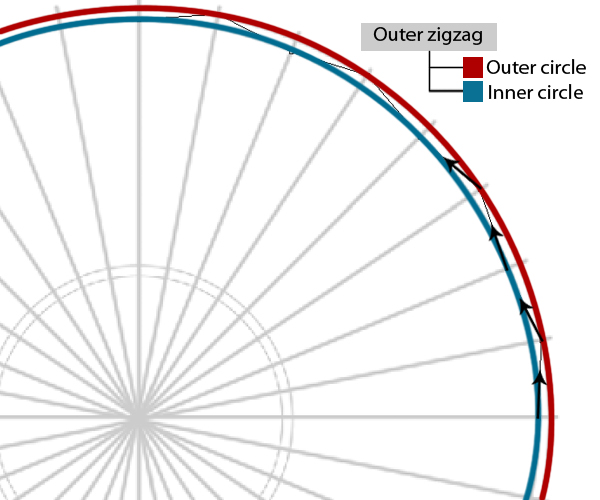
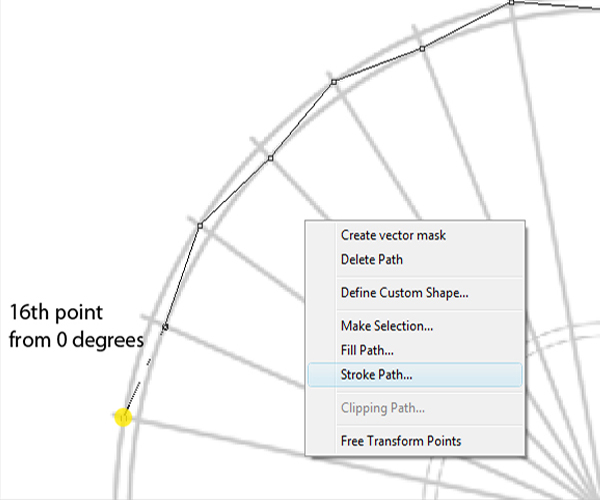
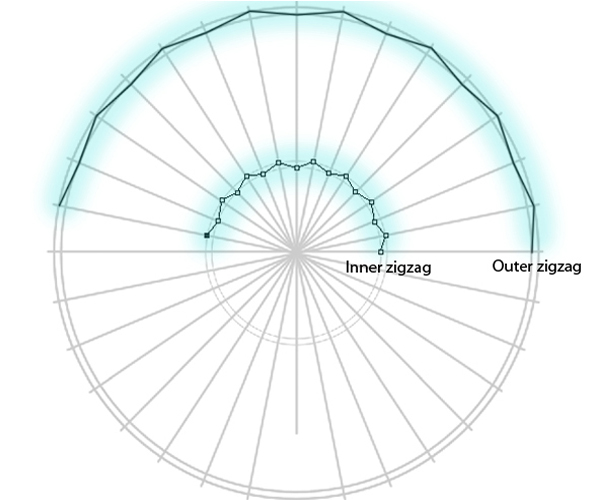
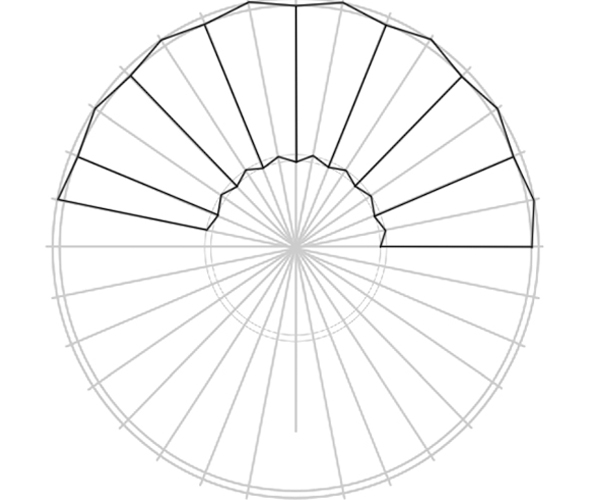
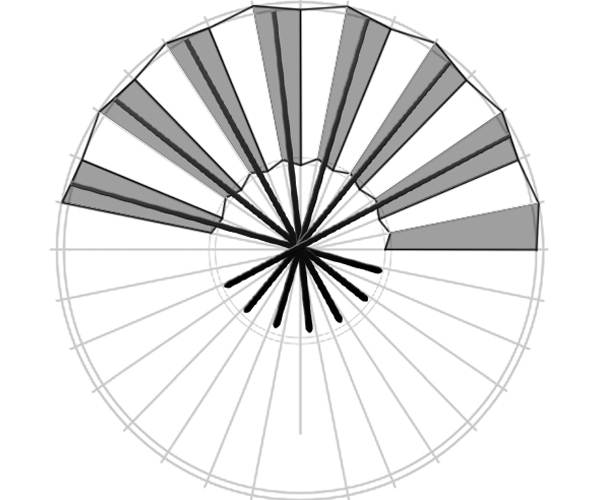
Next add a new layer and name it "Outer zigzag." Using the Pen tool (P), draw a path alternating from the inner circle going to the outer circle and back again to the inner circle until you’ve reached the 16th point from the 0 degree angle like as shown.

Step 11
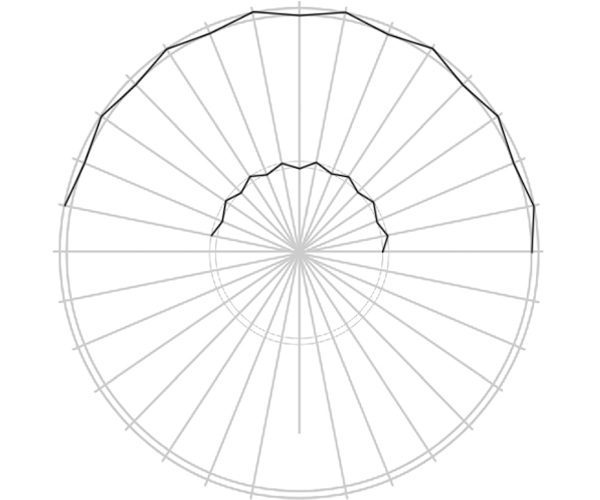
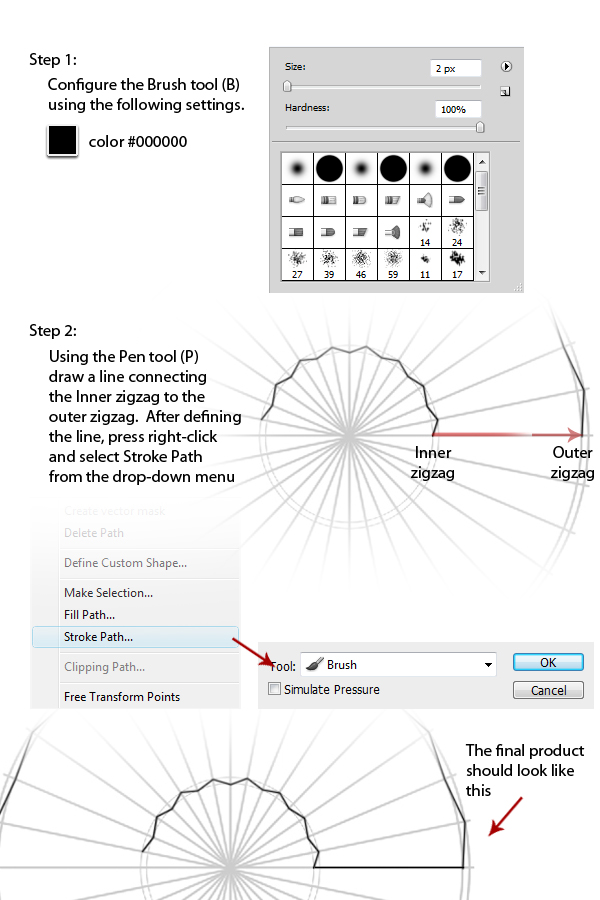
When you’ve reached the 16th point, right-click and select Stroke Path from the drop-down menu. Prior to this, make sure to configure the Brush tool (B) to a Master Diameter of 2px, Hardness of 100%, Color #000000 and Opacity level of 100%.

Step 12
Next, add a new layer and name it as "Inner zigzag." Do exactly what we did in the "Outer zigzag" making sure to start from 0 degrees up to the 16th point.


Step 13
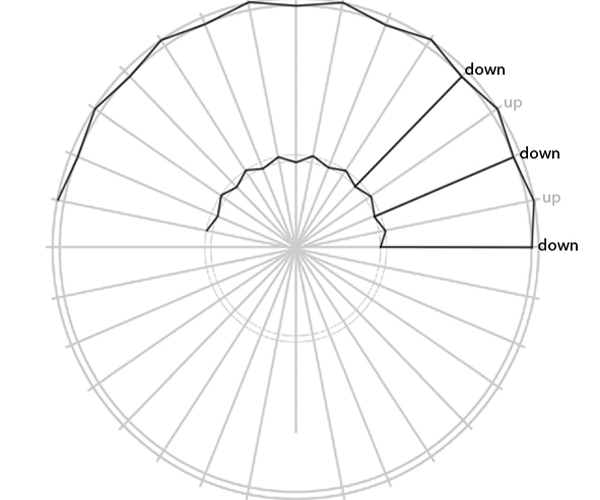
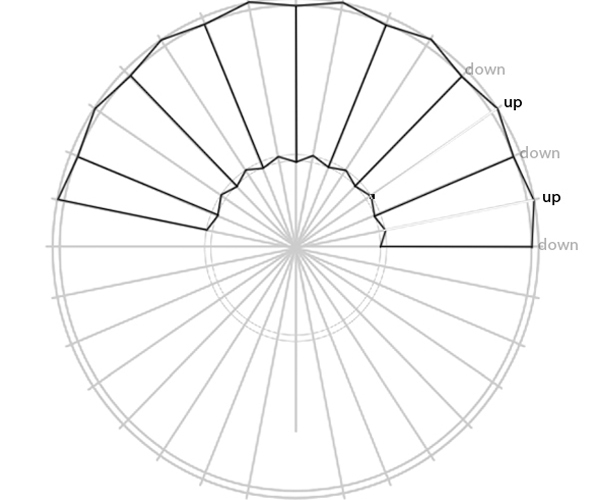
Now we will make the folding effect of the fan. To do this, we’ll start by adding a new layer, after that follow the instructions below.

Note: Make sure to create each line in a different layer. Connect only the "down" portions of the zigzags.

After connecting all the "down" portions of the zigzag, including the 16th point from the 0 degrees, press Cmd (Ctrl) then left-click the layers comprising all the lines and select Merge Layers from the drop-down menu. After that rename the merged layer as "Black lines."


Step 14
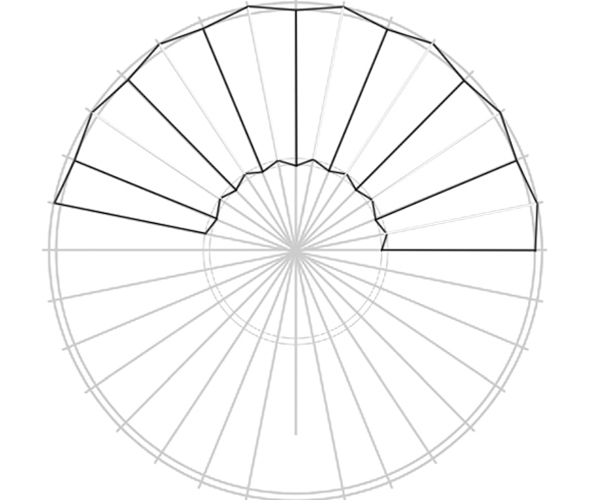
Use the same technique as outlined in Step 13 but now connecting only the "up" portions of the zigzag with the Pen tool (P), having the same configuration for the Brush tool, but now using the color #ffffff. After that, merge all the layers and name it "White lines." Change its Blending mode to Overlay.


Step 15
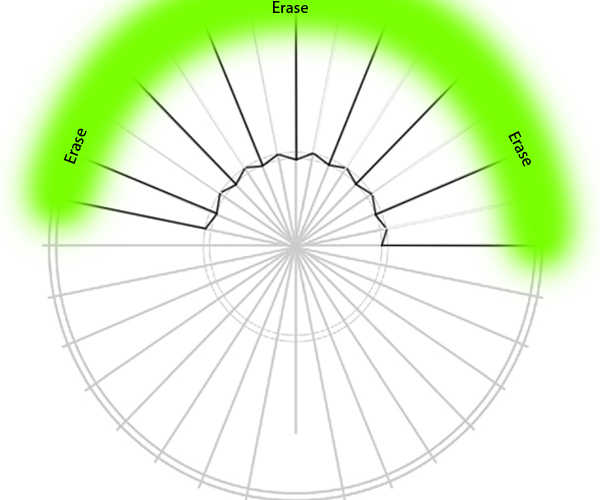
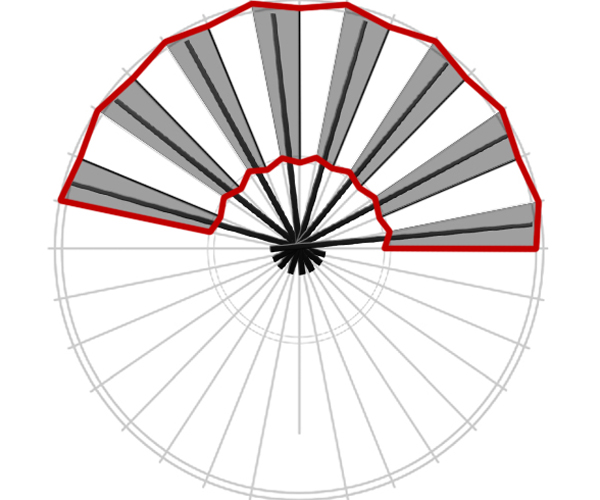
On the "White lines" layer, use the Eraser tool (E), configured to a Size of 100px and a Hardness of 0%, to erase the indicated areas as shown below.

Step 16
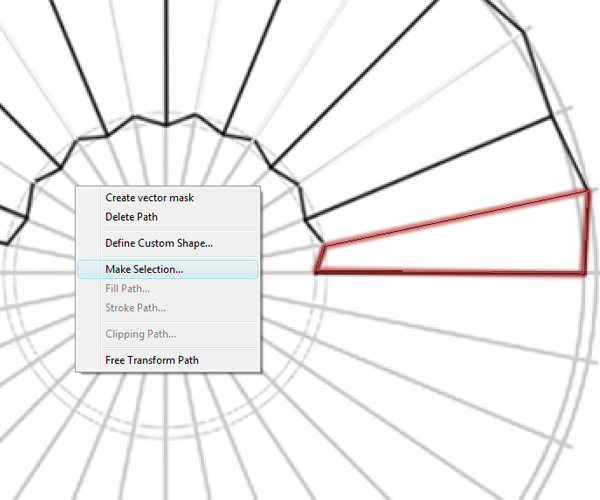
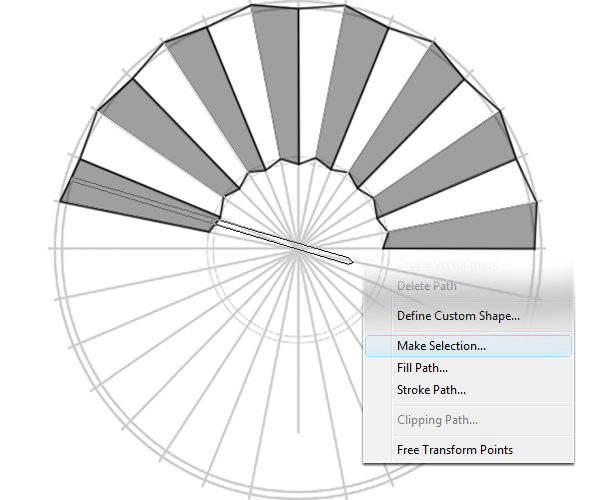
Next, we will add some shading. Add a new layer and name it "Shades." Using the Pen tool (P), make a shape as shown below. After making the shape, right-click and choose Make Selection from the drop-down menu.

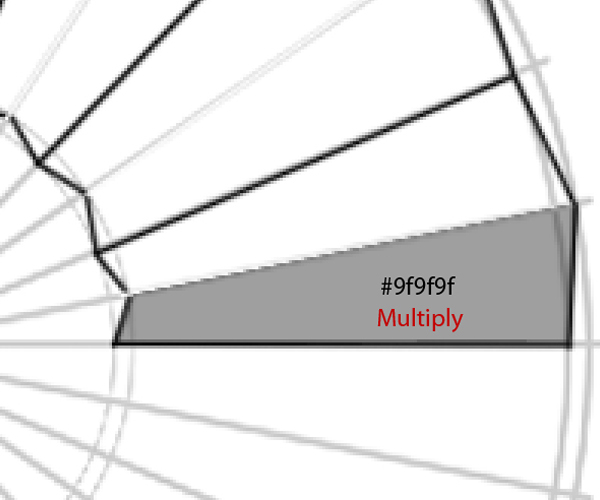
Fill the entire selection with #9f9f9f and set its Blending mode to Multiply.

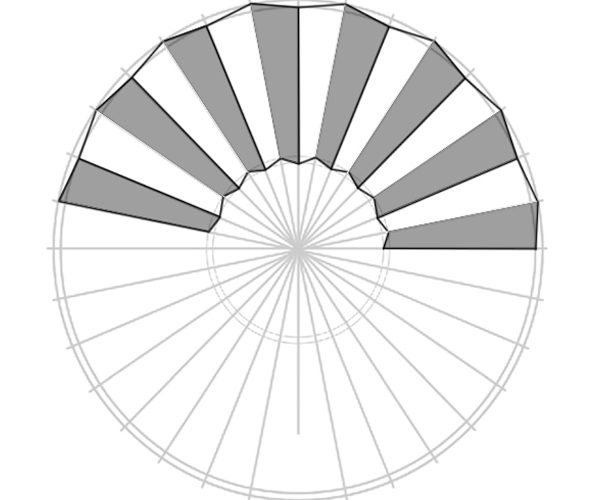
Do this as shown until you reach the other side.

Step 17
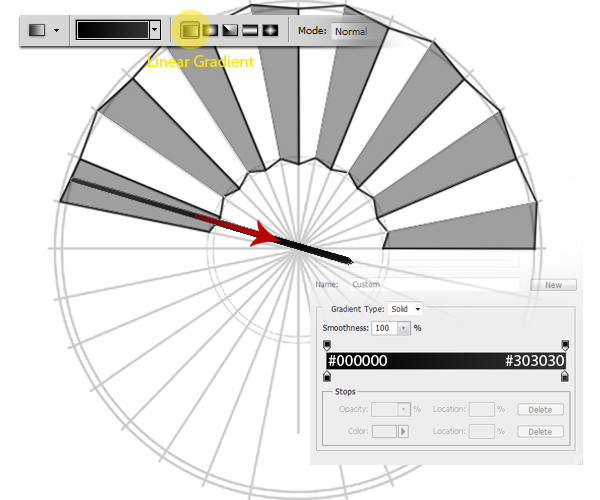
Add a new layer and name it "Sticks." Using the Pen tool (P), make a shape like as shown below. After that, right-click and select Make Selection from the drop-down menu.

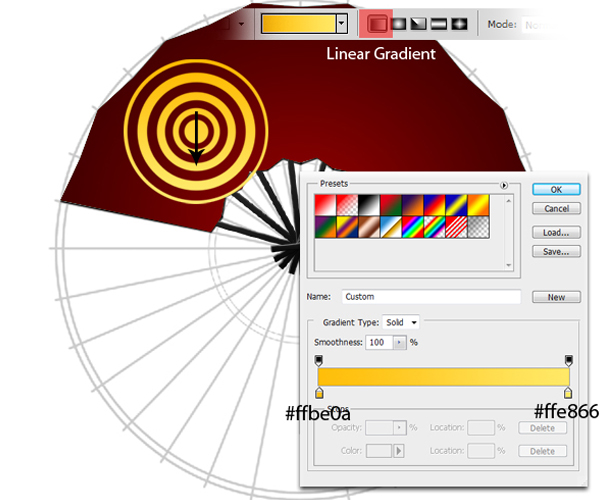
Using the Gradient tool (G), set to Linear Gradient, fill the entire selection with the colors indicated below.

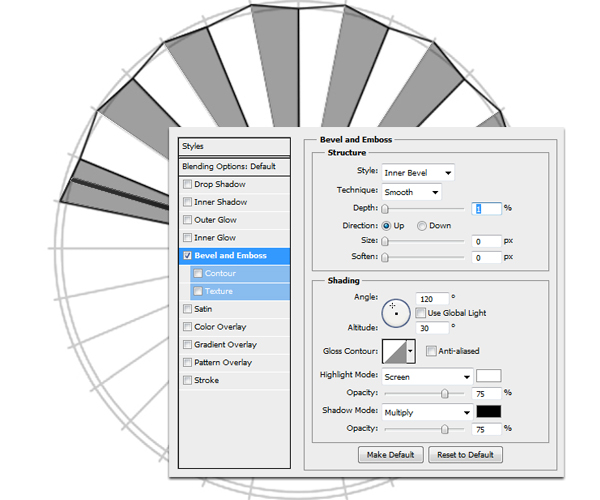
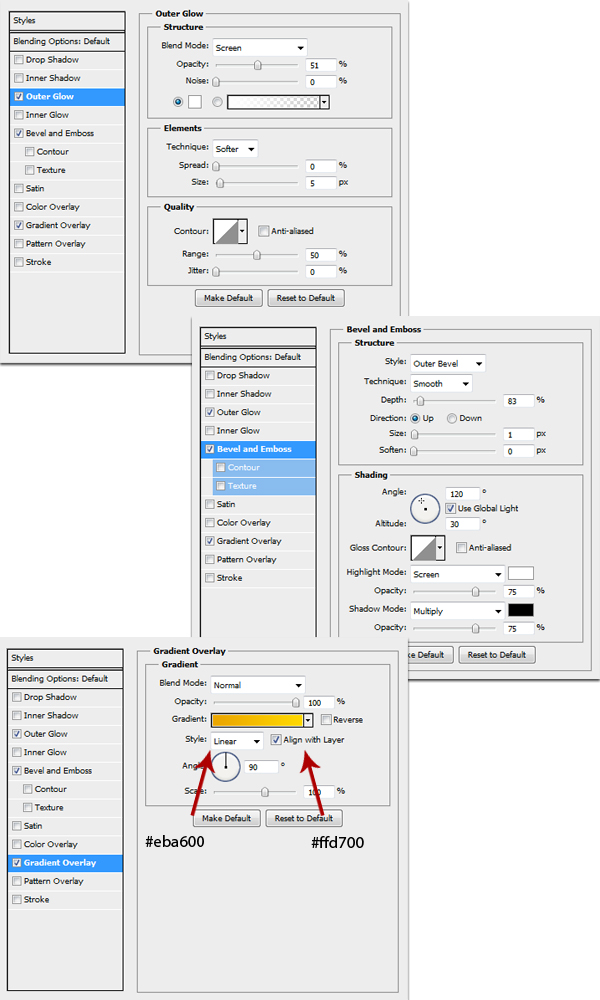
To add some thickness, double-click the "Sticks" layer and apply the values shown below.

Step 18
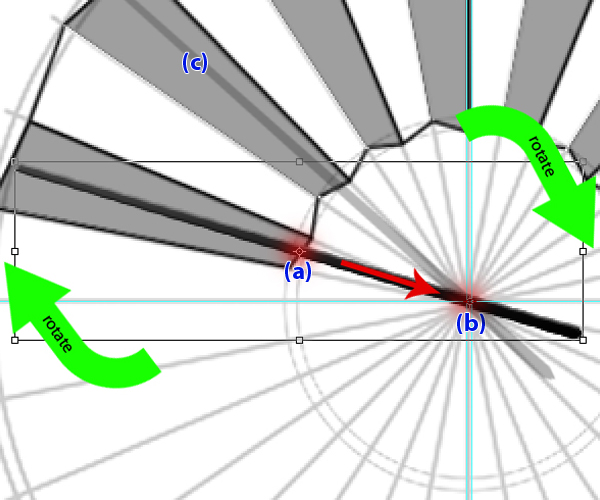
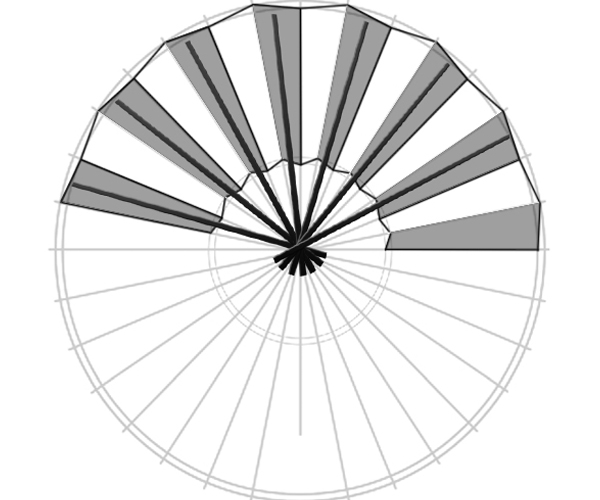
Next duplicate the "Sticks" layer then hit Cmd (Ctrl) + T to activate the resizing handles. Reposition the center of rotation axis (a) to the center point of the fan (b) then rotate it to the next shade (c).

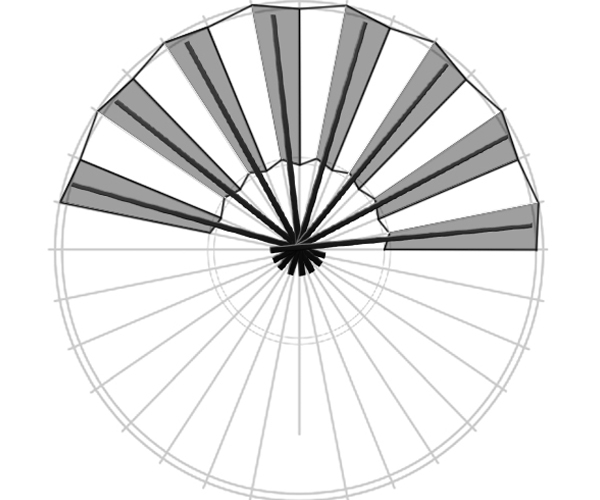
Continue duplicating and changing the angle of the sticks for every shade until you reach the second to the last shade from the right. After that drag all the stick layers to the Create a New Group icon in the Layers palette. Name this group "Sticks." Leave the last shade to separate the last stick from the rest of the sticks because we’ll put it on a higher position on the Layers palette later on.

Step 19
Add a layer mask in the "Sticks" group and use the Elliptical Marquee tool (M) to make a circle as shown below. Using the Brush tool (B) erase the areas indicated below using #000000.

Note: make sure to place the "Sticks" group below the "Black lines," "White lines," "Shades," "Outer zigzag," and the "Inner zigzag" layer.

Step 20
Now to complete the set of sticks, duplicate another sticks layer but now take it out from the "Sticks" group. Use the Elliptical Marquee tool (M) and create a circle from the center of the fan just like what we did in Step 19, create a layer mask and erase the parts you don’t need. The final effect should look like the one shown below. Rename this layer as "Line separate."

Step 21
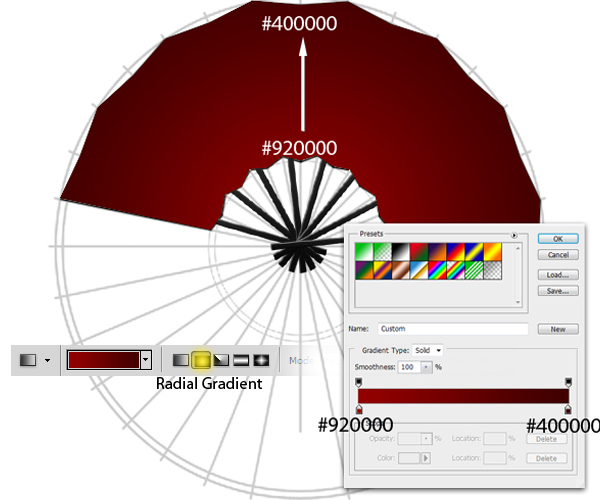
Next add a new layer and name it "Face." Using the Pen tool (P) draw a shape like the one shown below. Right-click and choose Make Selection from the drop-down menu.

Next, use the Gradient tool (G), set to Radial Gradient, to fill the entire selection with colors shown below.

Step 22
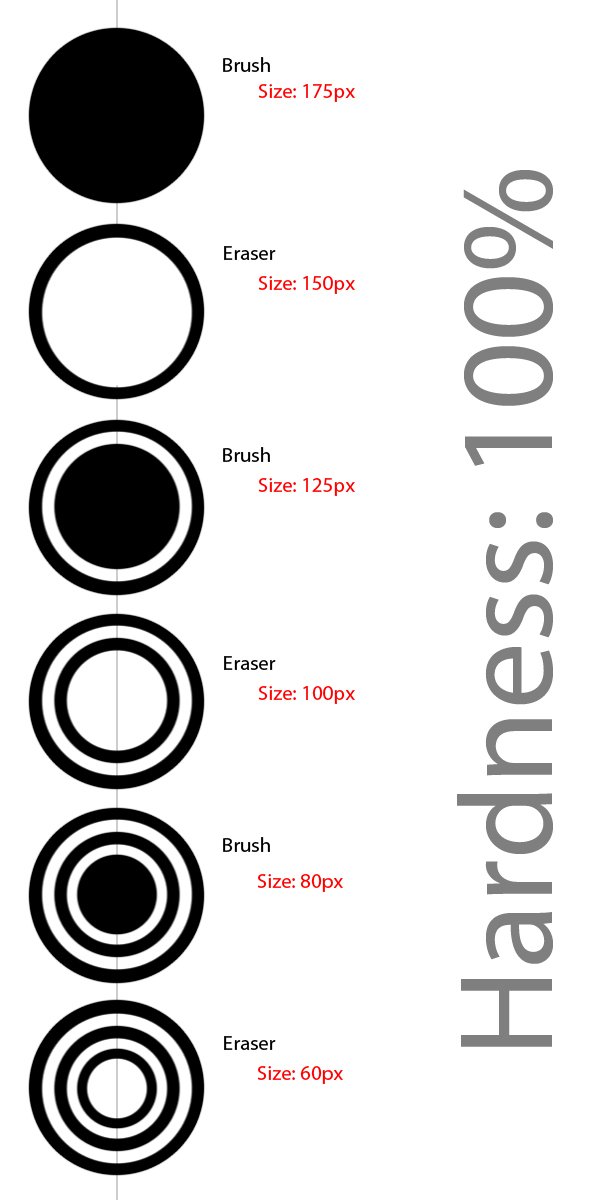
Add a new layer and name it "Circle". Using the Paint brush tool (B) and the Eraser tool (E) alternately follow the directions below.

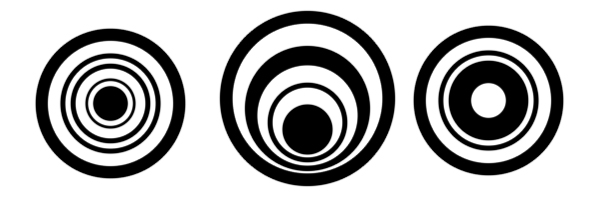
With this technique, you can make an unlimited set of designs like the ones shown below.

Next, Cmd (Ctrl) + click the thumbnail on the "Circle" layer to activate the selection marquee around the shape. Apply a color gradient using the Gradient tool (G), set to Linear Gradient, using the color numbers indicated below.

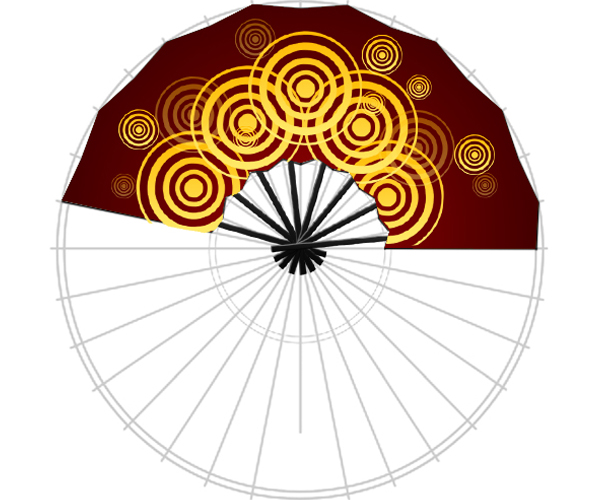
Duplicate the "Circle" layer enough to make a pleasing design. Resize and reposition the "Circles" to form the design like the one shown below. Select the "circle" layers (original and duplicates) and drag them to Create a New Group in the Layers Palette. Name this group as "Design." After that, using a layer mask, the unwanted areas of the design to complete this step.

After hiding the "Guidelines" layer and rotating it upright, the product should look like the one shown below.
Note: Make sure to place the "Design" group and the "Face" layer below the "Black lines," "White lines," "Shades," "Outer zigzag," "Line separate," and the "Inner zigzag" layer.

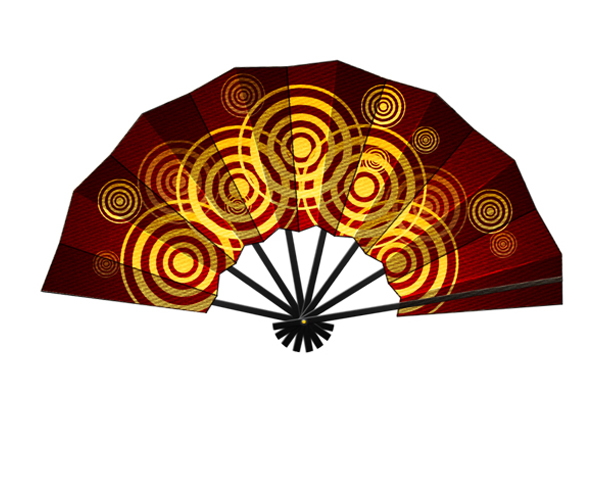
Step 23
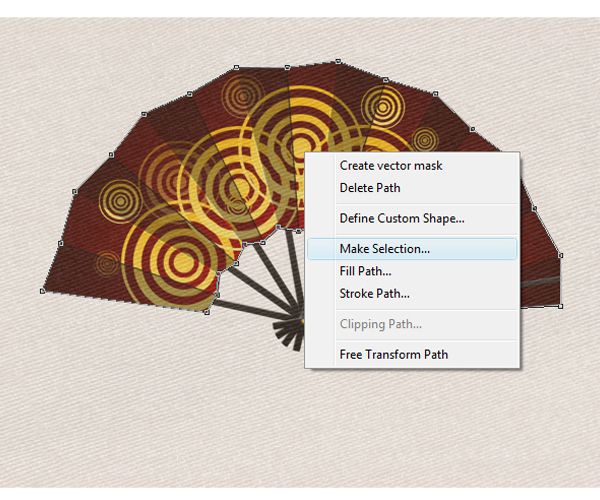
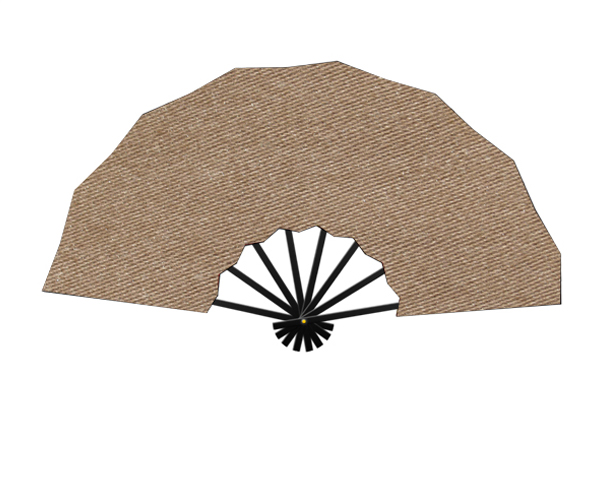
Open Fabric.jpg and drag it into our project. For the time-being, decrease its opacity to about 50% so that you can see the "Face" pattern underneath. Next, use the Pen tool (P) and follow the shape of the "Face" of the fan as shown below. Right-click and select Make Selection from the drop-down menu. Hold Cmd (Ctrl) + Shift + I to inverse the selection then hit delete. After that, increase the opacity level back to 100%. Rename this layer "Fabric" then change its Blending mode to Overlay.

Note: Make sure to place the "Fabric" layer below the "Shades" layer.

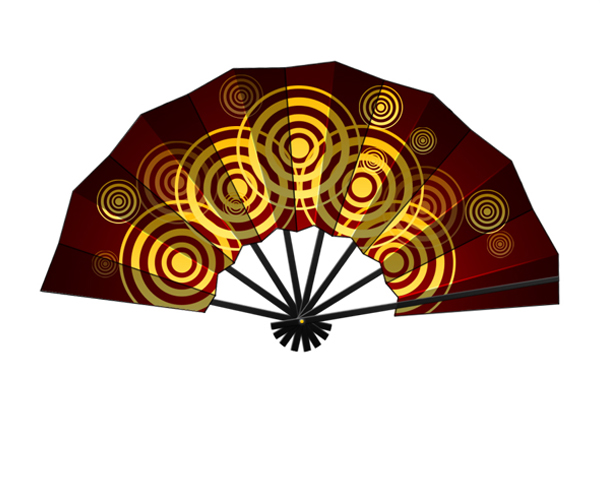
After unhiding some of the layers, your image should look similar to the one below.

Step 24
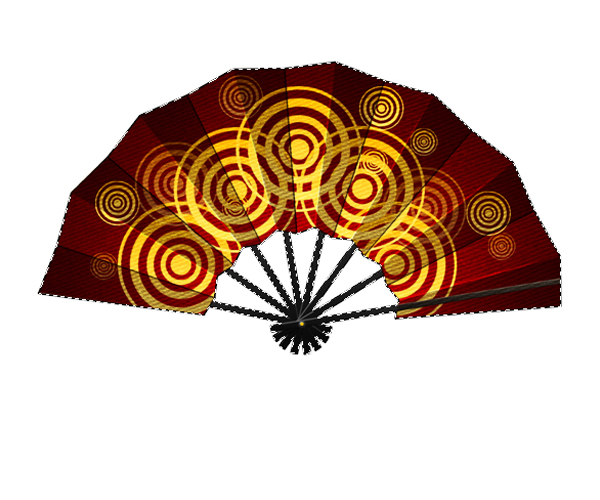
Next Cmd (Ctrl) + click the thumbnails of the "Sticks" layers (original and duplicates) and the "Face" layer in the Layers Palette. This will activate the selection marquee around the layers selected. Fill the entire selection with #000000 and place this layer under the "Sticks" group.

Next, go to Filter > Blur > Gaussian Blur and set the value of the radius to 2.0 px. Name this layer "Shadow 100." Duplicate the "Shadow 100" layer and reapply a Gaussian Blur with a radius of 4px then decrease its opacity level to 50%. Rename this layer "Shadow 50."

After revealing the texture layers your image should look similar to the one below.

Step 25
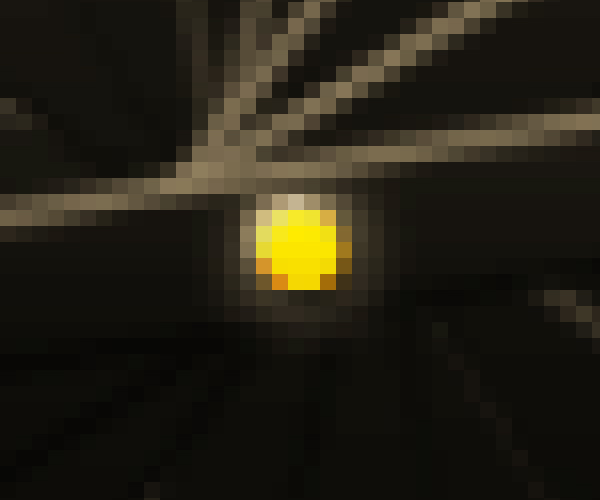
Now, add a new layer and name it "Bolt." Using the Elliptical Marquee tool (M) make a circle as shown below. Fill the entire selection with #000000.
Note: Hold down the Shift key to make perfect circles.

To make it more realistic, double-click the "Bolt" layer and apply the values below in the Layers Style window.


Step 26
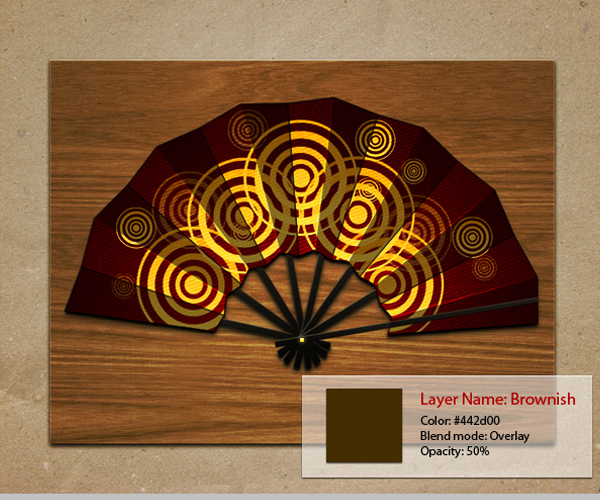
Add a new layer and name it "Brownish." Using the Paint Bucket tool (G), fill the entire layer with color #442d00, set the Blending mode to Overlay and Opacity to 50%.

Step 27
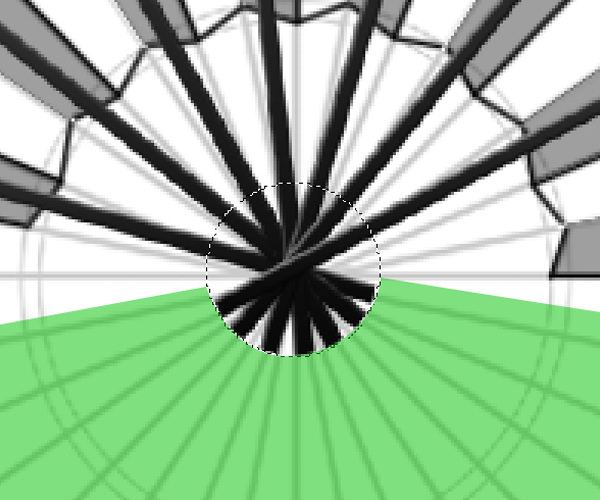
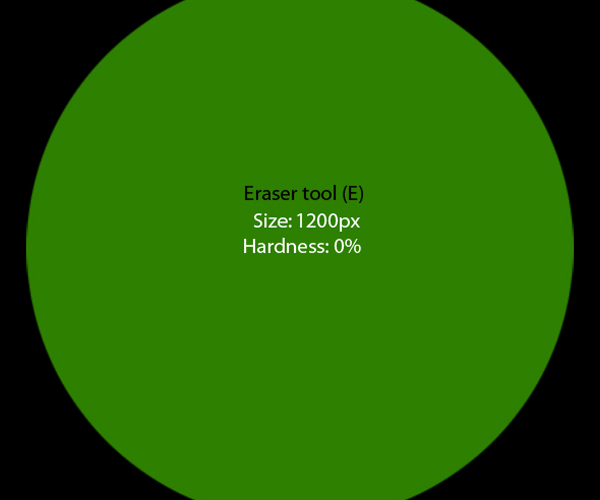
Next, add a new layer and name it "Shader." Using the Paint Bucket tool (G), fill the entire layer with color #000000. Then, using the Eraser tool (E) with a size of 1200 px and Hardness of 0%, erase the areas indicated below three times.


Step 28
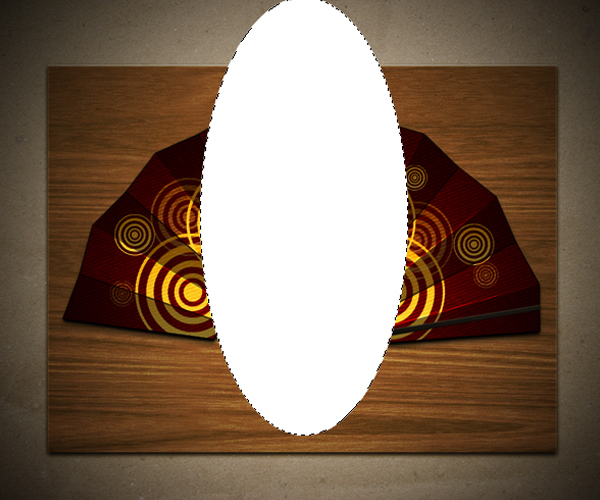
Next, add a new layer and name it "Light source." Using the Elliptical Marquee tool (M) make a shape as shown below then fill the entire selection with #000000.

Step 29
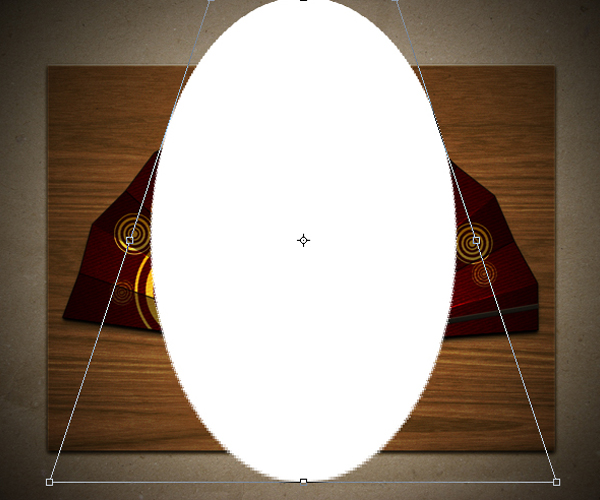
Press Cmd (Ctrl) + T to activate the resizing handles. Right-click from the selection and choose Perspective from the drop-down menu. Resize it as shown below.

Step 30
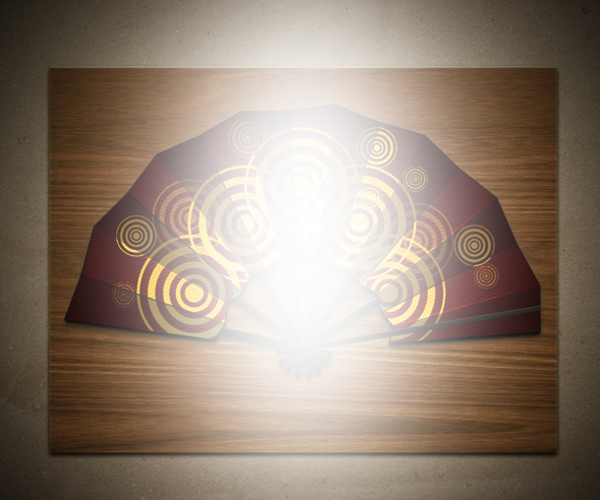
Go to Filter > Blur > Gaussian Blur and set its radius to 58 px.

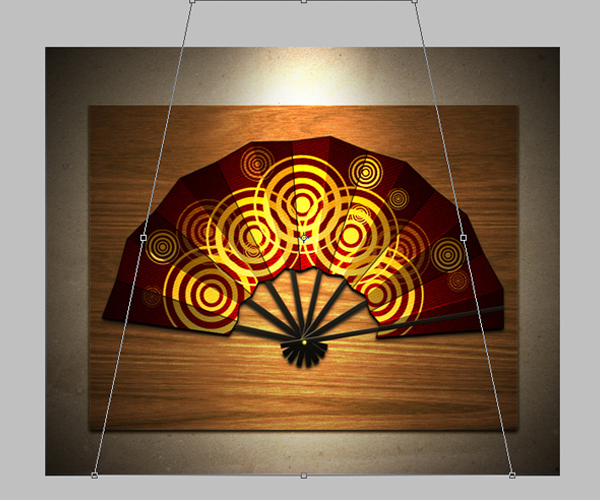
Make some further adjustments using the Transformation tool (Cmd (Ctrl) + T) to make it more realistic.

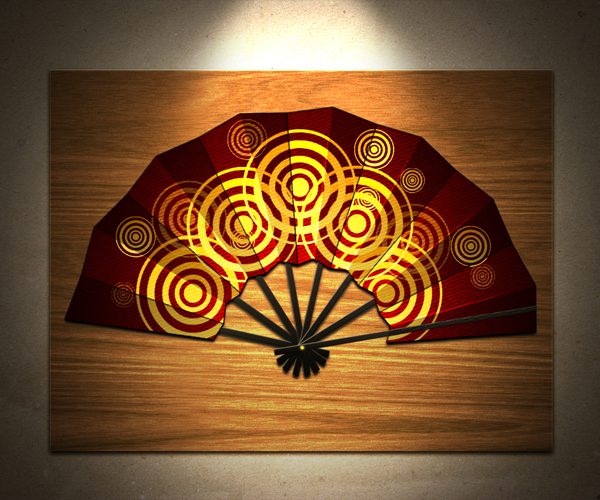
Final Image
That’s it! The final image is shown below. Hope you had fun working on this project and learned some additional skills and knowledge of Photoshop. Try using different patterns or pictures for the face of the fan for different results!


SEO for new to be launched ecommerce site by dwellyn
Launching a new iPad accessory ecommerce site in the next 60 days. ecommerce site will be built upon the SEO friendly prestashop v1.3.1 Looking for: 1. SEO methods that do not use any black or even gray hat methods that might get our URL banned for life… (Budget: $250-750, Jobs: Ghostwriting, Google Analytics, SEO, WordPress)
findadoc like site by yilik
Salesforce- Peachtree Integration solution by harrykalgi
We are looking for simple SalesForce.com and Peach Tree Integration solution. We are basically looking to integrate the two of them so that quotes done in Peach Tree can be imported into Sales force and the order info will flow from the Sales Force to Peach Tree automatically… (Budget: $750-1500, Jobs: CRM)
Quotation/invoice + advertissing reporting system by middir
E-mail Newsletter Template by achaean27
I’m looking to get a e-mail template for a newsletter designed for a project of mine. It will be fairly basic and MUST work on all web browsers and format nicely. I want to be able to edit it everyday- specifically text… (Budget: $30-250, Jobs: Format & Layout, Graphic Design, HTML, Newsletters, Templates)