Quick Look: WeFeel

Quick Look posts are paid submissions offering only a brief overview of an app. Vote in the polls below if you think this app is worth an in-depth AppStorm review!

In this Quick Look, we’re highlighting WeFeel. The developer describes WeFeel as an app that can show you, how any city, country, continent or the world feels. It’s all based on how you feel and where you are. You can choose your current mood and location, which will then become a part of WeFeel.
You can also build Smart Locations. Smart Locations are defined by your choice of emotion and location type. Like “the happiest city in the world”.

Read on for more information and screenshots!

Screenshots

screenshot

WeFeel

About the App

Here are the top five features you can expect to see in the latest version:

  • Observe any city, country, continent or the world
  • Enter your own mood and become a part of WeFeel
  • Build SmartLocations like “The happiest city in the USA”
  • Observe moodswings in realtime
  • Share your mood and locations on Facebook/Twitter.

Requirements: iOS 3.1.3
Price: Free
Developer: WG

Vote for a Review

Would you like to see us write a full review of WeFeel? Have your say in our poll:

Would you like to see WeFeel reviewed in-depth on AppStorm?customer surveys

Quick Look posts are paid submissions offering only a brief overview of an app. Vote in the poll if you think this app is worth an in-depth AppStorm review! If you’re a developer and would like to have your app profiled, you can submit it here.

An Introduction to Categories (Part 2 of 2)

Using Categories to enhance models, and get rid of those pesky compiler warnings

Overview
When using Core Data, our model classes are always generated. What happens if we wanted to add a couple utility functions to one of these generated classes? Yep, they would be discarded the next time we auto-generated our model classes. As we discussed in our previous categories post (icodeblog.com), adding a category on one of these generated classes would enable us to add those utility functions in without them being erased when we generate the core data models.

For example:
Say we created a Model object called Person, and added two NSString attributes called firstName and lastName. If we had populated our Core Data base with several Person objects, and then went to retrieve them, we would have an unsorted array. What if we wanted them to be sorted based on their names? One of the ways to accomplish this could be to implement a function called compareByName: that will return an NSOrderedResult. We can use this utility function to sort that array of Person’s.

Given a Core Data generated class from a model object called Person, we are given a file and it’s header of the form

//Person.h
#import
@interface Person : NSManagedObject
{
}
 
@property (nonatomic, retain) NSString *firstName;
@property (nonatomic, retain) NSString *lastName;
 
@end
------------------------------------------------------------------------
//Person.m
#import "Person.h"
 
@implementation Person
 
@dynamic firstName
@dynamic lastName
 
@end

To add our category, we create an NSObject file of the name Person+Sorting.m, making sure that you check the create header file option.
As in the previous tutorial, change the files to actually be a category, and add in our new sorting function.

//Person+Sorting.h
@interface Person (Sorting) 
 
- (NSOrderedResult)compareByName:(Person *)person2;
 
@end
----------------------------------------------------------------------------------------
//Person+Utility.m
@implementation Person (Sorting)
 
// Returns an NSComparisonResult caseInsensitiveCompare by lastName, and if that is the same, then by firstName
- (NSComparisonResult)compareByName:(Person *)person2 {
	NSComparisonResult result = [self.lastName caseInsensitiveCompare:person2.lastName];
	if (result == NSOrderedSame) {
		return [self.firstName caseInsensitiveCompare:person2.firstName];
	}
	return result;
}
@end

As you can see, I added in some code that first compare’s the Person objects based on their last name, and if those are equal compares them on their first names.

Now to use this category, all we have to do is add

#import "Person+Sorting.h"

to any file where we use Person, and we will be able to use that compareByName: function.

NSError *error = nil;
 
NSFetchRequest *request = [[NSFetchRequest alloc] init];
NSEntityDescription *entity = [NSEntityDescription entityForName:@"Person" inManagedObjectContext:managedObjectContext];
[request setEntity:entity];
 
NSArray *results = [managedObjectContext executeFetchRequest:request error:&error];
 
//Turn those unsorted results into a sorted array
NSArray *sortedPersons = [results sortedArrayUsingSelector:@selector(compareByName:)];
 
[request release];

There are of course other ways to get back sorted results from core data, but this is just one of the ways.

Getting rid of some compiler warnings
Another use of categories is to get rid of those pesky compiler warnings, when you call a function that is in the same file, however it is just lower down in the file.
The following code does not cause a compiler warning because the function we are calling comes first:

@implementation PersonViewController
 
- (void)loadPersonObjects {
	NSLog(@"function that comes before.");
}
 
- (void)viewDidLoad {
	[super viewDidLoad];
	[self loadPersonObjects];
}
@end

However if for some reason, like you want certain functions clumped together at one spot in a file, and you have viewDidLoad at the beginning, then something like the following would give a compiler warning.

@implementation PersonViewController
#pragma mark -
#pragma mark View lifecycle
- (void)viewDidLoad {
	[super viewDidLoad];
	[self loadPersonObjects];
}
 
#pragma mark -
#pragma mark Load from Core Data Functions
//Other functions that load from core data also….
//.….
//.….
- (void)loadPersonObjects {
	NSLog(@"function that comes after.");
}
@end

To get rid of that compiler warning you can create a category on the current class in which you declare all the functions that are giving you warnings. You can do this at the beginning of the .m file after all the #imports, and before the actual @implementation of your class. The reason to do this is because you don’t want other classes calling these private classes, so you don’t want them in the header file, but you do want to get rid of the warnings. The following code snippet shows an example of fixing the warnings in the above class.

@implementation PersonViewController (__PRIVATE__)
- (void)loadPersonObjects;
@end
 
@implementation PersonViewController
#pragma mark -
#pragma mark View lifecycle
- (void)viewDidLoad {
	[super viewDidLoad];
	[self loadPersonObjects];
}
 
#pragma mark -
#pragma mark Load from Core Data Functions
//Other functions that load from core data also….
//.….
//.….
- (void)loadPersonObjects {
	NSLog(@"function that comes after.");
}
@end

iCodeBlog 4.0

If you’re going to write about mobile development, and if you’re going to get excited about all the great things happening in this space, you have to be ready to change.

We are and we did.

This is the new look for iCodeBlog. We hope you like it. It is now part of a network of sites. A pretty cool network of sites under the aegis of Velum Media. We have RubyGlob, SmallCloudBuilder, SmallNetBuilder, Mxdwn, and TG Daily. Something for everyone.

But, everything we do is still going to remain consistent with what the standards we set for ourselves from the beginning. We just want to do more of it, and do better at it, and keep changing and evolving.

Just like the platforms we develop on.

ELCTextFieldCell – A Useful TableViewCell for Forms

Screen shot 2011-01-04 at 11.49.04 AM

Hello iCoders, today I am going to be open sourcing a UITableViewCell we have created over at ELC that we have found to be very useful. When developing apps we have found that many times a form of some type is required. This is common in Registration forms, contact forms, feedback forms, etc. The problem was writing the same basic code over and over to have an elegant fast form experience for the user. To quicken the development time of these elements we created the ELCTextFieldCell class which facilitates the creation and flow of a larger form. In this post I will be walking you through the usage of the class.

GIT Hub

You can find a demo project with this code hosted on GitHub. Follow us if you find it useful, we try to open source as much as we can.

Screencast

Here is a fast video demo of a simple form that can be made using these cells.

ELCTextFieldCell Demo from Collin Ruffenach on Vimeo.

How to use

This class is best used by defining to arrays in the header of the table view controller that is going to use it. I like to call mine labels and placeholders. In these arrays store the values that are going to be the left labels for your forms cells and the placeholders for the cells. I create these in the viewDidLoad method most commonly. The reason I like to do this is because it allows for less code to be written through many other method in the table view controller. From here we need to define 6 more methods, most of which are pre defined by Apple in your table view controller class.


- (NSInteger)numberOfSectionsInTableView:(UITableView *)tableView {
    return 1;
}
- (NSInteger)tableView:(UITableView *)tableView numberOfRowsInSection:(NSInteger)section {
    return [labels count];
}
- (UITableViewCell *)tableView:(UITableView *)tableView cellForRowAtIndexPath:(NSIndexPath *)indexPath {

    static NSString *CellIdentifier = @"Cell";

    ELCTextfieldCell *cell = (ELCTextfieldCell*)[tableView dequeueReusableCellWithIdentifier:CellIdentifier];
    if (cell == nil) {
        cell = [[[ELCTextfieldCell alloc] initWithStyle:UITableViewCellStyleDefault reuseIdentifier:CellIdentifier] autorelease];
    }

	[self configureCell:cell atIndexPath:indexPath];

    return cell;
}

Here I like to have a configureCell:AtIndexPath method to keep my delegate UITableViewCellDelegate methods a bit cleaner. In this case my 4th cell (row 3) is for a phone number, you can obviously change this depending on your needs.

- (void)configureCell:(ELCTextfieldCell *)cell atIndexPath:(NSIndexPath *)indexPath {

	cell.leftLabel.text = [self.labels objectAtIndex:indexPath.row];
	cell.rightTextField.placeholder = [self.placeholders objectAtIndex:indexPath.row];
	cell.indexPath = indexPath;
	cell.delegate = self;

	if(indexPath.row == 3) {

		[cell.rightTextField setKeyboardType:UIKeyboardTypeNumberPad];
	}
}

All that is left to do is implement the ELCTextFieldDelegate methods. The first we will implement is the method that will be called whenever text is changed within the text field of the cell. In this case I just print out all the data going through this method but in most cases you will be applying these changes to your model.

- (void)updateTextLabelAtIndexPath:(NSIndexPath*)indexPath string:(NSString*)string {

	NSLog(@"See input: %@ from section: %d row: %d, should update models appropriately", string, indexPath.section, indexPath.row);
}

The final method that you implement will be the method called when return is hit by the user when typing in the rightTextField of the cell. Here you will first check if it is anything but the bottom most cell. If it is, you will increment the IndexPath row and then request that the rightTextField of this next cell becomes the new first responder, which will make the field active. Then you tell the tableview to make sure that this new index path cell is visible. With long forms the tableview will scroll with the users navigation through each field which is very nice. If it is indeed returning from the last cell all we do is tell the textFieldCell to resign first responder so the keyboard disappears.

-(void)textFieldDidReturnWithIndexPath:(NSIndexPath*)indexPath {

	if(indexPath.row < [labels count]-1) {
		NSIndexPath *path = [NSIndexPath indexPathForRow:indexPath.row+1 inSection:indexPath.section];
		[[(ELCTextfieldCell*)[self.tableView cellForRowAtIndexPath:path] rightTextField] becomeFirstResponder];
		[self.tableView scrollToRowAtIndexPath:path atScrollPosition:UITableViewScrollPositionTop animated:YES];
	}

	else {

		[[(ELCTextfieldCell*)[self.tableView cellForRowAtIndexPath:indexPath] rightTextField] resignFirstResponder];
	}
}

That’s all and you’re done! This should be a super fast way to make forms in your apps. Let me know any questions and happy iCoding.

Follow me on twitter @cruffenach

Implementing UITableView Sections from an NSArray of NSDictionary Objects

Screen shot 2010-12-10 at 3.02.09 PM

If you’re working with a remote Web Service, your apps are probably displaying TableViews of objects. As soon as your dataset grows beyond 20 or 30 objects, it’s time to implement sections in your Table View. I’m going to show you how you can do this without too much trouble. In this example, we’ll use an array of dictionary objects (Books) to construct a single ‘sections’ dictionary that will be the basis for our TableView datasource.

Before we get started, you might want to clone the git repo containing the demo Xcode project for this post:

git clone [email protected]:elc/ICB_SectionedTableViewDemo.git

First let’s take a look at the UITableViewDataSource protocol methods that we’ll be using to get sections going:

    - (NSInteger)numberOfSectionsInTableView:(UITableView *)tableView
    - (NSString *)tableView:(UITableView *)tableView titleForHeaderInSection:(NSInteger)section
    - (NSInteger)tableView:(UITableView *)tableView numberOfRowsInSection:(NSInteger)section
    - (NSArray *)sectionIndexTitlesForTableView:(UITableView *)tableView {

These are the four methods needed to show section headers, as well as the section index (which is the scrubber on the right side). Normally, with a established dataset (say one that already contains at least one item that starts with each letter of the alphabet), you can take some short cuts and return 26 for numberOfSectionsInTableView, hard code an array of A-Z to use for titleForHeaderInSection, etc. I’ve done that a few times for static datasets, but it’s really the wrong solution if you’re pulling data from a user-generated or otherwise dynamic datastore.

Instead what we’ll do is build a new dictionary entirely. The keys of this dictionary will correspond to our tableview section titles, and the values for those keys will be arrays containing our dictionary objects; these represent cells in the tableview.

Let’s start by establishing our sections:


    BOOL found;

    // Loop through the books and create our keys
    for (NSDictionary *book in self.books)
    {
        NSString *c = [[book objectForKey:@"title"] substringToIndex:1];

        found = NO;

        for (NSString *str in [self.sections allKeys])
        {
            if ([str isEqualToString:c])
            {
                found = YES;
            }
        }

        if (!found)
        {
            [self.sections setValue:[[NSMutableArray alloc] init] forKey:c];
        }
    }

If you’re implementing this code as you go, make sure you’ve setup ‘sections’ as a NSMutableDictionary property of your datasource (which is usually just your UITableViewController). So after this block of code runs, you’ll have a dictionary with a key for each unique first character of book->title. So if your books are:

On Intelligence
On The Road
Ishmael
Dune

Your self.sections will be:

‘O’ => empty NSMutableArray
‘I’ => empty NSMutableArray
‘D’ => empty NSMutableArray

Notice that the keys in your NSDictionary aren’t sorted alphabetically. They would be if your initial datasource (self.books) was sorted alphabetically; but there’s no guarantee on that. I’ll show you how to deal with this in a minute.

So the next step is to populate the empty arrays in self.sections with the appropriate NSDictionary objects from self.books:

    // Loop again and sort the books into their respective keys
    for (NSDictionary *book in self.books)
    {
        [[self.sections objectForKey:[[book objectForKey:@"title"] substringToIndex:1]] addObject:book];
    }

Now the books are compartmentalized into their respective sections. Next we need to sort the books within each section:

    // Sort each section array
    for (NSString *key in [self.sections allKeys])
    {
        [[self.sections objectForKey:key] sortUsingDescriptors:[NSArray arrayWithObject:[NSSortDescriptor sortDescriptorWithKey:@"title" ascending:YES]]];
    }

Again, we’re basing our sort off @”title”. I’ll leave @”title” in here for readability, but it would be wise to pull this out into it’s own NSString *sortByProperty so you can easily change it should you decide you want to base your sections/sorting on Author, Publication Year, etc.

At this point you’ll probably want to drop this in too:

    [self.tableView reloadData];

So now that we’ve constructed our self.sections, we can finally implement the UITableViewDataSource protocol methods I mentioned above:

#pragma mark -
#pragma mark Table view data source

- (NSInteger)numberOfSectionsInTableView:(UITableView *)tableView
{
    return [[self.sections allKeys] count];
}

- (NSString *)tableView:(UITableView *)tableView titleForHeaderInSection:(NSInteger)section
{
    return [[[self.sections allKeys] sortedArrayUsingSelector:@selector(localizedCaseInsensitiveCompare:)] objectAtIndex:section];
}

- (NSInteger)tableView:(UITableView *)tableView numberOfRowsInSection:(NSInteger)section
{
    return [[self.sections valueForKey:[[[self.sections allKeys] sortedArrayUsingSelector:@selector(localizedCaseInsensitiveCompare:)] objectAtIndex:section]] count];
}

- (NSArray *)sectionIndexTitlesForTableView:(UITableView *)tableView {
    return [[self.sections allKeys] sortedArrayUsingSelector:@selector(localizedCaseInsensitiveCompare:)];
}

This is where things get a little confusing. Since these methods are called with indexPath.section, which an NSInteger, and not the actual section key, we’re forced to get a little tricky. In order to make sure that our section indexes and section titles match up correctly AND are ordered alphabetically, we have to sort allKeys each time and then reference the resulting NSArray. It’s kind of ugly, but I’ve done all the annoying bracket matching for you already.

OK. So now that we have sections out of the way, let’s show some cells…

- (UITableViewCell *)tableView:(UITableView *)tableView cellForRowAtIndexPath:(NSIndexPath *)indexPath {

    static NSString *CellIdentifier = @"Cell";

    UITableViewCell *cell = [tableView dequeueReusableCellWithIdentifier:CellIdentifier];
    if (cell == nil) {
        cell = [[[UITableViewCell alloc] initWithStyle:UITableViewCellStyleSubtitle reuseIdentifier:CellIdentifier] autorelease];
    }

    NSDictionary *book = [[self.sections valueForKey:[[[self.sections allKeys] sortedArrayUsingSelector:@selector(localizedCaseInsensitiveCompare:)] objectAtIndex:indexPath.section]] objectAtIndex:indexPath.row];

    cell.textLabel.text = [book objectForKey:@"title"];
    cell.detailTextLabel.text = [book objectForKey:@"description"];

    return cell;
}

That’s it! You should have a great looking sectioned tableView. If you have any questions or comments, you can get a hold me@matt_tuzzolo on Twitter.

Making Smarter Table View Cells

Microsoft_Surface_Icons_by_Jrdn88

Introduction

Table Views are one of the most common things within iPhone Applications. The standard UITableViewCells that are provided by Apple are nice but have always had  a HUGE flaw in my mind. When you apply some text to the textLabel or detailTextLabel of a UITableViewCell the length of the text is not considered at all. If the text is longer than a single line you need to set the numberOfLines property to be enough so that your content can be showed. Moreover, you also need to compute the new total height of the cell to supply for the height delegate method.

- (CGFloat)tableView:(UITableView *)tableView heightForRowAtIndexPath:(NSIndexPath *)indexPath

I wrote some code that will dynamically look at what you are placing within these labels and make sure the labels have the correct number of lines and that the cells report the correct height.

Smarter Table View Cells from Collin Ruffenach on Vimeo.

GitHub

You can find this project now on GitHub. Please let me know any issues you may have. Happy coding!

Explanation

There are only 2 important methods in the sample project I supplied. First off I created a PLIST of a few recent Tweets from my timeline. One PLIST array of dictionaries with each dictionary having a value for “title” and for “description”. “Title” will be our textLabel text and “description” will be our detailTextLabel text. We are going to be using NSString UIKit Additions Reference methods to calculate the number of lines we need and the final height of the cell. Take a look at our first data source method below.

- (UITableViewCell *)tableView:(UITableView *)tableView cellForRowAtIndexPath:(NSIndexPath *)indexPath {

    static NSString *CellIdentifier = @"Cell";

    UITableViewCell *cell = [tableView dequeueReusableCellWithIdentifier:CellIdentifier];
    if (cell == nil) {
        cell = [[[UITableViewCell alloc] initWithStyle:UITableViewCellStyleSubtitle reuseIdentifier:CellIdentifier] autorelease];
    }

	cell.textLabel.text = [[data objectAtIndex:indexPath.row] objectForKey:@"title"];
	cell.textLabel.font = [UIFont boldSystemFontOfSize:18];
	cell.textLabel.numberOfLines = ceilf([[[data objectAtIndex:indexPath.row] objectForKey:@"description"] sizeWithFont:[UIFont boldSystemFontOfSize:18] constrainedToSize:CGSizeMake(300, MAXFLOAT) lineBreakMode:UILineBreakModeWordWrap].height/20.0);
	cell.detailTextLabel.text = [[data objectAtIndex:indexPath.row] objectForKey:@"description"];
	cell.detailTextLabel.font = [UIFont systemFontOfSize:14];
	cell.detailTextLabel.numberOfLines = ceilf([[[data objectAtIndex:indexPath.row] objectForKey:@"description"] sizeWithFont:[UIFont systemFontOfSize:14] constrainedToSize:CGSizeMake(300, MAXFLOAT) lineBreakMode:UILineBreakModeWordWrap].height/20.0);

    return cell;
}

The real meat of this method is in calculating the number of lines. What we do here is get the string which we will place in the label, and use the sizeWithFont:constrainedToSize:lineBreakMode: to give is a height that is required. With that done, I know that each line is about 20 pixels tall, so taking the whole height divided by 20 and going to the next height integer will give us the correct number of lines. The same is done for the detail cell. If you want to use a different font, or you have a UITableViewAccessory which will make the width the label has to lay itself out in different then make sure to change those things within the methods.

Implementing the delegate method to inform the cell of its height is very similar to the logic used to devise the number of lines. In fact we use identical code but instead of dividing each by 20 we just sum them. The method in the end looks like this.

- (CGFloat)tableView:(UITableView *)tableView heightForRowAtIndexPath:(NSIndexPath *)indexPath {

	NSString *titleString = [[data objectAtIndex:indexPath.row] objectForKey:@"title"];
	NSString *detailString = [[data objectAtIndex:indexPath.row] objectForKey:@"description"];
	CGSize titleSize = [titleString sizeWithFont:[UIFont boldSystemFontOfSize:18] constrainedToSize:CGSizeMake(300, MAXFLOAT) lineBreakMode:UILineBreakModeWordWrap];
	CGSize detailSize = [detailString sizeWithFont:[UIFont systemFontOfSize:14] constrainedToSize:CGSizeMake(300, MAXFLOAT) lineBreakMode:UILineBreakModeWordWrap];

	return detailSize.height+titleSize.height;
}

An Introduction to Categories (Part 1 of 2)

pie

Overview

Have you ever wished that you could add one, or a couple, additional functions to an Objective-C core class?
Well Apple has thought of this, and they provide a way without extended the class! The way to do this is called a category. A category is a way to enhance an existing class, by adding additional functions to it. The difference between this and extending a class is that when you extend a class, you can add additional functions, as well as variables. In a category, you can only add additional functions. The benefit of a category though is that you don’t have to use the extended class to get the benefits of the added additional functions. All you have to do is include the header file of the category, and the additional functions of that class are available to you.

A Simple NSDate example

Say we have an NSDate object, and we know that we want it to always be formatted a certain way. You can create an NSDate category, with an additional function called getFormattedString, that will always return an NSString * with the current date formatted a certain way.

How it’s Made

We will start with a simple view based project, that includes two UITextField’s, that we will use to output our dates. I will leave it up to you to create this on your own, or download the entire project from github.

Categories typically have the convention of ClassName+OurText.m, so we create a new file of subclass NSObject, called NSDate+FormatString.m, make sure to check “Also create NSDate+FormatString.h”. After creating those files, we need to make some minor changes to them to actually have them be treated as categories. In the header file, change

@interface NSDate_FormatString : NSObject {

}
@end

to

@interface NSDate (FormatString)

@end

making sure to remove the brackets, in the header file. The reason for this is that a category can not add variables, only functions.

In the implementation file, change

@implementation NSDate_FormatString

to

@implementation NSDate (FormatString)

We have now created a category! This of course doesn’t do anything yet, so lets add some meat to it.

// In NSDate+FormatString.h, after @interface add
- (NSString *)getFormattedString;

// And in NSDate+FormatString.m, after @implementation add
- (NSString *)getFormattedString {
	NSDateFormatter *formatter = [[NSDateFormatter alloc] init];
	[formatter setDateFormat:@"MM/dd/yyyy h:mm a"];
	NSString *returnDate = [formatter stringFromDate:self];
	[formatter release];
	return returnDate;
}

Now to use this category, all we have to do is add

#import "NSDate+FormatString.h"

to any file where we have an NSDate, and we will be able to call

NSDate *today = [NSDate date]; //get the current date
NSLog(@"The current date is: %@", [today getFormattedString]);

This will print out today’s date all nicely formatted for you!

We use this to output a formatted date to our textfield

- (IBAction)dateButtonClicked:(id)sender {
	NSDate *today = [NSDate date];
	originalDateField.text = [today description];
	formattedDateField.text = [today getFormattedString];
}

Of course this is just a very basic example of using a Category. On my next installment I will cover using Categories to add functions to generated Core Data Model classes, and more fun things!

Get this project on github!

Interested in iOS programming? Join us on Reddit!

reddit-logo

Over here at iCodeBlog we love Reddit. I enjoy /r/programming but often developers aren’t interested in the iOS stuff that we are. As a result today I created /r/iOSProgramming, go over there and submit articles, GitHub projects you are interested in, questions, code samples or just thoughts on development. This should be a good place to ask us questions or get other iOS developers feelings about things you are creating or finding.

Adding a UIPopover to UISlider

slider_cupcakes

Overview

If you have an iPad you have probably used iBooks, Apple’s eBook application that gives users access to the iBooks store. In this application you can navigate through books in a number of ways. Today we are going to focus on the scroll bar at the bottom of a book that a user can utilize to skip to any given page within the book. This control involves a customized UISlider and a UIPopoverView that drags along with the slider as the value changes. Today we will be making a UISlider subclass that will duplicate this functionality.

How to Use

ELCSlider Demo from Collin Ruffenach on Vimeo.

So that is it! Put a UISlider in your XIB and then change its class to ELCSider. You can change the range of the slider through interface builder and the slider will work the same way. If you would like to change the appearance of the pop over, the number of digits that are shown or anything else you will need to change a bit of code. Look below for how the magic of this subclass is done.

GitHub

You can find this project now on GitHub. Please let me know any issues you may have. Happy coding!

How its Made

The ELCSlider package is a collection of 5 files. 2 classes and 1 XIB. The first class that we will look at is the ELCSlider class which is a UISlider subclass. First taking a look at the header, we declare a class property PopoverController and SliderValueViewController. You can see the code below.


#import "SliderValueViewController.h"

@interface ELCSlider : UISlider {

	UIPopoverController *popoverController;
	SliderValueViewController *sliderValueController;
}

@end

With the simple header declared we can go into the main of the ELCSlider. The first method you see in the main is the initWithCoder: method. This gets us into an interesting part of the iOS SDK that I we should investigate quickly. Looking at where initWithCoder: is declared, we see that it is a part of the NSCoding Protocol. This method is passed an archived object and is essentially to take saved files and turn them back into Objective C objects. If you ever create a custom class, and you want to save an instance of that class to a file, you will need to have that class conform to the NSCoding Protocol. If we look down the inheritance chain of a UISlider we will see that UIView indeed conforms to this protocol. This is because all UIView’s are going to need to archive and unarchive themselves from a .XIB file. As a result of this, when you lay out an element in a XIB the initialization method that will be called will be initWithCoder. Within the method we ensure that our super class initialized properly, and then we proceed to assign the method valueChanged: to the control event UIControlEventValueChanged. This will make a call to the valueChanged method to let us handle moving the UIPopoverView around based on the current value of the slider. After that we create an instance of our SliderValueViewController, which we will go through in the next section, and create a UIPopoverController with the content view controller being our SliderValueViewController. You can see the code for our initialization method below.

-(id)initWithCoder:(NSCoder *)aDecoder {
	if(self = [super initWithCoder:aDecoder]) {

		[self addTarget:self action:@selector(valueChanged:) forControlEvents:UIControlEventValueChanged];

		sliderValueController = [[SliderValueViewController alloc] initWithNibName:@"SliderValueViewController" bundle:[NSBundle mainBundle]];
		popoverController = [[UIPopoverController alloc] initWithContentViewController:sliderValueController];
		[popoverController setPopoverContentSize:sliderValueController.view.frame.size];
	}

    return self;
}

The only remaining method to make is the method to handle what happens when the slider value changes. This method is all about doing the math to calculate the CGRect where we want out UIPopoverView to show itself. This is a value that will be derived based on the x origin of the slider, the slider width, the slider’s max and min, the current value and the size of the slider circular button (22px). I wrote this class so that it supports any type of slider range, positive to positive, negative to positive and negative to negative. The math is kind complex to figure out exactly where to display the pop over, but you can take a look at the source if you are curious. The real trick was measuring the width of the UISlider circular button as the center of it doesn’t go all the way to the edge of the slider, you you need to add or subtract some small amount to the x coordinate you compute depending on the value the slider is reporting. You can see the method below.

-(void)valueChanged {

	[sliderValueController updateSliderValueTo:self.value];

	CGFloat sliderMin =  self.minimumValue;
	CGFloat sliderMax = self.maximumValue;
	CGFloat sliderMaxMinDiff = sliderMax - sliderMin;
	CGFloat sliderValue = self.value;

	if(sliderMin  halfMax) {

		sliderValue = (sliderValue - halfMax)+(sliderMin*1.0);
		sliderValue = sliderValue/halfMax;
		sliderValue = sliderValue*11.0;

		xCoord = xCoord - sliderValue;
	}

	else if(sliderValue <  halfMax) {

		sliderValue = (halfMax - sliderValue)+(sliderMin*1.0);
		sliderValue = sliderValue/halfMax;
		sliderValue = sliderValue*11.0;

		xCoord = xCoord + sliderValue;
	}

	[popoverController presentPopoverFromRect:CGRectMake(xCoord, 0, sliderValueController.view.frame.size.width, sliderValueController.view.frame.size.height) inView:self permittedArrowDirections:UIPopoverArrowDirectionDown animated:YES];
}

Creating the Popover’s Content View Controller

Now that we have all of the logic in place to move the view controller appropriately, we need to create the view controller that will be injected into the Popover. The view controller I have created is meant to be restyled, refactored or even replaced. The view controller has one required method, updateSliderValueTo:. This method is called every time the slider value changes. People may use this method to change other aspects of the content view controller, such as background color, or possibly other labels. Please feel free to customize as much as you like.

GitHub

You can find this project now on GitHub. Please let me know any issues you may have. Happy coding!

Follow me on twitter @cruffenach

Working with UIGestureRecognizers

apple-multi-touch-gesture-language

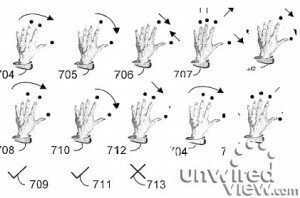
Hey iCoders! Today we are going to make a fun project that takes advantage of UIGestureRecognizers which were introduced in iOS 3.0, way back when it was called iPhone OS. UIGestureRecognizer is an abstract class that several concrete classes extend Eg. UITapGestureRecognizer, UIPinchGestureRecognizer. Today we are going to be building a simple photo board application. You will be able to add photos from your board, move, rotate and zoom them in and out around the board. We will also build in some simple physics to give a sense of the photos being thrown around the board. Here is a short video of what our final product will look like.

Demo of Photo Board Application for iCodeBlog.com from Collin Ruffenach on Vimeo.

GIT Hub

You can find this project now on GitHub. Please let me know any issues you may have. Happy coding!

Creating the project

Lets get a project ready that can handle all of this functionality. Open up xCode and start a View based iPad application called DemoPhotoBoard. Once the project window has come up go to the Framework group in the left bar and right click on it. Select Add -> Existing Framework… A large model view will come down listing all of the Frameworks that can be added to the project. Add in the Framework “Mobile Core Services”. Now go into DemoPhotoBoardViewController.h and add in the line

I apologies for having to use the image there, WordPress hates any line of code with < or > in it. We might as well finish filling in the rest of the header now too. Don’t worry about what these properties will be used for yet just include them in the header for the moment, they will be what we use to keep track of our scaling, movement and rotation. The add photo method will be called from a button we put in our interface in the next step.

@interface DemoPhotoBoardViewController : UIViewController  {

	CGFloat lastScale;
	CGFloat lastRotation;

	CGFloat firstX;
	CGFloat firstY;
}

-(IBAction)addPhoto:(id)sender;

@end

Filling in the XIB

The next thing we are going to do is add a tool bar and tool bar button to our XIB. Double click on DemoPhotoBoardViewController.xib. Once it has opened drag in a UIToolBar Item and then Put a UIToolBarButtonItem with a Flexible Space element to the left of it. Make the UIBarButtonItem the system button “Add”. Now if you go to the file owner below and right click on it, you should  see an outlet for the method “addPhoto”. Connect this to the add button we have. As a final step, select the UIToolBar and look at its size panel in the inspector. Make sure the Autosizing settings match the settings seen below so that things don’t get screwy when the app is in other orientations.

Implementing the Photo Picker

Go ahead and open up DemoPhotoBoardViewController.m. The first thing we are going to do is implement the addPhoto method. Insert the following code into your main.

-(IBAction)addPhoto:(id)sender {

	UIImagePickerController *controller = [[UIImagePickerController alloc] init];
	[controller setMediaTypes:[NSArray arrayWithObject:kUTTypeImage]];
	[controller setDelegate:self];

	UIPopoverController *popover = [[UIPopoverController alloc] initWithContentViewController:controller];
	[popover setDelegate:self];
	[popover presentPopoverFromBarButtonItem:sender permittedArrowDirections:UIPopoverArrowDirectionUp animated:YES];
}

This method creates a UIImagePickerController and tells it to only display images. Next we create an UIPopoverController that we instantiate with our UIImagePickerController as the content view controller. We set the delegate to ourself, and present it from the bar button item sender, which refers to the add button in our interface. We know the pop over will always be below our button so we force the button direction to always be point up. With this done, we can now run the app and see a UIImagePickercController appearing in a UIPopOverController below our add button.

Setting up the Gesture Recognizers

Now we need to implement the delegate method for our UIImagePickerController and add the image to our view when it is selected. We do this with the imagePickerControler:DidFinishPickingMediaWithInfo: delegate method. This method will provide us a dictionary where the key @”UIImagePickerControllerOriginalImage” will return a UIImage object of the image the user selected. We are going to need to create an ImageView and then put this ImageView in a UIView holder. The reason we do this is because standard UIImageViews, despite being UIView subclasses, do not react to gesture recognizer added to them. I’m not exactly sure why that is but this is the solution I have found in my testing. We are going to create 4 different kinds UIGestureRecognizers and connect them to our holder view.

We will first create a UIPinchGestureRecognizer. This object doesn’t require and customization, we will simply set its target to us with the scale: selector and assign this class as its delegate. With this done we add it to the holder view we created.

Next we create a UIRotationGestureRecognizer. This object doesn’t require much customization either. We simply set it to call the rotate: method in our class and set its delegate.

Net we create the UIPanGestureRecognizer. We create the PanGestureRecognizer to make a call to the method move: upon being activated. We tell the PanGestureRecognizer that we only care when a single touch is panning by setting the maximum and minimum touches to 1. We once again add this to the holder view we created.

The final UIGestureRecognizer we create is the UITapGestureRecognizer. The UITapGestureRecognizer will be used to stop an object that has been “thrown” from going all the way to its stopping point. It essentially will be used to catch an object while it is still moving. We set the required number of taps to 1 and set the delegate. We add this final UIGestureRecognizer to our holder view and add the view to subview. You can see the code below. Please ignore the random number WordPress is weak sauce.


- (void)imagePickerController:(UIImagePickerController *)picker didFinishPickingMediaWithInfo:(NSDictionary *)info {

	UIImage *image = [info objectForKey:@"UIImagePickerControllerOriginalImage"];

	UIView *holderView = [[UIView alloc] initWithFrame:CGRectMake(0, 0, image.size.width, image.size.height)];
	UIImageView *imageview = [[UIImageView alloc] initWithFrame:[holderView frame]];
	[imageview setImage:image];
	[holderView addSubview:imageview];

	UIPinchGestureRecognizer *pinchRecognizer = [[UIPinchGestureRecognizer alloc] initWithTarget:self action:@selector(scale:)];
	[pinchRecognizer setDelegate:self];
	[holderView addGestureRecognizer:pinchRecognizer];

	UIRotationGestureRecognizer *rotationRecognizer = [[UIRotationGestureRecognizer alloc] initWithTarget:self action:@selector(rotate:)];
	[rotationRecognizer setDelegate:self];
	[holderView addGestureRecognizer:rotationRecognizer];

	UIPanGestureRecognizer *panRecognizer = [[UIPanGestureRecognizer alloc] initWithTarget:self action:@selector(move:)];
	[panRecognizer setMinimumNumberOfTouches:1];
	[panRecognizer setMaximumNumberOfTouches:1];
	[panRecognizer setDelegate:self];
	[holderView addGestureRecognizer:panRecognizer];

	UITapGestureRecognizer *tapRecognizer = [[UITapGestureRecognizer alloc] initWithTarget:self action:@selector(tapped:)];
	[tapRecognizer setNumberOfTapsRequired:1];
	[tapRecognizer setDelegate:self];
	[holderView addGestureRecognizer:tapRecognizer];

	[self.view addSubview:holderView];
}

Quickly lets also define each of these methods as such so we can see them all occurring as we touch an object that we add to the view. Add this code in and run the application, you can click around on the objects you add to the board and see the Log messages displaying in the terminal. In the terminal you may or may not be able to activate all of these, because of multi touch being simulated in a pretty limited way. But you can run the code and try this out.

-(void)scale:(id)sender {
	NSLog(@"See a pinch gesture");
}

-(void)rotate:(id)sender {
	NSLog(@"See a rotate gesture");
}

-(void)move:(id)sender {
	NSLog(@"See a move gesture");
}

-(void)tapped:(id)sender {
	NSLog(@"See a tap gesture");
}

UIGestureRecognizer Action Methods

All UIGestureRecognizers contain a state property of type UIGestureRecognizerState. This is because of UIGestureRecognizers calling their action methods throughout the entire time a gesture is being performed. When the gesture first begins the state of the calling UIGestureRecognizer is UIGestureRecognizerStateBegan, throughout its all subsequent calls have the state UIGestureRecognizerStateChanged, and the final call is of state UIGestureRecognizerStateEnded. We can use this to our advantage to do house keeping in each of our gesture action methods. Another important thing to note about the action calls from UIGestureRecognizers is that the properties it will report about a gesture, such as scale for UIPinchGestureRecognizer and rotation for UIRotationGestureRecognizer, will always be in reference to the original state of the object. So as a scale is happening the scale may be reported as; 1.1, 1.2, 1.3, 1.4 and 1.5 on subsequent calls. These scales are not cumulative but all in reference to the original state of the object the UIGestureRecognizers are attached to.

Implementing Scaling

First thing we will do is implement the scale method. The scale method will be called by an id sender, this sender will actually be a UIPinchGestureRecognizer object. If we look at the documentation for a UIPinchGestureRecognizer object we will see that it includes a scale property that is a CGFloat. This scale property will be provided by the UIPinchGestureRecognizer every time the scale: method is called. Because the scale will be cumulative and always in reference to the original state of the object. Because of this, as we make our photo grow, we must make sure that we only scale by the difference of the last scale to the current scale. For example of the first scale: call has the UIPinchGestureRecognizer scale as being 1.1 and the next call has it by 1.2, we should scale by 1.1 and then by another 1.1. To handle this we have the the class property CGFloat lastScale. This will keep track of the last scale we applied to our view so  that on the next call we can only apply the difference between them.

So now that we can tell how much to scale an item upon being pinched we need to look into the mechanism that will actually scale the view. Every UIView has a CGAffineTransform property called transform. This described much of the geometry of the view that will be drawn. Using method provided by the Quartz frameworks we will figure out how to change this variable to scale as we need. Lets first take a look at out whole scaling method.

-(void)scale:(id)sender {

	[self.view bringSubviewToFront:[(UIPinchGestureRecognizer*)sender view]];

	if([(UIPinchGestureRecognizer*)sender state] == UIGestureRecognizerStateEnded) {

		lastScale = 1.0;
		return;
	}

	CGFloat scale = 1.0 - (lastScale - [(UIPinchGestureRecognizer*)sender scale]);

	CGAffineTransform currentTransform = [(UIPinchGestureRecognizer*)sender view].transform;
	CGAffineTransform newTransform = CGAffineTransformScale(currentTransform, scale, scale);

	[[(UIPinchGestureRecognizer*)sender view] setTransform:newTransform];

	lastScale = [(UIPinchGestureRecognizer*)sender scale];
}

The first thing we do in this method is bring the touched view to the front. We do this by accessing the view property of our sender which in this case is the UIPinchGesturereRecognizer. Next thing we do is check if this is the final touch in this pinch motion. If it is we reset out lastTouch value to 1. When the scale of one is applied a view does not change. When a pinch has ended we set the final pinch as being the new starting point for the next pinch sequence, specifically 1. Any other touch besides the last will subtract the difference from the last scale and the current scale from 1. This will be the scale change between the current touch and the last. We want to apply this to the current CGAffineTransfom matrix of the view this gesture recognizer is attached to. We now get the current transform of the view and pass it into CGAffineTransformScale() method. The first parameter is for current transform and the following two are the x and y scale to be applied to the passed in transform. The output here will be the new transform for the view. We apply this and reset the scale.

Implementing Rotation

Next thing we handle is rotation. This method has a very similar structure to the scaling method. We use another class property called lastRotation this time instead and a slightly different Quartz method, but the code overall should make sense. Check it out below.

-(void)rotate:(id)sender {

	[self.view bringSubviewToFront:[(UIRotationGestureRecognizer*)sender view]];

	if([(UIRotationGestureRecognizer*)sender state] == UIGestureRecognizerStateEnded) {

		lastRotation = 0.0;
		return;
	}

	CGFloat rotation = 0.0 - (lastRotation - [(UIRotationGestureRecognizer*)sender rotation]);

	CGAffineTransform currentTransform = [(UIPinchGestureRecognizer*)sender view].transform;
	CGAffineTransform newTransform = CGAffineTransformRotate(currentTransform,rotation);

	[[(UIRotationGestureRecognizer*)sender view] setTransform:newTransform];

	lastRotation = [(UIRotationGestureRecognizer*)sender rotation];
}

Implementing Movement

Now we handle movement which is a bit different that the rotation and scaling transformations. Although you could use the transform to move an object around using the transform property, we are going to continuously reset the center of each view. We utilize PanGestureRecognizers method translationInView to get the point which the view has been moved to in reference to its starting point. If this is the first touch from the gesture recognizer we set our class properties firstX and firstY. We the calculate our translated point by adding the original center points to the translated point in the view. We set the view’s center with this newly calculated view. You can see the code below.

-(void)move:(id)sender {

	[[[(UITapGestureRecognizer*)sender view] layer] removeAllAnimations];

	[self.view bringSubviewToFront:[(UIPanGestureRecognizer*)sender view]];
	CGPoint translatedPoint = [(UIPanGestureRecognizer*)sender translationInView:self.view];

	if([(UIPanGestureRecognizer*)sender state] == UIGestureRecognizerStateBegan) {

		firstX = [[sender view] center].x;
		firstY = [[sender view] center].y;
	}

	translatedPoint = CGPointMake(firstX+translatedPoint.x, firstY+translatedPoint.y);

	[[sender view] setCenter:translatedPoint];

	if([(UIPanGestureRecognizer*)sender state] == UIGestureRecognizerStateEnded) {

		CGFloat finalX = translatedPoint.x + (.35*[(UIPanGestureRecognizer*)sender velocityInView:self.view].x);
		CGFloat finalY = translatedPoint.y + (.35*[(UIPanGestureRecognizer*)sender velocityInView:self.view].y);

		if(UIDeviceOrientationIsPortrait([[UIDevice currentDevice] orientation])) {

			if(finalX < 0) { 				 				finalX = 0; 			} 			 			else if(finalX > 768) {

				finalX = 768;
			}

			if(finalY < 0) { 				 				finalY = 0; 			} 			 			else if(finalY > 1024) {

				finalY = 1024;
			}
		}

		else {

			if(finalX < 0) { 				 				finalX = 0; 			} 			 			else if(finalX > 1024) {

				finalX = 768;
			}

			if(finalY < 0) { 				 				finalY = 0; 			} 			 			else if(finalY > 768) {

				finalY = 1024;
			}
		}

		[UIView beginAnimations:nil context:NULL];
		[UIView setAnimationDuration:.35];
		[UIView setAnimationCurve:UIViewAnimationCurveEaseOut];
		[[sender view] setCenter:CGPointMake(finalX, finalY)];
		[UIView commitAnimations];
	}
}

Implementing Momentum

The final half of the above method is for us to calculate the momentum that the object will have after being moved. This will make the object appear as if it is being thrown across a table and slowly coming to stop. In order to do this we utilize UIPanGestureRecognizers velocityInView method which will tell us the velocity of the pan touch within a provided view. With this we can do an easy position calculation for both the x and y coordinates of our object. To do this we must provide an input for time, in this case .4 seconds. While this is not truly momentum and friction based physics it provides a nice affect for our interaction. With out final resting place calculated we ensure that where the object ends up will still be within the visible surface of the iPad by checking against the bounds of the screen depending on the current orientation. The final step is to animate the view moving to this final location over the same .4 second time period.

Implementing Taps

We have one final gesture recognizer implementation to do and that is the tap: method. This method will be used when a user taps an object that is in the midsts of sliding after being moved. We essentially want to stop the movement mid slide. In order to do that we are going to tell the CALayer layer property of our view to cancel all current animations. The short piece of code can be seen below.

-(void)tapped:(id)sender {

	[[[(UITapGestureRecognizer*)sender view] layer] removeAllAnimations];
}

Implementing UIGestureDelegate

If you run the code now you will be able to perform all of the gestures described within this document but you will notice that you are not able to do several at the same time. For instance you can not pinch zoom and rotate a view at the same time. This is because we still need to implement the UIGestureRecognizerDelegate method gestureRecognizer:shouldRecognizeSimultaneouslyWithGestureRecognizer. We want to make sure that any gesture recognizers can happen together except for the pan gesture recognizer. To do this we simply check that it is not a UIPanGestureRecognizerClass and return true in that case. See the short code below.

- (BOOL)gestureRecognizer:(UIGestureRecognizer *)gestureRecognizer shouldRecognizeSimultaneouslyWithGestureRecognizer:(UIGestureRecognizer *)otherGestureRecognizer {

	return ![gestureRecognizer isKindOfClass:[UIPanGestureRecognizer class]];
}

GIT Hub

You can find this project now on GitHub. Please let me know any issues you may have. Happy coding!

Follow me on Twitter @cruffenach

Cloning UIImagePickerController using the Assets Library Framework

PostPic

Hello iCoders. This is a follow up post to my initial post on the Assets Library Framework and Blocks. We came across an interesting problem when working on the application for Animoto.com. They have had an app in the store since the very early days of the app store, and one of our biggest struggles has been creating an interface to allow users to select multiple photos from their photo album for a slideshow. While the iPhone photos application allows for this, the UIImagePicker does not. With the release of the Assets Library framework we can now recreate the experience of the UIImagePicker, with some additional custom functionality to fit our needs. As a result we created a new cloned version of the UIImagePicker that allows for multiple photo selection just like the photos app. We have decided to open source the controller for other developers to use. This post will explain the process of creating the new image picker as well as the method of incorporating it into your code.

The ELCImagePickerController

The ELCImagePickerController is only possible because of the newly introduced Assets Library framework. This framework gives you raw (more or less) access to the photo and video elements of a user. We looked at UIImagePickerController and saw a lot of weaknesses with it. You can only select 1 photo at a time, and even in Apple’s photo app, where you can choose several pictures at a time, you can’t use multi touch to do your selection. To solve these problems we rolled our own solution that works very closely to UIImagePickerController.

How to use it

First I am going to explain using the picker since to many people the process of creating it won’t be very interesting. The image picker is created and displayed in a very similar manner to the UIImagePickerController. The sample application that is part of the GitHub project, where I distribute the controller, shows its use, but I will go into detail here. To display the controller you instantiate it and display it modally like so.

ELCImagePickerController *controller = [[ELCImagePickerController alloc] initImagePicker];
[controller setDelegate:self];
[self presentModalViewController:controller animated:YES];
[controller release];

The ELCImagePickerController will return the select images back to the ELCImagePickerControllerDelegate. The delegate contains to methods very similar to the UIImagePickerControllerDelegate. Instead of returning one dictionary representing a single image the controller sends back an array of similarly structured dictionaries. The two delegate methods are:]

- (void)elcImagePickerController:(ELCImagePickerController *)picker didFinishPickingMediaWithInfo:(NSArray *)info;
- (void)elcImagePickerControllerDidCancel:(ELCImagePickerController *)picker;

GIT Hub

You can find this project now on GitHub. Please let me know any issues you may have and look for future releases with feature enhancements

General Structure

The ELCImagePicker is a collection of UITableViewControllers that are placed inside a UINavigationController. While the ELCImagePickerController is actually 5 separate custom classes I have written, I have put them all within a single header and main. I chose this to make the classes that were required to be imported into a project when using this as few as possible.  While usually when presenting a UINavigationController you would create one yourself in code and use the initWithRootViewController method, in this case we have created a UINavigationController subclass called ELCImagePickerController which does all this behind the scenes. In the end all a developer has to do is use the initImagePicker method and present the controller modally. This lets the class match the functionality of UIImagePickerController closer. You can see the Header and Main for the ELCImagePickerController class on the next page.

ELCImagePickerControllerDemo from Collin Ruffenach on Vimeo.

Wind Up Batteries

charge_battery_wind_up_battery.jpg

We have seen many green projects around these parts and wind up energy products like flashlights are nothing new, but why not wind up batteries to power any gadget?

Designers Yeon Kyeong Hwang & Mieong Ho Kang have come up with this concept design for a battery that can be recharged by twisting the battery itself. By using a built-in spiral spring wrapped around a generator, friction is created which in turn is converted to energy for the built in Ni-mH battery.

charge_battery2.jpg

While the idea of free energy is great, you would have to twist this thing a whole lot to build up enough juice, not really practical. Maybe if there was a kick-out crank for leverage, but until then I’ll stick with my solar charger.

tech.nocr.atWind Up Batteries originally appeared on tech.nocr.at on 2011/02/22.

© tech.nocr.at 2011 |
Permalink |
Comments |
Read more in Gadgets |
Add to del.icio.us |
Stumble it |
Digg this

Explore more in: , , , ,


Dude Plays Super Mario Kart In Real Life

SuperMarioCart.jpg

I have spent many hours playing Super Mario Kart on my kids DS. This French dude has taken it to the next level by playing the game in real life. French humorist Rémi Gaillard drove a real go-cart through city traffic while dressed as Mario.

As you can see from the video, Mario tosses banana peels at the cars following him and collects power-ups. He even stopped at a grocery store to pick up some extra bananas.

If your considering giving this a try, don’t. Super Mario had a run in with some local traffic cops who weren’t too happy, not to mention, bumping a car in real life with a go-cart will get you killed.

tech.nocr.atDude Plays Super Mario Kart In Real Life originally appeared on tech.nocr.at on 2011/02/21.

© tech.nocr.at 2011 |
Permalink |
Comments |
Read more in Tech News |
Add to del.icio.us |
Stumble it |
Digg this

Explore more in: ,


Lightsaber Knows What Side Of The Force You Are On

lightsaber_dark_side_detector.jpg

It doesn’t matter if you are a Jedi Knight or a Sith Lord, you still need a Lightsaber. This “Build it yourself” Lightsaber will detect which side of the force you sit on. Perfect for those of you who are sitting on the preverbal Force fence.

As you start to assemble your Lightsaber, place the saber in your hand. If it glows blue you are a member of the Jedi order and if it glows red you must bow to the emperor. I’m not sure how it decides what side of the force you are on, but I’m willing to bet it’s just the luck of the draw. I wonder if it would glow pink if you have no force at all.

If your interested, head on over to the Star Wars Shop and pick one up for $14.99

tech.nocr.atLightsaber Knows What Side Of The Force You Are On originally appeared on tech.nocr.at on 2011/02/17.

© tech.nocr.at 2011 |
Permalink |
Comments |
Read more in Gadgets |
Add to del.icio.us |
Stumble it |
Digg this

Explore more in: , ,


DNS+NGINX + PHP-FPM + APC + FASTCGI+Magento by onejewelry

VPS hosting have one IP. 1.DNS Server Set up host few domains 2.mail server setup 3.I try nginx-autoinstaller install fine but magento 1.5.0.1 not installing ( data connection error..) if you know how to fix magento with LNMP you could use nginx-autoinstaller… (Budget: $250-$750 USD, Jobs: Linux, System Admin, Web Security)