How to Create and Publish a Jekyll Theme Gem

One of Jekyll’s noteworthy new features is the ability create official themes in the form of Ruby gems. These themes can be installed by a Jekyll user to style their static blog or website with ease, leaving them to manage their content.

Prior to this new theming feature, Kezz Bracey wrote a great tutorial on how to create a Jekyll theme. In this tutorial, we’re going to extend upon Kezz’s post by converting our template into an official Jekyll theme gem.

Preparation

Before we get started, I would recommend you read through the previous tutorial. I’m going to assume you already have a Jekyll theme created using Kezz’s method, or you may even have a well written Jekyll site that you’d like to convert into an official Jekyll theme.

You’re going to need to use the command line when working on your Jekyll theme, but once again, Kezz has you covered!

Open your command line tool and make sure you have the latest version of Jekyll installed (at the time of this article it’s 3.3) by using the following:

$ gem install jekyll

You’ll also need Bundler, which is a gem for managing other gems. I’ll explain why you need this later on. You can install this using:

$ gem install bundler

Finally, you’ll need to sign up for a RubyGems.org account. Doing this allows you to push your theme to their registry so other Jekyll users can download and use it.

Getting Started

To help us get started, Jekyll has a command just for creating a new theme. In your command line tool, locate the directory you plan to work in, and use the following command to create the base files for your theme:

$ jekyll new-theme awesome-jekyll-theme

You should see something like the list below in your working folder:

awesome-jekyll-theme/
  _includes/
  _layouts/
    default.html
    page.html
    post.html
  _sass/
  assets/
  Gemfile
  LICENSE.txt
  awesome-jekyll-theme.gemspec
  README.md

The _layouts/, _includes/ and _sass/ folders are the same as the folders you’d see in a normal Jekyll project, containing all your page layouts, “includes” (or “partials”) and Sass files.

The assets/ folder is for files you want to output to the user’s site. For example, JavaScript, image or style files. You would normally place these files into js/, css/ or images/ folders.

awesome-jekyll-theme.gemspec is the file that describes your gem theme. Here is where you can list the name, the version, a description, a homepage, and a list of gems for your theme gem.

The Gemfile is for Bundler, which we mentioned before. This links the gems listed in your .gemspec file with Bundler in your command line tool. We’ll be using Bundler later to test out your theme.

Finally, the README.md and LICENSE.txt are there to document your theme and to provide a suitable license. You’re probably familiar with these files if you’ve created a GitHub project before.

Note: It’s important to document your theme thoroughly. That way, people who want to use your theme will be able to do so easily, and use the options and controls you’ve provided within it.

Converting Your Theme

Given that a Jekyll project has a pretty similar file structure to a Jekyll theme, you can go ahead and copy most of your files over. You’ll probably want to overwrite the pre-existing layout files that come with the base theme with your own. So, all your layout files need to go into the _layouts/ folder, your includes into the _includes/ folder, and your Sass files into the _sass/ folder within the base theme you created.

Hint: New to Sass? Check out this course by Adi Purdila, 14 Days to Learn Sass

You’ll need to place your main styles, JavaScript and graphic assets in the assets/ folder. This is a key folder for Jekyll theming as it’s the only directory that will appear in the end users site. You may end up with an assets folder that looks like this:

assets/
  styles.scss
  scripts.js
  theme-logo.png

In turn, you’ll need to update the paths in your code to reflect this path change. For example, css/styles.scss will change to assets/styles.scss.

Hint: To make sure your paths are correct in your theme, you might want to check out relative_url and absolute_url which have recently been added to Jekyll.

Your Theme Metadata

The .gemspec file is designed to provide core information about your theme gem. The base Jekyll theme comes with this file, but you’ll need to replace the example values with your own. Here’s an example .gemspec file:

# coding: utf-8

Gem::Specification.new do |spec|
  spec.name          = "awesome-jekyll-theme"
  spec.version       = "0.0.2"
  spec.authors       = ["David Darnes"]
  spec.email         = ["[email protected]"]

  spec.summary       = %q{A short explanation of my awesome gem theme.}
  spec.description   = "A longer explanation of my awesome gem theme that isn’t the same as my summary."
  spec.homepage      = "https://alembic.darn.es"
  spec.license       = "MIT"

  spec.files         = git ls-files -z.split("\x0").select { |f| f.match(%r{^(assets|_layouts|_includes|_sass|LICENSE|README)}i) }

  spec.add_runtime_dependency "jekyll-seo-tag", "~> 2.0"

  spec.add_development_dependency "jekyll", "~> 3.3"
  spec.add_development_dependency "bundler", "~> 1.12"
end

Below is a run down of what I changed in my .gemspec file:

The name should be the name of your theme, which should match with the .gemspec file name. The version should be the latest number of your theme gem. The authors can be a list of people, but, for now, it’s just myself developing this theme. email should be the same email you signed up with for RubyGems.org.

The summary and description should be short and long explanations respectively of your theme gem. You can either set the homepage to a live demo of the theme or even the GitHub repo in which is resides.

The license should match whatever license you’ve provided in the theme gem (the LICENSE.txt file). The files value should be left unchanged as that marks the files and folders that will be used in your final theme gem.

The last part of the .gemspec file is a list of gems that are needed in order for your theme to work correctly. In my example, I have just one gem that is needed for it to run: jekyll-seo-tag. The other gems listed, jekyll and bundler, are development gems and are only needed when someone is developing the theme gem.

Make sure to add all the gems you need for your theme in this file. You can find a full list of Jekyll’s plugins on their site.

Testing Your Theme

Now that we have our theme files and our .gemspec file has been filled in, we can now perform some initial testing. However, we’re going to need some sample content, so copy over the _config.yml from your old template theme, along with some markdown content. An index.md file with some content should be sufficient for an initial test, but you may want to add an example post, as well. Blogging is one of the key features of Jekyll, so it would be a good idea to test this.

Note: Make sure your front matter has a layout selected or you might not see the theme correctly when running locally.

Remember that we installed Bundler and that Gemfile in the base of our theme directory? Well, Bundler uses Gemfiles to manage gems in projects and if you open that file, you’ll see the following:

source "https://rubygems.org"
gemspec

What this file does is to tell Bundler to look on RubyGems.org for the gems in your .gemspec file. So, with that in mind, let’s test your theme.

In your command line tool, use the command below to install all the gems needed for your theme gem:

$ bundle install

This should install all the themes in your .gemspec, which, in my example, would just be jekyll-seo-tag. Now we can run the theme locally using:

$ bundle exec jekyll serve

You should then be able to view your theme at http://localhost:4000. If an error occurs, it might be because you’re missing a gem in your .gemspec file.

Note: You might need to whitelist gems in your _config.yml file, if you haven’t already done so, as well as stating them in your .gemspec. If you’re struggling to get to grips with Jekyll, Guy Routledge has created a great course for Tuts+ on Building Static Websites With Jekyll.

Refining and Adding Customisation

Next, you’re going to be spending some time refining your theme to make sure it works with a variety of content formats and sizes. You might also want to consider customisation options, either through a global setting in the _config.yml or on separate pages in the front matter.

The user has the ability to overwrite any file in your theme gem with their own file on their own Jekyll site. For example, if you have _includes/header.html in your theme gem, the theme user can overwrite that file with _includes/header.html on their own site. You might want to think about making your theme flexible enough that the theme user can easily overwrite your files to make their own site more unique.

Documentation

If you’re adding customisation to your theme, you’re going to need documentation to go with it. Documenting your theme gem is very important. If the documentation is poor, then people won’t want to use the theme.

Here are some of the things that I would expect to see in a theme’s documentation:

  • A good description of the theme and its uses
  • A list of features
  • Clear installation instructions
  • Some demo content to show how to use the theme
  • How the configuration options work
  • How the page options work
  • Any shortcodes / includes that can be used
  • References to any open source projects you used to help create the theme

All of this can be listed in the README.md, which was created when we generated the base Jekyll theme. When the theme gets pushed up to RubyGems.org, the readme file will be processed and shown on the gem page for people to refer to.

Along with your documentation, I would recommend providing some demo content to get people started with your theme. A _config.yml, index.md and example post file, similar to the ones you used to test your theme with earlier, along with a Gemfile should be sufficient. Although it should only require the user to add the gem to their Gemfile, it would be very helpful to provide an example setup that they can download and use straight away.

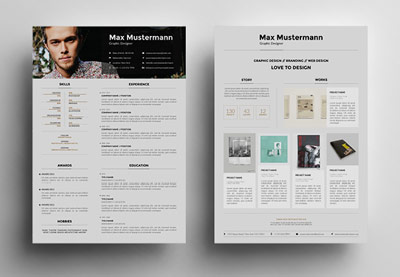
You’ll need to provide a screenshot for your theme, as stated in the official Jekyll documentation, with the name screenshot.png. Not only will this allow people to see how your theme looks at a glance, but it will also provide a consistency across all Jekyll themes so that they can be displayed in a gallery or admin UI in the future.

Publishing Your Theme

Once you’re happy with your theme, and you’ve tested and documented it, you’ll need to push it up to the RubyGems.org registry so that others can use it.

Locate your theme gem with your command line tool and use the following:

gem build awesome-jekyll-theme.gemspec

Make sure to match the name of the .gemspec file in your theme with the command shown above. This will create a file called awesome-jekyll-theme-0.0.2.gem, which is your official Jekyll theme gem! Next, you’ll need to push your gem up to RubyGems.org. Use the following in your command line tool:

gem push awesome-jekyll-theme-0.0.2.gem

If this is your first time pushing a gem to RubyGems.org, it will ask you to log in with the details you used to sign up. After that, the gem should be pushed up to the registry, meaning your theme gem has been published.

Hint: With most command line tools, if you write the first few letters of a file and then press Tab, it should autocomplete the rest of the file name, as long as there isn’t another file starting with the same letters in the same folder.

Once this has happened, you’ll need to do some further testing and follow your own instructions on installing and using the theme gem. The instructions should be fairly similar to the ones shown on the official Jekyll site.

Additional Reading

As well as following this tutorial, you might want to check out these resources when it comes to creating your own Jekyll theme gem:

Download How to Create and Publish a Jekyll Theme Gem

Building Your Startup: Refining Email Templates

Final product image
What You’ll Be Creating

This tutorial is part of the Building Your Startup With PHP series on Envato Tuts+. In this series, I’m guiding you through launching a startup from concept to reality using my Meeting Planner app as a real-life example. Every step along the way, I’ll release the Meeting Planner code as open-source examples you can learn from. I’ll also address startup-related business issues as they arise.

In this tutorial, I’ll be refining the responsive, HTML email templates that Meeting Planner uses to send out invitations, notifications, reminders, and account-related messages.

During the initial stage of Meeting Planner development, I’ve focused primarily on functionality and have not yet invested significantly in design or hired a designer. Today’s goal is to clean up the appearance of the existing HTML templates so that the basic emails are more readable and usable for people.

Likely half of people’s first experience with Meeting Planner will be via a Meeting Request email.

If you haven’t tried out Meeting Planner yet, go ahead and schedule your first meeting. I do participate in the comment threads below, so tell me what you think! You can also reach me on Twitter @reifman. I’m especially interested if you want to suggest new features or topics for future tutorials.

As a reminder, all of the code for Meeting Planner is written in the Yii2 Framework for PHP. If you’d like to learn more about Yii2, check out our parallel series Programming With Yii2.

Messages and Templates

The Early Templates

Initially, I used basic frameworks I found on the web to create early emails for Meeting Planner. They worked acceptably for the early development phase.

Here’s an example of our existing HTML emails; they’re functional but not very appealing. And, overall, I’ve decided that people don’t need this many options and links within their invitations. It was time to reduce the plethora of options for a simpler experience.

Meeting Planner Templates - Original HTML Invitation Template

Even with the templates I’d used, email tables often appeared corrupted without easy explanation:

Meeting Planner Templates - Example of Corrupted View of Invitation in Gmail

I’d been preparing to migrate to more professional email templates, but it was definitely overdue.

The Variety of Messages 

Here’s a summary of the messages that Meeting Planner regularly sends today:

  • meeting requests (i.e. invitations)
  • meeting updates for changes (also known as notifications)
  • meeting confirmations with calendar file attachment
  • meeting reminders
  • requests for contact information for an upcoming meeting
  • password reset requests

For the alpha test, I’m hoping I can reach a reasonable aesthetic baseline by applying open-source templates to be found on the web. At a later date, we’ll hire a designer to invigorate the templates, theme and brand together.

I began scouring the web for the best email templates.

Open-Source Template Resources

There are a number of helpful guides like these:

And a number of providers offer open-source templates of their own:

Initially, I was drawn to the Mailgun templates as I felt they were thoroughly tested and I could build on them, but ultimately, I decided to go with Sendwithus’s Oxygen email templates. Sendwithus is a synergistic marketing platform for Mailgun (or potentially other email providers), but I don’t have experience with their overall service.

Oxygen offered a complete family of templates for useful scenarios. It seemed simple, organized, and easily extensible:

Meeting Planner Templates - The Send With Us Oxygen Templates

It’s kind of them to offer their open-source email templates without requiring you to be a paying user. Go open source!

Integrating the New Templates

As an MVC framework, Yii separates layouts from body content. So I needed to break down the templates and monitor differences between variations within a group.

You can download the Oxygen family of templates from the Sendwithus GitHub, but they’ve not clearly divided the standard style elements common to each template, so you have to do that yourself.

It took some time to choose which templates I preferred, which elements I liked in each, and which CSS should be integrated into the layout.

Separating the Layout

Ultimately, here’s the new HTML layout (I’ve truncated the styles here for readability):

<?php
use yii\helpers\Html;
/* @var $this \yii\web\View view component instance */
/* @var $message \yii\mail\MessageInterface the message being composed */
/* @var $content string main view render result */
?>
<?php $this->beginPage(); ?>
<!DOCTYPE html PUBLIC "-//W3C//DTD XHTML 1.0 Transitional//EN" "http://www.w3.org/TR/xhtml1/DTD/xhtml1-transitional.dtd">
<html xmlns="http://www.w3.org/1999/xhtml">
<head>
  <meta http-equiv="Content-Type" content="text/html; charset=<?php echo Yii::$app->charset; ?>" />
  <meta name="viewport" content="width=device-width, initial-scale=1" />
  <title><?php echo Html::encode($this->title); ?></title>
  <?php $this->head(); ?>
    <style type="text/css">
  ...
</style>
<link rel="stylesheet" media="screen" type="text/css" href="http://fonts.googleapis.com/css?family=Oxygen:400,700">
...
</head>
<body>
<?php $this->beginBody(); ?>
<body bgcolor="#f7f7f7">
<table align="center" cellpadding="0" cellspacing="0" class="container-for-gmail-android" width="100%">
  <tr>
    <td align="left" valign="top" width="100%" style="background:repeat-x url(https://meetingplanner.io/img/bg_top_02.jpg) #ffffff;">
      <center>
        <?= Html::img('https://meetingplanner.io/img/transparent.png', ['class'=>'force-width-gmail']);?>
        <table cellspacing="0" cellpadding="0" width="100%" bgcolor="#ffffff" background="https://meetingplanner.io/img/bg_top_02.jpg" style="background-color:transparent">
          <tr>
            <td width="100%" height="80" valign="top" style="text-align: center; vertical-align:middle;">
            <!--[if gte mso 9]>
            <v:rect xmlns:v="urn:schemas-microsoft-com:vml" fill="true" stroke="false" style="mso-width-percent:1000;height:80px; v-text-anchor:middle;">
              <v:fill type="tile" src="http://s3.amazonaws.com/swu-filepicker/4E687TRe69Ld95IDWyEg_bg_top_02.jpg" color="#ffffff" />
              <v:textbox inset="0,0,0,0">
            <![endif]-->
              <center>
                <table cellpadding="0" cellspacing="0" width="600" class="w320">
                  <tr>
                    <td class="pull-left mobile-header-padding-left" style="vertical-align: middle;">
                      <a href="https://meetingplanner.io"><?= Html::img('https://meetingplanner.io/img/email-logo.gif', ['alt'=>'Meeting Planner logo','height'=>'47','width'=>'137']);?></a>
                    </td>
                    <td class="pull-right mobile-header-padding-right" style="color: #4d4d4d;">
                      <a href="https://twitter.com/intent/user?screen_name=meetingio"><?= Html::img('https://meetingplanner.io/img/social_twitter.gif', ['alt'=>'@meetingio on twitter','height'=>'47','width'=>'38']);?></a>
                      <!-- <a href=""><img width="38" height="47" src="http://s3.amazonaws.com/swu-filepicker/LMPMj7JSRoCWypAvzaN3_social_09.gif" alt="facebook" /></a>-->
                      <!-- <a href=""><img width="40" height="47" src="http://s3.amazonaws.com/swu-filepicker/hR33ye5FQXuDDarXCGIW_social_10.gif" alt="rss" /></a>-->
                    </td>
                  </tr>
                </table>
              </center>
              <!--[if gte mso 9]>
              </v:textbox>
            </v:rect>
            <![endif]-->
            </td>
          </tr>
        </table>
      </center>
    </td>
  </tr>
<?php echo $content; ?>
</table>
<?php $this->endBody(); ?>
</body>
</html>
<?php $this->endPage(); ?>

Replacing the Common Elements

Within the templates, I had to replace a number of elements:

  • Logo
  • Supporting images 
  • Links

I created a logo file that would work for now, and I statically hosted it and the helper images, e.g. for Twitter, on Meeting Planner’s server.

Meeting Planner Templates - Logo

I also replaced the default links within the email with code for our site links.

Building a Footer Section

To simplify reuse across the application, I separated the code for the footer:

<?php
use yii\helpers\Html;
use yii\helpers\Url;
use common\components\MiscHelpers;
?>
<tr>
  <td align="center" valign="top" width="100%" style="background-color: #f7f7f7; height: 100px;">
    <center>
      <table cellspacing="0" cellpadding="0" width="600" class="w320">
        <tr>
          <td style="padding: 25px 0 15px">
            <strong><?php echo Html::a(Yii::t('frontend','Meeting Planner'), $links['home']); ?></strong><br />
            Seattle, Washington<br />
          </td>
        </tr>
        <tr><td style="font-size:75%;"><em>
          <?php echo HTML::a(Yii::t('frontend','Email settings'),$links['footer_email']); ?>
          | <?php echo HTML::a(Yii::t('frontend','Block sender'),$links['footer_block']); ?>
          <?php //echo HTML::a(Yii::t('frontend','Block all'),$links['footer_block_all']); ?>
        </em>
        </td></tr>
      </table>
    </center>
  </td>
</tr>

Updating the Existing Templates

To integrate the templates, I wanted to start with the easiest one. Moving around complex, unfamiliar CSS and HTML is never simple.

I began with our Password Reset email template.

Password Reset

I chose Oxygen’s Welcome template shown below:

Meeting Planner Templates - Oxygen Welcome Template

Each of SendwithUs’s individual templates can be previewed and tested on their Litmus account.

Here’s our reset your password email now on an iPhone, much more aesthetically comfortable than before:

Meeting Planner Templates - Reset Your Password

I was a bit confused when the first Gmail attempts I received looked malformed to me. 

Meeting Planner Templates - Reset Your Password in Gmail

But reviewing their Litmus previews showed me that that’s what they look like in Gmail:

Meeting Planner Templates - Oxygen Welcome in Gmail

I later learned that Gmail requires more inlining of CSS than other services. I’ll guide you through repairing this in a future tutorial.

Here’s the passwordRequestToken.php code that helped generate the above:

<?php
use yii\helpers\Html;
/* @var $this yii\web\View */
/* @var $user common\models\User */
$resetLink = Yii::$app->urlManager->createAbsoluteUrl(['site/reset-password', 'token' => $user->password_reset_token]);
?>
<tr>
  <td align="center" valign="top" width="100%" style="background-color: #f7f7f7;" class="content-padding">
    <center>
      <table cellspacing="0" cellpadding="0" width="600" class="w320">
        <tr>
          <td class="header-lg">
            Reset Your Password
          </td>
        </tr>
        <tr>
          <td class="free-text">
            Hello <?php echo Html::encode(\common\components\MiscHelpers::getDisplayName($user->id)); ?>,
            Click the button below to reset your Meeting Planner password:
          </td>
        </tr>
        <tr>
          <td class="button">
            <div><!--[if mso]>
              <v:roundrect xmlns:v="urn:schemas-microsoft-com:vml" xmlns:w="urn:schemas-microsoft-com:office:word" href="http://" style="height:45px;v-text-anchor:middle;width:155px;" arcsize="15%" strokecolor="#ffffff" fillcolor="#ff6f6f">
                <w:anchorlock/>
                <center style="color:#ffffff;font-family:Helvetica, Arial, sans-serif;font-size:14px;font-weight:regular;">My Account</center>
              </v:roundrect>
            <![endif]--><a class="button-mobile" href="<?php echo $resetLink ?>"
            style="background-color:#ff6f6f;border-radius:5px;color:#ffffff;display:inline-block;font-family:'Cabin', Helvetica, Arial, sans-serif;font-size:14px;font-weight:regular;line-height:45px;text-align:center;text-decoration:none;width:155px;-webkit-text-size-adjust:none;mso-hide:all;">Reset Your Password</a></div>
          </td>
        </tr>
      </table>
    </center>
  </td>
</tr>
<tr>
  <td align="center" valign="top" width="100%" style="background-color: #ffffff;  border-top: 1px solid #e5e5e5; border-bottom: 1px solid #e5e5e5;">
    <center>
      <br />
    </center>
  </td>
</tr>
<?php echo \Yii::$app->view->renderFile('@common/mail/section-footer-static.php') ?>

The Meeting Request

The invitation people receive as a request to meet is our most complex template. It’s sharing a brief introduction, possible places, possible times, and sometimes a note.

For this, I used the Oxygen Confirm template:

Meeting Planner Templates - Oxygen Confirm Template

I thought the Shipping and Date Shipped boxes could be used for sharing Place and Date Time options, and it’s worked fairly well.

Here’s what the invitation looks like now:

Meeting Planner Templates - Meeting Request Template

Certainly, the basic aesthetic appearance is much better. In the future, I may do some work to level and equalize the vertical heights of the places and date times boxes.

Here’s the invitation-html.php body code that helped generate the above:

<?php
use yii\helpers\Html;
use yii\helpers\Url;
use common\components\MiscHelpers;
use frontend\models\Meeting;
use frontend\models\MeetingNote;
use frontend\models\MeetingPlace;
use frontend\models\MeetingTime;
/* @var $this \yii\web\View view component instance */
/* @var $message \yii\mail\BaseMessage instance of newly created mail message */
?>
<tr>
  <td align="center" valign="top" width="100%" style="background-color: #f7f7f7;" class="content-padding">
    <center>
      <table cellspacing="0" cellpadding="0" width="600" class="w320">
        <tr>
          <td class="header-lg">
            Your Meeting Request
          </td>
        </tr>
        <tr>
          <td class="free-text">
            <p><em>Hi, <?php echo $owner; ?> is inviting you to an event using a new service called <?php echo HTML::a(Yii::t('frontend','Meeting Planner'),MiscHelpers::buildCommand($meeting_id,Meeting::COMMAND_HOME,0,$user_id,$auth_key)); ?>. The service makes it easy to plan meetings without the exhausting threads of repetitive emails. Please try it out below.</em></p>
            <p><?php echo $intro; ?></p>
          </td>
        </tr>
        <tr>
          <td class="button">
            <div><!--[if mso]>
              <v:roundrect xmlns:v="urn:schemas-microsoft-com:vml" xmlns:w="urn:schemas-microsoft-com:office:word" href="http://" style="height:45px;v-text-anchor:middle;width:155px;" arcsize="15%" strokecolor="#ffffff" fillcolor="#ff6f6f">
                <w:anchorlock/>
                <center style="color:#ffffff;font-family:Helvetica, Arial, sans-serif;font-size:14px;font-weight:regular;">Track Order</center>
              </v:roundrect>
            <![endif]--><a href="<?php echo $links['view']; ?>" style="background-color:#ff6f6f;border-radius:5px;color:#ffffff;display:inline-block;font-family:'Cabin', Helvetica, Arial, sans-serif;font-size:14px;font-weight:regular;line-height:45px;text-align:center;text-decoration:none;width:155px;-webkit-text-size-adjust:none;mso-hide:all;"><?php echo Yii::t('frontend','View Request')?></a>
          </div>
          </td>
        </tr>
        <tr>
          <td class="w320">
            <table cellpadding="0" cellspacing="0" width="100%">
              <tr>
                <td class="mini-container-left">
                  <table cellpadding="0" cellspacing="0" width="100%">
                    <tr>
                      <td class="mini-block-padding">
                        <table cellspacing="0" cellpadding="0" width="100%" style="border-collapse:separate !important;">
                          <tr>
                            <td class="mini-block">
                              <span class="header-sm">Possible Times</span><br />
                              <?php
                                foreach($times as $t) {
                                  ?>
                                      <?php echo Meeting::friendlyDateFromTimestamp($t->start); ?><br />
                                      <?php
                                    }
                                ?>
                                <?php // echo HTML::a(Yii::t('frontend','accept all times'),$links['accepttimes']); ?>
                                <br />
                                <?php
                                if ($meetingSettings->participant_add_date_time) { ?>
                                <?php echo HTML::a(Yii::t('frontend','suggest a time'),$links['addtime']); ?><br />
                                <?php
                                }
                                ?>
                            </td>
                          </tr>
                        </table>
                      </td>
                    </tr>
                  </table>
                </td>
                <td class="mini-container-right">
                  <table cellpadding="0" cellspacing="0" width="100%">
                    <tr>
                      <td class="mini-block-padding">
                        <table cellspacing="0" cellpadding="0" width="100%" style="border-collapse:separate !important;">
                          <tr>
                            <td class="mini-block">
                              <span class="header-sm">Possible Places</span><br />
                              <?php
                              if (!$noPlaces) {
                              ?>
                              <?php
                                foreach($places as $p) {
                                  ?>
                                      <?php echo $p->place->name.' '; ?>
                                      <span style="font-size:75%;"><?php echo $p->place->vicinity; ?> <?php echo HTML::a(Yii::t('frontend','map'),
                                      MiscHelpers::buildCommand($meeting_id,Meeting::COMMAND_VIEW_MAP,$p->id,$user_id,$auth_key)); ?></span><br />
                                <?php
                                    }
                                ?>
                                <br />
                                <?php // echo HTML::a(Yii::t('frontend','accept all places'),$links['acceptplaces']); ?><br />
                                <?php
                                if ($meetingSettings->participant_add_place) { ?>
                                <?php echo HTML::a(Yii::t('frontend','suggest a place'),$links['addplace']); ?><br />
                                <?php
                                }
                                ?>
                                <?php
                              } else {
                                  ?>
                                  Phone or video <br />
                              <?php
                                }
                              ?>
                            </td>
                          </tr>
                        </table>
                      </td>
                    </tr>
                  </table>
                </td>
              </tr>
            </table>
          </td>
        </tr>
        <tr>
          <td class="free-text">
            <?php
                if (!$noPlaces) {
                    echo HTML::a(Yii::t('frontend','Accept all places and times'),$links['acceptall']).' | ';
                }
             ?>
               <?php
               if ($meetingSettings->participant_finalize && count($places)==1 && count($times)==1) {
                echo HTML::a(Yii::t('frontend','Finalize meeting'),$links['finalize']).' | ';
               }
               ?>
               <?php echo HTML::a(Yii::t('frontend','Decline request'),$links['decline']); ?>
          </td>
        </tr>

        <?php echo \Yii::$app->view->renderFile('@common/mail/section-notes.php',['notes'=>$notes,'links'=>$links]) ?>
      </table>
    </center>
  </td>
</tr>
<?php echo \Yii::$app->view->renderFile('@common/mail/section-footer-dynamic.php',['links'=>$links]) ?>

What’s Next?

Now that the basic templates have been updated, I’ll begin working to repair their appearances in Gmail. And soon, we’ll implement notifications and reminders using them.

While you’re waiting for episodes about these features, schedule your first meeting and try out the new templates. Also, I’d appreciate it if you share your experience below in the comments, and I’m always interested in your suggestions. You can also reach me on Twitter @reifman directly.

I’m also beginning to experiment with WeFunder based on the implementation of the SEC’s new crowdfunding rules. Please consider following our profile. I may write about this more as part of our series.

Watch for upcoming tutorials in the Building Your Startup With PHP series. There are a few more big features coming up.

Related Links

Download Building Your Startup: Refining Email Templates

30+ Best Resume Tips: That Will Get You Noticed and Hired

Have you recently sent out 15 or more resumes, only to get a single interview.

Sound familiar? If so, you’re not alone. 

Yet, with just a few tweaks, your resume can get you a leg up on other
candidates. 

I’ve
compiled the best resume tips and strategies into this quick-fire guide. These resume techniques will help you stand out, get more interviews, and land the job you really want. 

The best resume tips and tricks help you stand out to employers
The best resume tips and tricks help you stand out to employers quickly. (source graphic)

Note this post is part of our multi-part series on How to Create a Great Resume (Ultimate Guide). Here is our featured tutorial in this series, which is a great starting point: 

Now let’s jump into this collection of over 30 top resume tips and tricks to help polish your resume and improve your results.

Important Strategy Tips For Preparing to Make Your Resume

1. Read the Job You’re Applying for

Tailor your resume to every job
application.

Read the job ad line by line. Highlight
phrases used repeatedly, company culture hints, and anything that resonates
strongly with your career experience.

“Include their
‘About Us’ page, company news, and annual revenue reports in your research.
These sources are a treasure trove of clues about company culture, goals, and
challenges,” says Sarah Dowzell,
COO Natural HR.

2. Send the Right Document

Are you applying for a job in the U.S.? Is
it an academic, scientific, or government job? Did they ask for a resume or curriculum
vitae (CV)? Read the application instructions. If you’re not sure which one to
send, check out this guide:

3. Don’t Have All the Skills Required? No
Problem!

Do you pass on job opportunities where you
don’t have all the skills they’re looking for? Big mistake. Companies know
there’s no candidate with ALL the skills and characteristics they want.
Besides, they also get tons of applications from total beginners.

So what’s wrong with lacking one or two
skills they’re asking for? Nothing, so don’t
let it stop you
. It all comes down to how valuable you can be to their
team, based on your resume.

Emphasize your soft and transferable
skills. If you have the experience they need, but not in a company
setting, that’s okay. Side projects, volunteer experience, and academic work or
projects still count.

4. Don’t Write Your Whole Life Story

Your resume isn’t a diary detailing all the
job titles and duties you ever had. Think of it as a concise snapshot of your
present career and future potential.

5. Put the Impressive Stuff ‘Above the Fold’

‘Above
the fold’
refers to the area people see before having to scroll down. In
print, it refers to the first half of the document, or the upper half of a
folded newspaper. This is the first part recruiters see after reading your
resume. Use it well.

Don’t waste space with a big header for
your name and contact details. It’s common practice to put this information at
the top anyway, so you don’t have to use a big font. This professional resume template has a personalized header, but keeps the space used to a minimum, so your summary statement and work experience stand out above the fold: 

Minimal resume template design
Professional resume design.

Write
a good hook—an achievement, skill, or even a teaser question that will intrigue
the recruiter to read further.

Tips for Better Resume Writing

6. Use Digits in Writing Numbers

Numbers stand out in a sea of text, it also
makes your writing easier to read. Add numbers, statistics, percentages,
metrics, or ranges, to any skill or achievement in your resume to make it more
concrete.

Number Use Examples:

  • Range:
    Supervised 5 to 9 IT associates while we developed a Fintech app for budgeting
    and investments.
  • Savings:
    Streamlined debugging process of new software, saving over 25 hours of work per
    month. 
  • Frequency:
    Evaluated 7 website themes submitted by freelancers and in-house designers per
    week.
  • Results: 20% increase in ROI, while growing inbound traffic by 60,000 pageviews in the last year.

7. When Possible, Put Numbers at the Start

“People read
left to right so put numbers at the front of the bullets not buried in the
paragraph or at the end,” says Mike Sudermann, President &
Executive Recruiter at AscentSelect.

Example to Follow:

“15% reduction in
turnover after the creation and implementation of a new retention strategy”

8. Use Power Words Correctly

Power words are… well, powerful but only if
used in the right context and frequency.

Don’t forget these resume tips and tricks when
using power words:

  • Check the word’s definition in a dictionary.
    Don’t just use it because it sounds impressive. Don’t use words like ‘revolutionize,’ ‘pioneer’ or ‘dissuade’ if
    you can’t substantiate them, or if there are simpler words available.

Poor Example of Using Power Words:

“Improved team collaboration among
developers and database administrators using a revolutionized documentation
process”

Doesn’t ‘revolutionize’ sound too much for this context?

  • Don’t use power words on every bullet in your
    resume.
  • Avoid power words that are hard to comprehend.
  • Understand the nuances of your chosen power
    word. For example, ‘correspond’ means
    you communicated through email or letters. Communicate refers to both verbal
    and non-verbal communication.

 Check
out the downloadable power words I created for this guide:

9. Show, Don’t Explain, Soft Skills

Writing soft skills like ‘good
communication,’ ‘problem-solving,’
and ‘leadership’ is a waste of time.
Recruiters are immune to this.

Yes, these skills are still important. But
it’s better to prove you have these skills by subtly incorporating them into
your resume.

Leadership Example

“Led a
4-person team in creating a sales proposal for a new client.”

Teamwork Example

“Collaborated with the HR and marketing
team to create an employment roadshow that attracted top candidates from
different universities.”

10. Keep it Recent and Relevant

Only show the most recent and relevant job
titles you’ve held. Don’t waste valuable space for jobs you held in an industry
you’ve already left.

Remove job titles irrelevant to your
current professional goals. This frees up space to boost your qualifications
with more skills, achievements, or certifications.

11. Write a Summary

I often refer friends to companies where I
have an inside source, so I read lots of resumes. Until now, lots of them still
use a career objective that sounds like a wish list of what they want. 

Skip the objective. Write a summary
or career highlights instead. Limit it to 7 one-sentence bullets so recruiters
don’t gloss over this part. If you don’t want to write a customized resume for
every job application, re-write this part at least. For more information on this topic:

12. Maximize the First 3 Words of Your Bullets

In writing, I often read that the first
three words and last three words are what people remember most in headlines. I
think the same logic applies when it comes to writing bullets in your resume, because recruiters don’t read the whole document word for word.

Use numbers,
results, or power words to make your first three words count. Don’t waste it on
a preposition or article like ‘the.’

13. Avoid Clichés

Don’t use clichés like “creative,” “motivated,”
and “passionate.” They’re so overused that they’ve lost their meaning. Here are
the top 10 buzzwords to replace in your resume, courtesy of LinkedIn’s
2016 Global Buzzwords list
:

Top buzzwords to remove from your resume
Top buzzwords to remove from your resume.

14. Use
S.A.R. Format in Writing Achievements

“Use the formula ‘In Sitaution (S), I performed Action
(A)
, which led to Results (R).’ Adding achievements to your experience section
is one of the best things you can do for our resume. It gives recruiters a
tangible sense of how you use your skills to get results,” says Natalie
Severt, Career Expert at UptoWork.

Here’s an Example From
Severt

“To increase shopping cart value, I implemented an
upselling strategy, resulting in a 5% increase in sales.”

You can also
invert the formula to lead with the results: R.A.S.

R.A.S. Example – Leading With Results

“5% increase in sales after implementing an upselling
strategy for an e-commerce shopping cart.”

15. Create Curiosity

A little mystery is a good thing.

“You want the
reader to say to themselves, ‘Hmm… I am impressed this candidate had a 15%
reduction in turnover, but how did he do that?’” says Sudermann.

Don’t give away you best trade secrets. That curiosity is your bait in luring employers to call you.

If
they know what to do, what’s the sense in hiring you? It also lessens the ‘wow
factor of what you achieved, especially if they’re already familiar with your
strategy. 

16. Include Continuing Education

Add online courses and short seminars on
the education section of your resume. Don’t worry if it’s not taught in person,
or conducted by a well-known institution. Online education is widely recognized
nowadays so free and paid courses even from online providers carry weight.

If you took a course on Adobe Photoshop, MS Excel, or any other skill, don’t hesitate to
include it as long as it’s relevant to your job.

 17. Make Your Personality Shine

Your resume should reflect interesting
tidbits about your personality. Why?

Because high-achievers are interesting
people with diverse hobbies and interests. Employers often interview candidates
because something in their resume caught their eyes. Sometimes, these can come in the form of a sport, book, movie, side project, or volunteer
activity.

Some hobbies demonstrate skills related to
your job, such as how archery teaches focus and painting enhances creativity. These
activities do double duty to make you look both interesting and qualified for
the job.

Allow your personality to shine through in your resume. This stylish resume template has features to showcase your professional experience and skills, but also includes a “What I Like” hobbies section: 

Stylish personal resume design
Stylish personal resume.

Sprinkle references to books you’ve read,
sports you play, volunteer activities, and even places you’ve traveled in your
resume and cover letter.

18. Beware of Controversial Interests

Did you help a candidate during a political
campaign? Or maybe you raised money to support a church’s restoration. Both demonstrate
your work ethic and willingness to help. But those efforts could be used to
discriminate against you by someone who doesn’t agree with the cause. 

Tips for Better Resume Formatting

Good
formatting increases your resume’s readability and helps focus attention on the most important
parts of it.

19. Organized Spacing

Should you use single space or double space
between job entries? Pick one and stick to it. If you want to combine different
spacing, make sure it’s consistent between different elements. For instance, no
spacing between bulleted points but double spacing between two sections (i.e.
education and work history).

 20. Font Size

My rule of thumb is if the reader needs reading glasses to read the resume, you have already aggravated them. Font size will depend on the specific font but it MUST be legible. Also, avoid cursive and other quirky fonts, the recruiter might think you’re not serious about the job”, says Michelle
Riklan
, Certified Professional Resume Writer at Riklan Resources LLC.

21. Divvy Up Long Lists

Every profession has multiple skill sets related
to it. For instance, a UX designer has coding, design, illustration, and
administrative skills, just to name a few.

Dividing these skills into different lists
then itemizing what’s included in each clarifies your qualifications and
squeezes more keywords into your resume. It’s also easier to read this way.

22. Reverse Chronological Order

Start your professional history with your
current or previous job. Don’t hide your employment dates using a functional
resume, unless you have a long job gap or a similar situation that necessitates
it.

23. Length

Limit your resume to two pages. Any more
than that and you run the risk of some pages not getting the attention it
deserves. 

24. No Center or Justified Text

People read from left to right, so it’s
easier if most of your text, except the dates, are aligned left. Using center and
justified alignment also makes your resume hard to read because the eyes need
to scan for where the text starts again, instead of just starting immediately
at the left most part of the page.

25. Job Title or Company Name: Pick Which One
to Bold

Format your job title in bold to emphasize
career progression between the job titles you’ve held. If your career progression
isn’t evident after a quick scan of your professional history, just emphasize
your employer’s name. You can also do this to highlight employment from big
companies.

Tips for Improving Your Resume Design

26. Prioritize Skimmability

White space is breathing room for the eyes.
It makes your resume skimmable and less overwhelming to read, which is always a
plus for recruiters who spend all day reading applications.

27. Insert Keywords on the Sly

“Use a small
font and white-colored text to insert extra keywords in your resume”, suggests
Darin Herle, Co-Founder of TrackMeet.

It’s a sneaky way to insert
keywords into your resume, so I suggest putting these invisible keywords on the
document’s footer to avoid detection.

28. Match the Company’s Colors

“Instead
of a plain white-background document, one applicant submitted a resume that
matched our company’s colors. It was the most outstanding resume I’ve seen”,
says Alison Bradley,
Marketing Specialist and HR Assistant at Shiny Window Cleaning.

Using the company logo’s color theme shows
you did your research, and that you’re also passionate about the job.

29. Send a Traditional PDF, Even if You Have an
Infographic or Creative Resume

Creative resumes can help you stand out and get noticed. We have many resume templates with high quality, beautiful styles on Envato Market, such as those curated in these articles: 

Staffing firm The
Creative Group
polled more than 400 U.S. marketing and advertising
executives, and found that 78% of them still prefer traditional resumes in PDF
and word format.

Best-resume-tips-preferred-format

Creative resumes can help you stand out but
unless you have an insider, there’s no way to know for sure if an employer
prefers them over traditional resumes. Just to be safe, send a PDF or word file
resume even if your main resume is an infographic or video.

There are also a number of professional resume templates on Envato Market with traditional and more modern styles. And many easy to customize designs that can be exported to both PDF and Word formats. Here is a simple resume template, with minimal infographic elements: 

Simple resume template design
Simple resume design.

More Useful Resume Tips

30. Add a Resume Supplement

It’s impossible to show all your
qualifications in two pages, so take advantage of LinkedIn, portfolio sites,
and personal websites. Just cover all the important details and accomplishments
on your resume, and then let your online assets do the rest.

A printed portfolio of your works and a recommendation
letter from an influencer are also good resume supplements.

 31. Don’t Give them Reason to Toss Your Resume

“When I’m looking through resumes, I’m not looking for reasons to
interview someone. I’m looking for reasons to toss the resume in the shredder”, says Joshua
I. Wilson
, CMT, Chief Investment Officer at WorthPointe.

Busy C-executives aren’t the only ones guilty of this. Many
recruiters read resumes with the intention of weeding out applicants instead of
qualifying them. After receiving hundreds of resumes with similar qualifications, it’s hard to blame them.

A recruiter’s job is to look for the best candidate,
not the average. Scrub your resume clean of typos and dull job
responsibilities. Emphasize what makes you unique. 

32. Google Me

“If your online presence is extensive and impressive
enough, tell the recruiter to Google you to get a sense of your accomplishments,”
says Herle. 

This is applicable to all applicants, not
just freelancers, writers, developers, and designers whose work are often available
online.

 33. Name Your File

Use your name, job title, and the word ‘resume
as the document’s file name. That will make it easier for the recruiter to find
your job application, after you follow-up or send them a thank you note.

Improve Your Resume One Step at a Time

I
know reading everything suggested on this list is overwhelming. Doing it all is
even more tiring, so take it one step at a time. Some of these resume tips take
a few seconds to finish, while others might take half an hour—or more.

You don’t have to do it all at once. Make a few tweaks, then leave it at that and just pick up where you left off the next day. Improve your resume one step at a time. 

Learn more about how to make a great resume in our ultimate guide.

Download 30+ Best Resume Tips: That Will Get You Noticed and Hired

How to Highlight Freelance Work on Your Resume

If you freelance do you need a resume?

Some experts would argue that resumes are outdated when it comes to freelancing. The argument is that your website, portfolio, and social media presence contain enough information for a client to hire you. 

While it’s true that it’s possible to get freelance gigs without a resume, if you don’t have one you may be missing out on some lucrative opportunities. Even if you don’t use your freelance resume for every potential client, it’s better to be prepared and have one ready for when you need it.

One reason freelancers avoid making resumes is that creating a resume as a freelancer can be challenging. Most resume formats were designed with traditional employment in mind. It can be hard to fit a freelance career into a traditional resume structure.

Working on Freelance Resume
Working on freelance resume. (graphic source)

In this article, I outline why your freelance resume is important. I’ll also show you how to overcome resume obstacles that freelancers face. How best to include freelance work on your resume. Finally, I’ll share some template resources that work well for designing your freelance resume quickly.

To learn more about creating a resume, study our resume guide, and if you’re a freelancer then let’s get started.

Why Your Freelance Resume Is Still Important

You’re doing great as a freelancer. You’re getting lots of gigs and working regularly. So far, no one has asked for your resume.

That’s great. Now is the perfect time to update your resume to include your freelance work—before someone asks for it. 

When someone does asks for your resume, you want to have one nearly ready to go. You don’t want to have to spend a few days creating your freelancer resume under time pressure. It’s best to tackle this early and be prepared.

Here are some common scenarios when you might need a resume as a freelancer:

  • You’re applying for work with a larger client. In larger companies, freelancers (often referred to as independent consultants) are often asked to provide resumes. A large company is also more likely to use an Applicant Tracking System (ATS) to screen resumes.
  • You’re applying for work through an agency or a recruiter. If you’re looking for work through a third party, such as an agency or a recruiter, they may ask you for a resume that they can restyle and present to their end client.
  • You’re returning to traditional employment. The resume is still the mainstay of looking for traditional employment. If you’ve been freelancing for a while and are searching for a traditional position, it can be challenging to create a resume to encompass all your experience.
  • You’re applying for a professional license or certificate. In some fields, you may be required to submit a resume. Even if you’re not asked directly for a resume, it can serve as a reference to help you describe your experience.
  • You’re applying for an industry award. Sometimes an awards committee wants to see a list of your accomplishments. A resume is an easy way to summarize your accomplishments quickly.
  • You’re speaking at a conference or meeting. If you’re asked to give a presentation, the conference meeting organizer will probably want to introduce you. A resume is one way to provide them with the information they need.
  • Any other time a client requests one. Each client is different. Many will be happy with just a portfolio link. Others will insist on a resume. It would be a shame to miss out on a gig because you didn’t provide the client with the information they asked for.

Note that a resume does not replace a portfolio for a freelance creative. Rather, it supplements it. Be sure to include a link to your portfolio on your resume.

It’s also important to tweak your resume each time you submit it. Use it to emphasize how your experience and skills meet that specific client’s need. There’s no such thing as a “one-size-fits-all” freelancer resume.

How to Handle Common Freelance Resume Problems

One reason freelancers don’t use resumes is because it can be difficult to know how to include freelance work on a resume. Here are some common dilemmas freelancers face when creating their resumes:

  1. What job title do I give myself?
  2. Do I list freelance clients by name as separate jobs?
  3. How much detail do I include about my freelance projects?
  4. What if there are slow periods in my freelancing career? Will these look like gaps in employment?
  5. Do I include a link to my website or online portfolio?
  6. What if I’m freelancing alongside a full-time job? Do I include both?
  7. How do I format my resume? 

I’ll answer each of these topics separately: 

1. Job Title

As a freelancer, your clients don’t provide you with a job title. It’s up to you to come up with your own job title.

Since your freelancing business is a small business, you may be tempted to put a title on your resume that reflects that such as “owner” or even “CEO.”  While such a title might technically be correct, using it on your resume probably won’t help you find work.

Many experts suggest using a title that describes the actual work you performed for your client. For example, the job title “Independent Graphic Designer” is more informative for a potential client or employer than the job title “Owner.”

2. Listing Freelance Clients

Should you list your clients by name? If you’ve had a lot of clients, do you need to list each one separately?

First, consider any contract agreements you made. For example, if you are a freelance writer who does ghostwriting your contract may specify that you can’t name the client. In that case, describe the work only. Consider something like this example:

  • Served as a ghostwriter for a corporate blog. Provided weekly posts of between 500 and 1000 words.

If the contract allows it, list the client’s name while making it clear that you were not an employee. Adding the words “contractor” or “independent worker” after the company name should be enough.

If you’ve done a lot of freelancing work, you don’t need to list every single client you’ve ever worked for. Career experts agree it’s better to highlight work you did for a well-known company or brand over work you did for little-known companies.

When listing a client, make sure there is a contact at the company who can talk about the work you did for that client. Freelance clients do check references.

The best solution is to use your freelancing business name as an umbrella and list the most important client names as sub-points below. Lump lesser known clients and occasional clients together.

Here’s an example from a freelance graphic designer resume:

Graphic Designer, Anytown Consulting 2012-2016
Provided graphic design services for multiple clients including:

  • Big Company No. 1 (Consultant)
    Designed and created newsletter design 
  • Big Company No. 2 (Consultant)
    Developed logo and business card design
  • Smaller Company No. 1 (Consultant)
    Created banner ad and brochure
  • Consulted with additional clients about marketing design needs
    and corporate branding

3. How Much Detail Should You Provide?

Space is at a premium on your resume. A longer resume is not a better resume. This is true for freelancers and non-freelancers alike. A resume for even a senior-level professional should not exceed three pages. (Some experts recommend no more than two pages.)

For that reason, your resume needs to be edited tightly. Limit yourself to a single sentence to describe each freelancing gig that you list. Do use keywords that emphasize your skills and experience.

Omit the Job Objective section. It has no place on today’s resume. It may even cause your resume to be rejected. Learn more about resume objectives versus how to use summary statements instead: 

4. Dealing with Slow Periods and Gaps

Freelancing is known for its ups and downs. Your work may be hectic one month, and slow the next.

You may worry that the ups and downs of freelancing will look bad on your resume. If you use the name of your freelancing business as an umbrella and list your freelancing gigs beneath it, you don’t need to worry that slow months look like a gap in employment.

If you do have legitimate gaps in employment, times when you were neither employed nor running a freelancing business, be honest. It’s better to be honest than to make something up. Some specialists recommend explaining long gaps right on the resume.

For example:

  • Left workforce to care for sick family member, 2011-2012

Volunteer work can also be a good way to fill a gap in employment. This is especially true if the volunteer position is related to the job you are looking for.

Whether or not you decide to list the reason for your gap on your resume, be ready to talk about it in an interview. You will almost certainly be asked about it. If the gap is because you were looking for work, explain that.

If you’re qualified and have an otherwise solid work history, an explainable gap in your work history can be overcome.

5. Sharing Online Information

As a freelance professional, you likely have an online portfolio or website that you want to link to on your resume. You may also want to include links to your social media accounts such as LinkedIn.

Most HR professionals agree that it’s important to share your online information if it’s professional and relevant to your job search. Include your links right after your contact information at the top of the resume.

Be careful, though. Just because you have a social media account doesn’t mean it should be on your freelance resume. Include only those accounts that are up-to-date.

6. Part-Time Freelancing

One dilemma unique to freelancers is whether they should include part-time freelance work on their resume. Here are some questions to help you decide:

  1. Is the part-time work relevant to the position I am applying for?
  2. Do I need to list the part-time work to cover an employment gap?

If you need to list the part-time freelancing to cover an employment gap, do so. Focus on anything relevant to the job you are applying for.

If the job is not relevant to the position you are applying for and you don’t need it to cover an employment gap, then leave it off your resume.

7. How an ATS Affects Your Freelancer Resume

Many medium to large companies use an Applicant Tracking System (ATS) to screen resumes. What this means is that your resume could be rejected before a human even sees it. These systems can even affect freelancers seeking long-term projects or returning to traditional employment.

Here are some pointers to help your resume get past the ATS:

  • Submit the resume in .Doc or .TXT format
  • Focus on keywords used in the job listing
  • Use easily identifiable labels for resume sections
  • Avoid using images, tables, or symbols
  • Fix any spelling errors or typos

Freelancers are often encouraged to submit a functional or creative resume. While those resume formats work great for resumes that will be seen by humans, those formats may cause an ATS to reject your resume.

To learn more about how to create a resume and format it properly, review these tutorials:

Other Problems Freelancers Face

Once your resume gets through the initial screening process, you may still face some struggles.

Here are some common worries that employers have about freelancers:

  • Culture Fit – Freelancers are often viewed as loners. An employer may worry that a freelancer won’t take instructions well. They may wonder how you’ll work with others.
  • Qualifications Matching – Employers often want someone with the exact experience in their ad. As a freelancer your experience is probably broader and more varied than what the employer is looking for.
  • Salary Negotiations – If you’ve been self-employed, salary negotiations can be tough. Employers like to base the salary they offered you on a past salary.

The best way to deal with these issues is to expect them. Be prepared when you go to the interview.

To deal with culture fit worries, explain why you believe you’re a good fit for the company. Stress how your values align with theirs. Emphasize that you are a team player who works well with others.

For qualification worries, focus on those projects and parts of projects where your responsibilities were closest to the position you’re applying for.

To learn what salary you should accept, do some research. Find out what the average pay range is for the job title you are being considered for. That will give you an idea of what you should ask for. Don’t forget to factor in any benefits you are offered.

How to Make Your Resume Stand Out

At some point, your resume will be reviewed by real people. This is why it’s important to make your resume stand out. Appearance counts.

Templates can help you create an attractive, professional-looking resume. It’s not too difficult to use a template. For step-by-step instructions on how to use a Word resume template, review:

Here’s a curated list of creative resume templates that can work well for many freelancers:

You can find even more great resume templates at Envato Market (GraphicRiver), with numerous trending new designs to choose from.

Conclusion

When it comes to creating a resume, freelancers face unique challenges. As a freelancer, you may believe that you don’t need a freelance resume. But whether you want to continue freelancing or transition back to traditional employment, it’s a good idea to keep your freelance resume updated.

Have you faced any challenges creating your freelance resume? Share your experiences in the comments.

Download How to Highlight Freelance Work on Your Resume

Building RESTful APIs With Flask: ORM Independent

In the first part of this three-part tutorial series, we saw how to write RESTful APIs all by ourselves using Flask as the web framework. In the second part, we created a RESTful API using Flask-Restless which depends on SQLAlchemy as the ORM. In this part, we will use another Flask extension, Flask-Restful, which abstracts your ORM and does not make any assumptions about it. 

I will take the same sample application as in the last part of this series to maintain context and continuity. Although this example application is based on SQLAlchemy itself, this extension can be used along with any ORM in a similar fashion, as shown in this tutorial.

Installing Dependencies

While continuing with the application from the first part, we need to install only one dependency:

$ pip install Flask-Restful

The Application

Before we start, you might want to remove the code that we wrote for the second part of this tutorial series for more clarity.

As always, we will start with changes to our application’s configuration, which will look something like the following lines of code: 

flask_app/my_app/__init__.py

from flask.ext.restful import Api

api = Api(app)

Just adding the above couple of lines to the existing code should suffice.

flask_app/my_app/catalog/views.py

import json
from flask import Blueprint, abort
from flask.ext.restful import Resource
from flask.ext.restful import reqparse
from my_app.catalog.models import Product
from my_app import api, db


catalog = Blueprint('catalog', __name__)

parser = reqparse.RequestParser()
parser.add_argument('name', type=str)
parser.add_argument('price', type=float)


@catalog.route('/')
@catalog.route('/home')
def home():
    return "Welcome to the Catalog Home."


class ProductApi(Resource):

    def get(self, id=None, page=1):
        if not id:
            products = Product.query.paginate(page, 10).items
        else:
            products = [Product.query.get(id)]
        if not products:
            abort(404)
        res = {}
        for product in products:
            res[product.id] = {
                'name': product.name,
                'price': product.price,
            }
        return json.dumps(res)

    def post(self):
        args = parser.parse_args()
        name = args['name']
        price = args['price']
        product = Product(name, price)
        db.session.add(product)
        db.session.commit()
        res = {}
        res[product.id] = {
            'name': product.name,
            'price': product.price,
        }
        return json.dumps(res)

api.add_resource(
   ProductApi,
   '/api/product',
   '/api/product/<int:id>',
   '/api/product/<int:id>/<int:page>'
)

Most of the code above is self-explanatory. I will highlight a few points, though. The code above seems very similar to the one that we wrote in the first part of this series, but here the extension used does a bunch of behind-the-scenes optimizations and provides a lot more features that can be leveraged. 

Here the methods declared under any class that subclasses Resource are automatically considered for routing. Also, any parameters that we expect to receive along with incoming HTTP calls need to be parsed using reqparse.

Testing the Application

This application can be tested in exactly the same way as we did in the second part of this tutorial series. I have kept the routing URL the same for the same purpose.

Conclusion

In this last part of this three-part tutorial series on developing RESTful APIs with Flask, we saw how to write ORM-independent RESTful APIs. This wraps up the basics of writing RESTful APIs with Flask in various ways. 

There is more that can be learned about each of the methods covered, and you can explore this on your own, using the basics you’ve learned in this series.

Download Building RESTful APIs With Flask: ORM Independent

How to Draw a Unicorn Step by Step

Final product image
What You’ll Be Creating

What I love most about drawing is that it lets us picture unreal things as if they were real. If you want to feel the thrill of creation, in this tutorial I will show you how to draw a beautiful, realistic unicorn. These creatures were not just “horses with horns”—they were described as similar to goats, with cloven hooves and a donkey-like tail. Their horns were said to have magical powers, but since the animals were so timid, you’d need the help of a gentle maiden to capture one.

Today, unicorns are no longer believed to be real, but you can bring one to life with art. You don’t need to know how to draw horses, or horns—I will lead you step by step! But if you want to be better prepared, try this tutorial first:

1. Sketch the Pose of a Unicorn

Step 1

Start with an oval for the chest. It doesn’t need to be a perfect oval, and feel free to correct it as many times as necessary. The lines I’m showing you here are clean so that you can see exactly what I’m drawing—normally they would be much messier!

start a pose with oval

Step 2

Add the rump. Its size and distance from the chest will define the shape of the body. If this were a real horse, you’d need to be careful to achieve the right shape, but unicorns aren’t really horses—they’re considered a different species, often smaller/slimmer. So don’t worry if yours looks different than mine!

oval with half oval makes the body

Step 3

Add the neck and head. Again, you can use my proportions or modify them for something more original.

simple neck

Step 4

You can choose any pose you like for your unicorn, but it will be the most realistic if you borrow it from a horse. Check my tutorial about drawing horses to pick a pose. I’ve decided to use a frame from a canter—it’s a fast but very graceful running gait.

how to start drawing a horse in canter
horse in canter simple drawing

Step 5

Finally, add a tail:

drawing horse tail

2. Draw the Body of a Unicorn

Step 1

Now we’re going to add shapes characteristic for a horse body. Draw the head and the muzzle…

how to start drawing horse head

Step 2

… then connect them with two lines and add the ears on top of the head.

how to draw horse head

Step 3

This will be the eye:

how to start drawing horse eye

Step 4

Add some details on the head and start building the hooves. Adjust the direction of lines to the angle of the legs. Normally, the hooves would be larger, but in my vision unicorns are quite similar to deer in this manner.

how to draw horse hooves

Step 5

Finish the hooves:

how to finish drawing horse hooves
how to draw realistic horse hooves

Step 6

Add the wrists and heels. Yes, these aren’t knees!

how to draw horse knees

Step 7

Add some details to the heels. The bones are really showing in this area, and they create a typical horse look.

how to draw horse leg details

Step 8

Add the thigh and the arm.

how to draw horse thigh arm

Step 9

Connect the parts of the legs with gentle lines.

how to draw horse legs

Step 10

Before we draw the neck, it’s good to add some guide lines: the back of the shoulder blade and the width of the neck.

how to draw horse neck

Step 11

Now you can finish the outline of the body.

how to draw horse body

3. Draw a Unicorn Horn

Step 1

The horn of a unicorn may look complicated, but there’s actually a simple formula for it. Start by defining its length and direction with a line.

how to draw a unicorn

Step 2

Cross it with diagonal lines, skewing them more and more as you get close to the tip.

how to draw a unicorn horn

Step 3

Add a copy of every line below, keeping a little distance from the other line.

how to draw a spiral horn

Step 4

Connect each line with its copy with an arc.

unicorn horn tutorial

Step  5

Draw concave arcs in between.

horse horn tutorial

4. Finish the Drawing

Step 1

What would a unicorn be without its fabulous mane? Add some beautiful hair here and there. Traditionally, unicorns have been pictured with tufted tails, but feel free to use a normal horse tail if you want.

how to draw unicorn mane

Step 2

Your drawing looks very dirty right now, with many lines crossing and covering each other. But that’s normal! To create a clean picture out of this, you can use one of these tricks:

  • Create a new layer, if you’re drawing digitally.
  • Scan your drawing, lower its lightness/opacity with a program, and then print it with the sketch barely visible.
  • Draw over the most important lines with a ballpoint pen or a marker. Put a new sheet of paper above the sketch—the dark lines should be seen through.

Remember: tracing your own drawing is not cheating!

how to draw clean drawings

Step 3

Continue drawing on the new layer/printed sketch/new sheet of paper. This time, be more careful with lines, because they’re the final ones. You can again use my tutorial about drawing horses to add realistic details, but you can also finish it with your own style. It’s also always good to use a reference for this part:

how to draw detailed horse
Cloven hooves remind us that this is not actually a horse
how to draw a unicorn with pencil
how to draw a realistic unicorn

Fabulous Drawing!

Unicorns may not be real, but you have just created one! Is there something else you’d like to learn to draw? Let me know in the comments!

realistic unicorn drawing tutorial

Download How to Draw a Unicorn Step by Step

What’s New in watchOS 3?

Introduction

This year at WWDC, Apple officially unveiled watchOS 3, their latest update to the Apple Watch’s core software. While there were only a few “headline” user features shown off, watchOS 3 opens up a lot of APIs for developers to create even more functional watchOS apps. A lot of these APIs have been available on iOS for multiple years and have now been added to watchOS, including CloudKit, SpriteKit, and SceneKit.

In this tutorial, I’ll show you how you can use all of these new APIs in your watchOS 3 applications. I’ll also show you some of the most significant additions to existing watchOS frameworks.

Prerequisites

This tutorial requires that you are running Xcode 8 on macOS 10.11 or later. It is also assumes that you are comfortable with the basics of WatchKit and developing watchOS apps. If you aren’t, then I recommend checking out some of the following tutorials covering the basics of WatchKit:

You will also need to download the starter project from GitHub.

1. New Frameworks

SpriteKit and SceneKit

Two of the biggest additions to watchOS 3 for developers are the SpriteKit and SceneKit frameworks. These frameworks provide rich 2D and 3D graphics respectively in Apple Watch applications. You can display scenes in your apps by using the new WKInterfaceSCNScene and WKInterfaceSKScene interface objects, which are both subclasses of WKInterfaceObject. Similarly to SCNView and SKView on iOS, these interface objects provide properties and methods to manipulate your scenes, including play/pause functionality as well as default lighting.

Open up the starter project and open up the Interface.storyboard file. You will see that in this file, I have already set up some basic interfaces for you. For this part of the tutorial, we are only interested in the topmost interface controller with a single button. Go to the Object library in the bottom right corner of Xcode and drag in a SceneKit Scene object above the Play / Pause button:

SceneKit Scene Interface Item

Next, open up the Attributes Inspector and assign the scene file (Scene.scn) included in the project to the Scene property of this interface object:

Scene Property

To work with this in our code, open up the SceneKitInterfaceController.swift file in the Assistant editor and create and link an outlet called sceneItem for your interface object:

@IBOutlet var sceneItem: WKInterfaceSCNScene!

Please note that in order for your SceneKit content to render correctly, you must link the interface object in your storyboard with an IBOutlet in your code. At the time of writing this tutorial, it is not mentioned anywhere in Apple’s documentation, but this setup is required.

Lastly, to implement the play/pause functionality of our button, replace the existing didPress(button:) method with the following:

@IBAction func didPress() {
    if let paused = sceneItem.scene?.isPaused {
        sceneItem?.scene?.isPaused = !paused
    }
}

Build and run your app and you will see a red cube spinning on the screen:

Spinning Cube

Pressing the Play/Pause button should stop and start the animation of your scene as needed.

While we just covered displaying SceneKit content in this tutorial, adding support for SpriteKit is very similar. The only major difference is that SpriteKit assets must be used with a WKInterfaceSKScene object rather than a WKInterfaceSCNScene object for SceneKit.

UserNotifications

Another addition with iOS 10 and watchOS 3 is the UserNotifications framework. This framework provides a simple way to work with both local and remote notifications being sent and delivered by your application.

If you want to learn more about this framework, check out my tutorial covering it here:

Please note that not all the APIs in the UserNotifications framework on iOS are available in watchOS. Those that are present, however, function identically on watchOS and iOS.

CloudKit, GameKit, CoreAudio, and AVFoundation

Another major addition in watchOS 3 is the availability of frameworks which were previously only on other Apple platforms, including CloudKit, GameKit, CoreAudio, and AVFoundation. 

While the full set of APIs from these frameworks aren’t available in watchOS, the classes and methods that can be used in Apple Watch apps work identically to their iOS and macOS counterparts.

2. Existing Frameworks

In addition to adding many new frameworks, watchOS 3 also brings about many changes to existing frameworks—including WatchKit and ClockKit. 

WatchKit

The first new feature in the WatchKit framework we are going to look at is the new WKCrownSequencer class. This class allows you to retrieve detailed data about the digital crown, including its current rotation speed and whether or not it is idle. While this information is accessible via properties on a WKCrownSequencer object, the WKCrownDelegate protocol enables you to track changes more easily. 

All WKInterfaceController subclasses now have a crownSequencer property, which is an instance of the WKCrownSequencer class. This means that to track changes in the digital crown, you only have to specify a delegate object and implement the methods you want.

In your project, open up your CrownInterfaceController.swift file and make your CrownInterfaceController class conform to the WKCrownDelegate protocol:

class CrownInterfaceController: WKInterfaceController, WKCrownDelegate {
    
    ...
    
}

Next, replace your current awake(withContext:) method with the following:

override func awake(withContext context: Any?) {
    super.awake(withContext: context)
    
    crownSequencer.delegate = self
    crownSequencer.focus()
}

In the above code, we call the focus method on the crownSequencer because otherwise it will not receive events from the digital crown. If an item in your interface gets focused by the user tapping on it then you will need to call this method again for the crownSequencer to detect digital crown movement.

Lastly, add the following two methods to your class:

func crownDidRotate(_ crownSequencer: WKCrownSequencer?, rotationalDelta: Double) {
    if let speed = crownSequencer?.rotationsPerSecond {
        label.setText("Crown\nspeed:\n\(speed)")
    }
}

func crownDidBecomeIdle(_ crownSequencer: WKCrownSequencer?) {
    label.setText("Crown\nis idle")
}

So that this interface is loaded, open up your Interface.storyboard file and drag the Initial Controller arrow to select the bottom interface:

Crown Interface Controller Entry Point

Build and run your app and you will see that, when the watch’s digital crown is moved, the on-screen label reflects the current status:

Digital Crown Status

If you are using the Apple Watch simulator, then you can “turn” the digital crown by just scrolling with your Mac’s mouse or trackpad.

In addition to detecting digital crown movements, the WatchKit framework in watchOS 3 also provides the following classes for your app to detect gestures without using interface items:

  • WKLongPressGestureRecognizer
  • WKPanGestureRecognizer
  • WKSwipeGestureRecognizer
  • WKTapGestureRecognizer

As their names suggest, these gesture recognisers work very similarly to the way gesture recognisers work on iOS. These classes are particularly useful to detect touches if you’re using SceneKit, SpriteKit or a custom image-based interface to display content.

ClockKit

watchOS 3 also brings a few new important features for apps that take advantage of the ClockKit framework to provide complications on the watch face. 

Firstly, because of the new background processing functionality for apps in watchOS 3, if a user puts one of your app’s complications on their watch face, then your app will remain in memory and remain in a ready-to-launch state. Additionally, your app is guaranteed to be able to update its content in response to push notifications up to 50 times per day. 

If you want to learn more about the new background app functionality in watchOS 3, I have already covered this topic here:

Next, some new templates have been added to the extra-large complication family, including CLKComplicationTemplateExtraLargeColumnsText, CLKComplicationTemplateExtraLargeRingImage, CLKComplicationTemplateExtraLargeRingText, and CLKComplicationTemplateExtraLargeSimpleImage.

Lastly, the CLKTextProvider class now provides an API to create a localisable text provider to use different text for specific device regions.

Apart from these small additions, ClockKit remains unchanged from last year’s watchOS 2 release. If you want to learn more about this framework and how to use it yourself, you can check out my tutorial covering it here:

PassKit

While PassKit was already available in a limited form in watchOS 2, watchOS 3 brings full support for in-app Apple Pay purchases right on the watch. This is done through some new classes and a protocol, including:

  • WKInterfacePaymentButton: used to show a pre-designed Buy with Apple Pay button.
  • PKPaymentAuthorizationController: used to display a model interface with payment information for the user to confirm. This class performs the same role as the PKPaymentAuthorizationViewController class but does not depend on UIKit. This means that the PKPaymentAuthorizationController class can be used on both iOS and watchOS.
  • PKPaymentAuthorizationControllerDelegate: classes can be made to conform to this. This protocol allows your app to respond to the user’s actions regarding your payment, including when they select a payment method or when the payment has been authorised.

Conclusion

Overall, watchOS 3 is a significant release for developers of Apple Watch apps. Games and media-rich applications are now far easier to create with the addition of frameworks, including SceneKit, SpriteKit, GameKit, and AVFoundation. The addition of CloudKit and improvements to WatchKit, ClockKit and PassKit allows you to create more functional apps than ever before while becoming more independent of the iPhone.

As always, please be sure to leave your comments and feedback in the comments section below. For a closer look at how to create an app in WatchOS, check out the watchOS 2 From Scratch course here on Envato Tuts+.

Download What’s New in watchOS 3?

360 Basics: How to Stitch With Autopano Video Pro

In this tutorial you will learn the basics of how to use Kolor Autopano Video Pro to stitch together footage for 360 videos. We go through the entire process from start to finish, along with a few extra tips to add 360 video metadata to your footage so it can be played back in 360° video players online, like on YouTube. If you are not familiar with 360 videos, this lesson can also act as an introduction to the workflow of 360 videos.


In This Video Tutorial

  1. You’ll learn
    how to import your footage
    into Autopano Video Pro (0:41)
  2. I’ll show you how to
    synchronize your clips
    so they are all aligned perfectly (1:15)
  3. Then you’ll learn how to stitch your clips together (2:25)
  4. Then you’ll reorient the horizon (3:10)
  5. And set a starting point (4:54)
  6. We’ll take a look at the stabilization features (5:25)
  7. And color
    correction features
    (6:20)
  8. You’ll learn how to decide which blending mode work best for a
    given type of footage (8:08)
  9. Then we will cover how to adjust and fine tune settings (8:38)
  10. Then you’ll learn how to export your video (9:53)
  11. Finally, I’ll show you how to add 360 metadata to your video and make it ready for upload (11:44)

What You Need

In order to follow along with this lesson you will need Kolor Autopano Video Pro along with some footage shot on a 360 camera setup. You can download a trial version of Kolor Autopano Video Pro to follow along. I’ll also show you some addition steps using the Google 360 Video Metadata App and Adobe Premiere Pro CC 2015.3, but these are not required.

1. Import and Prepare Your Footage

Once you launch Autopano Video Pro, the first option you see is to drag and drop your videos into the project. You can use any type of camera setup, as Autopano will work with just about any rig, but make sure you import all the clips. Once you’ve dropped in all of your clips you can see
each one of them in the preview panel. 

Import your clips into Autopano Video Pro

2. Synchronize and Stitch

With advanced camera rigs, like the GoPro Omni, all the cameras start in sync. You may be using a camera setup that has multiple separate cameras
that aren’t in sync.

There are two methods we can
use to synchronize our footage: audio synchronization and motion synchronization. Now, if your camera is on
something is moving, it might be better to use the motion
synchronization, but when all the cameras are locked down
on a tripod, as in our example, audio synchronization works well.

Head up to the
synchronization tab and select the method that’s best for your footage. Start with a search range of 10 seconds: the default.

In our example, we ended up with two different clips off by one millisecond. That’s not even a full frame worth, so we didn’t have to worry about adjusting the nearest frame. If you need to you can adjust
any of your footage using the nearest frame tools.

The next
step is to stitch your footage. Click on
the Stitch tab, and find the camera pre-sets. Select you camera and click the Stitch button.
Autopano Video Pro will now run through and stitch all the clips
together and output an equirectangular image. 

Oops thats not right

3. Fine-Tune the Horizon Line

It’s very common at this stage to get an image that’s pretty wonky looking. You’ll usually need to make some fine-tuning adjustments. Just click and drag to adjust the orientation of your equirectangular
image.

One thing to note with our example: it was an outdoor shot, on a hillside, with no real
horizon line to look at. Making shots is a lot easier when you can see the horizon, but that’s not always possible. However, you can look for something else: a straight vertical edge. Put the straight edge in the center of your frame, this will help gauge
your equirectangular video and get everything lined up. The trees were a good vertical line in our example.

Set a starting point for your viewers

4. Set a Starting Point

You need to set a default field of view for you viewers when they start up a 360 video. In our example, that was where the bikers were going come through from the trees. The reason you want the primary action in the center of the screen at the start of a 360 video is because the viewer will be looking all around once the video starts. You want to immediately direct their attention by already having them oriented towards the action.

The best way to focus your viewer is to move the primary action area to the center of the screen (the direct center of the 360 video is facing forward for the viewer when they start watching). If the point of interest was too far towards the edges, this would force the viewer to ‘wander’ too much, looking left or right to find the action. Reorienting the 360 video so that the action is in the center of the frame is easy: go to the beginning, then just click and drag on the preview, the same as you do to fix the horizon line.

5. Preliminary Render

At the bottom your clip there are four different timelines. We have the
horizon, the stitch, color, and mask and this so we can make
adjustments to each one of these independently of the other. When you finish adjusting everything and are happy with your video, go ahead and click Apply.

At the top of your video are red and purple
bars. The red indicator indicates the render in and
out. Purple
is the current selection. If you just want to do adjustments on certain sections of
the video, you can adjust that with these red and purple indicators.

After you’ve rendered, go ahead and make the video full-screen. Take a closer look and make sure everything is right.

Rendering in Autopano video pro

6. Global Corrections

All right, that’s the basic process, but in most cases your video is going to need a little bit more correction and adjustment to make it perfect.

Stabilization

Our next tab is Stabilization. We’re going to save the deep dive for another day, but here are the
basics of what goes into it:

Click on Stabilization. If your shot is locked down on a tripod, like our example,  you don’t really need to do any
stabilization to it. But if you have a moving shot and you
want to use stabilization you can adjust the compensation level here. What this will do is apply to your selection (anywhere the purple indicator is).
So if you need to process your entire video,  make sure the selection is stretching the
entire time line.

For in the compensation level, you can adjusted different points.  At about 50% it’ll remove any fast jarring motions of your camera but still let the video be dynamic, and responsive to any panning throughout the video. If you want your video to be basically motionless and kind
of locked down you can move it all away to 100%. Click
on compute stabilization to start the process.

Picture Correction

Next up is the Color tab. Now with 360
video, because we have so many different cameras and they’re facing in
so many different directions, it’s easy to have exposure issues and
color issues. One of the best things about Autopano Video Pro is it’s
going to help automatically adjust and iron out any problems that you might have.

Correction types that are
checked by default are the exposure, vignetting and the color
White Balance is another common issue that you’ll often have adjust for. Start with the three defaults,
and click Apply. And Autopano Video Pro will go ahead and
automatically apply those corrections to your footage.

7. Fine Tune the Picture

Now that a basic correction has been applied you can make a fine-tune correction. We’ll cover these in detail in our next tutorials, but here’s an overview:

Lighting Changes

If your camera is moving, for example traveling
through this underbrush as in our example, you’re prone to get lots of different light
changes. Likewise if you’re going from outdoors to indoors. You can do an
autotransition: Autopano will compute the color correction every
five seconds, or 300 frames, or whatever you set it to, up here,
which is very handy.

Click on compute
automatic color correction
. This will run through and automatically
correct for any color changes throughout your 360 video. We also have
access to the exposure compensation, so you can also
adjust this if I need to make it darker or brighter.

One feature I find really cool
is that we get nice little indicators at the bottoms and top to show
us where the clipping in our footage is happening.

Blend

360 video uses multiple videos overlapped to make a composite. There are basically two types of blending to make that overlap: sharp blending and smooth blending.

With sharp, it’s
more of an abrupt cut off between each camera. If your
footage is locked down on a tripod, like we have in our example, you may want to
use the sharp blending. If you have a lot of motion in your video you
may want to go with the smooth blending setting. You can also adjust the blend in the
Advanced Settings.

8. Final Render and Export

Alright, time  to render out your final video. Click on the Render tab to bring up the various
rendering options:

  • Autopano Video Pro will give you the width and the height, but it’ll also give you the
    maximum size allowed with your output.
  • Leave the output type on the default mp4: that’s pretty much the most common 360
    video format right now.
  • For a preset, choose H.264 4K.
  • For
    the frames per second, leave it on whatever your footage was recorded at.
  • For video bit rate the
    default is 24,000 kilobits per second. YouTube actually recommends
    anywhere between 50,000 and 150,000 kilobits per seconds.
  • For audio bit rate, set it at 320.
  • For
    aspect ratio, keep the pixels as size.
  • For the audio
    source
    , select which camera
    I want the main audio to be baked into the video.

Finally, name your video, and click render.

At the upper left hand corner you have batch render
options. You can see the current status of your render, and can stop it or pause at any point if you need to.

Now that your video is finished rendering you can open it up
and preview it, make sure everything looks right, make sure all the
stitching lines are correct.

Export presets

9. Add Metadata

Before we finish the 360 video you need to do one
more step: inject some metadata into your video file so that video players will recognize it as a 360 video.

Now there are a few ways we can do this, but I prefer to use the 360 videometadata tool from Google (download link at the bottom of this page).

Download and install the tool. Run the tool, click Open, and navigate to find your exported video. You’ll see that your video has no metadata yet, which is correct.

Go ahead and click on Spherical (this is a spherical 360 video), and then click Save.

Again, what this metadata does is tell any external video
player you upload the video to that this is a 360 video. 

Add spherical metadata to your video

Next Time

I hope you enjoyed this quick tutorial showcasing the features of
Autopano Video Pro and how easy it is to stitch footage together. In upcoming tutorials we’ll take a closer look at stitching and how to get better results, and how to stabilize your footage.

Links Mentioned

Download 360 Basics: How to Stitch With Autopano Video Pro

How to Create a Road Text Effect in Adobe Illustrator

Final product image
What You’ll Be Creating

In the following steps, you will learn how to create a road text effect in Adobe Illustrator using a simple pattern brush.

For starters, you will learn how to set up a simple grid. Using the Rectangle Tool along with some basic vector shape-building techniques, you will learn how to create the shapes that make up the road. 

Moving on, you will learn how to save patterns and how to create your own pattern brush. Using this pattern brush and taking full advantage of the Snap to Grid feature, you will create the text effect. Finally, using the Appearance panel and some basic effects, you will learn how to add subtle shading and highlights along with a subtly textured background.

For more inspiration on how to adjust or improve your final text effect, you can find plenty of resources at Envato Market.

1. Create a New Document and Set Up a Grid

Hit Control-N to create a new document. Select Pixels from the Units drop-down menu, enter 850 in the width box and 600 in the height box, and then click the Advanced button. Select RGB, Screen (72 ppi) and make sure that the Align New Objects to Pixel Grid box is unchecked before you click OK.

Enable the Grid (View > Show Grid) and the Snap to Grid (View > Snap to Grid). You will need a grid every 1 px, so simply go to Edit > Preferences > Guides > Grid, and enter 1 in the Gridline every box and 1 in the Subdivisions box. Try not to get discouraged by all that grid—it will make your work easier, and keep in mind that you can easily enable or disable it using the Control-“ keyboard shortcut.

You can learn more about Illustrator’s grid system and how it can help you in this short tutorial from Andrei Stefan: Understanding Adobe Illustrator’s Grid System.

You should also open the Info panel (Window > Info) for a live preview with the size and position of your shapes. Don’t forget to set the unit of measurement to pixels from Edit > Preferences > Units > General. All these options will significantly increase your work speed.

setup grid

2. Create the Main Shapes

Step 1

Pick the Rectangle Tool (M) and focus on your Toolbar. Remove the color from the stroke, and then select the fill and set its color to R=110 G=180 B=81. Move to your artboard and simply create a 6 x 31 px rectangle—the grid and the Snap to Grid will make this easier.

rectangle

Step 2

Make sure that your rectangle is still selected and make a copy in front using the Control-C > Control-F keyboard shortcut. Select the newly made copy, and simply drag it about 11 px to the right as shown in the second image.

Pick the Rectangle Tool (M), create a 15 x 31 px shape and place it about as shown in the second image.

duplicate

Step 3

Using that same Rectangle Tool (M), create two 6 x 27 px shapes and a 15 x 27 px shape. Fill these three rectangles with R=40 G=29 B=43 and place them as shown in the following image. Again, the grid and the Snap to Grid feature will come in handy.

dark rectangle

3. Create the Red and White Squares

Step 1

Using the Rectangle Tool (M), create four 3 px squares. Fill two of these shapes with white (R=255 G=255 B=255) and the other two with R=219 G=4 B=22, and then place them as shown in the following image.

red white squares

Step 2

Multiply the red and white squares made in the previous step and spread the copies as shown in the following images.

duplicate squares

4. Create the Street Lines

Step 1

Using the Rectangle Tool (M), create four 6 x 1 px shapes and two 15 x 1 px shapes. Fill these new rectangles with white and place them as shown in the first image. Use the same tool and attributes to create a 3 x 1 px shape and place it as shown in the second image.

white rectangles

Step 2

Using the Rectangle Tool (M), create five 3 px squares. Fill these new shapes with white and place them as shown in the first image. Once you’re done, duplicate these white squares and place the copies as shown in the second image.

white squares

Step 3

Using the Rectangle Tool (M), create two 1 x 5 px rectangles. Fill both shapes with white and place them as shown in the first image. Using the same tool and attributes, create four 2 x 1 px shapes and place them as shown in the second image.

white rectangles

5. Create the Flag

Step 1

Using the Rectangle Tool (M), create a 4 x 26 px shape, fill it with R=40 G=29 B=43 and place it as shown in the following image.

dark rectangle

Step 2

Using the Rectangle Tool (M), create a bunch of 2 px squares, make sure that the fill color is set to white, and spread them as shown in the following image.

white squares

Step 3

Using the Rectangle Tool (M), create two 9 x 1 px rectangles. Fill both shapes with R=84 G=94 B=96 and place them as shown in the following image.

poles

6. Create the Pattern Brush

Step 1

Select all the shapes highlighted in the following image and simply drag them inside the Swatches panel (Window > Swatches) to save your selected shapes as a pattern.

Now, naming this pattern might make things easier later. Make sure that you deselect the shapes from your artboard and then select the newly added pattern from the Swatches panel. Open the fly-out menu from the same panel and simply go to Swatch Options. Name your pattern “Start” and then click that OK button.

save patttern

Step 2

Select all the shapes highlighted in the following image and turn them into a new pattern. Name this one “End“.

save second pattern

Step 3

Now that you have the two patterns, you can get rid of the set of shapes that were used to make them.

Select the remaining shapes, open the Brushes panel (Window > Brushes), and click that New Brush button. Check the Pattern Brush box and click the OK button. Pick a name for your pattern, make sure that the attributes are set as shown below, and then focus on the Tile boxes. Simply open the Start Tile and add your “Start” pattern, and then open the End Tile and add your “End” pattern. Once you’re done, click the OK button and your new pattern brush will show up in the Brushes panel.

save pattern brush

7. Create the Text Effect

Step 1

Pick the Type Tool (T) and open the Character panel (Window > Type > Character). Select the MamaRound font, and set the size to 200 pt and the tracking to 50. Make this piece of text black and lower its Opacity to about 25% using the Transparency panel (Window > Transparency).

text

Step 2

Using the Pen Tool (P) and a piece of text as a rough reference, draw a smooth path across your text, about as shown in the following image.

paths

Step 3

Now that you have your paths, simply delete that piece of text. Select the remaining paths and replace the existing stroke with your pattern brush from the Brushes panel (Window > Brushes). Select the path that makes up your “E“, pick the Pen Tool (P), click the bottom end point, and add a nice smooth path, approximately as shown in the second image.

pattern brush

8. Adjust the Text Effect and Add Shading

Step 1

Make sure that your “E” path remains selected and pick the Width Tool (Shift-W). First, focus on the left end of your selected path and drag those handles to the outside, which will enlarge your brush. Move to the other endpoint of your path, and this time drag those handles slightly to the inside, which will shrink your pattern brush. 

In the end, things should look about as shown in the following image.

width tool

Step 2

Make sure that your “E” path is still selected and make a copy in front (Control-C > Control-F). Select this copy, go to Object > Expand Appearance, and then hit Shift-Control-G to Ungroup the resulting group of shapes.

expand appearance

Step 3

Using the Move Tool (M), select the groups of shapes highlighted in the following image and click the Unite button from the Pathfinder panel (Window > Pathfinder). Fill the resulting shape with a random blue.

blue shape

Step 4

Using the Move Tool (M), select the groups of shapes highlighted in the following image and click that same Unite button from the Pathfinder panel. Fill the resulting shape with a random red.

red shape

Step 5

Select the remaining groups of shapes (highlighted in the first image) and simply delete them. Also, select your blue shape and bring it to front using the Shift-Control-] keyboard shortcut.

delete shapes

Step 6

Select the path that makes up your “C” and make a copy in front (Control-C > Control-F). Select this copy and go to Object > Expand Appearance. Make sure that the resulting group of shapes remains selected, and click that same Unite button from the Pathfinder panel. Fill the resulting shape with a random green.

green shape

Step 7

Using the Pen Tool (P), create a simple shape about as shown in the following image. Fill it with black and lower its Opacity to about 30%.

black shape

Step 8

Select your blue shape and bring it to front using that same Shift-Control-] keyboard shortcut. Reselect this blue shape along with the black transparent one, and click the Minus Front button from the Pathfinder panel. Fill the resulting shapes with yellow, and increase their Opacity to 100%.

minus front

Step 9

Select the green and the yellow shapes highlighted in the following image and click the Intersect button from the Pathfinder panel. Fill the resulting shape with black, and lower its Opacity to 30%.

intersect

Step 10

Select the red and the yellow shapes highlighted in the following image and click that same Intersect button from the Pathfinder panel. Fill the resulting shapes with black, and lower their Opacity to 40%.

intersect

Step 11

Using the Pen Tool (P), create a black shape about as shown in the first image and send it to back using the Shift-Control-[ keyboard shortcut.

shadow black

Step 12

Make sure that your newest black shape remains selected, focus on the Gradient panel (Window > Gradient), and simply click that gradient thumbnail to quickly replace the existing fill color with the default linear gradient. Make sure that the Angle is set to 0 degrees and then select the left slider, set the color to black, and lower its Opacity to 0%.

Move to the Appearance panel and select the existing fill. First, change its Blending Mode to Overlay, and then go to Effect > Blur > Gaussian Blur. Enter a 15 px Radius and click the OK button.

linear gradient

Step 13

Make sure that your blurred shape remains selected and keep focusing on the Appearance panel. Select the existing fill and duplicate it using the Duplicate Selected Item button. Select the newly added fill, lower its Opacity to 10%, and remove that Gaussian Blur effect.

add fill

9. Add a Background and Subtle Highlights

Step 1

Using the Rectangle Tool (M), create an 860 x 610 px shape. Make sure that this new rectangle covers your entire artboard, send it to back (Shift-Control-[), and set the fill color to R=140 G=198 B=63.

green background

Step 2

Make sure that your green rectangle remains selected, focus on the Appearance panel, and add a second fill using the Add New Fill button. Select the new fill, make it black, lower its Opacity to 3%, change the Blending Mode to Multiply, and then go to Effect > Artistic > Film Grain. Drag those sliders as shown below, and then click the OK button.

film grain

Step 3

Reselect your green rectangle, make a copy in front (Control-C > Control-F), and bring it to front (Shift-Control-]).

Select this new copy and simply hit the D button from your keyboard to replace the existing Appearance attributes with the default ones (white fill and a black stroke). Remove that black stroke and replace the white fill with the radial gradient shown below. Change its Blending Mode to Soft Light and keep in mind that that yellow zero from the Gradient image stands for Opacity percentage. Also, use the Gradient Tool (G) to stretch your gradient about as shown in the following image.

radial gradient

Step 4

Make sure that the rectangle added in the previous step is still selected and make a copy in front (Control-C > Control-F). Select this copy, lower its Opacity to 25%, and replace the existing gradient with the linear gradient shown below.

linear gradient

Step 5

Make sure that the rectangle added in the previous step is still selected and make a copy in front (Control-C > Control-F). Select this copy, increase its Opacity to 30%, replace the existing linear gradient with the one shown below, and then go to Effect > Path > Offset Path. Enter a -70 px Offset, click the OK button, and then go to Effect > Blur > Gaussian Blur. Enter an 80 px Radius, click that OK button, and you’re done.

linear gradient

Congratulations! You’re Done!

Here is how it should look. I hope you’ve enjoyed this tutorial and can apply these techniques in your future projects.

Feel free to adjust the final design and make it your own. You can find some great sources of inspiration at Envato Market, with interesting solutions to improve your design.

final product

Download How to Create a Road Text Effect in Adobe Illustrator

How to Use Siri on a Mac

Other than the name change, the big news in macOS is that Siri has finally come to the Mac. She—and yes, I’m going with Apple’s gendered pronoun rather than the impersonal it—has been available on iOS for the past five years but this is the first time Mac-only Apple fans will get a look in. 

Siri’s available to every Mac user running macOS 10.11 Sierra. If you have a Mac that you bought more recently than 2009, you can most likely update.

Although Siri has been around on iOS a while, the macOS version is a lot more powerful. She’s integrated far more with the file system. To get you started, in this tutorial I’ll cover the basics of using Siri on a Mac.

Siri Redux

Although there are far more iOS users out there than Mac users, there are still some people with an Apple computer and an Android—or even Windows—smartphone. For them, and the millions of iPhone users who have never really spoken to Siri, let’s start with the very basics. 

Siri is Apple’s personal assistant software. She’s meant to make it easier to do simple tasks like search the web, create reminders, post to Facebook or Twitter, and lots more just by using your voice. 

tweeting with Siri
Sending a tweet with Siri.

The key to Siri’s success is natural language processing. Rather than having to use a specific rigid format to make commands, you can do them just by speaking normally and she should be able to interpret what you’re saying. So, something like, “Make appointment for 11am tomorrow; Brunch,” and “Siri, can you put Brunch in my calendar for 11 tomorrow morning,” get you the same result: a calendar event called “Brunch” for 11am the next day. 

Siri’s natural language processing and ability to understand accents has become a lot better over the last four years. When she first came out, she struggled with my not-particularly-thick Irish accent. Now, there’s obviously been some regionalisation and she has no real issues, as long as I speak clearly. 

Siri isn’t just for American English speakers. She’s now available in 20 languages with a dozen or so regional variations. They are:

  • Arabic,
  • Chinese (Cantonese and Mandarin),
  • Danish,
  • Dutch (Belgium and Netherlands),
  • English (Australia, Canada, India, Ireland, New Zealand, Singapore, South Africa, United Kingdom and United States),
  • Finnish,
  • French (Belgium, Canada, France and Switzerland),
  • German (Austria, Germany and Switzerland),
  • Hebrew,
  • Italian (Italy and Switzerland),
  • Japanese,
  • Korean,
  • Malay,
  • Norwegian,
  • Portugese,
  • Russian,
  • Spanish (Chile, Mexico, Spain and United States),
  • Swedish,
  • Thai, and
  • Turkish.

Triggering Siri in macOS

When a Mac reboots after installing Sierra, you’ll be prompted to Enable Siri. Leave the checkbox ticked and click Continue to get started. 

By default, Siri is triggered with the keyboard shortcut Option-Spacebar. There is also both a Dock Icon and a Menu Bar Icon you can click.

Siri uses your language and region settings to determine which Siri voice you hear, and what accent she assumes you’re speaking with. 

The American voice used in the ads is only one of the choices available. To change this, and any of the other settings, head to the Siri Preferences Pane in System Preferences.

siri preference pane
The Siri Preference Pane.

To use Siri, press the trigger keyboard shortcut and start talking. It’s best to talk naturally while making sure to enunciate every word clearly. 

Siri is designed to work with natural voices so slowing to a crawl and over-pronouncing every word doesn’t help, but at the same time, she struggles most when you run your words together. 

If you speak like a radio broadcaster or newsreader, she tends to get things right every time.

Searching With Siri

On a Mac, Siri can do everything she does on the iPhone and more. She can still launch apps, post to social media, show you sports scores, search Maps, play music from Apple Music, create events and reminders, search the web, do simple maths, and tell you terrible jokes. 

The biggest addition is her smart control over the file system. You can use commands like:

  • “Show me the files I was working on yesterday.”
  • “What photos did I take last week.”
  • “Did I create any documents last April?”
siri search
All the documents I edited yesterday, found with Siri.

These all open a list of files for you to browse. It’s the best way to quickly perform advanced searches.

A nice twist is that if you click the little + icon, the results get added to the Notification Centre where they’ll update live. This works with all Finder searches as well as sports results.

pinned results
The live results pinned to the Notification Centre.

Siri on macOS is definitely the best version of Siri yet, but there’s still room for improvement. For the time being, she can only really work with information; commands like, “close that tab” or “quit Slack” don’t do anything. 

The only hardware commands available are simple things like “Put my Mac to sleep”, “turn off Bluetooth”, or “What version of macOS am I running?” Adding more hardware control seems like a relatively easy addition for Apple in the near future.

Wrapping Up

Siri is a great addition to macOS. While it’s easy to see why Apple focussed on the iPhone first—voice input is much nicer than a touchscreen keyboard—the extra Mac features make her a lot more useful. The advanced searching alone is a welcome addition. 

While Siri probably isn’t going to radically alter how you use a Mac, her presence in macOS is important. It represents Apple’s continuing effort to bring iOS devices and Macs closer together. With devices like the Apple TV and Apple Watch, voice control is becoming a more important part of their ecosystem. It’s about time the Mac got included.

Download How to Use Siri on a Mac

How to Organize Your Pictures for Free With Daminion

A client calls you looking for an image from their shoot several years ago. Can you find it and deliver it within an hour?

If not, it’s time to think about integrating a proper image management tool. An image manager is essential for commanding your image library. These tools help you browse your image collection quickly, filtering based on rules such as capture date and the camera used for the photo.

Daminion Standalone
Daminion Standalone is an excellent image manager, and free for up to 15,000 images. There are many pieces of photo editing software that will style your images, but not organize and manage them. Daminion is the perfect bridge for managing an image collection.

Daminion Standalone for Windows is an excellent option for managing your images. It’s free to catalog up to 15,000 images, and affordable for larger image collections. It sports a powerful interface and fast performance.

If you’re a solo photographer already using a tool like Adobe Lightroom, that has built-in image management features, you’re probably set. But if you use a tool like Adobe PhotoshopCapture One, or ON1 Photo 10 for editing, you might need a more robust tool for managing images. 

That’s where Daminion Standalone comes in. In this tutorial, you’ll learn to use Daminion Standalone to catalog your images and get organized. It’s free to try, so jump over to Daminion’s website and download it to get started in this tutorial.

For team-based image management, Daminion offers Daminion Server as a premium product. Daminion Server let’s you manage a shared collection of media between many team members, and is ideal for small companies or larger photography studios. This is something Lightroom, and most other consumer-level photo-organizing software, can’t do.

Get Started with Daminion

To get started with Daminion, you first need to add images to your Daminion catalog. Like a Lightroom catalog, a Daminion catalog is a database that stores information about your images. It doesn’t hold the image files themselves, but instead tracks data about the images in the catalog.

To add images to your Daminion catalog, go to the File > Add Files menu. Then, simply browse to where your images are stored and choose Add. Daminion supports RAW image files as well as finished images such as JPEG and PNG files.

Add Files in Daminion
Daminion uses a catalog system that builds a database of our images. To get started with Daminion Standalone, add images to the catalog from the File > Add Files menu.

After you’ve selected the folder of images to select, Daminion will show you a preview of the images that will be added to your catalog. The yellow boxes indicate an image that will be added to the catalog, but you can click on the yellow box to not import it.

Another choice is how you want to handle your image files. The primary choice is between whether to leave your images in the same folder or to organize them into new folders. Here’s what each option does:

  • Add files to the catalog without copying them: when you choose this option, Daminion will simply leave images in the same folder. They aren’t moved or organized, just added to the Daminion catalog.
  • Copy files to a folder and add to the catalog: if your images are disorganized, Daminion can sort them into new folders according to the capture date. This is a great option if your images are currently disorganized.
Choose Files to import
On the import window, the key decision to make is how you’ll handle the file locations. You can either leave them in place and just add them to Daminion (“add files to the catalog without copying them”) or choose “Copy files to a folder and add to the catalog” to organize images in new folders while they are added to Daminion. If you are just trying Daminion out, I would recommend the first option.

That’s it! You’ve added the images to your Daminion catalog and we can now begin browsing, organizing and managing our image library. If you need to add more images to your catalog later, just return to the Add Files menu option and repeat the process.

Now that we’ve added our images to Daminion, we’ll see them in the application as thumbnails. Let’s move on to find out how to manage them.

Image Management with Daminion

Why is an image manager so important? It helps us slice and dice and explore our image collection based upon rules. These could be rules such as when an image was captured, what camera we used to capture it with, or the rating we’ve given the image. Daminion can do all of these.

Here are three key image management tasks that a Daminion can help accomplish:

Change Views for Power Browsing

The heart of an image manager is the ability to browse images, scrolling through them quickly to find what you’re looking for. There are three very helpful views in Daminion to browse your images. Let’s walk through them in the video below:


Add Ratings, Flags and Color Labels

Star ratings, flags, and color labels are used in many photo managers. All of these criteria are useful to help us organize our images. We can add the criteria now, and then filter to those metadata criteria later.

  • Star ratings are typically used to give an image a rating based upon our preferences.
  • Flags flags are a simple, “on/off” switch to mark which images are worth keeping or working with. 
  • Color labels are a way to add meaning and to your images. Every photographer uses them differently. For me, I might use a Blue color label to mark an image that needs to go to Photoshop for fine adjustments.

In Daminion, the easiest way to start adding each of these is from the right-click menu. With an image or several images selected, right click on the image. Choose one of three options—Set Rating, Set Color Label, or Set Flag—to add metadata to the images. You’ll also note the keyboard shortcut from the menu as the fastest way to add it to future images.

Add Metadata Daminion
In Daminion, you can set ratings, color labels and flag statuses from the right click menu. Note the keyboard shortcuts on the right side of the menu.

Here’s a list of the default keyboard shortcuts in Daminion Standalone:

  • Rating: Control+1-5 to add the corresponding number of stars
  • Color label: 1-9 to add a color label; 1-5 adds red through purple in color wheel order
  • Flag: F for flag, U for unflagged, X for reject

Filtering Images in Daminion Standalone

Adding data like flags or color labels is just the first step in managing our images. Let’s look at how to filter images based on metadata.


Delivering Images

At the beginning of this tutorial, I started with a question: can you find and deliver an image to a client quickly? We’ve already learned how to find images, so now let’s export them from Daminion.

First, select the images that you wish to export from the browser view. You can hold control on your keyboard and select several at the same time. Then, click the Export > Copy to Folder option in the upper right corner of Daminion to start the export.

Export images option
On the export images window, you can leave the Transform option set to Export Original Files to export an exact original image.  You can also change the dropdown option to export a smaller version of the image if this will be used on the web or other lower resoltion source. Also, make sure that you’ve selected a Destination Folder to save the finished images.

On the pop-up window, you’ll need to choose two options with each export:

  • Transform: the default option is to export the original file, which means that the finished file is identical to the original image in resolution and quality. There are also dropdown options to export a smaller finished file to save space, which is ideal when the image is going to be used online.
  • Destination folder: this folder is where the finished image file will be saved.

Once you’ve set these options, press Copy to export your finished images.

Recap and Next Steps

Every photographer needs a tool to manage her image library. There are plenty of powerful tools for correcting and styling an image, but a well-organized photographer needs an image manager as well.

If you want to learn more about getting your images organized, check out these tutorials:

  • Check out The ABCs of Photo Sorting if you’re just beginning to think about getting organized, this tutorial is a great first read.
  • What’s in a Name? This tutorial will help you name your images in a way that’s useful to photographers, embedding some meaning in filenames. This will be way more useful than DSC_23849.RAW.
  • Daminion is a Windows application, but Mac users need a capable image organizer as well. Check out the course Image Library Management with Lyn  on how to use Lyn, an inexpensive tool for Mac with many of the same features.

Download How to Organize Your Pictures for Free With Daminion

How to Create a 3D, Glowing, Retro Text Effect in Adobe Photoshop

Final product image
What You’ll Be Creating

This tutorial will show you how to use smart objects and layer styles to create a 3D, retro, glowing text effect. Let’s get started!

This text effect was inspired by the many Layer Styles available on Envato Market.

Tutorial Assets

The following assets were used during the production of this tutorial:

1. Create the Background Gradient

Step 1

Create a new 800 x 600 px document, click the Create new fill or adjustment layer icon at the bottom of the Layers panel, and choose Solid Color.

Solid Color Layer

Step 2

Use the Color #2e363.

Fill Color

Step 3

Double-click the Solid Color layer to apply a Gradient Overlay effect using these settings:

  • Check the Dither box
  • Blend Mode: Linear Burn
  • Opacity: 20%
  • Style: Radial
  • Scale: 150%
  • Click the Gradient box to create the gradient fill using the colors #ffffff to the left and #ababab to the right
Gradient Overlay

This will create a simple gradient background.

Gradient Background

2. Add the Background Texture

Step 1

Place the Metal texture on top of the Solid Color layer, and resize it as needed.

Rename the texture’s layer to BG Texture, and change its Blend Mode to Soft Light.

Add the Background Texture

Step 2

Go to Image > Adjustments > Levels, and change the Gamma value to 1.50.

Levels Adjustment Layer

3. Create the Text and Its Smart Object

Step 1

Create the text using the font Big John. The Size is 200 pt, the Color is #e8a505, and the Tracking is 100.

Create the Text

Step 2

Rename the text layer to Textright-click it, and choose Convert to Smart Object.

Make sure to follow the naming of the layers throughout the tutorial so that things don’t get confusing.

Create the Smart Object

Step 3

Duplicate the Text layer, make it invisible, and drag it on top of the copy layer.

Duplicate the Text Layer

4. Create the Transform Action

Next, we’re going to duplicate the text and transform the copy layer, and then repeat that for a number of layers.

Since we’re working with smart objects, and to avoid any duplicate with transform issues, we’ll record an Action for that.

Step 1

Open the Actions panel (under the Window menu).

Open the Actions Panel

Step 2

Click the Create new set icon at the bottom of the panel, enter Extrusion in the Name field, and click OK.

Create New Set

Step 3

Click the Create new action icon at the bottom of the panel, enter Action in the Name field, and click Record.

Create New Action

5. Record the Action

Step 1

Duplicate the Text copy layer by click-dragging it to the New layer icon at the bottom of the Layers panel.

Duplicate the Text copy Layer

Step 2

Press Command-T to enter the Free Transform Mode, and then hit the Down Arrow key once and the Right Arrow key once to move the Text copy 2 layer 1 px downwards and 1 px to the right.

Move the Copy 2 Layer

Step 3

Hit the Return key to commit the changes. You should see all the steps recorded and added to the Action you’re creating.

Recorded Action

Step 4

Click the Stop recording icon at the bottom of the Actions panel.

Stop Recording

6. Create the Extrusion

Step 1

Click the Play selection icon at the bottom of the Actions panel 10 times to create 10 more copies with the transformation.

Play the Action

The final layer should have the name Text copy 12.

Final Layer

Step 2

Select all the Text copy layers (without the original invisible Text layer), and go to Layer > Arrange > Reverse.

This will place the last copy layer at the bottom and bring the first to the top.

Reverse the Layers Order

Step 3

Deselect the first and last layers, and then place the remaining selected layers in a group and call it Extrusion.

Extrusion Group

Step 4

Rename the Text copy layer to Text Front, and the Text copy 12 layer to Text Back.

Duplicate the Text Front layer, change the copy’s Fill value to 0, and then duplicate it.

Create the Text Front and Back Layers

7. Style the Extrusion Layers

Double-click the Text copy 2 layer to apply the following layer style:

Step 1

Add a Bevel and Emboss with these settings:

  • Size: 0
  • Shadow Mode – Opacity: 15%
Bevel and Emboss

Step 2

Add a Drop Shadow with these settings:

  • Opacity: 7%
  • Distance: 3
  • Size: 2
Drop Shadow

Step 3

This will style the first extrusion layer.

Right-click the styled layer, and choose Copy Layer Style.

Copy Layer Style

Step 4

Select the rest of the extrusion layers, right-click any of them, and choose Paste Layer Style.

This will create the 3D extrusion effect.

Paste Layer Style

Step 5

Duplicate the Extrusion group, drag the copy to place it on top of the Text Front copy 2 layer, and change its Fill value to 0.

Duplicate the Extrusion Group

8. Style the Text Front Layer

Double-click the Text Front layer to apply the following layer style:

Step 1

Add a Bevel and Emboss with these settings:

  • Size: 3
  • Gloss Contour: Cove – Deep
  • Check the Anti-aliased box
  • Shadow Mode – Opacity: 15%
Bevel and Emboss

Step 2

Add a Contour with these settings:

  • Contour: Cove – Deep
  • Check the Anti-aliased box
  • Range: 100%
Contour

Step 3

Add a Stroke with these settings:

  • Size: 1
  • Position: Inside
  • Blend Mode: Screen
  • Fill Type: Gradient
  • Use the faucet 70 gradient fill
Stroke

Step 4

Add an Inner Shadow with these settings:

  • Opacity: 35%
  • Uncheck the Use Global Light box
  • Angle: 141
  • Distance: 9
  • Choke: 6
  • Size: 18
Inner Shadow

Step 5

Add an Inner Glow with these settings:

  • Blend Mode: Linear Light
  • Opacity: 100%
  • Color: #d1cc90
  • Technique: Precise
  • Size: 90
  • Contour: Cone – Asymmetrical
Inner Glow

Step 6

Add an Outer Glow with these settings:

  • Opacity: 100%
  • Color: Use the faucet 140 gradient fill
  • Spread: 28
  • Size: 10
  • Contour: Cove – Shallow
Outer Glow

Step 7

Add a Drop Shadow with these settings:

  • Opacity: 7%
  • Distance: 3
  • Size: 2
Drop Shadow

This will style the top layer of the text.

Styled Front 1

9. Style the First Front Copy

Double-click the Text Front copy layer to apply the following layer style:

Step 1

Add a Bevel and Emboss with these settings:

  • Size: 10
  • Uncheck the Use Global Light box
  • Angle: 138
  • Altitude: 21
  • Gloss Contour: Cove – Deep
  • Check the Anti-aliased box
  • Shadow Mode – Opacity: 15%
Bevel and Emboss

Step 2

Add a Contour with these settings:

  • Contour: Cove – Deep
  • Check the Anti-aliased box.
  • Range: 100%
Contour

Step 3

Add a Stroke with these settings:

  • Size: 1
  • Position: Inside
  • Blend Mode: Screen
  • Fill Type: Gradient
  • Use the faucet 70 gradient fill
Stroke

This will style the first layer of the text front’s inner part.

Styled Front 2

10. Style the Second Front Copy

Double-click the Text Front copy 2 layer to apply the following layer style:

Step 1

Add a Bevel and Emboss with these settings:

  • Technique: Chisel Hard
  • Size: 10
  • Uncheck the Use Global Light box
  • Angle: 110
  • Altitude: 26
  • Gloss Contour: Cone – Asymmetrical
  • Check the Anti-aliased box
  • Shadow Mode – Opacity: 15%
Bevel and Emboss

Step 2

Add a Contour with these settings:

  • Contour: Notched Slope – rounded
  • Check the Anti-aliased box
  • Range: 100%
Contour

This will style the second layer of the text front’s inner part.

Styled Front 3

11. Style the Text Back Layer

Copy and Paste the Text Front layer’s layer style to the Text Back layer, and then double-click the Text Back layer to adjust the following settings:

Step 1

Bevel and Emboss:

  • Size: 6
Bevel and Emboss

Step 2

Contour:

  • Contour: Cone – Inverted
Contour

Step 3

Drop Shadow:

  • Opacity: 70%
  • Distance: 20
  • Size: 50
Drop Shadow

This will style the back layer.

Styled Back Layer

12. Style the Extrusion Groups

Step 1

Double-click the Extrusion group to apply a Gradient Overlay effect with these settings:

  • Check the Dither box
  • Blend Mode: Multiply
  • Use the stove pipe 185x gradient fill
Gradient Overlay

This will add some more dimension to the extrusion.

Extrusion Gradient Effect

Step 2

Double-click the Extrusion copy group to apply an Outer Glow effect with these settings:

  • Blend Mode: Linear Light
  • Opacity: 35%
  • Color: #a9f6ff
  • Size: 27
  • Contour: Ring
  • Range: 75%
Outer Glow

Step 3

Group all the visible text copy layers and extrusion groups you have, and call the group Text Effect.

Text Effect Group

Step 4

Double-click the Text Effect group to apply an Outer Glow effect with these settings:

  • Blend Mode: Screen
  • Opacity: 50%
  • Color: #399da7
  • Size: 150
Outer Glow

Step 5

This will finish off the text effect.

If you want to change the text, you can double-click the original Text layer’s thumbnail to open the original text file, change the text, go to Image > Reveal All, and then File > Save, and File > Close.

This will update the rest of the smart object layers, and you’ll get the effect applied to the new text you entered.

Final Text Effect

13. Add a Texture and Some Adjustment Layers

Step 1

Place the Freeze texture on top of all layers, and rename its layer to Texture Overlay. Change the Texture Overlay layer’s Blend Mode to Linear Burn and its Opacity to 15%.

Texture Overlay

Step 2

Add a Gradient Map adjustment layer on top of all layers, and check the Dither box.

Create the gradient fill using the colors #433469 to the left, #5e6474 in the middle, and #d4b28a to the right.

Change the layer’s Blend Mode to Color and its Opacity to 15%.

Gradient Map 1

Step 3

Duplicate the Gradient Map adjustment layer, and then change the copy’s Blend Mode to Soft Light and its Opacity to 50%.

Gradient Map 2

Congratulations, You’re Done!

In this tutorial, we created a simple gradient background with a texture overlay.

Then we created the text, converted it into a smart object, and duplicated it. After that, we recorded an action to create the extrusion and started applying different layer styles to the layers to create the text effect.

Finally, we added a texture and a couple of adjustment layers to finish everything off.

Please feel free to leave your comments, suggestions, and outcomes below.

Final Result

Download How to Create a 3D, Glowing, Retro Text Effect in Adobe Photoshop

Creating a Low Poly Aeroplane Set for Games: Part 2

Final product image
What You’ll Be Creating

Marking the Seams

Step 1

Scondary-click on the plane and press Tab to enter edit mode. Click on the Edge
select mode
button.

Edge select mode
Edge select mode

Step 2

Press A on the keyboard to deselect any selected edges. 

Hold Shift
and then secondary-click on the edges where the wing starts, one by one, to
select them all.

Press Ctrl-E to bring out the Edges menu
and click on Mark Seams

You’ll notice that the selected edges turns
red. The seams are from where the mesh will get unstitched onto a flat UV map.

Select edges and mark them as seams

Step 3

Select the bottom edges of the wing as shown in the image. Press Ctrl-E and
click on Mark Seam.

Mark bottom edges as seams

Step 4

Select the edge loop form where the tail wing starts. Hold Shift and then
right click on the edges to select them. Press Ctrl-E and select Mark Seam.

Select edges and mark them as seams

Step 5

Select the bottom edge of the wing from all sides. Hold Shift and then right
click on the edges. Press Ctrl-E and click on Mark Seams.

Mark bottom edges as seams

Step 6

Press A to deselect the edges. Select the front edge loop at the engine. You
can hold Alt and secondary-click on any of the edge to select the edge loop.
Press Ctrl-E and select Mark Seam.

Select front edges and mark them as seam

Step 7

Since the model actually half there is no need to mark the center loop as
seam. You can preview the half model by clicking on the eye button to toggle
on/off modifier preview in 3D view port.

Preview mirror modifier

Step 8

Press Tab to exit edit mode. Secondary-click on the propeller object to select
it.

Select propeller
Select propeller

Step 9

Press Tab to enter edit mode. Secondary-click on the side edge and mark it seam.
Select the front edge loop (full circle) and mark it as seam. Secondary-click to select and Ctrl-E
to Mark seam.

Select edges and mark seams

Press Tab to exit edit mode. Secondary-click on the plane to select it.

Exit edit mode
Exit edit mode

UV Mapping the Model

Step 1

Split the 3D viewport by dragging the corner with primary mouse button.

Split 3D viewport
Split 3D viewport into two

You’ll now have two 3D viewports.

Split 3D viewport into two

In one of the 3D viewport, click on the Editor type button and select
UV/Image editor. The 3D viewport will change to UV editor.

Change editor type to UVImage Editor
Change editor type to UV/Image Editor

Step 2

  • In 3D viewport, press 3 in the number pad to get into side view. 
  • With the plane
    selected, press Tab to enter edit mode. 
  • Press Ctrl-Tab and select
    Face select
    mode. 
  • Move the mouse over the main body of the plane and press L. This will select
    the main body mesh which is separated by the seams. 
  • Press U on the keyboard to bring
    UV
    Mapping
    options. 
  • Select Project From View. This will unwrap the selected mesh as
    seen in the  , onto the UV Editor.
Select mesh and unwrap

Step 3

In the UV Editor, hold Alt and then right click on the out edge of the mesh
to select the edge loop. 

Press S and then Y to scale it along the Y-axis
to loosen it a bit form the rest of the mesh.

Select the individual vertices on the
tail and move them away so that they don’t over lap on any other vertices or
edge. Do not move the inner vertices or edges. Only spread out the outer edge
loop.

Tweak the vertices in UV Editor

Similarly secondary-click on the vertices on the front part and then press G to
move them away one by one.

Tweak the vertices in UV Editor
Tweak the front vertices in UV Editor

Step 4

In the 3D view port, press 7 on the number pad to get into top view. 

Select
Face
Select mode. 

Move the mouse over the wings top part and press L to select the
mesh separated by the seam. Check from bottom. Nothing else is should be
selected, only the top part of the wings.

Select top faces of wings

Step 5

In top view, with the wings selected, press U to bring out UV Mapping
menu
and select Project from View. The wings are now project on to the UV Editor.

Unwrap selected faces

Step 6

Select the outer vertices and edges. Scale and move them away just a little bit so
that they are not getting overlapped by other edges. .

Tweak vertices in UV Editor

Step 7

In the 3D viewport, press Ctrl-7 to get into bottom view. Move the mouse over
the wings and press L to select them one by one. Press U and select
Project From
View
to unwrap them in the UV Editor.

UV Map bottom faces of wings

Step 8

In the UV Editor, press A to select all vertices of the wings and press
G to
move them away form the grid. I did this because the UV mesh of all mesh will
land here and would overlap each other. So to avoid this move them from the
default position.

Move the vertices away from the grid

Step 9

In the 3D viewport, press A to deselect any selected face. Move the mouse
over the front part and press L to select it. Press U and select
Project From
View
to unwrap the selection onto the UV Editor.

UV map the front part

Step 10

Select the outer edge and scale it. Move the selected loop to the side so
that it becomes parallel to the inner loop. Press A to select all vertices and
the G to move it away from the main grid.

Tweaking the vertices

Step 11

Press Tab to exit edit mode. Right click on the plane to select it and then
press Tab to enter edit mode. Press A to select all edges. You will see the UVs
in the UV Editor might be jumbled up or overlapping each other. 

Arrange all the island groups such that it fits neatly inside the grid. Keep some space for
the propeller UVs. The commands in the UV Editor are same as in 3D viewport:

  • Hover over any group and press L to select the group
  • Select any vertex or vertices of the group and press Ctrl+L to
    select the whole group with connecting vertices.
  • Hold Shift for multiple select.
  • A to deselect / Select all.
  • W to bring out the weld/Align menu
  • Right click to select any edge / vertices

Here are other editing commands for the UV editor, though they are same as in
3D view.

  • G to move
  • R to Rotate
  • S to scale
  • Zoom in/Zoom out – Mouse wheel.
  • Pan = Shift-Middle mouse button and drag.

To maximize the UV Editor, move the mouse over the UV Editor and press Ctrl-Up
Arrow
. Press Ctrl-Up arrow to toggle back.

Rearranging the UV groups

Step 12

Press Tab to exit edit mode. Secondary-click on the propeller to select it and
press Tab to enter edit mode.

Select propeller and enter edit mode

Step 13

Press A to select all vertices. Press U to bring the UV Mapping menu and
select Unwrap this time. You don’t need it to get projected from view.

Unwrap the propeller mesh

Step 14

Move the UVs so that they have some space in between. Select the blade which
is facing the opposite direction and rotate it 180 degrees. 

Press R and
then type 180 to rotate
the selection 180 degrees. Adjust the edge loop of the front part as well as shown in the
image.

Move and tweak the UV map

Step 15

Press A to select all vertices and then press S to scale it down. Press
G to
move them away from the grid.

Move and tweak the UV map

Step 16

Press Tab to exit edit mode. Secondary-click on the plane to select it. Click on
the modifiers button in the properties window. Press the Apply button in the
Mirror modifier. This will generate the opposite side of the mesh.

Apply the mirror modifier

Step 17

Hold Shift and secondary-click on the propeller and then the plane. Press
Ctrl-J
to join them.

Join propeller and plane model

Step 18

Press Tab to enter edit mode. In the 3D view, press A to select all vertices,
so that UV maps of the whole mesh appear in the UV Editor.

Rearrange UV maps
Rearrange UV maps

Step 19

Move and adjust the propeller UVs inside the grid. 

Press A to deselect the
vertices, move the mouse over any of the UV island and press L to select it and
G to move. 

To see more commands and shortcuts, go to step 11.

Rearrange the vertices

Step 20

When done, Click on the UVs menu and select Export UV Layout. This will be
the guidelines to paint textures in the painting program.

Export UV Layout
Export UV Layout

Select the PNG Format and decrease the Fill Opacity to 0.00.
I kept the default size of 1024×1024 pixels.

Export settings
Export settings

Step 21

Now we will bake the Ambient Occlusion data onto the image. This will add
shadow information to a new image, which will be helpful while painting texture
in paint program. 

In the UV Editor, press
New button to create a new image onto which you will bake the AO data.

Create new image
Create new image

I changed the size to 1024×1024 pixels. Press OK.

Image settings
Image settings

A new image is added in the UV Editor.

Default black image
Default black image

Step 22

In the 3D view, press A to select all vertices and then press W to bring the
Specials menu. Select Shade smooth. This will give smooth look to the model.

Set mesh to Shade Smooth
  • Press A to deselect the vertices. 
  • Select only the propeller blades and
    center. 
  • Move the mouse over the mesh of the propeller and press L to select each 
    blade and the center part. 
  • Press 3 in the number pad to get into side view. 
  • Move the selection away from the plane temporarily so that their shadow does not
    appear on the plane, while baking the AO data. 
  • Press Tab to exit edit mode.
Move the propeller away

Step 23

Click on the World settings button in the properties window. In the Gather
panel, increase the Samples to 15. Higher value will give smooth and noiseless
results.

Ambient Occlusion settings

Step 24

  • Click on the Render settings button in the properties window. 
  • In the Bake
    panel, Select Ambient Occlusion in the Bake Mode
  • Tick the Normalized checkbox. 
  • Set Margin to 12 or 16 pixels.
Bake settings
Bake settings

Press the Bake button. After few seconds the image will be updated. In
the 3D View, press Alt-Z to view the model with textured applied. Use Alt-Z
again to toggle back to shaded view.

Ambient Occlusion baked on an image

Step 25

In the UV Editor, click on the Image menu and select Save As Image to save
the image.

Save Image
Save Image

In the Save As Image panel, select PNG file format. Choose RGBA to save
transparent image without black background. 

Type in the name for the file and
press the Save button.

Save image as png
Save image as png

Texturing and Painting

Step 1

Open the image with Baked AO data, in your favorite image editor. You can use
Gimp or Photoshop.

Open image in Gimp
Open image in Gimp

In a new layer on top, put the UV Layout you exported.

Add UV layer
Add UV layer

Step 2

Create a new layer in between the Wire and AO layer. This will be the layer
on which you can paint the texture. You can create more layers for painting but
keep them between the Wire and AO Layers.

Add another layer in between

Step 3

Paint the texture with the wire-frame as guidelines.

Paint colors in a separate layer

Step4

Add another layer and draw the detail lines. Paste the logos/symbols in
their own layer.

Add details and logo

Step 5

Set the paint layer to Multiply or hard light or overlay. You will notice the
AO layer will give a nice shadow effect. You can adjust the levels/contrast of
the AO layer to decrease the intensity of shades. 

Save the image in .psd format.
Turn off the layer visibility for the UV wire layer and export it to .png or
jpeg format.

Layer settings
Layer settings

Step 6

In 3D viewport (in Blender) and in the edit mode, select all vertices of the
plane by pressing A key. Open your exported PNG image, in the UV Editor.

Open exported image
Open exported image

Step 7

If you don’t see the texture on the model in the 3D view, Press Alt-Z
to enable Texture View Mode.

Texture map applied to object

Step 8

With the plane selected, click on the Materials button in the properties
window and click on the New button to assign a new material. 

Rename the
material. In the shading panel, check the Shadeless Tickbox. Since I have baked
the Ambient Occlusion data onto the texture, I can set the material to be
shadeless.

Uncheck it if you want to have dynamic light and shades onto the
object. You can also turn off the AO layer while painting texture in Photoshop
or Gimp and export only the colour map.

Material settings
Material settings

Step 9

Click on the Texture button in the properties window. Press the New button.
Rename the texture to whatever you want. In the Image panel, open and
browse for the texture image. 

In the Mapping panel, make sure to select
UV for Coordinates.

Texture settings
Texture settings

Creating Variations

Step 1

Turn off the visibility of the painted layer. Add another layer and create
paint with different colour scheme. Export the image with different name in jpg
or png format.

Add new layer in Gimp

Step 2

In Blender, ensure you are in object mode. Press Tab to exit edit mode.
Secondary-click on the plane to select it. Press Shift-D to make a duplicate. Move
the mouse and primary-click to confirm.

Duplicate the object

Step 3

Press Tab to enter edit mode. In the UV Editor, click on the Image menu and
Open the new exported image.

Open exported image
Open exported image

Step 4

With the new duplicated plane selected, press the Materials button in the
properties window. Click on the number against the name of the material to make
it a duplicate for the new model. Rename the material.

Material Settings
Material Settings

Step 5

Click on the texture button in the properties window. Click on the number
button to make a new copy of the texture for this new model. 

Rename the texture.
In the Image panel, browse for the new image.

Texture Settings
Texture Settings

Step 6

The aeroplane set is now ready for the game.

Airplane ready for games

Download Creating a Low Poly Aeroplane Set for Games: Part 2

5 Inspirational Black and White Images and How to Make Your Own

The time of
associating black and white photography simply with old photographs has passed. Many digital photographers
choose to work in monochrome, often to great effect, but why?

There are many
reasons to photograph in black and white, or to post-process it that way afterwards,
but it’s also something that can be easily misused or not done to full effect.
Here we’ll look at some effective ways to use black and white as well as some
great examples to inspire you.

What You Need

The Kit

In respect of the
kit you need to take a digital black and white image, it’s the same as if you were
taking anything else. There’s nothing special you need to take a good black and
white photograph, but there are a few small things that can help.

Neutral Density Filters

Neutral density
filters go over your lens to block out the light. The extent to which they do
this depends on the ‘stop’ of the glass. A 10 stop ND filter, for example, is the
equivalent of blocking 10 stops of light, or reducing the light by 1000x. This
allows you to have the shutter open for longer (with tripod) to create more
dramatic skies or water.

These filters also
come in graduated versions, meaning you can choose to block the light from a
particular part of your image; just the sky for instance.

Polarising Filter

A polarising filter
reduces a particular wavelength, or family of wavelengths, from your image. These can cut reflections and make certain colours appear more saturated. Polarising filters are particularly useful for black and white photography as you can create a greater contrast
without losing detail in the highlights.

A Good Subject

As with anything in
photography, you need a good subject as the focus of your image. Not everything
looks great in monochrome but the brilliant thing about shooting in digital is
that you get the chance to make that decision later. Still, it pays to think
about what you’re shooting in advance.

When you’re thinking about the subject you also need to think about the background. An abandoned building may look great against a plain sky or field for example, but not so good in the midst of a city and its clutter.

Black and white really brings out texture and shape, so something may have more appeal once you lose the colour, than it did before.

Inspiration

City

city
Image: Photodune

Sometimes
I’m so taken by all the vibrant colours of a city at night that I never even
give thought to the fact that it could look amazing in monochrome. The muted
tones in this image make it so sleek and simple, it’s incredibly effective.

Abstract

abstract
Image: Photodune

Abstracts and architectural elements often look great in black and white, allowing you to focus
more on texture, shape and symmetry.

Flat Light

flat light
Image: Photodune

Flat light isn’t always a bad thing. As in cases like the picture above, flat light
can actually enhance your image. Softer highlights and midtones help to dramatize
the shadows, creating interesting lines from the trees.

Portrait

portrait
Image: Photodune

The soft greyscale
here really compliments this subject. The subtle centre spotlight keeps our
attention on her rather than the city but the buildings provide a great frame
and don’t distract due to their lack of colour.

Rain

rain
Image: Photodune

Although I’m convinced this would have worked in colour too, there’s no
doubting that the drama in this image has been enhanced by choosing to display
it in black and white. As it’s clearly stormy (we see rain, grey skies and the
flags blowing) then the choice of colour (or lack thereof in this case) really
hammers home how we’re supposed to interpret this image.

Technique

Colour

We can’t talk about monochrome without also talking about colour. The temperature of an
image, what people are wearing and the background colours can all be an
integral part of how we see the picture. Take away the colour, take away
distractions.

This will shift
your focus to other points; do all of the elements now work together? Is there
enough definition between foreground and background?

Communicate

If you want to make
great black and white imagery then there’s probably a reason. So, what is it?
What do you want to communicate to your audience?

Softer tones in
black and white, or greyscale photographs can convey love, mystery,
romanticism! Think of old black and white movies: just the term ‘old black and
white’ movies conjures up a sense of nostalgia and it can be the same with your
photographs.

Contrast

When we think black
and white, we can tend to think drama, lots of contrast and deep tones. It’s
almost the opposite of what we think of in a colour photograph. When was the
last time you tried to make a colour landscape have as much contest as
possible?

Our eyes are drawn
to contrast; the differences between the light and dark parts of your image.
Increasing the difference gives it more and decreasing it, less.

An image doesn’t
always need this ‘pop’ though, it depends entirely on what you’re trying to
convey. A landscape might have more drama and ‘ooh’ factor with dark shadows
and bright highlights, but what about a portrait? Images don’t always have to have punch to them. The look of a picture and its interpretation can often come down to the light. You don’t need fat white clouds or bright sunshine to get a great black and white photograph. Think of a dull, misty day with flat light, like one of our examples had above. Would that have worked quite as well with full drama?

Composition

Negative space becomes easier to
showcase when you take away colour. Think of a boring, empty sky in colour. It
may be blue, it may be dull grey but there still won’t be much of interest for
a viewer. Now consider that same sky in black and white: suddenly it’s great ‘negative’
space and can help make your subject really stand out in comparison.

Leading lines and textures also work
well when you ditch the complication of colour. Something that is ‘ugly’ to see
in colour, can become an interesting study in shape or texture when in black
and white. Think of black mold on a white tiled wall, or dirty puddles on a
light pavement.

Capture in RAW

RAW files give you
much more scope when it comes to post-processing. They retain all of the data from your
sensor without compressing or losing any information. You need a parametric
image editor like Adobe Camera RAW or Lightroom to make sense of this data, but it means you
can make far more intricate changes without losing quality, than you could
shooting JPEG.

Post Processing

I’ve already mentioned shooting in RAW and making some edits there, but
there are alternatives when processing. A favourite of mine, is Nik’s Silver Efex Pro 2, part of the
Nik Collection
, formerly paid for software which is now free to use.

This software has a range of black and white adjustments that are
incredibly quick and easy to use. You can choose pre-sets and leave them ‘as is’,
or you can fine tune each one to get a really bespoke look.

Potential Problems

Grain, or noise shows up much more in black and white images. This is not
necessarily a problem though! Some monochrome images look great with a bit of
texture and it can in fact improve their appearance and enhance the mood you’re
trying to convey.

Over-editing can be a problem too. Too many adjustments can leave an
image looking overdone, so knowing when to stop is a real skill. Working on
non-destructive layers and saving your progress as an editable file like a PSD
in Photoshop means that if you make a mistake or you have your image printed
and it doesn’t look great, you can go back and work on your picture without
starting from scratch.

Top Tips to Getting Monochrome Shots

  1. Try
    filters to add drama to skies and water, or to reduce reflections.
  2. Don’t
    rely on post-processing to make a great image: have in mind what you want
    to achieve from the start.
  3. Shoot
    in RAW to capture as much image data as possible.
  4. Think
    about key elements like light, contrast and negative space.
  5. Try
    a free resource like Silver Efex Pro to really give your pictures a punch.

Further Resources

Final Thoughts

I think most of us
enjoy nice monochrome images. We see the world in colour and having it
presented to us in a different and more abstracted way can create real
intrigue.

Whether it’s high
contrast and drama, or something more subtle in soft grey tones, there’s no
denying that black and white, when used well, can have great impact and effect.
Remember to try and picture what it is you want, as you’re shooting. Even
though we have the benefit of digital, it still helps other aspects of your image,
like composition, to have a goal in mind before you get to the processing
stage.

If you’re unsure as
to whether something would look right in black and white then try and look at
the scene objectively. Is the scene ‘busy’? Are there a lot of colours and do
those colours clash horribly or work well? If the colours are a distraction or
there’s too much going on then chances are it might work better in monochrome.

Try photographic
filters to help reduce reflections and to allow longer shutter speeds, which in
turn can create drama in movement. Shoot in RAW to be able to go further with
your adjustments and when post-processing, try not to go ‘too far’. Keep in
mind your original idea for the image and save your work as an editable file to
give you the chance to change your mind later without having to start over.

Finally, consider
using software to make your life easier. Free to use programs can give you as much or little control as you want and can yield some truly
spectacular results.

Download 5 Inspirational Black and White Images and How to Make Your Own

5 Courses to Get You Started With Game Design

If all the coverage of this week’s E3 expo has inspired you to improve your game design skills, read on. In this article, I’ll introduce you to five of our best game design courses. Whether you want to design characters, environments or landscapes, these comprehensive video courses will teach you everything you need to know.

1. Environment Concept Art for Games

In this course, concept artist and game designer Jonathan Lam will teach you how to paint environment concept art for video games. The course will take you through a step-by-step process of learning how to paint and design in Adobe Photoshop. Topics covered will include composition, value, painting with colour, lighting effects, and shape language.

2. Character Design & Animation for Games

This time, Jonathan Lam will take you through a step-by-step process from learning how to design your character to managing your assets in animation programs such as Spine. Topics covered will include sketching, asset creation, posing and basic movement.

3. Landscape Concept Art for Film and Games

In this short course, Brian Lee will walk you through his process of developing several designs as he would in a real production environment. This is an advanced course and moves very quickly from one concept to the next, covering concepts such as color, atmosphere, and composition.

4. Creating Compelling Environments for Concept Art

Join Kalen Chock to learn how to develop a compelling environment for games or film. You’ll learn the core principles of sketching, lighting, composition, color and design. At the end of this course, you will have learned the foundation of how to create your own compelling environments for concept art.

5. Design Isometric Environments for Games

In this course, Jonathan Lam will teach you how to create isometric props for your video game levels and scenery. This course will take you through a step-by-step process of learning how to sketch out and design your in-game assets using both Adobe Illustrator and Adobe Photoshop.

Start Learning With a Free Trial

You can take all of these and more game design courses with a free 10-day trial of our monthly subscription. So get started today, and who knows, maybe you’ll see one of your own games taking the limelight at a future E3.

And if you want some extra resources to help you with your projects, check out the range of beautifully designed sprites, backgrounds, and other game assets on Envato Market.

We also have some great free tutorials on game design, so check these out if you’d like to learn that way:

Download 5 Courses to Get You Started With Game Design