iPhone 4 x 1.7 million = $1,105,000,000

Earlier today, Apple sent out a note stating that it has sold 1.7 million iPhone 4s during the first three days of its availability. No other Apple launch has moved a similar number of units at launch. The original iPhone needed 74 days to hit 1 million, the 3G S sold 1 million units in 3 days and the iPad sold about 1 million units in a month.

The economics behind the launch are especially interesting. AT&T and other retailers are believed to pay nearly retail price to Apple for each iPhone, while the profit is mainly made via service contracts. At $600 for the cheaper version of the two iPhone variants, Apple’s iPhone 4 has already shifted more than $1 billion in sales in three days. Some estimates claim that Apple will be selling some 2.5 million iPhones until the end of July.

Market research firm iSuppli has already come up with some other numbers in its teardown report. Apparently it costs Apple about $188 to build and assemble each 16 GB iPhone. The most expensive component remains the screen, which is estimated at $28.50. That may be one of Apple’s best profit margins yet: Typically, the margin is somewhere in the 40-50% neighborhood. The iPhone 4 margin is at close to 70%, if the (unofficial) $599 price tag is correct.

If you order an iPhone 4 now, you will have to wait until the end of July, we hear. And those who don’t want to shell out $200 can get discounts or even free phones in a contest wave that is already flooding the Internet. The most creative idea may come from BlendTec, which said it will give one lucky winner an iPhone and prepay a 2-year service contract. In return, you are asked to surrender your old iPhone, which may end up in iSmoke and ascend to YouTube fame.

Planning Your App Fortune

Consider this scenario. You in wonderland. Your app among 200,000 other apps in one store. Plenty of customers: More than 3 billion downloads confirmed. A great new iPhone with brisk demand. An iPad that is breaking sales records and is already beyond what many analysts had predicted initially. Soon there may be 100 million customers that are directly connected to the App Store as their only resource for software. You may already be thinking about an early retirement. Think again.

Well, never say never. If you have a great app with mass market appeal becoming a millionaire with a few weeks is not out of the question. There are enough success stories out there. But, of course, there are enough apps out there that get hardly any downloads as well.

So, how exactly do you predict the sales of your future iPhone App? I mean, reasonably?

What should you expect?

Do you aim high or do you aim low?

Heck, what should you aim for at all?

Let’s ignore all those fairy tales of mega-sellers that create instant millionaires for as moment. Of course, it takes a great app, a lot of work, marketing and quite a bit of luck to strike it rich. And if you depend on a very successful app right now while you would be screwed otherwise, you may want to look elsewhere. As it turns out, if you aren’t already a big player, betting on a successful iPhone/iPad app may be a bit like gambling. Or like launching a website that promised gazillions of dollars of ad revenues.

On a reasonable level, there has been a recent article that has caught my attention. It takes a much more conservative look (a very conservative look, in fact) at what the average app earns. It could be a bit frustrating to read, but it may help to adjust some expectations.

The BSN article dives deep into publicly available numbers and draws conclusions by using numbers that may not be accurate, which is why we should take them with a grain of salt. The foundation for the calculated revenue is Apple’s publicly disclosed figures of currently $542 million of revenues in the first half of the year. The app average does not sound too bad, but this is, of course, a distorted view since, as so often, 5% of the paid apps are generally believed to account for 95% of the revenues. 200,000 apps and $542 million would mean that the average app author gets $2710 every six months, which is not that great, but then we know that the majority of downloads are free downloads (according to BSN about 85% of downloads are free, while they represent only 27% of the App Stores stock), but a few apps rake in millions while others just a few dollars.

BSN quotes market researchers who believe that the average price paid for an app is somewhere between $1.90 and $2. The average app gets less than 1000 downloads over a 2-year period and if we apply a median number of $1.95, then the media revenue would be about $1950 per app over two years, or $682 per year after Apple’s 30% cut. Building a business on that would be kinda foolish, of course.

But then, this is really a very conservative scenario. If you are enthusiastic about your app, and you have a powerful social network that can help you market your app, or have other resources to get you going, you may very well end up north of that median. BSN also noted that each iPhone/iPad is estimated to generate about 7 paid downloads and 40 free downloads per year. With 100 million outs in the market soon, that is a substantial opportunity. And it is up to you how you take advantage of this opportunity.

iOS 4: Please start your engines.

If you haven’t done so yet (not that we believe you didn’t), it’s a good time now to have a closer look at Apple’s new iOS 4, which was officially rolled out yesterday.

So we have known about it for two months and talked about it a couple times. In numbers, there are 100 new features and access to more than 1500 APIs, with details being provided by Apple on its SDK site.

There is a lot of focus on the new features (Ars Technica has the most thorough first look we have seen so far), but given Apple’s emphasis on iOS 4, the real news may not be so much new APIs or features, such as multitasking, per se. It’s the collective opportunity behind it.

Of course, there will be a race who will have the first apps out that use some of those new features, but it may the app that finds a way to take an intuitive approach to leverage iOS 4 features that will come out on top. It is a comprehensive update that can be overwhelming and clearly needs some thought. Perhaps that was the reason why Apple has given us more than two months to prepare for this release, if you think about it.

It is not particularly difficult to figure that Apple will push this release hard. There is some competition out there and we expect Apple to step up the marketing game even more, which should create new ways to ride in Apple’s tailwind to market your application. Make sure you are ready for this opportunity. It’s a growing market that quickly rewards your creativity and innovation.

We will spending quite a bit of time with iOS4 over the next few weeks, so make sure you check back frequently.

How Many iPads Can Apple Sell?

Predicting the potential customer base for your application is not that easy. It has become clear that especially the iPad has become a moving target that should be taken seriously. Latest sales numbers are proof that it is worth your while to make sure that you app runs well on both the iPhone and the iPad.

Apple said that 3 million iPads have been sold in 80 days. That works out to about 37,500 iPads every day. While this number is impressive, Apple’s numbers also suggest that iPad sales are climbing beyond the initial sales volume right after launch. As far as we know, it took Apple 28 days to sell the first million of iPads. It took about (we don’t know the exact count) 30 days to sell the second million and apparently about 22 days for the third million.

There was some speculation that overall sales could die down, but it seems that international demand is actually accelerating the demand. There have been some colorful comparisons, as Apple highlighted the “80 days” mark and mentioned that Apple will be making the iPad available to more people around the world. So Apple sold 3 million iPads in the same time Phileas Fogg traveled around the world in Jules Verne’s 1873 novel Around the World in Eighty Days. But in case you are wondering, of course, the iPads solds would not be able to make it “around the world.”  If placed end-to end, the line of iPads would stretch for about 452 miles. Apple will have to sell 165,067,381 iPads to make it once around the globe.

Not surprisingly, Apple’s new estimate has brought updated sales estimates from analysts, which have been somewhere between 5 and 7 million for this year, with the exception of Forrester, which was, as far as we know, the only research firm that indicated a slowdown of iPad sales, as they believe 3.5 million tablets (including the iPad) will be sold this year. Piper Jaffray’s Gene Munster now believes that Apple will sell 7.5 million iPads in 2010, up from a previous estimate of 6.2 million. By the end of 2011, Apple will have sold 16.5 million iPads, Munster said in a research note to his clients.

Given the fact that the sales estimates that most analysts covering the iPad have revised their estimates at least half a dozen times this year already, I wonder where we really will end up by the end of the year?

iPhone 4 Could Propel Apple to 100 million users

It is no secret anymore that Apple is shattering pre-sales records with the new iPhone. Apparently, more than 600,000 phones have been ordered in just one day. What is much more interesting, are the forecasts just how far this new phone can go. Morgan Stanley’s Katy Huberty thinks Apple may be able to expand its user base to 100 million iPhone owners and users. She believes that about 42 million fourth-generation iPhones could be sold by the end of the year.

We know that Huberty is usually among the more optimistic analysts – especially since her rather controversial iPad sales predictions, but even if she is slightly off, those numbers are huge. Huberty thinks that the iPhone 4 is attractive enough so that Apple can triple its user base within 18 months. That should have some impact on its market share which is currently just above 5% of the entire cell phone market, according to Gartner.

So what does that mean for application developers? Obviously that’s good news as the market expands and iPhone/iPad users are getting more and more used to how those apps of a smartphone or tablet work. However, there is another statistic out by ABI Research, which now says that, by 2015, some 1.2 billion apps will be downloaded (Overall, not just Apple). We are not quite sure where that number exactly comes from, especially since ABI quotes the most recent number of more than 200,000 available iPhone apps and we also know that Apple said earlier this year that more than 3 billion apps have been downloaded within 18 months of the launch of the AppStore.

ABI believes that competition will play a role in available apps and app sales and therefore says that downloads will peak sometime during 2012 and 2013. The market research firm noted that there are many apps that do not provide much value. Neil Strother, practice director at ABI, explained: “When considering the value of mobile apps as marketing tools, planners need to take a step back from all the hoopla and ask themselves, ‘How will those work for my brand? Is it right for me? What is my audience doing? Do I even have a large mobile audience? If so, how do I craft an effective strategy?’”

So yes, while we have a tough time finding a way to back up ABI’s numbers, we do agree that app strategy absolutely matters if you are trying to come up with a successful app.

Download WWDC 2010 session videos and source code

I know many people already get this email from apple, but i would like to share with those who didnt

This year I got the WWDC ticket from Apple, but I could not make my visa in such a short period. But I will try not to miss next year. After feeling bad, I […]

Related posts:

  1. Five things you should know for building iPhone applications Five things you know before you start developing iPhone applications:…
  2. Bypass Code Signature & Published Your Application on Cydia Published iPhone Application On Cydia. Build your application for jail…
  3. How to setup/install 2 iPhone SDKs on one Mac Tags: install, installation, iphone sdk, iOS4, Mac, setup I was…


How to setup/install 2 iPhone SDKs on one Mac

Tags: install, installation, iphone sdk, iOS4, Mac, setup

I was trying to install iOS4 (iPhone sdk 4) and also want to have iPhone sdk 3.2. I remembered what I did last year when i want to try iPhone sdk 3.0 beta and continue to submit applications on iPhone sdk 2.2. I created another drive and then […]

Related posts:

  1. Download WWDC 2010 session videos and source code I know many people already get this email from apple,…
  2. Basic Questions before You start iPhone Development One person from India asked me few question for iPhone…
  3. done with blog setup top 15 plugins for WordPress…


Error launching remote program: security policy error.

I was helping my friend to install application on his jailbreak iPhone. It took me some time to understand the issue. Actually he have two issues, one was understanding what to do to make a build and second how to install build to his iPhone.
How to make a build for iPhone, is a question people […]

Related posts:

  1. List/Guideline for submitting iPhone Application to Apple Store Creating Certificate for your application and then make provisioning profile…
  2. iPhone Video Tutorial: Bypassing Code Signature in Xcode & Installing jail-break application to iPhone Video Tutorial to bypass code signature in Xcode and installing…
  3. Bypass Code Signature & Published Your Application on Cydia Published iPhone Application On Cydia. Build your application for jail…


Back to Blogging

My last post was about a year back and so today I think its a time to start again my blog. So i would suggest that we start tutorials again and used iPhone sdk 4. So I will either update the old one’s or write new one.

I will write one tutorial on this weekend. […]

Related posts:

  1. Five things you should know for building iPhone applications Five things you know before you start developing iPhone applications:…
  2. Basic Questions before You start iPhone Development One person from India asked me few question for iPhone…


Diving into the Twitter Stream


Hey iCoders. As I posted earlier I recently made an iPad app called TweetMapper. I just put out a new release of the app with a big new feature. The app now has a scrolling timeline of the tweets it is seeing as they come in. In order to make this app I took advantage of the Twitter Stream API that is provided by twitter. This API creates a persistent connection between the Twitter servers and your application. We will essentially start a stream of incoming NSData object to an NSURLConnection that you create querying the stream. We will look into the different search parameters which can be passed into the request, the way in which our code responds to authentication requests from Twitter, and the logic we must use to ensure that the data we have received is a complete XML element and not chopped off. There are three major steps to taking advantage of this in your app.

  1. Create an NSURLConnection to request an XML response from the Stream.
  2. Create a parameter string for the HTTP Body.
  3. Respond to the authentication challenge with user credentials.
  4. Append the data as it comes in and when a complete element is received parse the Tweets.

So lets dive in.

Creating the Class

The first thing that we need to do is establish a connection with the Twitter stream. I will not be creating a Twitter client class that can be plugged into any application you choose. You will be able to find the class as a download at the end of the post. We will call the class TwitterStreamClient. Lets first define the header file of the class.

#import
#import "TouchXML.h"
#import "Tweet.h"
 
@interface TwitterClient : NSObject {
 
	NSString *searchString;
	NSString *locationString;
	NSMutableString *holderString;
	id mapController;
	NSURLConnection *connection;
	NSMutableURLRequest *request;
}
 
@property (nonatomic, assign) id mapController;
 
-(void)startStreamingTweets;
-(void)makeMyRequest;
-(void)searchByLocation;
-(void)searchByTerm;
-(void)searchByUser;
-(void)parseXMLString:(NSString*)xmlString;
-(NSString*)locationStringForLongitude:(double)_long Latitude:(double)_lat;
 
@end

You will need to have TouchXML installed for this class to work. You can find installation instructions here. Let move onto the .m file of the TwitterStreamClient. First thing to do is create the initializer. Ours will look like this:

-init {
	if([self = [super init]) {
		holderString = [[NSMutableString alloc] init];
	}
 
	return self;
}

This holder string is what we are going to use to synchronize our incoming NSData from the service. We will see the reason for this in the next step.

Connect to Service

The Twitter stream provides many different parameters for users to pass into their request. You can see the full list here, but we will be focusing on user specific stream, keyword specific stream and location specific stream. We are going to be hardcoding what these will be searching for but in use you can pass in whatever values you like. We will create an NSMutableURLRequest and fill in its HTTP body with the appropriate request. First we will make a method to create the stream request.

-(void)makeMyRequest {
 
	request = [[NSMutableURLRequest alloc] initWithURL:[NSURL URLWithString:@"http://stream.twitter.com/1/statuses/filter.xml"]];
	[request setHTTPMethod:@"POST"];
}

With this done we will create three different methods that can be called. One that bases its search on keywords, another based on users and a final one based on location.

Request by keyword

-(void)searchByTerm {
 
	searchString = @"track=Love,Hate,Want,Need";
 
	NSString *httpBody = searchString;
	[request setHTTPBody:[httpBody dataUsingEncoding:NSUTF8StringEncoding]];
	connection = [[NSURLConnection alloc] initWithRequest:request delegate:self startImmediately:YES];
	[request release];
}

Request by User ID

-(void)searchByUser {
 
	searchString = @"follow=14402149,29089557,807095,19058681";
 
	NSString *httpBody = searchString;
	[request setHTTPBody:[httpBody dataUsingEncoding:NSUTF8StringEncoding]];
	connection = [[NSURLConnection alloc] initWithRequest:request delegate:self startImmediately:YES];
	[request release];
}

The final method will create a location string. The twitter stream requires passing in 4 coordinates, 2 coordinate pairs. This will define the southwest most point and northeast most point. The square that the coordinates define has a maximum of 1 degree length for any side of the defined box. My helper method takes in a longitude and latitude as a center points and creates as large an area as possible around it and returns the 4 coordinates as a string. Paste in the following code to search with center points on Tempe, AZ and New York, NY.

-(NSString*)locationStringForLongitude:(double)_long Latitude:(double)_lat {
 
	NSString *returnString = [NSString stringWithFormat:@"%f,%f,%f,%f",(_long-.5),(_lat-.5),(_long+.5),(_lat+.5)];
 
	return returnString;
}
 
-(void)searchByLocation {
 
	searchString = [NSString stringWithFormat:@"locations=%@,%@",
					  [self locationStringForLongitude:-111.932898 Latitude:33.419265],
					  [self locationStringForLongitude:-74.0 Latitude:40.7]];
 
	NSString *httpBody = searchString;
	[request setHTTPBody:[httpBody dataUsingEncoding:NSUTF8StringEncoding]];
	connection = [[NSURLConnection alloc] initWithRequest:request delegate:self startImmediately:YES];
	[request release];
}

Answering Authentication

The NSURLConnection will connect to the Twitter stream and then Twitter will ask for a username and password for the request. With the NSURLConnection’s delegate set to self we will implement the following method to answer the TwitterRequest.

- (void)connection:(NSURLConnection *)connection didReceiveAuthenticationChallenge:(NSURLAuthenticationChallenge *)challenge {
 
	NSURLCredential *cred = [[NSURLCredential alloc] initWithUser:@"tweetmapperAPI" password:@"w0_0tSp1" persistence:NSURLCredentialPersistencePermanent];
	[[challenge sender] useCredential:cred forAuthenticationChallenge:challenge];
	NSLog(@"Received Challenge");
	[cred release];
}

This should satisfy the authentication challenge and the stream should start sending you data.

Receiving Data

Now the stream will start sending you data, it will coming into another NSURLConnection delegate method. The stream will send NSData into this method. The NSData can be parsed into a string and if you print it you will see output like this:

2010-05-21 14:05:17.491 TweetMapper[72280:207] Recieved Data from Stream:
 2010-05-21 14:05:17.919 TweetMapper[72280:207] Recieved Data from Stream: <?xml version="1.0" encoding="UTF-8"?>
<status>
  <created_at>Fri May 21 21:05:17 +0000 2010</created_at>
  <id>14452520592</id>
  <text>Need some followers yo I jus got this twitter its pretty str8</text>
  <source>&lt;a href=&quot;http://mobile.twitter.com&quot; rel=&quot;nofollow&quot;&gt;Twitter for Android&lt;/a&gt;</source>
  <truncated>false</truncated>
  <in_reply_to_status_id></in_reply_to_status_id>
  <in_reply_to_user_id></in_reply_to_user_id>
  <favorited>false</favorited>
  <in_reply_to_screen_name></in_reply_to_screen_name>
  <user>
    <id>144901351</id>
    <name>David Powell</name>
    <screen_name>Ballaholic3223</screen_name>
    <location></location>
    <description>I'm a chill dude that love to play ball, hang out,  and uhhhh chillax...holla at me and we can be cool</description>
    <profile_image_url>http://a1.twimg.com/profile_images/907668616/VDG61D80_normal</profile_image_url>
    <url></url>
    <protected>false</protected>
    <followers_count>1</followers_count>
    <profile_background_color>9ae4e8</profile_background_color>
    <profile_text_color>000000</profile_text_color>
    <profile_link_color>0000ff</profile_link_color>
    <profile_sidebar_fill_color>e0ff92</profile_sidebar_fill_color>
    <profile_sidebar_border_color>87bc44</profile_sidebar_border_color>
    <friends_count>0</friends_count>
    <created_at>Mon May 17 16:17:15 +0000 2010</created_at>
    <favourites_count>0</favouri
2010-05-21 14:05:23.073 TweetMapper[72280:207] Recieved Data from Stream: e_background_color>
    <profile_text_color>666666</profile_text_color>
    <profile_link_color>2FC2EF</profile_link_color>
    <profile_sidebar_fill_color>252429</profile_sidebar_fill_color>
    <profile_sidebar_border_color>181A1E</profile_sidebar_border_color>
    <friends_count>5</friends_count>
    <created_at>Fri Aug 01 08:10:36 +0000 2008</created_at>
    <favourites_count>0</favourites_count>
    <utc_offset>-28800</utc_offset>
    <time_zone>Pacific Time (US &amp; Canada)</time_zone>
    <profile_background_image_url>http://s.twimg.com/a/1274144130/images/themes/theme9/bg.gif</profile_background_image_url>
    <profile_background_tile>false</profile_background_tile>
    <notifications></notifications>
    <geo_enabled>false</geo_enabled>
    <verified>false</verified>
    <following></following>
    <statuses_count>44</statuses_count>
    <lang>en</lang>
    <contributors_enabled>false</contributors_enabled>
  </user>
  <geo/>
  <coordinates/>
  <place/>
  <contributors/>
</status>

A response from the Twitter stream comes in as XML. An entire XML element that represents a single is a element. The status element seen here took two different calls to the didRecieveData method. Because of this we need to build in logic to recognize when a complete Tweet XML object is received and pass that onto our parsing method. This is what we use the NSMutableSting holderString for. You can see the completed method below.

- (void)connection:(NSURLConnection *)connection didReceiveData:(NSData *)data {
 
	NSString *dataString = [[NSString alloc] initWithData:data encoding:NSUTF8StringEncoding];
 
	[holderString appendString:dataString];
	[dataString release];
 
	if([holderString rangeOfString:@""].location != NSNotFound &amp;&amp; [holderString rangeOfString:@""].location != NSNotFound) {
 
		if([holderString rangeOfString:@""].location &lt; [holderString rangeOfString:@""].location) {
			NSRange start = [holderString rangeOfString:@""];
			NSRange end = [holderString rangeOfString:@""];
 
			NSRange range;
			range.location = start.location;
			range.length = (end.location+end.length)-start.location;
 
			NSString *xmlString = [holderString substringWithRange:range];
 
			[self parseXMLString:xmlString];
 
			[holderString deleteCharactersInRange:range];
		}
	}
}

Here we receive data and append it to our holder string. We then check that both an opening and closing element tag is seen. If both tags are seen and the opening tag occurs before the closing tag, we create a substring in that range, pass the completed element to a method called parseXMLString and delete the characters from the holder string.

Parsing Data

Now that we have completed elements being grabbed out of the data we receive we need to parse out what we find as important. For the sake of extensibility I created a helper object called Tweet. A Tweet takes in tweet text, an author name, the authors Twitter URL, a timestamp, an image URL and a coordinate. This is the header for the class

#import
#import 
 
@interface Tweet : NSObject {
 
	NSString *tweet;
	NSString *author;
	NSURL *authorURL;
	NSString *timeStamp;
	NSURL *authorImageURL;
	CLLocationCoordinate2D coord;
}
@property (nonatomic, retain) NSString *tweet;
@property (nonatomic, retain) NSURL *authorImageURL;
@property (nonatomic, retain) NSString *author;
@property (nonatomic, retain) NSURL *authorURL;
@property (nonatomic, retain) NSString *timeStamp;
@property (nonatomic, assign) CLLocationCoordinate2D coord;
 
-(UIImage*)authorPhoto;
-(NSURL*)tweetLink;
 
@end

I implement the class like this. I include a method called TweetLink which will return an NSURL of any url within the tweet text.

#import "Tweet.h"
 
@implementation Tweet
 
@synthesize tweet;
@synthesize authorImageURL;
@synthesize author;
@synthesize authorURL;
@synthesize timeStamp;
@synthesize coord;
 
-init {
 
	if([super init]) {
 
	}
 
	return self;
}
 
-(NSURL*)tweetLink {
	NSRange httpRange = [[self tweet] rangeOfString:@"http://"];
 
	if(httpRange.location == NSNotFound) {
		return nil;
	}
 
	else {
		httpRange.length = [[self tweet] length] - httpRange.location;
		NSString *customString = [[self tweet] substringWithRange:httpRange];
		httpRange = [customString rangeOfString:@" "];
 
		if(httpRange.location == NSNotFound) {
 
			httpRange.location = 0;
			httpRange.length = [customString length];
		}
 
		else {
			httpRange.length = httpRange.location;
			httpRange.location = 0;
		}
 
		NSLog(@"URL I am returning: %@", [customString substringWithRange:httpRange]);
 
		return [NSURL URLWithString:[customString substringWithRange:httpRange]];
	}
}
 
-(UIImage*)authorPhoto {
 
	return [[UIImage alloc] initWithData:[NSData dataWithContentsOfURL:authorURL]];
}
 
-(NSString*)description {
 
	return [NSString stringWithFormat:@"Tweet:%@\nAuthor:%@\nAuthor URL:%@\nPublished:%@\nLongitude:%f\nLatitude:%f\nAuthor Image URL:%@", tweet, author, authorURL, timeStamp,coord.longitude,coord.latitude, authorImageURL];
}
@end

I will use this class to create a single object holding all of the data I parse out of the XML elements I am looking at. All that is left to do is finish my parse method to get create these Tweet objects. This is my parse method that takes advantage of Touch XML and its awesome XML parsing methods.

-(void)parseXMLString:(NSString*)xmlString {
 
	CXMLDocument *document = [[CXMLDocument alloc] initWithXMLString:xmlString options:0 error:nil];
 
	if([[[[document rootElement] elementsForName:@"geo"] objectAtIndex:0] childCount] &gt; 0) {
 
		Tweet *tweet = [[Tweet alloc] init];
 
		[tweet setTweet:[[[[document rootElement] elementsForName:@"text"] objectAtIndex:0] stringValue]];
		[tweet setAuthor:[NSString stringWithFormat:@"@%@", [[[[[[document rootElement] elementsForName:@"user"] objectAtIndex:0] elementsForName:@"screen_name"] objectAtIndex:0] stringValue]]];
		[tweet setAuthorURL:[NSURL URLWithString:[[[[[[document rootElement] elementsForName:@"user"] objectAtIndex:0] elementsForName:@"url"] objectAtIndex:0] stringValue]]];
		[tweet setAuthorImageURL:[NSURL URLWithString:[[[[[[document rootElement] elementsForName:@"user"] objectAtIndex:0] elementsForName:@"profile_image_url"] objectAtIndex:0] stringValue]]];
 
		NSString *coordinateString = [[[[[[document rootElement] elementsForName:@"geo"] objectAtIndex:0] elementsForName:@"point"] objectAtIndex:0] stringValue];
		NSRange range = [coordinateString rangeOfString:@" "];
		NSRange lon;
		lon.location = 0;
		lon.length = range.location;
		NSRange lat;
		lat.location = range.location+range.length;
		lat.length = [coordinateString length] - lat.location;
 
		double longit = [[coordinateString substringWithRange:lon] doubleValue];
		double latit = [[coordinateString substringWithRange:lat] doubleValue];
 
		CLLocationCoordinate2D coord;
		coord.longitude = latit;
		coord.latitude = longit;
 
		[tweet setCoord:coord];
 
		//PASS TWEET ONTO WHATEVER CLASS WILL USE IT
 
		[tweet release];
	}
}

Usage

Make sure that you install Touch XML and import the MapKit framework when using this class. Customize the terms, users and coordinates for the stream method to fit what you need it for. All that will be required to use the class is the following to create and begin parsing:

TwitterClient *client = [[TwitterClient alloc] init];
[client makeMyRequest];
 
[client searchByTerm];
 
OR
 
[client searchByLocation];
 
OR
 
[client searchByUser];

Fillin the very end of the parsing method to send the tweets off to whatever part of the application you want to use them in. I hope this introduction will help you guys add live twitter streams into your apps. Happy coding!

Source Downloads

TwitterStream

How To Integrate Google Analytics Tracking Into Your Apps In 7 Minutes

How To Integrate Google Analytics Tracking Into Your Apps In 7 Minutes

Ok, maybe that title is +- 3 minutes depending on how efficient you are ;) .

What?

So, why would you want to integrate Google Analytics into your iPhone application.  Duh, for the same reasons you would integrate it into your site.  Google has extended their killer analytics platform to include mobile devices including the iPhone and Android devices.

The analytics API gives you some very powerful options to get as nitty gritty as you would like in your application tracking.

Why?

Uhh, because stats are freakin sweet.  Even if you don’t have a million+ downloads of your app, it is still interesting to know how your users are using your application.  Being able to track every single action made by a user is priceless when thinking about the direction of your app including what features to add, improve, or scrap.

Imaging spending all of your time on some complex feature to find out that only 1% of your users even care about that feature.  How could you know that only 1% of your users actually care about that feature unless you are doing some sort of tracking.

So before you add that super duper all in one end all be all 1337 feature to your app, consider reading the rest of this tutorial and add stat tracking first.  It is quick and painless and I promise that it will be totally worth it.

Configuring your Google Analytics Account

Google Analytics is a free server provided by Google.  If you dont already have an account, you can sign up for one with your existing Gmail account.  http://google.com/analytics. Sign up and log in.

The first thing you will want to do is Add a new Website Profile.

On the next page:

  • Select Add a Profile for a new domain
  • Enter in some URL – This doesn’t really matter since google doesn’t use it to identify your app.  A good convention is iphone.yoursite.com or appname.yoursite.com so that you know these stats are for your iPhone app.
  • Select your country and timezone
  • Click Finish

Pretty simple… On the next screen, make sure you copy the Web Property ID. This number (begins with UA) is what we will be using to uniquely identify your application.

That’s all for the web side of things!  Now on to the iPhone part.

Download the Google Analytics Library and Add It To Your Application

This could not be easier.  Head on Over to http://code.google.com/apis/analytics/docs/tracking/mobileAppsTracking.html . They explain much of the steps  so you could read the rest there, but I will lay them out in detail here with screesnhots.  Download the Analytics SDK for iPhone and extract it.

There are 2 files that are important.  Drag both files from the Library folder into your XCode project.  These files are GANTracker.h and libGoogleAnalytics.a.

When XCode pops up the confirmation box, make sure that you check the box that says “Copy items into destination group’s folder (if needed)”.  This will ensure that the code gets place in your project directory.

Include CFNetwork and Link Against the sqlite framework

The google analytics framework requires the use of CFNetwork (for interent connection detection) and the sqlite framework (most likely to store events when the user does not have internet).

Let’s start by adding CFNetwork to the project. Right click on the frameworks folder and select Add -> Existing Frameworks.  Next, select CFNetwork.framework from the list and click Add.

Now we need to link the project against libsqlite3.0.dylib.  To do this Click Project -> Edit Active Target “<project name>” where <project name> is the name of your XCode project.

Next, click the + button at the bottom to bring up the library picker. Select libsqlite3.0.dylib and click Add

Including and Initializing the Tracker

Since the Analytics tracker is a singleton class, we only have to initialize it once and the rest of the application can use the same instance.

Let’s start by opening up the app delegate and adding the code to import the Google Analytics framework.

#import "GANTracker.h"

Now you need to initialize the tracker… Make sure you have the UA number handy that you received from Google earlier.  Add the following code to you applicationDidFinishLaunching method.

[[GANTracker sharedTracker] startTrackerWithAccountID:@"UA-15609865-3"
				dispatchPeriod:10
				delegate:nil];

Make sure you replace my UA number with yours. The dispatchPeriod variable tells the tracker how often to report back to Google. Google suggests using 10 seconds in their example so we’ll stick to that.

Tracking Pageviews and Custom Events

Google gives you 2 different ways to track how your users use the application.  The first way is via pageviews.  Pageviews work just like they do in the browser as if the user navigated to a new page in your website.  Some examples of when to use pageview are when you have a tab interface or a flipside view controller.  I would not suggest using a pageview every time the user performs an action such as click a button.

The second way is via custom events.  These are really cool.  With custom events, you can easily see HOW your users are using your application.  Examples of events are button clicks, typing in a textbox, submitting high scores, etc…

We will see an example of implementing each of these methods and take a look at how they appear inside of the Google Analytics website.

Pageview method

Here is an example of a pageview when the user first launches the app.  Put this code inside of your applicationDidFinishLaunching method.

NSError *error;
if (![[GANTracker sharedTracker] trackPageview:@"/app_launched"
                                        withError:&amp;error]) {
     // Handle error here
   }

Note that the “app_launched” is essentially our page name similar to index.html or aboutus.php. You can add this code anywhere in you app that you want to add a page view. Make sure you include the GANTrack.h file and change the pagename for each new location.

Event method
Here is an example of an event that gets fired when the user presses a Save button.

- (IBAction) saveTheWorld:(id) sender
{
	NSError *error;
	if (![[GANTracker sharedTracker] trackEvent:@"button_click"
				             action:@"save_the_world"
					      label:@"my_label"
					      value:-1
					  withError:&amp;error]) {
		// Handle error here
	}
}

What’s really cool about event tracking is you have 3 levels of customization. You have the category, the action, and the label. How you organize it is up to you, but make sure the grouping makes sense. In the example above, I will use the category “button_click” every time a user clicks any button. The action will determine which button was clicked (in this case, it’s “save_the_world”). Finally, the label is just another level. I’d suggest using the UDID of the users device.

Now that we have implemented our code, let’s take a look inside of our Google Analytics account and see what the stats look like.

This is just some of our sample data from another app.  Notice the interface is exactly the same as it is when you are tracking website statistics.  It shows you unique visits as well as pageviews.  You get all of the advanced reporting too including time spent on each “page”.

Now we take a look at events.  To find the actions click Content -> Event Tracking inside of your Google Analytics Page.

In the above screenshot, we see tracking for an event called “clap”.  It shows us the number of times the users “clapped” within a given day.

Conclusion

One last thing I want to mention before concluding this tutorial. Google Analytics stats are 1 day behind.  What this means is, you won’t see your stats appear immediately.  So, before you comment here because you don’t see the stats appearing, please please please wait one day and check your stats again.  That is all :)

Be one of the cool kids, follow me on Twitter.

Happy iCoding

Tweet Mapper in the App Store

Tweet Mapper in the App Store

I recently decided to look into the Stream API that is provided by Twitter. Though this API, you can specify a request with certain parameters and be stream tweets as they are posted live. I decided to make my first iPad app using it called Tweet Mapper. Tweet Mapper is meant to be a window into the live world of Twitter. It doesn’t require a Twitter account to use and is free in the store. The app looks at 10 major cities; Los Angeles, San Francisco, Chicago, New York, Miami, Barcelona, London, Tokyo, Rome and Mexico City.

You can find Tweet Mapper in the App Store.

Any time a tweet is posted in one of those cities with a geotag the tweet is posted on the map. If the tweet has a URL included in it, a detail disclosure option is shown to bring up the web page. I will be doing posts on how I accomplished this using NSURLConnection in a post very soon. Thanks for the support!

iPhone OS 4.0: The death of the 3G

iPhone OS 4.0: The death of the 3G

Hey Blancer readers. If you were on the internet this morning you most likely saw mention of the iPhone 4.0 preview. We did a predictions post yesterday and actually faired pretty well with our guesses.

  1. MultiTasking (No 3G) – CHECK
  2. iAd – CHECK
  3. iBooks – CHECK
  4. Folders – C?HECK
  5. Application Switching Update – CHECK

Lots of good news here, except for the lack of multitasking on the 3G. 3G owners shouldn’t expect to be getting any more of the features coming into major updates of the iPhone OS. The big news rests is all the new API’s though. With over 1500 new API’s being delivered to developers, we are sure to see another year of compelling and effective apps being brought into the app store. Lets look at a few of the specific API’s that are going to lead to some awesome apps!

Event Kit

The Calendar has always felt like an underdeveloped component of the iPhone operating system. It looks ok, syncs with my comp and MobileMe, Exchange and CalDev is cool too I suppose. But why can’t the Local Concerts app in the app store add actual calendar events reminding me of upcoming show I want to attend? Also, Apple has their calendar app, which is fine. But I’m sure there are some better UI’s that developers can come up with. I am excited to see how the developer community will leverage access to this section of the operating system.

Audio Visual Access

Apple has really opened up the doors to the camera on the 3GS. Some of the new API’s include a huge addition to AVFoundation. Things like AVAssetExportPreset1920×1080 are mentioned signaling the emergence of HD video output from application, which is going to really add a lot of functionality to iPhone and iPads.

Regular Expressions

This one is for all my computer science and math nerds out there. Whole new data type NSRegularExpression! This is going to be awesome for developers that are going to be making custom data detectors. Not necessarily something you will notice when being used in apps, but developers are going to have their lives made a little bit easier.

XML Parsing

Here at iCodeBlog we have done demos parsing XML using NSXMLParser. We have also mentioned the superior TouchXML classes. Apple is doing a lot of work to get NSXMLParser work better in iPhone 4.0. NSXMLParser is finally getting a delegate so that it conforms to the design patterns of the other classes within the OS. The delegate methods are still kind of dumb in my opinion but at least no more confusion because of the lack of delegate in that class!

Game Kit

Game Kit is impressive. It could very well become the only way games interact with the cloud, similar to xBox Live. Folks over at OpenFeint probably are not happy.

Map Kit

Map Kit got a HUGE update too. Draggable annotations, overlays, lots of added helper functions to calculate distance and position. Between this and background position tracking, position aware apps are going to get a lot better with this update.

Other Points Of Interest

Local Notifications are going to be awesome for some apps, especially third party reminder or to do apps. The page curl transition is now built in, which always adds a nice bit of flair to UI and will allow competition ebook readers a chance. Also the most mysterious possibly of the additions is QuickLook. How is this working? Will update once I get come code rolling and check it out. Any thoughts, comments, opinions, shot out in the comments section!

The final and maybe most missed point of today was Steve giving us developers a whole new method of getting work and revenue. Not only does iAd look like a killer new way to make some money with your free apps, it seems like the companies who are going to have ads in iAd will need us to make them. I can’t wait till I make my first bit of money displaying an ad I made in a free app I made. Talk about making money coming in and going out!

Creating a document centric iPhone/iPad application with own file format using ZipArchive

Creating a document centric iPhone/iPad application with own file format using ZipArchive

If I need to predict one thing about where the App Store is heading to, now that the iPad has been released, I would say “It’s going to be less about farting apps and much more about productivity apps” Yes – the iPad has already changed the game drastically – with an almost real life size keyboard, large beautiful screen and file sharing direct in iTunes you can achieve much more than before. But hey, iPhone OS 4.0 is just around the corner, and I bet one of those new features will be the same file sharing you get on the iPad.

The problem

Assuming you are already familiar with Objective-C and Cocoa Touch, today I’ll be discussing how to create a productivity application which can read and write multimedia files – custom format files which will be a mixture of image and text data. If you look at the most of the Apple’s productivity applications you’ll notice they all use bundles as their output format. For those not familiar with the concept – the bundle is an actual file directory, which then holds different files, but to the user it’s presented as a single file – easier to copy around and in general to work with. I am going to be doing the same today by making my example application create different text and image files and then zip them together in a single file – this way the user could then copy this single file over trough iTunes via the file sharing feature.

ZipArchive overview

The star of today’s article is ZipArchive – the Objective-C library I’m going to use for compressing and uncompressing my custom zip files. It is completely free and you can download it from : http://code.google.com/p/ziparchive/

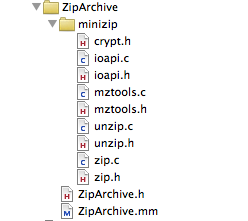
To use ZipArchive I download the library and add it to my Xcode project.

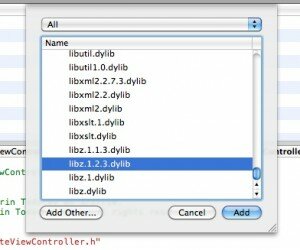
Now that I added the ZipArchive sources I am almost ready to create and extract zip archives. In fact ZipArchive uses the libz framework, so I need to add this framework to my XCode project too. Add->Existing Frameworks and I choose “libz.1.2.3.dylib”

ZipArchive is very straightforward to use, also because it offers just a handful of methods, let’s have a look together at what’s inside:

Creating a ZipArchive instance is super simple.

#import “ZipArchive.h”
 
ZipArchive* zip = [[ZipArchive alloc] init];

Create zip archives

Call CreateZipFile2: to create an empty zip archive file, or call CreateZipFile:Password: to create an empty zip archive which is password protected (the latter makes creating encrypted files really easy). NB: If your application is creating password protected zip files in general it uses encryption, so you would need to tick the encryption checkbox when you submit it to the App Store.

Once you create a zip archive you can add as many files as you like by calling addFileToZip:newname: and when you are done call CloseZipFile2. Or as they say “a line of code is worth thousand words”:

ZipArchive *zip = [[ZipArchive alloc] init];
 
[zip CreateZipFile2:@”archive.zip”];
 
[zip addFileToZip:@”photo1.png” newname: @”photo1.png”];
 
[zip addFileToZip:@”photo2.png” newname: @”photo2.png”];
 
[zip addFileToZip:@”../../test/IMG_0001.png” newname: @”photo3.png”];
 
[zip CloseZipFile2];

Now I really don’t think creating a zip archive gets any simpler than that. All of those methods return a boolean result, which you can check to see if the operation was successful, so you can implement also your error handling code along. To create a password protected file call:

[zip CreateZipFile2:@”archive.zip” Password: @”plaintextpassword”];

(I should really admit that ZipArchive’s the naming convention is strange: some names are CamelCase: , some camelCase:, some camel:Case: , some camelCase:case:, and sometimes a capital in the middle of the word “overWrite” – and this is a class with only 8 methods :)

Extracting zip archives

Extracting files from a zip archive is as simple as creating one. You open an archive using UnzipOpenFile: or UnzipOpenFile:Password: Now pay attention to the result of that operation- if the file exists, but UnzipOpenFile: returns NO, it might mean the archive is password protected. If the archive file has been successfully opened it means ZipArchive can read the contents and you can proceed to extracting the files to a destination of your choice by using UnzipFileTo:overWrite: If you pass YES as the second argument, the extracting operation will overwrite files at the target location.

ZipArchive *zip = [[ZipArchive alloc] init];
 
if ( [zip UnzipOpenFile:@”archive.zip”] ) {
 
[zip UnzipFileTo:@”tempFolder” overWrite:YES];
 
}
 
[zip UnzipCloseFile];

To gain a bit more control over what ZipArchive does you can set a class of yours as a delegate, here is the ZipArchiveDelegate protocol:

@protocol ZipArchiveDelegate &lt;NSObject&gt;
 
@optional
 
-(void) ErrorMessage:(NSString*) msg;
 
-(BOOL) OverWriteOperation:(NSString*) file;
 
@end
So as the method names suggest if you want to get more information about the errors happening let your delegate implement ErrorMessage: and if you want to be more flexible which files gets overwritten during archive extraction implement OverWriteOperation: (return YES to overwrite the given file)

Now that you know everything there is to know about ZipArchive, I can start with my super duper productivity application …

Creating simple custom file format with ZipArchive

I’ll first create a class called CustomFile, which will be my data model – it will be responsible for reading and writing data to the file system. I’ll need few ivars and properties for them:

NSString* filePath;
 
//the file contents
 
NSString* title;
 
NSString* text;
 
UIImage* photo;

In filePath I’ll keep the absolute path to the location the file will be written to or red from. The rest of the ivars will be my file contents – 2 texts and 1 image. Now let me explain what this custom file format will be about – I will want to store in my files short articles – much similar to blog posts – my files will hold the title, the full text and a photo (if attached) of an article.

Some of you will ask why do I need a custom format for my files … can’t I just save a text file with the text and the image somewhere on my disk and then save their names in a sqlite database and done ? Nope, think trends, think iPad / iPhone 4.0 and think file sharing: as I said things are moving beyond apps which sole purpose is to amuse their users for about 5 to 10 minutes. If my app saves separate files of text and images, when the user wants to copy them from his iPad to his wife’s iPad he might miss one of those files and that will ruin the integrity of his document… So let’s look further what I have in mind:

My model’s initializer:

-(id)initWithFilePath:(NSString*)initPath
 
{
 
self = [super init];
 
if (self != nil) {
 
//set the file path
 
if (initPath != nil) {
 
self.filePath = initPath;
 
}
 
}
 
return self;
 
}

Nothing special, just making sure every instance of the model is related to a file path. So since all the file contents are also class properties, I can use them to  fill in my file’s instance with content and then I will need a save method to save to the file system. And what I’d need is create a temp folder, save all my data as files there, and them zip’em! If you have a look in the code below, now that you know how to use ZipArchive the code is actually very straightforward:

-(void)saveFile
 
{
 
//create a temp directory
 
NSFileManager* fileManager = [NSFileManager defaultManager];
 
NSString* documentsDir = [filePath stringByDeletingLastPathComponent];
 
NSString *tmpPath = [documentsDir stringByAppendingPathComponent:@"tmp"];
 
[fileManager createDirectoryAtPath:tmpPath attributes:nil];
 
ZipArchive *zip = [[ZipArchive alloc] init];
 
[zip CreateZipFile2:self.filePath];
 
//save the texts
 
NSDictionary* texts = [NSDictionary dictionaryWithObjectsAndKeys:self.title,@"title",self.text,@"text",nil];
 
NSString* textsFile = [tmpPath stringByAppendingPathComponent:@"texts.plist"];
 
//save the image and add them to the zip file
 
if (self.photo!=nil) {
 
NSString* photoFile = [tmpPath stringByAppendingPathComponent:@"photo0.png"];
 
NSData *imageData = [NSData dataWithData:UIImagePNGRepresentation(self.photo)];
 
[imageData writeToFile:photoFile atomically:YES];
 
[zip addFileToZip:photoFile newname:@"photo0.png"];
 
[fileManager removeItemAtPath:photoFile error:NULL];
 
}
 
[texts writeToFile:textsFile atomically:YES];
 
[zip addFileToZip:textsFile newname:@"texts.plist"];
 
[fileManager removeItemAtPath:textsFile error:NULL];
 
if( ![zip CloseZipFile2] )
 
{
 
// error handler here
 
}
 
[fileManager removeItemAtPath:tmpPath error:NULL];
 
[zip release];
 
}

I am just putting the texts in a NSDictionary and saving it as a plist file, and then saving the image as a separate PNG file.  Then I zip everything and remove all traces. Note how I create my temporary folder in the same location where the file is going to be saved (assuming it is indeed writable) Your own document centric application is probably much greater than putting together some texts and an image, but I’m sure this example already gives you the right direction.

Now that I have already my saving method, it’s very easy to put together also the one that reads the data from the file system.

-(BOOL)loadFile
 
{
 
//create a temp directory
 
NSFileManager* fileManager = [NSFileManager defaultManager];
 
NSString* documentsDir = [filePath stringByDeletingLastPathComponent];
 
NSString *tmpPath = [documentsDir stringByAppendingPathComponent:@"tmp"];
 
[fileManager createDirectoryAtPath:tmpPath attributes:nil];
 
ZipArchive *zip = [[ZipArchive alloc] init];
 
BOOL result = NO;
 
if([zip UnzipOpenFile:filePath]) {
 
//zip file is there
 
if ([zip UnzipFileTo:tmpPath overWrite:YES]) {
 
//unzipped successfully
 
NSLog(@"Archive unzip Success");
 
result= YES;
 
} else {
 
NSLog(@"Failure To Extract Archive, maybe password?");
 
}
 
} else  {
 
NSLog(@"Failure To Open Archive");
 
}

To load the file contents I have very similar approach: I get the directory of the file and create a temp folder in the same place and then I unzip it inside. Spoiler alert: All my documents are going to be saved in the Documents folder which is always writable, so no worries whether this little temp folder of mine can be crated or not. I chose for the Documents folder as this is the folder which you application can share with your computer via iTunes (in OS 3.2+)

Then onwards is also very simple, now the contents are extracted just load them back into the class instance:

if (result==YES) {
 
NSString* textFile = [tmpPath stringByAppendingPathComponent:@"texts.plist"];
 
NSDictionary* texts = [NSDictionary dictionaryWithContentsOfFile:textFile];
 
self.title = (NSString*)[texts objectForKey:@"title"];
 
self.text  = (NSString*)[texts objectForKey:@"text"];
 
NSString* tmpPhotoPath = [tmpPath stringByAppendingPathComponent:@"photo0.png"];
 
if ( [fileManager fileExistsAtPath:tmpPhotoPath] ) {
 
self.photo = [UIImage imageWithData: [NSData dataWithContentsOfFile:tmpPhotoPath] ];
 
}
 
}
 
//do cleanup
 
[fileManager removeItemAtPath:tmpPath error:NULL];
 
[zip release];
 
return result;
 
}

Now that I have my model working (a simple class to read and write my custom file format) I’ll create also the GUI of my example application – I assume you are already familiar with creating UITableControllers and binding GUI elements to your classes so I won’t go into details about those. I’ll just quickly make a resume of the app’s idea and let you dig into the source code, which is available for download at the end of the article.

I’ll create my main view controller to load the names of all files in my Documents directory which have extension “.mtt” – those are the files my application create and show them in a table:

My second view controller will be the application work area – a screen where you can load an image from your photo gallery and enter some texts (again if you are not familiar with the techniques to do all these, read a more introductiory article about iPhone programming)

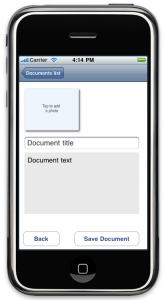
So the idea of the demo app is simple, initially shows you a list of the available documents, if you click on one of them, the CustomFile class unarchives it and loads its contents into the second view controller, there you can change the contents and hit Save Document. If you want to create  a new document you just choose the “New Document …” item from the list and this will just load the details view controller empty, so you can edit and save. Just download the source and run the app to get a feeling of the app and make sure to check the source to see how ZipArchive is being used.

Wrap up

I hope this article has been useful – I showcased ZipArchive and also did put some ideas together on how to create more elaborate document centric applications. The custom file format can be developed a lot further and the interface for editing multimedia contents could be improved dramatically on the iPad’s big screen.

The full source code of the demo application you can download here.

If you have comments or questions, please write in the comments below or ping me in twitter!

I wish you happy iCoding !

Marin Todorov

Pick Your Own Adventure iPhone Edition

Pick Your Own Adventure iPhone Edition

A few days ago I came across this cool Pick Your Own Adventure game on Twitter from user Peretti. I decided to make a quick renewable application that used UIAlertViews and UIActionSheets to tell the story. We are going to implement the UIAlertView and UIActionSheet protocol methods in order to get the functionality we are looking for. This will be a short project but will show the important methods associated with these views.

Step 1

Start a new view based project called CYOA. If you want to add a background image you can add a UIImageView to your CYOAViewController.xib. You can get the one I used here. But that is not necessary.

Step 2

In your project we are going to create a new object to hold the pieces that compose and given “frame” of a pick your own adventure. A frame of a pick your own adventure game is composed of 6 things as far as I am concerned.

  1. Prompt/Title
  2. Choice 1 Text
  3. Choice 2 Text
  4. Choice 1 Tile
  5. Choice 2 Tile
  6. isEnd

Through the use of these 6 objects we will be able to create a network of what I have called “AdventurePieces”. Create a new file. Make a subclass of NSObject and call it AdventurePiece.

Open AdventurePiece.h and input the following.

#import 
 
@interface AdventurePiece : NSObject {
	NSString *message;
	NSString *choice1;
	NSString *choice2;
 
	AdventurePiece *choice1Piece;
	AdventurePiece *choice2Piece;
 
	BOOL isEnd;
}
 
@property (nonatomic, retain) NSString *message;
@property (nonatomic, retain) NSString *choice1;
@property (nonatomic, retain) NSString *choice2;
 
@property (nonatomic, retain) AdventurePiece *choice1Piece;
@property (nonatomic, retain) AdventurePiece *choice2Piece;
 
@property (assign) BOOL isEnd;
 
-initWithMessage:(NSString*)_message
	 firstChoice:(NSString*)_choice1
	secondChoice:(NSString*)_choice2
	  firstPiece:(AdventurePiece*)_choice1Piece
	 secondPiece:(AdventurePiece*)_choice2Piece
		   isEnd:(BOOL)_isEnd;
 
@end

Step 3

We are now going to implement the initialization method that we defined in our header. Open up AdventurePiece.m and input the following.

#import "AdventurePiece.h"
 
@implementation AdventurePiece
 
@synthesize message;
@synthesize choice1;
@synthesize choice2;
 
@synthesize choice1Piece;
@synthesize choice2Piece;
 
@synthesize isEnd;
 
-initWithMessage:(NSString*)_message
	 firstChoice:(NSString*)_choice1
	secondChoice:(NSString*)_choice2
	  firstPiece:(AdventurePiece*)_choice1Piece
	 secondPiece:(AdventurePiece*)_choice2Piece
		   isEnd:(BOOL)_isEnd
{
	if(self = [super init])
	{
		message = _message;
		choice1 = _choice1;
		choice2 = _choice2;
		choice1Piece = _choice1Piece;
		choice2Piece = _choice2Piece;
		isEnd = _isEnd;
	}
 
	return self;
}
@end

All we need to do in this initialization method is fill in our object parameters appropriately.

Step 4

Now that we have made the object that will facilitate our story we need to go about making the logic to automate bringing up the adventure pieces in the right order. First we are going to define one object in our view controller header. Go to CYOAViewController.h and input the following.

#import
#import "AdventurePiece.h"
 
@interface MakeMyOwnAdventureViewController : UIViewController &lt;UIActionSheetDelegate, UIAlertViewDelegate&gt;  {
 
	AdventurePiece *currentPiece;
}
 
@end

Step 5

With that done we need to do the following final steps.

  1. When the app launches a method should be called that creates a bunch of connected adventure pieces and sets the currentPiece instance variable to the one we desire to start on.
  2. Tell the app to show the currentPiece adventure tile.
  3. Respond to users pushing buttons on the adventure tile by resetting the current piece instance variable.
  4. Pull up a different view when the end of the chain is reached.

For our purposes we will be have UIAlertViews show the parts of the story before the end. And the final piece of our story will be shown in a UIActionSheet. Lets look at each of the code pieces required to finish off our last four steps.

1. When the app launches a method should be called that creates a bunch of connected adventure pieces and sets the currentPiece instance variable to the one we desire to start on.

-(void)makeTheStory {
 
	AdventurePiece *successPiece = [[AdventurePiece alloc] initWithMessage:@"Sparks fly from the red wire but no explosion! Kim Jong Il’s evil plot is foiled!" firstChoice:@"YAY" secondChoice:nil firstPiece:nil secondPiece:nil isEnd:YES];
	AdventurePiece *failPiece = [[AdventurePiece alloc] initWithMessage:@"Cutting the blue wire begins a chain reaction - omg that is bad. Like really bad..Kaboom! What went wrong!?!" firstChoice:@"Too Bad" secondChoice:nil firstPiece:nil secondPiece:nil isEnd:YES];
	AdventurePiece *failPiece1 = [[AdventurePiece alloc] initWithMessage:@"Bad Choice. You Die" firstChoice:@"Too Bad" secondChoice:nil firstPiece:nil secondPiece:nil isEnd:YES];
	AdventurePiece *middlePieceA = [[AdventurePiece alloc] initWithMessage:@"You parachute to North Korea, sneak past guards to a live nuclear bomb. Do you" firstChoice:@"Cut Red" secondChoice:@"Cut Blue" firstPiece:successPiece secondPiece:failPiece isEnd:NO];
	AdventurePiece *middlePieceB = [[AdventurePiece alloc] initWithMessage:@"As you are leaving you notice trained assassins behind you" firstChoice:@"Run" secondChoice:@"Fight" firstPiece:failPiece1 secondPiece:failPiece1	isEnd:NO];
	currentPiece = [[AdventurePiece alloc] initWithMessage:@"You are assigned to a dangerous mission." firstChoice:@"Accept" secondChoice:@"Vacation" firstPiece:middlePieceA secondPiece:middlePieceB isEnd:NO];
}

In this method we make 5 total adventure pieces. This specific pick your own adventure is quite short. It as 3 prompts, 2 choices each with a total of 4 end points. You can see what I mean in this diagram here. The white square are the prompts, the green squares are the choices and the red squares are the final results. We fill in the current piece instance variable as the top most piece and we are done here.

2. Tell the app to show the currentPiece adventure tile.

- (void)viewDidLoad {
 
    [super viewDidLoad];
	[self makeTheStory];
	[self showStoryForCurrentPiece];
}
-(void)showStoryForCurrentPiece {
 
	if([currentPiece isEnd]) {
		UIActionSheet *actionSheet = [[UIActionSheet alloc] initWithTitle:[currentPiece message] delegate:self cancelButtonTitle:nil destructiveButtonTitle:nil otherButtonTitles:[currentPiece choice1],@"Retry",nil];
		[actionSheet showInView:self.view];
	}
 
	else {
 
		UIAlertView *alert = [[UIAlertView alloc] initWithTitle:@"Your Message" message:[currentPiece message] delegate:self cancelButtonTitle:nil otherButtonTitles:[currentPiece choice1],[currentPiece choice2],nil];
		[alert show];
	}
}

This method should be called every time a new current piece is set. If checks to see if the adventure piece is an ending piece, if it is then an action sheet it created. If it is not an alert view is created. The button titles, and prompts are filled in appropriately.

Respond to users pushing buttons on the adventure tile by resetting the current piece instance variable.

- (void)alertView:(UIAlertView *)alertView willDismissWithButtonIndex:(NSInteger)buttonIndex {
 
	if(buttonIndex == 0)
	{
		currentPiece = [currentPiece choice1Piece];
		[self showStoryForCurrentPiece];
	}
 
	else
	{
		currentPiece = [currentPiece choice2Piece];
		[self showStoryForCurrentPiece];
	}
}

When an alert view button is pressed this method will be called. An adventure piece that brings up an alert view should always have connected adventure pieces for both of the possible answers it as. This resets the currentPiece adventure piece and show the current piece again.

Pull up a different view when the end of the chain is reached

- (void)actionSheet:(UIActionSheet *)actionSheet clickedButtonAtIndex:(NSInteger)buttonIndex {
 
	if(buttonIndex == 1)
	{
		[self makeTheStory];
		[self showStoryForCurrentPiece];
	}
}

If this method is called that means that a action piece that was at the end of a chain was brought up. If the users hits the second button (button id == 1) that means they want to reset the story. This can be performed by building our story again showing the current piece again.

You can change the makeTheStory method to be whatever type of story you want. You can download the project here.