Actually i am in a first stage of my project(inotebook – where you can make your notes). Using next.js as a backend. So i am unable to connect it with mongodb.
I tried a lot to resolve this error and i am expecting and dude who can help me.
Blancer.com Tutorials and projects
Freelance Projects, Design and Programming Tutorials
Category Added in a WPeMatico Campaign
Actually i am in a first stage of my project(inotebook – where you can make your notes). Using next.js as a backend. So i am unable to connect it with mongodb.
I tried a lot to resolve this error and i am expecting and dude who can help me.
My code does not work. This is due to the Javascript I used. I am essentially using the same code as what is from the “how to make an image carousel” from W3Schools.
It should display the images and scroll through them every 30 seconds. Right now, it is displaying nothing.
Here is the code I have in Script.js.
console.log('Hello!');
let slideIndex = 0;
function showSlides() {
  let i;
  let slides = document.getElementsByClassName("mySlides");
  for (i = 0; i < slides.length; i++) {
    slides[i].style.display = "none";
  }
  slideIndex++;
  if (slideIndex > slides.length) {slideIndex = 1}
  slides[slideIndex-1].style.display = "block";
  setTimeout(showSlides, 30000); // Change image every 30 seconds
}

if (window.location.pathname == "/index.html") {
  showSlides();
}
This Listener event doesn’t works when clicked any option. I try’d “loadPage” to function() but still doesn’t works.
//event listener
const loadPage = (id, page) => {
  $(`#${id}`).on('click', function() {
    $('#contenedor').load(page);
  });
};

// HTML generator
const generateMenuHTML = (menuData) => {
  const menuContainer = document.getElementById('contenedor');

  menuData.forEach(menuItem => {
    const { id, nombreinterno, ruta, titulo, padre } = menuItem;

    if (padre == '-1') {
      const hasChildren = menuData.some(item => item.padre == id);
      const html = menuItemTemplate(nombreinterno, titulo, hasChildren);
      menuContainer.innerHTML += html;

      if (!hasChildren) {
        loadPage(nombreinterno, ruta);
      }
    }
  });
Please tell me how i can resolver this or do it for a diferent way. Thanks.
I want to integrate toggle hamburger animation for my mobile menu WordPress website. I was following a tutorial where on the JavaScript code the “Open” and “Close” buttons are two separate icons. I have a hamburger menu but I cant figure out how the “toggle” function works and I cannot make it work. I can connect them so that the menu opens, but after that it cannot be closed. Any help will be appreciated. Bellow is my code for my full screen menu (no toggle). Thank you!
    <script src="https://code.jquery.com/jquery-3.6.0.min.js"></script>
<script>

var $ = jQuery
    leavePage = false

var placeImages = function(){

$('.f-menu .elementor-icon-list-item').each(function(i){

    var offset = 20,
        x = $(this).find('.elementor-icon-list-text').width() + offset,
        y = $(this).offset().top - $('.f-menu .elementor-icon-list-item').eq(0).offset().top

    console.log($(window).width())

    if( $(window).width() < 768 ) { x = 0 }

    $('.menu-image .elementor-gallery-item').eq(i).css('transform', 'translate(' + x + 'px,' + y + 'px)')

    $('.menu-image').css('top', $('.f-menu .elementor-icon-list-item').eq(0).offset().top - $('.f-menu-section').offset().top)
})
}


$(document).ready(function(){

placeImages()

var menuStart = 0.8;
    menuDiff = 0.1;

$('.f-menu-section .elementor-icon-list-item').each(function(){

    $(this).css('transition-delay', menuStart + 's')
    menuStart += menuDiff
})

var menuHovered = false

$('.f-menu .elementor-icon-list-item').hover(function(){

    var i = $(this).index()
   $('.menu-image .elementor-gallery-item').eq(i).addClass('active')
   $('.menu-image').css('z-index', 1)
   menuHovered = true
}, function(){
    $('.menu-image .elementor-gallery-item').removeClass('active')
    menuHovered = false
    setTimeout(function(){
        if(menuHovered) return
        $('.menu-image').css('z-index', -1)

    },300)
})

$('.f-open').on('click', function(){
    $('.f-menu-section').addClass('active')
})

$('.f-close').on('click', function(){
    $('.f-menu-section').removeClass('active')
})


$('.f-menu-section .elementor-icon-list-item a').on('click', function(){

    setTimeout(function(){
        if(leavePage) return
        $('.f-menu-section').addClass('faded')
        setTimeout(function(){
            $('.f-menu-section').removeClass('active')
        },200)
        setTimeout(function(){
            $('.f-menu-section').removeClass('faded')
        },1000+200)
    },50)
})

})

window.onbeforeunload = () => {
    leavePage = true

}

$(window).on('load resize', placeImages)

</script>
Please tell me how to add JwtToken authentication when loading tile maps. My side of the service adds token authentication to the map, and I set token authentication in the request to get the map tiles。
This is the token authentication I added to the ajax request that needs to be added to the request header, how do I add it to the request in the tile
headers: {
“Authorization”: Bearer ${.accessToken},
“X-Token”: .token,
“X-Authorization”: Bearer ${refreshToken},
}
I have searched the internet for a lot of ways to do this but can’t get it to work, so I feel your help
I have a web project (in TypeScript) that generates files and then allows you to package them them into a .zip file using the jsZip library, and then the file-saver library to actually save/download the file.
Here is how I create the zip and save it
import * as JSZip from 'jszip';
import * as fileSaver from 'file-saver';

downloadZipFile(): void {
  const zip = new JSZip();

  for (const outputFile of this.outputFileList) {
    zip.file(outputFile.fileName, new File([outputFile.outputContent], outputFile.fileName));
  }

  //Generate the zip file contents
  zip
    .generateAsync({type: 'blob'})
    .then((zipContent: Blob) => {
      fileSaver.saveAs(zipContent, `LyricConverter (${this.outputFileList.length} files).zip`);
    });
}
This has worked fine for me in the past, and currently works fine locally. However I recently purchased a domain name for my project, and when I attempt to download files from there Chrome blocks the download showing this message:

I have seen plenty of articles and questions online about how to turn this Chrome feature off, but how can I just get this to work on my site for Chrome users?
Is Chrome looking for something on a site to mark it as “safe”? Could it be that my domain was only recently purchased, or maybe it requires an HTTPS site? Does anyone have more information of a solution for this?
I’m just getting into JavaScript coding. I am trying to sort a table with four columns. The sort happens when one of four buttons are clicked on. Two contain letters and the other two contain numbers. Those with letters sort fine. Though, those with numbers do not sort correctly. I assume I need to alter my function resortData somehow. Any tips would be greatly appreciated! Here is my code:
var sortBy = 3;

var database = [
  ['Ray', 'Bourque', '1518', '1506'],
  ['Johnny', 'Bucyk', '1436', '1339'],
  ['Patrice', 'Bergeron', '1294', '1040'],
  ['Phil', 'Esposito', '625', '1012'],
  ['Rick', 'Middleton', '881', '898'],
  ['Bobby', 'Orr', '631', '888'],
  ['Brad', 'Marchand', '947', '862'],
  ['Wayne', 'Cashman', '1,027', '793']
];

function resortData() {
  database.sort(function(a, b) {
    if (a[sortBy].toLowerCase() <
      b[sortBy].toLowerCase()) {
      return -1;
    } else if (a[sortBy].toLowerCase() >
      b[sortBy].toLowerCase()) {
      return 1;
    } else {
      return 0;
    }
  });

  var htmlString = '' +
    '<center><table cellspacing="20">' +
    '<tr><th>First Name</th>' +
    '<th>Last Name</th>' +
    '<th>Games Played</th>' +
    '<th>Goals Scored</th>' +
    '</tr>';
  for (var i = 0; i < database.length; i++) {
    htmlString += '<tr>';
    for (var j = 0; j < database[i].length; j++) {
      htmlString += '<td>' +
        database[i][j] +
        '</td>';
    }
    htmlString += '</tr>';
  }
  htmlString += '</table></center>';
  document.getElementById('tableDisplay').innerHTML =
    htmlString;
}
resortData();

document.getElementById('sortLast')

document.getElementById('sortLast').onclick = function() {
  sortBy = 0;
  resortData();
};
document.getElementById('sortFirst').onclick = function() {
  sortBy = 1;
  resortData();
};
document.getElementById('sortGames').onclick = function() {
  sortBy = 2;
  resortData();
};
document.getElementById('sortGoals').onclick = function() {
  sortBy = 3;
  resortData();
};
<button id="sortLast">Sort Last</button>
<button id="sortFirst">Sort First</button>
<button id="sortGames">Sort Games</button>
<button id="sortGoals">Sort Goals</button>
<div id="tableDisplay"></div>As per the hcaptcha docs it says:

I have done this, but I still get a CORS error in my requests. I am visiting the URL from:
http://test.mydomain.com:3000 and in my network requests it comes from the same URL.
My hosts file contains:
127.0.0.1 test.mydomain.com
I’m not sure what else to try.
  const handleVerificationSuccess = async (token, ekey) => {
    console.log(token);

    // Provide your secret key here
    const secretKey = '...';

    const response = await fetch('https://hcaptcha.com/siteverify', {
      method: 'POST',
      headers: {
        'Content-Type': 'application/x-www-form-urlencoded',
      },
      body: `response=${token}&secret=${secretKey}`, // make sure to URL encode the data
    });

    const data = await response.json();
  };


I’m trying to display the image from localStorage but i get error 404. The problem is that i can see just the image of the current item. For already added items the image is not retrived by localStorage. I found out that i need to convert to a string but i didn’t manage to do it.
Here is my approach:
const MOVIES_KEY = 'movies';

root.innerHTML += `
<ul id="movies"></ul>
<button class ="btn" id = "plus"> + </button>
<button class = "btn" id = "minus"> - </button>
`;

let movies = [];

function storeMovies() {
    localStorage.setItem(MOVIES_KEY, JSON.stringify(movies));
}


function getMovies() {
    const localMovies = getLocalMovies();
    if (localMovies !== null) {
        movies = localMovies;

        return;
    }
}

function getLocalMovies() {
    const localMovies = localStorage.getItem(MOVIES_KEY);
    if (localMovies !== null) {
        return JSON.parse(localMovies);
    }
    return null;
}

function showMovies(order = 'DEFAULT') {

    let moviesToShow = [];

    if (order === 'DEFAULT') {
        moviesToShow = movies;
    } else if (order === '+') {
        movies.sort((a, b) => {
            return a.id - b.id;
        })
    }
    else if (order === '-') {
        movies.sort((a, b) => {
            return b.id - a.id;
        })
    } else {
        moviesToShow = movies;
    }

    const list = document.querySelector('#movies');
    list.innerHTML = ``;
    for (const movie of movies) {
        const { nume, descriere, img, year, rating, date } = movie;
        const template = `<div>
        <h1> ${nume} </h1>
        <h2> ${descriere}</h2>
        <h3>
        <img id='preview' src='${img}'>
        </h3>
        <h4> ${year}</h4>
        <h5> ${rating}</h5>
        <h6> ${date}</h6>
        </div>`
        list.innerHTML += template;
    }
}

function initButtons() {
    const plus = document.querySelector('#plus');
    const minus = document.querySelector('#minus');

    plus.addEventListener('click', () => {
        showMovies('+');
    })

    minus.addEventListener('click', () => {
        showMovies('-');
    })

}

getMovies();
initButtons();
function handleFormSubmit() {
const form = document.querySelector('#myForm');
form.addEventListener('submit', (event) => {
    event.preventDefault();
    const nume = document.querySelector('#nume').value;
    const descriere = document.querySelector('#descriere').value;

    const fileInput = document.querySelector('#img');
    const img = fileInput.files[0];
    const reader = new FileReader();

    reader.onload = function (event) {
        const previewImage = document.querySelector('#preview');
        previewImage.src = event.target.result;
        previewImage.style.display = 'block';
    };

    const base64Image = event.target.result;
    reader.readAsDataURL(img);


    const year = document.querySelector('#year').value;
    const rating = document.querySelector('#rating').value;
    const date = document.querySelector('#date').value;

    const movie = {
        id: 100, nume, descriere, img:base64Image, year, rating, date
    }

    movies = [movie, ...movies];

    showMovies();

    storeMovies();

})
}
window.addEventListener(‘load’, handleFormSubmit);
i’m using Angular Js with an example similar to this one
https://www.w3schools.com/angular/tryit.asp?filename=try_ng_routing_provider
My question is: i click, for example, Main, and in a section of my page i see the data contained in main.htm
in my example my main file is not a html file, it’s a file in which data change, depending what i click in my home page. i send data to this main file, the data change in this file and then i can see them in a part of my page. when i make the first call to main there is no problem it works, but when i make the other calls, the data in my page are the same of the first call, as if the other calls don’t work.
i did the first call to main, it works, i expected that the other calls work and i can see new data in my page
When I deploy my app using npx expo start I get the error seen below on the iOS simulator. I’ve seen various posts say it’s anything from a missing comma, malformed json to “Just change stop: [“n”] in something different. Worked in my case!” None of these worked in my case.

Javascript part of Main.js is below:
import { Configuration, OpenAIApi } from "openai";
import { TextInput, TouchableOpacity, View } from "react-native";
const configuration = new Configuration({
    organization: "org-xxxxxxxx",
    apiKey: process.env.OPENAI_API_KEY,
});
const openai = new OpenAIApi(configuration);
const response = await openai.listEngines();

const Main = () => {
    const [input, setInput] = useState('')
    const [output, setOutput] = useState('')

    const handleInput = async () => {
        try {
            const userInput = constPrompt + input
            // createCompletion http call to api and get the response
            const response = await openai.createCompletion({
                model: "text-davinci-003",
                prompt: `You: ${userInput}nAI:`,
                temperature: 0.2,
                max_tokens: 30,
                top_p: 1.0,
                frequency_penalty: 0.5,
                presence_penalty: 0.0,
                stop: ['You'],
            })
            // use setOutput method from react state to be equal to the response object
            // call data object of the response, nav to choices array, get first element of array and convert it to text.
            setOutput(response.data.choices[0].text)
        } catch (error) {
            console.log(error)
        }
    }
I am looking for help. I am trying to add extra feature to calendar. If user select 1 or more days, this day/s will be selected. Problem is if I select one day in month, calendar select this specific day in all months. For example, If I select day second in June, calendar select day second in all months.
How can I fix it? Thank you.
here is link for project: https://calenda-next-js.vercel.app/
here is link for repo: https://github.com/sivo91/Calenda-Next.JS/blob/master/pages/index.js
const handleClick = (e) => {

   let m = e.currentTarget.children[0].children[1].textContent.split('|')[0]
   console.log('selected month: ' + m)

   let d = e.target.textContent
   console.log('selected day: ' + d)

   let c = e.target
   console.log('selected span: ' + c)

    if(m && d) {
      c.classList.add("selected") // add orange background
   }
 }
I added handleClick to div and find specific element by children selection. Not sure, if this is best way but it is working. Best way would be to add handleClick to span, I thought if I found current month and specific day it select only specific day..
<div className="datePicker" onClick={handleClick}> // <<<<<<< handleClick
<div className="pickerHeader">
<button onClick={ handlePrevClicked }>
Prev
</button>
<h1>
{MONTHS[currentMonth]}
<small>
| {currentYear}
</small>
</h1>
<button onClick={ handleNextClicked }>
Next
</button>
</div>
<div className="weekHeader">
<span>Su</span>
<span>Mo</span>
<span>Tu</span>
<span>We</span>
<span>Th</span>
<span>Fr</span>
<span>Sa</span>
</div>
<div className="dates">
{ Array.from({ length: currentStartingDay },
(i) => (
<span className="empty" key={i} /> ))
}
{
Array.from({ length: currentLastDay }, (_, d, i) => (
<span className={ isToday( d + 1 ) ? "active" : "" }
key={i} >
{ d + 1 }
</span> ))
}
</div>
</div>
Uncaught type of error
Properties of null
Cannot read
I can’t figure out how to fix it, anyone could help me? I’d really appreciate it as I am new to writing scripts and stuff and it’s for my project at work, thanks and appreciate the help for real
I want to add multiple panes to my TV-Lightweight Chart, but I can’t make it work.
There is this SO question: LightWeightChart: How can i add chart which look like this way?
which leads to this github issue https://github.com/tradingview/lightweight-charts/issues/50
in the hidden comments, there is a custom solution https://jsfiddle.net/adrianntf/6qea5ytv/ but I can’t make it work. (I don’t know what to do with the provided code, I tried to copy it, removed/replaced the chart creation at the end of the file with mine, but the chart doesn’t show up while there are no errors and the chart object get initialized)
However, then there is this guy https://www.youtube.com/watch?v=NlHjhmIe1EI&t=424s who tells at 16:50 that one can add a pane by simply doing something like this:
const chart = LightweightCharts.createChart(domElement, {pane: 0});
const seriesOnNewPane = chart.addLineSeries({pane: 1});
He uses, just as me, the official lightweight-charts package:
<script
        type="text/javascript"
        src="https://unpkg.com/lightweight-charts/dist/lightweight-charts.standalone.production.js">
</script>
But it’s not working, it ignores the pane kwargs and plots it on the main chart, not unlike in his video, where it adds a pane..
Does someone know how to make this work?
I hope you are well, I would like to ask for help from the community as I have been stuck with the modular implementation of @angular/fire messaging for a few days now.
First of all, there is no official documentation to follow, as the page where there should be documentation seems to be just an empty skeleton:
https://github.com/angular/angularfire/blob/master/docs/messaging.md
I’ve tried to build on their examples, which appear in the same repository:
And based on its “documentation” parent firebase,
import { Component, OnInit, Optional } from '@angular/core';
import { Messaging, getToken, onMessage } from '@angular/fire/messaging';
import { EMPTY, from, Observable } from 'rxjs';
import { share, tap } from 'rxjs/operators';
import { environment } from 'src/environments/environment';
@Component({
selector: 'app-messaging',
template: `
<p>
Messaging!
<code>{{ token$ | async | slice:0:12 }}<ng-container *ngIf="(token$ | async) !== null">…</ng-container></code>
<code>{{ message$ | async | json }}</code>
<button (click)="request()" *ngIf="showRequest">Request FCM token</button>
</p>
`,
styles: []
})
export class MessagingComponent implements OnInit {
token$: Observable<any> = EMPTY;
message$: Observable<any> = EMPTY;
showRequest = false;
constructor(@Optional() messaging: Messaging) {
console.log('messaging', messaging);
if (messaging) {
this.token$ = from(
navigator.serviceWorker.register('firebase-messaging-sw.js', { type: 'module', scope: '__' }).
then(serviceWorkerRegistration =>
getToken(messaging, {
serviceWorkerRegistration,
vapidKey: environment.vapidKey,
})
)).pipe(
tap(token => console.log('FCM', {token})),
share(),
);
this.message$ = new Observable(sub => onMessage(messaging, it => sub.next(it))).pipe(
tap(token => console.log('FCM', {token})),
);
}
}
ngOnInit(): void {
}
request() {
Notification.requestPermission();
}
}
And so far I have only been able to register the service worker in the app and request the token,
This works if it returns me a correct token for the device,
But the one I can’t get to work at all is the onMessage function, I don’t get any notification.
I have tried it as a listener only for javascript, nothing.
listen() {
    const messaging = getMessaging();
    onMessage(messaging, (payload) => {
      console.log('Message received. ', payload);
      this.message=payload;
    });
  }
I changed it to subscriber rxjs, just like the example, and neither
this.message$ = new Observable(sub => onMessage(messaging, it => sub.next(it))).pipe(
        tap(token => console.log('FCM', {token})),
      );

this.message$.subscribe(msg=>console.log('msg', {msg}));
And I send notifications to this token in 2 ways:
Through the firebase cloud messaging console where it says to send a test message and I put the token received and nothing.
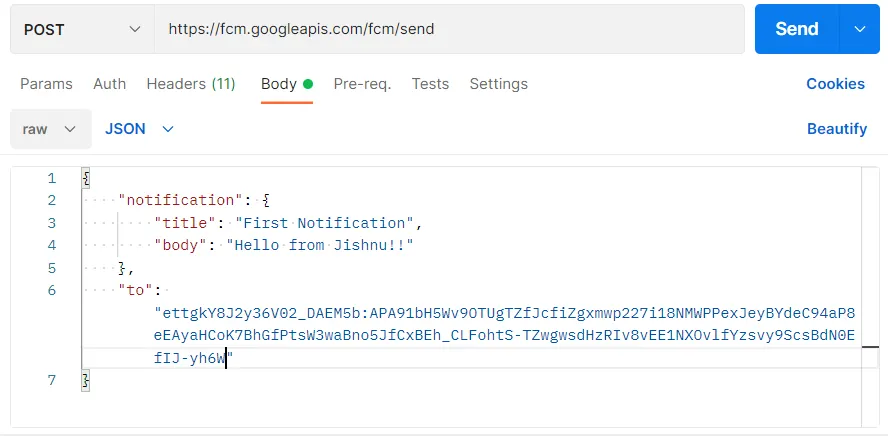
I’ve also done it via the fcm API using postman.
Screenshot
Please community, can you help me with any way that you have made Angular/fire’s onMessage function work as I feel totally lost and I don’t see where to keep trying.