TweetDeck 2.0 for iPhone Now Available for Download!

TweetDeck, the popular Twitter client, gets huge makeover and new features with version 2.0. TweetDeck 2.0 for iPhone has not only been redesigned but also rebuilt from the ground up. TweetDeck is now much faster and contains powerful features.

Hit the jump for detailed TweetDeck 2.0 features…

TweetDeck allows you to monitor, manage and engage in your social world by bringing together your Twitter and Facebook feeds in a powerful and flexible column-based dashboard.

This is a brand new version of iPhone TweetDeck rebuilt from the ground up to be fast, flexible and full-on powerful.

Looks amazing
Designed by the same team that brought you Android TweetDeck, the new iPhone TweetDeck is smarter and more beautiful than ever.

Powerful and flexible
Super-customisable for power-users too. Combine any of your feeds into personalised columns to suit you.

Easy to manage
Adding columns is quicker and easier than ever before. Just browse, and tap ‘Add’ to save the column.

Download TweetDeck 2.0 for iPhone

You can download TweetDeck 2.0 for iPhone from the App Store for free. [Download Link]

TweetDeck 2.0 for iPhone (5)TweetDeck 2.0 for iPhone (4)TweetDeck 2.0 for iPhone (3)

TweetDeck 2.0 for iPhone (2)TweetDeck 2.0 for iPhone (1)

You can follow us on Twitter, Google Buzz, Facebook, and Subscribed to RSS Feed to receive latest updates.

Also checkout:

Digg Twitter StumbleUpon Facebook Reddit del.icio.us

Save iOS 4.3.2 SHSH Blobs with TinyUmbrella 4.32.01

TinyUmbrella 4.32.01 can save iOS 4.3.2 SHSH blobs (iPhone, iPad and iPod Touch). These are the steps to save SHSH blobs for iOS 4.3.2 / 4.2.7 with TinyUmbrella 4.32.01 for iPhone 4, iPhone 3GS, iPod Touch 4G, 3G and iPad 2, iPad 1…

TinyUmbrella is now updated to support 4.3.2 / 4.2.7 iOS versions. I’ve also added a simple feature to allow you to ‘Visit Blog’ when updates are available.

If you want to save 4.3.2/4.2.7 get the updated 4.32.01 as there was a file missing in 4.32.00 XD.

NOTE:

  • You can save SHSH blobs for iOS 4.3.2 only if it’s being signed by Apple. Go grab your iOS 4.3.2 SHSH blobs before it’s too late. Apple stops signing a firmware when an updated version is out.
  • TinyUmbrella can save SHSH blobs regardless of jailbreak.
  • With TinyUmbrella you can save SHSH blobs for iOS 4.3.2 even if you’re on an older iOS version.

Let’s save iOS 4.3.2 SHSH blobs for iPhone, iPad and iPod Touch.

How to Save iOS 4.3.2 SHSH blobs

Steps to save SHSH blobs for iOS 4.3.2 are exactly similar to the guide posted earlier. So, please navigate to the guide linked below and follow the steps there to save SHSH blobs.

iOS 4.3.2 Guides

You can follow us on Twitter, Google Buzz, Facebook, and Subscribed to RSS Feed to receive latest updates.

Digg Twitter StumbleUpon Facebook Reddit del.icio.us

Adding data using SQLite for iPhone

This is the Sqlite database app. Some times your app may have the need to store data in some kind of database. In iPhone application you can do so using SQLite.

Step 1: Open the Xcode and create a new Xcode project using Navigation base application template. Give the application name “SQL”. As shown in the figure below:

Step 2: Expand classes and notice Interface Builder created the RootViewController.h and RootViewController.m class for you. Expand Resources and notice the template generated a separate nib, RootViewController.xib.

Step 3: To create database in sqlite follow the below steps:
Now that the terminal is open let’s create the database. This is done with the command:

sqlite3 Datalist.sqlite

SQLite3 will now start and load the Datalist.sqlite database. By default the database is empty and contains no tables.
We only need to create one table. We will create a table called Datalist by typing the following statement:

CREATE TABLE Datalist(pk INTEGER PRIMARY KEY, name VARCHAR(25), age INTEGER);

One thing to note here is the pk field. It is the primary key of the table.
Now that our table has been created, let’s add some data. Type the following commands below.

INSERT INTO Datalist(name,age) VALUES(‘vishal’,29);
INSERT INTO Datalist(name,age) VALUES(‘nilesh’,30);
INSERT INTO Datalist(name,age) VALUES(‘vinod’,28);
INSERT INTO Datalist(name,age) VALUES(‘amrita’,25);

Your terminal window will look something as shown below:

Now go back to XCode. Do a Control-Click (right click) on the folder named Resources. Click Add -> Existing Files… and browse to your Datalist.sqlite file and click Add. It will then prompt you with a screen as shown below:

Step 4: Now that we have added the database, we need to load the Objective C libraries so we can use it. Do a control-click (right click) on the Frameworks folder. Click Add -> Existing Frameworks. So in the search bar type in libsqlite3. The file we are looking for is called libsqlite3.0.dylib.

Step 5: We need to add another file. Right-click on the Classes folder and choose Add -> New File. Under Cocoa Touch Class category choose Objective-C class. Name it SqlA.h and SqlA.m file.
This will be a very simple class that will take our dummy data file, read it in as an NSArray and provide some utility methods to access the data from the file.

@interface SqlA: NSObject {
        NSInteger age;
        NSString *name;

        //Internal variables to keep track of the state of the object.
        BOOL isDirty;
        BOOL isDetailViewHydrated;
}

@property (nonatomic, readonly) NSInteger age;
@property (nonatomic, copy) NSString *name;

@property (nonatomic, readwrite) BOOL isDirty;
@property (nonatomic, readwrite) BOOL isDetailViewHydrated;

//Static methods.
+ (void) getInitialDataToDisplay:(NSString *)dbPath;
+ (void) finalizeStatements;

//Instance methods.
(id) initWithPrimaryKey:(NSInteger)pk;

@end

Step 6: Open the SqlA.m file and make the following changes in the file.

#import "SqlA.h"

static sqlite3 *database = nil;

@implementation SqlA

@synthesize name,age,isDirty, isDetailViewHydrated;

+ (void) getInitialDataToDisplay:(NSString *)dbPath {
       
        SQLAppDelegate *appDelegate = (SQLAppDelegate *)[[UIApplication sharedApplication] delegate];
       
        if (sqlite3_open([dbPath UTF8String], &database) == SQLITE_OK) {
               
                const char *sql = "select name,age from Datalist";
                sqlite3_stmt *selectstmt;
                if(sqlite3_prepare_v2(database, sql, 1, &selectstmt, NULL) == SQLITE_OK) {
                       
                        while(sqlite3_step(selectstmt) == SQLITE_ROW) {
                               
                                NSInteger primaryKey = sqlite3_column_int(selectstmt, 0);
                                SqlA *coffeeObj = [[SqlA alloc] initWithPrimaryKey:primaryKey];
                                coffeeObj.name = [NSString stringWithUTF8String:(char *)sqlite3_column_text(selectstmt, 0)];
                                                               
                                coffeeObj.isDirty = NO;
                               
                                [appDelegate.coffeeArray addObject:coffeeObj];
                                [coffeeObj release];
                        }
                }
   }
   else
        sqlite3_close(database); //Even though the open call failed, close the database connection to release all the memory.
}

+ (void) finalizeStatements {
        if(database) sqlite3_close(database);
}

(id) initWithPrimaryKey:(NSInteger) pk {
        [super init];
        age = pk;
       
        isDetailViewHydrated = NO;
       
        return self;
}

Step 7: Open the RootViewController.h file and make the following changes in the file.

@class SqlA;

@interface RootViewController : UITableViewController {
        SQLAppDelegate *appDelegate;
}
@end

Step 8: Open the RootViewController.m file and make the following changes in the file.

(NSInteger)tableView:(UITableView *)tableView numberOfRowsInSection:(NSInteger)section {
    return [appDelegate.coffeeArray count];
}

(UITableViewCell *)tableView:(UITableView *)tableView cellForRowAtIndexPath:(NSIndexPath *)indexPath {
   
    static NSString *CellIdentifier = @"Cell";
   
    UITableViewCell *cell = [tableView dequeueReusableCellWithIdentifier:CellIdentifier];
    if (cell == nil) {
        cell = [[[UITableViewCell alloc] initWithFrame:CGRectZero reuseIdentifier:CellIdentifier] autorelease];
    }
        //Get the object from the array.
        SqlA *coffeeObj = [appDelegate.coffeeArray objectAtIndex:indexPath.row];
       
        //Set the coffename.
        cell.text = coffeeObj.name;
   
    // Set up the cell
    return cell;
}

(void)tableView:(UITableView *)tableView didSelectRowAtIndexPath:(NSIndexPath *)indexPath {
    // Navigation logic — create and push a new view controller
}
(void)viewDidLoad {
    [super viewDidLoad];
   
    self.navigationItem.rightBarButtonItem = self.editButtonItem;
       
    appDelegate = (SQLAppDelegate *)[[UIApplication sharedApplication] delegate];
       
    self.title = @"Name List";
}

Step 9: Open the SQLAppDelegate.h file and make the following changes in the file.

@class SqlA;
@interface SQLAppDelegate : NSObject <UIApplicationDelegate> {

   UIWindow *window;
    UINavigationController *navigationController;
       
        //To hold a list of Coffee objects
        NSMutableArray *coffeeArray;
}

@property (nonatomic, retain) IBOutlet UIWindow *window;
@property (nonatomic, retain) IBOutlet UINavigationController *navigationController;

@property (nonatomic, retain) NSMutableArray *coffeeArray;

(void) copyDatabaseIfNeeded;
(NSString *) getDBPath;

Step 10: Open the SQLAppDelegate.m file and make the following changes in the file.

(void) copyDatabaseIfNeeded {
       
        //Using NSFileManager we can perform many file system operations.
        NSFileManager *fileManager = [NSFileManager defaultManager];
        NSError *error;
        NSString *dbPath = [self getDBPath];
        BOOL success = [fileManager fileExistsAtPath:dbPath];
       
        if(!success) {
                NSString *defaultDBPath = [[[NSBundle mainBundle] resourcePath] stringByAppendingPathComponent:@"Datalist.sqlite"];
                success = [fileManager copyItemAtPath:defaultDBPath toPath:dbPath error:&error];
               
                if (!success)
                        NSAssert1(0, @"Failed to create writable database file with message ‘%@’.", [error localizedDescription]);
        }      
}

(NSString *) getDBPath {
        //Search for standard documents using NSSearchPathForDirectoriesInDomains
        //First Param = Searching the documents directory
        //Second Param = Searching the Users directory and not the System
        //Expand any tildes and identify home directories.
        NSArray *paths = NSSearchPathForDirectoriesInDomains(NSDocumentDirectory , NSUserDomainMask, YES);
        NSString *documentsDir = [paths objectAtIndex:0];
        return [documentsDir stringByAppendingPathComponent:@"Datalist.sqlite"];
}

Step 11: Now compile and Run the code and get the final output.

You can download source code from here SQL

Aetuts+ Hollywood Movie Title Series – Skyline

This entry is part 8 of 8 in the series Hollywood Movie Titles

Continuing our Aetuts+ Hollywood Movie Title Series, today’s tutorial will explain how to make the “Skyline” flying logo style, using Cinema 4d, After Effects, Trapcode Form, Trapcode Shine, and Trapcode Starglow. “Don’t watch the light!”


Tutorial

Download Tutorial .mp4

File size: 185.7 MB


Read More

Primary Design Elements Found in Outstanding Digital Illustrations


Following on from, Using Design Principles to Create Exceptional Vector Illustrations, today we have a collection of digital illustrations that highlight the primary elements of design. Design elements are the building blocks that are used to create an image. These include, line, color and shape. Although they may seem basic, if you take the time to think about the elements and how they can be used, you will have a better understanding of your creations – and perhaps think of a few new ideas too!

Continue reading “Primary Design Elements Found in Outstanding Digital Illustrations”

50 Photoshop Tutorials to Get You Ready for Spring


In many parts of the world, spring is almost here. In this round up we will bring you 50 Photoshop tutorials to help prepare you for spring. This round up includes many tutorials that demonstrate techniques that have to do with nature, bright flowers, and being outdoors. Let’s take a look!


1. Green Landscape Beanstalk

Shows you how to make a cool fairytale type illustration.


2. Create an Ice Cream Type Treatment

Learn how to make some colorful Popsicles this spring and be ready for summer!


3. Make Oranges and Lemons in Photoshop

Use Photoshop to make some oranges and lemons from scratch.


4. How to Create an Abstract Floral Explosion

Learn how to create a graphic full of spring florals and color.


5. Piece of the Artic Pie Chart

Make a cool 3D pie chart of the ocean in Photoshop.


6. Create a Flowerpot in Photoshop

Build your very own flower pot for all those spring flowers in Photoshop.


7. Nature Inspired Photo Illustration

Turn an ordinary photo into a cool nature inspired image.


8. Serene Fantasy Photomanipulation

Create a vintage style, serene fantasy nature scene.


9. How to Paint a Surreal Scene in Photoshop

Learn how to paint a surreal nature scene using only Photoshop.


10. Create a Glamor Scene in Photoshop

This tutorial teaches you how to make a glamor scene full of spring greens.


11. Create a Fantasy Out the Door Wallpaper

Make a neat image that pulls the spring outdoors, inside.


12. The Making of Eagle Ray

Learn how to make your very own pet stingray.


13. The Making of Underwater

Follow along and learn how to make a sweet underwater scene with lightrays.


14. Fantasy Out of Bounds

Design a framed up nature scene where the flora explodes out of the frame.


15. Create a Spectacular Grass Text Effect

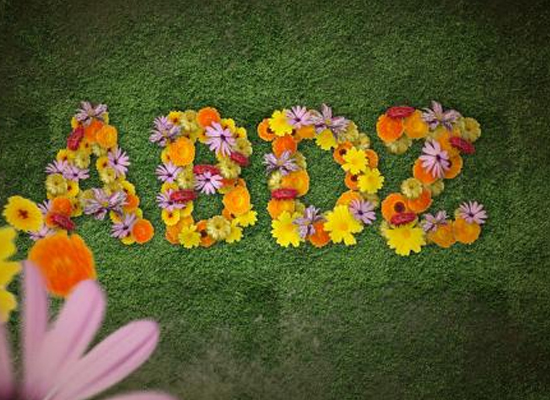
Turn your text into a grass with a few easy steps in Photoshop.


16. Create a Nature Inspired Photomanipulation

Use Photoshop to create a nature inspired image to use in advertisements and posters.


17. Unreal Rose Bouquet

Make a splash with this tutorial that turns roses into something surreal.


18. Create a Vector Style Magazine Cover

Make a fun and colorful vector magazine cover, all in Photoshop.


19. The Making of the Frog

Create a cool frog silhouette on a bright green leaf.


20. Making of the Green Field

Watch the making of Vlads green field and learn how to make your own.


21. Making of Condensed

Short but sweet tutorial on making some water droplets on a solid background.


22. Create an Abstract Ecology Scene

Use Photoshop to create a vibrant scene full of nature.


23. Making of a Forest Magical Scene

Build your own magical forest scene with help from this tutorial.


24. Creating a Nature Inspired Digital Piece

Use some of the outdoors to get inspired and create this digital masterpiece.


25. Super Easy and Cool Flower Text Effect

With this quick and easy tutorial, you can create a pretty sweet flower text effect.


26. Glass Tomatoes

Here is a surreal tutorial that shows you how to take everyday tomatoes and turn them into glass.


27. Create a Flowery Natural Composition

This tutorial will demonstrate how to create a flower power peace themed composition.


28. Sunlight in the Trees

Learn how to create majestic sunlight rays through trees with this tutorial.


29. Create Soft Flowing Waterfalls

Perfect an old photographers effect with this Photoshop tutorial to create soft flowing water.


30. How to Create a Magical Painted Scene

Use Photoshop to create this painted magical scene full of color and creativity.


31. Magical Forest Photo

Yet another magical forest tutorial.


32. Elegant Typography on a Vista Background

This tutorial will demonstrate how to create some cool typographical treatments on a vista background.


33. How to Create a Spectacular Nature Composition

Nature is a spectacular thing. Why not use Photoshop to create a spectacular nature composition?


34. Create a Modern Heart Concept

Use nature as your inspiration to create the cool modern heart concept image.


35. Create a Dynamic Nature Poster

Create a poster that uses almost all the various elements nature has to offer.


36. Creating an Ecological Fairy Tale Wallpaper

Have some fun learning to make an eco friendly fairy tale scene with this tutorial.


37. Composing 3D Rendering into a Nature Scene

Use 3D rendering, Photoshop, and nature to create some amazing designs.


38. Making a Book of Magical Playgrounds

Let your imagination run wild with this tutorial that helps you create a scene right out of your favorite book.


39. The Enchanted Forest Fantasy

Use Photoshop to create your very own enchanted forest fantasy. G rated of course.


40. Create a Vibrant Conceptual Photomanipulation

Create a cool and unusual image with this tutorial that combines all sorts of spring time fun.


41. The Cute Flying Hippo

When pigs fly is a tutorial on how you can create hybrid animals through Photoshop.


42. Create a Green Planet

Use Photoshop to create your very own green planet.


43. Leaking Honey effect

Create this sweet nectar in Photoshop.


44. Create an Awesome Grass Texture

Learn how to make your own grass texture to use in many other projects.


45. The Magic Night

Create a surreal night photo manipulation full of color and mystery.


46. Making of a Magical Forest Scene

Another Photoshop tutorial to help you create your very own magical forest scene.


47. The Fantastic Tree

Create an ominous tree full of dark personality.


48. The Soft Sea Light

Use some big moon images and soft light to create a breathtaking ocean scene.


49. Day and Night

Combine day and night in this Photoshop tutorial.


50. How to Create Bamboo in Photoshop

Make your own bamboo using nothing but Photoshop and some mad skills.

Read More

Need Server Side Hosted Scripts

* Note: We are not looking for any one or any company to offer to code any script for us,
We are looking for already pre-made and 100% completed script that we can offer to our hosting clients
** Please do not reply and offer to code any script for us, we are not looking for any newly coded scripts
=======================================================================

We are a medium size private hosting company, and we are in the market of looking for Server Side Hosted Scripts

If you are the Script Owner/Coder of a PTC, Bux, Traffic Exchange, Cycler, Doubler, Matrix and/or any type of custom member signup with referral and earning type scripts then contact us and show us a full working sample of the live working script, and tell us in a reply to use via a PM if you wish to sell the script rights or partner with us on a per install script fee for each hosted script we setup.

We need the script to be able to be setup as a hosted script site where the user will only have access to the admin settings and some minor template changes, use will not have access tot he script database or any FTP access to edit or copy any of the script files, so the script must be a fully installable server side script with just the needed access for the hosted site admin to manage.

=======================================================================
* Note: We are not looking for any one or any company to offer to code any script for us,
We are looking for already pre-made and 100% completed script that we can offer to our hosting clients
** Please do not reply and offer to code any script for us, we are not looking for any newly coded scripts

WordPress Thesis Custom Theme Dev Thesis Experts Only Please

See the mockup attached. This is a migration but you only need to build the site and Ill handle the data move.
The client wants this in Thesis to take advantage of the speed.
If you look at the mockup, here are the details:
1. The site is basically a product site using posts for each product.
2. The categories will be used to manage the manufacturers, carriers, and special categories like, whats new, specials, etc. Each post will dynamically show the product box in the correct spot based on the programming using the category on the page.
3. The post admin needs a few special fields for “Price, thumbnail loader, and special js code used for the cart / button. The title and excerpt and descrip will be used for each products relevant data.
4. Top left box is an ajaxy dependent selector where the user can first grab a manufacturer (dropdown shows the category names for manufacturer), Then based on the manufacturer, the posts that have that manufacturer as their category will show (the dependent ones).
See this site for the exact nature of the dropdown functionality ; GSMLIBERTY.COM
5. The left sidebar will then have the category listings for manufacturer … click any of them takes you to a category specific page with all the relevant products shown in the product box style just like the mockup.
6. Reviews can be just a moderated guest post allowing users to submit reviews. The full review page is just like a blog category listing page with all review teasers shown for the review category in the blog.
7. The homepage will only have the ‘featured products’ category products showing with a max of 6 showing. There will NOT be any pagination or sorting since its only 6. These products are styled so that the respective post fields are fixed location for any product box. The js code is behind the ‘unlock now’ button.
8. The main banner is actually a slideshow of about 4 slides of text. The read more button is a javascript popup with more copy for each of the slides. I would think this would be a post for each as well.
9. The top right whats new box is bg image of the star and just a product block post for a post using the ‘home-new’ category. If more than 1 we can make a fade slider.
10. The footer has ‘news/articles’ post teasers showing the most recent 3. This is setup as blog posts – styled like the mockup.
11. The subscribe box goes to a feedburner account.
13. Social buttons are just links to the social urls for this site.
14. The whats new and specials top navigation are just pages (templates) showing the similar layout to home without the banner and whats new box and showing any product box for a ‘whats new’ category oR a ‘specials’ category for the respective page.
15. Contact us is just a simple form
16. affiliates is a wp page for some copy to be supplied.
17. There is also an about us top nav not shown – again this is just a wordpress page styled as a 2 column layout with catgories on left and content box on right / main.
18. Button / images in top header / right side are supplied to you with their urls.
Thats about the entire project.
Really simple if you know the wordpress codex and you have done a bunch of wp sites before. If possible and not making a mess out of the dev, the client wants this in thesis – ill buy the license.

Logo With A Bull 2

Hello,
I’m looking for a logo for a phrase, the first word would be 6 letters and the 2nd word would be 4 letters.
I was thinking of the first word creating like a V or an upside down V with the 2nd word fitting in the middle. I would like .com incorporated in to the logo and having some of the letters making a bulls head. Another Idea would be the same phrase with the .com with some bull with horns graphics.
Thanks

Customized Article Creation Form For Mediawiki

I have a single-purpose Mediawiki deployment, where people will enter just one kind of article. I would like to engage someone to help build a more intuitive user experience for article creations, that does not require one to be experienced with Mediawiki in order to use.

Some expectations:

Would like a be a simple, single web-page or a wizard-like multi-page experience used to collect data from the user, and well as allow them to upload images and embed them in the article.

SemanticForms are installed now, and is functional, but hardly intuitive. I am open to dropping SMW.

Uploaded images should be shown as either as a “Featured Image” and/or as part of a Mediawiki “gallery”.

The “New Post” interface used on WordPress is really something I am looking for.