![Final product image](https://cms-assets.tutsplus.com/uploads/users/108/posts/30794/final_image/how-to-draw-pig-4-4.png)
Pigs are a very interesting subject to draw, because they have a simple body structure: like a barrel with a head and legs. This means that even if you’re a beginner, you can do a decent job of drawing a pig! In this tutorial I will show you how to do it step by step.
And if you’re interested in pigs in general and want to learn more about various species and anatomy, you can try this tutorial instead:
1. How to Start a Drawing of a Pig
Step 1
Draw an oval. It doesn’t need to be perfect.
![draw pig torso](https://cms-assets.tutsplus.com/uploads/users/108/posts/30794/image/how-to-draw-pig-1-1.png)
Step 2
Add a vertical oval to the front (for the shoulders) and a circle in the back (for the hips).
![draw pig shoulders and hips](https://cms-assets.tutsplus.com/uploads/users/108/posts/30794/image/how-to-draw-pig-1-2.png)
Step 3
If we want to include the third dimension in our drawing, we need to plan the perspective first. Draw a vertical line towards the “ground”, about half of the pig’s torso’s height. Then draw a cross on the ground using perspective.
![draw persepctive grid for animal](https://cms-assets.tutsplus.com/uploads/users/108/posts/30794/image/how-to-draw-pig-1-3.png)
Step 4
Draw basic “legs” between the body and the ground.
![plan the pig legs](https://cms-assets.tutsplus.com/uploads/users/108/posts/30794/image/how-to-draw-pig-1-4.png)
Step 5
Sketch the actual direction of the legs. Add a curly tail, too.
![sketch the pig legs and tail](https://cms-assets.tutsplus.com/uploads/users/108/posts/30794/image/how-to-draw-pig-1-5.png)
Step 6
Add two circles to the shoulder to simulate its muscles.
![add simple pig shoudler muscles](https://cms-assets.tutsplus.com/uploads/users/108/posts/30794/image/how-to-draw-pig-1-6.png)
Step 7
Add the muscles to the other shoulder, and one big muscle to the thigh.
![add simple pig thigh muscle](https://cms-assets.tutsplus.com/uploads/users/108/posts/30794/image/how-to-draw-pig-1-7.png)
Step 8
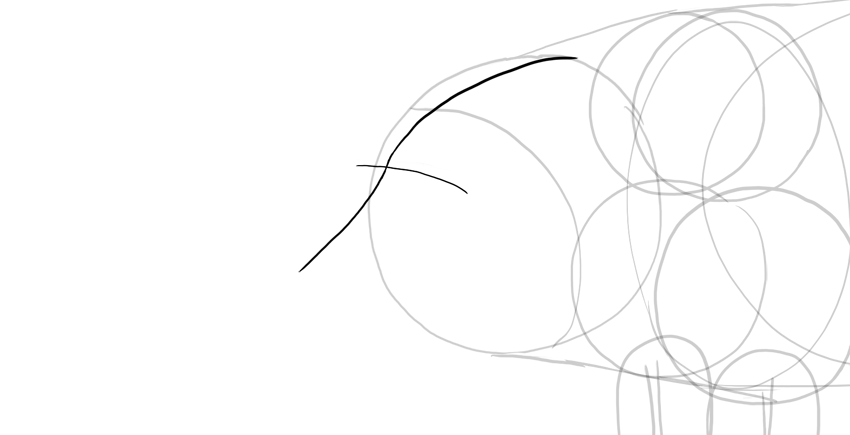
Add a huge, circular head right in the front. It should be slightly narrower than the rest of the body.
![sketch the outline of pig head and body](https://cms-assets.tutsplus.com/uploads/users/108/posts/30794/image/how-to-draw-pig-1-8.png)
2. How to Draw a Pig’s Legs
Step 1
Draw circular joints in the legs: the wrists and ankles.
![draw pig leg joints](https://cms-assets.tutsplus.com/uploads/users/108/posts/30794/image/how-to-draw-pig-2-1.png)
Step 2
Sketch the bottom of each hoof.
![draw bottom of pig hooves](https://cms-assets.tutsplus.com/uploads/users/108/posts/30794/image/how-to-draw-pig-2-2.png)
Step 3
Outline the hooves.
![sketch pig hooves](https://cms-assets.tutsplus.com/uploads/users/108/posts/30794/image/how-to-draw-pig-2-3.png)
Step 4
Add some muscles to the forearms and the calves.
![draw pig leg muscles](https://cms-assets.tutsplus.com/uploads/users/108/posts/30794/image/how-to-draw-pig-2-4.png)
Step 5
Add the “toes” at the back of each hoof.
![draw back pig toes](https://cms-assets.tutsplus.com/uploads/users/108/posts/30794/image/how-to-draw-pig-2-5.png)
![finish pig back toes](https://cms-assets.tutsplus.com/uploads/users/108/posts/30794/image/how-to-draw-pig-2-6.png)
Step 6
Split the hooves.
![split pig hooves](https://cms-assets.tutsplus.com/uploads/users/108/posts/30794/image/how-to-draw-pig-2-7.png)
Step 7
Outline the split hooves.
![outline pig shooves](https://cms-assets.tutsplus.com/uploads/users/108/posts/30794/image/how-to-draw-pig-2-8.png)
Step 8
Outline the rest of the legs.
![finish pig legs](https://cms-assets.tutsplus.com/uploads/users/108/posts/30794/image/how-to-draw-pig-2-9.png)
3. How to Draw a Pig’s Head
Step 1
Imagine the circle in the pig’s head is a sphere. Cut it in half.
![cut pig head in half](https://cms-assets.tutsplus.com/uploads/users/108/posts/30794/image/how-to-draw-pig-3-1.png)
Step 2
Attach a “cross” to the top of the head, creating the guide lines for the forehead, the eyes, and the snout.
![draw a cross on top of head](https://cms-assets.tutsplus.com/uploads/users/108/posts/30794/image/how-to-draw-pig-3-2.png)
Step 3
Draw small eye sockets.
![sketch pig eye sockets](https://cms-assets.tutsplus.com/uploads/users/108/posts/30794/image/how-to-draw-pig-3-3.png)
Step 4
Sketch the general shape of the snout.
![sketch pig snout](https://cms-assets.tutsplus.com/uploads/users/108/posts/30794/image/how-to-draw-pig-3-4.png)
Step 5
Draw a flat “nose bridge” on top of this snout sketch.
![draw pig nose bridge](https://cms-assets.tutsplus.com/uploads/users/108/posts/30794/image/how-to-draw-pig-3-5.png)
Step 6
Cut the snout in half, towards the eye.
![draw pig upper jaw](https://cms-assets.tutsplus.com/uploads/users/108/posts/30794/image/how-to-draw-pig-3-6.png)
Step 7
Draw a disc on the top of the snout.
![draw the snout disc](https://cms-assets.tutsplus.com/uploads/users/108/posts/30794/image/how-to-draw-pig-3-7.png)
Step 8
Draw the top of the snout by connecting the disc with the rest. Keep its 3D shape in mind!
![draw the upper snout](https://cms-assets.tutsplus.com/uploads/users/108/posts/30794/image/how-to-draw-pig-3-8.png)
Step 9
Draw the mouth.
![draw pig mouth](https://cms-assets.tutsplus.com/uploads/users/108/posts/30794/image/how-to-draw-pig-3-9.png)
Step 10
Draw the lower jaw. Keep it fat!
![draw pig lower jaw](https://cms-assets.tutsplus.com/uploads/users/108/posts/30794/image/how-to-draw-pig-3-10.png)
Step 11
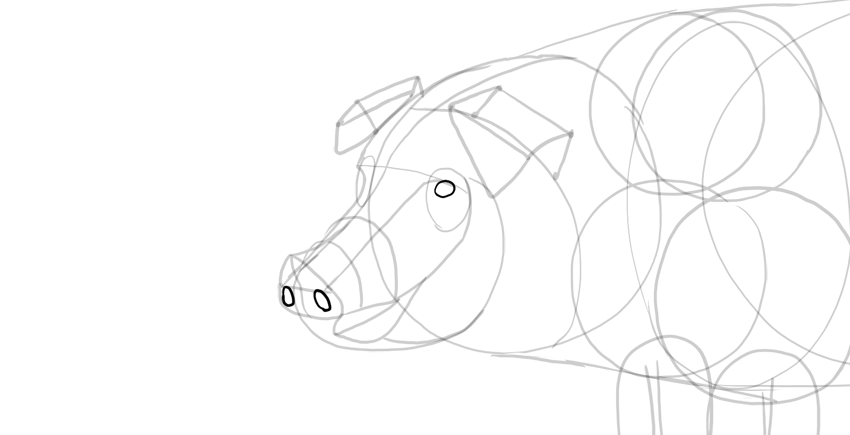
Sketch the floppy ears.
![draw pig ears base](https://cms-assets.tutsplus.com/uploads/users/108/posts/30794/image/how-to-draw-pig-3-11.png)
![draw pig ears middle](https://cms-assets.tutsplus.com/uploads/users/108/posts/30794/image/how-to-draw-pig-3-12.png)
![draw pig ears tips](https://cms-assets.tutsplus.com/uploads/users/108/posts/30794/image/how-to-draw-pig-3-13.png)
Step 12
Add the nose holes and the oval eyes.
![draw pig nose](https://cms-assets.tutsplus.com/uploads/users/108/posts/30794/image/how-to-draw-pig-3-14.png)
Step 13
Add some detail to the eye.
![draw pig eyes](https://cms-assets.tutsplus.com/uploads/users/108/posts/30794/image/how-to-draw-pig-3-15.png)
4. How to Finish a Drawing of a Pig
Step 1
Draw all the lines clearly suggested by the guide lines.
![outline pig body](https://cms-assets.tutsplus.com/uploads/users/108/posts/30794/image/how-to-draw-pig-4-1.png)
Step 2
Add some secondary lines to suggest some muscles under the skin.
![add detail to pig body](https://cms-assets.tutsplus.com/uploads/users/108/posts/30794/image/how-to-draw-pig-4-2.png)
![draw pig face](https://cms-assets.tutsplus.com/uploads/users/108/posts/30794/image/how-to-draw-pig-4-2-2.png)
Step 3
Add some simple, linear shading to accentuate the 3D form of the body.
![shade a pig](https://cms-assets.tutsplus.com/uploads/users/108/posts/30794/image/how-to-draw-pig-4-3.png)
Step 4
Darken the main outline to finish the drawing.
![finish pig drawing](https://cms-assets.tutsplus.com/uploads/users/108/posts/30794/image/how-to-draw-pig-4-4.png)
Good Job!
That’s a beautiful, happy pig! Are you in the mood for more simple drawing tutorials? We’ve got you covered:
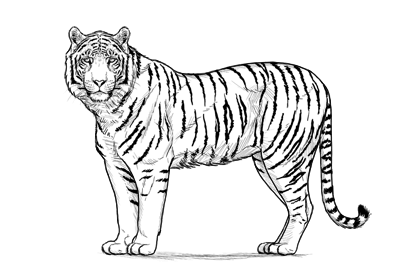
- AnimalsHow to Draw a TigerMonika Zagrobelna
- DrawingHow to Draw a BearMonika Zagrobelna
- Fan ArtHow to Draw PokémonMonika Zagrobelna
Or maybe you want to try some other pig-related tutorials now? We have those, too!
- IllustrationHow to Make a Cute Pig Face Icon With Simple Gradient Mesh in Adobe IllustratorMary Winkler
- Valentine’s DayHow to Create a Valentine’s Piglet Illustration in Adobe IllustratorNataliya Dolotko
- Character DesignCreate a Kawaii Farmer for the Harvest Season in Adobe IllustratorNataliya Dolotko
![how to draw a pig step by step](https://cms-assets.tutsplus.com/uploads/users/108/posts/30794/image/how-to-draw-pig-4-4.png)
{excerpt}
Read More