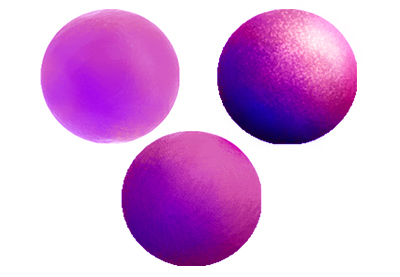
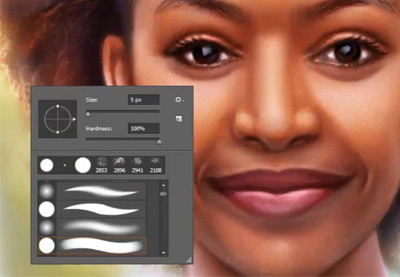
New to the Brush Tool? Learn essential tips with this free Photoshop course below!
Essential Brush Tips for Adobe Photoshop
Have 30 minutes to spare? We’re excited to bring you, for free, my latest course on 10 Tips to Master Adobe Photoshop Brushes.
This course outlines all the essential tips for getting started with digital art in Adobe Photoshop, from which brushes to use to how to blend and more. With the lessons here, you’ll be able to get a grasp of the basics of this phenomenal tool.
Find incredible Photoshop brushes for your digital paintings on Envato Market and Envato Elements. And check out this free course in the video below.
Need more help? Take some time to look over these additional tips to further your understanding.
1. How to Pick Your Favorite Brushes
Which Photoshop brushes should I use?
By far the biggest misconception I’ve heard with the Brush Tool is the idea that you need a certain set of fancy brushes to be successful.
In fact, I’ve seen this theory played out many times. Newcomers to digital art often think that by grabbing their favorite artist’s brush pack, they will magically transform their art with very little effort. And they think that somehow, the brushes will handle all the work of shading, highlights, and color development with just a few simple clicks.
Unfortunately, this is just not true (although I wish it were).
But don’t let this new development scare you away. Mastering Photoshop brushes is still within your grasp; you just have to realize you don’t need a special brush pack to be successful. In fact, in many cases, all you really need is to get a hold on the basics.
Adobe Photoshop CC already comes with a variety of preset brushes you can use. And in the latest version of Creative Cloud, you can now organize the Brush Tool by dragging and dropping your favorite brushes into new groups.
Let’s take a look at my top five brushes, in no particular order:
-
(A) Soft Round Brush
- (B) Hard Round Brush
- (C) Tapered, Hard Round Pressure Size Brush
- (D) Hard Round Pressure Opacity Brush
- (E) Texture Brush

I can confidently say that the Hard Round Brush is the number one brush used by digital artists. Multipurpose and reliable, this simple brush can be used at various stages of your work, from drawing the initial sketch to filling in the flat base colors, and later developing the colors and shadows.

Following this brush is the Soft Round Brush. Simply put, you can consider this as the original Hard Round Brush with a much lower value for the Hardness setting. Great for atmosphere and blending, this brush creates a soft, silky result.

The remaining brushes (apart from some textured ones) usually rely on additional tools like a graphics tablet to help achieve realistic brush strokes similar to traditional drawings and paintings. Both the Hard Round Pressure Opacity and Tapered brushes, for instance, help you draw lines similar to pencil strokes.

And if you don’t have a graphics tablet handy, you won’t be able to enable the settings directly related to Pen Pressure. Many affordable options are available, however, so consider a small investment so that you won’t have to paint with a regular, optical mouse.
Photoshop Brush Cheat Sheet
How familiar are you with these basic tools?
Consider making a cheat sheet for your favorite brushes. In a new PSD file, draw or paint test strokes next to the corresponding brush. Write notes on when and how you could use these brushes to become more familiar with their use and application.
2. How to Master Brush Panel Functions
Now that you’ve organized your favorite brushes, it’s time to get more familiar with their settings.
Trust me, I know this part sucks.
But any problem that you’re having with Photoshop brushes is usually related to how familiar you are with their settings. So naturally, the more you know, the more confident you’ll feel.
Brush Panel Settings You Should Definitely Know
Select the Brush Tool (B). Then hit F5 on your keyboard to bring up the Brush Panel.
It’ll look similar to this image below.

Now don’t overwhelm yourself by tackling everything at once. Here are three of the most important settings you’ll need to know:
-
Brush Tip Shape
- Brush Dynamics
- Transfer
Brush Tip Shape: Access the tip shape through the Brush Panel or by Right-clicking on your keyboard while the Brush Tool is selected. Here, you’ll be able to change settings like the Rotation, Size, Hardness, and Spacing of your brush.

Shape Dynamics: Want a beautiful tapered end as you draw? Click on the Shape Dynamics tab and set the Control to Pen Pressure. Now, every time you flick your pen, the end will be pointy or tapered, instead of blunt like the default round brush.

Transfer: This special setting can only be accessed with a graphics tablet. It’s also similar to enabling the Pen Pressure for Opacity setting in the top brush toolbar.
With Transfer, you can create beautiful, traditional-looking results by pressing harder or softer on your graphics tablet. Press harder for a deeper, more pigmented result, and press lighter for an airy, soft-looking result.

These initial settings should set you up with many options to work with. Feel free to tackle the rest of the brush panel functions whenever you have time.
3. Why Practice Makes Progress
Digital art will test your patience as you spend countless hours chipping away at your digital paintings or illustrations. That’s why it’s important to realize that the best results come with time and lots of practice.
Instead of aiming for a perfect result, aim for progress with your technique each time. Here are some common brush problems you can easily solve through trial and error.
Common Brush Problems
1. Your sketches aren’t clean.
Are you expecting a perfect sketch with the first pass of your brush? Don’t give up! Try redrawing the same line until it looks visibly cleaner. You may have to hit Undo (Control-Z) a couple of times before you get it just right.

2. Your colors won’t blend.
When was the last time you adjusted the Opacity or Hardness? As a rule of thumb, adjust these settings with each stage of your painting or at least every 10-20 minutes. You can even set an alarm on your phone as a helpful reminder.

3. Your brush is lagging significantly.
Depending on your version of Photoshop, brush lag may become a serious problem. So first consider updating to the latest version.
Brush lag can also be a result of using a brush size that is too big, having a large file size to work with, or using a complicated brush, like some texture brushes. If possible, try to Merge layers together in the Layers panel to reduce file size. Fewer layers will always equate to better brush performance.

The best way to avoid common brush problems is to ask yourself some basic questions regularly. Despite the misconception, digital art is not an intuitive process, but instead, an experimental one.
So get into the habit of testing out new techniques and settings for the best results.
4. How to Blend 101: Hardness vs. Opacity
So you’ve tested out a few brushes and made countless doodles. Now what?
The next step is to understand the number one issue when it comes to digital painting: how to blend two colors together.
In order to blend colors, you must first understand Hardness versus Opacity.
- Hardness: Controls the hardness or softness of the edges of your brush.
- Opacity: Controls how opaque or pigmented the final brush stroke looks.
The Eyedropper Tool
You also have to know the special role of the Eyedropper Tool (E).
The Eyedropper Tool can select any color already on your canvas and set it as the Foreground Color. This means that once you grab the color you see, it automatically becomes the color you can paint with.
To access it while working with the Brush Tool (B), simply hold the Alt key to switch over to the Eyedropper. Then click on the color you want to make it your new Foreground Color.

How to Blend
Blend colors together by selecting one color first and painting it over the other at a much lower Opacity. Then, select the new color that was created in the center, and use it to blend the left and right sides. Continue these steps until you have a smooth gradient effect.
Adjust the Hardness and Opacity values whenever necessary.

Learn more about blending in this article:
5. How to Cheat Texture With Specialty Brushes
Want to add realistic effects to your paintings? Just add some texture!
Texture brushes are the easiest way to add dynamic character to your digital art. From grunge brushes to hair textures and more, these special tools help you achieve realistic results in less time.
You see, nothing in nature is completely smooth. In fact, one of the telltale signs of digital art is that most artists create a smooth, airbrushed look, often achieved with Hard and Soft Round Brushes.
But texture brushes shouldn’t be used on their own. Use them alongside your original basic set to get the most out of your work.
Here are a few texture brushes you might want to use:
- Grunge Brushes
- Charcoal Brushes
- Hair Brushes
- Nature Brushes
- Paint Splatter Brushes

As with the other presets, Adobe Photoshop comes with many texture brushes to choose from. You can download new sets from Adobe itself, or import Legacy Brushes created from previous versions.
Creating Realistic Texture
Here’s a quick exercise for creating a realistic fruit texture. I’ll be using the popular Clipping Mask technique to organize my layers, which can be found in this tutorial:
Fill a circle with a green #0f8e18 and blue #164851 Radial Gradient using Blending Options. Then use a Hard Round Brush to paint dark green #105137 to represent the lines on a watermelon.

Switch over to a textured brush (Paint on Rough Texture) to paint lime green #13b21f between the dark lines. Use the Eyedropper Tool (E) to help blend the textures together for a more natural look.

Continue blending the textures, adding some shadow around the edges for more volume. Then follow up by painting soft white along the edges to make it more 3D and reflective.
Add some scattered dots to reflect the natural pattern of a watermelon.

Finish with a quick, soft shadow at the bottom and a few bright green highlights to make it pop. A combination of basic brushes along with textured ones does just the trick for a realistic look!
Here is the result.

Conclusion
Digital art is all about patience. So the more time you’re willing to put into understanding these tools, inevitably, the better you’ll become.
Remember these essential brush tips, and be sure to bookmark this article for future reference.
Want to learn more about digital art and painting? Check out these articles:
 Digital PaintingDigital Painting 101: Using Texture Brushes in Adobe PhotoshopMelody Nieves
 BrushesPhotoshop in 60 Seconds: How to Install Custom BrushesMelody Nieves
{excerpt}
Read More


