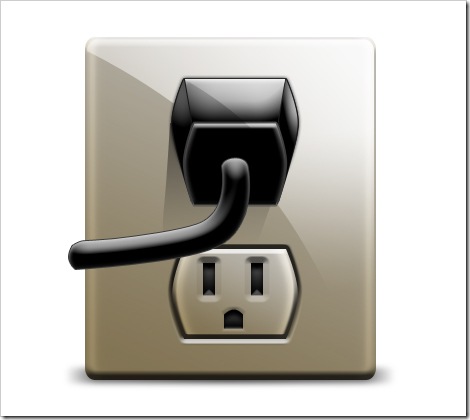
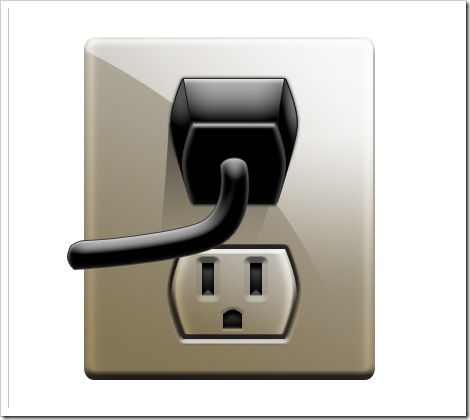
In today’s tutorial, we will be making use of vector masks and layer styles in Photoshop to create a high quality electrical outlet icon. Let’s get started!
Before You Begin
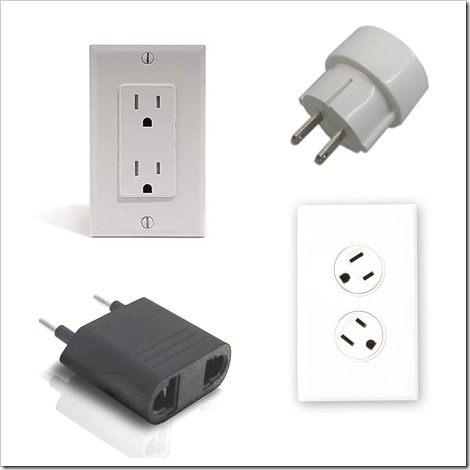
When creating icons from real-life objects it is best to first take a look at those objects and see how they look. When you are done, go ahead and start to sketch out how you want your icon to look.
Step 1
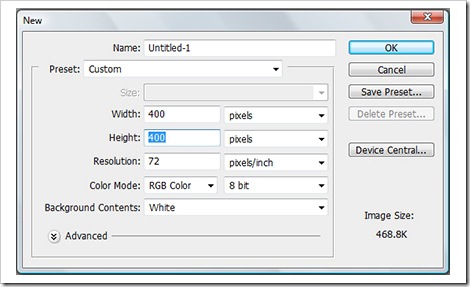
Create a 400 x 400 pixel canvas at 72 dpi.
Step 2
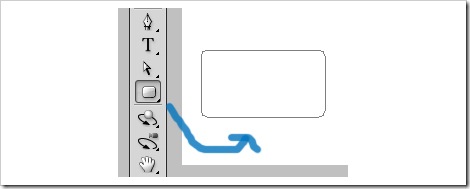
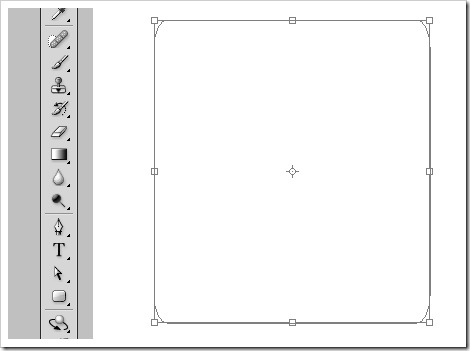
The first thing that we’re going to do is create the outlet shape. For that, choose the round rectangle tool and draw a simple rectangle.
You can see your newly created path in the path palette next to the layers palette. Now, use the Free Transform Path Tool, which you can found in the Edit menu or by selecting Cmd/Ctrl + T and change its size as shown below.

Step 3
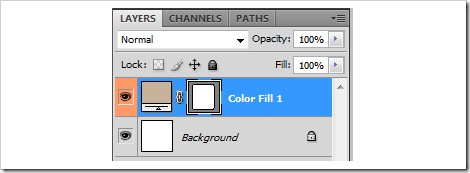
Pick the path selection tool (black arrow) and click on the rectangle either on the canvas or in the path palette. Go to Layer > New Fill layer > Solid Color.
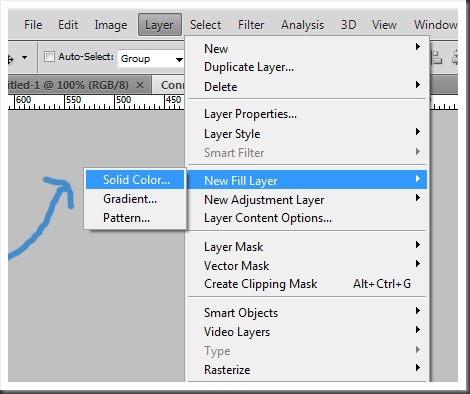
Choose any color.
Step 4
Click on the "Add Layer Style" button at the bottom of the layer palette.

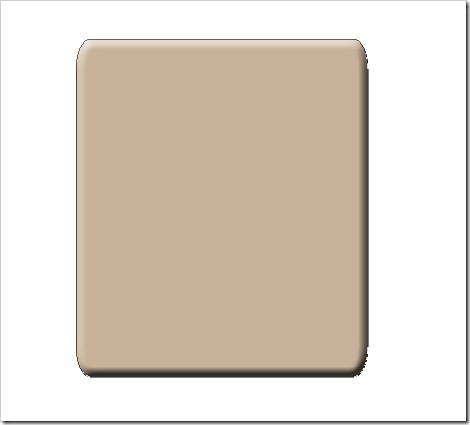
We will apply three layer styles to this element. Let’s begin with "Bevel and Emboss."
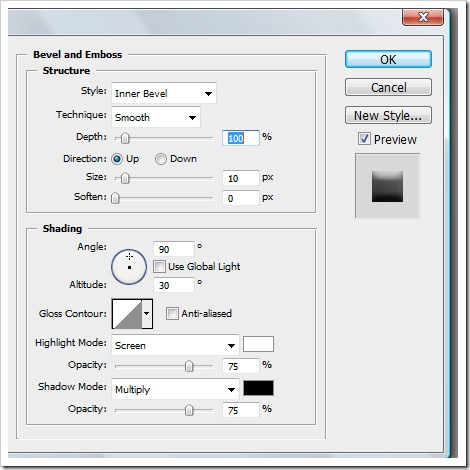
Now apply the following settings: Style: Inner Bevel, Technique: Smooth, Depth: 100%, Direction: Up, Size: 10 px, Soften: 0 px.
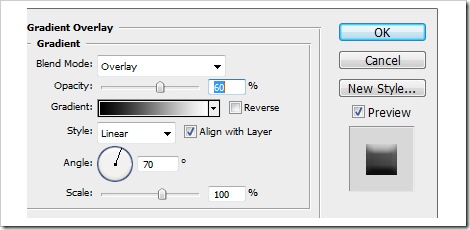
Next, we need to apply a Gradient Overlay style to give our outlet a little bit of lighting. In this case, apply the following layer styles: Opacity: 60%, Style: Linear, Angle: 70, Scale: 100%.
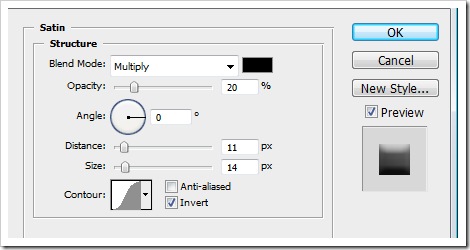
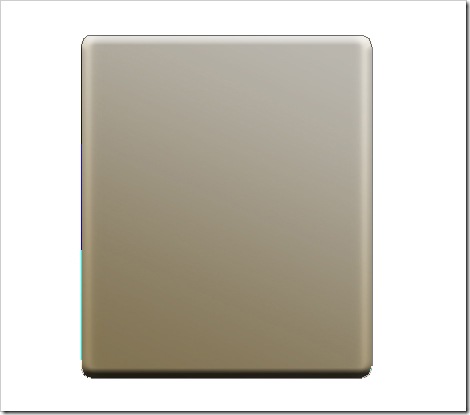
Now apply a Satin layer style using the following settings: Blend Mode: Multiply, Opacity: 20%, Angle: 0, Distance: 11 px, Size: 14 px.
Step 5
We’re now going to create a shine effect on one of the outlet corners. Select the pen tool and draw a shape as shown.

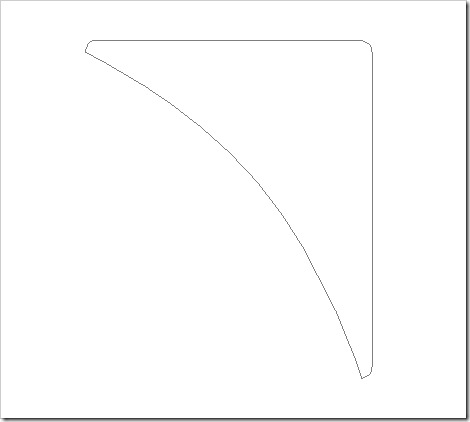
Step 6
Go to Layer > New Fill Layer > Solid Color and pick a pure white color.
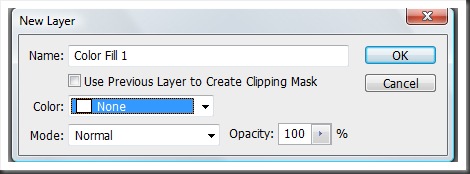
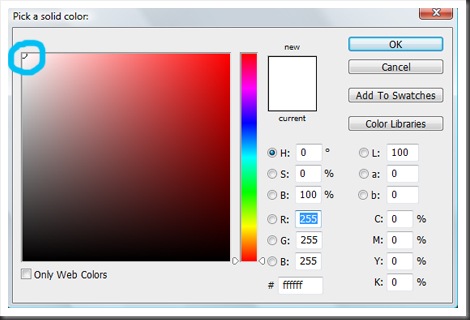
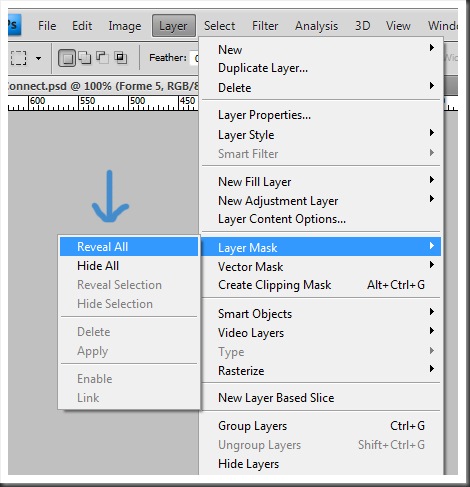
Then select your active layer to confirm by clicking on it, and go to Layer > Layer mask > Reveal all. A white box will appear in between your path and the Solid Color Fill.
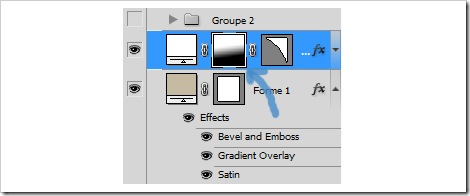
The layer mask will give us control over the gradient so we can place it exactly where we want it to be. Pick the Gradient tool in the tool bar, and choose Black to white linear Gradient from the tool options bar.
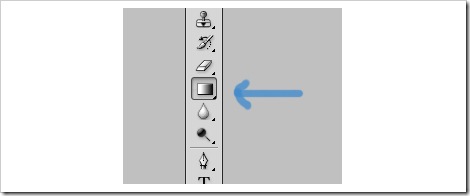

Apply a down to top gradient over the shine shape we drew earlier.
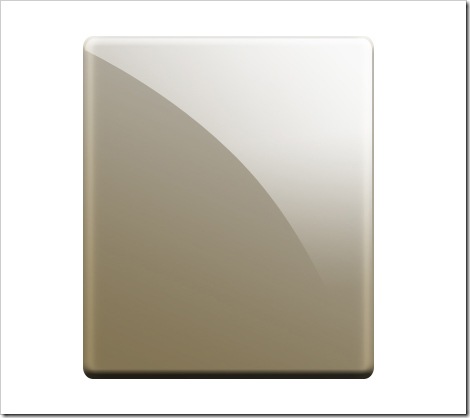
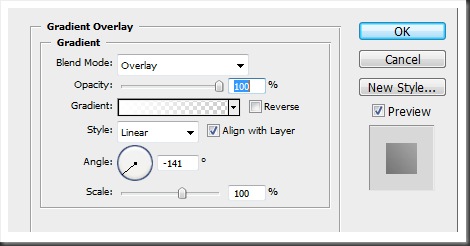
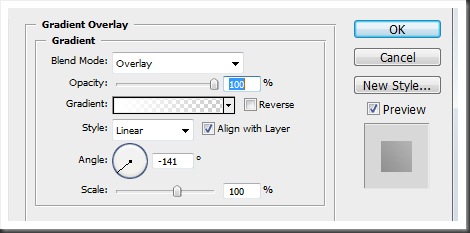
Then, apply a Gradient Overlay Layer style effect. Use the following settings: Opacity: 100%, Angle: -141, and Scale: 100%.
Step 7
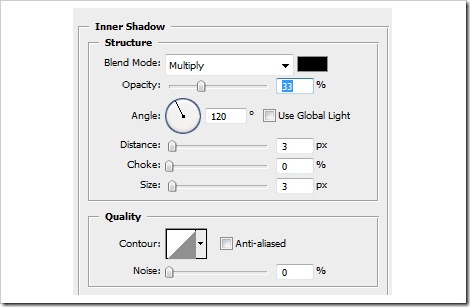
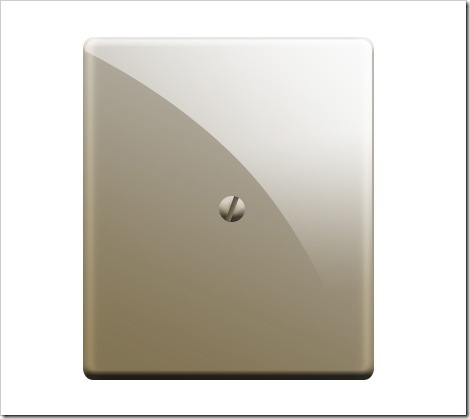
To create the screw that holds our outlet to the wall, we only need to make a couple of layers In one layer, use the rectangle tool to create the center of the object. Then create a new fill layer (Layer > New Fill layer > Solid Color) and choose the color you consider the most appropriate. Now add a layer style, in this case, select "Inner Shadow", and enter the following values: Blend Mode: Multiply, Opacity: 33%, Angle: 120, Distance: 3 px, Choke: 0, Size: 3 px.
After that, use the circle tool to generate the screw’s basic shape, as we did before, go to menu Layer > New Fill layer > Solid Color and choose the best one.

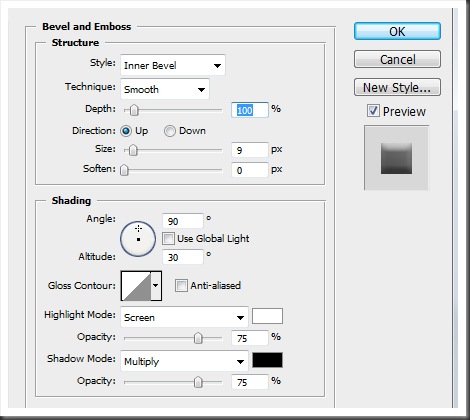
Now we need to add some layer styles. First, add "Bevel and Emboss" and enter the values Style: Inner Bevel, Technique: Smooth, Depth: 100%, Direction: Up, Size: 9 px, Angle: 90, Altitude: 30, Opacity: 75%.
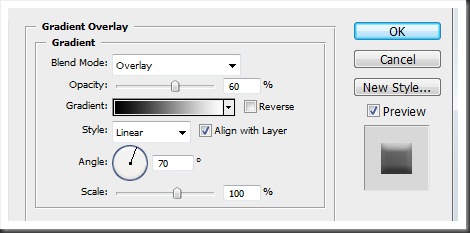
Now, apply a "Gradient Overlay" and enter the following settings: Opacity: 60%, Style: Linear, Angle: 70, Scale: 70%.
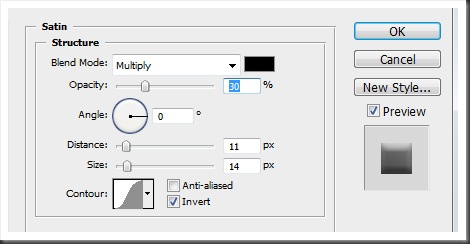
Finally, add a "Satin" layer style with the following settings: Blend Mode: Multiply, Opacity: 30%, Distance: 11 px, Size: 14 px.
Step 8
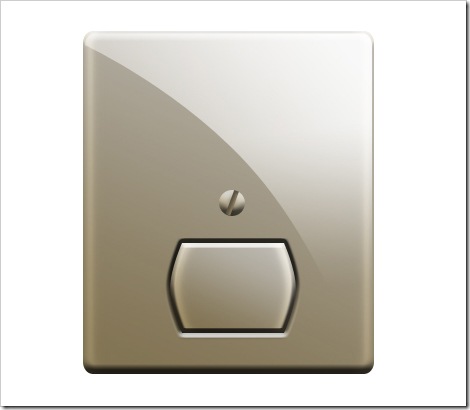
Choose the pen tool and draw the shape of the plug, go to menu Layer > New Fill layer > Solid Color and choose and appropriate one.

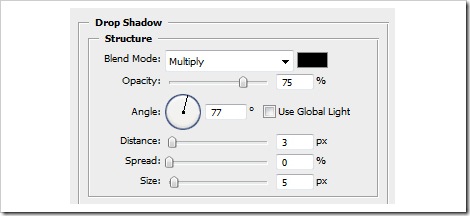
This is one of the shapes that require more than three layer styles. First, add the "Drop Shadow" style and adjust the parameters to Blend Mode: Multiply, Opacity: 75 %, Angle: 77, Distance: 3 px, Spread: 0 %, Size: 5 px.
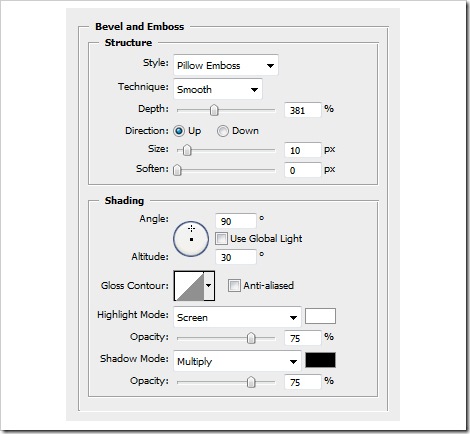
Next, select "Bevel and Emboss" and the parameters will be the following: Style: Pillow Emboss, Technique: Smooth, Depth: 381%, Direction: Up, Size: 10 px, Soften: 0 px, Angle: 90, Altitude: 30, Opacity: 75%.
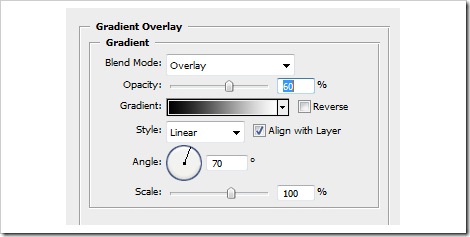
Now select "Gradient Overlay" and give it this values: Opacity: 60%, Style: Linear, Angle: 70, Scale: 100%.
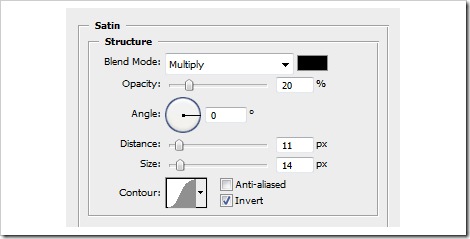
Finally, click on "Satin" and customize the parameters to Opacity: 20%, Angle: 0, Distance: 11 px, Size: 14 px.
Step 9
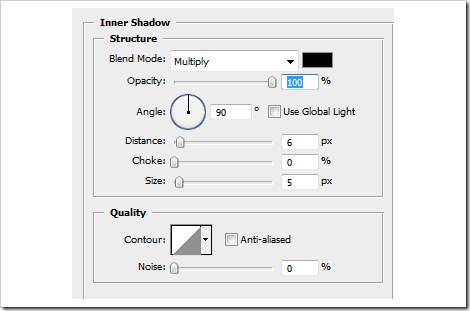
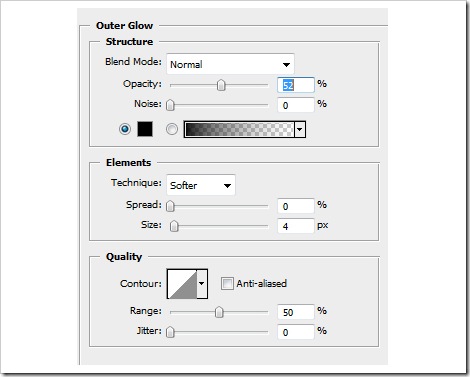
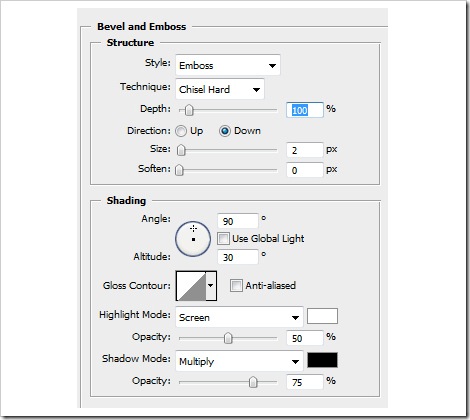
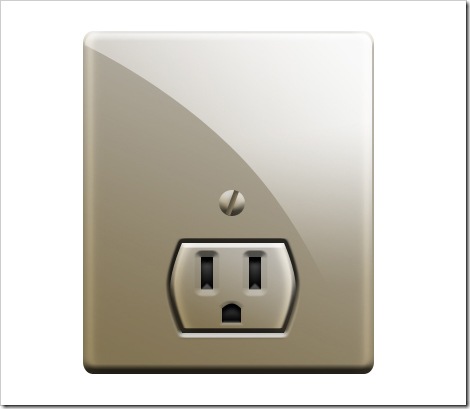
As you know, electric outlets have three holes, two for the energy and one for grounding. We need three layers to do this. We can start with any of the three, it doesn’t matter. For the electric ports, use the rectangle tool, and for the grounding, use the pen tool. Once you’ve drawn your shapes go to Layer > New Fill layer > Solid Color and choose an appropriate one.


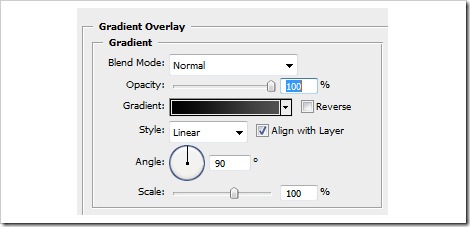
Use the following layer styles.
Step 10
Using the pen tool, draw the shadow shape.

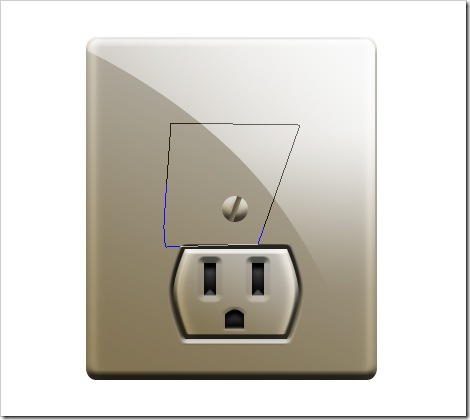
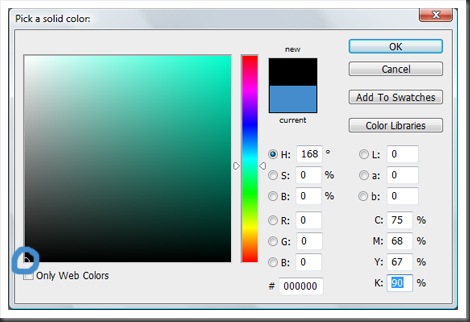
Go to menu Layer > New Fill layer > Solid Color and choose a plain black. After that is very important to lower the opacity to 50%, remember, this is a shadow.

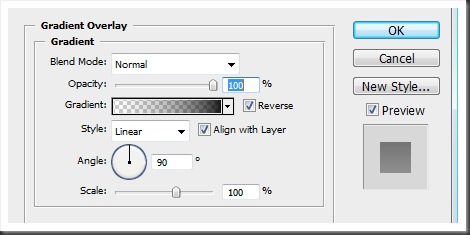
Add a Gradient Overlay Style with the following parameters: Blend Mode: Normal, Opacity: 100%, Gradient: Reverse, Style: Linear, Angle: 90, Scale: 100%.
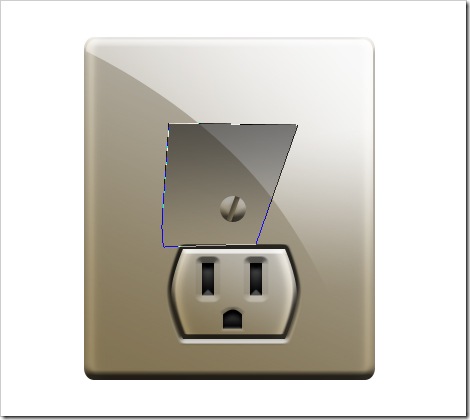
Now, create a new layer and using the Pen Tool, draw the same figure that we’ve made around the three connectors, this is to make the cable fit as if it were connected. Go to menu Layer > New Fill layer > Solid Color and choose a plain black.


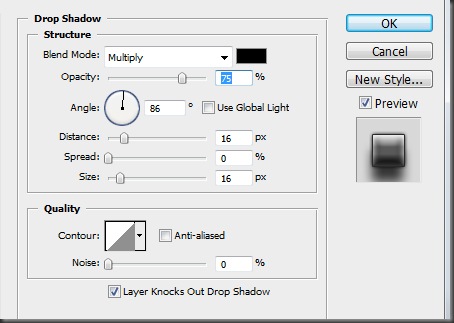
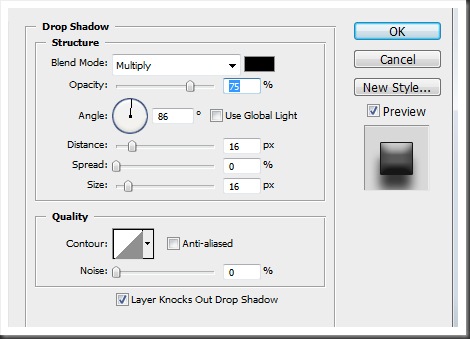
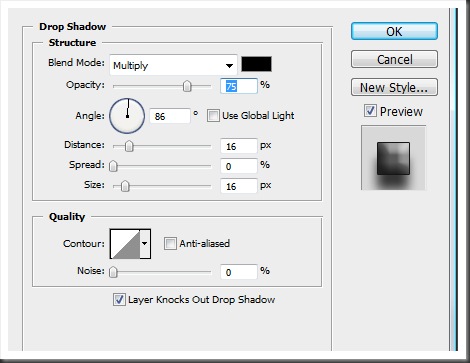
Now, go to the layer styles button and select "Drop Shadow", although at the end, we decided to hide it, is your choice. Enter the parameters Blend Mode: Multiply, Opacity: 75%, Angle: 86, Distance: 16 px, Spread: 0% and Size: 16 px.
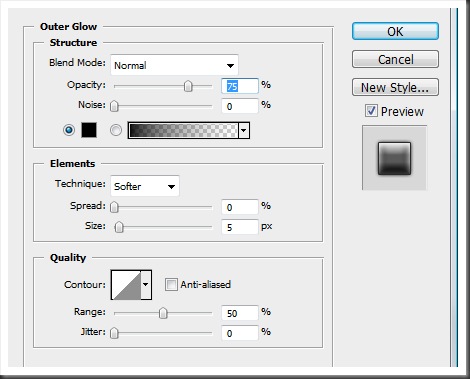
Now add an "Outer Glow" and enter the following values: Opacity: 75%, Noise: 0%, Spread: 0%, Size: 5 px, Range: 50% and Jilter: 0%.
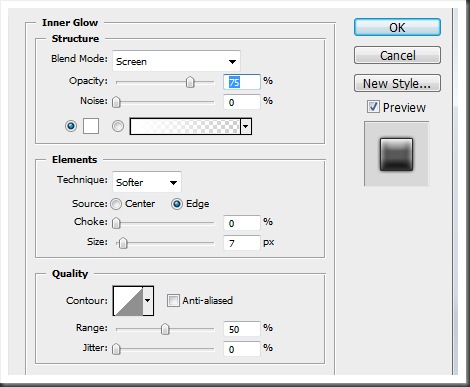
Add an "Inner Glow" using the following settings: Opacity: 75%, Noise: 0%, Source: Edge, Choke: 0%, Size: 7 px, Range: 50% and Jilter: 0%.
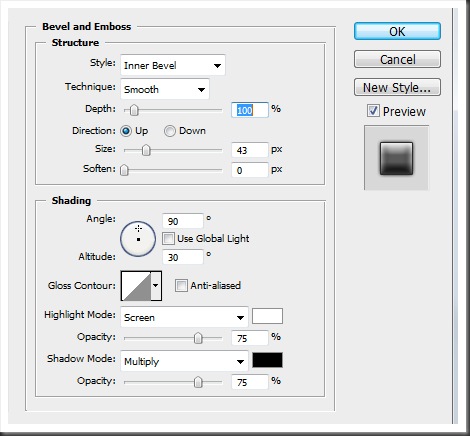
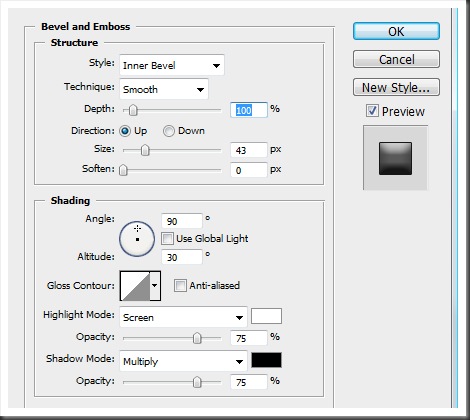
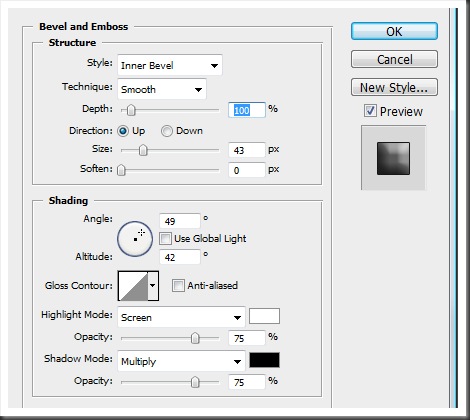
Now add "Bevel and Emboss" and the values Depth: 100%, Size: 43 px, Soften: 0 px, Angle: 90, Altitude: 30 and Opacity: 75%.
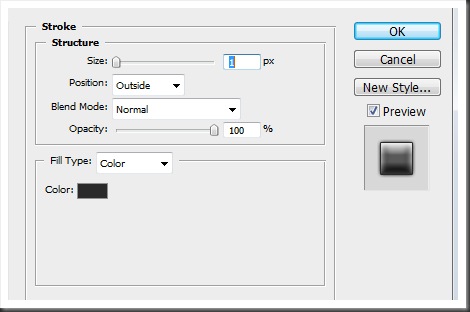
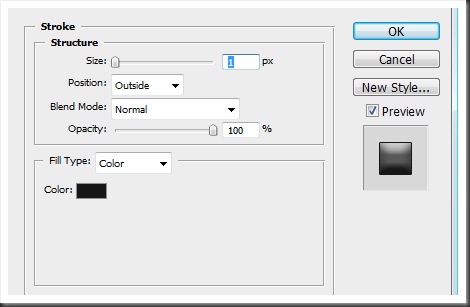
Add a "Stroke" with the following parameters: Size: 1 px, Position: Outside and Opacity: 100%.
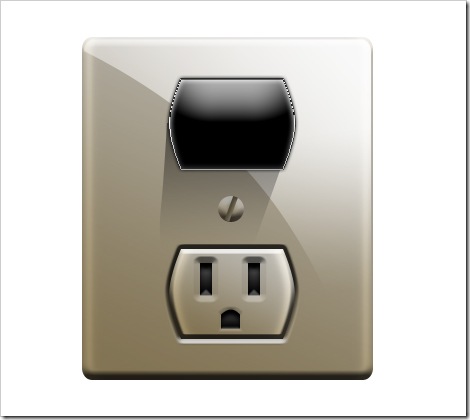
It’s time to start making the cable 3D. First we must add the left and right side. It is very important to keep in mind your references, so we can make a good use of the perspective. Using the Pen Tool, draw the left side of the cable’s head.

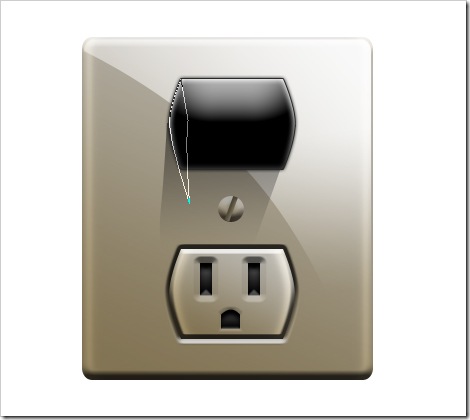
Now add some layer styles. Add "Drop Shadow" (once again we decided at the end to hide it) and enter the values Opacity: 75%, Distance: 16 px, Spread: 0%, Size: 16 px and Noise: 0%.
Add "Bevel and Emboss" with the values Depth: 100%, Direction: Up, Size: 43 px, Soften: 0 px, Angle: 90, Altitude: 30 and Opacity: 75%.
Add the "Stroke" layer style and assign it the following parameters: Size: 1 px, Position: Outside and Opacity: 100%
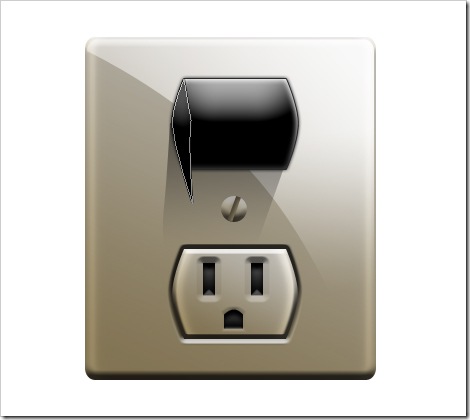
To make the right side, we need to do exactly the same, so start drawing it with the Pen Tool and then go to menu Layer > New Fill layer > Solid Color, then choose a plain black.


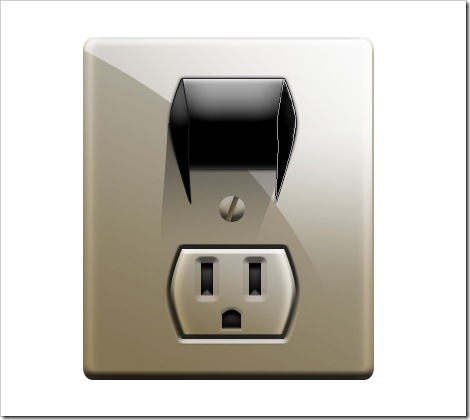
Now add some layer styles. First add "Drop Shadow" (this one we also decided to hide it at the end) and enter the values Opacity: 75%, Distance: 16 px, Spread: 0%, Size: 16 px and Noise: 0%.
Add "Bevel and Emboss" with the values Depth: 100%, Direction: Up, Size: 43 px, Soften: 0 px, Angle: 49, Altitude: 42 and Opacity: 75%.
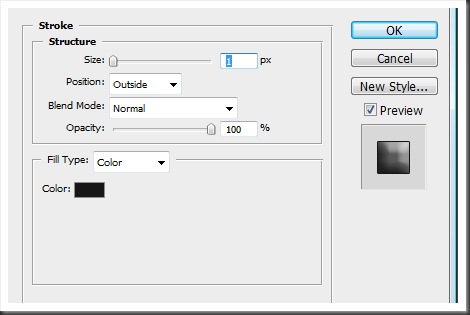
Add the "Stroke" layer style and assign it the following parameters: Size: 1 px, Position: Outside and Opacity: 100%.
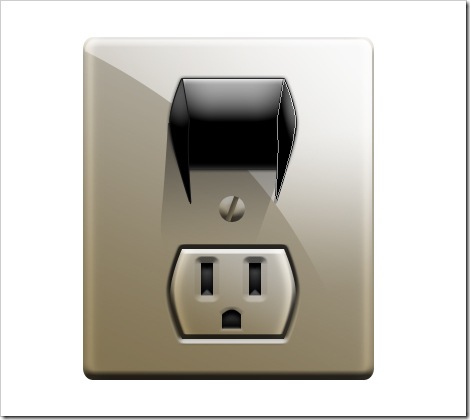
Take your pen tool and decide how the side must look, then draw it.

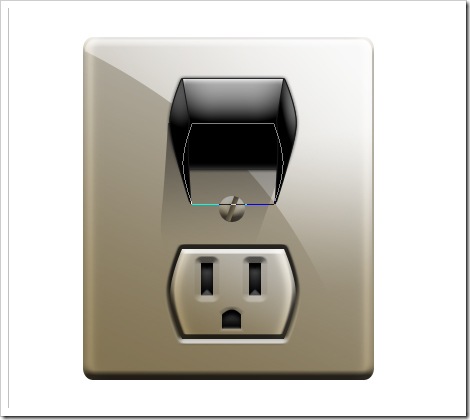
Go to Layer > New Fill layer > Solid Color and choose a black.

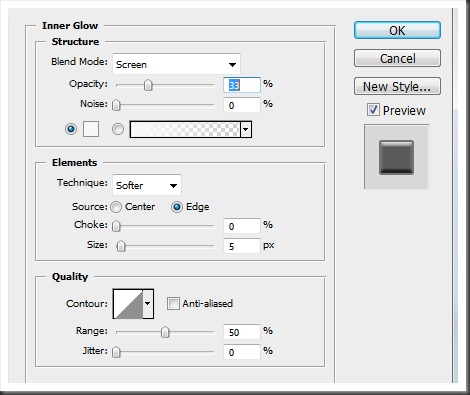
First, "Inner Glow", enter the following values: Opacity: 33%, Noise: 0%, Source: Edge, Choke: 0%, Size: 5 px, Range: 50%, Jilter: 0%.
Add "Bevel and Emboss" with the values Depth: 100%, Direction: Up, Size: 5 px, Soften: 0 px, Angle: 90, Altitude: 30 and Opacity: 75%.
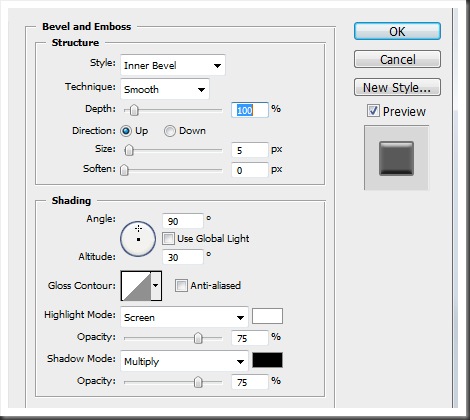
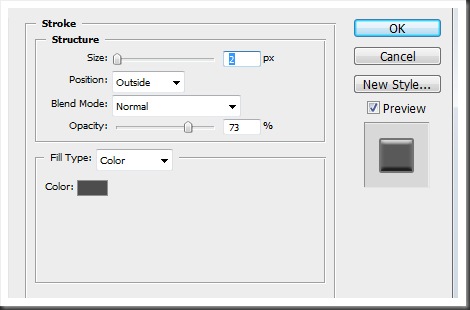
Now add the "Stroke" layer style and assign it the following parameters: Size: 2 px, Position: Outside and Opacity: 73%.
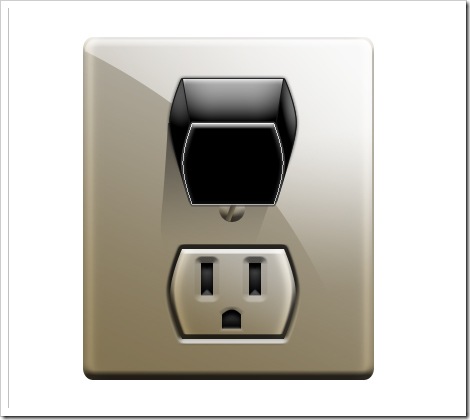
Select the pen tool and draw a standard cable, then go to menu Layer > New Fill layer > Solid Color and choose a black so we can continue with the layer styles


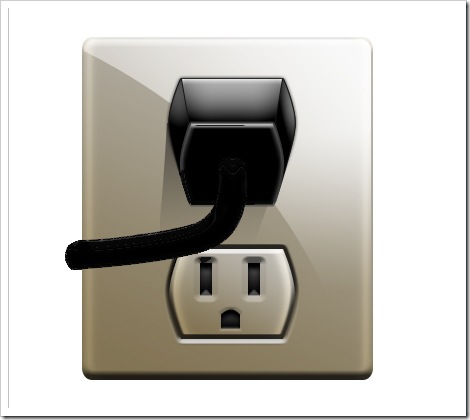
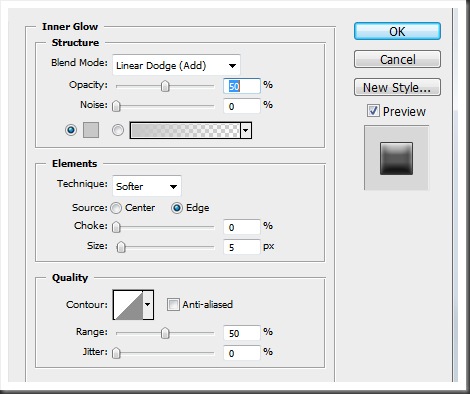
Let’s start with "Inner Glow", enter the following parameters: Opacity: 50%, Noise: 0%, Source: Edge, Choke: 0%, Size: 5 px, Range: 50%, Jilter: 0%.
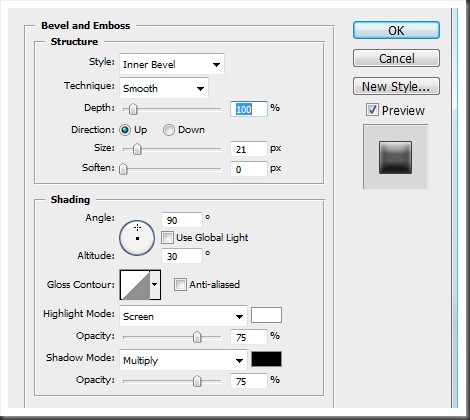
Select "Bevel and Emboss" and assign it the values Depth: 100%, Direction: Up, Size: 21 px, Soften: 0 px, Angle: 90, Altitude: 30 and Opacity: 75%.
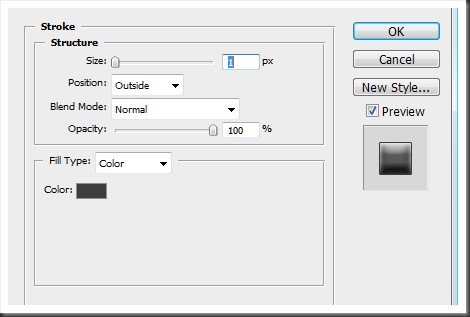
Now the "Stroke" layer style, give it the following parameters: Size: 1 px, Position: Outside and Opacity: 100%.
Step 11
Now our outlet is almost ready, and the only thing left to do is to add some details and a shadow. Take the pen tool and draw a shape on the upper right side of the cable’s head, then go to the menu Layer > New Fill Layer > Solid Color and pick a pure white color.


Now select your active layer to confirm by clicking on it, and go to Layer > Layer mask > Reveal all. A white box will appear in between your path and the Solid Color Fill.
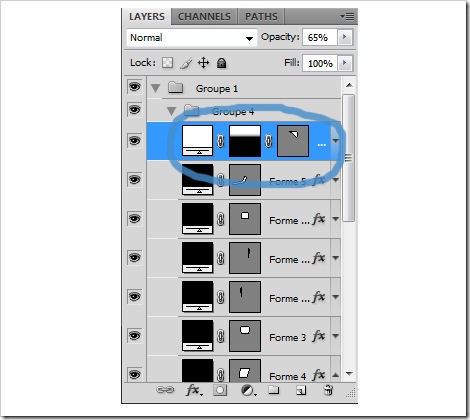
Pick the Gradient tool in the tool bar, and choose a Black to white linear Gradient from the tool bar options.


Apply a down to top gradient over the shine shape we drew earlier. Finally, select the "Gradient Overlay" style and enter the values Opacity: 100%, Angle: -141 and Scale: 100%.
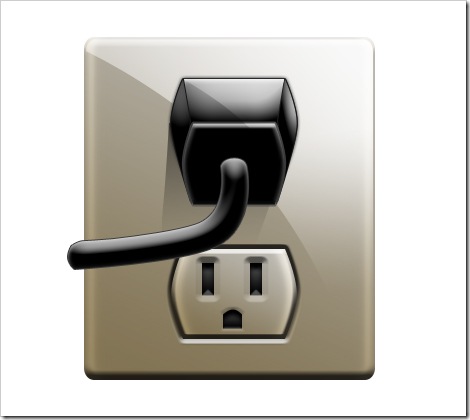
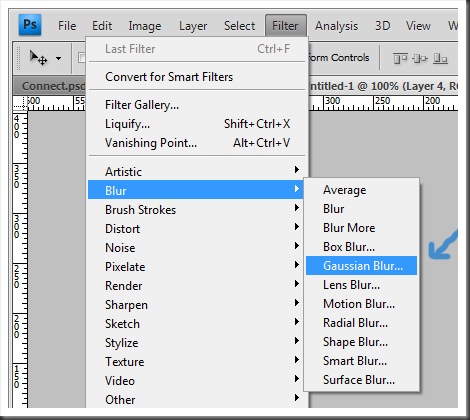
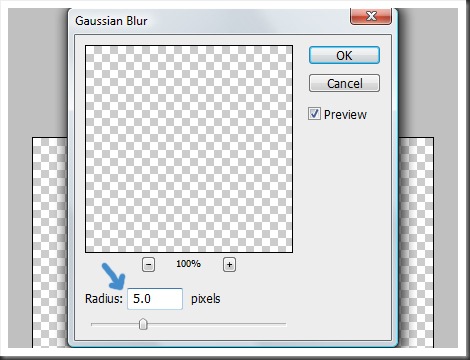
At this phase, we could consider this project complete but because we always want the best, let’s add a shadow to provide some depth to our icon. The shadow is easy. Just add a new layer below all the rest layers and draw with the rectangle tool on the base of the outlet. Then go to Layer > New Fill layer > Solid Color and choose black. Change the opacity to 75% and finally, select the layer and go to Filter > Blur > Gaussian Blur and give it a value around 5.0.


Final Image
