Lifelike billowing smoke and flowing water are easy to create with expensive plugins, but monumental changes in the free, open-source software Blender 2.5 can enable you to replace the plugins whilst maintaining your software of choice. By changing your workflow you can save money (and replace some old particle effects with beautiful new volumetrics!) In this article, Matthew Groeling takes a look at a few things you could consider…
Whilst altering your workflow can take some getting used to, that flexibility is a tremendous skill for any 3D artist. The way the robust features below find their way into your workflow is ultimately up to you, but hopefully our recommendations will help you find a place for them!
Smoke

Smoke simulators are prime examples of a potentially expensive feature. Blender’s smoke simulator takes the first step into a domain exclusive to pricey add-ons and dedicated software suites – and even in its infant stage its already pouring out impressive results. Stunning fire, smoke and explosions are already possible, and before long you’ll be able to kiss goodbye to unrealistic particle effects.
The best place to work this feature in would be after modeling, texturing, and if you like, even animation. Importing the smoke simulation into other programs is a questionable tactic at best, chances are it probably won’t be supported.
Don’t worry though! If you don’t want to render using Blender, LuxRender should be your next stop. It’s unbiased rendering can easily produce breathtaking, lifelike results. Even better, a project called Small Lux GPU uses your graphics card to do all the hard work, getting those beautiful renders to you faster.
Cgtuts+ are currently running a tutorial series taking a look at the smoke/fire effects possible with Blender 2.5. Written by the man behind Blender 2.5′s smoke docs himself, Gottfried Hofmann, it’s a great place to start, and the preview is shown below. Check out the first part now by clicking here!
Fluids

From pouring a cup of water to wiping out New York with a tsunami, you’ll find that a good fluid simulator is practically your only option. Whilst commercial 3d software packages are beginning to bundle in simulators, learning how to use Blender’s and implementing it in your own workflow is still a great option!
There’s a lot of benefits to using Blender’s fluid simulator. For instance, you can be sure that the development will never stagnate for too long, even when your buddies using commercial software haven’t seen an update in months. Recently, Blender’s fluid sim has been getting some nice new features like subframing, which increases the stability and accuracy of your simulations.
Just like with the smoke simulator, feel free to import your textured scene into Blender to start setting up your fluid simulation. Then add your emitter, define your bounding box, and go!
For an example of what’s possible, check out Promotion Studio’s TV commercial, courtesy of BlenderNation
Compositing
Good compositing is currently something that very few plugins can deliver. In fact, for post processing video or still frame renders using commercial means, your best options lie in a separate software package. However, one of Blender’s hidden gems is it’s own built-in compositor! As you can see from the below image, the compositor is node based, meaning it’s non-linear and non-destructive.

If that terminology is new, and you’ve never worked with nodes before, the above image may be a little intimidating. When it comes down to it, though, working with a node based compositor can be as simple as plugging one box into another and watching your work start to come together!
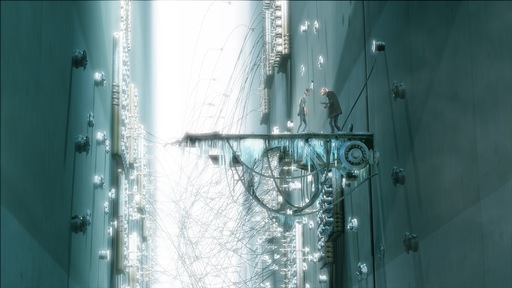
Using compositing, you can mix live action with your CG, add some slight scratches or water droplets to your virtual camera lens, balance colors, and so much more. Compositing opens doors you didn’t even know existed, and you can use images and sequences in a variety of common formats. In fact the above node graph results in the image shown below :
If you find out you love the node based approach, with the Texture Nodes you can procedurally create textures and materials to use at other points in your workflow! They can be accessed through the Compositor window, but that doesn’t mean you have to wait until you render to use them.
For the ultimate look at just what the compositor is capable of, check out the following video from the making of Big Buck Bunny – in fact why not check out the entire short whilst you’re at it!
(c) copyright 2008, Blender Foundation / www.bigbuckbunny.org
Sequencer
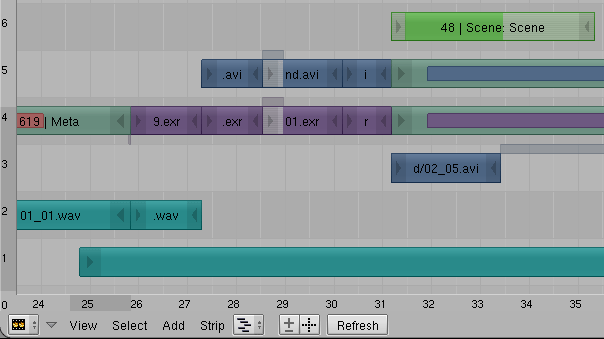
If you want a simple video editor with some extra advanced features, Blender’s sequencer will get the job done. Use it to edit together your rendered animations, sound, and other video clips from any application. While not as fully featured as the compositor, the sequencer is a good way to put together a edit quickly and easily. However be warned, the more complex features can take some time to learn, not to mention machine power!
Conclusion
If you ultimately decide to add Blender 2.5 to your workflow, you could end up saving a lot of money, but, more importantly, it will help to break you out of a box you may have been unknowingly sitting in.
Every software package has it’s unique strengths and weaknesses, but if you choose to live with these weaknesses you limit yourself. A simple export from one program to another can keep your wallet from loosing some serious weight, boost the quality of your project, and it helps to keep yourself open minded and flexible about your work.
If you like what you’ve seen above, why not check out the latest alpha release of Blender 2.5 from http://www.graphicall.org/
Don’t miss more CG tutorials and guides, published daily – subscribe to Cgtuts+ by RSS.