Fan art is one of the most interesting subjects in the creative world for me today. It is very surprising how many great artists in recent years have gotten themselves noticed by producing fan works of popular shows and movies.
So for this tutorial I am going to show you how by using various references, plus careful planning, drawing and rendering, you can create a tribute to the marvel that is the world of Star Wars! This series of films now enjoys massive cult status around the world, and with a new series on the way, why not do a tribute to this wonderful set of films?
What You Will Need


- Drawing paper or newsprint
- Drawing board (optional)
- Masking tape
- Pencils (Types 7B to 3H)
- Mechanical pencils (Types 6B to 2H)
- Pencil sharpener
- Steel ruler
- T-ruler
- Black coloured pencil
- Compressed charcoal sticks (extra soft)
- Charcoal pencil
- Tissue/toilet paper
- Cotton buds
- Kneaded eraser
- Gum eraser
- Tombow Square and Circular detailed erasers
- Varied size blending nubs
- Tub of graphite powder
- Tub of Titanium White paint
- Basic toothbrush
- Very fine paint brush
- Soft paint brush
- Artists fixative
1. Prepare Your Paper
For this
tutorial we will be working on A3 size paper (11¾ x 8¼ inches) on a sideways
(landscape) layout secured to a drawing board. If you have a drawing board, secure your paper onto it with
masking tape so that it does not slide around as you are drawing.

2. Drawing Your Image
Step 1
If you are already an experienced artist, you will
have a rough idea how to properly compose your image. If you are not so
experienced, it might be worth your while doing some rough layout sketches on a
separate piece of paper to work out your composition and the perspective of the
image to see how it might work in the final version.

Step 2
To begin with, we shall start by dividing our image
in half. Using your steel ruler,
measure where the centre line of the paper is, and draw a line in using your T-ruler.
We may find it useful later on
in the drawing phase if you use the middle of this line as a vanishing
point which is used to act as a guide for your perspective of the
image.
To keep things simple we shall only be using one point perspective, but
if we construct our image carefully we will still be able to create a striking
picture.

Step 3
If you
have a good idea of where to place your image on the page, we shall begin by
drawing in some basic shapes such as circles and squares to rough out the partially
built Death Star in the background of the image. This wants to be almost in
the centre of the paper to establish a focal point.
At this early stage, do not
be too precise about your lines, as we will work into these once our image
becomes more established. It is best to work with a soft lead like a 2B
pencil. It might be useful to also have a reference to help you
work, and I suggest that this image might be suitable.

Step 4
The vehicles I remember most from the Star Wars
early movies are the empire’s flagship fighters. They are so distinctive and are
still icons in their own right to this day, so I think for this image it is
only fitting that we include some. To begin constructing one of these fighters, use simple hexagons for
the wings, and the main body can be made up of cylinders and circles.
If you are looking for a reference for an empire
fighter, this image might be of help to you.
Remember though, it
might be worth your while using the centre of the paper as a vanishing
point to help get the perspective correct on the objects in your
drawing.

Step 5
To add a
little more drama to our image, it might be fitting to include a fighter
squadron leaving the Death Star base to go out hunting. To create and construct
a few other fighters that trail in the leaders wake, simply employ the same
technique we have used in previous steps. If you are struggling with the construction of
the fighters, this reference might be of use to you.

Step 6
For Darth
Vader, I prefer to use the method of using stick figures to build him up.
Basically, this method entails drawing a simple stick figure skeleton to
establish his pose. I am using this reference for him.
Take care
when drawing anatomy as, even after years of study, an experienced artist can
still make mistakes. This is why in the early stages it might serve you well to
do some rough sketches first!

Step 7
Now to flesh
out your figure, again only use loose lines at this stage, working over the top of
your stick figure using loose cylinders for his upper and forearms. For his
joints it is best to use circles to build these up.
For his head, using the
circle we started off with, divide this up horizontally with a line roughly in
the middle. This will act as a guide for where his eyes will be. Further
down, using our reference, draw another two lines to mark the top and bottom of
his breathing vent. You can draw in additional lines to mark out where the
bottom of his cowl is and the level of his forehead.

Step 8
We should
hopefully now have the base layout for our drawing and at this point it is vital
you check your anatomy and perspective against your reference and make sure the
whole image makes visual sense.
From here
on we now begin to draw in more fine details. To do these it is best to
continue using a mechanical 2B pencil,
but make sure you sharpen it before you proceed, as clean lines for the next
steps are a must.
Having
checked your image for any early mistakes, we now can continue drawing in the
fine details. With the empire fighters (especially the craft closest to us)
drawing in small details may seem a bit of a pointless task, but it is little
things like these that will make the biggest impact when we come to the final
image.
When you have drawn in your more detailed lines, you can erase your
early construction sketches with your putty
eraser. It is best to use this rather than your gum eraser as you will end up removing the tighter lines you have
just drawn in.

Step 9
When
drawing in the fine details on the Death Star, do not be too precise, as when it comes to rendering the image we will be able to pick out a lot of
details using shadow. If there are any major details I would focus on these for
now, one of which is the crater for the laser. Also rough in the areas
where the star itself is still under construction.

Step 10
Moving
on to the details on Lord Vader, as with the empire fighters, it is best to
focus carefully on these as he is another main focal point on the image. Personally,
I would draw in where the folds on his clothes are and where the stitches are
too. It is also worth your while to draw out where the shadows on his figure
are as a guide for later on in the process.

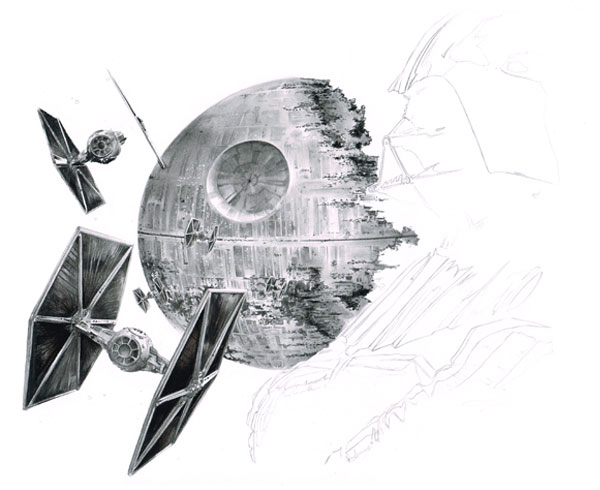
Step 11
We should now have a complete image to enable us to
begin rendering. If you have used a sharp 2B pencil and have been careful in
your drawing, you should have an image similar to that below. If you still have
any guidelines lingering, erase these using your putty eraser or, if these lines are in open space, use your gum eraser.

3. Rendering Your Image
Step 1
Now we have the outline of the image, we can begin to fill in the details. We shall be working from left to right on the paper to avoid smudging the graphite and charcoal (if you are left-handed you can do the opposite).
My best advice to you at this point is to only work a section at a time and avoid working on too much of the image. If you do work on too much of the image at once, you will find smudging becomes more of a hazard as you fill in the details.
We will be using two methods of applying graphite to the paper with pencils and graphite powder:
- circulism
- cross hatching
Circulism involves rotating your pencil with moderate pressure in a circular motion whilst moving the pencil across the page as shown below. Like hatching, this can be used to build up tone depending on the pressure applied to the paper and how many times you repeat the motions. I use circulism more for darker tones, and it is especially useful for black areas as it gives good coverage on the paper.
Cross hatching is applied by drawing a series of strokes in a diagonal direction going one way, and then repeating the motion in the opposite direction. Levels of tone can be built up in this method by bringing hatchings closer together or repeating the motions time and again. You can also choose to blend the area you have shaded afterwards with a cotton bud or tissue paper.
To start off, we shall render the empire fighters, starting with the frames of the ships.
Begin by putting down a base layer using tight cross hatching with an HB pencil.


Step 2
With your
base laid down, we can work on top of this using a darker pencil to create
shadow. Depending upon how dark the shadows are, I would go for a 3B, 4B, or 5B pencil. For really dark
shadows we may need to go to a mechanical
6B or black coloured pencil, but for now we will hold off on that, as it
will be harder to erase darker shadows.
At this stage, ensure
you know where your light sources are coming from and, once you do know, make
sure you stick to it and do not confuse yourself or the viewer with light
sources coming from all over. You may notice that in our image I have chosen a soft
light source falling from the top left of the image.
It is key that you get this stage right, as I have seen many good illustrations
spoiled by artists not thinking about the light source.

Step 3
If you
have applied your shadows correctly, we can now move to the inner wings of the
fighters, which are much darker than the frames of the ships.
For this phase we
begin by laying in our base tones using graphite
powder with a cotton bud using
the circulism method explained earlier. The reason we are doing this,
instead of using one of our pencils,
is that we may well need to erase little areas later on, and it will be easier
if we layer powder rather than press on with hard graphite.

Step 4
Now you
have your first layer blended in, work over the top of this with more graphite,
building up layers of tone.
Once you feel you have all of your mid tones worked
in, move on to black tones. To do this we shall use a sharp charcoal pencil. It
is best to use this tool rather than our soft
charcoal stick as that is just too broad for this small area. Using a
moderate touch, use the cross hatching technique to work this in.

Step 5
Now we
have our first charcoal layer down on the paper, take another clean cotton bud and blend the edges of the
charcoal with the graphite powder you have already laid down, and you should get
a pretty seamless gradient. If not, you can continue laying down more charcoal
to build up your darker tones, or if you already have enough charcoal laid down, take a 5B or 6B pencil and, using
tight cross hatching, blend the layers together this way.

Step 6
With your
layers now blended together, and paying close attention to your reference, take
your black coloured pencil and draw
in fine lines in the inner wing to create the effect of the material the wing
is constructed from. You should now be looking at a complete wing, and if you are
happy with your image we shall move on to rendering the other wing.

Step 7
For fine
details around the cockpit of the fighters, including the glass, you are best
using one of your mechanical pencils
to draw these in. The reason for this is that they remain fairly sharp no
matter how much use they take and, for small details like the ones we are
working on, a fine point is ideal. This is another area where taking note of
your reference is essential!

4. Rendering the Death Star
Step 1
You
should now have a fleet of rendered empire fighters, so now let us move on to the
Death Star, the empire’s ultimate weapon. To begin with, we shall blend in a
layer of graphite powder to set a
base layer for the Star. At this early stage, remember to use measured amounts
of powder, and do not overload your cotton
bud or paintbrush.

Step 2
For any
shadows on the Star, such as in the crater, apply a second layer of graphite. For
this area in particular you may need to apply a little more graphite to darken
the area. Alternatively, you can take a 5B
pencil and use tight cross hatching to build up the layers.

Step 3
Now you
have your base layers rendered, we shall now move on to the fine details on the
Star’s surface. This again is a point that might take a while to do, but it
will be worth it in the long run. For light details it is best to take a mechanical or regular HB pencil and, using the circulism method, work these in.
Darker areas may need to be touched in with a mechanical 2B or 4B pencil.
For the
areas of the Death Star which are still under construction it is best to render
these by laying down a base with a sharp 5B
pencil. For slightly darker areas, move up to a 6B mechanical pencil or black coloured pencil if you wish. Bear in
mind I would suggest only using this step for the tight areas within the Death
Star; larger areas on the edge of the star should be left for now, and we will
work on them later in the tutorial.
If you take note of our reference mentioned earlier, you may notice that there some small lights dotted around the Death Star’s surface. To place these, take your very fine paint brush and titanium white paint and very carefully dot in the lights, making sure to periodically dip your brush back into the paint. This may seem a very tedious task, but I am afraid it is the only way we can do this step without making a complete mess of the image, and it will pay off in the long run.
5. Working on Darth Vader
Step 1
Now we
come to Darth Vader, the empire’s dark knight and feared lieutenant, second only
to the emperor. To begin rendering him, we start as we have done previously by
laying down a base layer of graphite
powder using a cotton bud.

Step 2
As Darth
Vader is wearing cloth, to create the texture of this fabric you might find it
best to use cross hatching using a 3B
pencil or darker to build up tone. For really detailed areas, moving to one
of your mechanical pencils may be the
best course of action, remembering to still use the cross hatching method.
For any
black areas on Vader’s clothes, it is time to break out your black coloured
pencils again. However, avoid filling the main shadows on him for now—we will return to these later. For now we are only interested in the
greyscale tones as it is best to get this right before we move on.

Step 3
For
Vader’s helmet, you will notice it has a smooth texture, as opposed to his
clothes, which are rougher. To perfect this, refer back to our method of
applying layers of graphite powder
with a cotton bud in order to build
up tone. To further blend the graphite you can use either a piece of tissue paper or use a soft paintbrush. As with Vader’s
clothes, any large areas of shadow on his helmet are best left for the time
being. If you need to use your erasers at this stage, either your putty eraser or Tombow eraser will be best.

6. Filling in the Surrounding Galaxy
Step 1
Now we
should have a rather semi-rendered image. All that is left now is to fill in
the pure blacks and put a base down for the galaxy surrounding our fighters and
the Death Star.
To do this step, take your compressed
charcoal stick (remember to use an extra soft one as it gives better
coverage and is easier to blend with) and simply begin, going from left to
right and in measured sections, drawing in your black areas. Left handers may choose to go right to left.

Step 2
After
laying down a section of charcoal if you need to, take a few pieces of tissue paper and, using a circular
motion, blend over the top of the layer you have worked. The reason we do this
is that sometimes the charcoal doesn’t quite cover all of the canvas we want it
to, so to fix this we blend it, as it helps to cover those areas that have been
missed.
Once this is done, go over the area you have worked with a second layer
of charcoal to add more depth to our tones, as you may find that having blended
the first layer of charcoal, it now looks more “grey” than black.

Step 3
Now you
have worked your first section, continue moving around the image, filling the
black areas that need doing. You may find that in tight areas you need to break
out your charcoal pencil to cover
these sections. However, for really fine details or really tight corners, use one of your sharp black colour
pencils. It is also at this point, as you work round the image, that you
should fill in the shadows around Darth Vader that we left earlier.

7. Fix Your Image
You
should now have an almost complete image; all that is left is to complete the surrounding
galaxy. Just before you start on this, however, it might be worth your while to
fix what you have already worked on to prevent smudging and ruining all the
effort you have put into your picture. Once your artist’s fixative has been sprayed, allow sufficient time for it to
dry completely before moving on.

8. Adding Final Touches
Step 1
For the
last part of this tutorial we shall now add the other stars and planet that
populate our galaxy using white paint,
our small paintbrush and toothbrush.
We are going to take our toothbrush and dip the bristles into
the white paint, avoiding overloading it as you will end up with messy results.
However, before you go into this step, if you are not comfortable with this
technique I would strongly suggest using a separate piece of paper to practice
on and to check you are doing it right before moving to your master image.
Also,
if you wish to do so, you can take a sheet of tracing paper and cut
this to mask off the empire fighters to prevent over-splatter. Mistakes will be
very costly at this late stage.

Step 2
Hopefully,
if you have decided to do a test before proceeding with this step, you will now have the confidence to move forward. As mentioned, take a little white paint on your toothbrush and, using the end of a
small spoon or a knife, “flick” the bristles with the brush angled toward the
paper.
You should now find you have a scattering of stars on the paper, but be
sure to vary your flicks as you go around the page, and do not do too many as this
will affect the image. For more individual stars, you can take a fine paintbrush and, using a light
touch, simply dot in stars around your image. To create larger stars simply
vary the pressure you use on the brush.

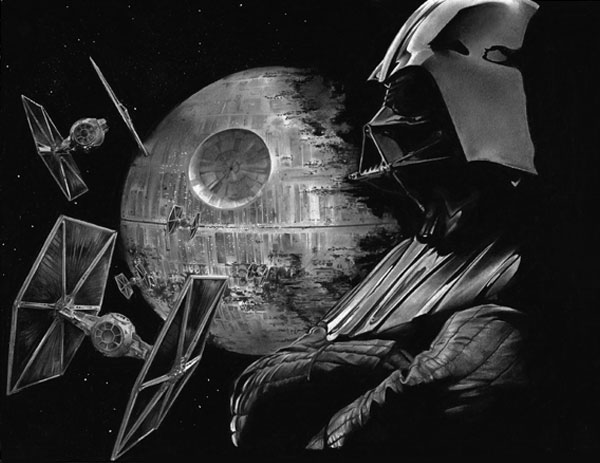
And We
Are Done!
At last we have an image that hopefully you can be proud of. With all of the fandom
that surrounds the Star Wars series, producing images like this may raise
your profile amongst the many fans that follow the series. So, why not create a
fan art image like this yourself and show your fandom too?
Just
make sure you are not drawn to the dark side yourselves, my young apprentices!
{excerpt}
Read More