These three ways of creating identical artwork may sound similar, but they all have completely different uses. Let’s go over duplicate, clone, and copy and paste in Inkscape to see which ones fits best in each situation.
1. Duplicate
Step 1
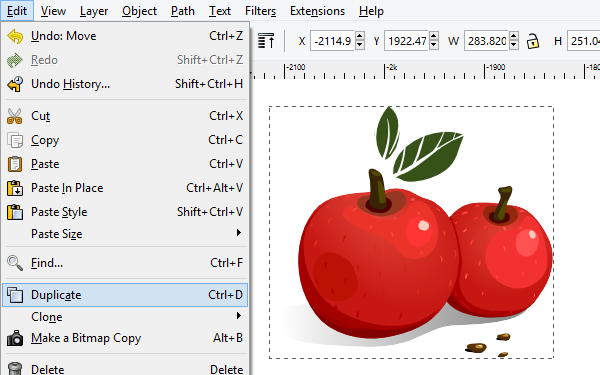
Go ahead and select an object to duplicate. Either head up to Edit > Duplicate, or simply hit Control-D to do so. You might notice that this seems to do… well, nothing. What is actually does is makes an exact duplicate of your object in the same position as the original.
Step 2
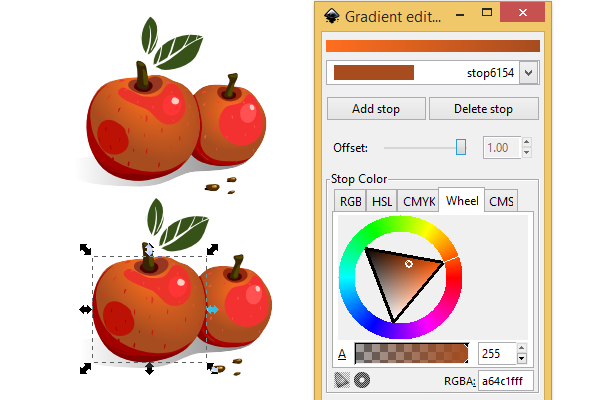
Duplicate is the easiest and quickest way to create an identical copy of an object, but there is one thing to note. When you duplicate an object, the new object inherits all custom properties, such as Gradients or Swatches. Below, you’ll see that I edited the gradient on the duplicated object, but that in turn also edited the original object.
2. Copy and Paste
Step 1
Unlike the simplicity of Duplicate, the famous Copy and Paste is two separate operations. As you might already know, the easiest way to do this is to select an object, then simply hit Control (C) and Control (V).
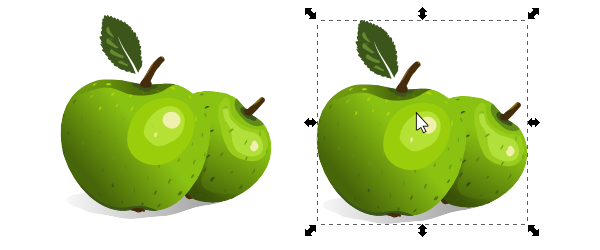
The first difference you’ll notice here is that when you Paste, it places the new object exactly where your cursor is.
Step 2
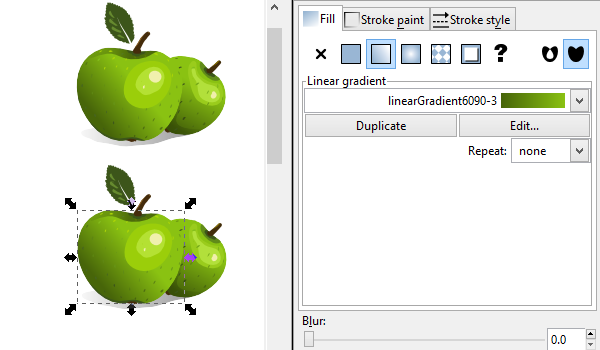
Another big difference from Duplicate when using Copy and Paste is that it actually gives the object a new gradient (the same gradient parameters, but actually a different gradient). So using this method works well over Duplicate if you’ll be working with something like different gradients.
As you can see below I’ve copied these apples a few times, so it’ll keep copying the original linearGradient6090 to each new pasted object and just assign an incremental number to it.
Step 3
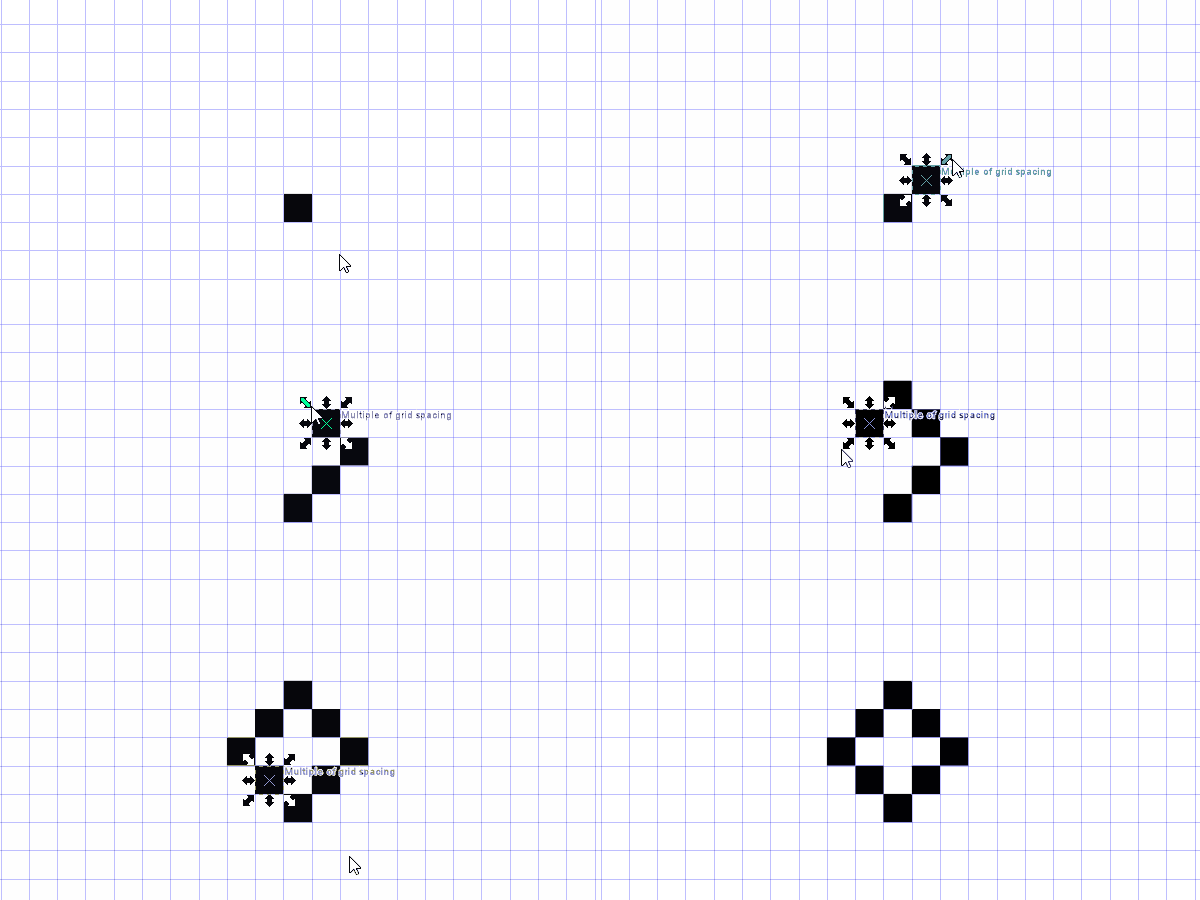
A neat trick when using copy and paste is when you have a grid with snapping enabled, your pasted objects will snap to the closest grid point of your cursor. This is awesome for pixel art stuff. Below, I’m just slapping Control (V) every time I move my cursor to the next grid spot.
3. Cloning
Step 1
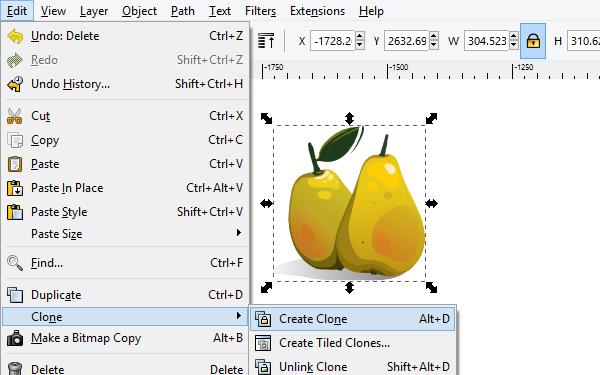
Okay, so this is where things start to get a bit funky. Even though this sounds like just another Duplicate situation, Cloning is the one that really stands out. First, go ahead and select another object and head up to Edit > Clone > Create Clone.
Step 2
Just like Duplicate, it’ll put your new cloned object in the exact same position as the original. You can go ahead and move it somewhere for now, just so we can see it for this example.
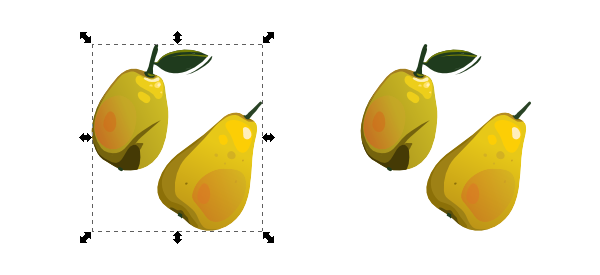
This new cloned object is a dynamic clone, so whenever you change anything on the original object, it’ll change the clone right away. Below, I rotated the original and separated the two pears. You can see that my clone on the right also took those changes.
Step 3
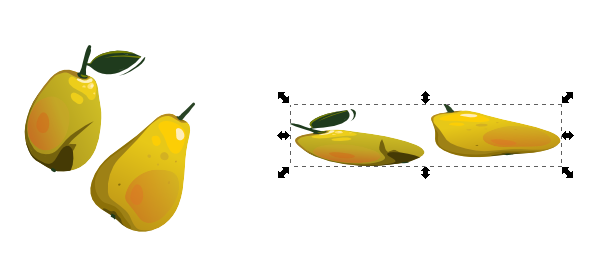
Now, this is not necessarily the case when you edit the clone. You can do whatever you want to the clone, but that won’t affect the original. However, you can still modify the original and the clone will continue to accept those changes as well. I told you, this gets pretty intense!
Below, I just intentionally ruined the clone by stretching it to unreasonable proportions, but as you can see, the original is untouched.
That’s it, Copy That!
We went through the very simple duplicate, then spiced things up a bit with copy and paste, and finally went over the crazy cloning! While all of these tasks are quite simple and helpful, try playing around with clones, because they’re actually a lot of fun to see what you can come up with!
{excerpt}
Read More