ABOUT
Retronimator is a retro animation creator. With this tool you can create small “pixeled” style animations for your games. The output format is an alpha channel PNG image strip. An image strip (or image list) is a collection of images of the same size, each of which can be referred to by its index.
Retronimator is also capable of export single images, the output does not have to be an animation.
ICONS
There are several icons on the left side and the bottom of the screen.
LEFT SIDE ICONS AND THE ANIMATION PREVIEW
First row:

- New (Start a new animation)
- Open (Open an existing animation)
- Save (Save your current animation)
- Export (Export final animation to an image strip)
Second row:

- Draw (Drawing on the canvas)
- Pick (Pick a color from the canvas)
- Color 1 (Color for the left mouse button)
- Color 2 (Color for the right mouse button)
Third row:

- Eraser (Delete pixels from the canvas)
- Copy (Copy current canvas to the clipboard)
- Paste (Paste clipboard to the current canvas)

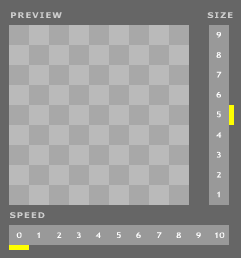
In the preview windows you can see the actual size of the current frame. You use the SIZE BAR to select a new size for the preview. Click on a number. The preview windows automatically update the frame.
Under the preview window you find the SPEED BAR. This allows you to set and preview the animation at different playing speeds. Click on a number to select a speed.
Under the SPEED BAR you find four icons:

- Onion editing On/Off (see next chapter)
- Show previous frame (see next chapter)
- Show next frame (see next chapter)
- Grid On/Off (Turns on/off the canvas grid)
What is Onion editing?
When you are editing your current frame, it is possible to see the previous or next frame of the animation on the same canvas. This is helpful when you need to draw pixels at certain positions.
If Onion editing is turned on, select which frame you want to display (next frame or previous frame)
BOTTOM ICONS AND THE FRAME SELECTOR
Under the canvas you find the frame selector bar:
- Select actual frame
- Set animation length
How to set the animation length?
You can define the length of the animation by clicking on a number with the right mouse button. You can redefine the length of the animation anytime by right clicking on the bar.
How to select the current frame?
Click on a number with the left mouse button to select which frame you want to edit.
Transform icons

On the bottom of the screen there are 7 icons which allows you to transform the actual frame:
- Shift left (Shifts the drawing to the left by one pixel)
- Shift right (Shifts the drawing to the right by one pixel)
- Shift up (Shifts the drawing upwards by one pixel)
- Shift down (Shifts the drawing downwards by one pixel)
- Mirror horizontally (Mirrors the drawing horizontally)
- Mirror vertically (Mirrors the drawing vertically)
- Rotate (Rotates the drawing by 90 degree)
MY FIRST ANIMATION
When you run the program, there is a one frame long empty canvas by default. You can start drawing by using your mouse left and right buttons.
On the left side you find the color selector icons (please see previous section). Select the colors for the left and right mouse button.
Draw your nice character on the canvas. Once it looks fine you can extend the animation with a new frame. Click on the frame selector and define the length of the animation (please see the previous section).
Copy the actual frame to the clipboard and select the next frame. Now you can paste the clipboard to the second frame. You have the same drawing on the second frame. Make some changes according to the action of the character. The animation preview automatically start playing your animation. Adjust the size and the speed of the sequence (please see the previous section)
Continue drawing more frames.
Onion editing allows you to see the previous frame on the actual canvas. It is useful, so you can see the changes between the actual and the previous frame. It is also possible to see the changes between the next and the actual frame. Turn on Onion editing and select which frame you want to see (please see the previous section).
Once your character is done, save your work then you can export it. Click on the export button and Retronimator creates the final image strip. Please note that the animation speed is not saved with your final image, it is only a setting for the playback speed. However the preview window displays the actual size of the image, so adjust the image size to the desired dimension. You can also save the same animation with different size according to the needs of your program.
Congratulations, you’ve created your first animation with Retronimator Animation Creator!