The latest Envato Bundle inspired me to create a new vector portrait. One of the stock images within was a great portrait of a senior male and I couldn’t help but give him a vector make over. In today’s tutorial I’m going to show you how to create a simple vector avatar from a stock image with several additional options. So let’s get stuck in!
Step 1
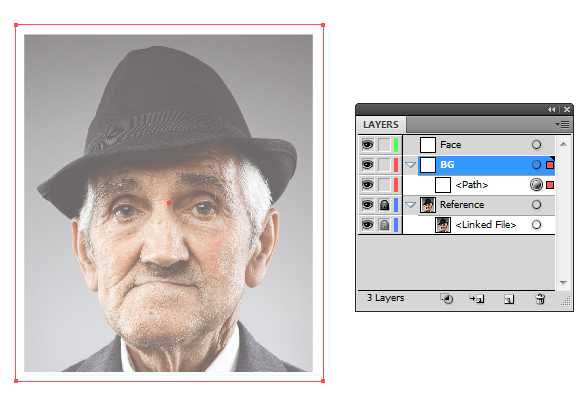
After cropping the stock image in Adobe Photoshop or whatever photo editing program you use, File > Placed it onto a New document. I’ve given it it’s own layer and added a new layer on top with a white fill Rectangle (M) set to 50% Opacity. I’ve then added a new layer on top and this is where I’ll be adding my vector shapes.
Step 2
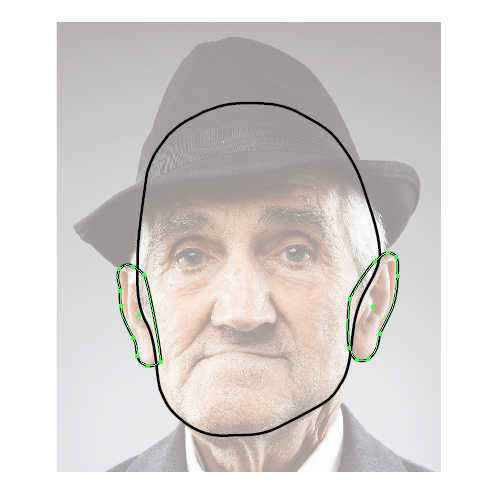
Using the Ellipse Tool (L), draw an oval over the face, it doesn’t have to be exact. While selected go to Object > Path > Add Anchor Points and this will add a new anchor point in between each node. Repeat to add further nodes.
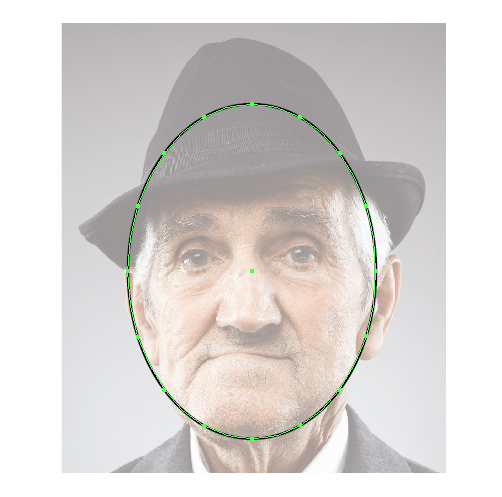
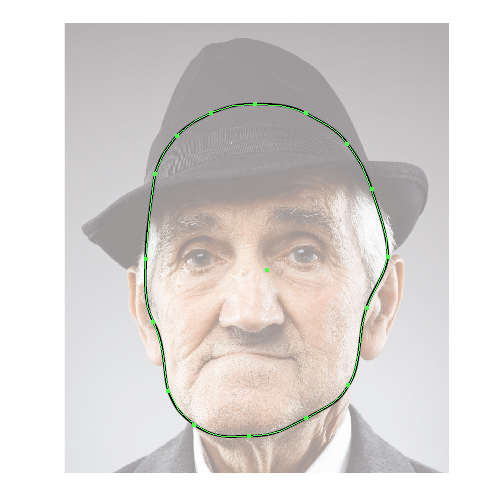
Then with the Direct Selection Tool (A), modify the points and handles so the once oval is outlining the face. Aim for smooth curves to preserve a cartoon look.
Step 3
Repeat the process by adding Ellipses (L) for the ears and adding additional points.
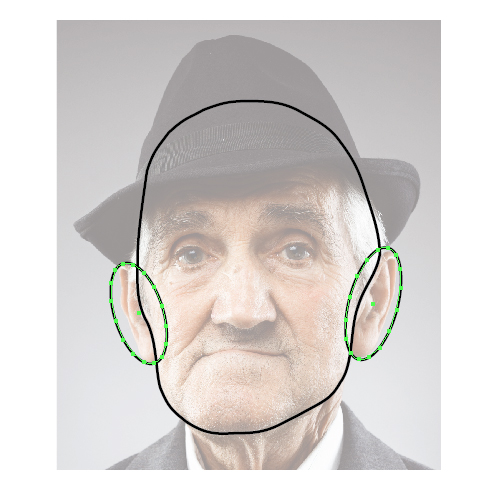
You may find with smaller shapes, you will not need as many points. I’ve removed these by using the Pen Tool (P) and hovering over a point to delete it. Use the Direct Selection Tool (A) to modify the shapes.
Step 4
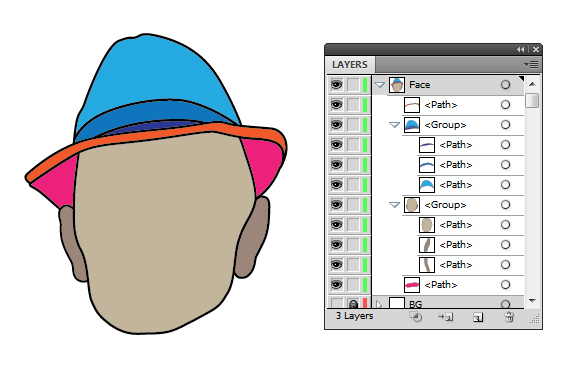
With the Pen Tool (P), draw a basic shape for the hat and the rim. The key is to use as little point as possible to create simple shapes.
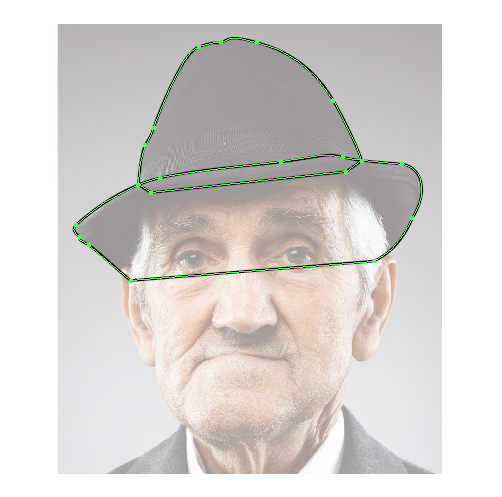
Draw lines over the shapes to where the band on the hat is and the outer rim of the hat is.
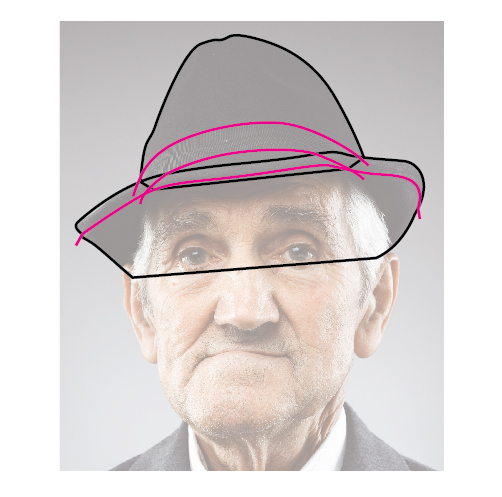
Step 5
Select one set of lines and shape and use Pathfinder > Divide to split the hat into three shapes.
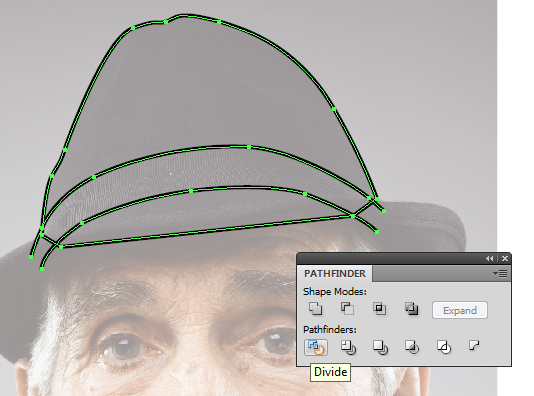
Repeat this process for the rest of the hat and shape.
Step 6
Use the Pen Tool (P) to draw the eyebrows and hair. While it maybe tempting to draw jaggered shapes for the hair, this would make the shapes too detailed and take away from the style we want to create.
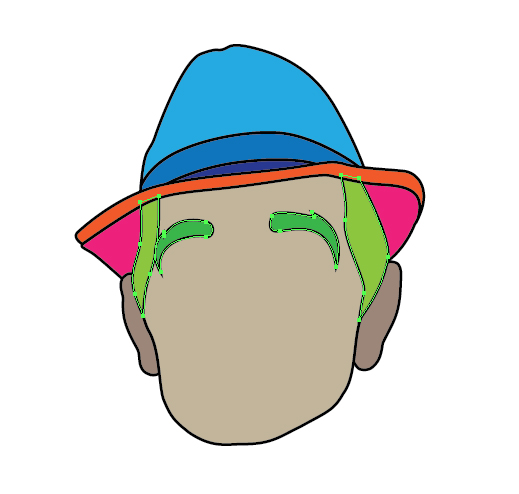
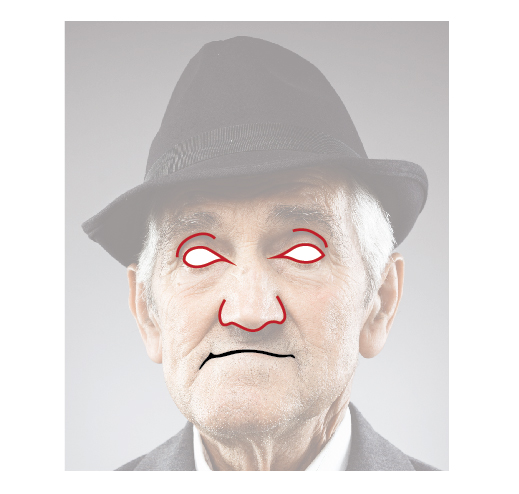
Then draw shapes for the eyes, eyelid crease, nose and mouth. The mouth is not actually a line but a solid black shape.
Step 7
For the eyes themselves, use the Ellipse Tool (L) to create even circles. For the pupils, use a black fill and a null stroke. Once you’ve created one eye, duplicate it and move it to the other eye to ensure the eyes are of an even size.
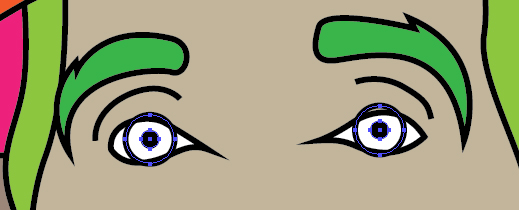
I’ve then Grouped the eyes (Ctrl + G) and made a duplicate of the original eyeball shape and used it to create a Clipping Mask (Ctrl + 7).
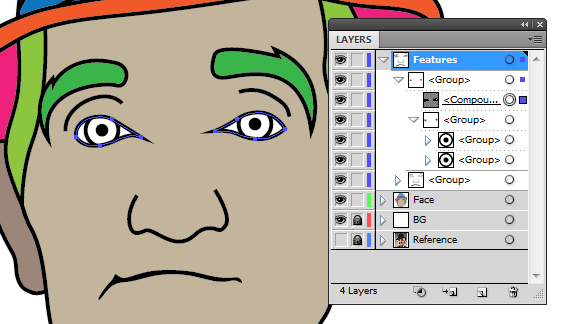
As the corner of my eyes were a little too pointy, I modified the shapes using the Direct Selection Tool (A) to create a less shape point.
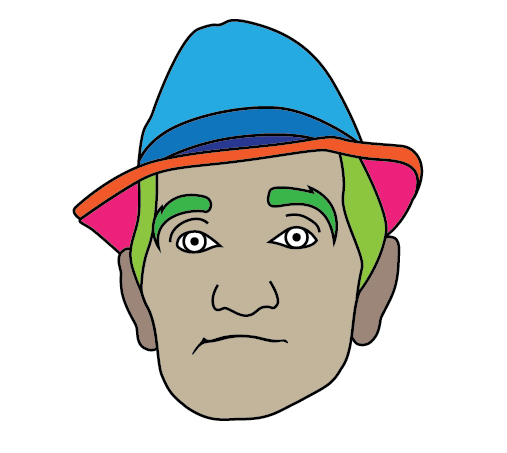
Step 8
Go ahead and add color to your avatar. I’ve purposely made the ears a slightly darker skin tone so they stand out more and look in slight shadow. It’s also worth noting that I’ve used a chunky Stroke Weight of 4pt. The thick lines emphasis the cartoon style.
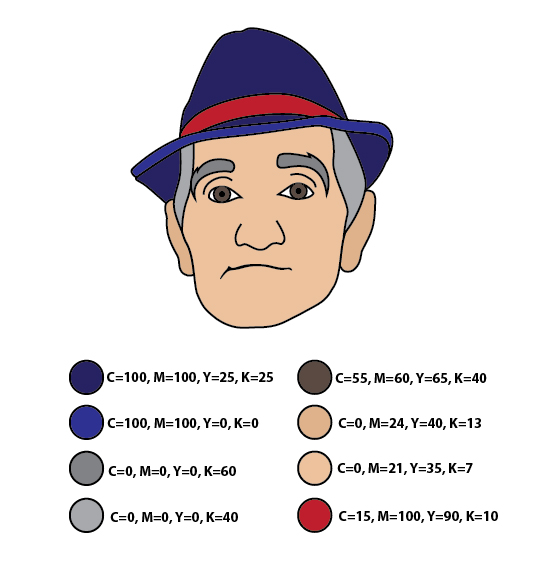
Step 9
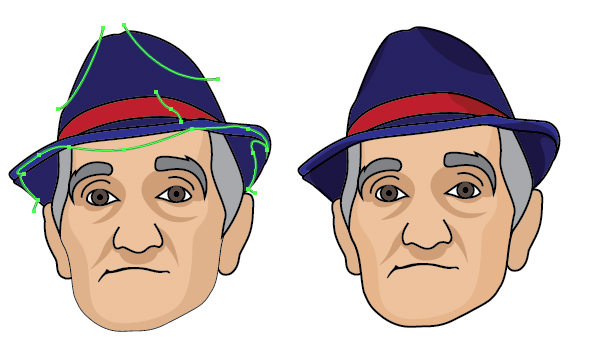
Now to begin adding some simple face shading. First a line going down one side of the face, curving around the chin and up the other side. Use Pathfinder > Divide with a duplicate of the face shape to produce shading for either side of the face. I’ve then used the Pen Tool (P) to add shading for the eyes and nose. As this is a senior gentleman, I’m emphasizing the grooves of the face around the mouth and eyes. If you’re vectoring a younger person, you may want to avoid doing this.
Give the shapes a skin tone fill and then set them to Blending Mode Multiply and adjust the Opacity depending on how deep you want the shadow. The reason why you set the Blending Mode to Multiply is to avoid the shading overlapping onto the line work.
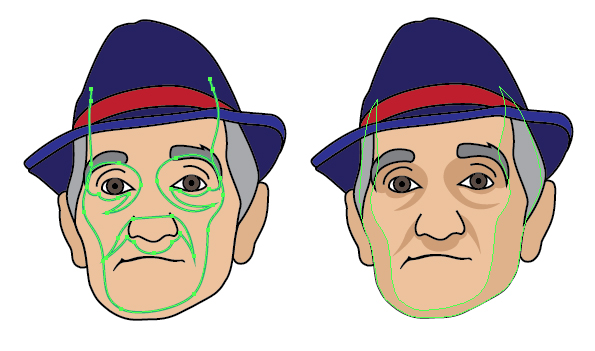
Repeat the same process for the hat and the band detailing. I found with the rim of the hat I needed to duplicate the line twice to divide the outer rim and the rim in the background.
Step 10
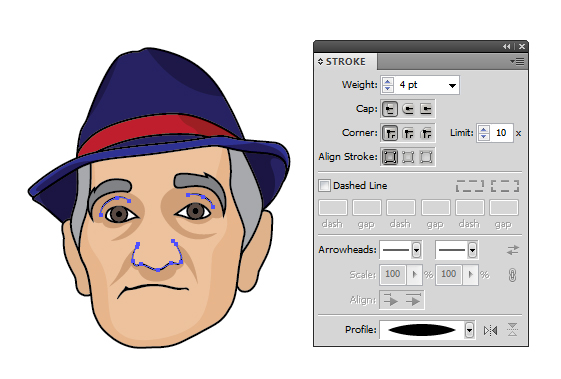
For the lines for the eyelid crease and the nose, I’ve applied Profile "Width Profile 1". If you’re using an earlier version of Adobe Illustrator CS5, you can work around this by using an Art Brush. Check out my Width Profile tutorial to find out how.
Step 11
Using the same Width Profile, add lines to the side of the face, nose, eyelids, ears and chin to age him further. If you’re vectoring a youthful person, only add highlights to the side of the face, nose and eyelid.
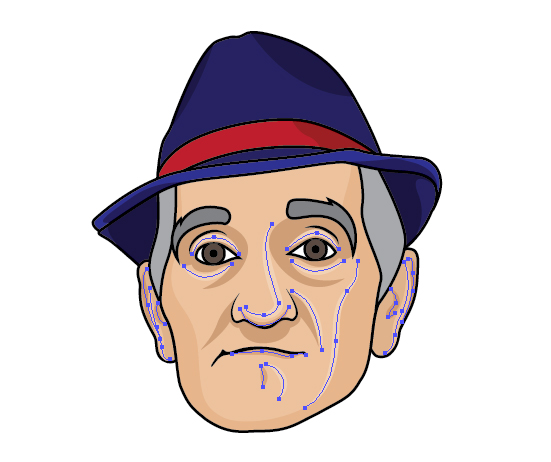
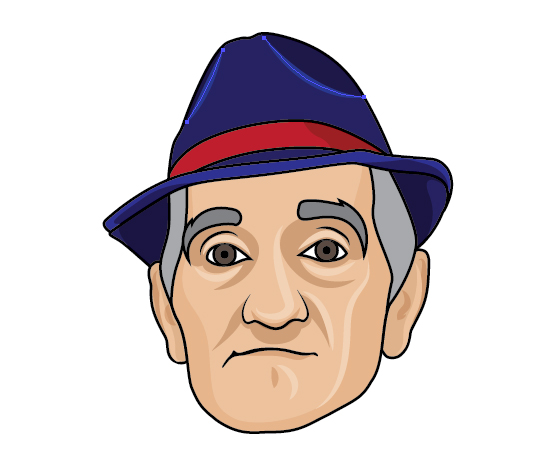
Add highlights to the hat to emphasis the dents either side at the top.
Step 12
Use Width Profile 4 to add triangle strokes to the hair with the Paintbrush Tool (B). Be consistent where you draw the lines in areas of shadow. So underneath the hat and at the bottom of the eyebrows and hair. Once Grouped together (Ctrl + G), set the group to Blending Mode Multiply.
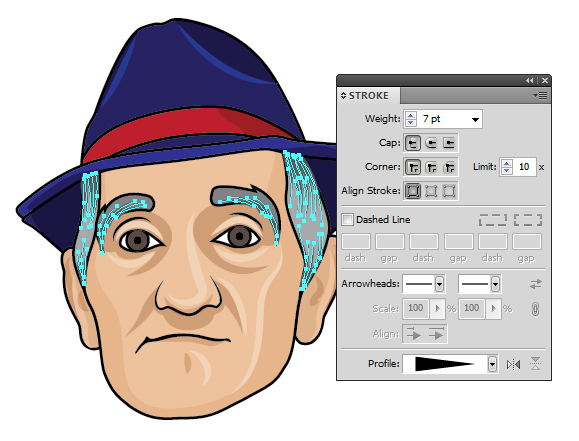
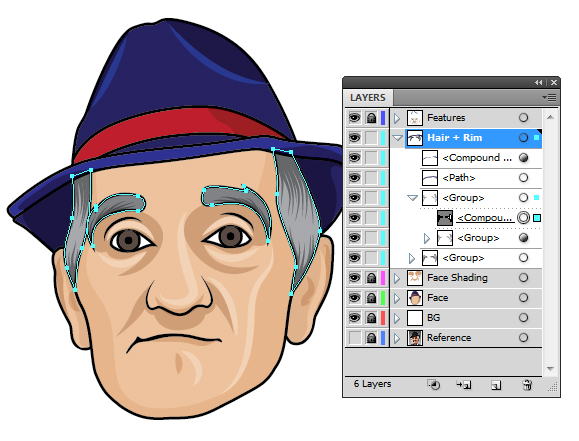
Create a Compound Path (Ctrl + 8) with a duplicate of the hair shapes and then use this to create a Clipping Mask (Ctrl + 7) with the triangle strokes.
Step 13
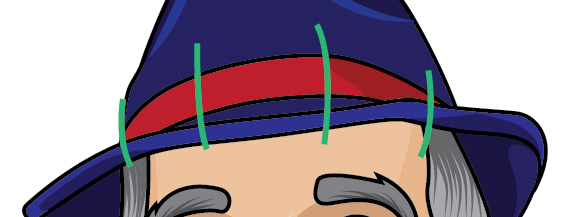
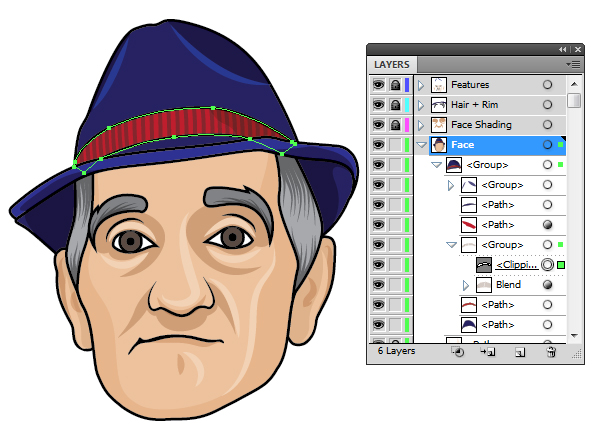
To jazz up the hat, I’m going to add a little decoration to the band on the hat. I’ve done this by drawing four lines along the curve of the band.
Then creating a Blend (Ctrl + Alt + B). Go into Object > Blend > Blend Options to change the Spacing to Specified Distance and the value to 12pt. Click on OK once done.
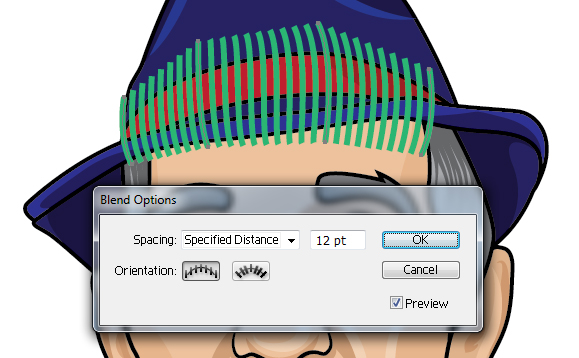
Then add the blend to a Clipping Mask (Ctrl + 7). I’ve set the Blend to Blending Mode Multiply to prevent any color altering the black line art.
Step 14
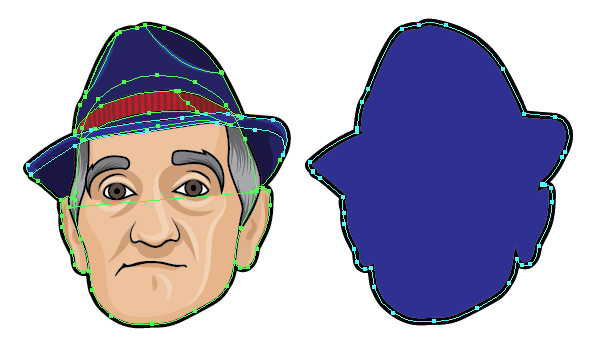
Select all of the large shapes covering the face and duplicate them. Use Pathfinder > Unite to create one large shape. Place this shape underneath the avatar and give it a thick Stroke Weight of 14pt. This will give the overall portrait a thick outline.
Step 15
Use the Ellipse Tool (L) to create two even circles with a white fill and a 1pt black stroke. This will be the light reflection in the eye. Duplicate the circles and place them on the other eye.

Step 16
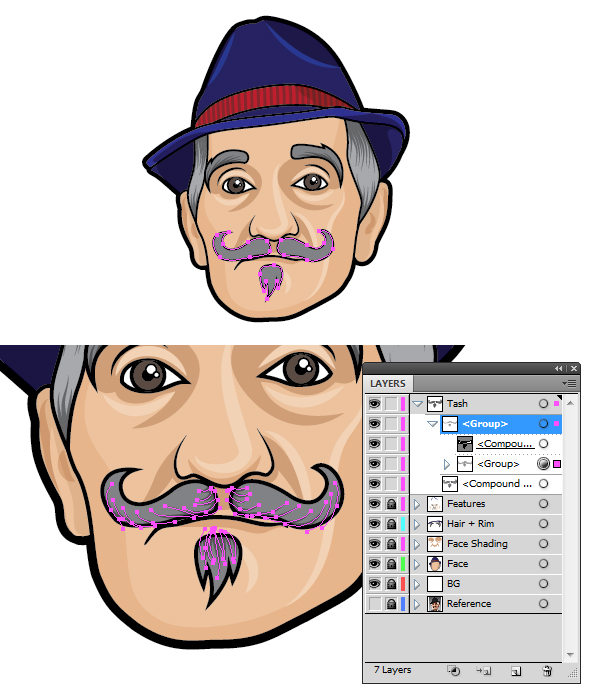
Although we have a complete avatar, let’s mix it up and add some customization. Perhaps you could try adding some facial hair. This is easily done copying the same process as the hair. Begin with using the Pen Tool (P) to draw the shapes for the mustache and beard. Use the same fill color as the eyebrows. Then add triangle strokes to give it shading and detail. Place these in a Clipping Mask (Ctrl + 7) once done.
Step 17
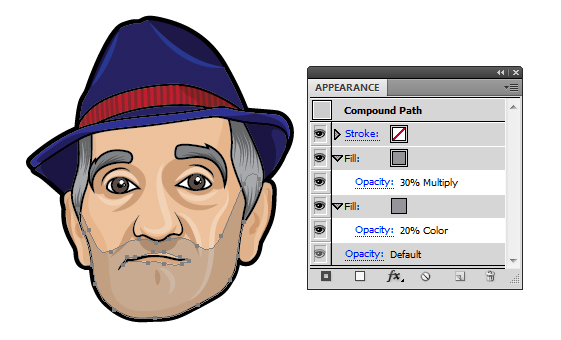
Perhaps you just want to add a "5 o’clock" shadow/stubble? Draw a shape over the top of the lower portion of the face and use Pathfinder > Minus Front to remove a shape from the mouth area. Duplicate the face shape and with the stubble shape use Pathfinder > Intersect.
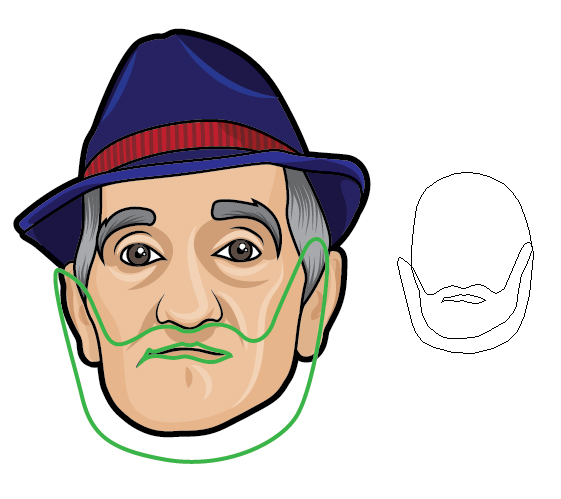
Use a grey fill color to dull the skin to a grey tone and then darken it via the Appearance panel as shown below. Alternatively you could use a dot pattern for this, however it may add too much detail to an otherwise simple looking avatar.
Step 18
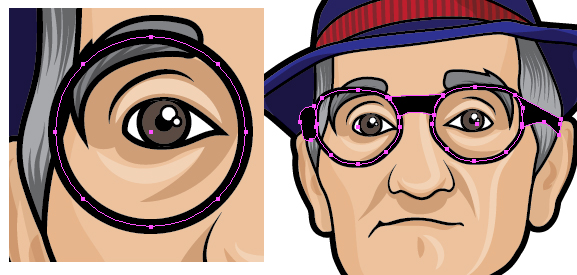
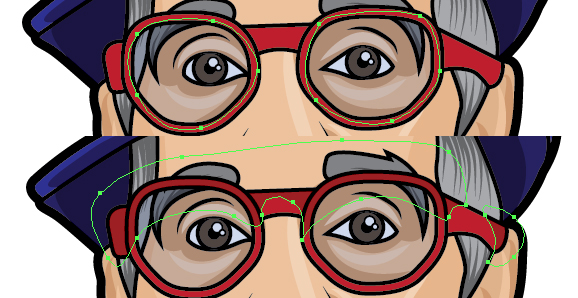
Perhaps you could even give your avatar some glasses! Using the Add Anchor Point process from earlier on, draw an Ellipse (L) over the eye. You could leave the shape alone to create "Lennon" style glasses, but that would be too easy for us right? Use the Direct Selection Tool (A) to modify the points around the glasses. Duplicate the shape and Reflect it for the other eye.
As the face is on a slight angle, I’ve selected the right most points and shifted them several places to the right. Both shapes are given a thick Stroke Weight of about 8pt. I’ve drawn in the rest of the frames with the Pen Tool (P).
Step 19
Select the round shapes for the glasses and Object > Expand them to fill shapes.
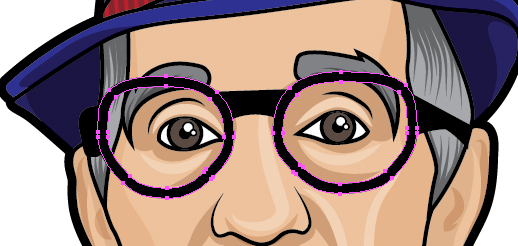
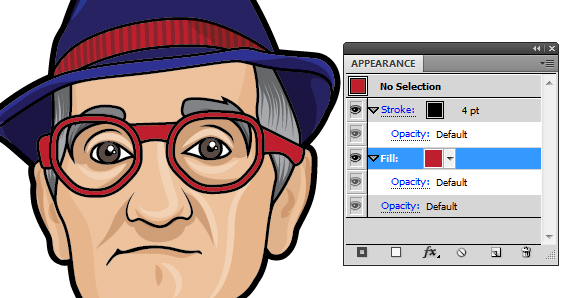
Give all of the shapes a 4pt Stroke Weight and a fill to your liking. I’ve went for a red shade to match the band on the hat. He’s a stylish senior!
Step 20
Use the Pen Tool (P) to add shapes behind the glasses with a blue fill. Set the Blending Mode to Multiply and Opacity to 20%. If you’re wanting to create a sunglasses effect, you could use a much higher Opacity with a grey or black fill.
I’ve then added shading on the glasses within a Clipping Mask (Ctrl + 7).
Step 21
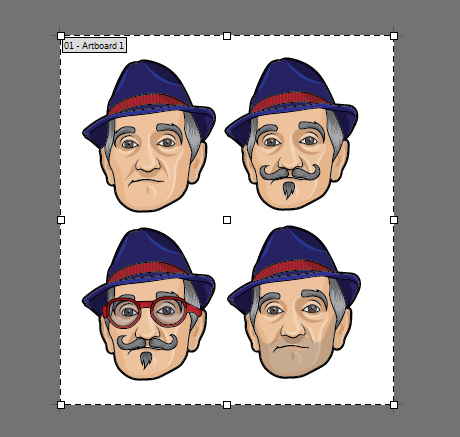
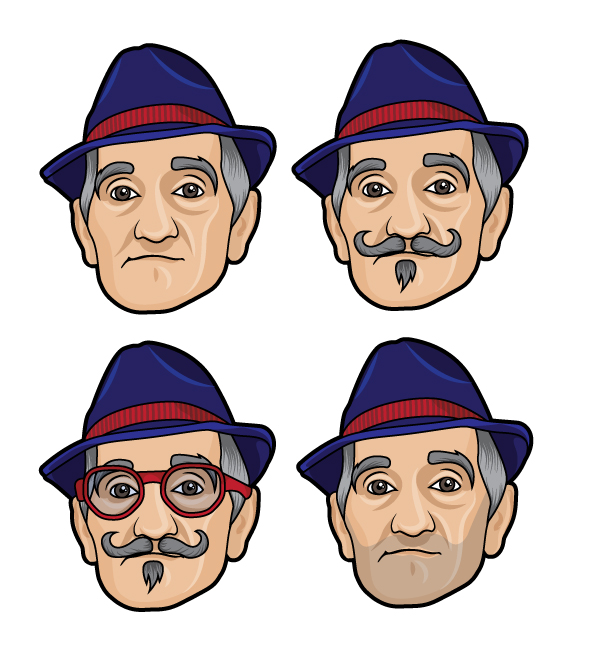
To finish off, I’ve duplicated our gentleman and arranged them to show the different features he has. I’ve then used the Artboard Tool (Shift + O) to modify the dimensions of the Artboard.
Conclusion
Why not try creating your own avatar or perhaps ones of your friends and family? The key points to remember are to use simple shapes with minimal points, don’t be afraid of bold Stroke Weights and bold colors. Finally, don’t forget to have some fun! Add bonus items to customize your avatars. Until next time, happy avatar making!
{excerpt}
Read More