One to rule them all… Wait, that’s not the story. But, of course, every Lord of Darkness needs some dark, evil weapon that will make their enemies cry in fear just looking at it. Today we’ll create an Evil Sword of Evilness in Adobe Illustrator, perfect for the vector warrior! So, let’s forge one!
Step 1
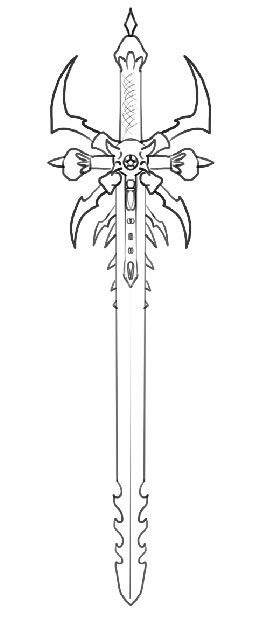
Everything starts with an idea – no program will create it for you. So before you start, you will need to sketch a concept of your sword. In this tutorial you can use my idea. It’s pretty simple, but this way it makes a good material for learning.
Step 2
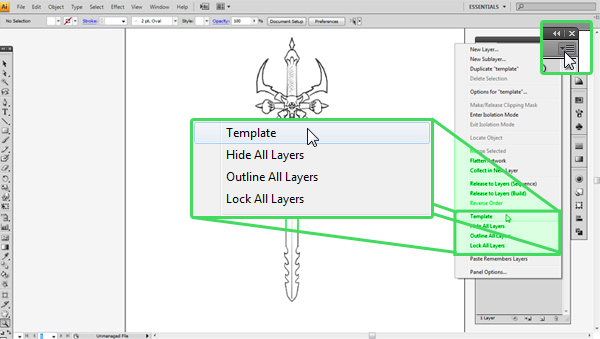
Create a New Document and File > Place your sketch on the canvas. It’s going to be your template, a base for every part you’ll be building, so it should be there, ready to help you, but not in a disturbing way. To achieve this select the layer with the sketch, open Layer Menu and choose the option "Template".
Step 3
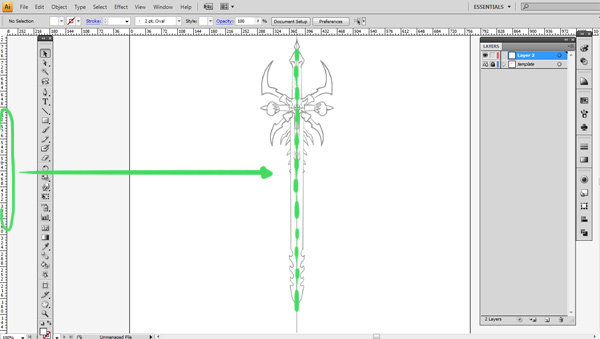
Now the layer is locked and slightly transparent, perfect for being there without distracting you in your work. The other thing you need to do before you start is to prepare a guideline (Guide). It’s clear that the sword is symmetrical, so creating a visible symmetry axis will be very helpful in avoiding double work. Click Ctrl + R (or, if you don’t like shortcuts, choose "Show Rulers" option from View Menu). When the rulers appear, click somewhere on the left one and drag it to the symmetry axis. The line that showed up isn’t a part of the picture, and you can hide it whenever you want by clicking Ctrl + ;.
Step 4
Time to start forging for real! You’ll be building all the parts one by one, so it’s important to keep your workspace tidy and consistent. If you started from the the blade, you’d cover the decoration on it, and that would cause a lot of problems. The smartest way will be to start from "the highest" part of the sword (the gemstone, then the horns, the ball, and so on). Illustrator automatically adds every new layer above the previous one, so don’t forget to click on the template layer before creating a new one (and it’s useful to make a new layer for every part).
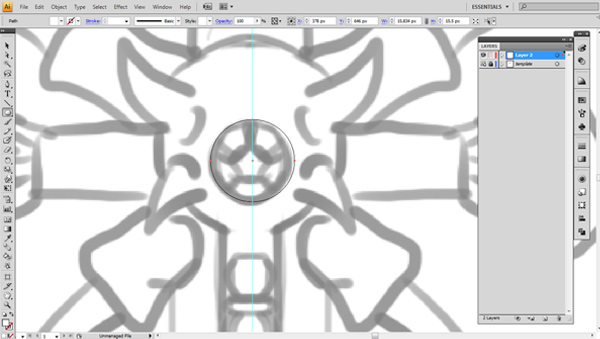
So, less talking, more working – draw a circle using Ellipse Tool (L) according to the Guide (holding Alt may help you with this). It’s not time to think about colors yet, so work in Outlines Mode (Ctrl + Y).
Step 5
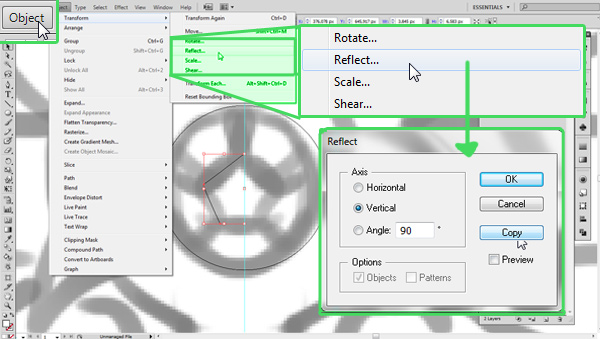
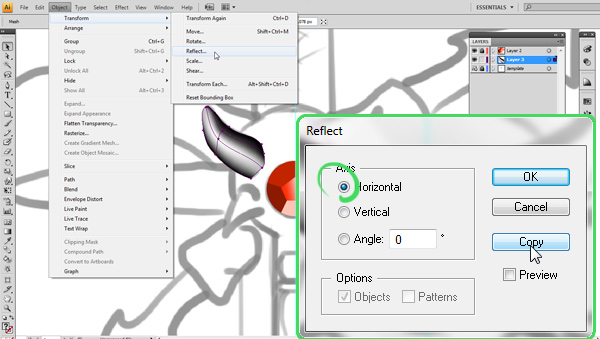
Now draw a half of pentagon with a Pen Tool (P). The other half may be made itself by clicking Object > Transform > Reflect, then choosing Copy.
Step 6
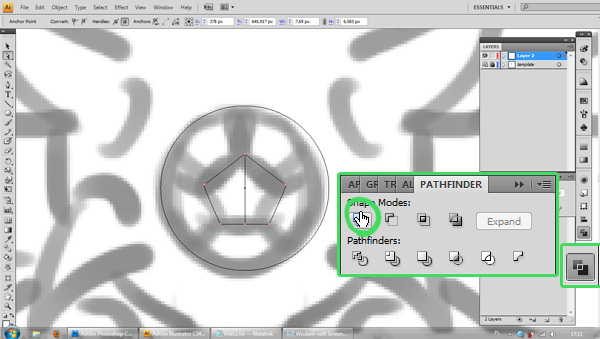
Move the half that appears to its destination, select them both, then click the Unite option in the Pathfinder Menu. This will – surprise – unite the two halves.
Step 7
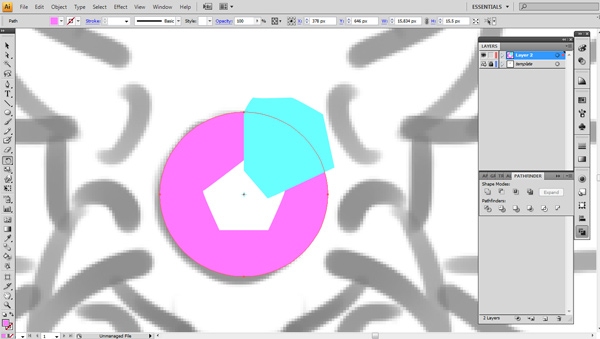
Now go out of Outlines Mode (Ctrl + Y), so that it’s easier to see this part (the colors are still random and not crucial). Draw one facet without caring about its coming out of the gemstone area.
Step 8
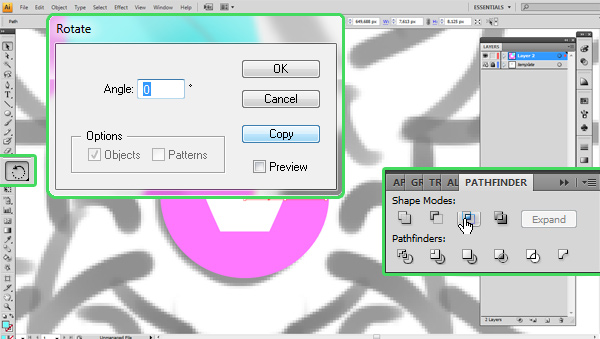
To get rid of the part that’s coming out, you’ll use a common trick. Copy the circle by using Rotate Tool (R) and then clicking Copy without changing the angle (it’s the simplest way to copy something without changing its position). Then select both circle and the facet (hold Shift to select more than one object), and choose Intersect option from Pathfinder Menu.
Step 9
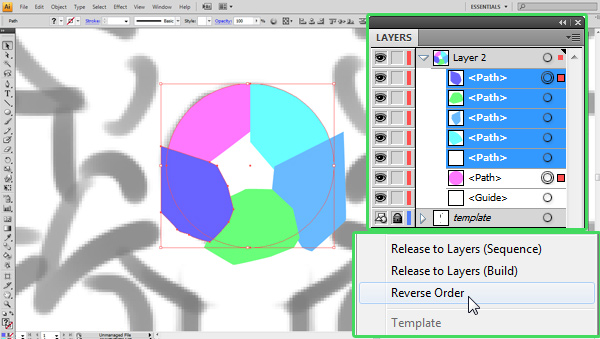
Now repeat steps 7-8 to create all the facets left. As you can see, they’re now totally messed up, one covering another. To fix this, select all the layers except of the circle (holding Shift will help you here too) and choose Reverse Order option from the Layer Menu.
Step 10
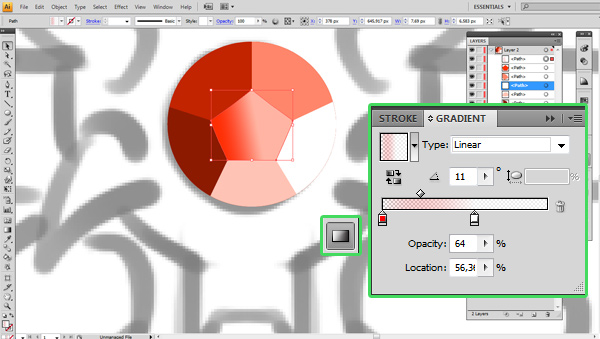
Now it’s time for the colors (you’ve been waiting for it, haven’t you?). Let’s say the light source is somewhere on the right, so use darker shades of red on the left and lighter on the right. Cover the upper facet with some neat, simple gradient, that will be clearly visible from the distance (I used two copies of the facet – the lower one’s brightly red – that’s why the gradient is slightly transparent).
Step 11
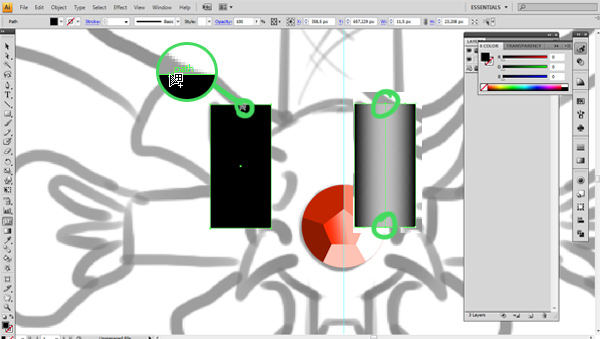
The "horns" will be a good opportunity to try a Mesh Tool (U). It’s very powerful tool that can be used to achieve a realistic effect in Illustrator, but in this tutorial I’ll show you just basics of it. Draw a black rectangle using Rectangle Tool (M), then pick Mesh Tool (U) and click somewhere in the middle of the rectangle. It will add two points that can be selected and recolored – and the color of them will flow smoothly into the colors around. Try it – select these two points (using Direct Selection Tool (A) or Lasso Tool (Q) with Shift pressed) and put a light grey on them in the same way you change color of a shape or line.
Step 12
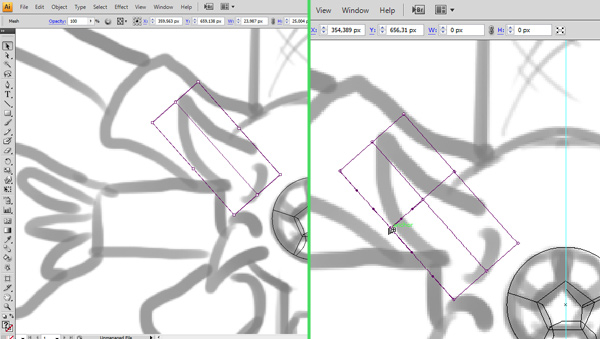
Go into Outlines Mode (Ctrl + Y) and rotate the rectangle so that all the horn was inside it. Then add another mesh points to get more control over the shape. Why did I say control? Mesh points can be moved to achieve any shape, and when they are, their color goes with them.
Step 13
This part may seem hard, but it doesn’t really differ that much from manipulating common Path with its anchor points. Use Direct Selection Tool (A) to move the points and their handles (if they start to come into each other, tangling, just shorten them, dragging them closer to their points), then – if you find it fit – you can add some more points to get a better color effect. When it’s done, go to Object > Transform > Reflect and this time use Horizontal option. When you get your copy, resize it so that it fits the sketch.
Step 14
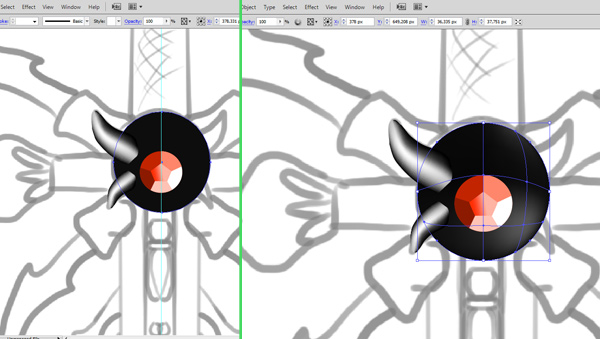
The next step is the ball. Draw a black circle with the middle on the Guide, then add some mesh points with the Mesh Tool (U). This is an easy way to achieve 3D look.
Step 15
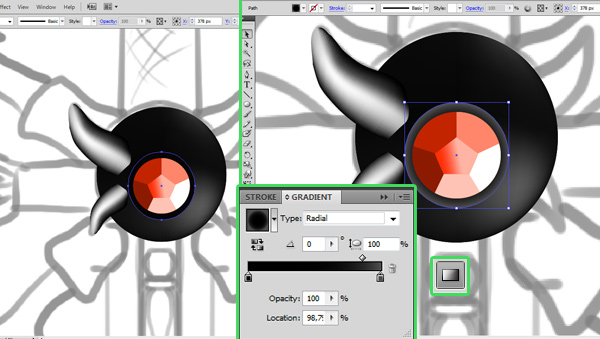
It doesn’t look too real when the gemstone is put directly into the ball like this, so add black circle under it and put a radial gradient on this.
Step 16
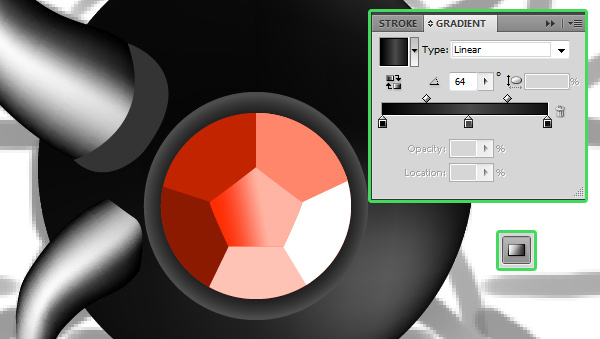
The horns shouldn’t be put directly on the ball too, so add some surroundings to them. Well, at least to one of them, reflecting and resizing the copy of it afterwards.
Step 17
It’s time for the hilt. You can use a simple mesh to get a nice look.
Step 18
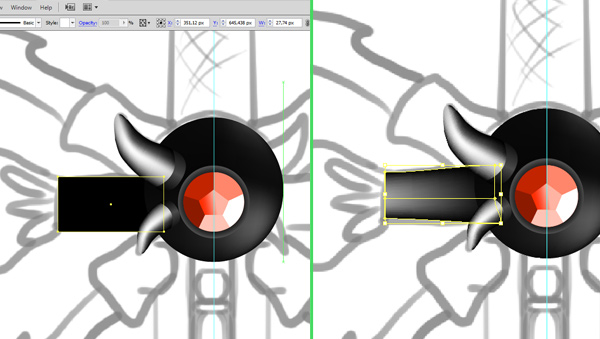
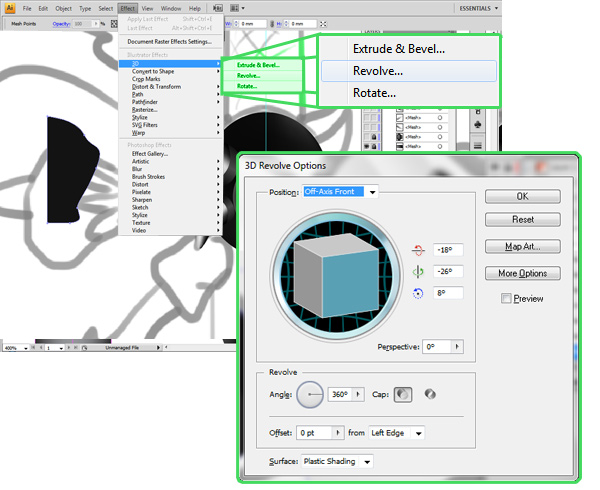
Draw one half of the knob, then go to Effect > 3D > Revolve and see the magic!
Step 19
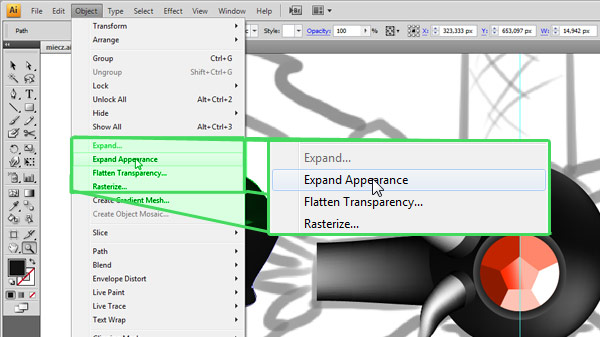
The shape you’ve just created is calculated in real time, so if you rotated it now, you’d get something completely different. To avoid it, choose Object > Expand Appearance. Then you can rotate your object and move it to its place.
Step 20
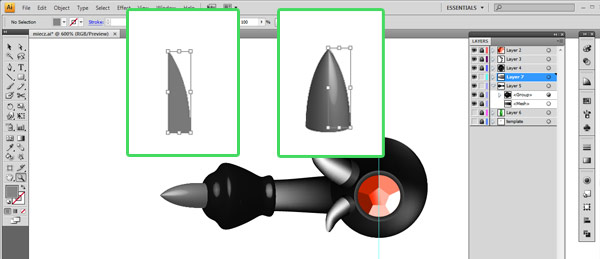
Use the way described above to create spine.
Step 21
Now let’s add a little poison bottle. You know, it’s a technology, poisoning all the blade, so that even a tiny graze becomes deadly.
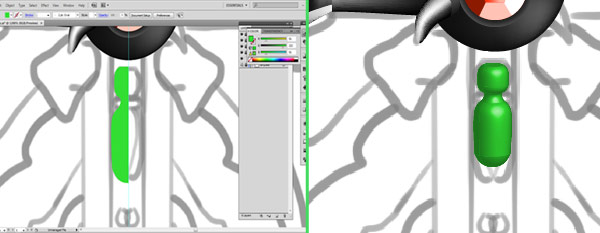
Step 22
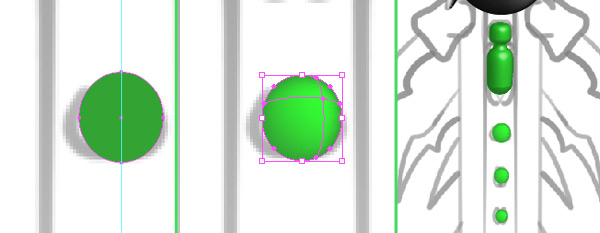
The poison soaks into the blade by special tube that can be seen trough three holes. Draw a circle, then use Mesh Tool (U) to make it more 3D-ish. When it’s done, copy and resize the circle.
Step 23
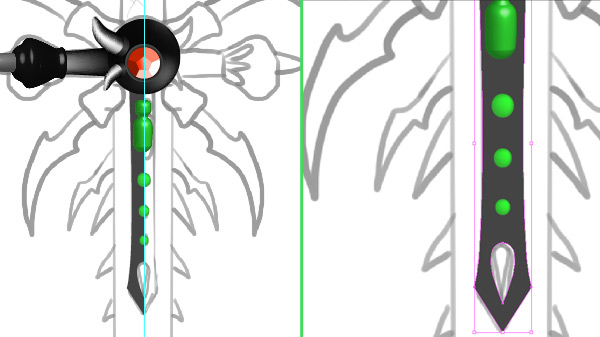
Now draw a half of this blade decoration and then Copy, Reflect and Unite as covered previously.
Step 24
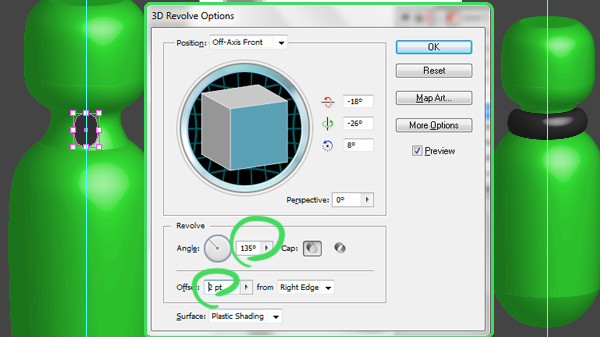
The bottle should be incorporated into the blade somehow, so add a ring around the neck of the bottle to do this. Draw an oval with the Ellipse Tool (L) and go to Effect > 3D > Revolve, then use values from below. Keep the preview on, so that you can see what you’re doing.
Step 25
Some of our enemies may be too slow-thinking to realize the sword you’re wielding is so deadly. Let’s help them and draw a little skull that will scream out: "yes, it’s poison, RUN!". Steps 5-6 will help you here, if you can’t remember this trick.
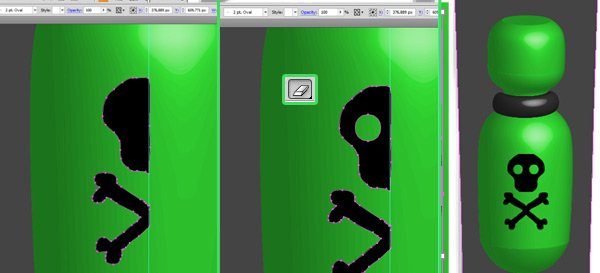
Step 26
The blade should shine! There’s no use of matt blade, right? Draw two parts of the blade and add some gradient, remembering about the light source you placed on the right in Step 10.
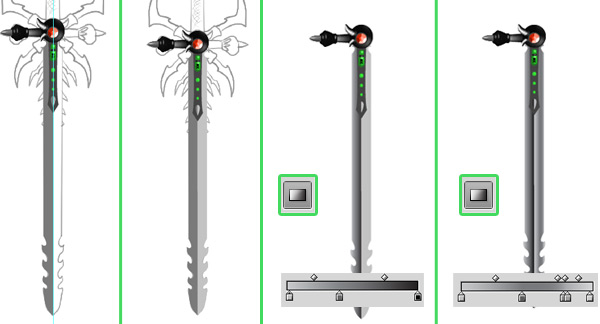
Step 27
The blade decoration looks a bit flat, so copy it, move the copy under the original and put a lighter color on it. It will simulate an edge.
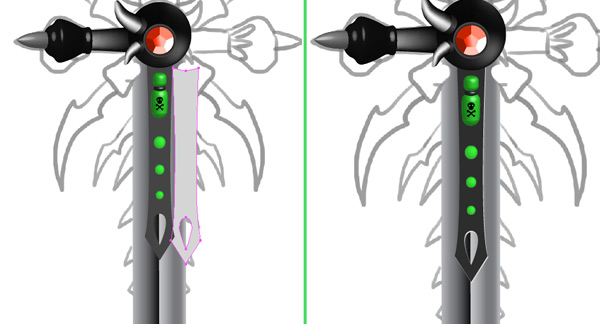
Step 28
You probably guessed the hilt may be done with the trick described in Step 18 (Effect > 3D > Revolve). To save your time, copy the knob and the spine you created before, and fit them into the hilt.
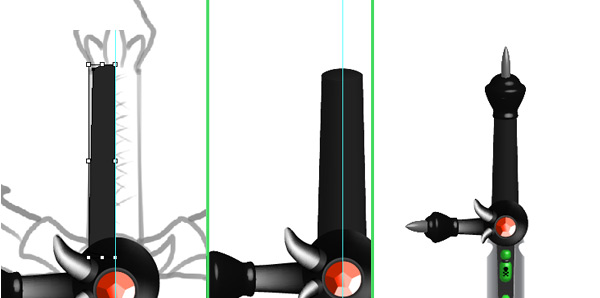
Step 29
Let’s now make the hilt studded, so that it’s easier to hold. Now I’ll show you very interesting trick that will save you a lot of time in driving all the studs in. Start with one stud, drawing a circle and putting a radial gradient on it, then copy it and move a few inches away. Select them both and choose Object > Blend > Make, then customize the blending you’ve just made by going to Object > Blend > Blend Options.
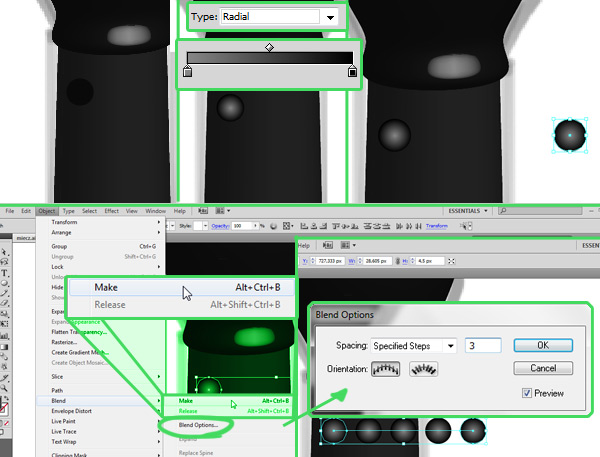
Step 30
Select all the circles and warp them to fit 3D effect by going to Effect > Warp > Arch.
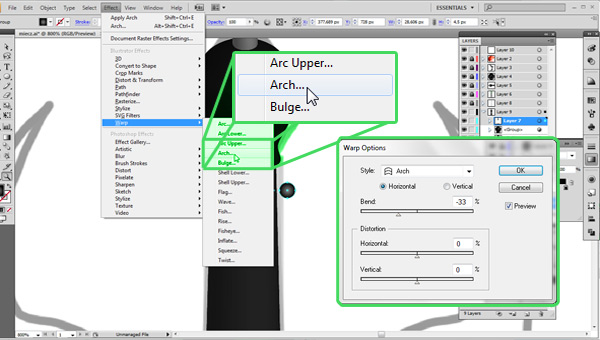
Step 31
Select your studs line and convert them to common object by going to Object > Expand Appearance. Then copy it, place it across and resize them both to fit the hilt. When you find perfect position for them, just Blend them (Object > Blend > Make). Voila! That was fast, wasn’t it?
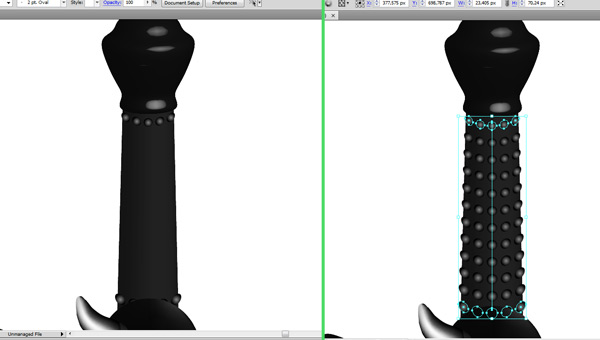
Step 32
Repeat Steps 18-19 and Step 13 to create the additional blades handles. That should be easy now, after all this work you did.
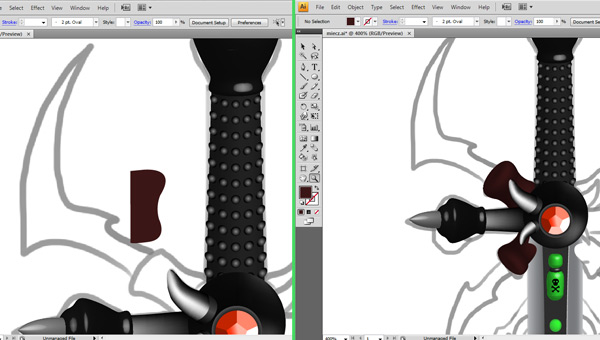
Step 33
Use Pen Tool (P) to draw the blade, then put shiny gradient on it and – of course – reflect copy, resize and adjust.
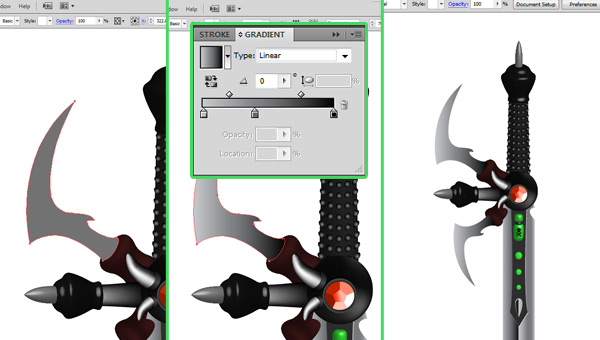
Step 34
Now select all the parts that need to be reflected and… yes, reflect the copy of them. Remember, don’t group the copy, or you will lose the order of layers.
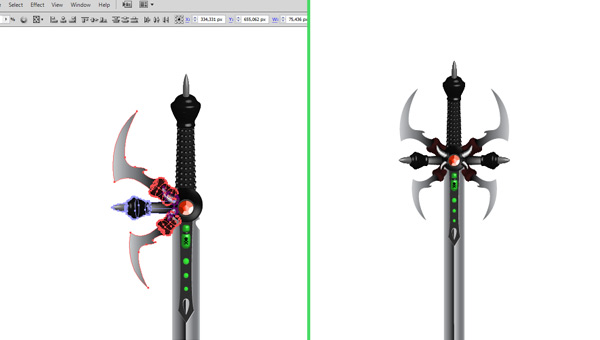
Step 35
And, suddenly, I feel I don’t like this brown of additional-blades-handles. It just doesn’t work here, does it? So, if you think so too, there’s an easy way to fix them. Go to Edit > Edit Colors > Recolor Artwork. Experiments are good and black given to revolved objects adds an amazing contrast.
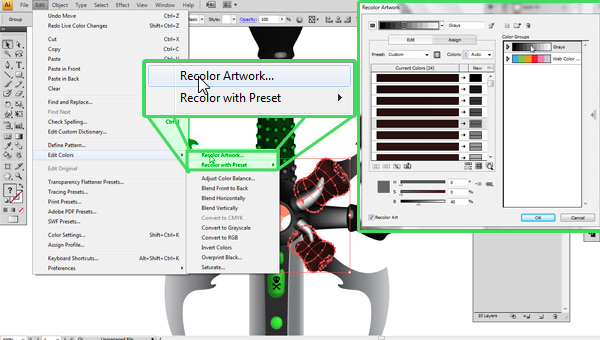
Step 36
Seems like I forgot about some blade features. It’s OK – let’s add them now with the Pen Tool (P).
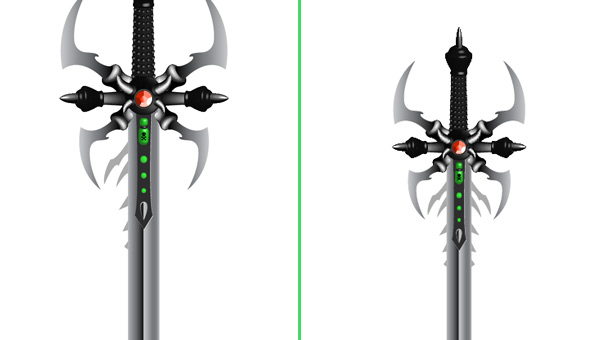
Step 37
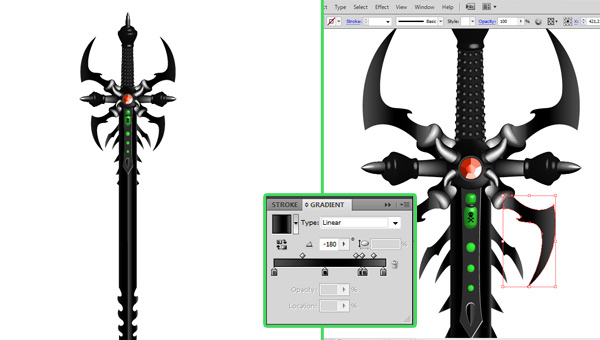
If you like the effect, you can stop now and be proud of yourself. But I still don’t like it, you know, it should be black and dark! You’ve seen the magic of recoloring… why don’t you use it again?
Step 38
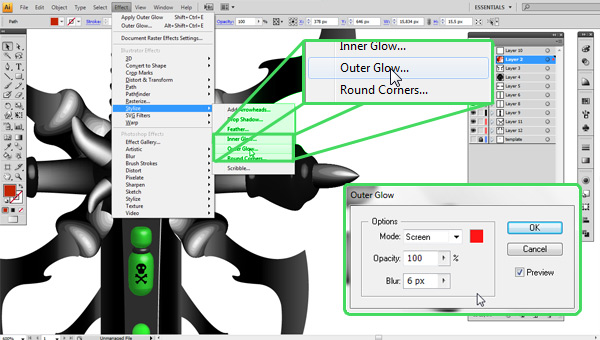
And now the icing on the cake! Let’s say the gemstone in the hilt is a magic one, full of evil energy, and it should radiate it! So go to Effect > Stylize > Outer Glow and check it out.
Conclusion
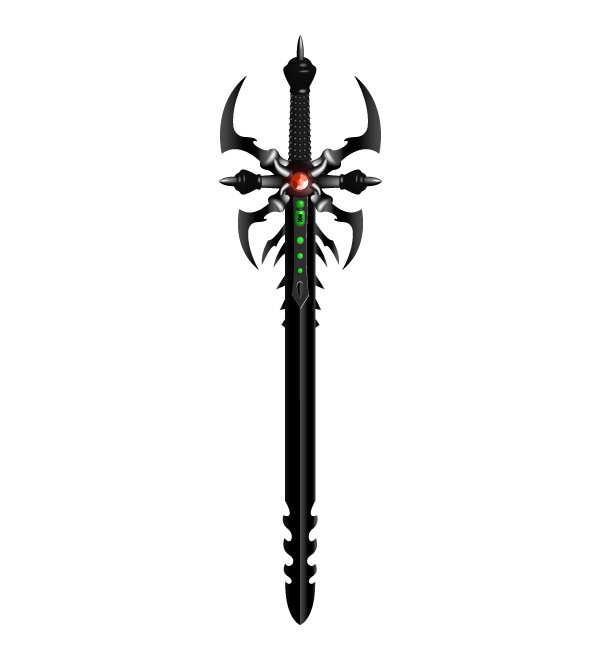
And it’s done! You have now your own Evil Sword of Evilness, that will give you some dark powers… over Illustrator skills. Use it wisely! Or not. Thanks for reading!
{excerpt}
Read More