In this quick tutorial you will learn how to create an original vector shampoo bottle in two color designs. We will use a Shape Tool, Meshes, Gradients and Warp Effects. So let’s get started!
Step 1. Creating a Bottle Shape
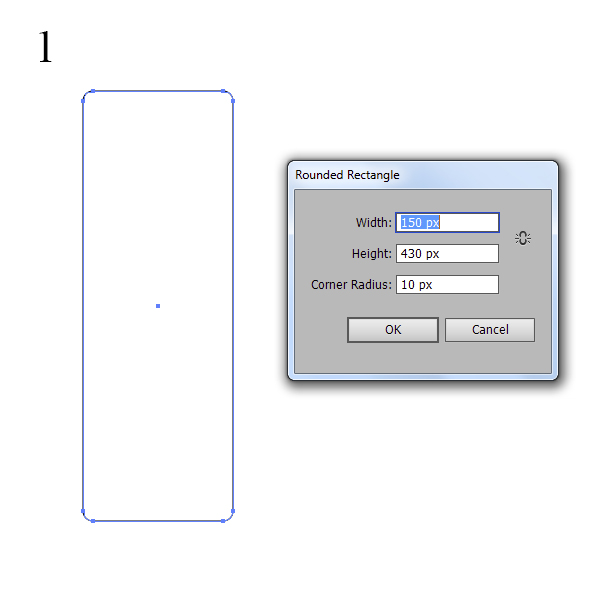
First open a New web document with the dimensions of 600 by 600px. Using the Rounded Rectangle Tool, draw a 150 x 430px rectangle with corner radius 10px.
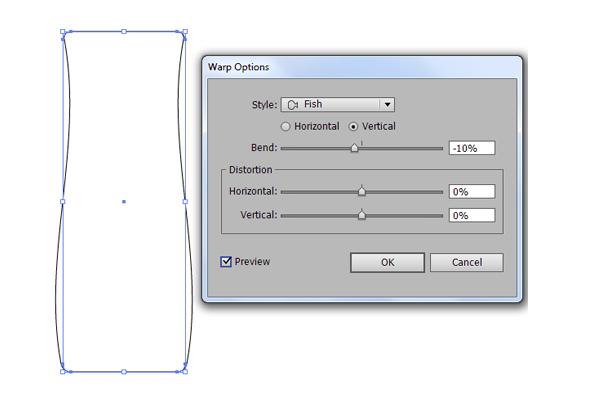
Select a rectangle and go to Effect > Warp > Fish. In the dialog option choose Vertical and the Bend put a -10%. When you are finished with it, go to Object > Expand Appearance.
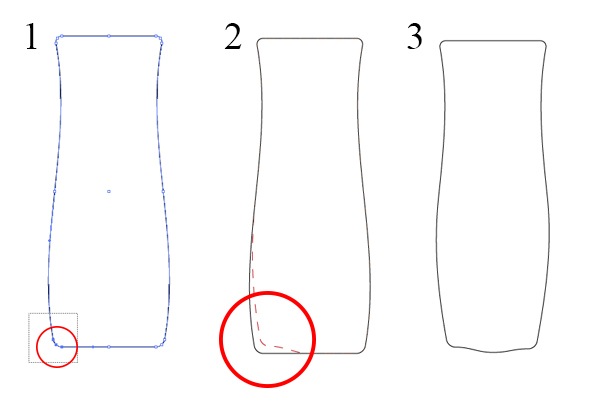
Now we will move some of the points in the shape to get a more shampoo bottle style shape. Select the shape and go to Object > Path > Add Anchor Points. With the Direct Selection Tool (A), select a point in the lower corner and move it as shown below. Repeat for both lower corners.
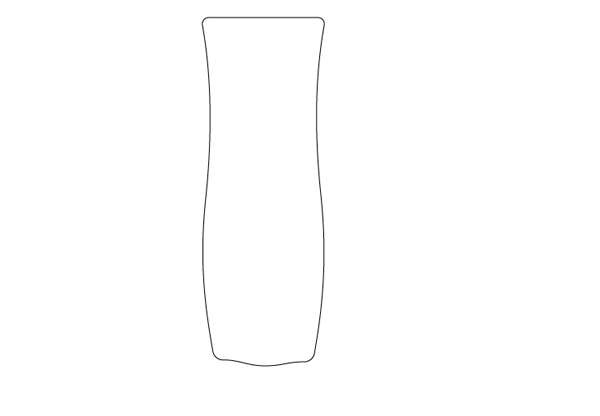
You can drag other points as you wish for a better result. Here is mine.
Step 2. Creating a Bottle Cap
Using the Arc Tool and draw an arc 170 x 170px. Rotate it on 45 degrees.

Place the arc in front of with shape bottle. Select two shapes and Align them on a Horizontal Center.

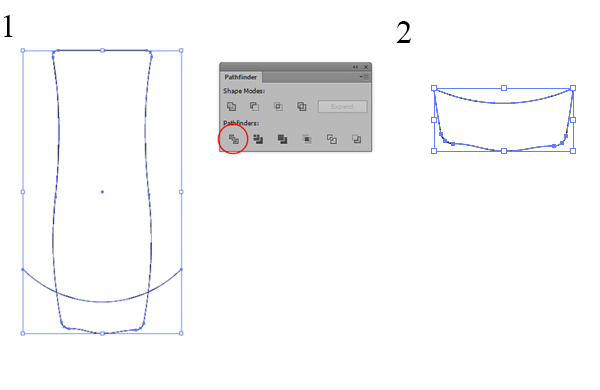
Duplicate the original bottle shape and the arc. Use Pathfinder > Divide to create two shapes. Delete the top portion of the two so you’re left with what will be the bottle cap.
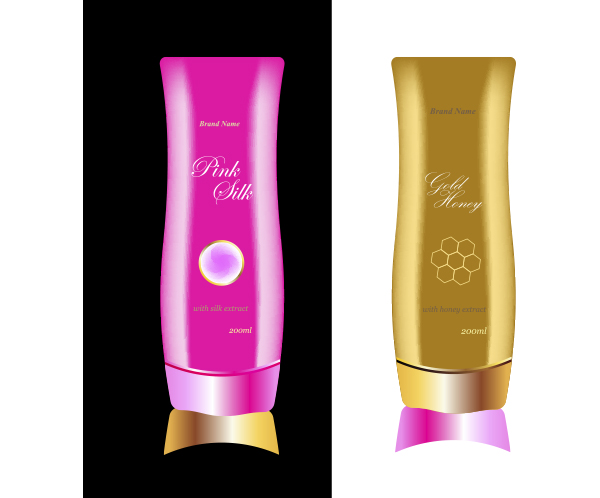
Step 3. Coloring the Bottle: "Pink Silk"
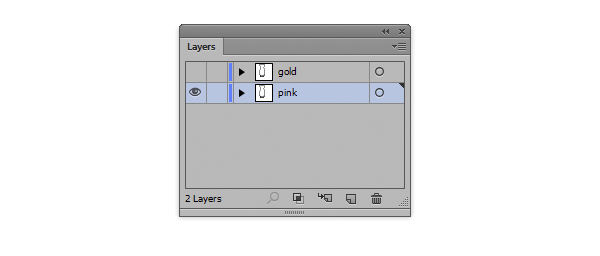
Firstly, go to Layers panel, make a copy of your layer and hide them. We will work with first layer.
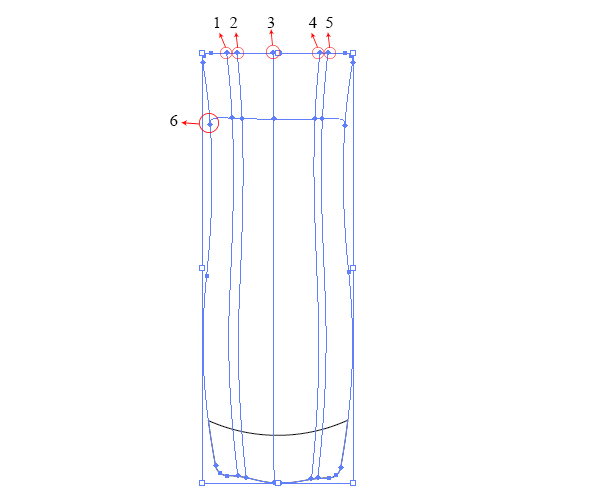
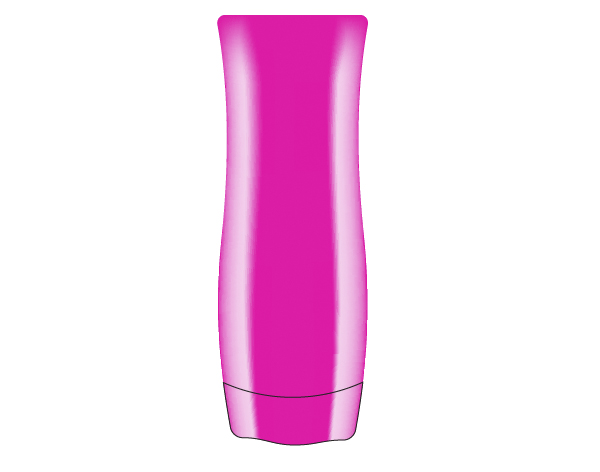
Select your cap and Lock it by clicking Ctrl + 2. Now select your bottle shape, if you have any outline on them, set it on null. Using the Mesh Tool (U), add points by clicking on the shape. Use the image below as a reference.
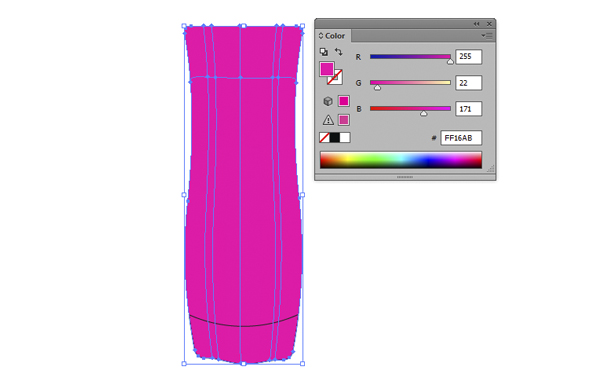
Select a bottle shape and color it pink color: R 255, G 22, B 171.
Select the nodes with the help of Direct Selection Tool (A) and fill them in light pink: R 255, G 208, B 238.

Now you can move some of the points to give a smoother result on the bottle. When you are done, go to menu Object > Unlock All.
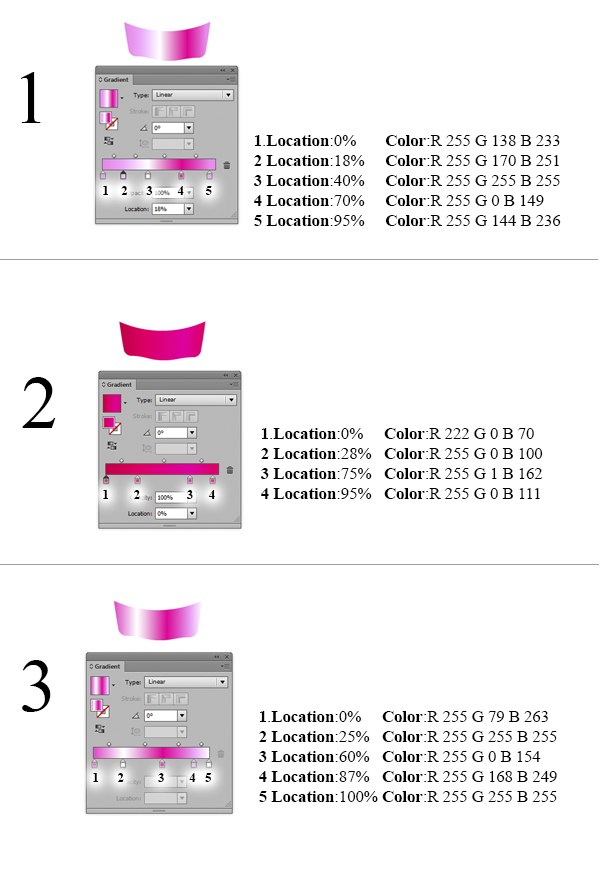
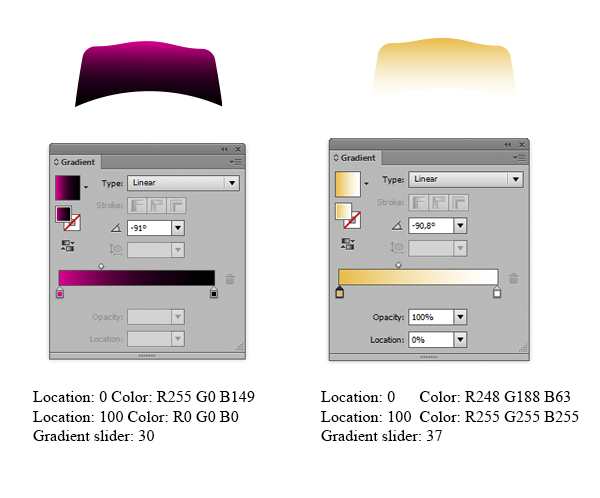
Select the bottle cap and create two copies of this, Ctrl + C and twice a Ctrl + F. Fill the caps with the following gradients.
Now put them together as shown in picture
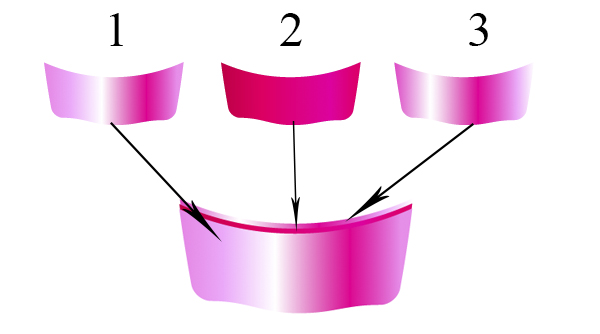
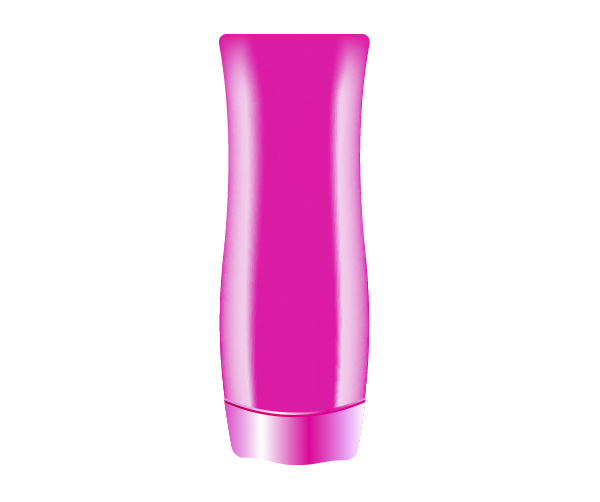
Place the cap with your bottle shape.
Step 4. Coloring the Bottle: "Gold Honey"
Now to color the second layer. Do the same things as you done with the pink bottle. The colors you need: main color of the bottle: R 180, G 127, B 19, highlights on the bottle: R 255, G 223, B 136. The colors of cap see in the image below:
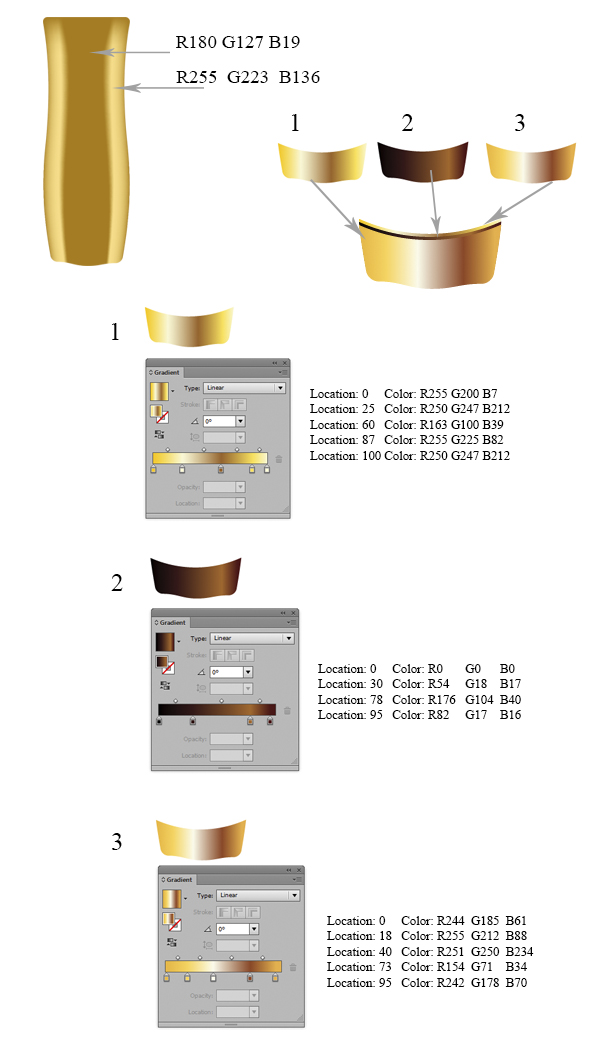
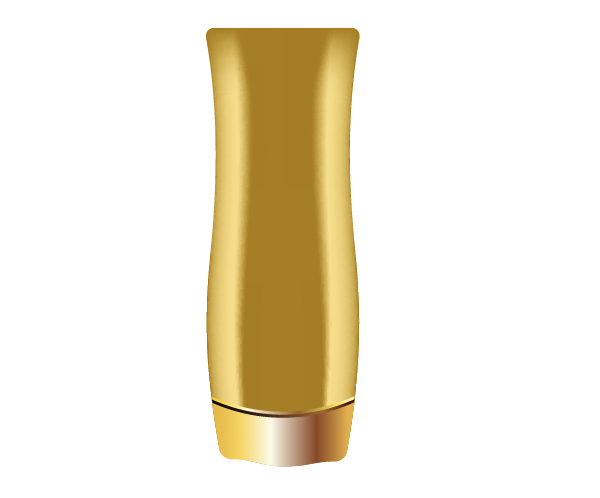
Put the cap and bottle together.
Step 5. Decorating the Bottles
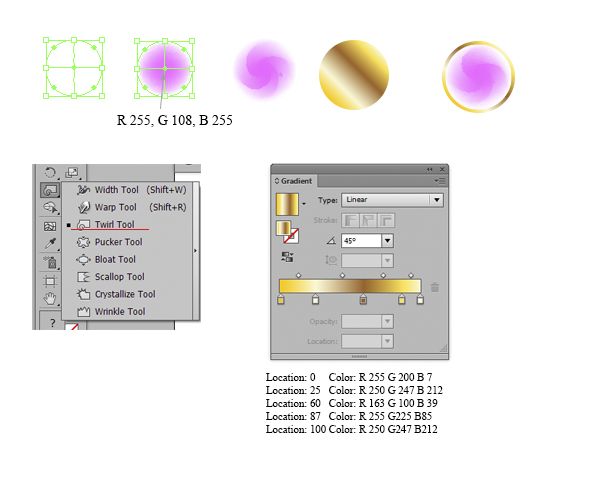
Now we will add some decorations on the bottles. For decorating a pink bottle draw a white circle 50 x 50px. Go to menu Object > Create Gradient Mesh and put rows 2 and columns 2.
Recolor central point into pink R 255, G 108, B 255. Select a middle point and use the Twirl Tool. Play with brush size (Double-click on the Twirl Tool icon) to get a different result. Draw a circle 55 x 55px, color it with gradient as shown in the image below. Align it with pink circle and send it back.
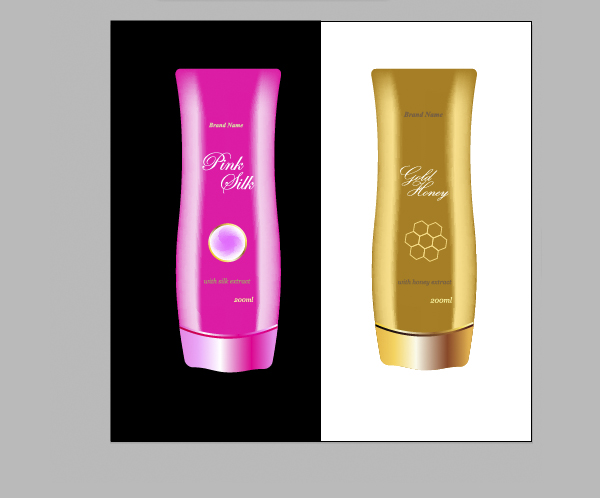
Place the circle on the bottle and add some text.

For decorating the gold bottle with the Polygon Tool. Draw a polygon 30 x 25px, set the fill color to null, and put a stroke color R255, G223, B136. Duplicate the shape to create a honeycomb pattern and then add your text.

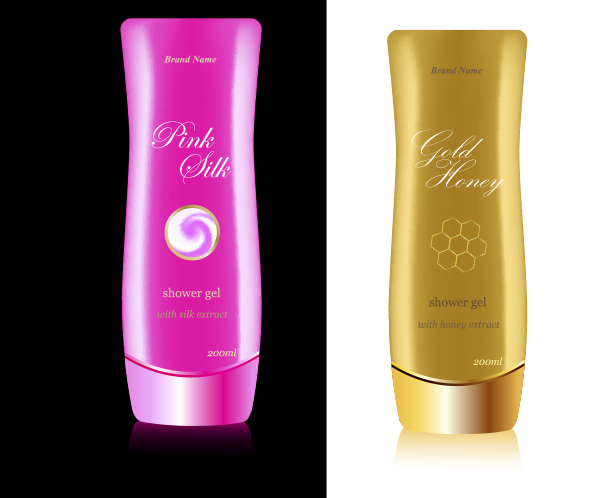
Step 6. Adding a Reflection
Now we will add a reflection. Firstly we will color one half of page in black. Draw a rectangle 300 x 600px, color it black and put it in the one side of page.
Select a front part of the cap on the both bottles, duplicate it and rotate it 180 degrees. Send them in the back of bottles.
Recolor the caps with the gradients as shown in the picture below.
Conclusion
We are done and have two different types of bottles. Try to create your own styles, using different colors and decorations.
{excerpt}
Read More