Hello everyone! If you have discovered the wonderful program of Adobe Illustrator recently, then this tutorial is good for you. It is very hard to use Pen Tool to draw beautiful and harmonious lines for perfect illustrations if you are beginner. I remember from my previous experiences. Skill comes with time. But you can draw cute illustrations without complicated shapes and intricate technique. Look at this funny basketball player. I have just created this illustration using only basic shapes like Rectangle Tool or Ellipse Tool and simple effects. And now let’s see how it’s done.
Step 1
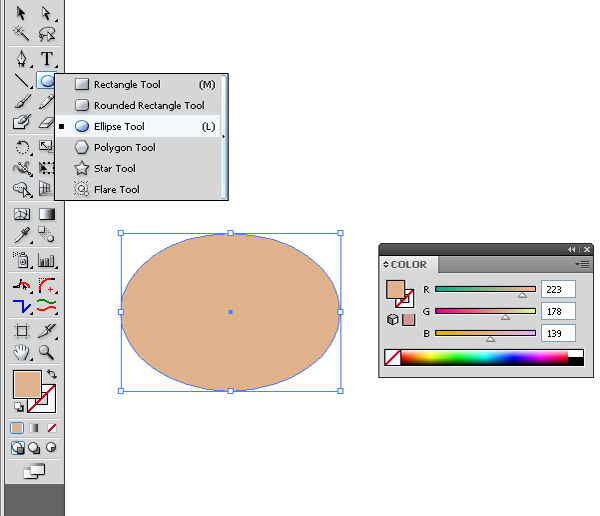
Take the Ellipse Tool (L) and draw an ellipse as shown in the image below. It will be a face. You can take the color from the Color Panel.
Step 2
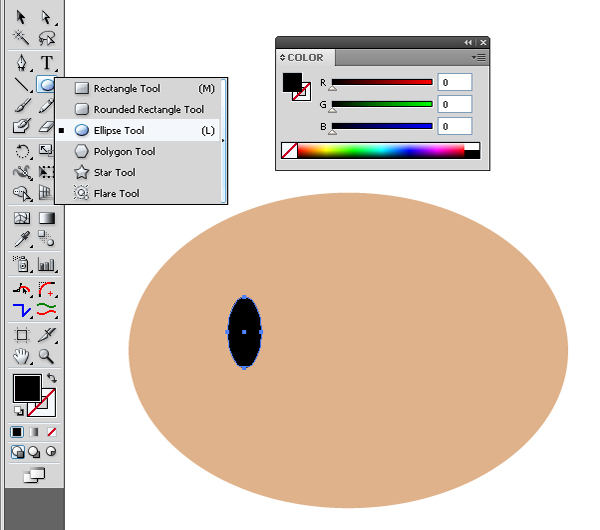
Next draw another ellipse for an eye over the first one. I use zoom to see it clearly. Use black color.
Step 3
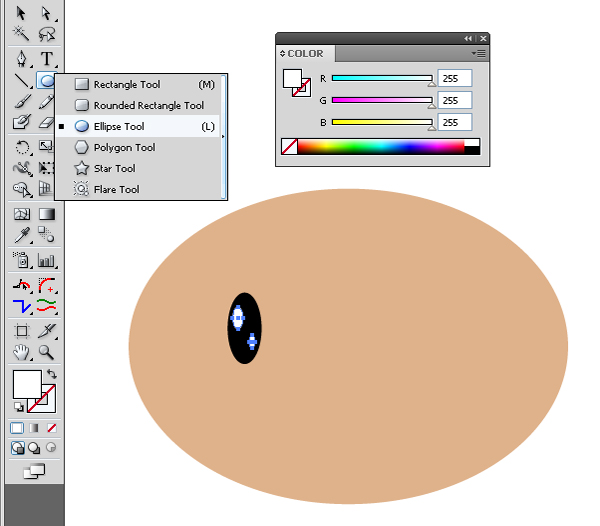
Add two more ellipses like the eye from the previous step, but make them smaller and white. Now it looks much better. Don’t forget to group the components of the eye. Object > Group (Command+ G).
Step 4
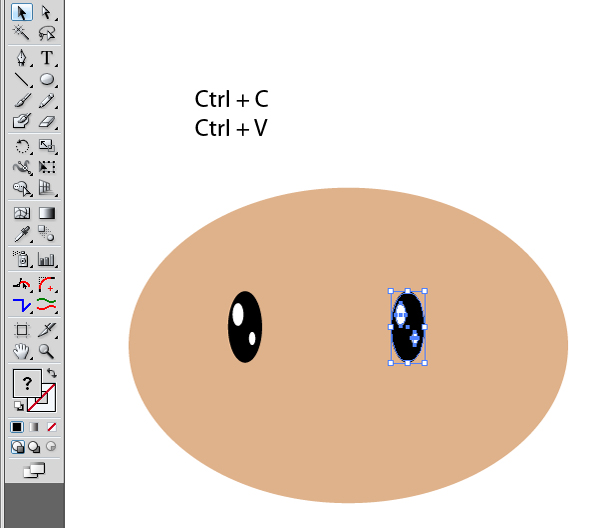
Now just make a copy of this eye. Command + C and Command + V. And put it in place.
Step 5
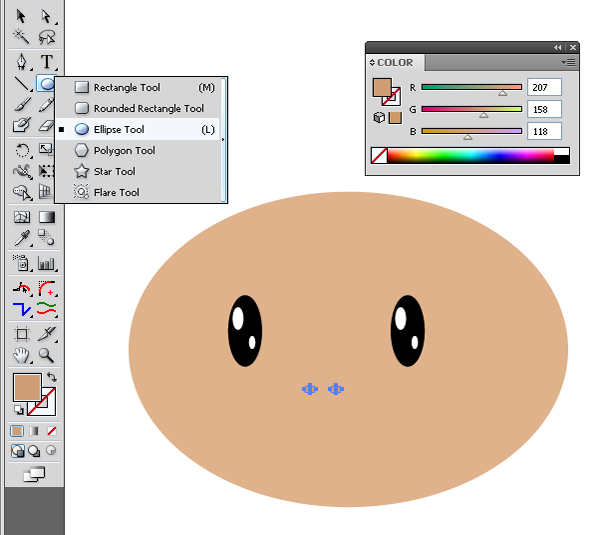
Draw two more small ellipses for a nose as shown in the image below. They should be darker than the face.
Step 6
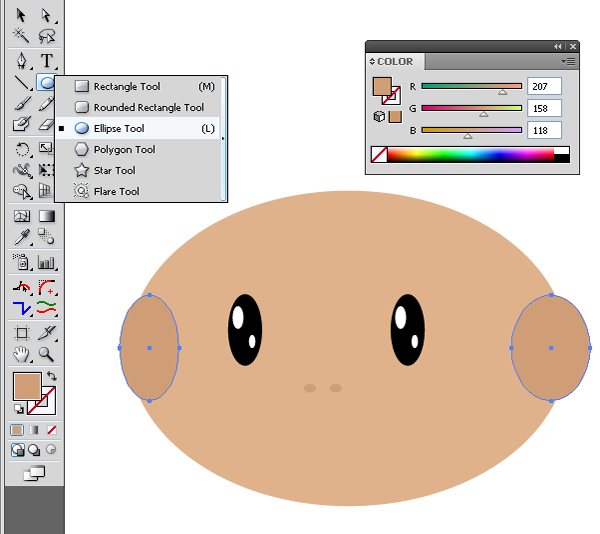
The shape of the ellipse is perfect for the ears too. Draw them as shown in the image below.
Step 7
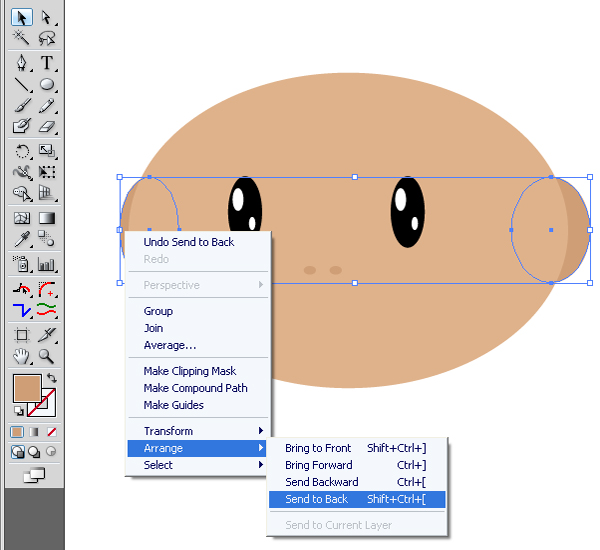
Then right click your mouse to select Arrange > Send to Back (Shift + Command+ Left Square Bracket ). Now his ears are in the usual place.
Step 8
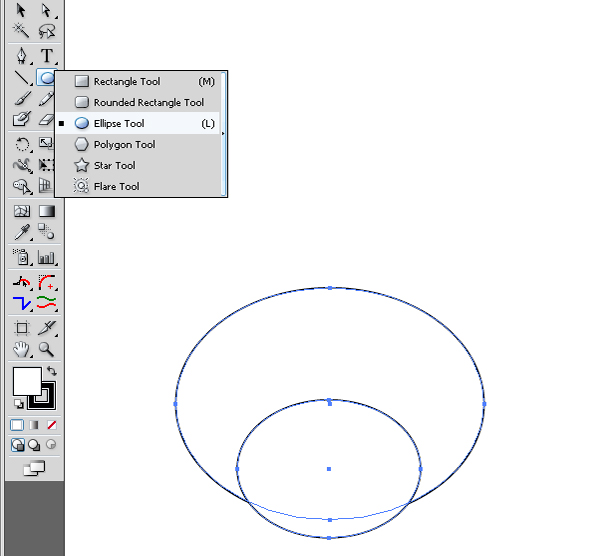
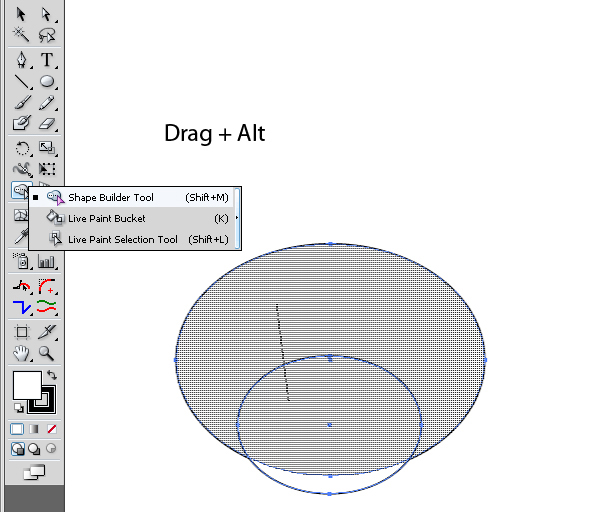
Draw a few more ellipses. They are needed to get the shape of the mouth. Make two ellipses as shown in the image below.
Step 9
Take the Shape Builder Tool (Shift + M) and drag on parts that need to be removed. Hold down the Alt key to delete unnecessary parts.
Step 10
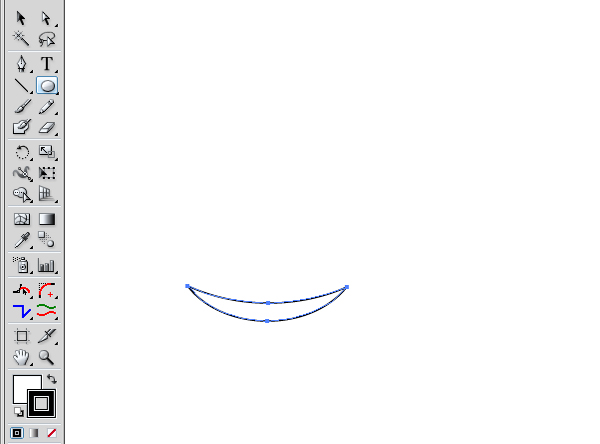
The result is the shape of a smile.
Step 11
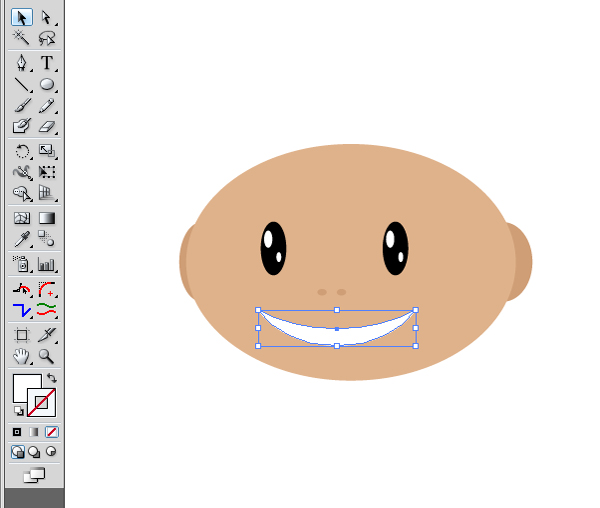
Put a smile on the face. Remove the stroke. It is no longer needed.
Step 12
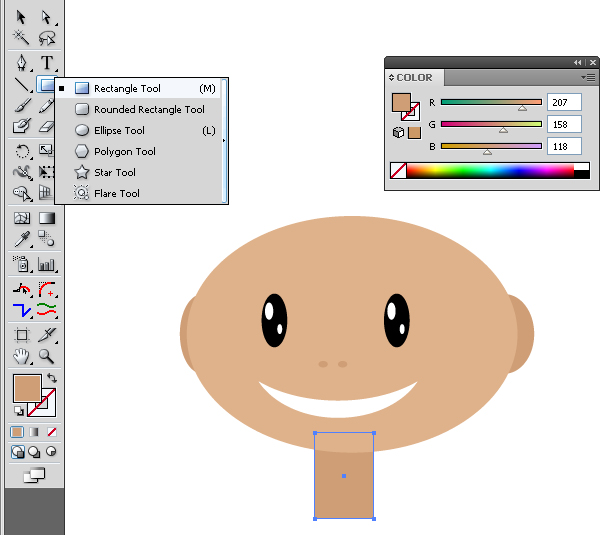
It’s time to draw a first rectangle in this tutorial. It will be a neck. Take the Rectangle Tool (M) and draw it as shown in the image below. Then use the "Send to Back" command as in Step 7. The face is ready! We can group all these components now. Object > Group (Command + G).
Step 13
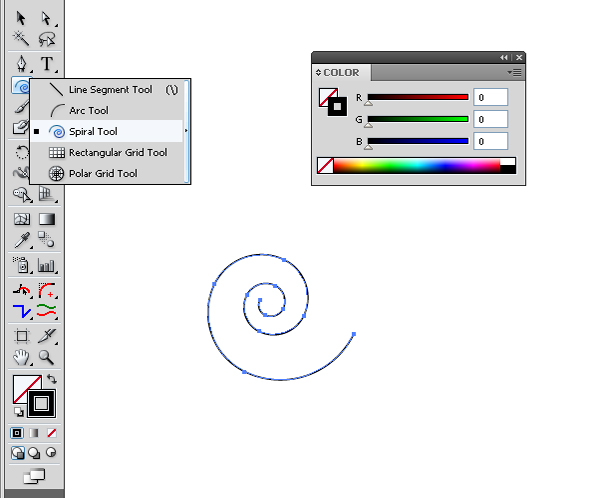
Now draw the hair. Use the Spiral Tool to draw a spiral as shown in the image below.
Step 14
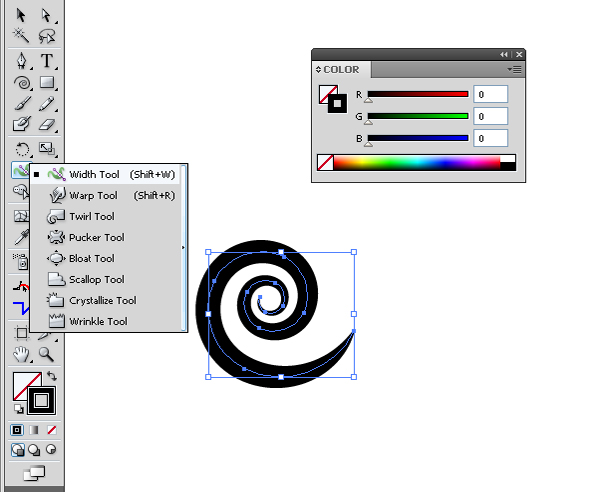
Then take the Width Tool (Shift + W) and add some extra thickness to the spiral. Pull the spiral in the middle and the Width Tool will add thickening.
Step 15
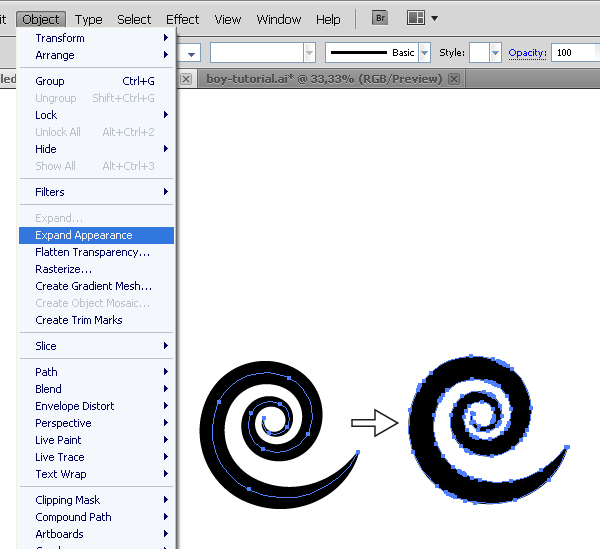
Go to Object > Expand Appearance to transform a spiral into an object.
Step 16
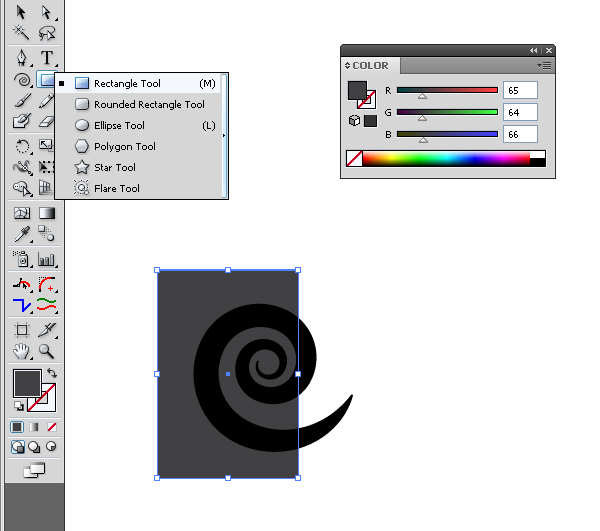
Take the Rectangle Tool (M) and draw a gray rectangle as shown in the image below. Move it to the background as in Step 7.
Step 17
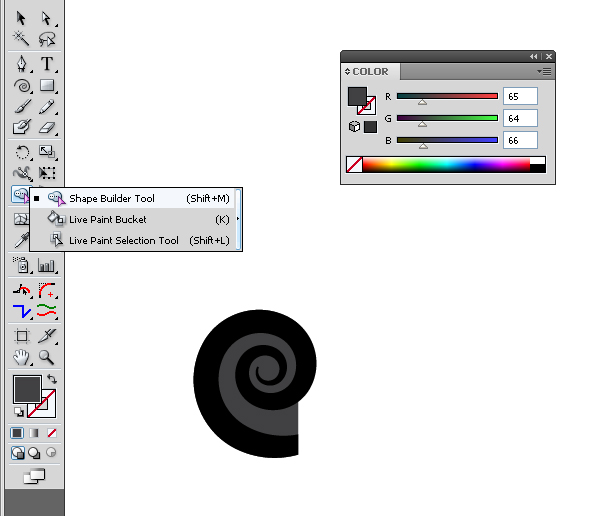
Take the Shape Builder Tool (Shift + M) and delete the protruding part of the rectangle and the tip of the spiral. Use Shape Builder Tool as in Step 9. You should have such a shape as shown in the image below. So we got a curl of hair. Now group these shapes. Object > Group (Command + G).
Step 18
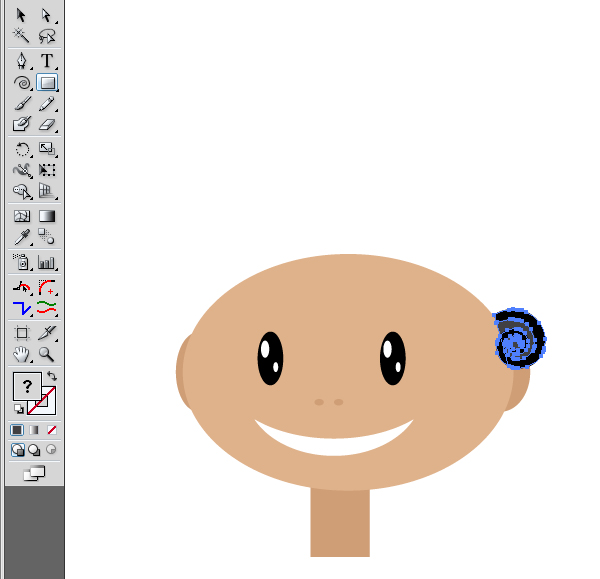
Rotate a curl of hair upside down. Then reduce the size and put it on the head as shown in the image below.
Step 19
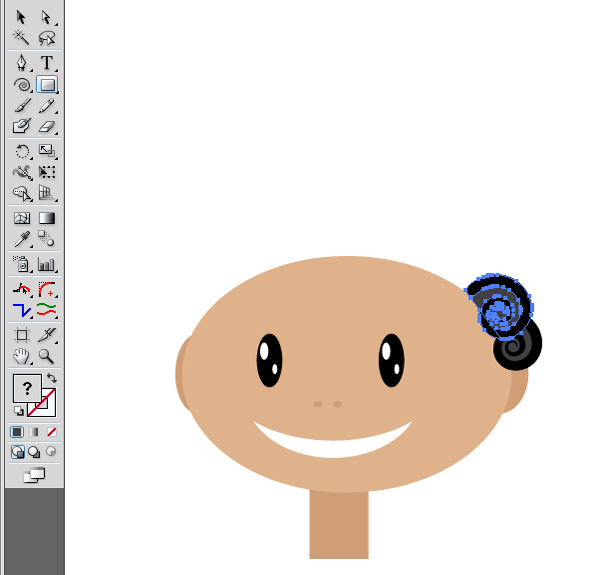
Next make a copy of the curl of hair. Command + C and Command + V. Increase the size and place as shown in the image below.
Step 20
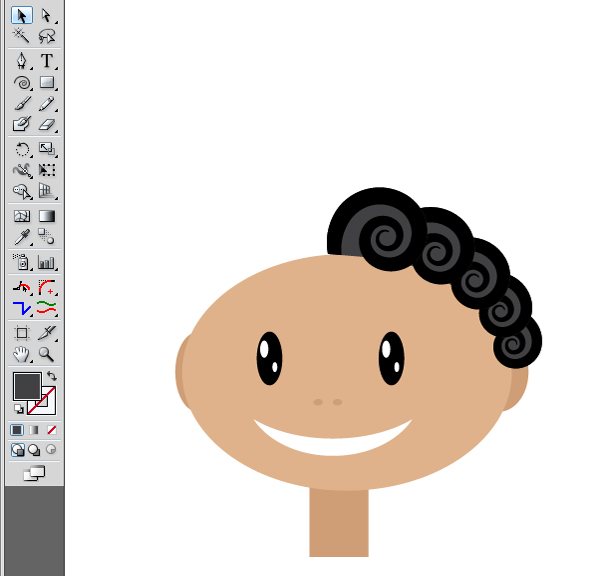
Make copies as in the previous step. The result is hair. Group these shapes.
Step 21
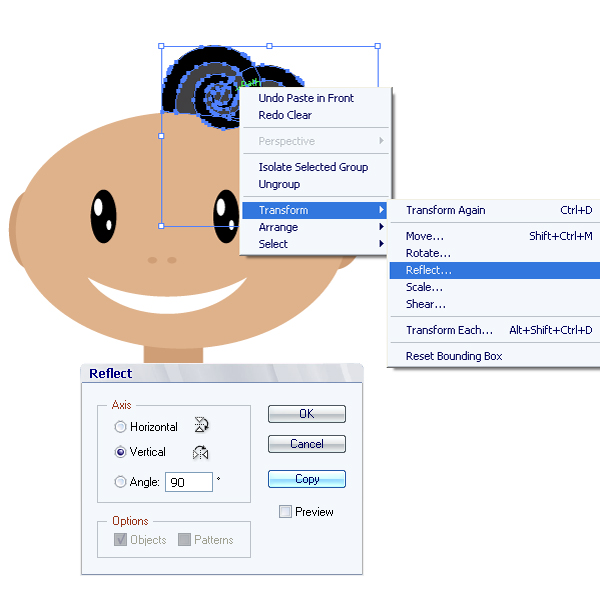
Then right click your mouse to select Transform > Reflect. We need to make a reflection of the hair to finish it. Click the Copy button in the Reflect Panel.
Step 22
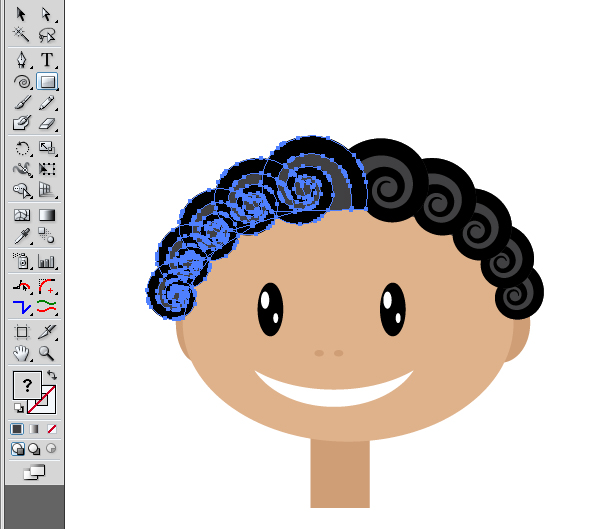
Now complete the hairstyle with this copy. Put it on the head as shown in the image below. You should also change the size of some of the hair curls so it will look better.
Step 23
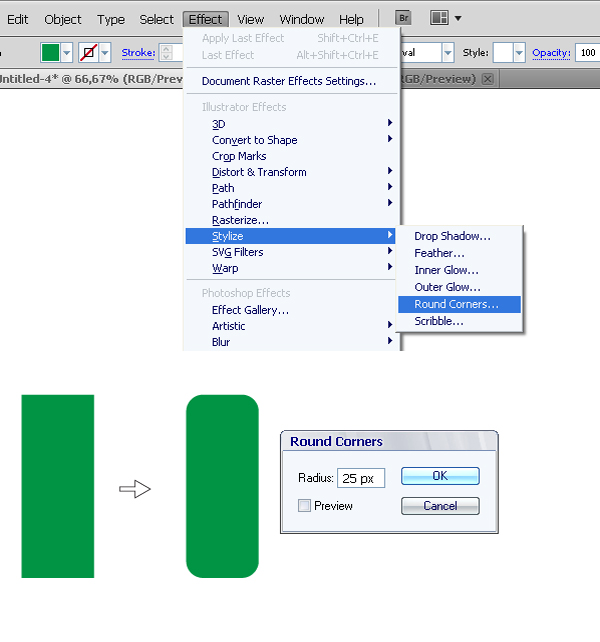
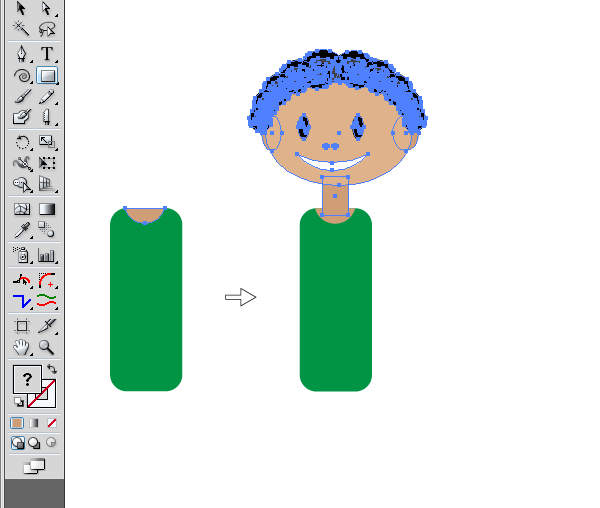
Now draw a body. Take the Rectangle Tool (M) and draw a green rectangle. Then go to Effect > Stylize > Round Corners to get the same result as shown in the image below.
Step 24
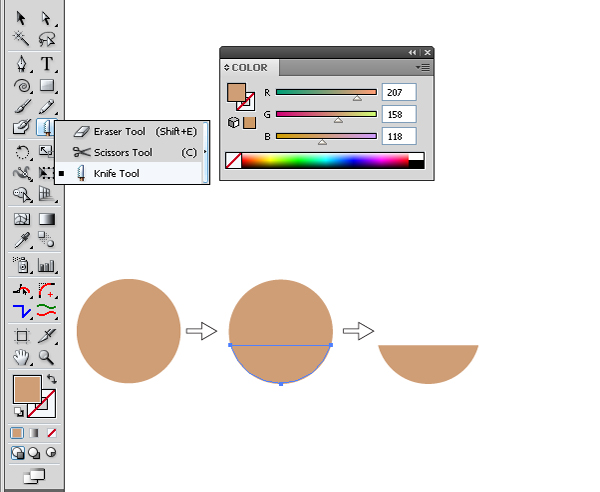
Take the Ellipse Tool (L) and draw a circle. Next cut it using the Knife Tool. Remove the top part of the circle. We need the bottom part of it.
Step 25
Put this part of the circle on the top of the body as shown in the image below. Now put the head in place.
Step 26
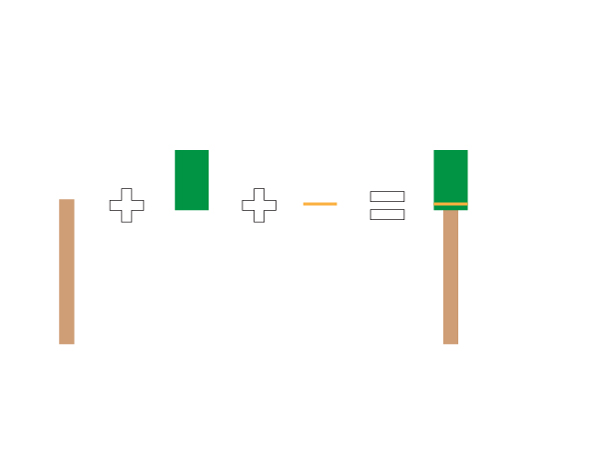
The foot consists of simple rectangles. Draw three rectangles as shown in the image below.
Step 27
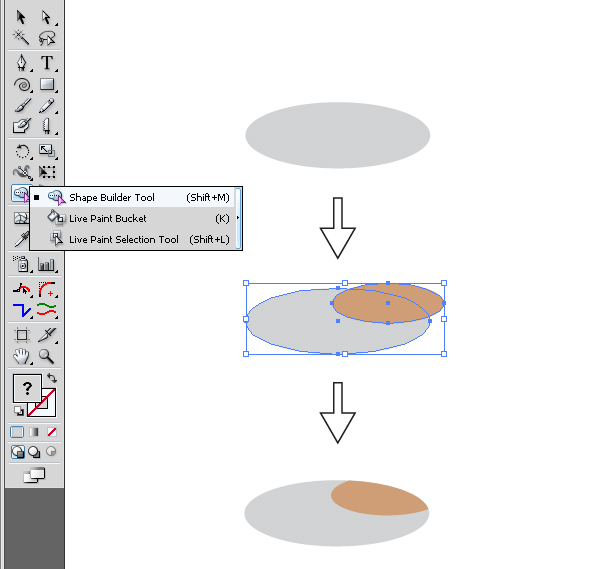
Now we need to draw a shoe to finish the foot. Take the Ellipse Tool (L) and draw an ellipse. Then draw another, only smaller, as shown in the image below. Next delete the unnecessary part of the ellipse. Use the Shape Builder Tool (Shift + M) for it.
Step 28
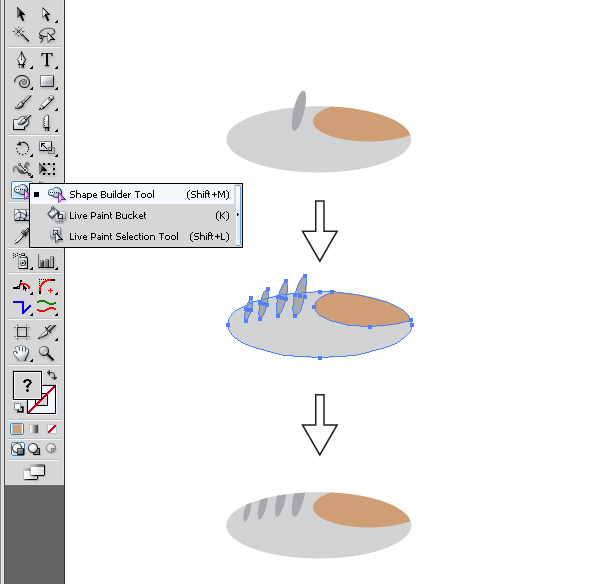
Draw a small gray ellipse. Make several copies of it. Use the Shape Builder Tool (Shift + M) to delete redundant parts. The result is a shoe with laces.
Step 29
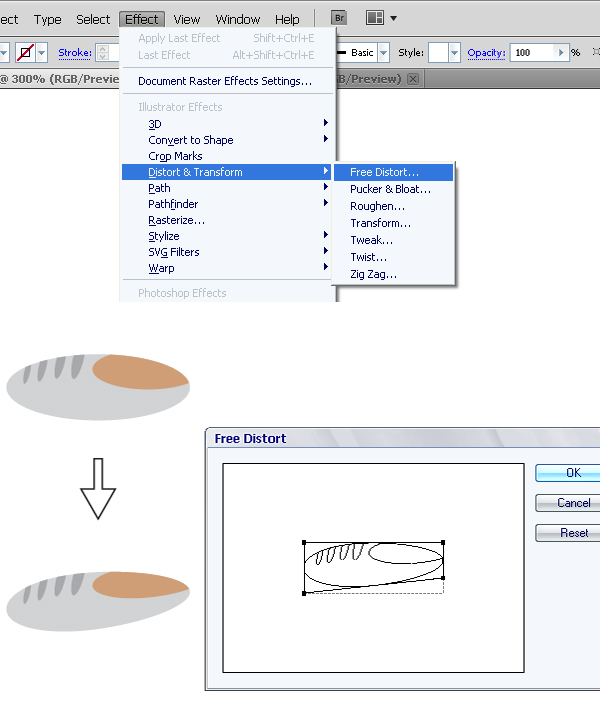
Now go to Effect > Distort & Transform > Free Distort. Make the form as shown in the image below.
Step 30
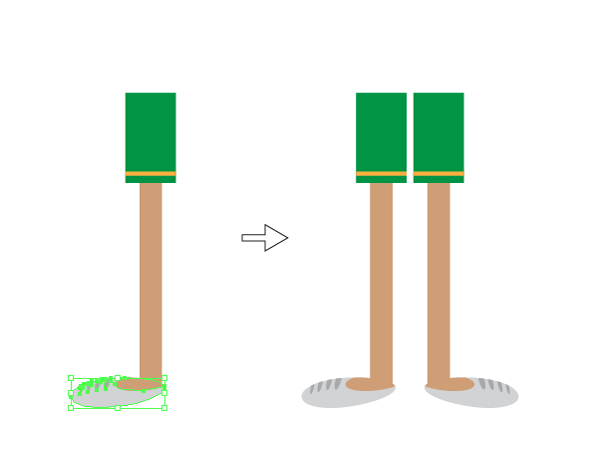
Put the shoe in place as shown in the image below. Group these shapes. Make a reflection copy as in Step 21.
Step 31
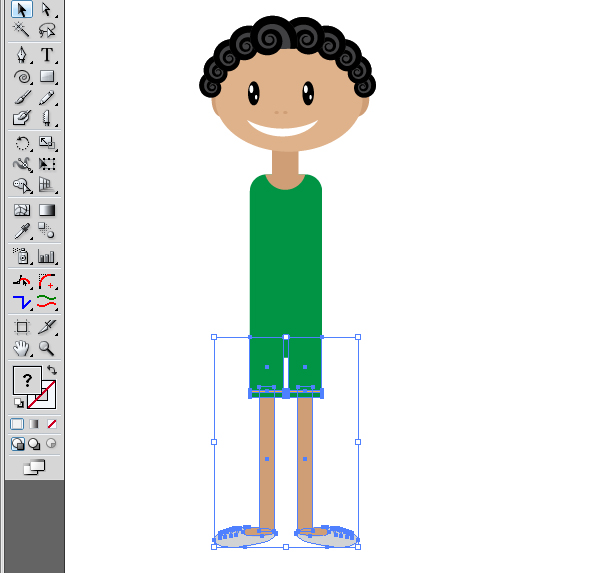
All that remains is to attach legs to the body.
Step 32
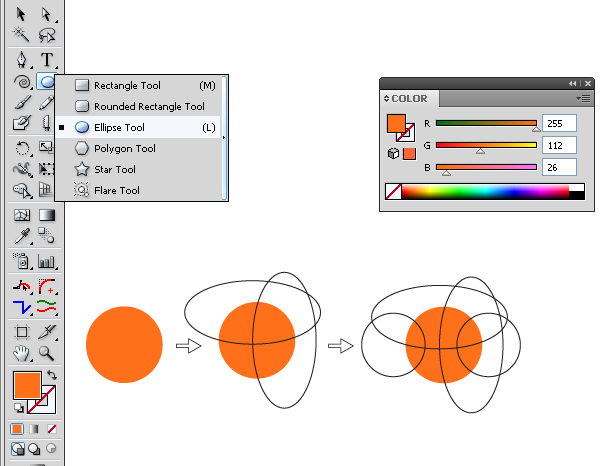
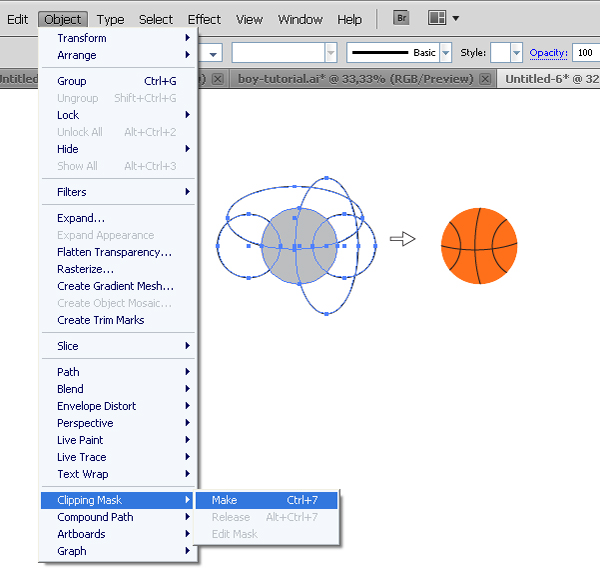
It’s time to draw a basketball. Take the Ellipse Tool (L) and draw a several circles as shown in the image below. The result looks like a basketball. It is only necessary to hide redundant parts.
Step 33
Use the Clipping Mask to hide redundant parts. The first thing to work on is the base of the mask. Create a copy of the ball. Select the orange circle and use hotkeys Command + C and Command + F. Move it forward. I filled a
copy with gray to make it clearer. Now select all objects and go to Object > Clipping Mask > Make.
Step 34
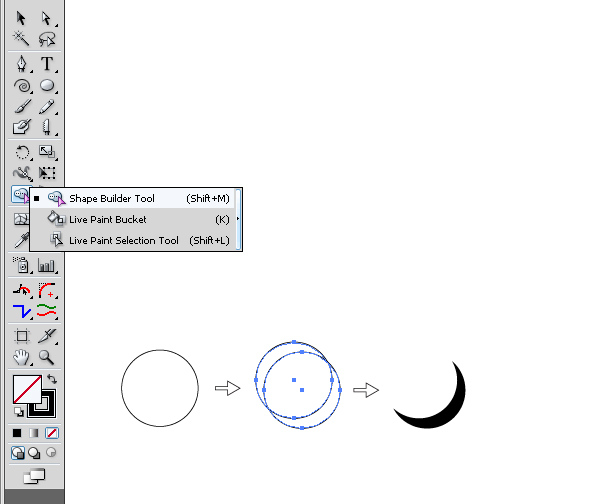
Now create a shadow for the ball. Use a two circles and the Shape Builder Tool (Shift + M) to create the shape of a shadow.
Step 35
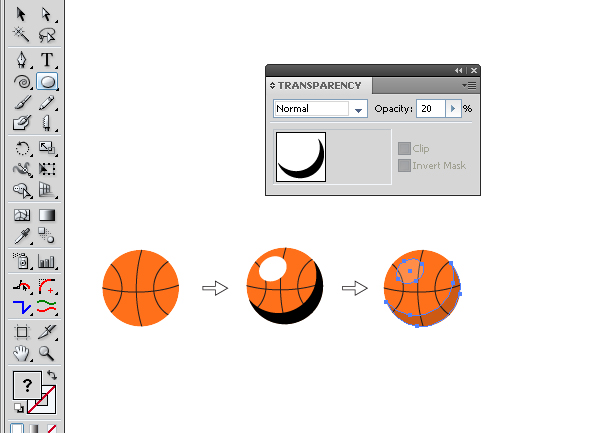
Then add this shadow to the ball. Draw another white ellipse, and set the Opacity in Transparency Panel to 20. Group these shapes.
Step 36
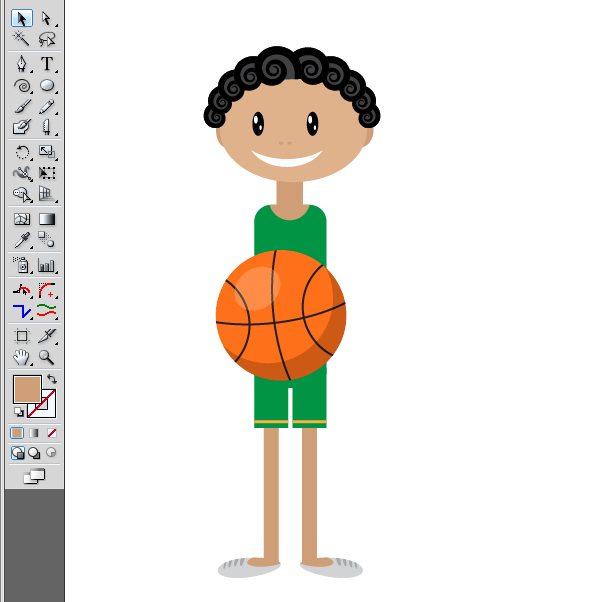
Give the ball to basketball player. Oh wait! He has no hands! In a minute we’ll fix this.
Step 37
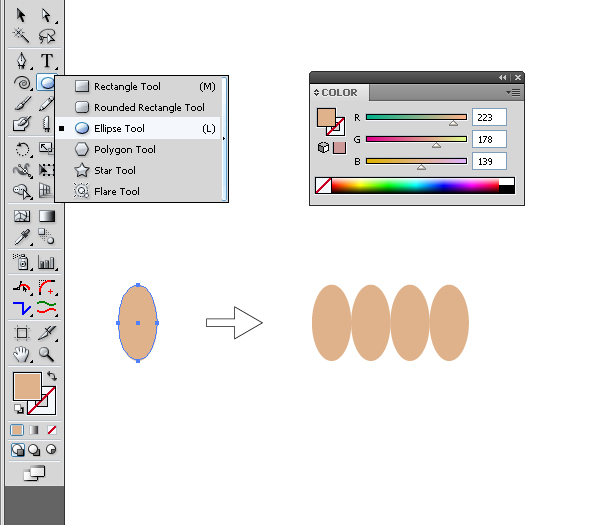
To draw the fingers with the Ellipse Tool (L). Then make four copies.
Step 38
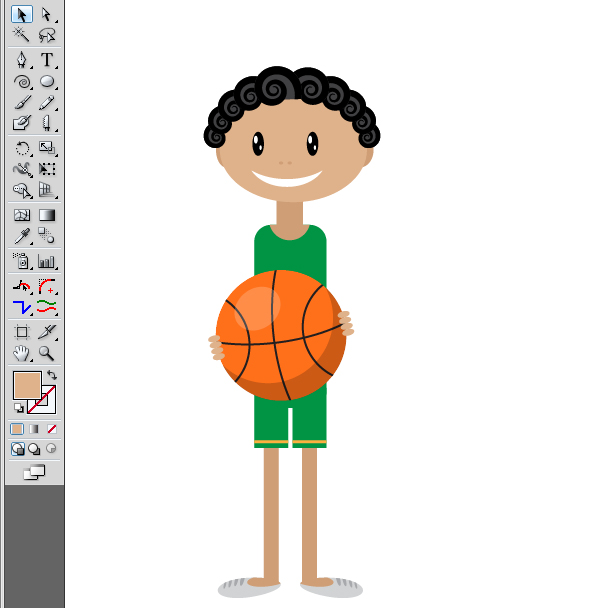
Add fingers to the final image. The second hand is a copy of the first.
Step 39
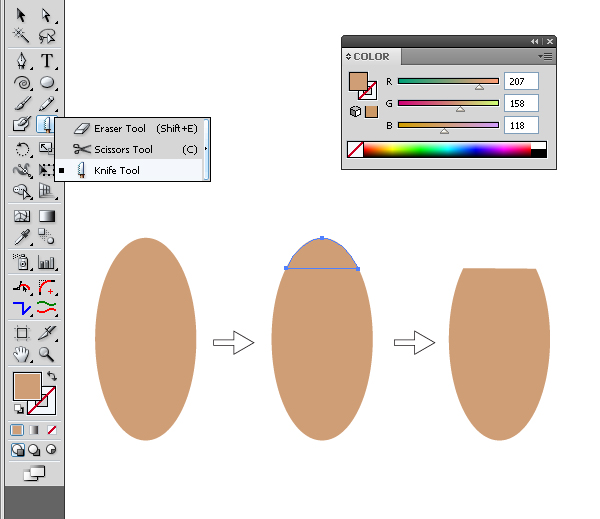
To draw the shoulders use the Ellipse Tool (L). Then cut the ellipse using the Knife Tool. Remove the top part of the ellipse.
Step 40
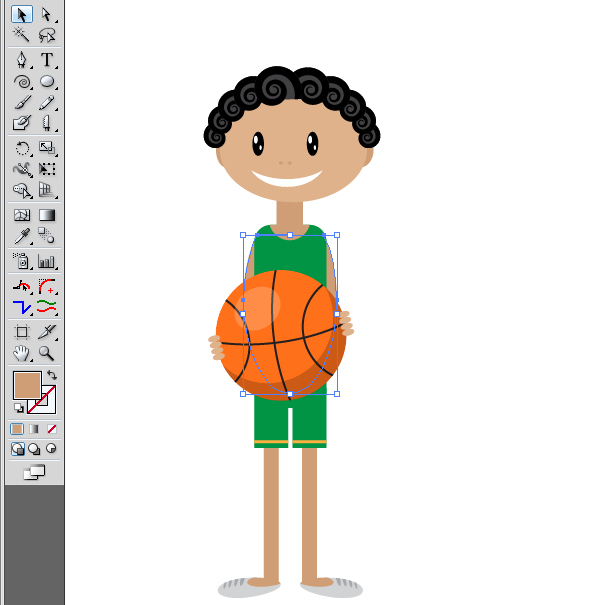
Then add the shoulders to the final image as shown in the picture below.
Conclusion
Now the illustration is ready.
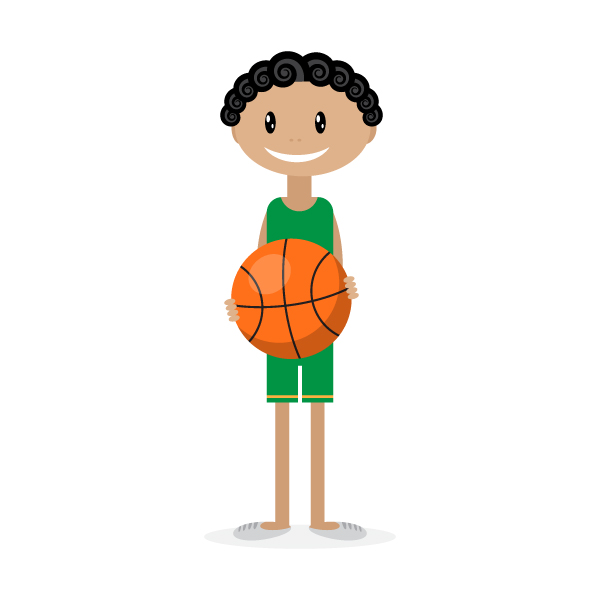
And here you can see several variations of this character. You can give him any object. I hope you’ve enjoyed this tutorial!

{excerpt}
Read More