In this tutorial we will look at how to design a character for a video game, in this case a "beat ‘em up". We will work from the very first sketch to the final artwork. I will share my process and workflow for drawing vector characters with lots of tips, tricks and shortcuts to use in your everyday vector workflow. So lets get started!
Step 1
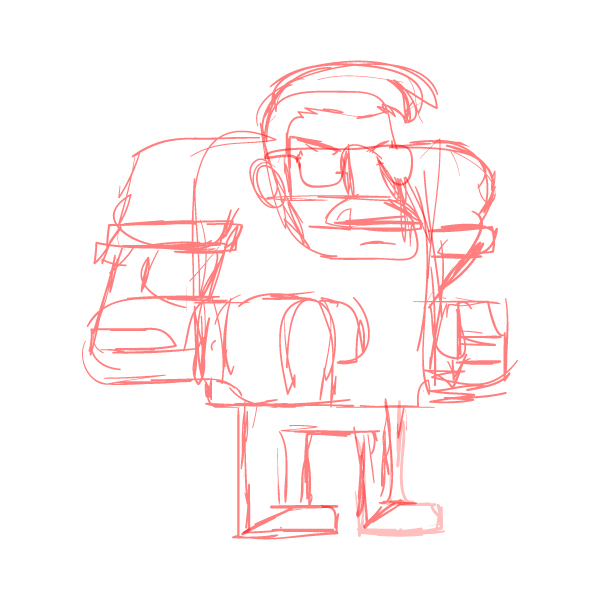
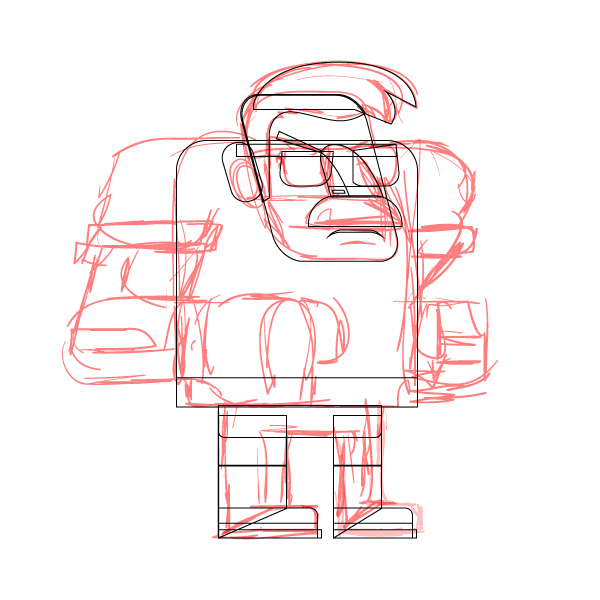
First we will start with a sketch of your character. You can make it with the Blob Brush tool (Shift + B) on a layer named Sketch. Always try to use a color like red or blue with an opacity of 50%, this will help you to trace the sketch.
Step 2
Now we will lock out the Sketch layer. On a new layer that we will call "Drawings", begin to draw your character. In this case, we use a 1 pt black line. For example, I draw a lot with shapes with the Rectangle Tool (R ) and Rounded Rectangle Tool (an advantage is that if you drag and hold it, you can modify the roundness of the rectangle tool with the arrow keys). Try to draw your character in segments. This way you can use it like a puppet, and you can move it or change only the pieces that you need. Divide your character into sections of the head, body, arms and legs.
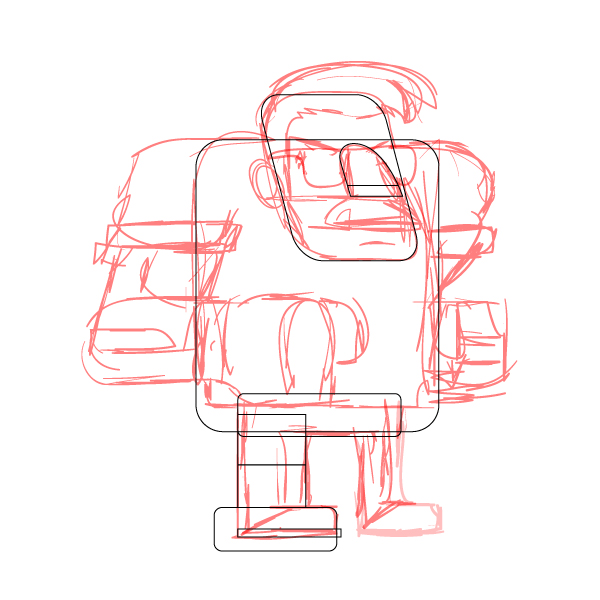
Try to draw with geometric shapes and adjust them with the eraser tool and pathfinder.
Remember to lock your layer called Sketch and draw on a new layer, if you want you can lock your sketch by pressing Command + 2 and draw on the same layer.
Step 3
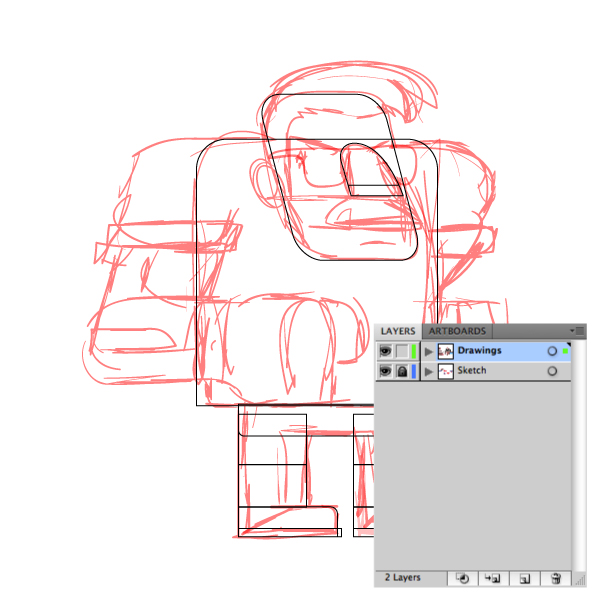
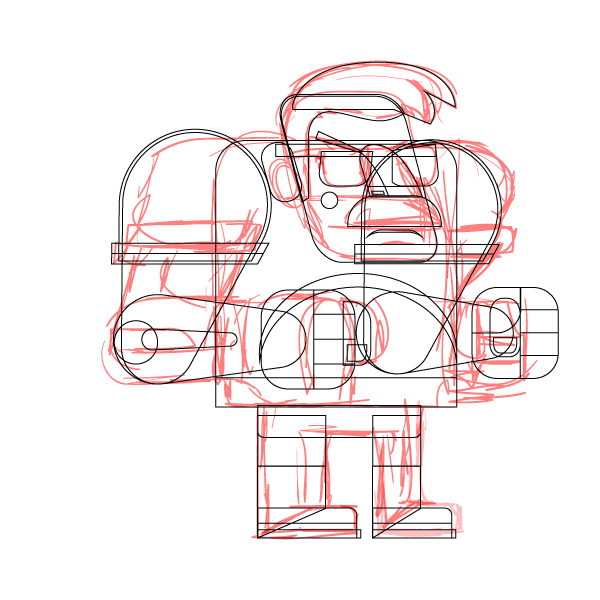
With the Anchor points we have the option to move the nodes using the Selection Tool (A), to take advantage of the basic shapes and adjust them to contour the sketch. In some cases this could be the fastest way to draw or redraw elements, just by adding or adjusting shapes
Tip: to modify or make straight cuts without the Pathfinder, you can use the Eraser Tool (Shift + E) by pressing Alt and dragging the mouse, remember to select the object that you want to delete, because if you have nothing selected you could delete a line though all of your objects.
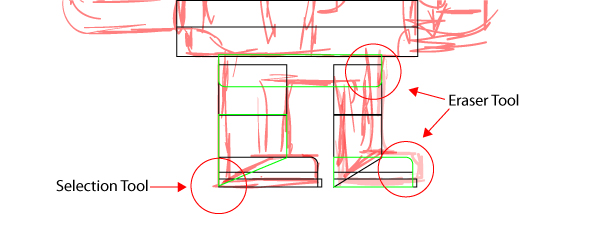
Move the nodes with the selection tool (A) and modify the objects with the eraser tool, pressing Alt + Mouse Drag to make straight cuts.
At this step think like you’re working from back to front, because by default every new object you draw its going to be in front, just keep that in mind (you can use layers to separate objects like the head, arms, etc. But I prefer to work with groups).
Step 4
A quick tip to draw, for example, a character´s arms, is to use the Width Tool (Shift + W). With this tool, you only adjusts the width of the lines. Then you can convert them to paths, and that’s it.
Now we can take the this shape to draw the sleeves, this could be done by copying (Command + C) and paste in front (Command + F), then modify the shapes as you like. If you need to use the pathfinder, always make a copy of your basic object. Remember to use the Eraser tool for straight cuts, in this case the arm sleeve.
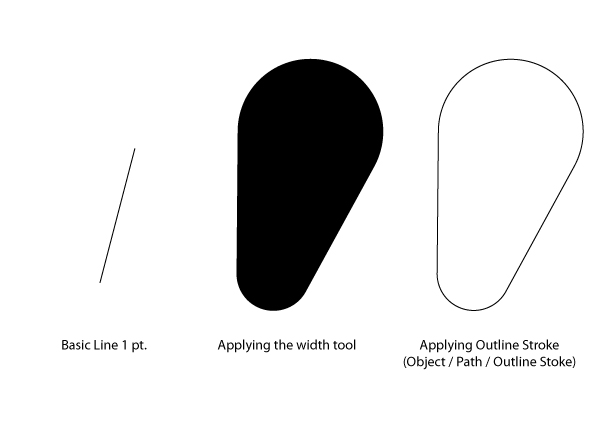
The Width Tool can be very useful to draw a lot of things, just give it a try and experiment with this awesome tool, you can save time and make some smooth shapes.
Step 5
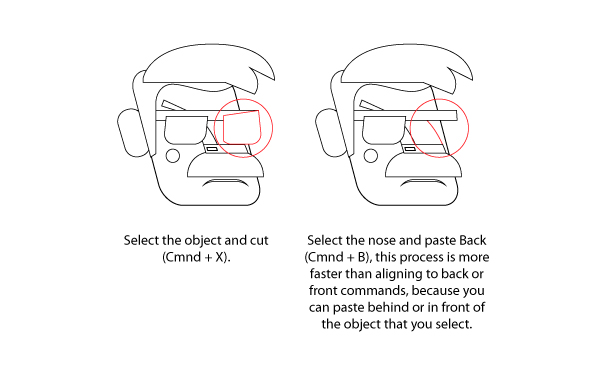
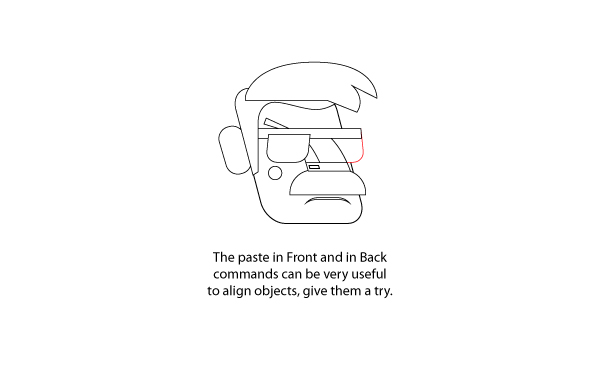
This is how the character may look when you’ve finished tracing the shapes. Press "D" to set the default color fill ( white fill with a black 1pt line). Adjust the pieces that you may need to fix. By the way, a quick way to do this is cutting the object (Command + X) and paste it front (Command + F) or back (Command + B) of the selected object. For example, in this sketch, I cut the semi circle and the glasses of my character, and then select the nose to paste it at the back (Command + B) of the objects.
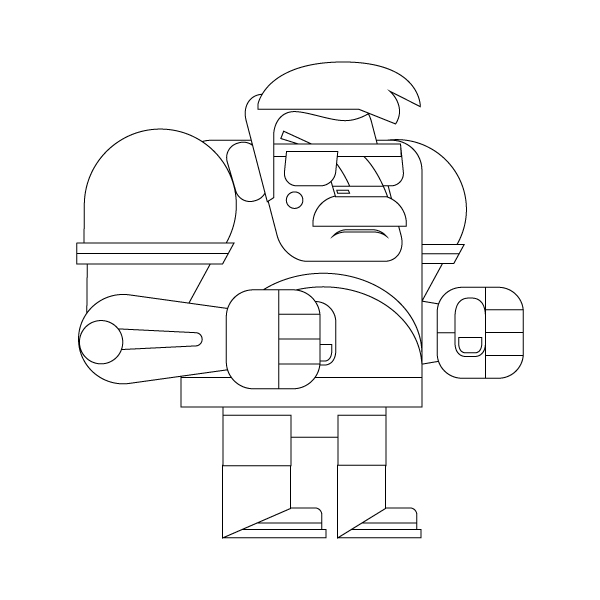

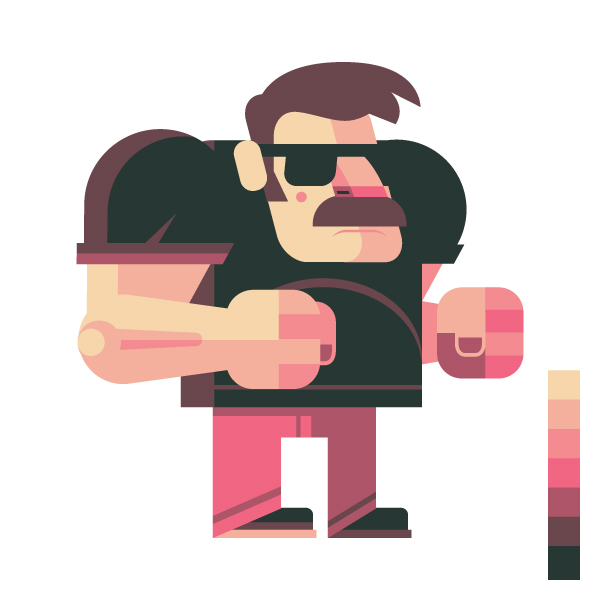
At this time you should have the character drawn, but without color just with the default color setting (D), here comes the part where your illustration comes to life with the colors.
Step 6
Keep the illustration apart but inside a single group, head, body, right and left arms. This could be done in two groups. One of them from the shoulder to the elbow and an other one from elbow to the wrist, hands , feet, and legs (split just like the arms) so when you have to draw other character positions, you only have to draw certain details and not the whole illustration. Your character should be like a puppet.
Step 7
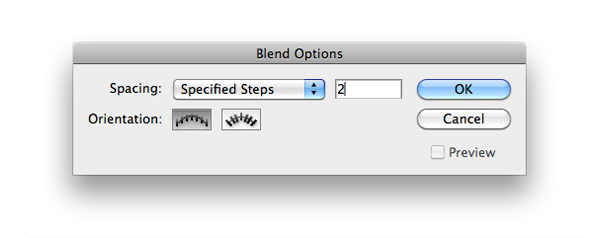
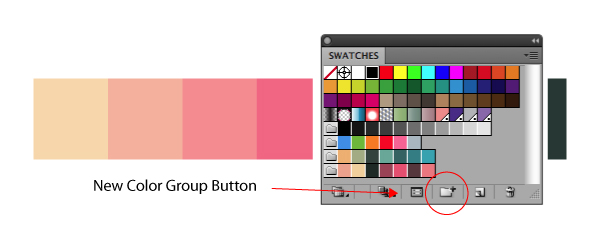
To apply the color, first you have to decide what colors will you use. To make a good palette, you can choose 3 of your favorite colors. Select them and use the Blend Tool (W) to make a blend between this colors, press Enter to see the blend options, then use "Specified steps" and type "2". To add all colors to Swatches, you have to Expand the Blend (to do this click on Menu / Object / Expand ) and select them all. Then go to swatches, create a New Color Group, and give it a name.
Choose the base colors of your illustration, you can select for example a color for the lights and another to shadows in this case the colors were selected as color base of the character skin and clothes.

Use the Merge tool to do this combination, remember to put in your merge tool options to Specific Steps and put 2.

To put your colors in the swatches you have to expand the merge and select all colors, then in the swatches window click the "New Color Group" button, put a name to your palette and its done.
Step 8
To apply the base colors, use the Eyedropper Tool (I) and click the color to give it the value . By pressing Alt, this tool can be used to color your character with the base colors. You can put your color palette near the image to pick and use the colors quickly.

Step 9
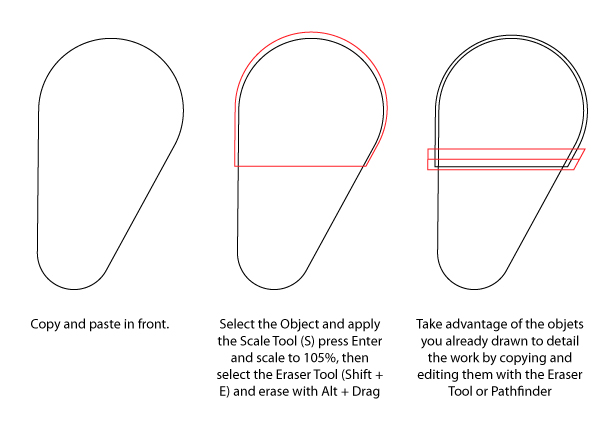
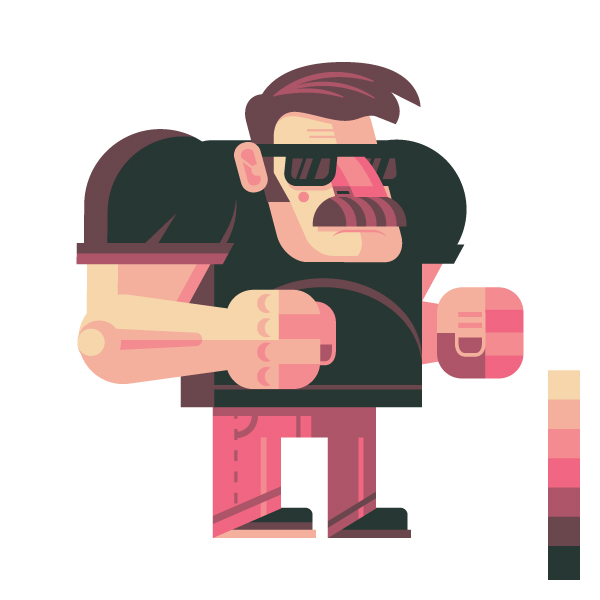
To add the lights and shadows you can use the same shapes that you have made for the main image, just drag and hold Alt to duplicate the shape. Then copy (Command + C) and paste in front (Command + F) of the object that would be detailed.
With the Pathfinder tool, we can do this job. We have Intersect or Minus Front to add highlights and shadows (by the way, when you press Command + 4 and the last action of the Pathfinder will be repeated). Another way to make the lights is selecting an object, (like the ear) and then go to Object/ Path / Offset Path, this will make a copy inside or outside of the figure. Select the option preview to check the changes that you make. In this case 2px.

Take advantage of the figures you already have to create shadows and lights.
Step 10
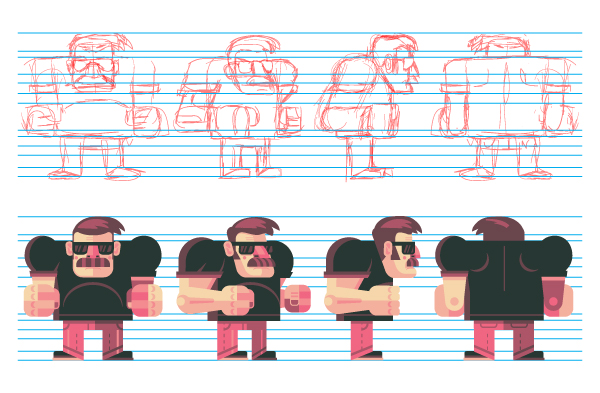
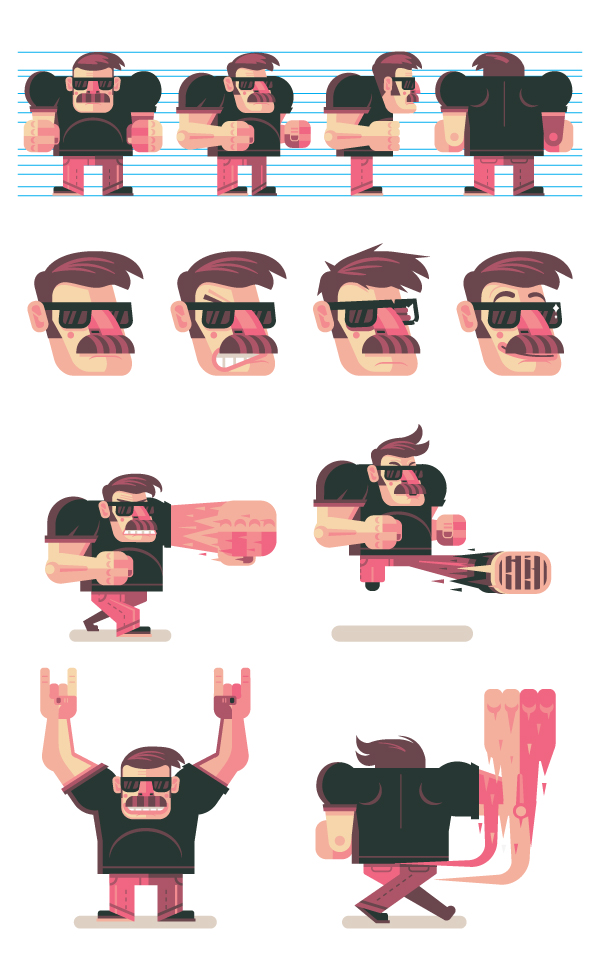
The finished character will look a bit like this, remember to draw a turn around of the character to see all the angles. To make this a bit easier, use some guide lines at certain points like the head, shoulders, waist, knee, etc.
Step 11
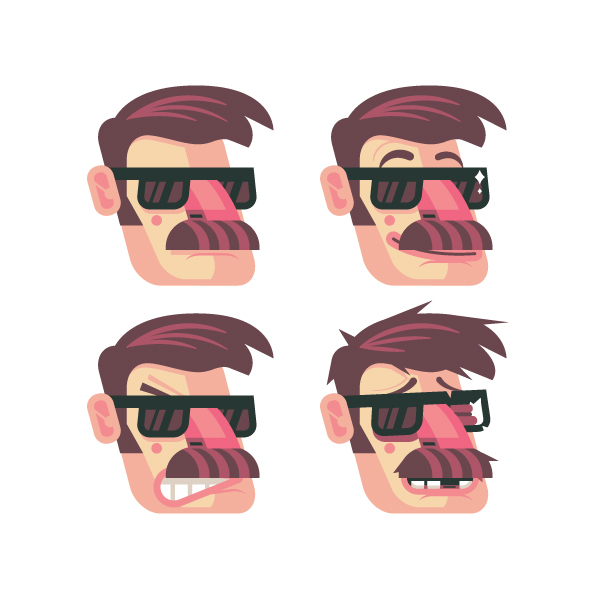
To make the character’s expressions we will use a 3/4 view. To change the expressions we can do some adjustments of the mouth and eyebrows. All of these can be made with the Width Tool (Shift + W), the Rounded Rectangle tool and Offset Path. In this case, we will use 4 facial expressions, normal, happy, angry and defeated. These expressions will serve as a reference for the game.
Step 12
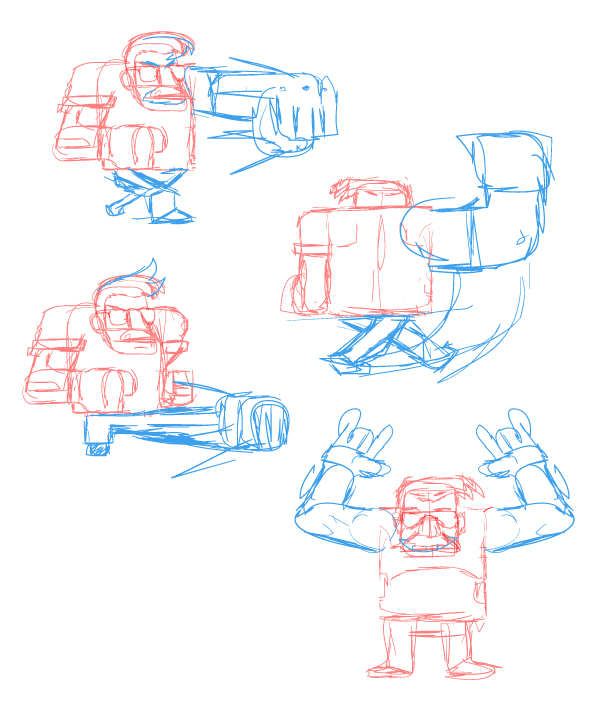
Now it’s time to make the character positions. We take our basic sketch and add changes and details. This way, you only need to redraw these parts with the sketches of the turn around. You can see some of the character positions, like the jump or his victory position. This will be useful when we have to animate our character or when someone needs to draw it. I will give him larger limbs to enhance the movement effect of the attacks.
Step 13
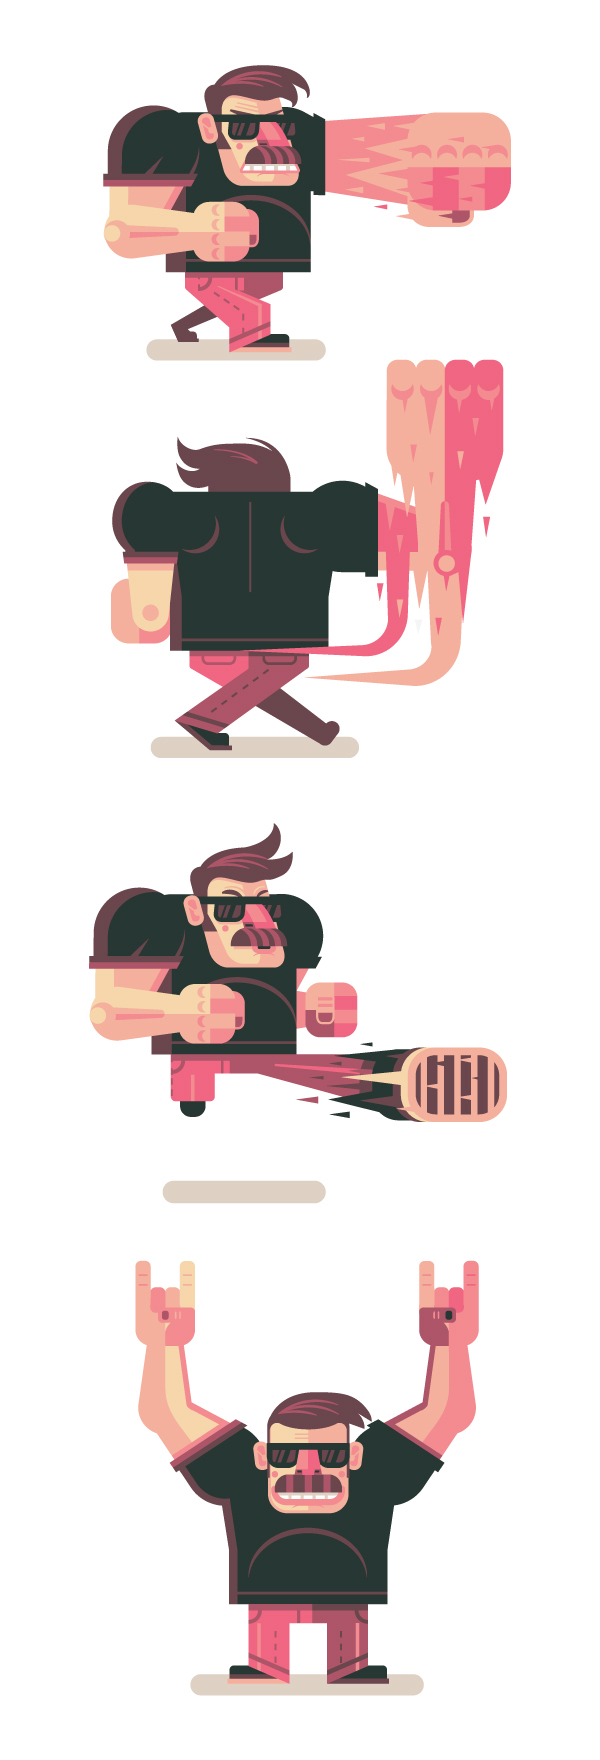
This is how the character looks when it’s finished, add the detail as you want, have fun with the colors and shapes.
Step 14
At last, put your illustrations on a new page and your character sheet is ready!
This document its very helpful when you need to draw the character in new poses or expressions and with the turn around its a lot easier to draw it because you can see how it looks in all angles. If you work on a game with a team and everyone is making animations and illustrations of a specific character the character sheet its a basic document to get the work well done. With a character sheet everyone should be on the same channel and the work flow its going to be better than without it. With this our tutorial has ended, I hope you enjoyed it, Goodbye!
{excerpt}
Read More