In today’s quick tip tutorial I’m going to show you how to create a quick and easy retro leaf and flower design with the help of the Transform Effect in Adobe Illustrator. Although I’ll be using AI CS5, you should be able to achieve this in any version of AI CS. So let’s jump in!
Step 1
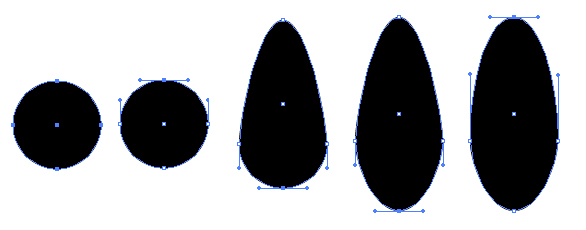
I’m going to start out by creating my initial leaf/petal shape. Do this by drawing an even circle with the Ellipse Tool (L) by holding Alt + Shift and dragging outwards. Then use the Direct Selection Tool (A) to select the top point of the circle. With your arrow keys on your keyboard, nudge the point up about ten to fifteen spaces. Do the same with the bottom point and about five spaces. Then use the Direct Selection Tool (A) to modify the top handle bars of the two points at the sides of the shape, to give it a more smooth curve.
Step 2
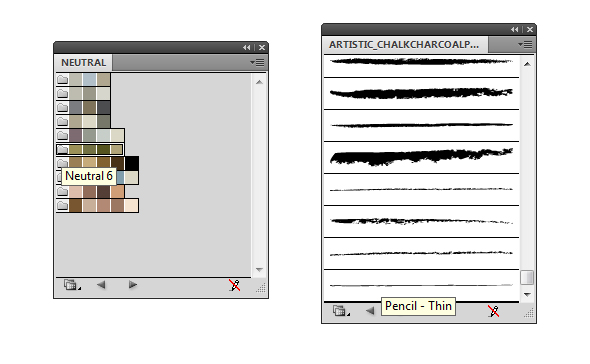
I’m going to be using two sets of colors for this design. Both can be accessed via the drill down menu in the Swatch panel and going to Open Swatch Library > Neutral. Select the green swatch "Neutral 6". I’ve also used a swatch from Nature > Flowers and the pink selection "Pink Rose" which I’ll use later on. I’ll also need a rustic/organic looking brush for the line art. So in the Brush panel go into the drill down menu and select Open Brush Library > Artistic > Artistic_ChalkCharcoalPenil and select "Pencil – Thin".
I’ve given the outside of the leaf the darkest shade of green with a 3pt Stroke Weight and used the lightest shade of green for the fill. The line art isn’t neat and tidy, this is part of the style I’m aiming for so don’t worry.

Step 3
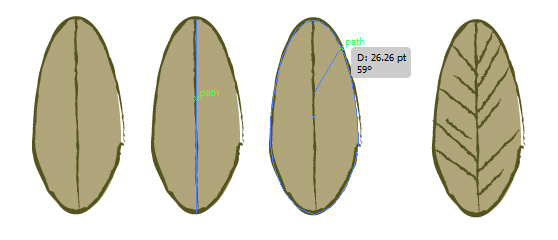
Enable Smart Guides (Ctrl + U) for this next part, as you’ll find it easier to do. Use the Line Segment Tool (\) to draw a central vertical line from the top to the bottom of the left. Mouse over this line until you see "path" and click and drag to the outside until you see "path" again. This is to ensure the lines you draw are flush to the outline of the shape. Carry on this to draw several lines for the veins of the leaf, so perhaps to be too short to reach the edge. These lines should have the darkest green stroke color with a 2pt Stroke Weight and use the Pencil – Thin brush.
Step 4
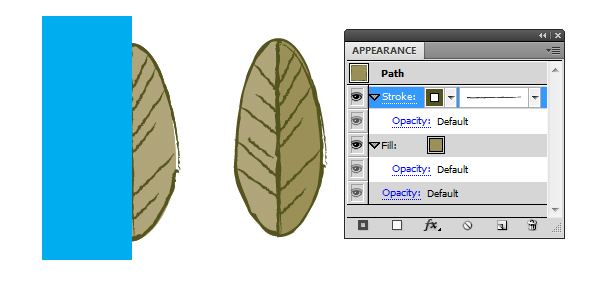
Duplicate the original leaf shape by Copying (Ctrl + C) and Pasting in Front (Ctrl + F). Draw a Rectangle (M) over half of the shape and use Pathfinder > Minus Front to remove half of the shape. With this half of the leaf, change the fill to the second lightest shade of green. The stroke is to remain as before with the Pencil – Thin brush at 3pt.
Step 5
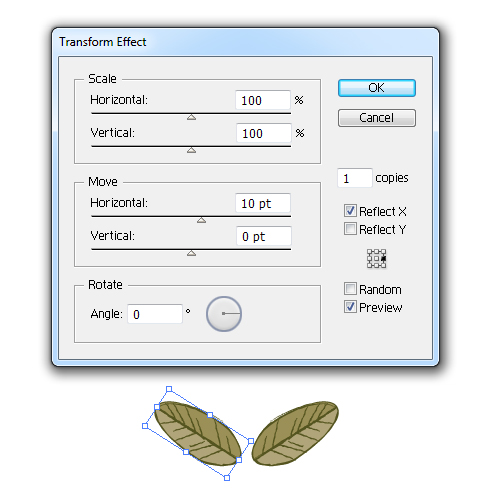
Group up all your leaf elements (Ctrl + G). Duplicate the group as we’re going to use the same leaf to create a flower. Use the Free Transform Tool (E) to slightly rotate it around 45 degrees. Go to Effects > Distort and Transform > Transform and use the below settings. To give you a break down of what I’m asking it to do, I’m first wishing to have one copy of the leaf mirrored vertically (or on the X Axis) and once it’s mirrored for it to move 10pts Horizontally. I want all these changes to apply to the middle right of the leaf. Click on OK once done.
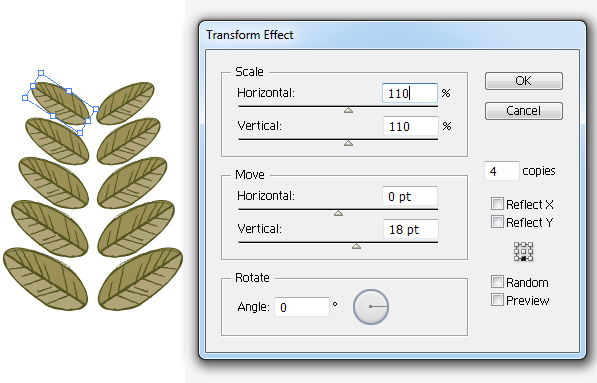
I’m going to apply the Transform Effect again. When you apply a duplicate effect for the first time, Illustrator will ask you if you’re wanting to apply a new effect or modify the current. We’re wanting to apply a new effect. I’m using the settings below and this is what I’m asking it to do. I want Illustrator to treat the two leaves we already have as one entity, so imagine the paired leaves are one group. I want it duplicated four times, so including the original pair of leaves, there will be five sets in total. I’d like the pairs to increase in size for every new set by 110% Horizontal and 110% Vertical (so it’s evenly scaled). I’d like each new set of leaves to be moved down by 60pt and I’d like all this to be applied to the bottom of the leaves in the center. Click on OK once done.
Step 6
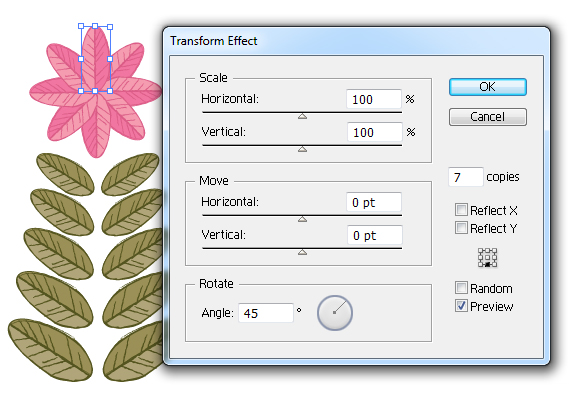
Now to use the duplicate leaf. First I’m going to recolor it with the "Pink Rose" Swatch as accessed earlier. I’m going to apply the Transform Effect to this pink group with the below settings and this is what I’m asking it to do. I’d like to create a petal at every eighth of a circle. So this would mean I’d need eight petals in total, thus 7 copies and 1 original. I’ll need the petals to be rotated instead of Scaled or Moved. Quick maths will be 360 degrees in a circle divided by 8 petals which will give us 1 petal at every 45 degrees. So that will be 45 degrees we enter in the Angle field. Then I want this to be applied to the central bottom of the group. Click on OK once done.
Step 7
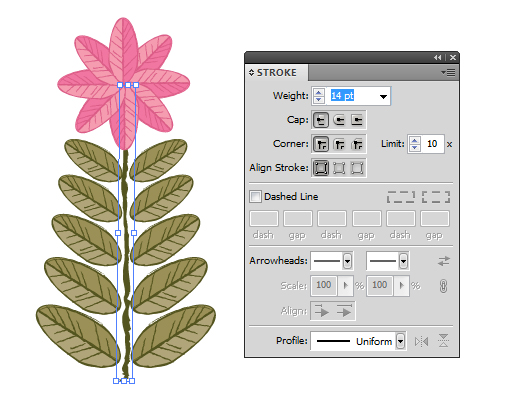
For a quick stem, use the Line Segment Tool (\) to draw a 14pt Vertical line with the dark green shade.
Step 8
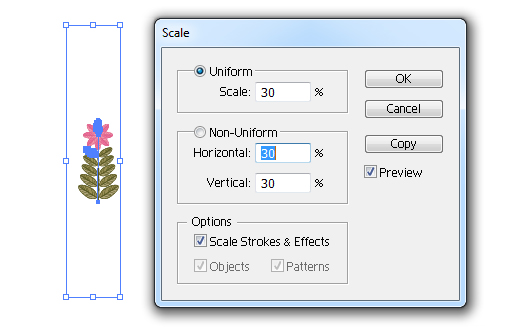
Group up all the elements for your flower (Ctrl + G) and then I’ve reduced the size of the design by going to Object > Transform > Scale. Make sure you put a tick in "Scale Strokes & Effects" otherwise you’ll have some distortion in the design.
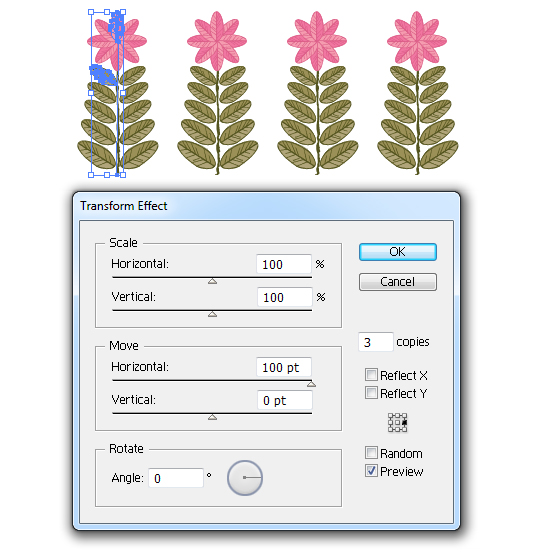
Finally go to Effects > Distort & Transform > Transform and use the below settings. I’m asking Illustrator to duplicate my flowers three times which will give me four sets in total. I’m also asking for the flower sets to be moved 100pts Horizontally. Once done, click on OK.
Conclusion
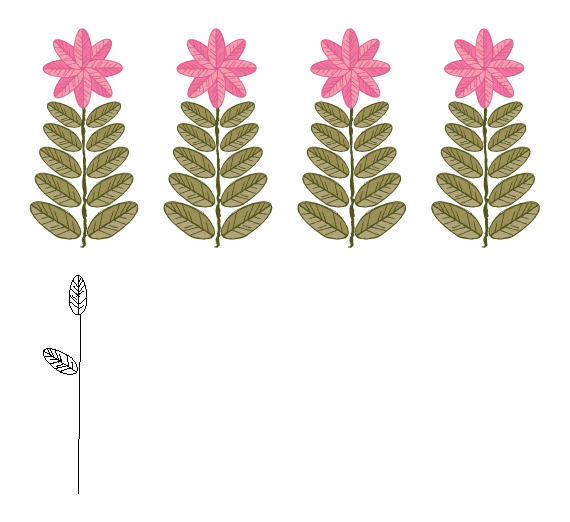
Now you’ve finished your quick and easy flower design. If you go into Outline Mode (Ctrl + Y), you’ll see that the whole design has been created only with two leaf shapes and a line for the stem… this is the major benefit of using the Transform effect for duplicating shapes!
{excerpt}
Read More