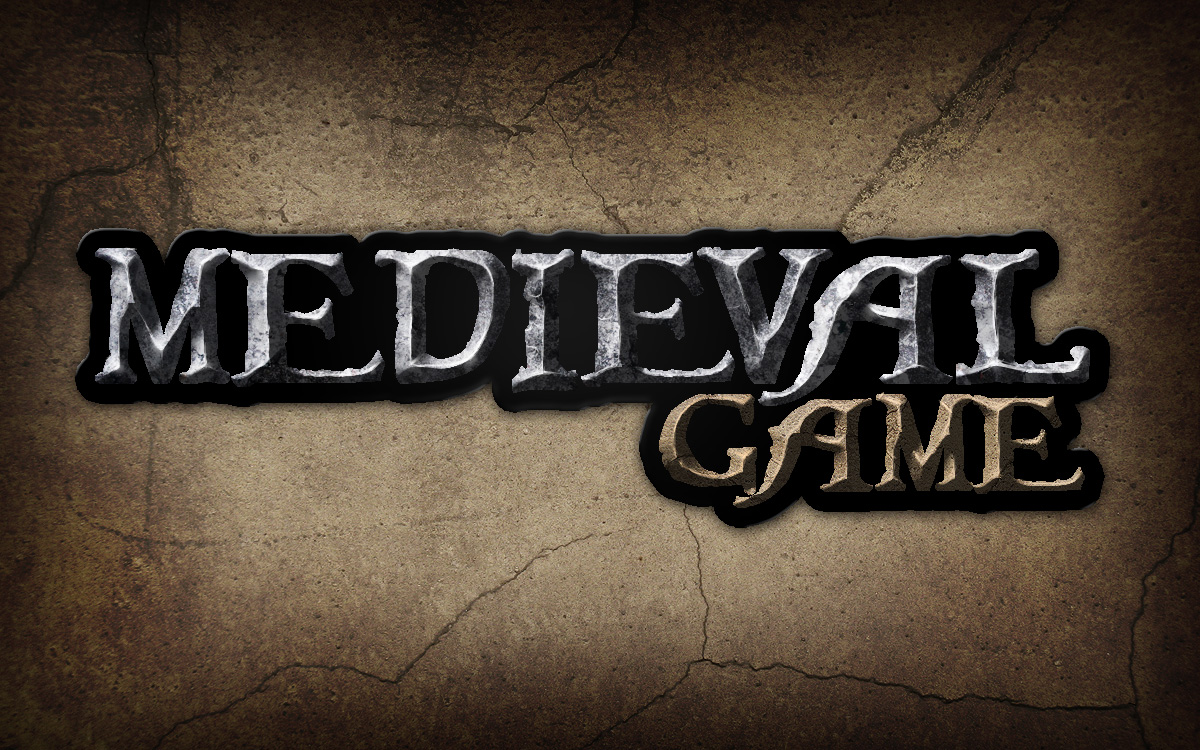
Designers are often asked to take a pre-existing one or two-color logo and give it dimension. In today’s tutorial we will take a black and white logo and give it a rough stone look in just a few short steps using textures and layer styles. Let’s get started!
Resources
The following resources were used during the production of this tutorial.
Step 1
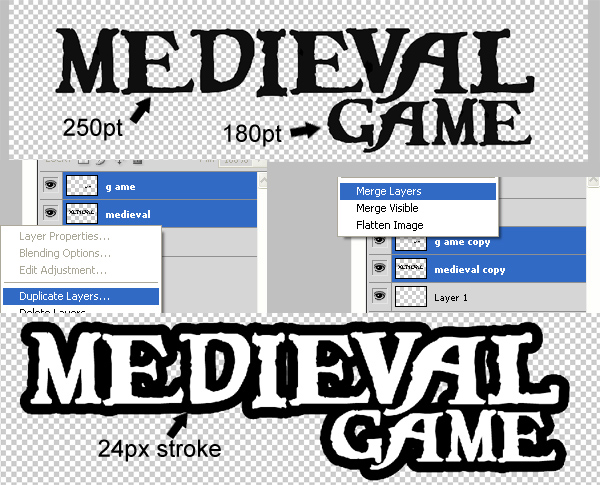
Create a new document that is 1200×750 px and download the Caribbean font. Then, type out the title of the game as shown.
Once you are done, rasterize both layers and duplicate them. Take those two layers and merge them together. Finally, duplicate that layer, send it to the back and add a 24 px stroke to it using a layer style.
Step 2
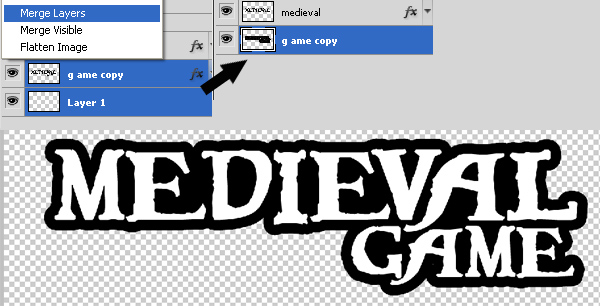
Now merge the layer with the stroke with an empty layer to rasterize the stroke and get rid of the layer style. Then use the Paint Bucket to fill in the gaps between the letters.
Step 3
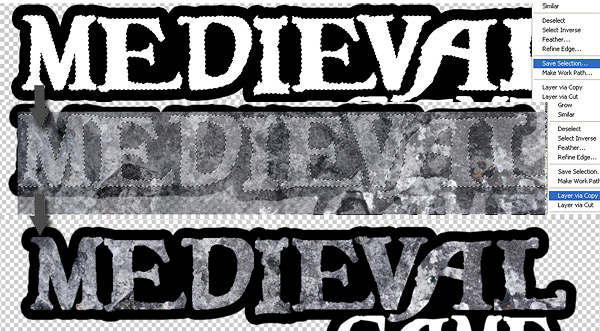
To add texture to the word “medieval.” place the Stained Concrete texture over the text. Then use the magic want tool to obtain a selection of the word "medieval." Now select the texture layer and select Cmd + J to create a new layer using the selection.
Step 4
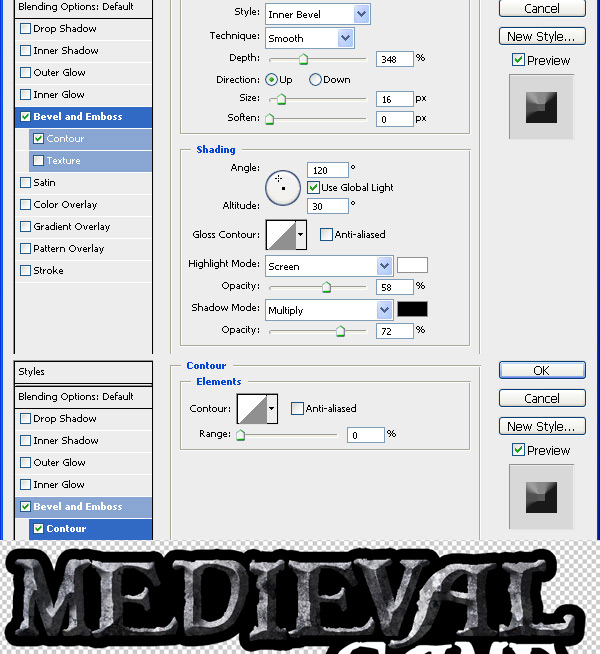
Select the new texture Medieval layer and go to layer style then check "bevel and emboss" and enter the values like its shown below.
Step 5
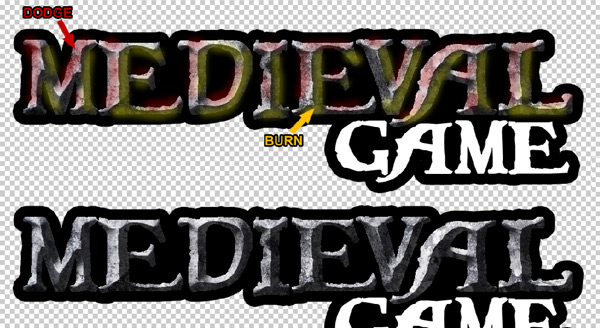
To make the bevel effect more prominent, dodge and burn it as shown below. The red brushes are "dodge" and the yellow brushes are "burn".
Step 6
Use this Concrete Texture to add to the word “game.” Repeat Step 3 to achieve a similar result as below.

Step 7
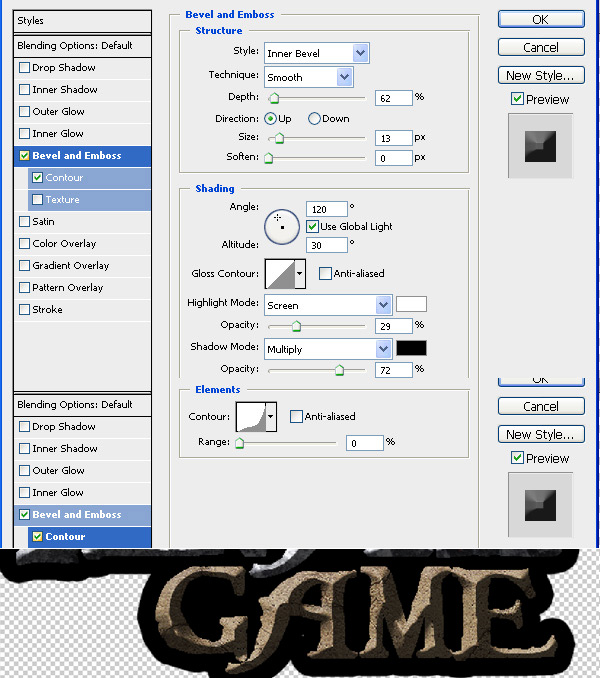
Now select the new textured game layer and go to layer style, then check "bevel and emboss" and enter the values like its shown below.
Step 8
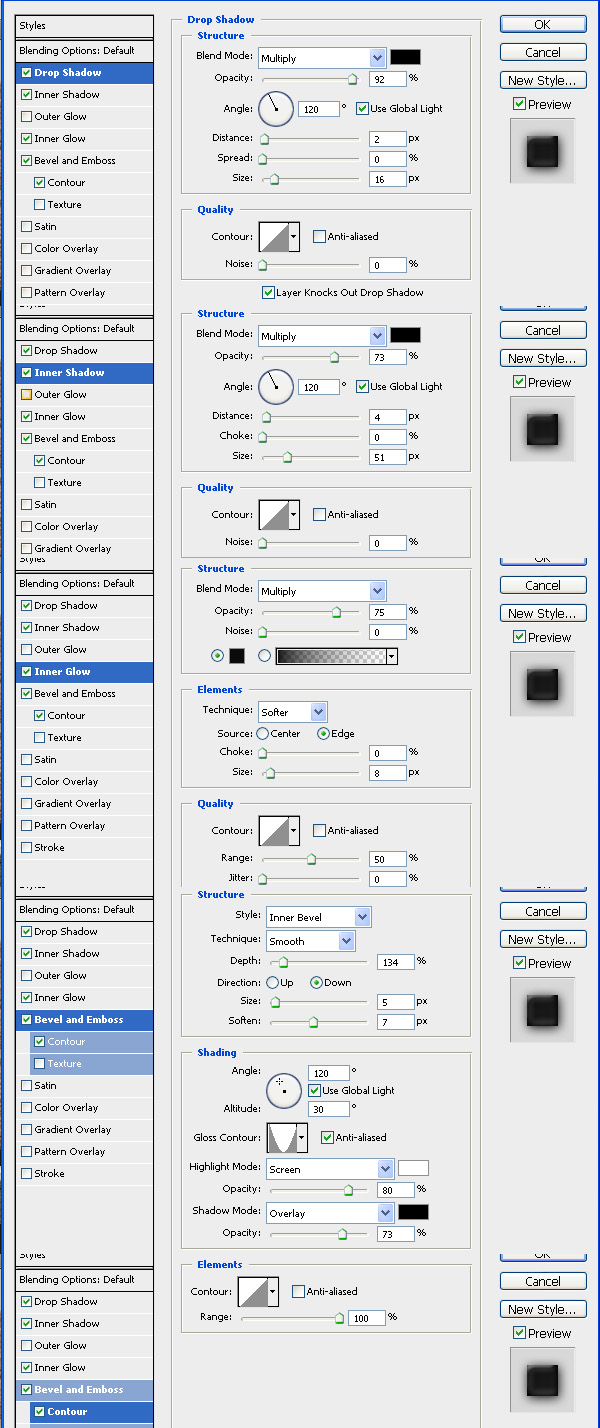
Choose the black stroke layer and go to "bevel and emboss" and enter the values as shown below.
Step 9
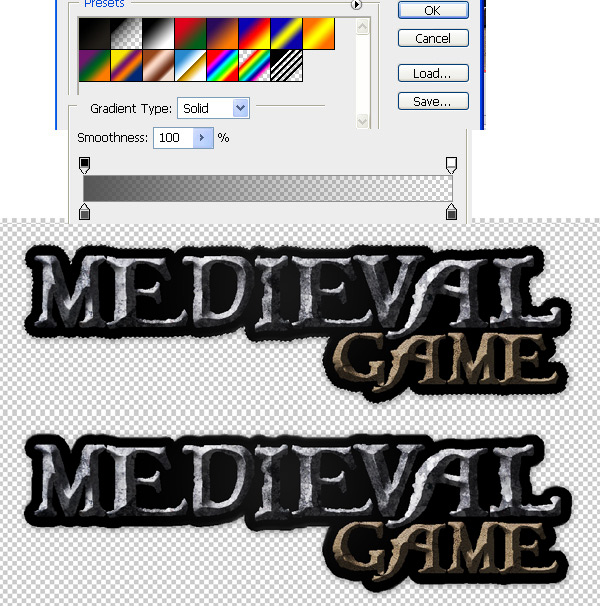
Now choose the black stroke layer and apply a gradient like the one shown below.
Step 10
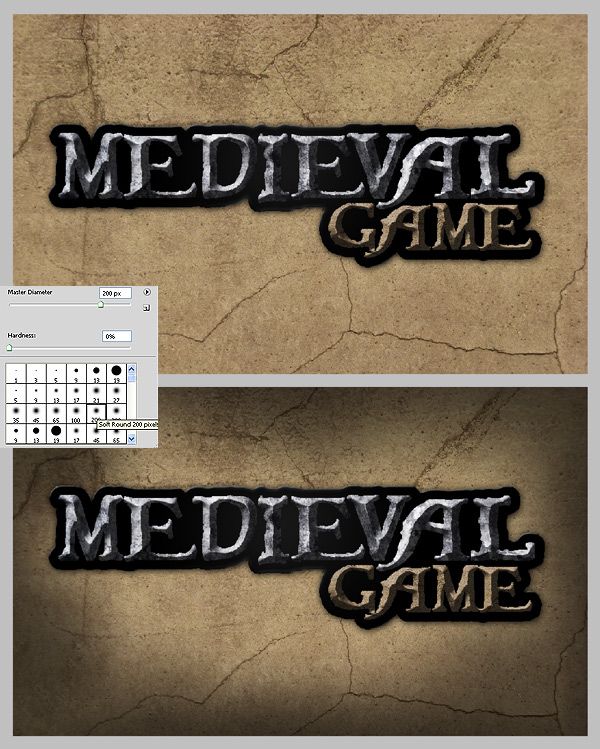
Use this Concrete Texture as a background, after you add it, make a duplicate, go to filter > sharpen > sharpen and lower the opacity of the duplicated layer to about 60%. Now select the brush tool and chose a nice rounded brush around 200 pt, and select black color and set the opacity to about 60%, add a new layer above the texture and start drawing on the edges of the canvas, to get something like below.
Step 11
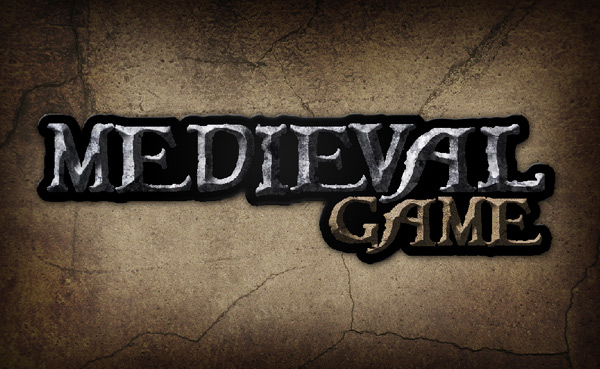
Now duplicate the layer with the black brush on the edges and set the first layer to "overlay" and the second to "normal."
Step 12
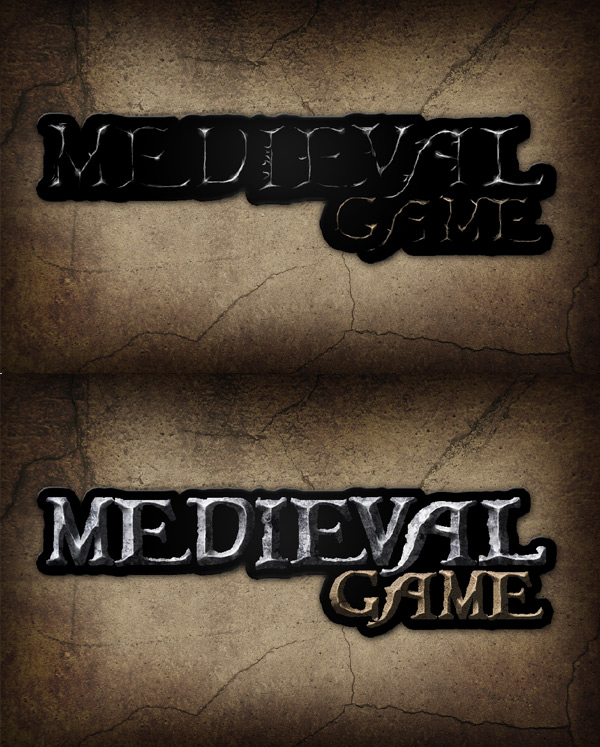
On top of all layers make a new layer to add some highlight/reflections. On the text choose a 1pt brush and set color to white, and the opacity to 70% and start drawing on the edges of the text, to make the edges more polished and shiny, this will make the logo look more detailed and realistic. See the image below for details.
Final Image
Well, that’s it! The final image is below. I hope you’ve learned something and please let me know if you have any questions.
