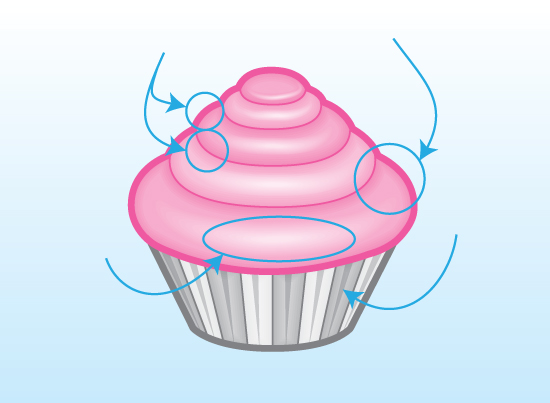
I have to be honest, I have a really bad sweet tooth. So when I showed you how to create a tasty cupcake icon in Adobe Illustrator last month it inspired me to show you how to create another cake icon in the same style.
Introduction
I have to be honest, I have a really bad sweet tooth. So when I showed you how to create a tasty cupcake icon in Adobe Illustrator last month it inspired me to show you how to create another cake icon in the same style.
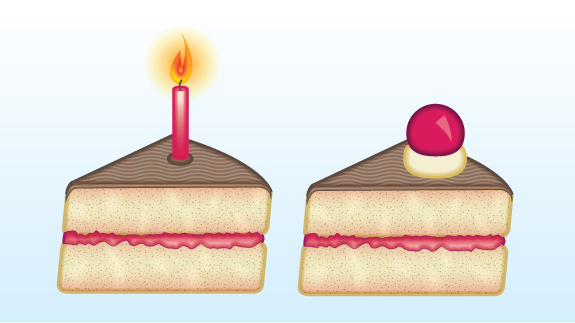
In today’s tutorial, I’m going to show you how to create a slice of cake icon in Illustrator. It’s going to take on a previously determined style to help become part of a baked goods icon set. So let’s get started.
Step 1
To start off, it’s times to do some research. As I’m wanting to use a previously established style, I’m going to need to look what elements could possibly be used in this project. From looking at the tutorial you can assume the following:
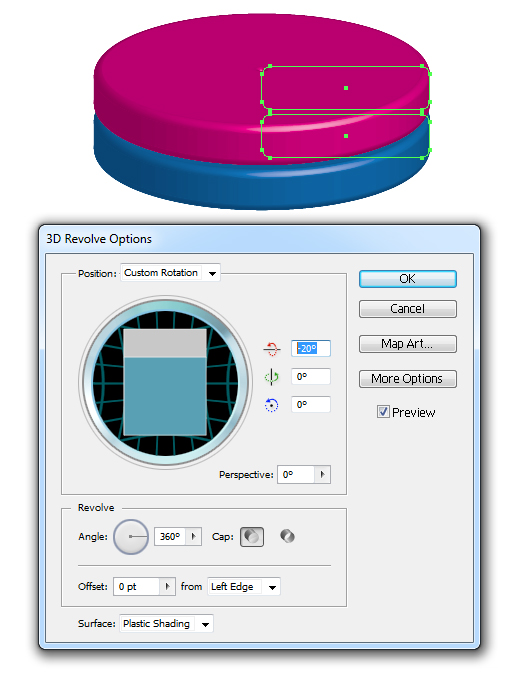
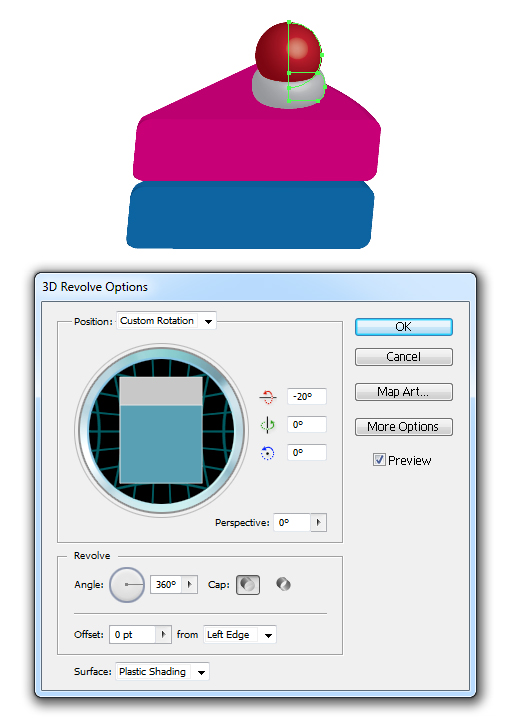
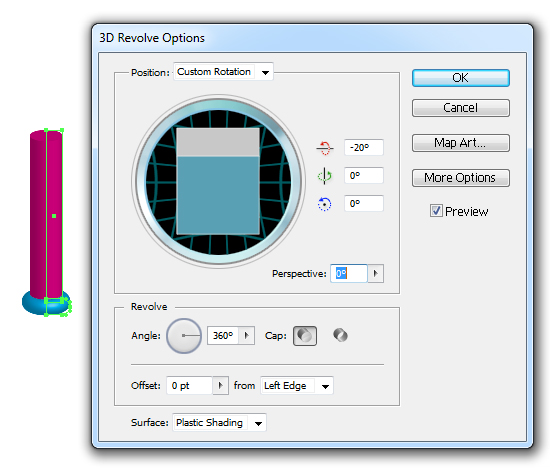
- The icon is based on using a 3D model to achieve a fixed angle and perspective. It uses a cross section and uses 3D Revolve to produce a model which is at -20 degrees on the X axis. All other values are set to 0 degrees including the perspective.
- It’s created using line art, with 3pt Stroke Weights to define the overall area and 0.75pt Stroke Weights to define the smaller details.
- Shading is created by using the Appearance panel with duplicates of Align Inside Strokes from 1pt to 5pt set to Blending Mode Multiply. Highlights are creating using an art brush made from a Blend which is set to Blending Mode Screen.
- It takes advantage of the Width Profiles for more defined highlights and shadows – such as on a cherry or creases in a cupcake casing.
These factors can be applied to anything if I wanted to replicate the style. They are generic details for things like the line art, the shading, the angle/perspective.
Step 2
To start with, I’m going to need to construct my 3D model. The initial thought for me was to create a curved triangle and use this, however we need a cross section of the cake slice, not an over head view of the cake.
I’m going to use the Rounded Rectangle Tool to create a long shape and then duplicate it and use my arrow keys to nudge it downwards. We’ll be able to create our own jelly/jam inside the cake slice, so we won’t need a guide for this. Use different colors for the rectangles as this will be easier to trace from when it comes to creating the line art. Once done, Group your two shapes (Ctrl + G).

Step 3
With your group selected go to Effects > 3D > Revolve. I’ve applied the settings used for the cupcake onto our group and we’re left with what looks like a whole cake. This is because the Revolve Angle is set to 360 degrees. We’re just wanting a slice!
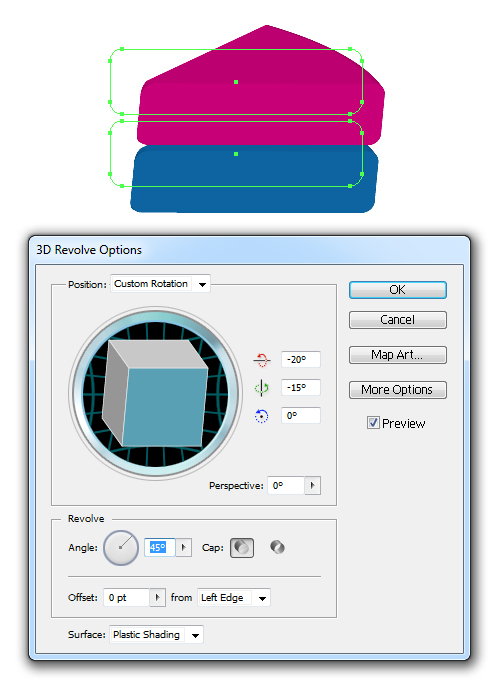
So I’ve changed the Revolve Angle to 45 degrees. I’ve also altered the Y Axis angle to -15 degrees. As long as the X and Z Axis are fixed at -20 and 0 respectively, it’s fine to rotate the slice on the Y Axis.
Step 4
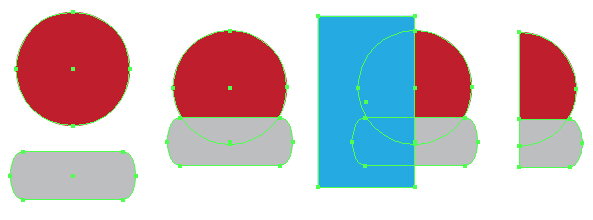
I’m going to create a cherry which is fixed in cream for on top of our slice of cake. To create the shapes required, I’m going to use the Ellipse Tool (L) to first draw the cherry and then draw a Rounded Rectangle for the cream. I’ve then used a plain Rectangle (M) and Pathfinder > Minus Front to remove the left half of the cherry and cream. To finish off, I’ve Grouped the shapes (Ctrl+ G).
Step 5
Once you’ve created your cherry and cream, you can go ahead and apply the 3D Revolve Effect. I’ve then placed it on top of the slice of cake.
Step 6
Now that you’ve got your slice of cake and decoration in 3D you can now Object > Expand it. This will change it from basic shapes which have an Effect applied to it, to a selection of complex shapes. I’m doing this as I’m going to take full advantage of Smart Guides (Ctrl + U) as it will help keep my line art as close to the guide as possible. I’ve then placed a white fill Rectangle (M) at to 50% Opacity over the top of the guides so the colors aren’t as strong and I can see my line art clearer.

Step 7
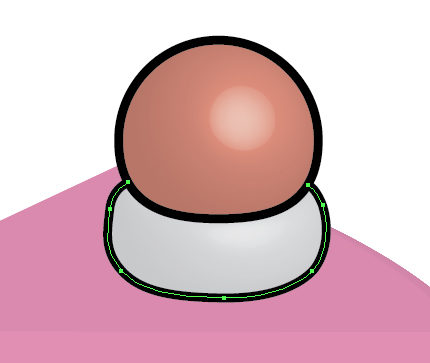
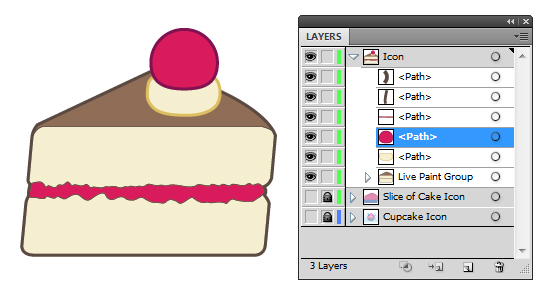
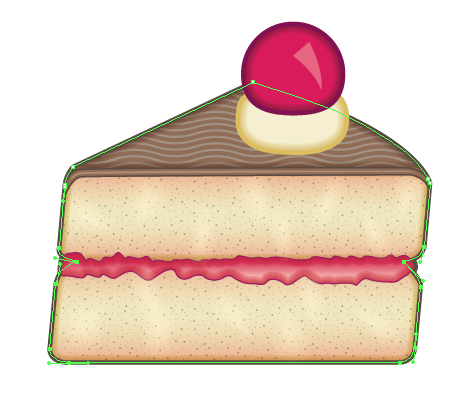
So let’s start drawing the line art. I’m going to start simple and draw the cherry. I’m going to draw an even circle with the Ellipse Tool (L) and then use the Direct Selection Tool (A) to bring the bottom point upwards a notch and then pull the handle bars on the side points down slightly to get the shape as shown below.
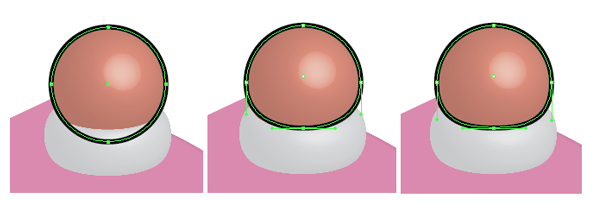
I’ve then drawn a rounded shape underneath with the Pen Tool (P). Now as these shapes are their own elements, they’ll have a Stroke Weight of 3pt.
Step 8
For the actual cake, I’ve first drawn around the entire wedge with the Pen Tool (P) and then roughly drawn a bumpy shape for the jelly/jam center.
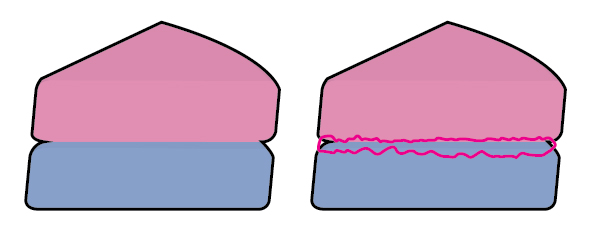
As the jelly/jam filling is a smaller detail of the entire cake, I’ve changed the Stroke Weight to 0.75pt and also added a line for the edge of the cake. As the filling overlaps the edges of the overall shape of the cake, I’ve drawn two extra lines either side with a 3pt Stroke Weight to compensate.
Step 9
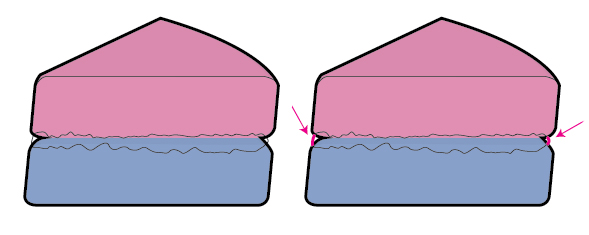
The plan is to use Live Paint to color the sections of the cake and then use options in the Appearance panel to produce the inner glow effect shading. With this in mind, I’m going to need to split the top and bottom pieces of cake with a line so they are treated as two shapes and not one. This line will be covered by the jelly/jam filling as shown below.
Step 10
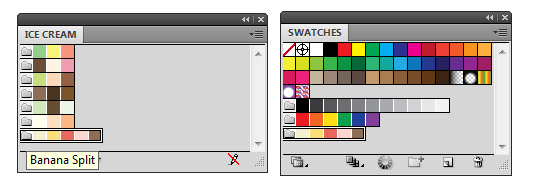
For color inspiration, I’ve went looking into the Swatch libraries ready available in Illustrator. Go into the drill down menu in the Swatch panel > Open Swatch Library > Food > Ice Cream and I’ve used the Banana Split swatch. Click on the folder to the left of it to add it to your Swatch panel.
I’ve then used the Live Paint Bucket (K) on the actual cake slice and then filled in the rest of it manually.
Step 11
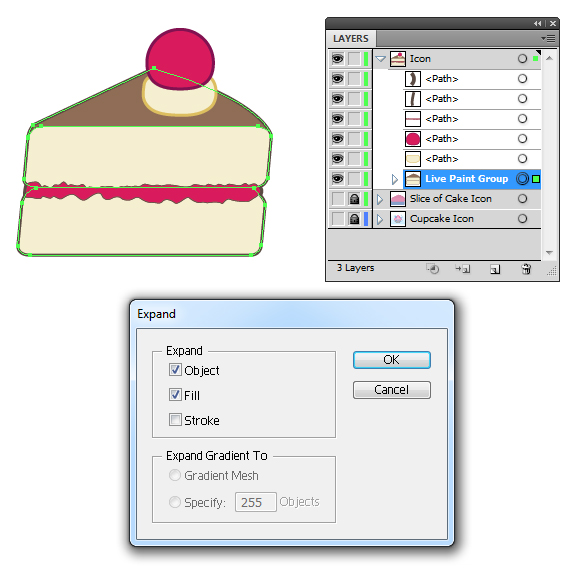
I want to access the shapes of the cake slice, so select the Live Paint Group and go to Object > Expand and untick the option “Stroke”. We want to keep the strokes intact. Click on Ok once done.
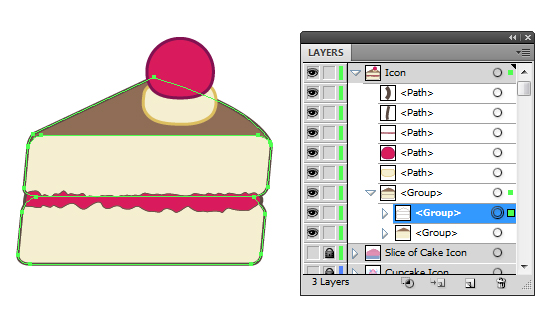
When you drill down into the group which was the Live Paint group, you’ll notice that there will be two groups within… one which is just your line art, the other the fills. It’s the fills we want to modify.
Step 12
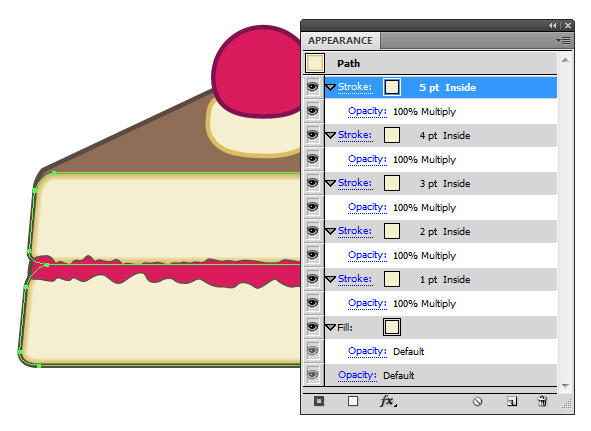
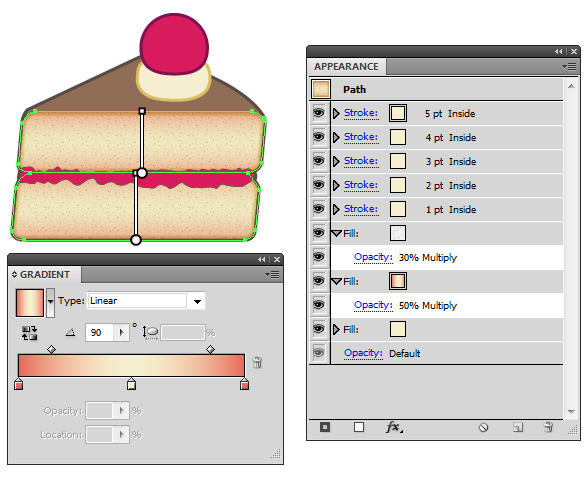
Select the two rectangles for the inside of the cake and give them five strokes which are Aligned Inside. Set the Stroke Weights from 1pt to 5pt and set them to Blending Mode Multiply, Opacity 100%. They’ll need to have the same stroke color as the fill color to keep the style of the cupcake.
I’ve added a variation to the cake to give it more detailing. I’ve first applied a new fill with the pattern “USGS 22 Gravel Beach” which you can access via Open Swatch Library > Patterns > Basic Graphics > Basic Graphics_Textures. This is set to Blending Mode Multiply, Opacity 30%.
I’ve then used colors from our Banana Split swatch to create a linear gradient and applied that at 90 degrees. This is set to Blending Mode Multiply, Opacity 50%.
Step 13
For the topping of the cake, I’m going to repeat the same process of using the Align Stroke Inside and this time using the pattern “Waves Smooth” set to Blending Mode Screen, Opacity 50%.
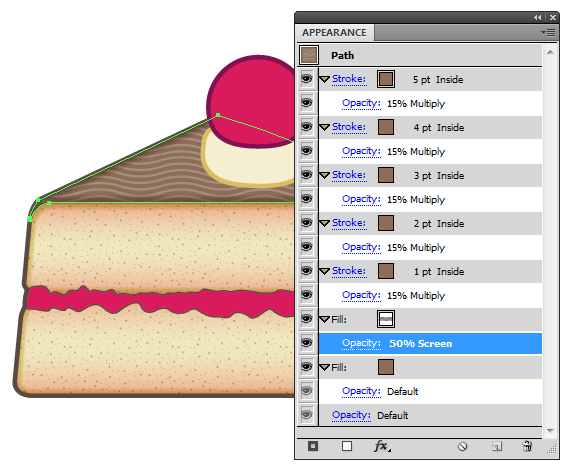
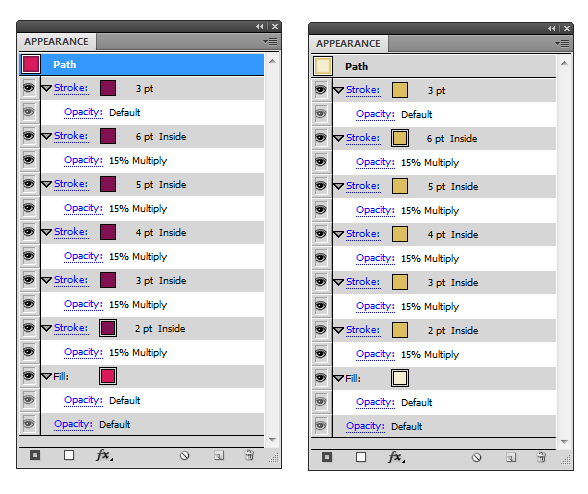
For the cherry and frosting, I’ve just used a slightly darker stroke but still using the same process as before.
Step 14
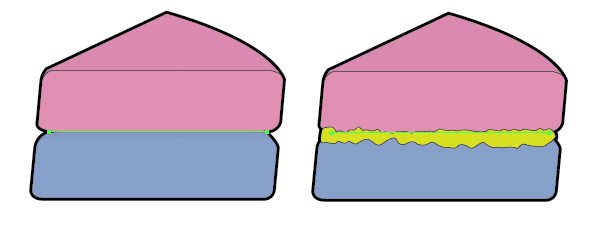
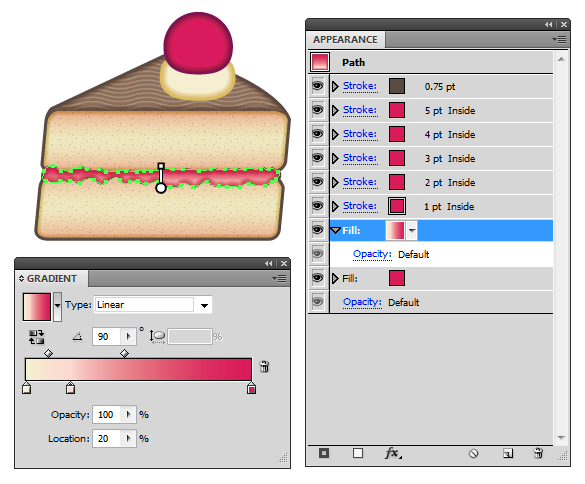
For the jelly/jam, I’ve started as usual with the Align Stroke Inside.
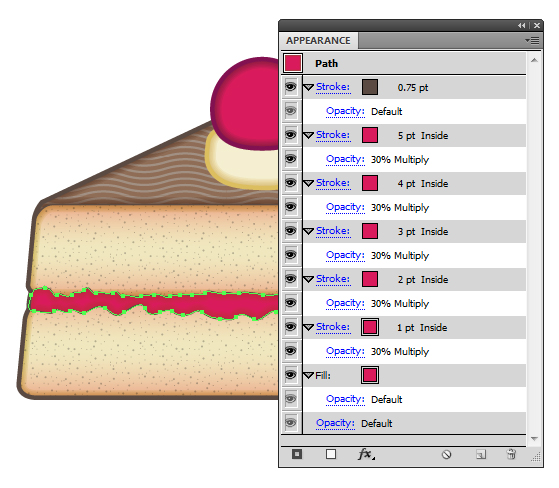
However I’ve added a fill underneath the shading with a gradient to make the filling look as if it’s catching the light. I’ve stuck to the colors from the “Banana Split” palette, so I’m keeping consistent.
Step 15
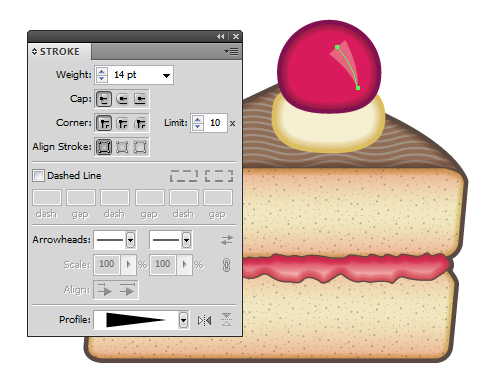
The cherry on the cupcake had a shine which used the Profile “Width Profile 4″ so I’ve kept this. It’s got a cream pink stroke color (C=0, M=50, Y=20, K=0) and 14pt Stroke Weight. I’ve then set it to Blending Mode Screen, Opacity 50%.
Step 16
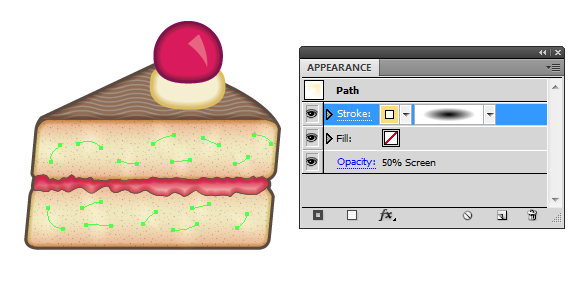
Although I’m not going to be using a blend brush for highlights, however I am going to use it to create variations in the texture of the cake. So using the golden shade in the “Banana Split” swatch, I’m going to add some short 1pt strokes set to Blending Mode Screen, Opacity 50%.
Step 17
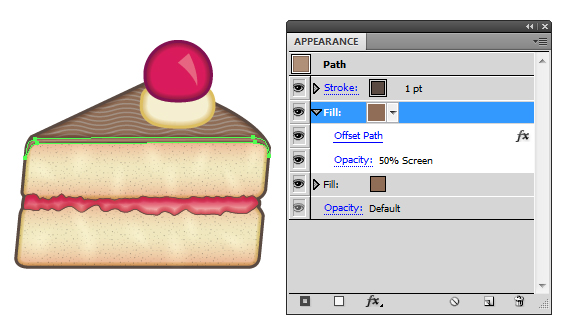
I’m going to finish off the cake by adding some depth to the fondant icing on top by adding a thin shape along the top. I’ve added an effect to the fill called Offset Path and set the value to -1.
Step 18
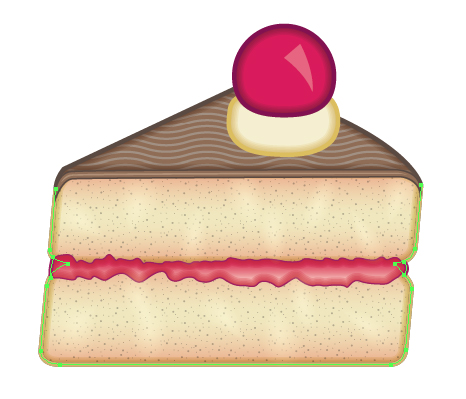
I’ve modified the line art for around the bottom of the cake to reflect the golden shades of the inside of the cake. I’ve done this by selecting the line art at the bottom of the overall wedges shape using the Direct Selection Tool (A)…
… and then Copy (Ctrl + C) and Paste in Front (Ctrl + F) and giving it a golden shade. For the jelly/jam filling, you’ll need to go into the Appearance panel settings to modify the Stroke color. Remember, you’ll also need to change the color of the Strokes of the two lines either side of the jelly/jam filling shape!
Candle Variation
Step 1
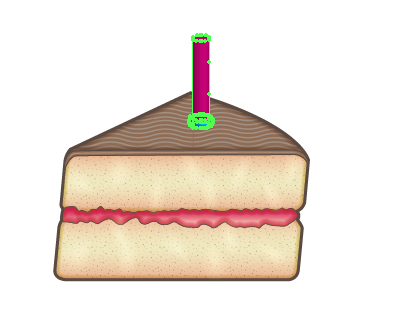
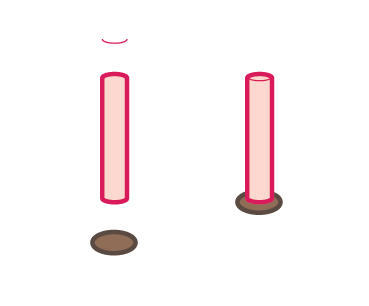
As a different decoration, I’m going to add a candle to the frosting. I’m going to use a half Rounded Rectangle and Rectangle (M) as the base for a guide. Remembering to use the same 3D Revolve settings.
I’ve then placed it on top of the cake and Object > Expanded it.
Step 2
I’ve used the expanded guide to create shapes for the candle using the Rounded Rectangle, Ellipse Tool (L) and the Pen Tool (P). Keeping consistent to use 3pt Stroke Weight around the main element and 0.75pt Stroke Weight for the detailing.
Step 3
I’m going to take advantage of the Appearance panel settings already set for the fondant topping and the jelly/jam filling. Using the Direct Selection Tool (A) select the fondant topping. Go into the Graphic Styles tab and click on New Graphic Style.
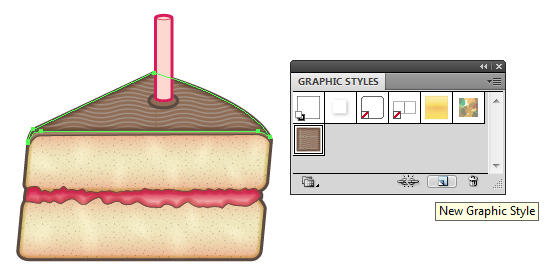
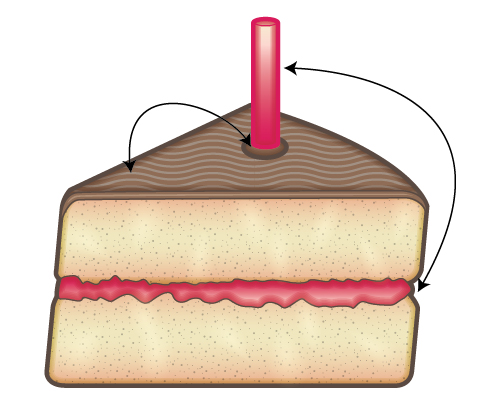
I’ve applied the fondant topping to the base of the candle and hidden the pattern and for the candle, I’ve applied the jelly/jam filling and switched the direction of the gradient.
Step 4
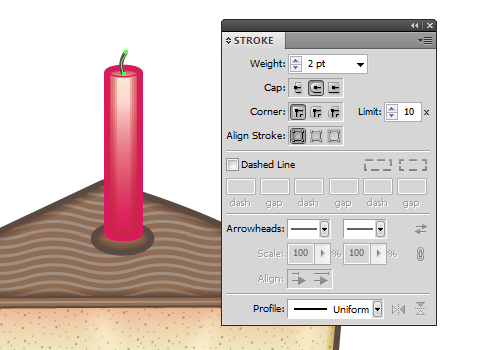
The wick of the candle is just a 2pt Stroke Weight brown line with Round Caps, drawn with the Pen Tool (P).
Step 5
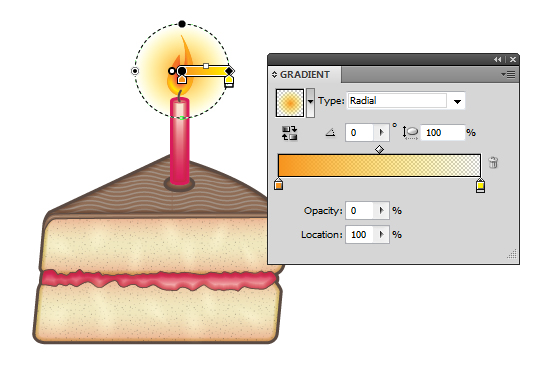
For the flame I’ve used the Align Stroke Inside method with oranges and yellows as shown below.

And then finished it off by placing an orange to yellow transparent radial gradient within an Ellipse (L) behind the flame.
Conclusion
I hope you’ve enjoyed today’s tutorial on creating a cake slice icon. Keep your eyes open for a premium pack full of bakery themed icons in the same style!
{excerpt}
Read More