In this QuickTip tutorial we will be looking at the Warp Tool and the Bristle Brush settings to make a quick and effective chalkboard illustration. Let’s get started!
Step 1
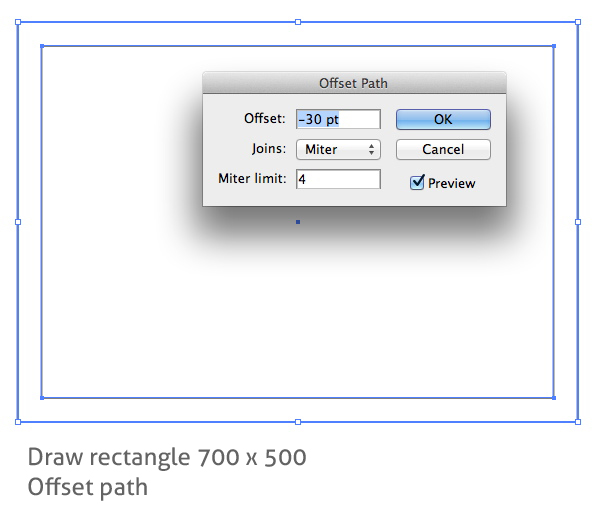
Draw a rectangle 700px x 500px. Keep it selected and go to Object > Path > Offset Path. Enter -30
Step 2
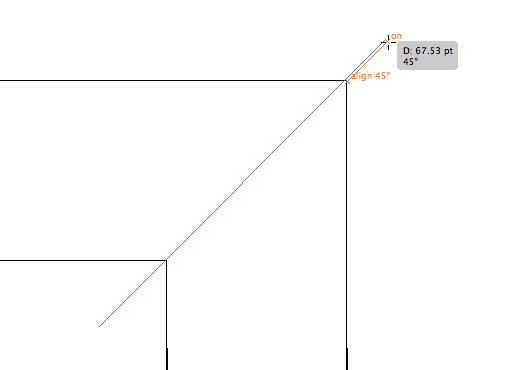
Zoom in so you can see the corners, and using the Line Segment tool (Backslash), draw a line at a 45-degree angle. You can turn on Smart Guides to help. The line should extend beyond the rectangles in each direction, as in the image below. Do this for each corner.
Step 3
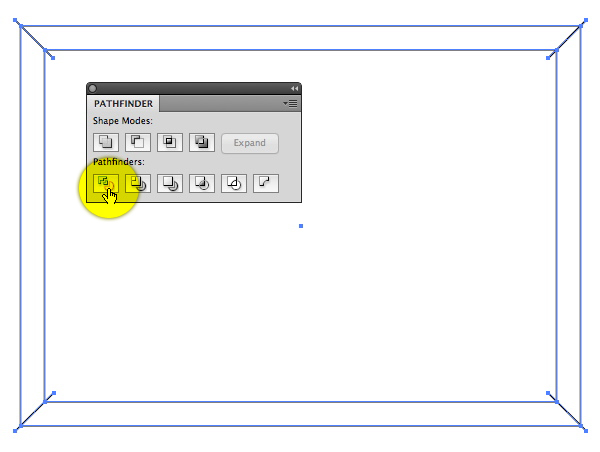
Select everything and click Divide in the Pathfinder panel.
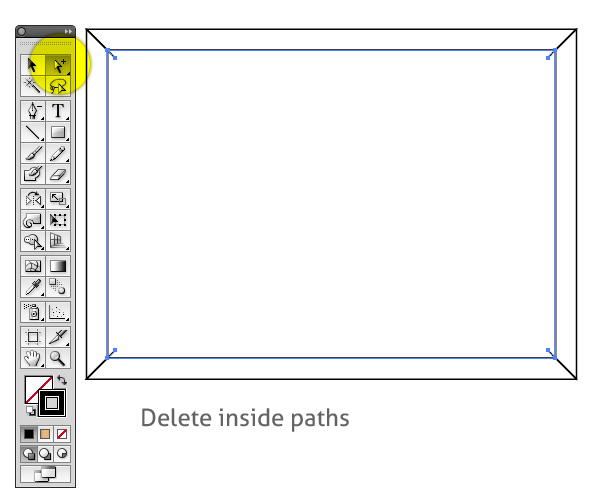
Now take the Group Selection tool and click once on one of the inner angled lines. This should select all of the overlapping paths at once. Press Delete.
Step 4
For the wood grain, draw a long thin rectangle. Holding down the Option/Alt key, drag to make a copy. Press Command/Ctrl-D to make a few more copies.
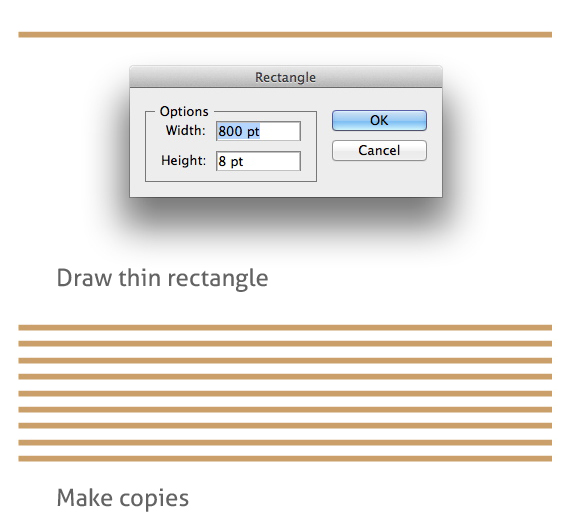
Step 5
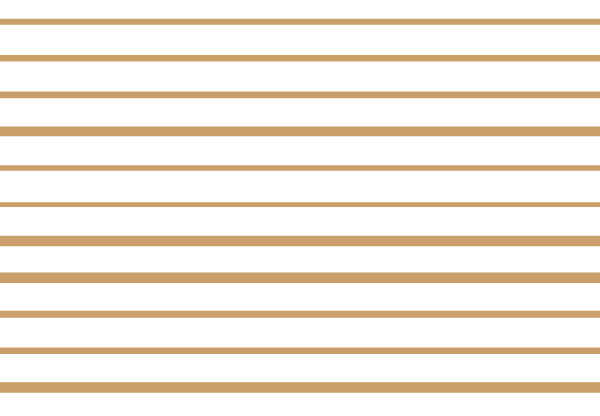
With all of these lines selected, go to Effects > Distort & Transform > Transform. Enter about a 40% vertical scale, and click Random.
The result will look something like the image below. Go to Object > Expand Appearance.
Step 6
Double-click the Warp tool (Shift-R) to bring up its options. Enter the values below.
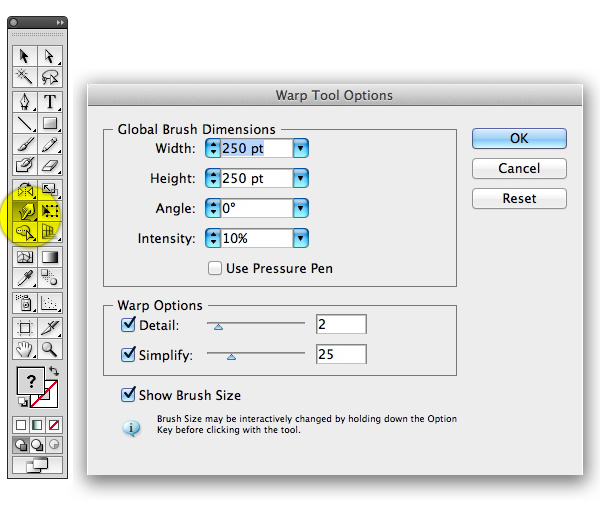
Now drag over the lines a couple of times to warp them, as in the image below.
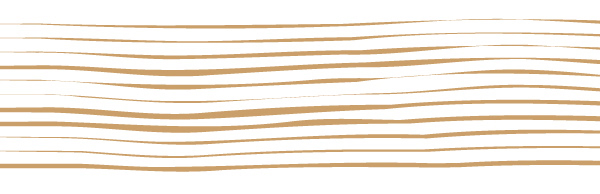
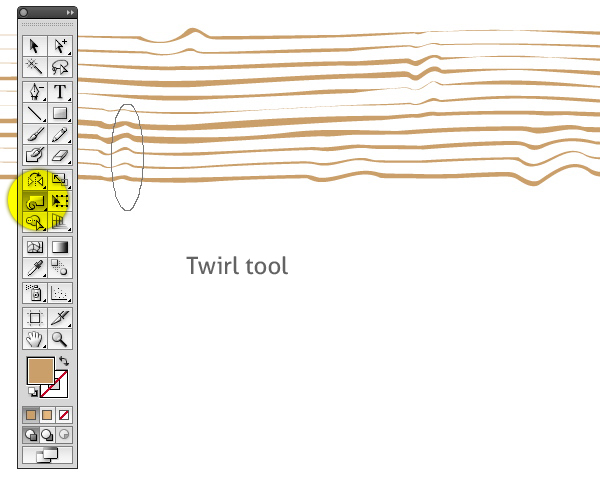
Step 7
Choose the Twirl tool (underneath the Warp tool). To change its shape, hold down the Option/Alt key while dragging. Make it a narrow oval, and lightly twirl in a few places, as in the image below. You may have to double-click the tool and lower the intensity, if the twirl effect is too intense.
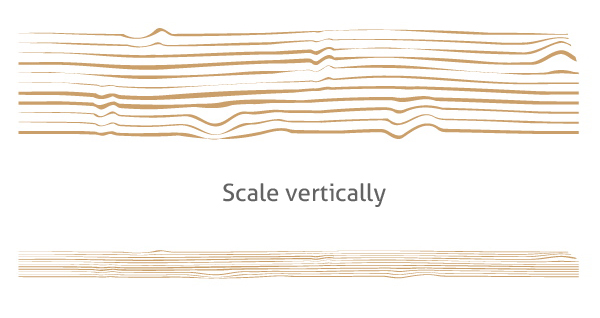
Scale the entire wood grain vertically, but dragging downward with the bounding box.
You can repeat the wood-grain process three more times for each section of the chalk board frame, or simply make three more copies, totaling four sets.
Step 8
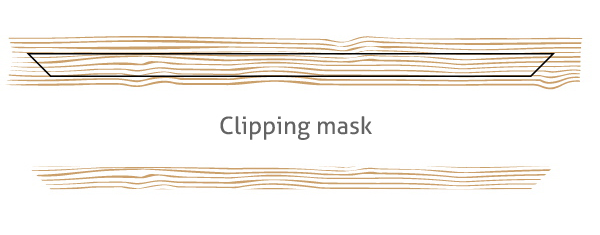
Make a copy of the frame shape and set it aside. Ungroup, then place one segment’s shape on top of a set of wood grain. Select both the grain and the frame segment, then go to Object > Clipping Mask Make. Do this for each section of the frame. The result should look like the image below.
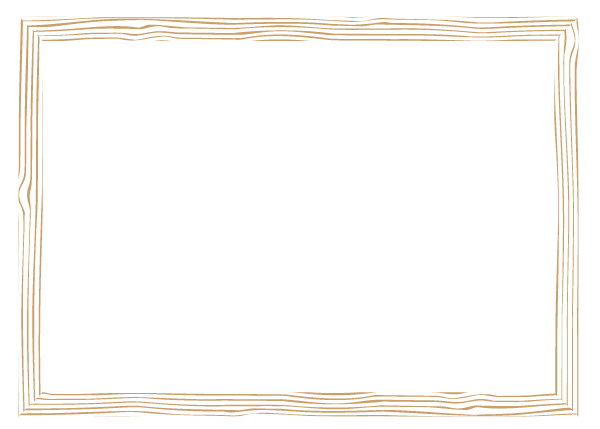
Repeat this process with the other three sides of the frame. The four sides of the frame, all together, are below.
Step 9
Take the other copy of the frame shapes and fill them with a lighter wood-colored gradient, as shown.
Place the wood grain frame on top of the gradient-filled objects. The frame is complete.

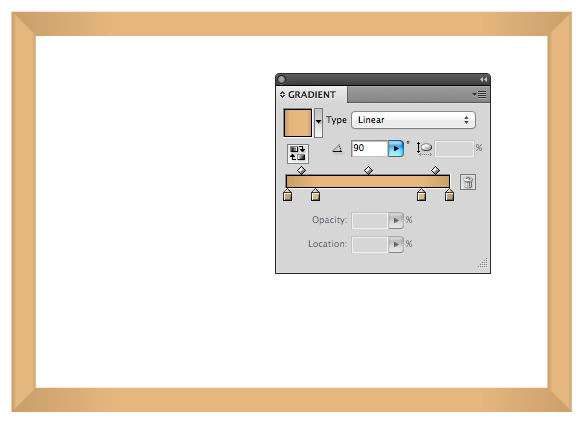
Step 10
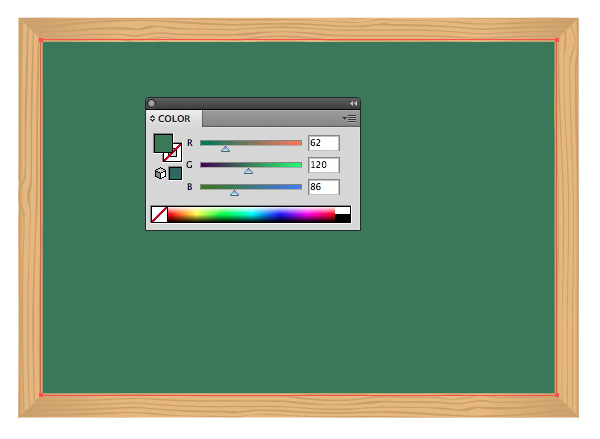
Draw a rectangle slightly larger than the frame opening. Fill it with a bluish green and send it behind the frame.
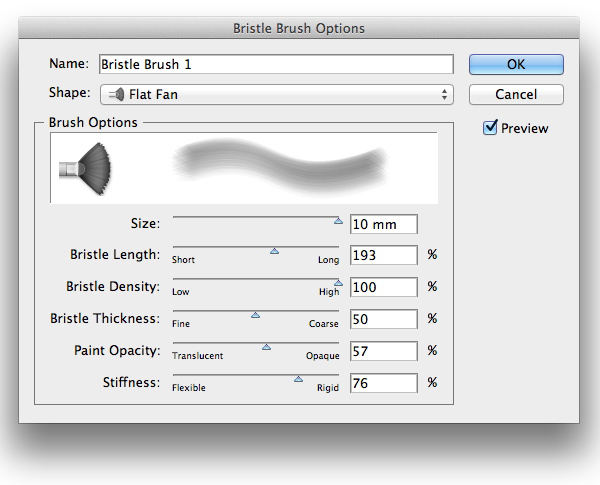
Step 11
On the bottom of the Brushes panel, click the New Brush icon. Choose Bristle brush, then enter the settings below:
Step 12
Draw a simple Z-shaped line with the Pen tool. Click the Bristle Brush in the Brushes panel to apply it to the path. You may have to increase the point size of the path to get a more abstracted texture.

Lower the opacity of the brush stroke until it looks like the board has been erased a few times.
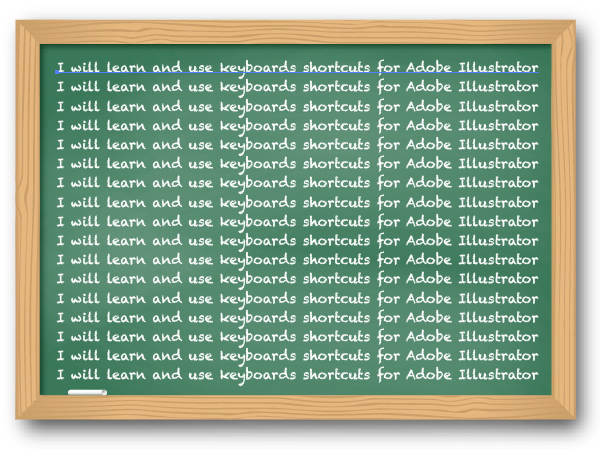
Conclusion
You can add some shadow effects and to add dimension, and of course, any message you like! The font used below is Chalkduster, a MacOS system font.
{excerpt}
Read More