Intro
Widgetized Stickybar is a plugin for WordPress that allows you to add a highly customizable widget bar to your blog or website. As it is said in the title, bar contains widget areas, where you can place any widgets available in your WordPress dashboard. As an administrator you decide where to stick the bar: top, bottom, right or left edge. You also can customize size, colors, opacity, number of columns and other parameters of the bar. Widgetized Stickybar is a perfect way to extend functionality of your website.
Widgetized Stickybar might be used as notification bar (just put text widget with required info) or social bar (put social buttons)!
Features
- Place any WordPress widgets: drag and drop any widgets available in WordPress dashboard.
- Highly customizable: set size, color, number of column, alignment and even edit CSS .
- Set default state: it might be expanded or collapsed by default.
- Stick bar to desired edge: place stickybar wherever you want.
- Separate tab color: make it more bright and more visible.
- Up to 6 widget areas: put your widgets as tightly as you wish.
- Easy to install: install and activate the plugin as any other plugins.
- Translation ready: plugin might be translated to any language.
- Built using WordPress best practices: no any alerts from Plugin Check.
Front End Functionality
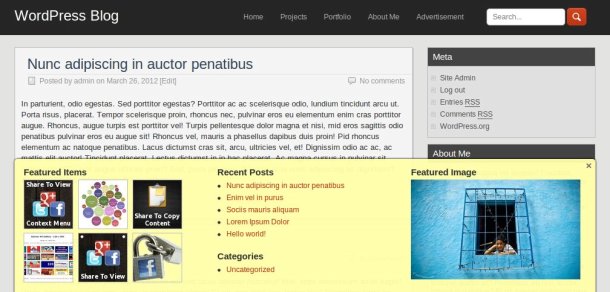
The best way to understand the idea of Widgetized Stickybar is to see live example. Click “Live Preview” or look at screenshot below. At the bottom of the page you will see small dark red tab – this is collapsed bar. If you click on this tab, Widgetized Stickybar expands. As you can see I placed several different widgets on the bar.
Installation
1. Install and activate the plugin. Once activated, it creates menu item “Widgetized Stickybar” under menu section “Settings” in left side column in the admin area. It also adds 4 new widget areas available on Widgets page.
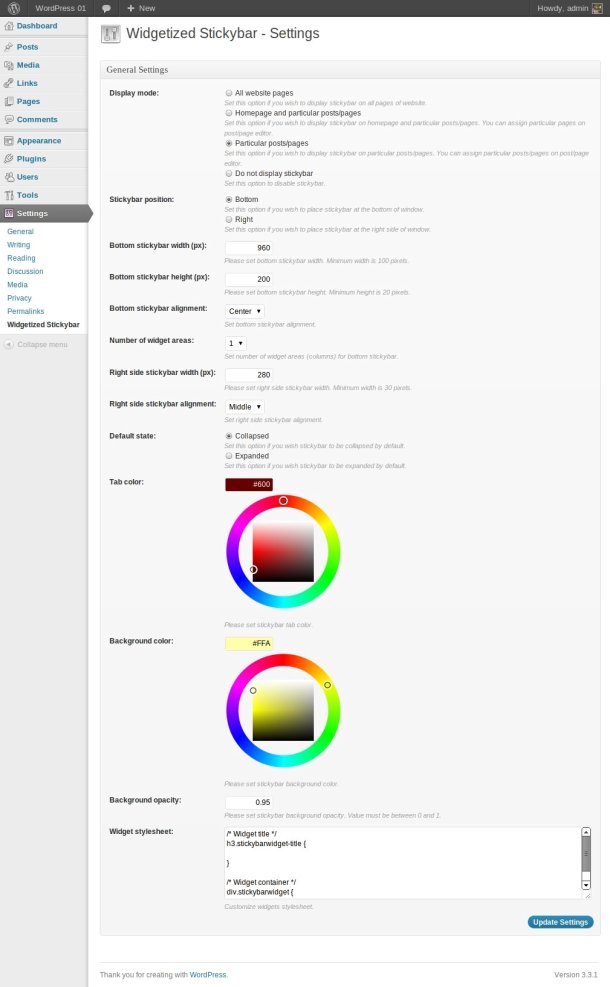
2. Click left side menu “Settings >>> Widgetized Stickybar” and do required settings. Set bar position, color, size, number of columns, or customize CSS stylesheet. You also can use different displaying modes. Please look at the screenshot below to see what kind of settings you can do there.
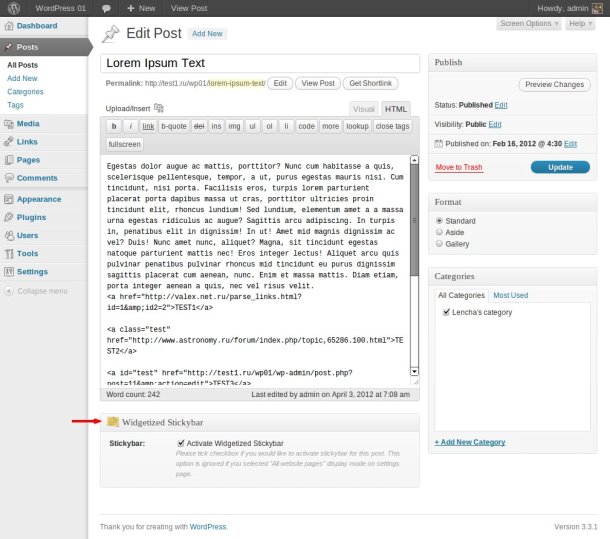
3. If you selected “Homepage and particular posts/pages” or “Particular posts/pages” display mode on settings page, then you can assign particular posts/pages to be covered by plugin functionality. Go to post/page editor and set checkbox “Stickybar” (view screenshot below).
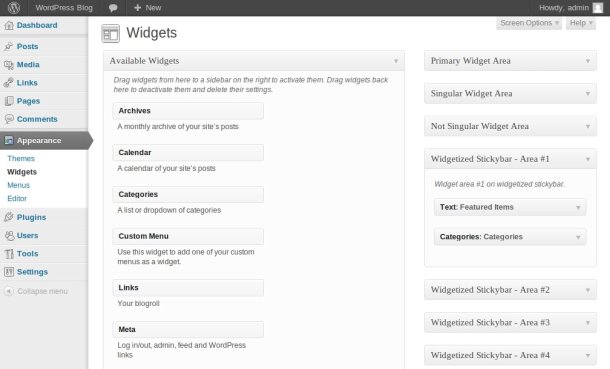
4. Go to Widgets page (“Appearance >>> Widgets”) and drag and drop desired widgets into Widgetized Stickybar Area (look at screenshot below).
That’s it! Enjoy using the plugin.
Support
If you have problems regarding using the plugin, please contat me and I’ll help you.