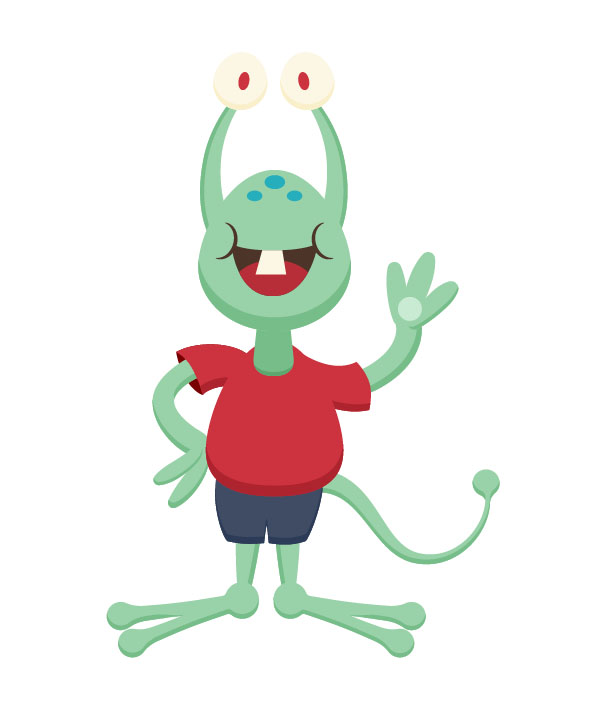
In this tutorial we will be creating a little alien guy very quickly, by taking advantage of the Width Tool. We will also be using the Ellipse tool, Pen Tool and the Pathfinder panel. Let’s begin!
Step 1
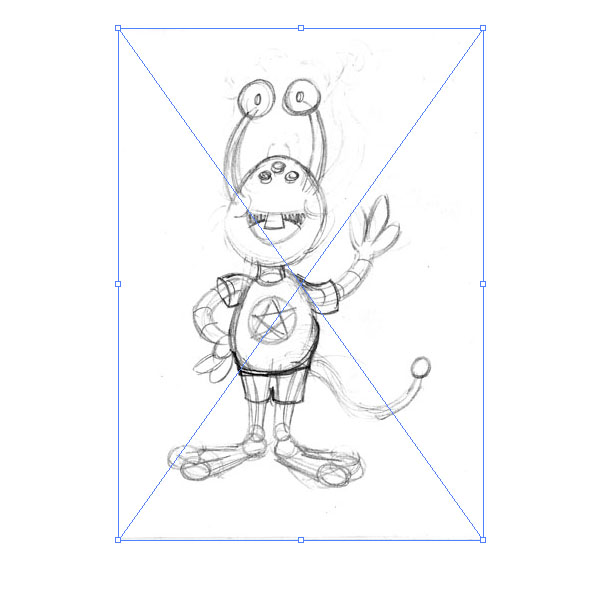
It all starts with a pencil sketch. I have it saved as a JPG file. Place the image on the artboard using File > Place.
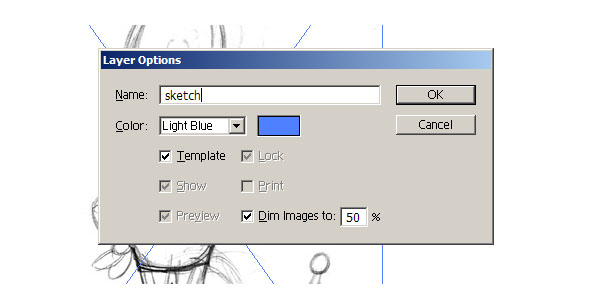
Once that’s done, double click on Layer 1, rename it as "sketch" and activate "Template", with Dim Images to 50%. This will keep the sketch on the background so we can trace it comfortably.
Create another layer to do the actual vector work on top of "sketch" and name it "artwork". Then press Control + Y or go to View > Outline to switch to this view mode on this new layer.

Step 2
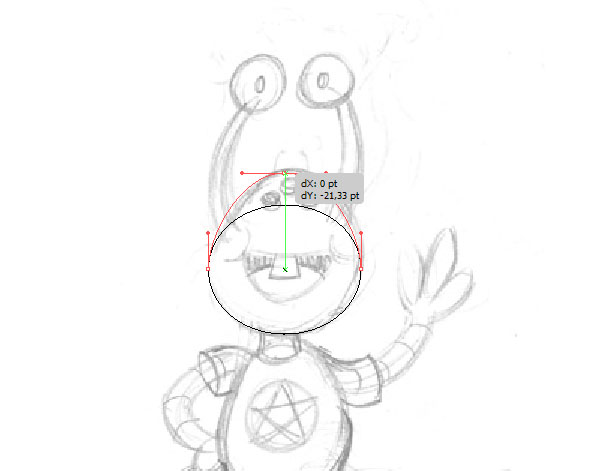
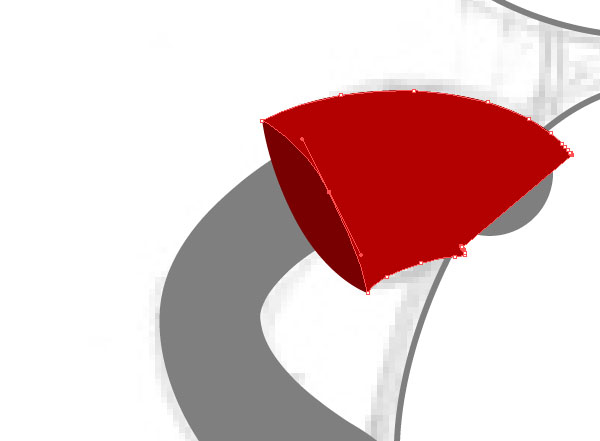
We’ll start to trace this character, beginning with the Ellipse Tool (L). The shape of his head is not a perfect ellipse, so drag the top node using the Direct Selection Tool (A).
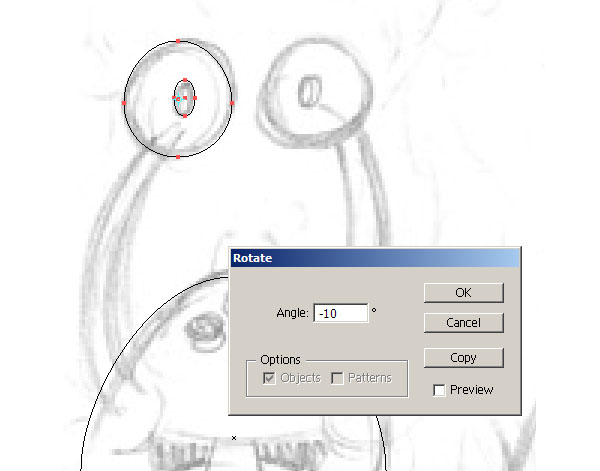
Next, the eyes. Trace them using ellipses. No node editing will be needed here, but they are slightly rotated in the sketch.
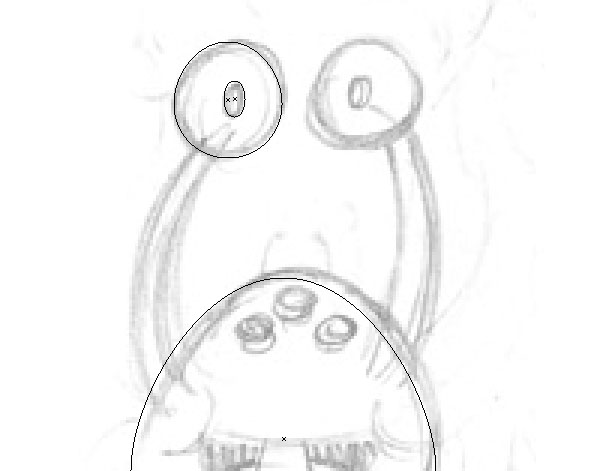
Double click on the Rotate Tool icon to bring the options window. Select an angle of -10° and click OK.
Then, Option + Shift + Drag the eye to the position of the other one in the sketch and go to Object > Transform > Reflect to create a symmetrical eye.
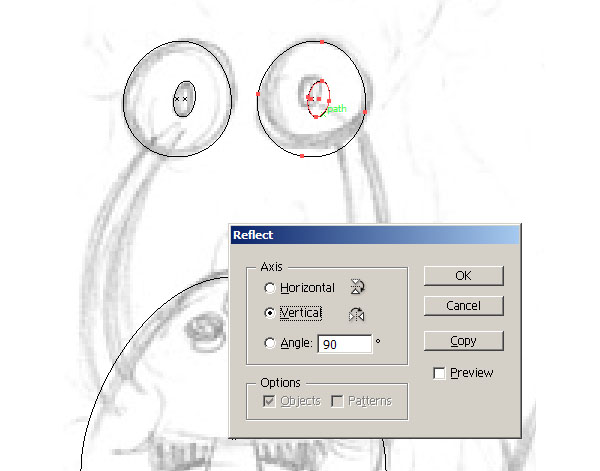
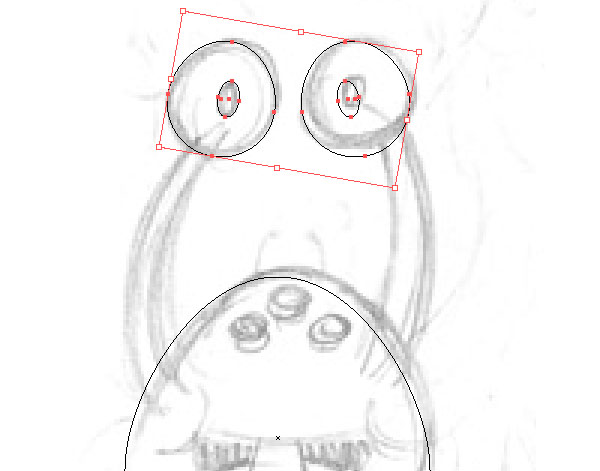
Be sure to group the eyes together, as well as everything that goes on pairs. It will save you a lot of trouble if you want to align everything.
Step 3
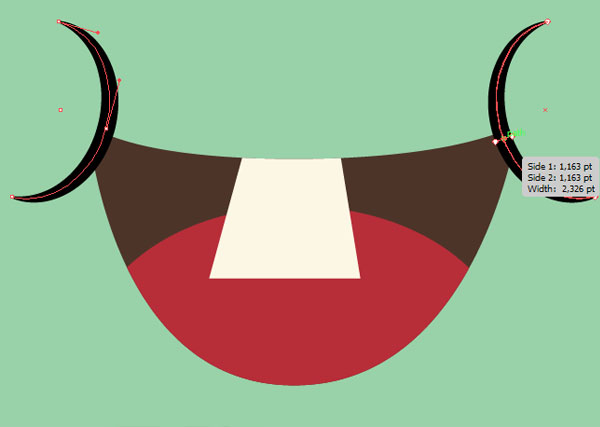
Use the Pen Tool (P) to trace the mouth. If you have the Smart Guides on (Command + U), they’ll help you to keep the shape symmetrical.
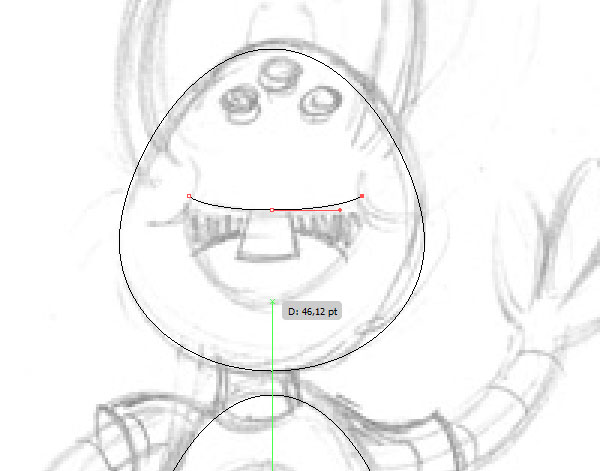
Use the Pen Tool (P) again to draw the teeth and an ellipse (L) to draw the tongue. Next, select the mouth shape, and press Command + C and Command + F. This will create a duplicate shape that will be exactly on the same place as the original. With that duplicated shape selected, hold Command and select the teeth as well.
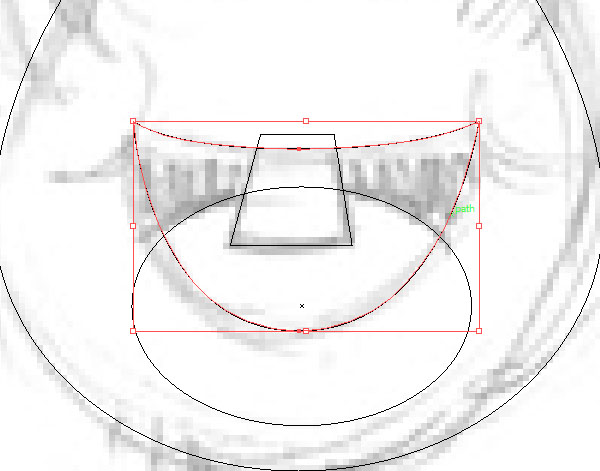
Go to the Pathfinder Panel and select Intersect. This will make the teeth to be restrained inside the mouth shape. Repeat the same process for the tongue (don’t forget to duplicate the mouth shape again!)

Now, go for the cheeks. You could just trace it with the Pen Tool, but in order to create a curve that’s almost perfect, just draw an ellipse (L), then double click on the Rotate Tool on the Toolbar and select -15°.
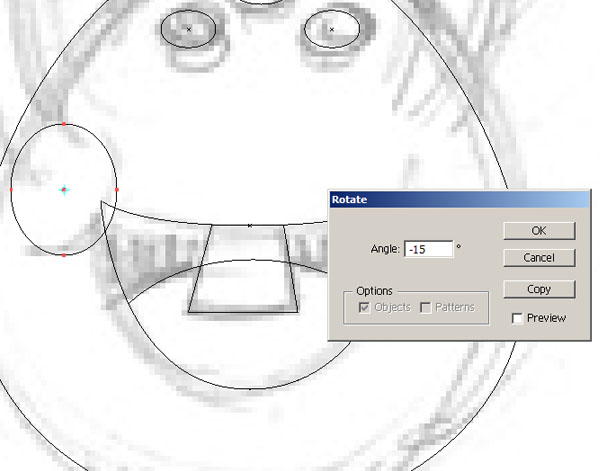
Then, just delete the node on the left.
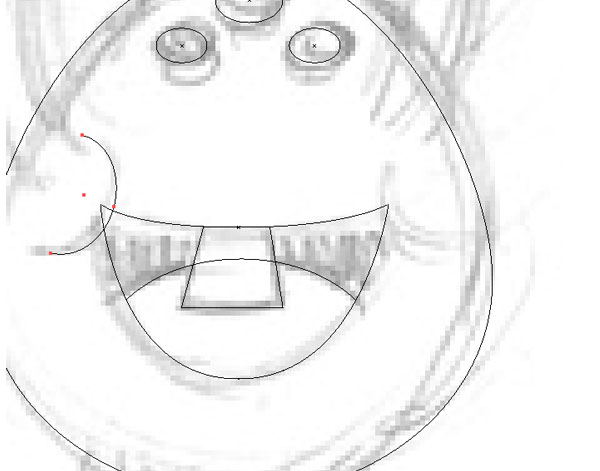
Option + Shift + Drag the shape to create the other cheek, and then, go to Object – Transform – Reflect to flip it and get a symmetrical shape.
Step 4
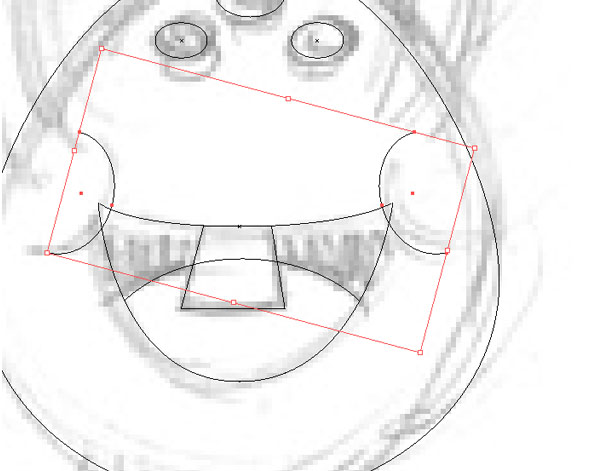
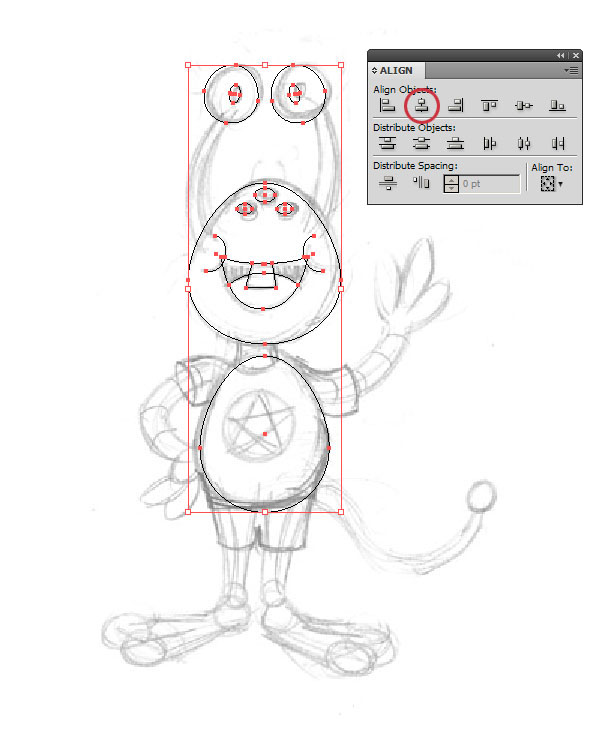
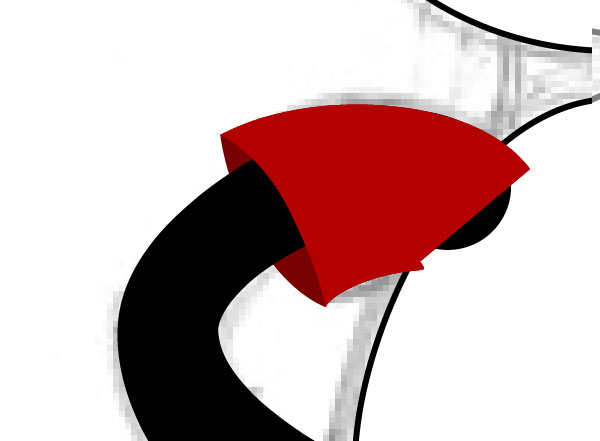
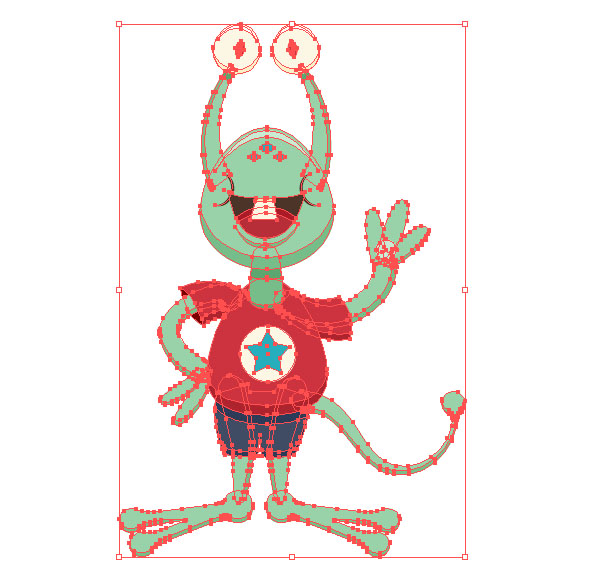
In this step we’ll take care of the limbs of the character. But before we do that, it’s a good time to align everything we have. Select all (Command + A), go to the Align panel and select Horizontal Align Center. Make sure you have everything properly grouped (the eyes, the freckles, the cheeks), if not, Illustrator will send everything to the center.
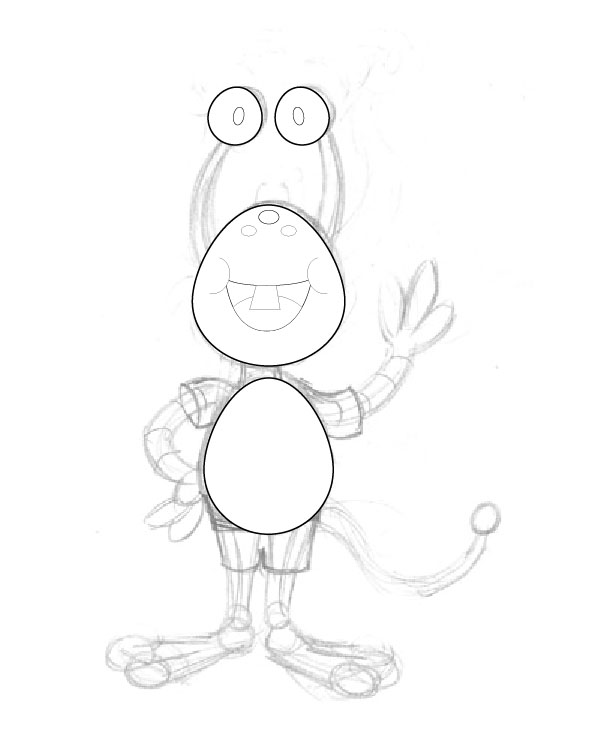
Now it’s time to abandon Outline view. Press Command + Y to go back to Preview mode.
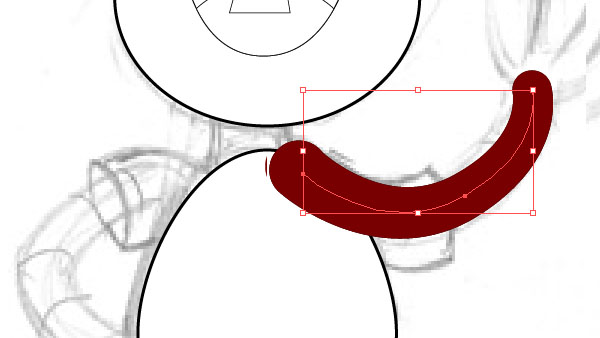
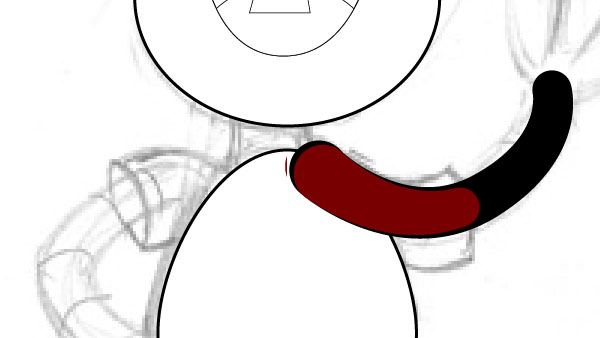
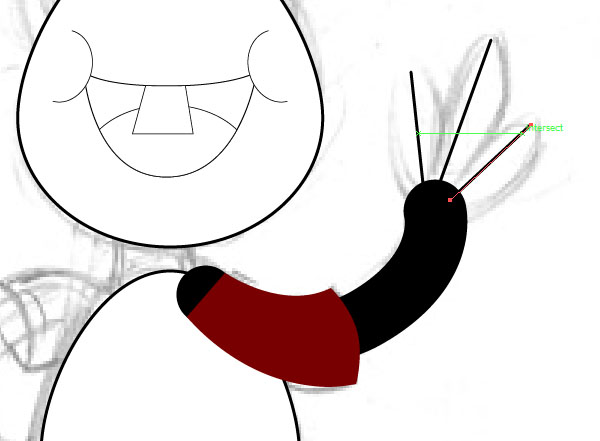
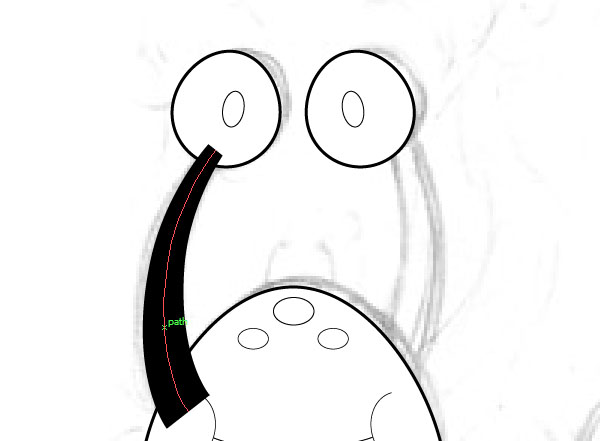
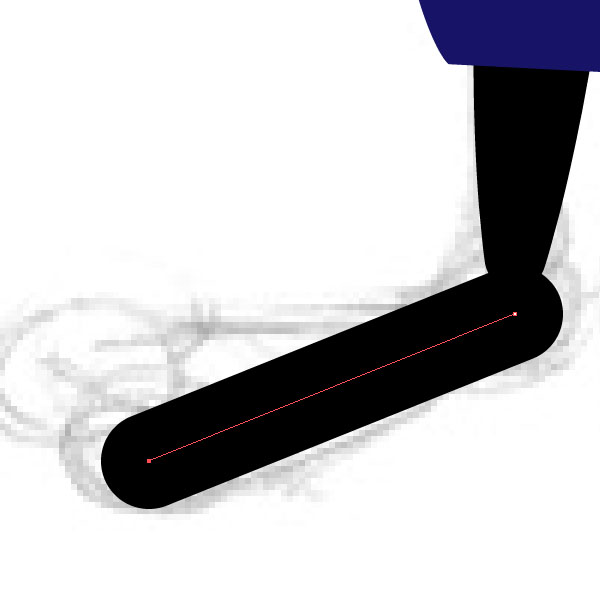
Now, we’ll start tracing the arms. To do it, just draw a line using the Pen Tool (P) in the center of the arm.

From the Stroke panel, increase the value for the line. This is not an exact science, just keep increasing it until you feel the thickness feels right.
(Make sure you have the Round Cap selected in the Stroke Panel!)

Now, select the Width Tool (Shift + W) to start customizing this line. Clicking and dragging with this tool allows you to change the width of the line in certain section.

Step 5
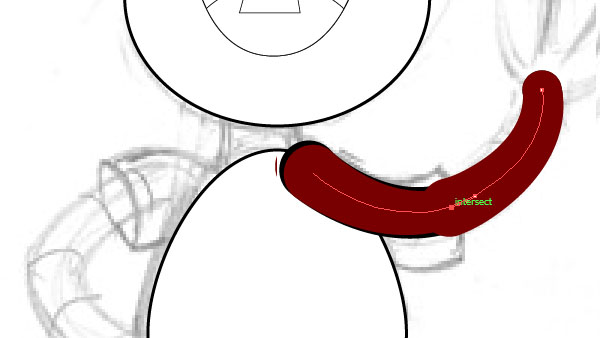
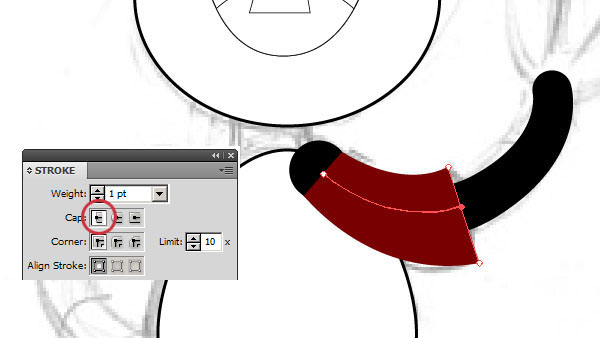
Now that the arm looks good, we need to create the sleeve. We can do it using the Pen Tool (P), but we can reuse this same line, too! Select the arm, press Command + C and then Command + F to duplicate the shape in position. Change the color of this new shape so you don’t get confused.
Then, using the Scissors Tool (C), cut the line where the sleeve ends.
Delete the rest of the shape.
The shape of the sleeve is more straight than round, so make sure you select Butt Cap from the Stroke Panel. Use the Width Tool (Shift + W) to enlarge one of the extremes.
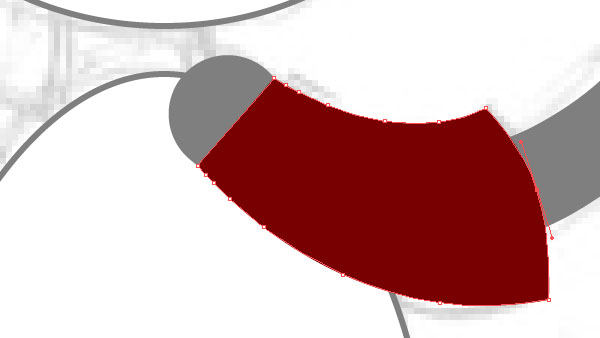
Now, it looks good enough, but not exactly as it was in the original drawing! So we’ll Expand that line (Object > Expand Appearance) to edit it.
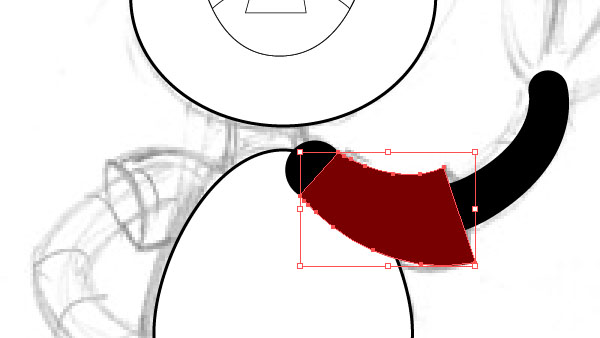
Double click on it to switch to Isolation Mode. Add a node with the Pen Tool (P) and with the Convert Anchor Point Tool (Shift + C) make it slightly curve.
Now it looks exactly as in the pencil drawing!
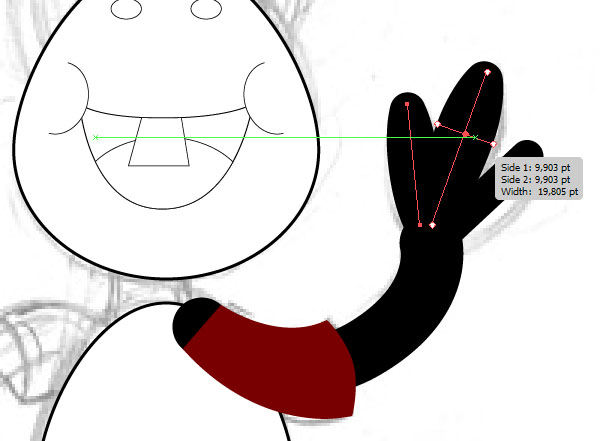
Now, simply create straight lines for the fingers, using the Line Segment Tool (\).
By using the Width Tool (Shift + W), modify its thickness until you feel it looks right.
Repeat the same steps for the other arm.
Just one difference: we need to see the inside of this sleeve. Double click on it to work in isolation, select it, and press Command + C and Command + F to duplicate it.
Change the color of the duplicated shape and simply drag the node using the Direct Selection Tool (A).
Exit Isolation Mode and rearrange the shapes using Object > Arrange.
Assign the same color for all the shirt. Don’t worry, the colors will simply be temporary placeholders.
Step 6
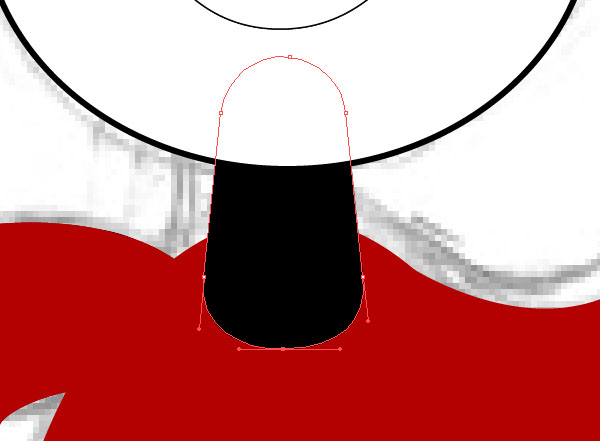
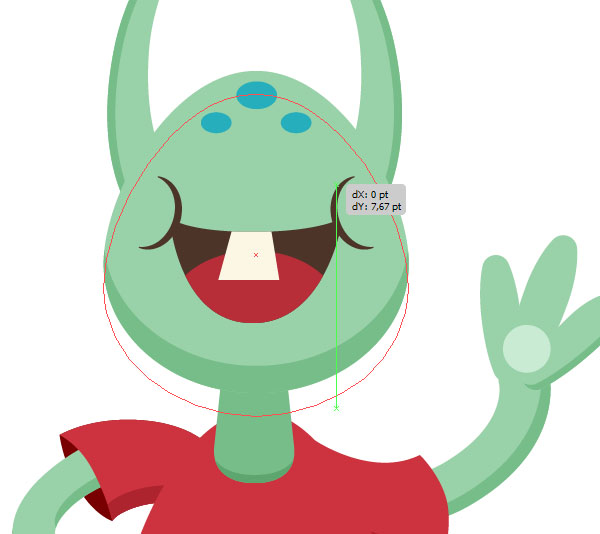
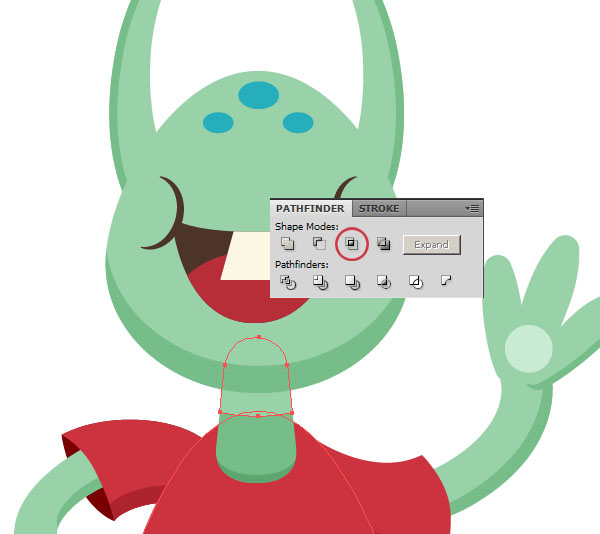
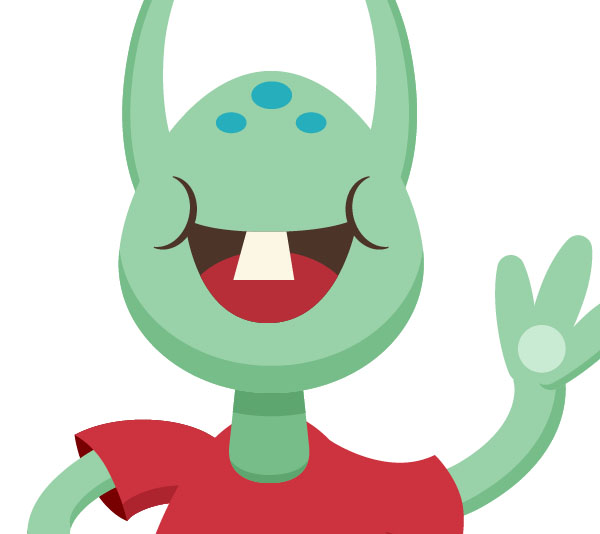
By using the Line Segment Tool (\) we create the neck shape. Adjust its thickness as you wish from the Stroke Panel and its width with the Width Tool (Shift + W).

The perspective looks a little odd here, since the Round Cap of the line is way too round. Go to Object > Expand Appearance and drag the bottom node with the Direct Selection Tool (A) a little bit upwards.
Repeat the same process for the "snaily eyes" of the character.
As before, Option + Shift + drag to duplicate, and then Reflect to make it symmetrical.

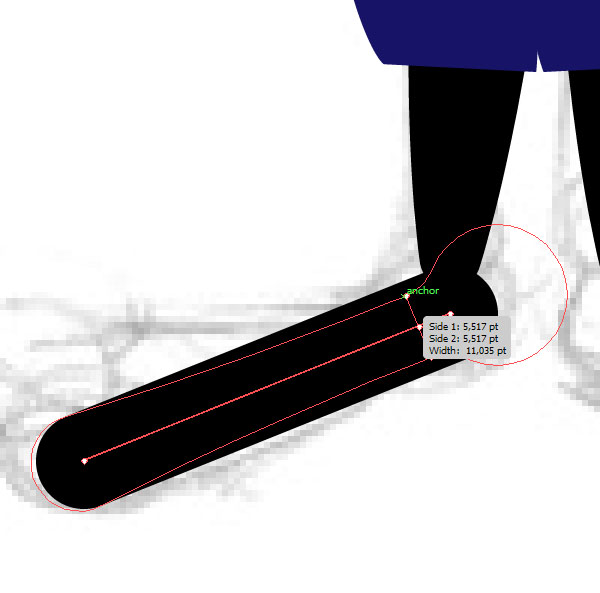
The same thing goes for the legs, with one exception. Here we can take advantage of another trick of the Width Tool: while dragging to enlarge, you can hold Option to modify only one side of the line (the outer side or the inner side). Legs are slightly asymmetrical, so make sure you take advantage of that cool feature!
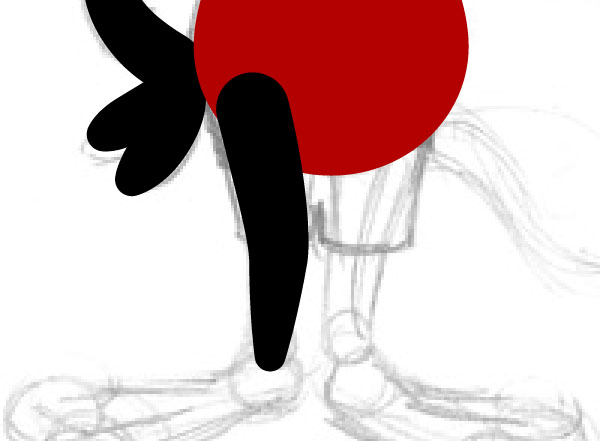
We repeat the same steps that we did to create the T-Shirt sleeves here, and of course, we duplicate and reflect to make the other leg.
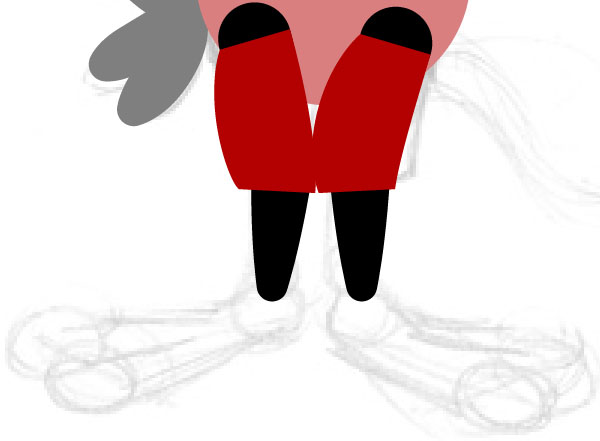
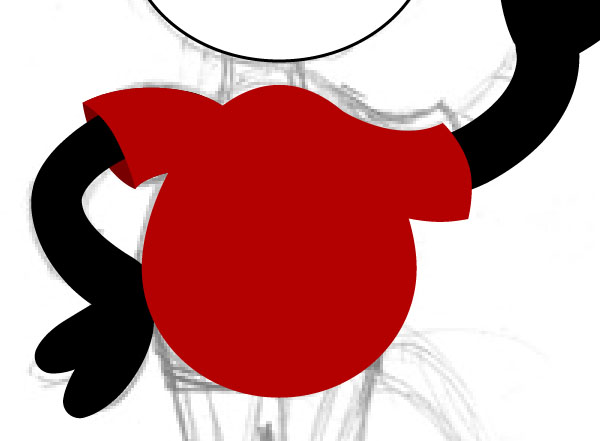
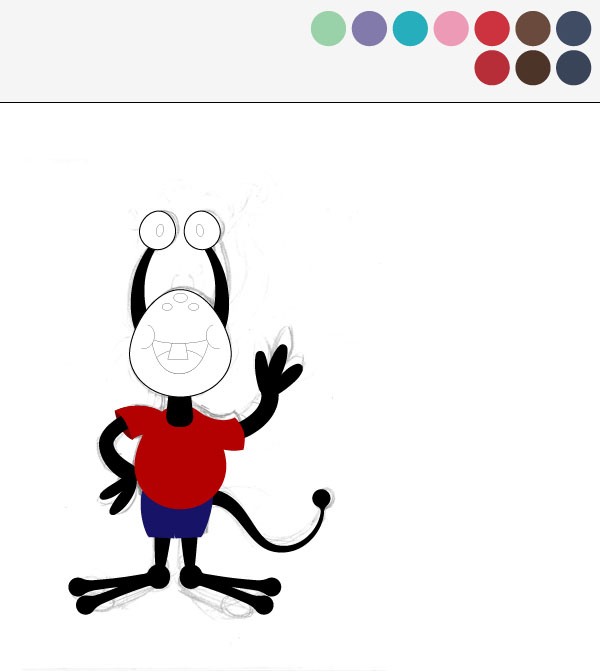
Here is the character so far. It’s a good moment to look at it and make any adjustments you think it may need – remember that we are using lines to create the limbs, so everything is easily editable!
Step 7
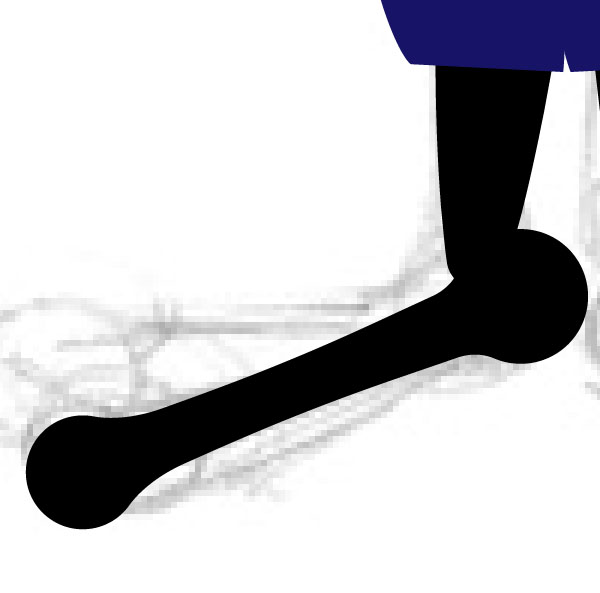
Draw a straight line using the Segment Line Tool (\) for the feet.
Now, here’s another cool trick we can use with the Width Tool. Click and drag in a zone that’s near one of the extremes of the line. You will see that a "ball" starts to form, as if you were squeezing that line!
This is a great way to do lizard-esque feet for this character. I used the same thing to create the toe.
Now duplicate that line and drag one of the nodes using the Direct Selection Tool (A).
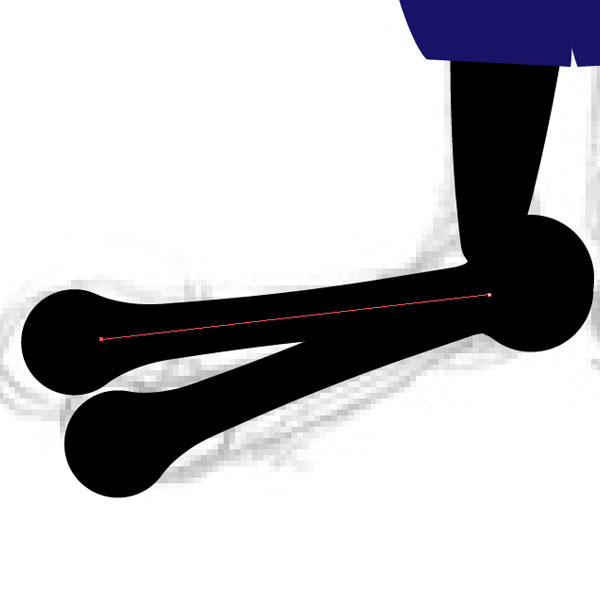
As usual, copy and reflect to create the other foot.

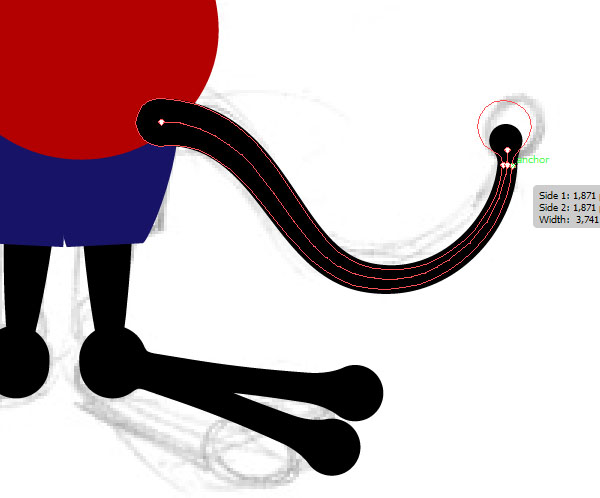
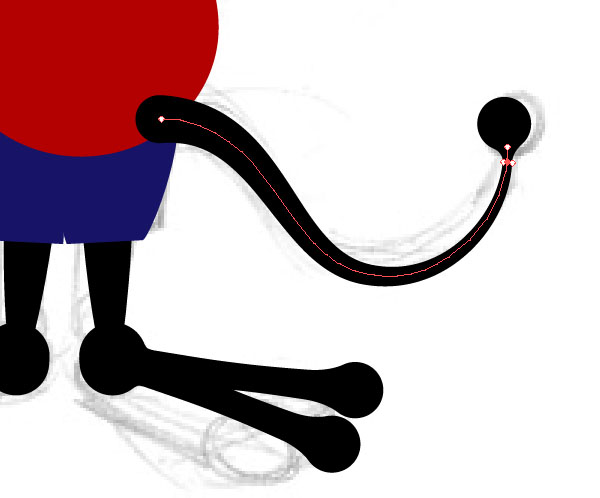
Draw a line using the Pen Tool (P) for the tail, and then use the same trick with the Width Tool (Shift + W) that you used for the feet, so we can give him a little sphere at the end of his tail.
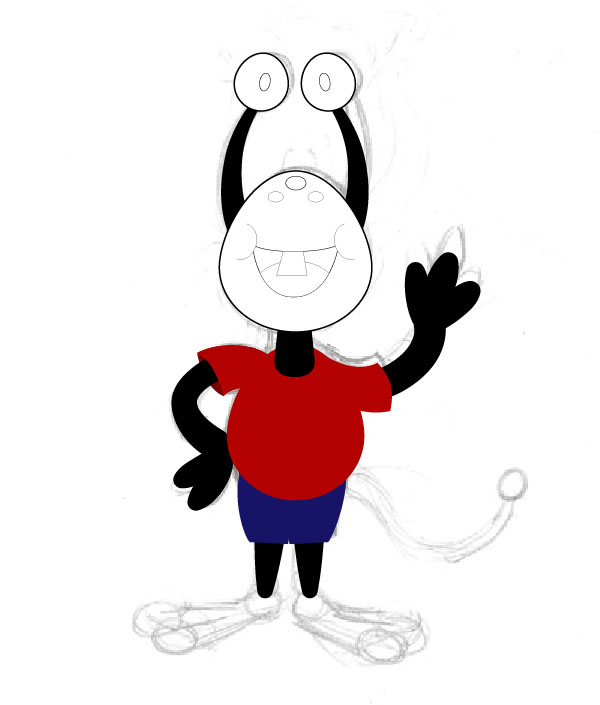
And we’re done tracing!
Step 8
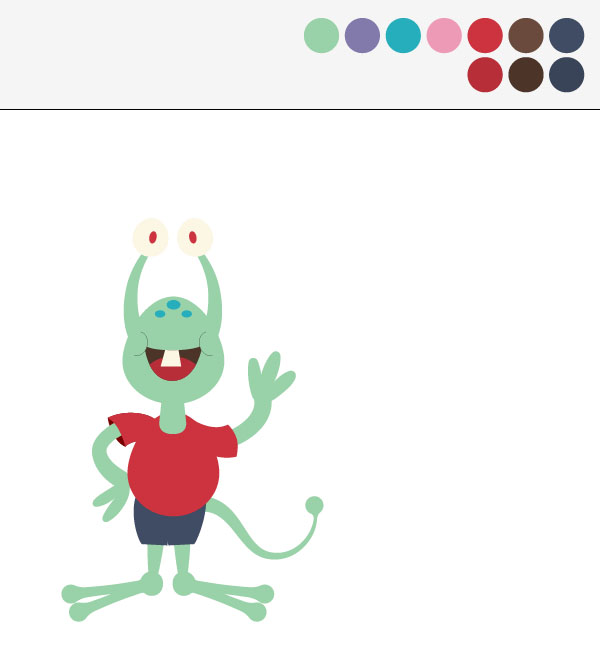
Now it’s time for you to find a color pallet that suits you. There are plenty of ways to do that: you can visit some online resources as www.colourlovers.com or kuler.adobe.com, you can help yourself with the Swatches Panel, the Color Guide Panel, etc.
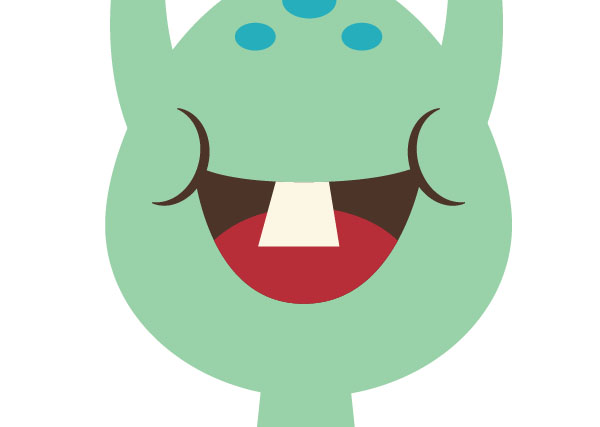
I chose this color palette and aided with the Eyedropper Tool (I), I colored this guy. (Note: ALWAYS use Shift + I while working with the Eyedropper Tool, so you only copy color information and note stroke values. If you don’t, you might lose the lines you carefully created!)
Now, a little detail. The cheek lines were flat, using the Width Tool (Shift+W) make them thicker.
Since I’m not using black anywhere else in this illustration, I changed the color of those lines to the same brown that’s inside the mouth.
Step 9
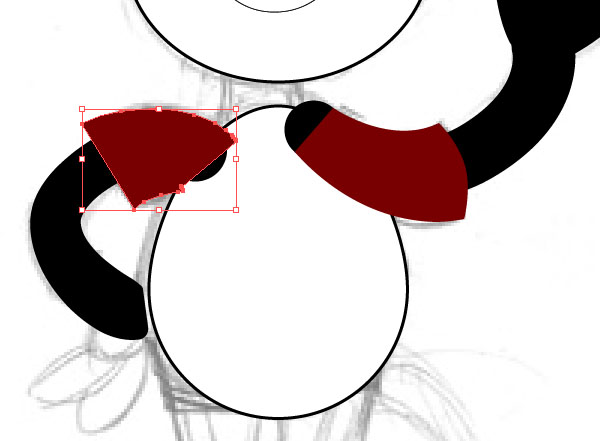
Now, the final details: shadows and light. Command + C and Command + F the shape of the head to create a duplicate. Then,
Option + Shift + drag the shape of the head a little bit up, to create yet another duplicate, but in a different position. Now, select both of those duplicates, go to the Pathfinder Panel and click Minus Front.
You’ll end up with a shape that’s the shadow on the chin.
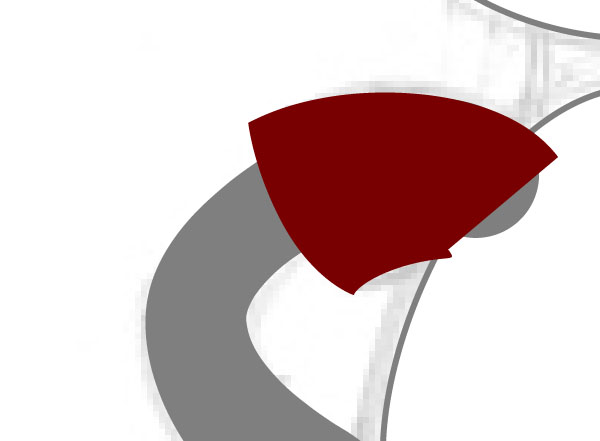
Select a slightly darker color for it. One good way to create a nice looking darker tone is to use the HSB sliders. Drag the Saturation a little bit up, and the lightness a little bit down.
Repeat the same procedure for all shapes.
Now, the projection shadows. Option + Shift + drag the shape of the head down. Command + C and Command + F the neck to duplicate it.
Select both duplicates and click Intersect on the Pathfinder Panel.
Assign a darker color for this shape. Remember that projecting shadows are usually darker than other shadows.
By using the same method you can create some nice looking lights, too.

Here, I used the mouth to create the subtle shadow on the tooth and to suggest the shape of a bottom lip. Be creative with the Pathfinder, you can create tons of shadow effects with it!

Step 10
Now it’s time to add the final details (i.e., the T-Shirt design, by using the Star Tool and the Ellipse Tool).
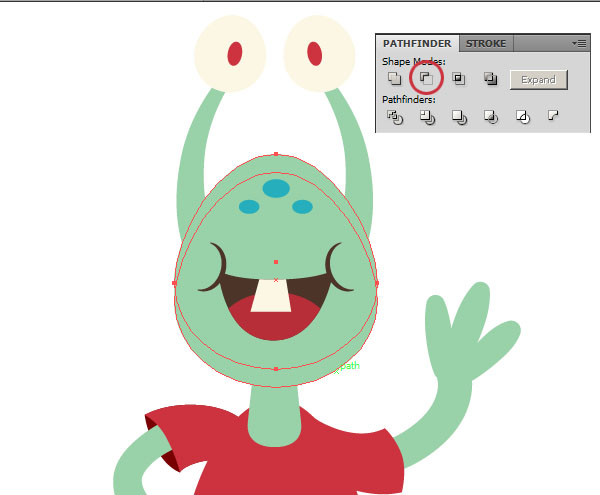
Select All (Command + A) and Group (Command + G). Now, Command + C and Command + F to duplicate the entire character in place.
Go to the Pathfinder Panel and click Unite.
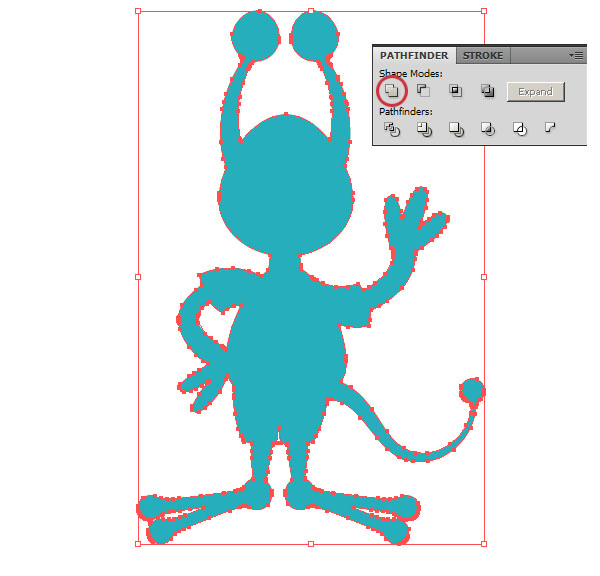
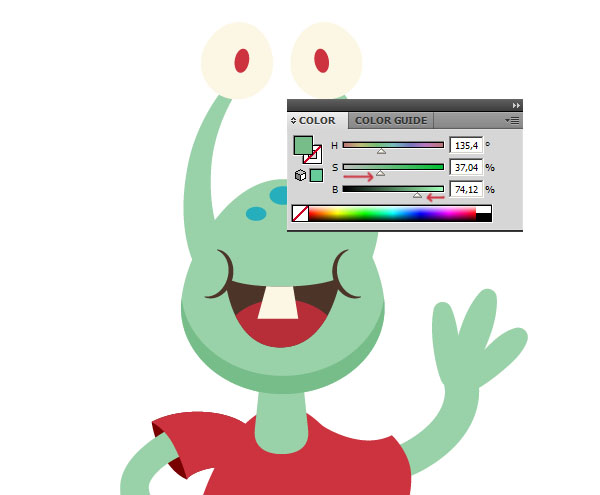
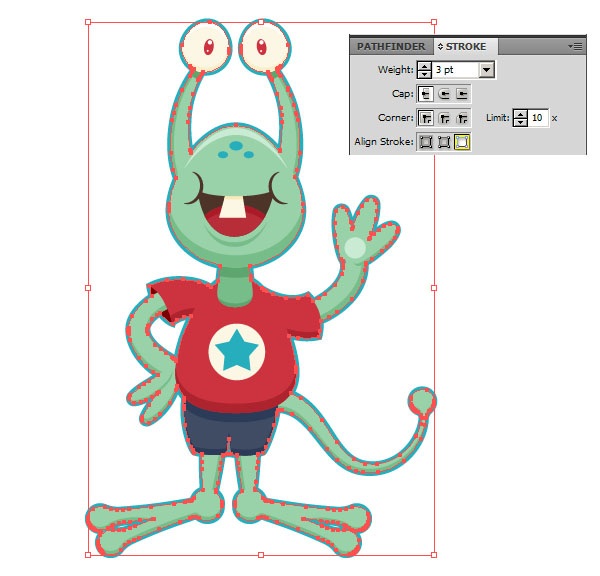
Now, press Shift + X to switch Fill and Stroke. Go to the Stroke Panel and select Align Stroke: Outside. Make the stroke as thick as you feel it looks good.
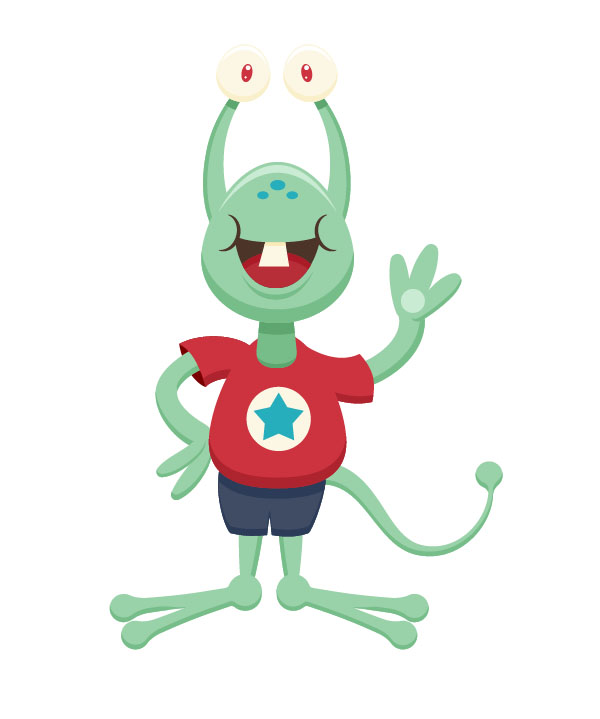
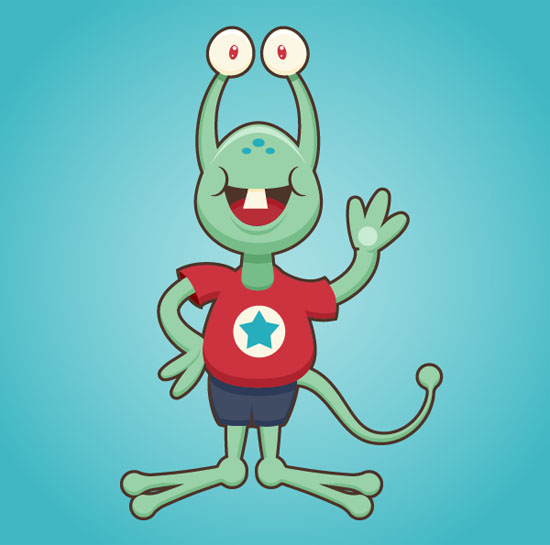
I gave him a simple radial gradient background with a color that matches the pallet I was using. The stroke of the character was changed to a dark brown so it pops from the blue background. Here it is!
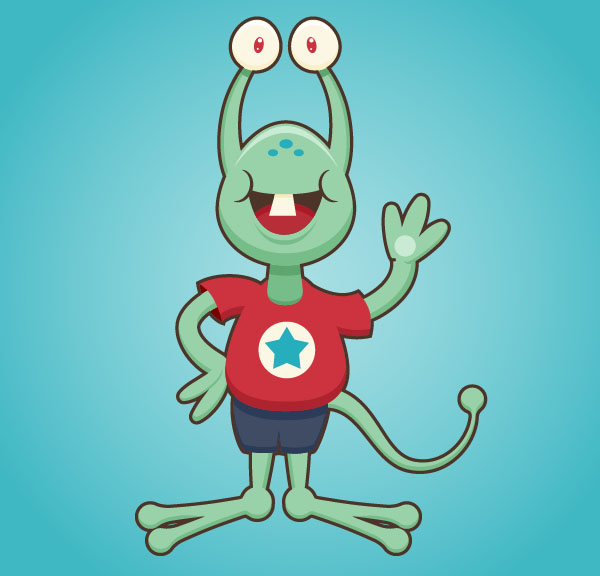
Conclusion
What I liked about this technique is that you can stop thinking of lines as just lines; they can work as shapes, too. The Width Tool is very versatile and it helps to create a character in no time, especially if it’s cartoony, with "rubber hoses". I hope it helps you and it encourages you to experiment with this tool!
{excerpt}
Read More