In this tutorial you will learn how to draw a designer gift bag using basic shapes and various patterns, which are made available in Illustrator. You will also learn to add your own customized details to the design.
Step 1
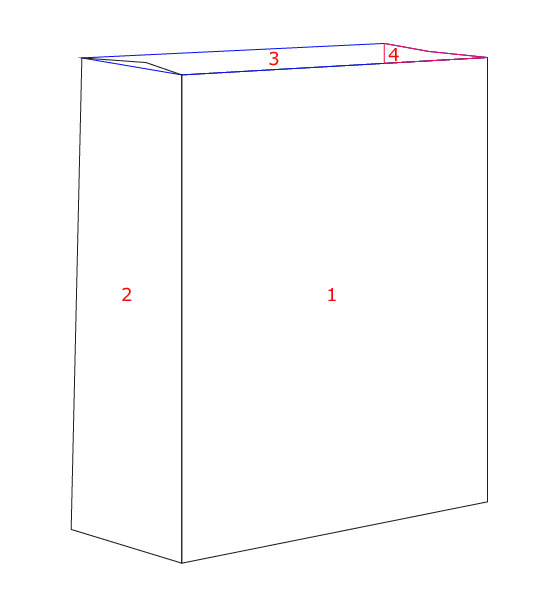
Create an 800px by 800px RGB document. Let’s start by creating the basic drawing of a bag. Select the Pen Tool (P) and draw the different parts, i.e. interiors and exteriors of the bag as shown here. I have given the numbering for a quick reference. To draw shape #1 and #2 you may also use the Rectangle Tool (M) and define the angle with the Shear Tool.
Step 2
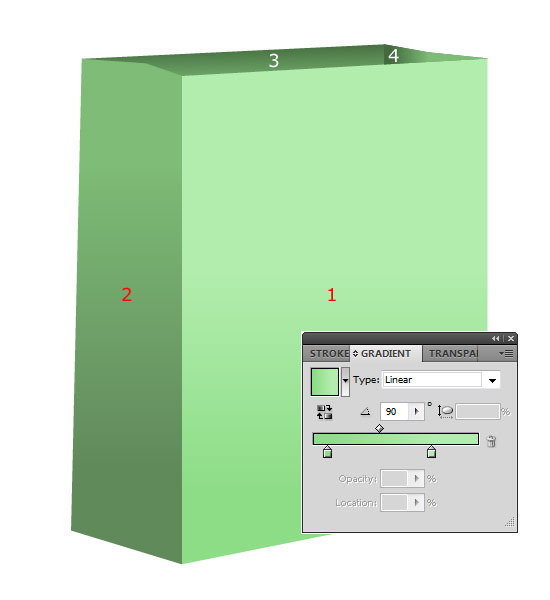
Now fill in the Linear Gradients (Command+F9) in each part of the bag. For shape #1 use the gradient from top #B2EDAE to bottom #8DDD87. For shape #2 use, from top #7EBC77 to bottom #61895B. For shape #3 use from top #436B3D to bottom #7EBC77, and for shape #4 use, from left #436B3D to right #7EBC77.
Step 3
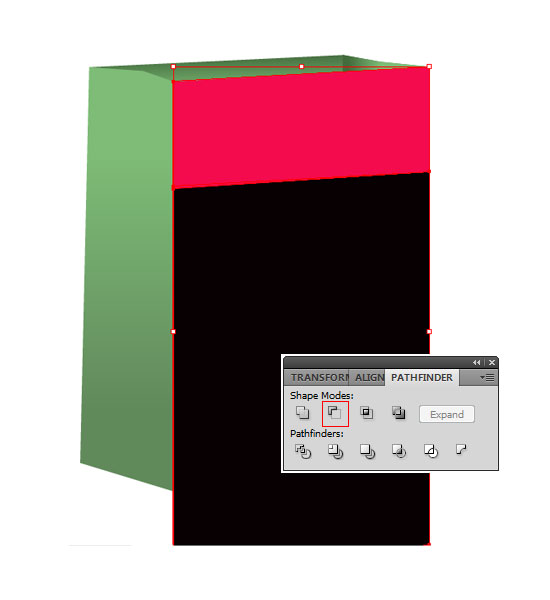
To make a bag more interesting, let’s add two shapes on top of it where we will use a different design pattern than the basic pattern of the bag. To do that, select shape #1 with the Selection Tool (V) and press Command + C and Command + F. This will copy and paste the shape on its place. Repeat this one more time.
Now select the shape (which is the top most) and move it down a bit (the black color shape shown below). Keeping this selected, now select the shape beneath it (pink color shape) and go to Pathfinder (Command + Shift + F9) panel. Click Minus Front as highlighted below.
Step 4
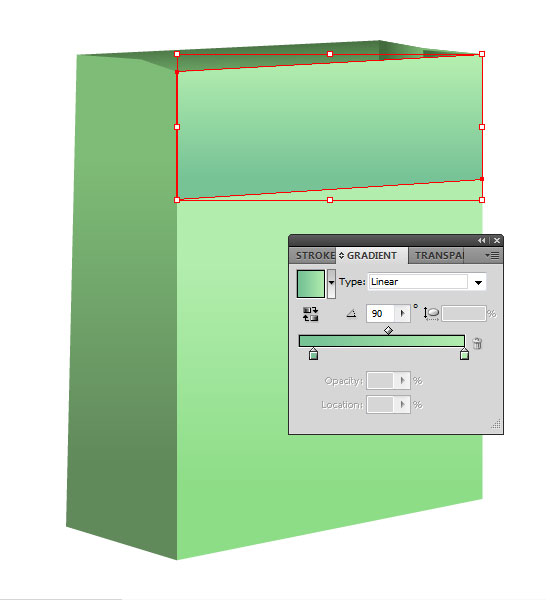
Fill in a Linear Gradient (Command + F9) that goes from from top #B2EDAE to bottom #77C396.
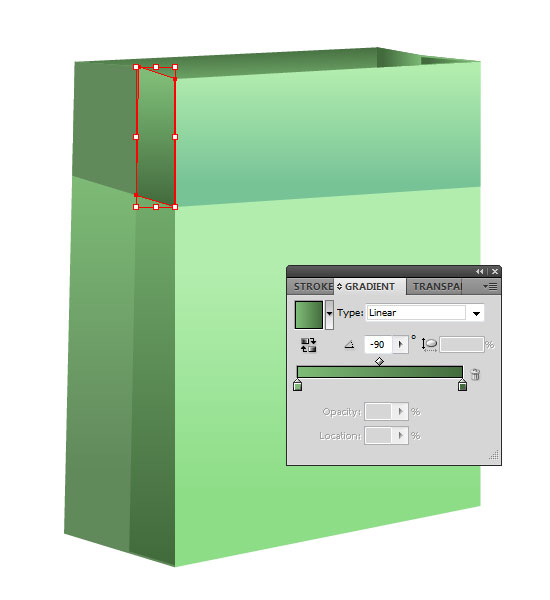
Step 5
Create another shape on the side flap of the bag. To do this, repeat the steps as explained in Step 3. Fill in a Linear Gradient (Command + F9) that goes from top #7EBC77 to bottom #61895B.
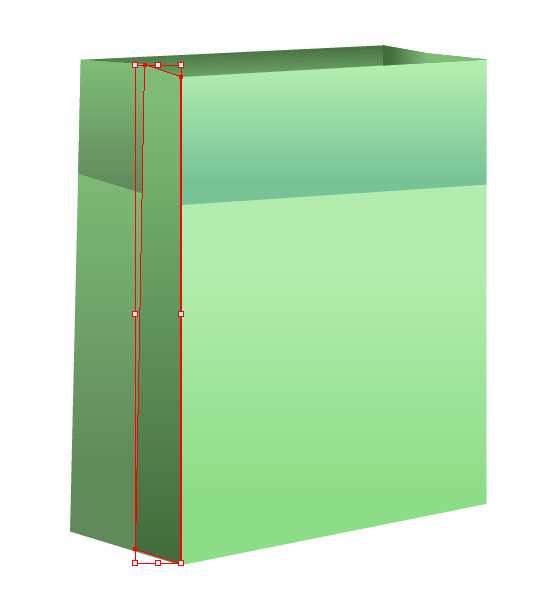
Step 6
Draw a fold effect on the side flap either with the Pen Tool (P) OR to be more precise repeat the steps explained in Step 3. Fill in a Linear Gradient (Command + F9) that goes from top #7EBC77 to bottom #436B3D.
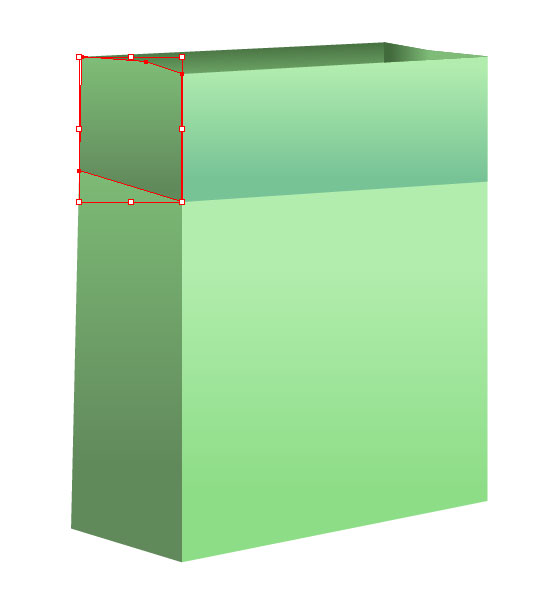
Step 7
To define the top area of the fold, draw a new shape over it by following the steps explained in Step 3. Fill in a Linear Gradient (Command + F9) that goes from top #7EBC77 to bottom #436B3D.
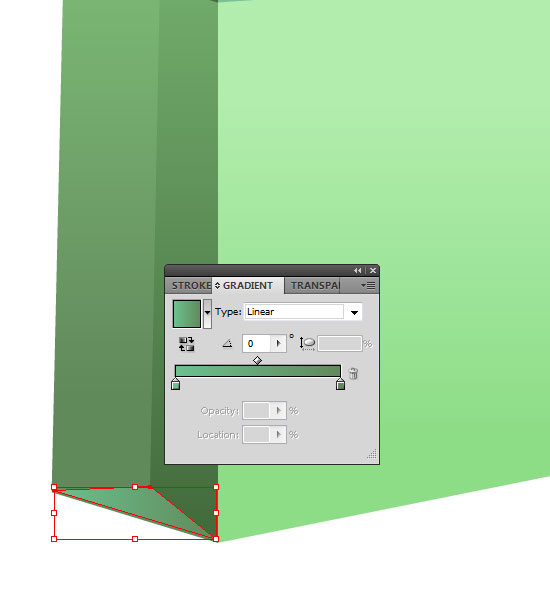
Step 8
Select the Pen Tool (P) and draw a triangle shape at the bottom of the fold as shown. Fill in a Linear Gradient (Command + F9) that goes from left #6BC18E to right #61895B.
Step 9
Select the Pen Tool (P) and draw a triangle shape on the other side of the fold as shown. Fill in a Linear Gradient (Command + F9) that goes from left #436B3D to right #7EBC77.
Step 10
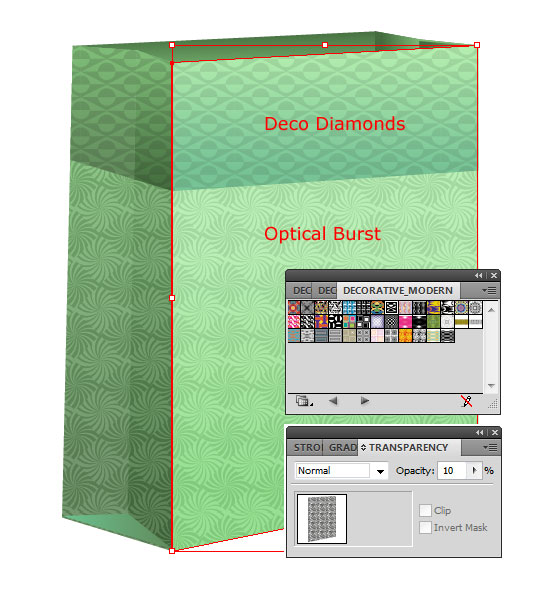
Now let’s apply the decorative patterns to the bag. Select the front shape of the the bag and press Command + C and Command + F. This will duplicate the shape that will be placed over the original shape. We will apply a pattern to the duplicated shape. Go to Window > Swatch Libraries > Patterns > Decorative > Decorative Modern and select the pattern of your choice. I have used " Optical Burst" pattern here. Set the Opacity (Command + Shift + F10) 10%.
With the same method apply the patterns of your choice to the rest of the shapes of the bag and set the Opacity between 10%-15%. To create your own pattern, simply draw the graphic and drag it to the Pattern Library. Follow more details here on how to create a pattern in Illustrator.
Step 11
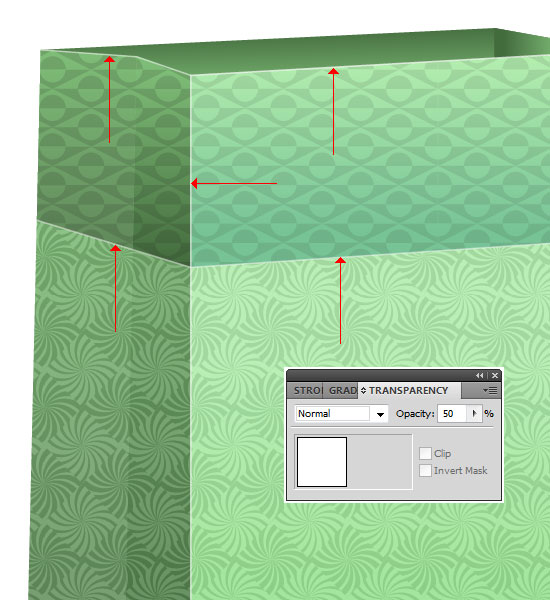
Select the Pen Tool (P) and draw fold lines as shown. Refer to the red arrows. Set the Opacity (Command + Shift + F10) to 50% for these lines, as we don’t want to see them too prominent.
Step 12
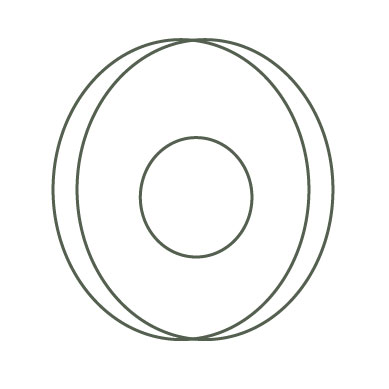
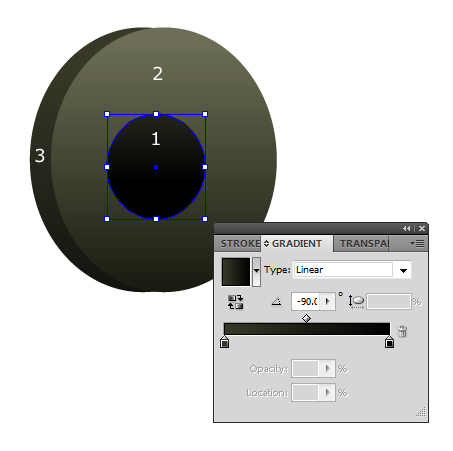
We’ll now create the eyelets of the bag. Select the Ellipse Tool (L) and draw ovals as shown in the image.
Step 13
Fill in Linear Gradients (Command + F9). For Oval 1 use, from top #383827 to bottom #000000. For Oval 2 use, from top #6D6E55 to bottom #14160C. And for Oval 3 use, from top #383827 to bottom #0F0F0C.
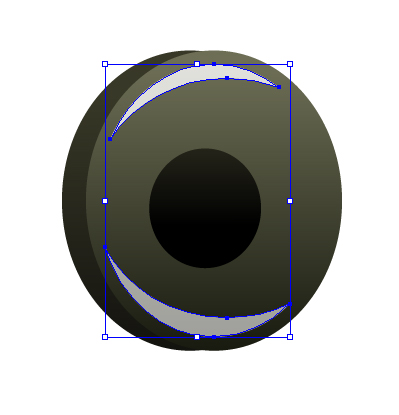
Step 14
Select the Pen Tool (P) and draw the highlights on top of Oval 2. Fill in #FFFFFF color and set the Opacity to 80%. Select all the shapes of the eyelets with the Selection Tool (V) and Group (Command + G) them all.
Step 15
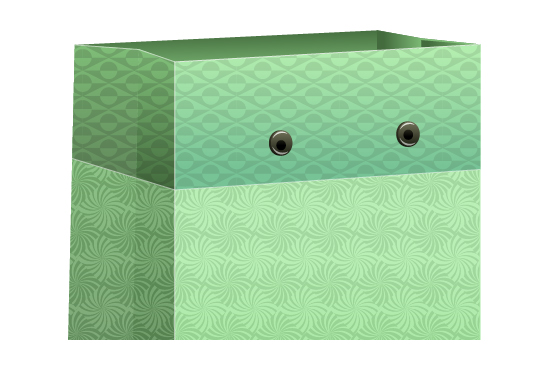
To duplicate the eyelet, hold down the Alt key and drag the eyelet. We now have two eyelets ready. Arrange them on the bag as shown.
Step 16
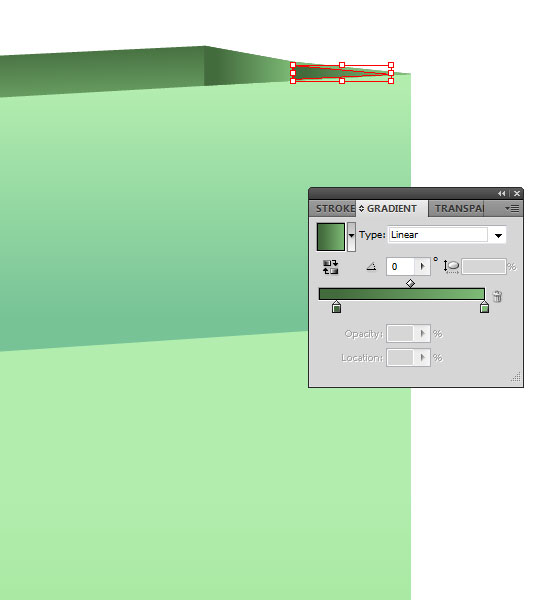
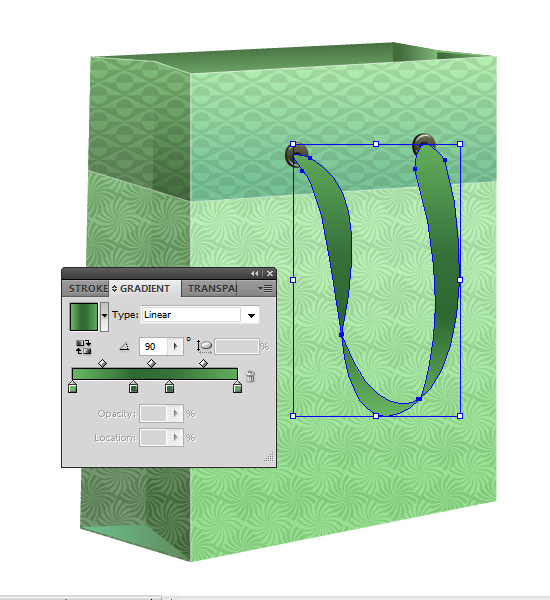
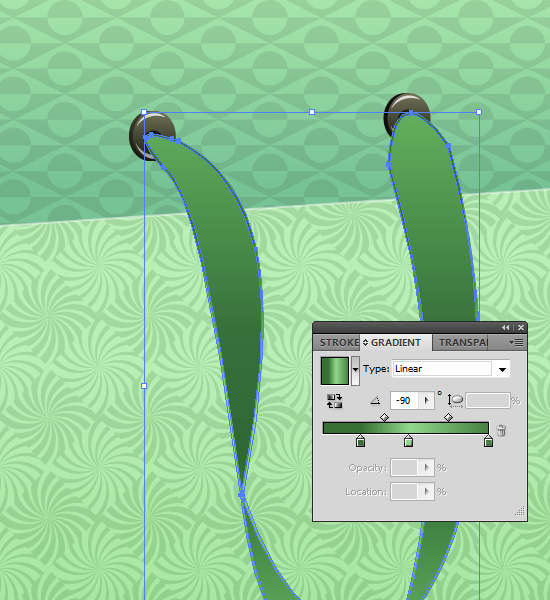
To create a bag handle, select the Pen Tool (P) and draw a satin shape as shown. Fill in the Linear Gradient (Command + F9). The Gradient color values are #68B762 (lighter shade) and #36703A (darker shade). Adjust the gradient color sliders as shown below.
Step 17
With the handle selected, add a stroke (Command + F10) of 1pt. Go to Object > Path > Outline Stroke. By doing so, we will be able to fill the gradient to the stroke.
Right-click on the shape and select Ungroup. This will separate the outline from the shape. Select the outline with the Selection Tool (V) and fill the Gradient with #377033 and #91D88B. Adjust the Gradient color sliders as shown.
Step 18
To apply the pattern to the handle, follow the instructions in Step 10. I have used the "Diamond Square Color" pattern from Window > Swatch Libraries > Patterns > Decorative > Decorative Geometric 1 > Diamond Square Color. Set the Opacity (Command + Shift + F10)15% for the pattern.

Step 19
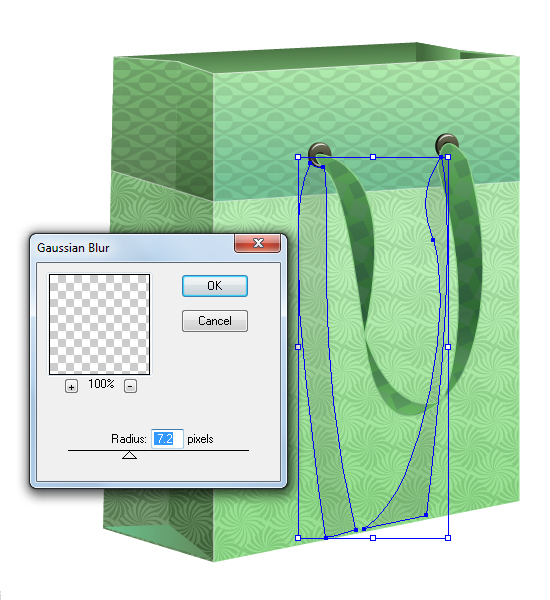
To add the shadow of the handle, Select the Pen Tool (P) and draw a shape as shown in the image below. Fill in #000000 color and go to Effect > Blur > Gaussian Blur, then set the parameters as given here. Set the Opacity (Command + Shift + F10) to 20% for the shadow.
Step 20
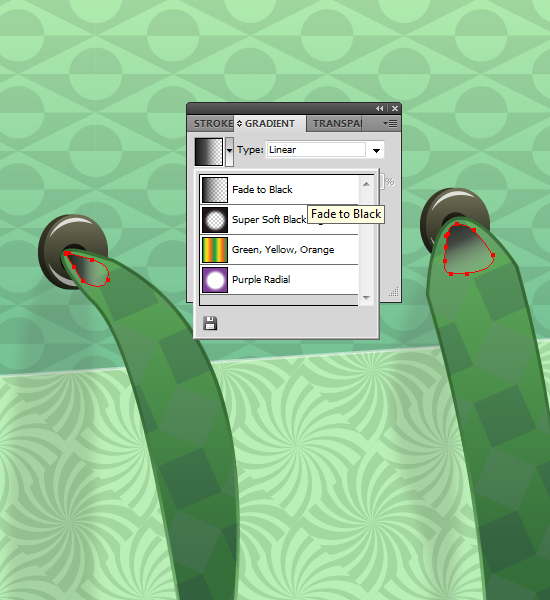
Select the Pen Tool (P) and draw the shapes as shown. Select the Gradient Fill (Command + F9) as "Fade to Black" and apply the gradient as shown.
Step 21
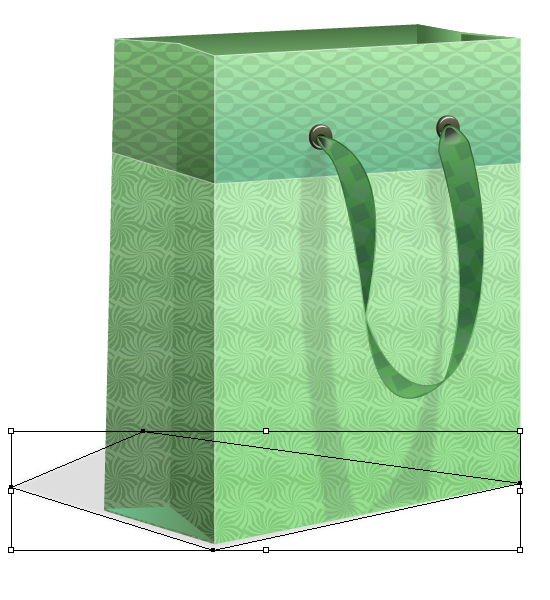
With the Pen Tool (P), draw the shadow of the bag, and apply Blur Effect as we did in Step 19. Set the Opacity (Command + Shift + F10) to 15%.
Step 22
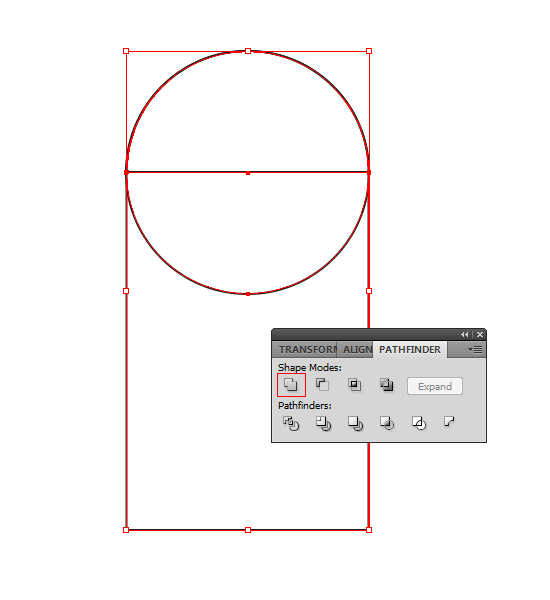
To create a gift tag, first draw a circle with the Ellipse Tool (L) and a rectangle with the Rectangle Tool (M) overlapping each other. Select both the shapes with the Selection Tool (V) and go to the Pathfinder panel (Command + Shift + F9). Select Unite. Here we get the basic shape of the tag. Fill it with any color for now.
Step 23
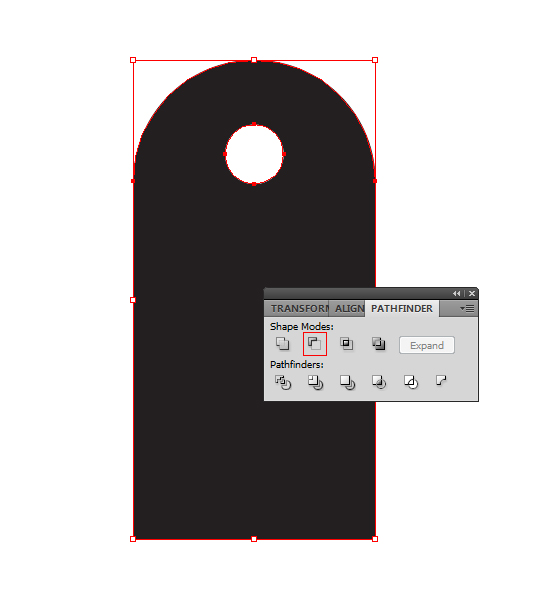
Draw a circle of 26×26 px at the center of the tag. Now select both the shapes and go to the Pathfinder Panel (Command + Shift + F9). Now apply Minus Front.
Step 24
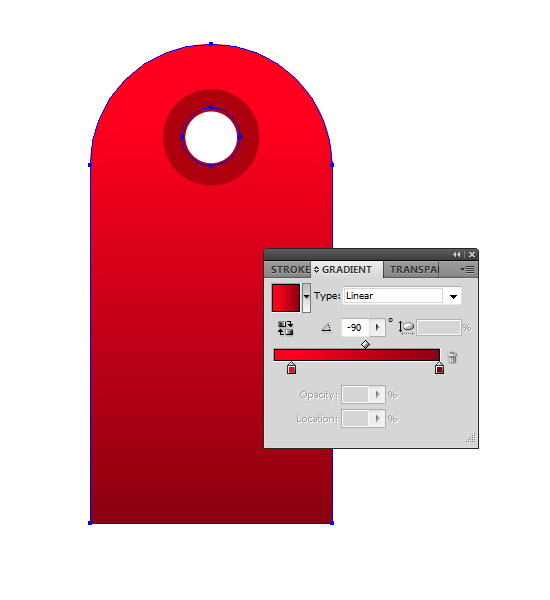
Draw one more circle around the cropped circle and fill #AD000D color. Select the tag shape with the Selection Tool (V) and apply a Linear Gradient (Command + F9) that goes from top #FF001E to bottom #8B0010.
Step 25
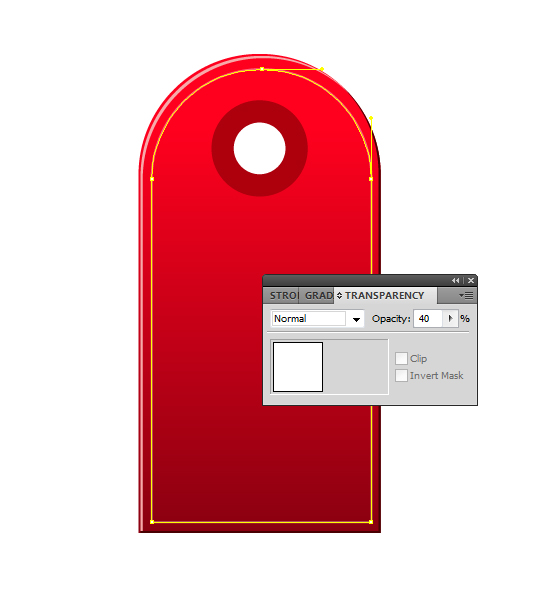
To give slight thickness to the tag, Select the tag, then press Command + C and Command + F. This will duplicate the shape. Fill in #490101 color. Place this copied shape behind (Command + Shift + Left Bracket key) the original shape and move it 1px right and down. To draw the highlighted shape, follow the steps mentioned in Step 3 (you need to do this with the Pathfinder options). Fill this highlight with #F7AAAA color.

Step 26
Let’s add some design to the tag. Select the original tag shape and press Command + C and Command + F. We will get the duplicated shape. Resize this shape to the smaller size than the original tag. Fill in #FFFFFF color and set the Opacity at 40%. This is an inner outline that we just created.
Step 27
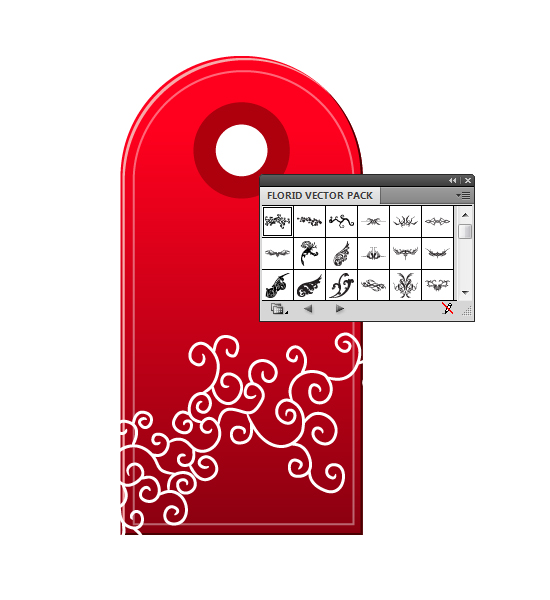
Go to Window > Symbol Libraries > Florid vector pack and select the symbol of your choice. Drag the symbol on the tag and fill #FFFFFF color for the symbol. I have used "Florid Vector Pack 01" symbol here. To change the color of the symbol, simply Double-click it and it will allow you to make changes to the symbol.
Step 28
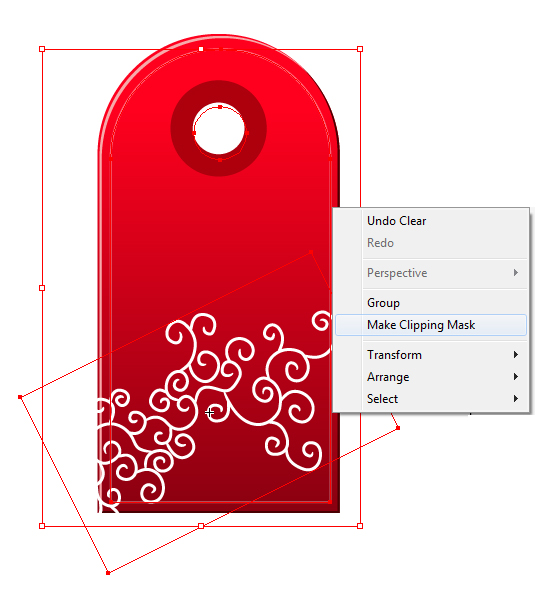
Now select the inner outline that we created in Step 26. Press Command + C and Command + F. We get the duplicate copy of the outline. Keeping the outline selected, hold down the Shift key and select the symbol that we have dragged over the tag. Right-click the object and select Make Clipping Mask. Set the Opacity (Command + Shift + F10) at 24%.
Step 29
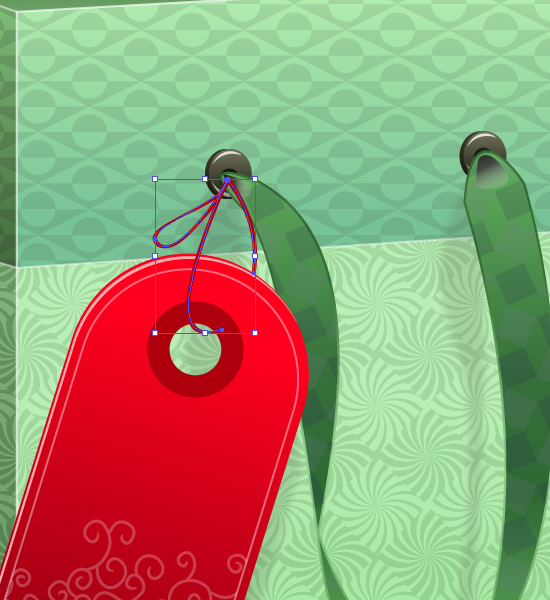
Now group all the parts of the tag that we created. Rotate the object with the Rotate Tool (R) and place it over the bag as shown below.

Step 30
To tie a tag on the bag, Select Paintbrush Tool (B) and draw a thread as shown. Select the brush color #AD000D and set the brush parameters as shown.
Step 31
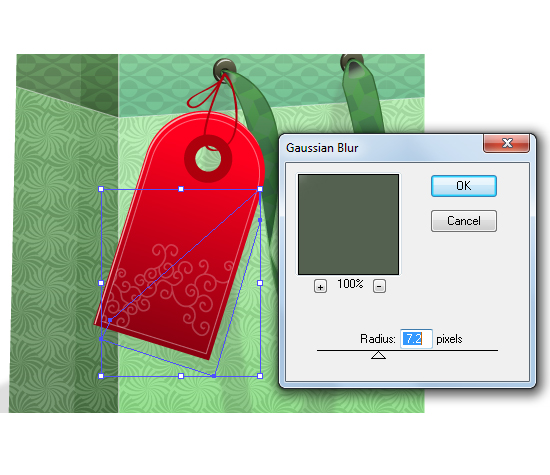
To create a tag shadow, select the Pen Tool (P) and draw a shape as shown. Go to Effects > Blur > Gaussian Blur and set the parameters as given here. Set the Opacity (Command + Shift + F10) at 20%.
Final Image
There you have it. After binding all the elements together we have a designer gift bag ready. I hope you enjoyed this tut.

{excerpt}
Read More