In electronic dance music, DJ’s often loop tracks to cheer up the crowd. In your music productions, you can also use this effect to create an uplifting effect for what’s to come. This tutorial shows you how to create such a loop effect on vocals, using Reason 4.0.
The vocal sample used in this tutorial is downloaded from VocalDownloads.com. This site offers some free vocal samples that are royalty-free. The sample used here is called ‘Don’t You Stop’ by Cooley. A direct link to this sample can be found HERE.
Step 1
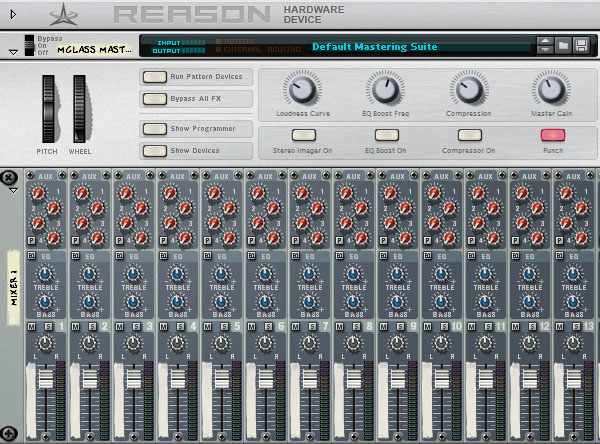
Let’s set up our project. Open up Reason and, if not done already, delete all the devices in your rack so we can start from scratch. Now, create a MClass Default Mastering Suite Combi followed by a Mixer 14:2.
Step 2
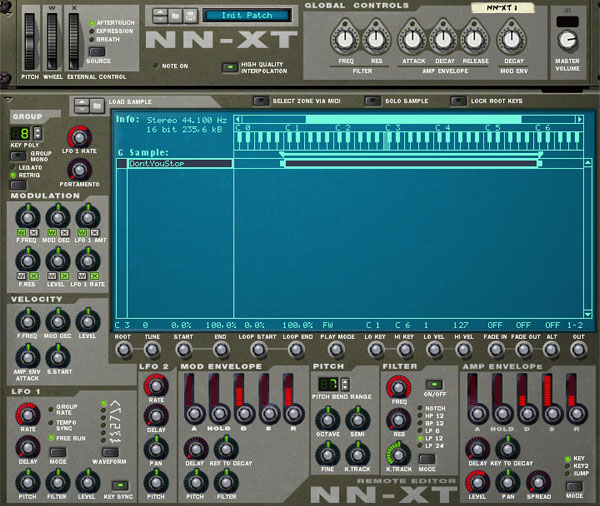
Now we need a sampler to play the vocal sample. The NN-XT will be used for this tutorial. So, create an NN-XT Advanced Sampler underneath the Mixer. First, initialize the NN-XT patch if not done already. Then open up the Remote Editor of the NN-XT by clicking the triangle in the lower left corner. Now, load up the sample and play a C3 note:
Download audio file (audioclip_1.mp3)
Step 3
In order to have full control over your vocal sample, chop it up. The easiest way to do this would be using ReCycle. However, not everyone owns a copy of this software so in this tutorial the chopping will be done in the NN-XT itself.
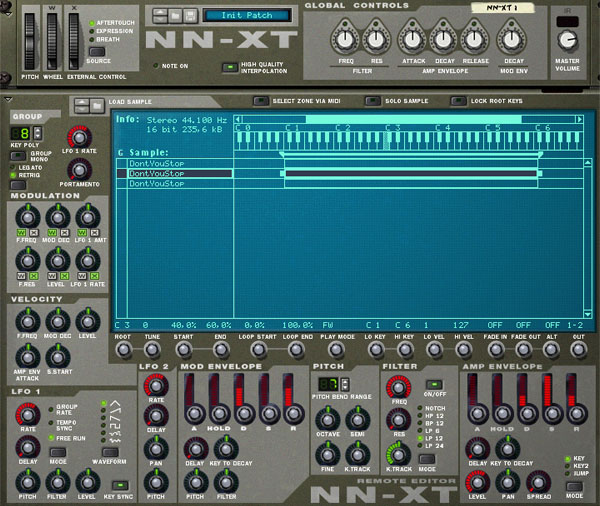
We already have the vocal sample loaded in the NN-XT. Duplicate this sample two more times and change the Loop Start and Loop End parameters like this:
- Loop Start: 7.0%, Loop End: 40.0%
- Loop Start: 40.0%, Loop End: 60.0%
- Loop Start: 60.0%, Loop End: 100.0%
Step 4
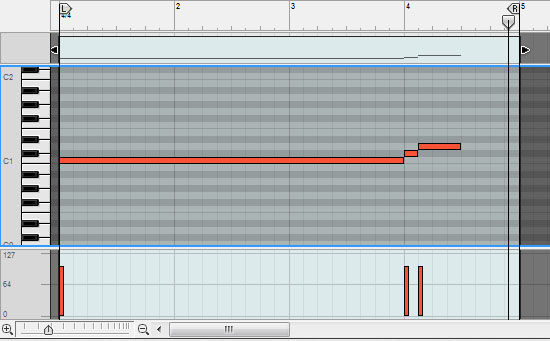
We now have three samples and each sample contains one word of the phrase. Time to make a sequence of our chopped pieces. In the Remote Editor of the NN-XT, select all three samples. Right-click one of them and select Automap Zones Chromatically. Now grab the Pencil Tool in the Sequencer Window and draw a 4 bar long clip. Assuming your projects tempo is 120 BPM, draw a sequence of notes as shown in the screenshot below.
Step 5
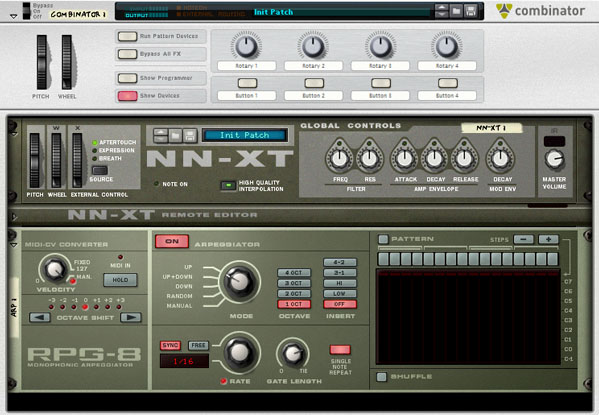
When we play the sequence we hear nothing special, just a big gap between the first and second word of the phrase. This gap is where the effect will take place. To let’s create the effect, right-click the NN-XT and choose Combine. A Combinator device is wrapped around the NN-XT. Again, Right-click the NN-XT and create an RPG-8 Monophonic Arpeggiator. This arpeggiator will be determining the loop length.
Step 6
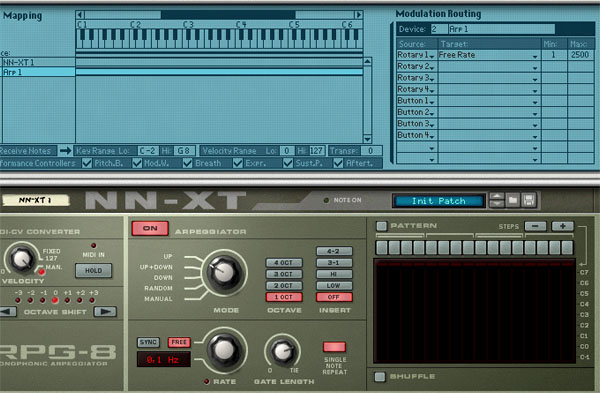
The rate rotary on the arpeggiator will be the parameter that changes the loop length. To keep everything nice and clean, we’ll use the Combinator Programmer to automate the arpeggiator. On the Combinator, click Show Programmer and select the RPG-8 device in the list. Then, on the right hand side, set the Target for Rotary 1 to Free Rate. On the arpeggiator itself, click the button that says Free. With this option enabled, the rate of the arpeggiator is no longer synced to MIDI clock (the projects tempo). This way you can produce extremely fast arpeggios and that’s what we want.
Step 7
Let’s automate the Rate parameter. One way to do this is using CV control on the first rotary of the Combinator, but the easiest way to do this is to automate the rotary directly. Right-click the Rotary 1 of the Combinator and select Edit Automation. You can also hold the Alt key (or Option for Mac users) and click the rotary.

Step 8
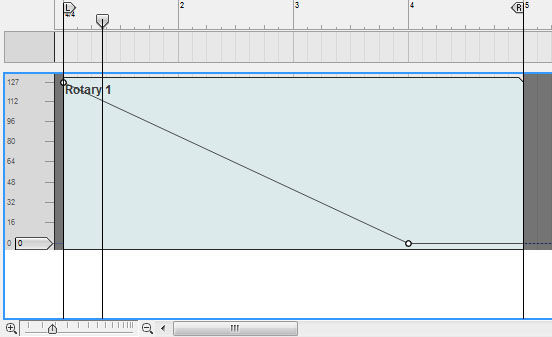
In the Sequencer Window, draw a 4 bar clip in the automation lane. Double-click this clip and draw a dot on the loops starting point having a value of 127. Now closely look where the long note ends, which is after 3 bars, and draw a second dot on that point, having a value of 0. So as the first note is played, the arpeggio speed decreases.
Step 9
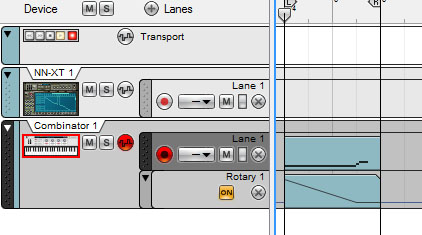
In Step 5, we’ve combined the arp and sampler in one Combinator so that we’ll only need one note lane. Go to the Sequencer Window and drag the drawn clip from the NN-XT lane to that of the Combinator. Also, play the loop.
Download audio file (audioclip_2.mp3)
Step 10
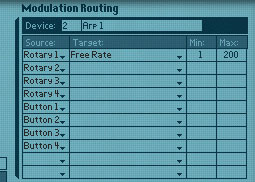
What we hear now is an robotic, almost flanger-like effect. However, this is not what we want. The problem lies in the arpeggio rate. Head over to the Combinator Programmer and notice that the maximum value of the Free Rate automation is 2500, which equals 250 Hz. That value is set way to high, because our loop is relatively short. Decrease that value to around 200 and play the loop again. You can now hear that the length of the loop gets larger over time.
Download audio file (audioclip_3.mp3)
Step 11
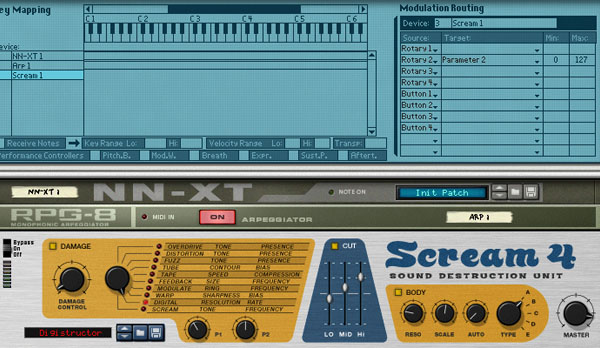
You’ve done it, the desired effect is created. What’s next? Get creative on the uplifting part. For example, create a Scream 4 device after the NN-XT. Open the patch Digistructor, which can be found in the Scream 4 directory of the Reason Factory Sound Bank. Automate Parameter 2 with the Combinator Programmer and play the loop again.
Download audio file (audioclip_4.mp3)
Step 12
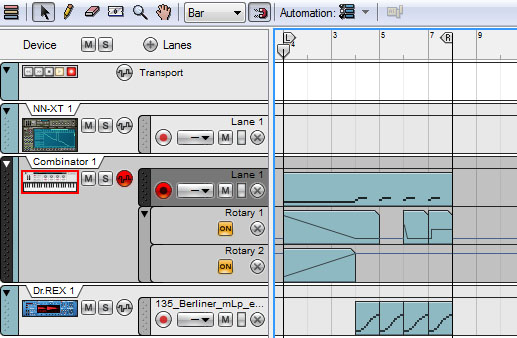
To give a small example on how effective this trick is, create a Dr. Rex Loop Player and load up the patch Berliner, which can be found in Reason Factory Sound Bank -> Music Loops -> Variable Tempo (rex2) -> Uptempo Loops. Turn up the vocal volume by changing the Scream 4 Master Volume to 127 and play a pattern as shown below.
Download audio file (audioclip_5.mp3)
Additional Notes
In this tutorial we’ve used a relatively simple vocal sample. Try to experiment with more complex samples to hear what else is possible with this technique. Another tip would be to use ReGroove or the RPG-8′s Shuffle function on the vocals to make your loop a bit more dynamic. Also, in here we’ve used the technique mostly on the beginning of the loop to create an uplifting effect. However, you can use this effect everywhere in your song depending on the effect you want to achieve. Have fun!
{excerpt}
Read More