Ableton Live offers users an fun and innovative way to make music using a very unique workflow. Users coming from a hardware environment may initial be a little put off by Ableton’s user interface and functionality, but it can mimic and surpass many features of popular hardware sequencers.
One of the most popular and influential pieces of hardware production gear ever is the Akai MPC series. For users of the MPC series, Ableton’s Drum Racks feature can mimic many of the more popular functions of the MPC, including monophonic sample cutoffs.
Step 1
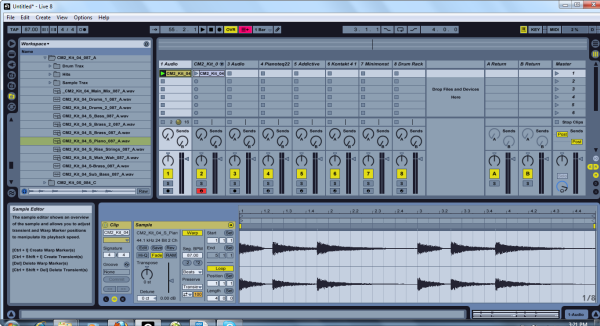
Load up a sample into a session view slot. It can be a .WAV file, REX loop, Acidized .WAV file, .AIFF file, or even an MP3.
Step 2
Move your transient markers to your desired positions. Warp the clip using your preferred warp settings. For maximum fluidity, I suggest chops of no less than one full beat. Shorter sample lengths will not require such automated cut-off, usually.
Step 3
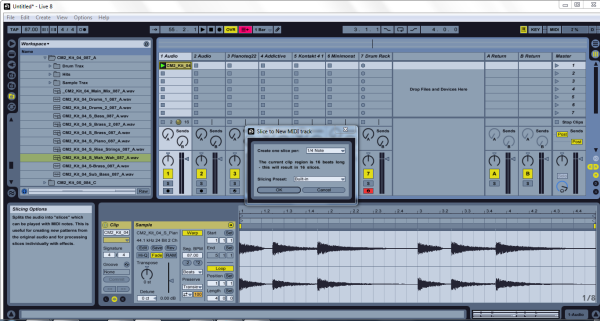
Right click the warped clip, and select slice to MIDI, using the appropriate slice settings. You will then see a new MIDI channel with your sliced sample mapped to individual pads in a Ableton drum rack instrument.
Step 4
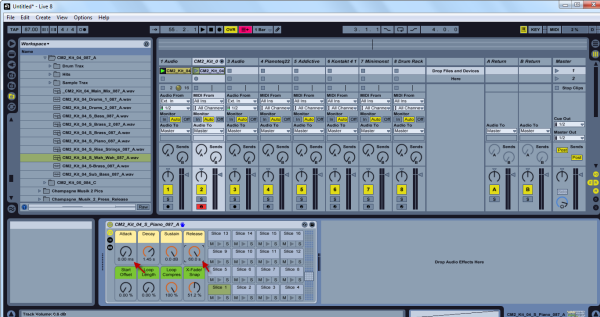
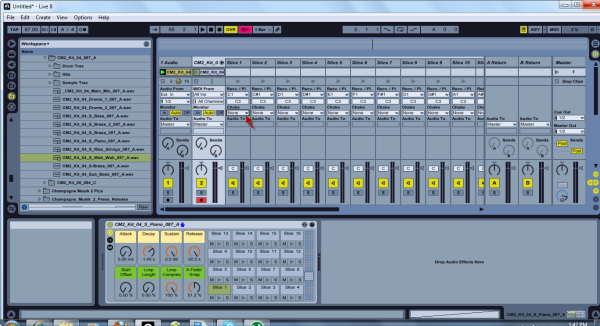
Here is where it gets interesting. Select the MIDI track containing the drum rack. In the lower half of the screen you will see your drum rack and it’s control parameters. In the top row of its control parameters will be the envelope functions – Attack, Decay, Sustain and Release.
Turn the Release knob all the way to the right, which numerically should be 60.0 s You may also turn your Attack knob all the way to the left to 0 in order to get a quick response when you press a pad.
Step 5
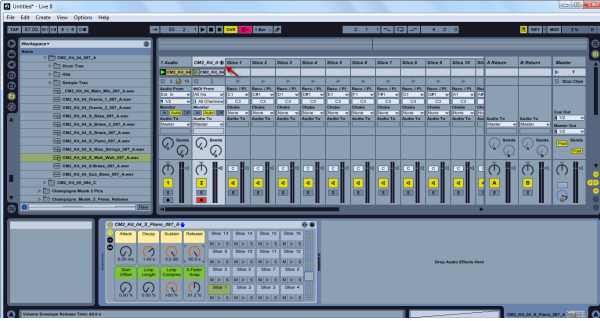
Remaining in Session View, return to the drum rack channel. At the top of the channel will be a downward pointing triangle, right next to the name of the chopped loop. Click the triangle to open the channels for each individual slice.
Step 6
In the input/output area of the slice channels is a dropdown menu labeled choke. This allows you to assign each channel to a choke group. Channels that share the same choke group setting essentially mute one another. In practice this means that you can set all of your channels to the same choke group, and make your drum rack pads silence each other as you play them, just like they would on an MPC.
{excerpt}
Read More