It’s October and if you’re like me, you’re looking forward to the zombie apocalypse or Halloween, either are fun! So to celebrate the creepy occasion I’m going to show you how to create a jack o’ lantern, which can be used as an icon or as a decorative item. Not only that, but I’ll show you have to create some very useful art brushes based on quick blends, which create a smooth airbrushed effect, but is still 100% vector! Are you ready for some vector pumpkin carving?
Resources
I’ll be using a stock image for the base of this tutorial, which you can get from PhotoDune from as little as $1 USD! So let’s jump into today’s tutorial…
Step 1
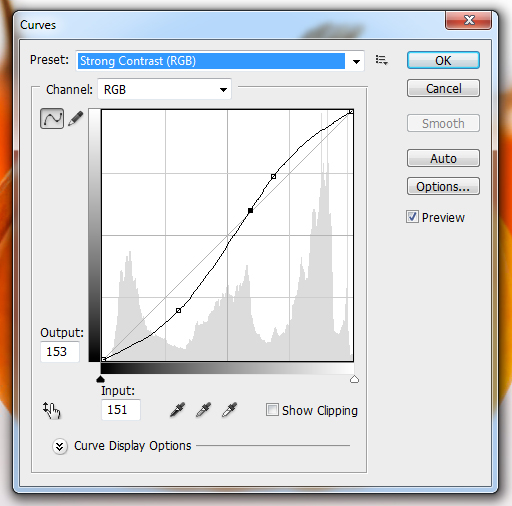
Whenever I’m vectoring from stock, I like to increase the contrast of the image so it’s easier to see the shadows and the highlights. A good way to have control of this is to use Photoshop and play with Curves (Command + M). There is a Preset in the drop down menu called “Strong Contrast,” which I use the majority of the time.
Step 2
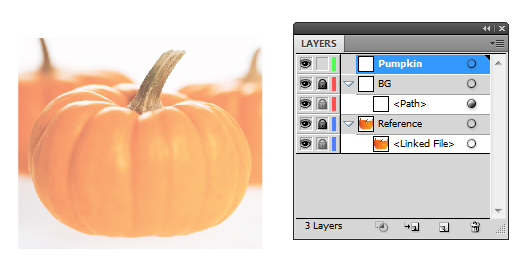
Create a New document set to RGB and Image > Place your modified stock image onto the canvas. I’ve set up my layers as follows:
- Rename “Layer 1″ by Double-clicking on the layer, rename it to “Reference,” and click on OK. Then Lock the layer.
- Create a New Layer and rename it “BG.” Within this layer folder place a white fill Rectangle (M) over the stock image and set it to Opacity 40% via the Transparency panel.
- Create a New Layer and rename it “Pumpkin.”
Step 3
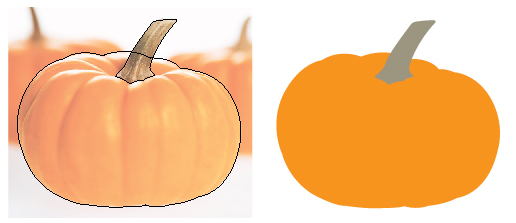
Use the Pen Tool (P) to create the base layers of the image. The pumpkin body will be set to R=247, G=148, B=30 and the stalk to R=154, G=147, B=127.
Step 4
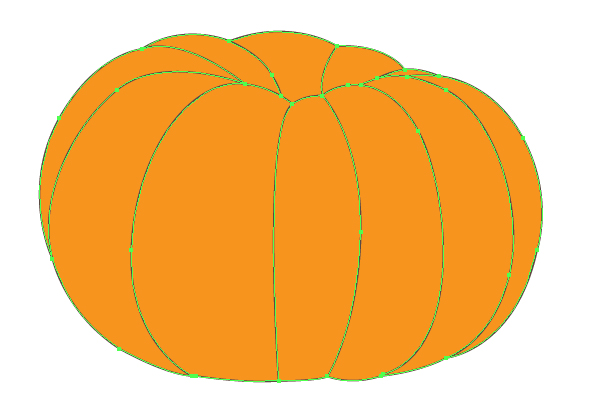
Copy (Command + C) and Paste in Front (Command + F) the pumpkin body base layer, null the fill, and give it a stroke. The stroke color doesn’t matter. Now use the Pen Tool (P) to draw in the sections of the pumpkin, making sure that all the lines are intersecting/touching each other. This is important for when it comes to using Live Paint.
Group (Command + G) the lines and then duplicate them. One group will be used for the Live Paint section and the other will have one of our fancy Blend brushes applied to it later on.
Step 5
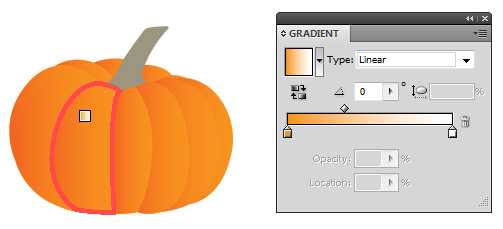
Using the Live Paint Bucket (K), fill in each of the sections with an orange (R=247, G=148, B=30) to white linear gradient. Then set these shapes to Blending Mode Multiply and Opacity 100%. Now null the stroke color. You won’t need to modify the direction of the gradient, it should automatically fill the shapes as shown below.
Step 6
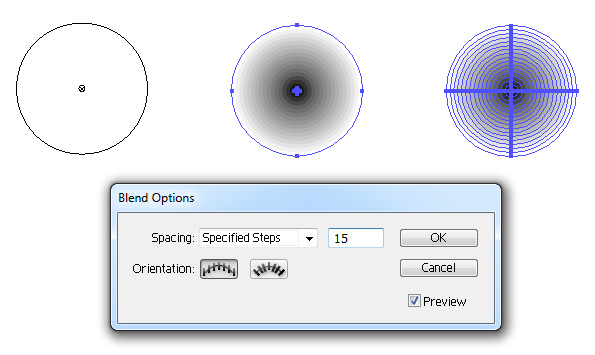
I’m going to create my first Blend based Art Brush. Using the Ellipse Tool (L) to draw a circle with a black fill, yet with its Opacity set to 0%. Then duplicate the circle and reduce its size. Change the Opacity to 100%.
Select both of the circles and create a Blend (Command + Alt + B). Go to Object > Blend > Blend Options and change the Spacing to “Specific Steps,” then the value to “15,” and click on OK.
With the Blend still selected, go to Object > Expand, which will give you a group of circles, as shown below.
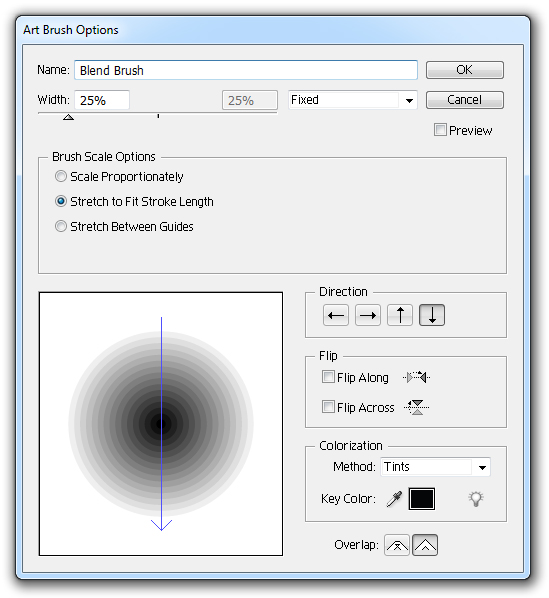
In the Brush palette, click on New Brush and select “New Art Brush.” Copy the settings I have below, making sure the Colorization Method is set to “Tints.”
Step 7
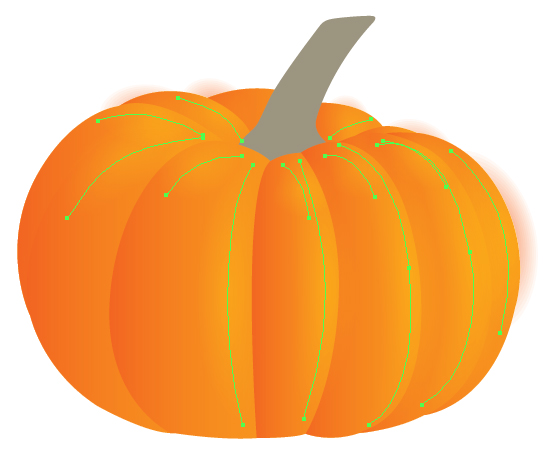
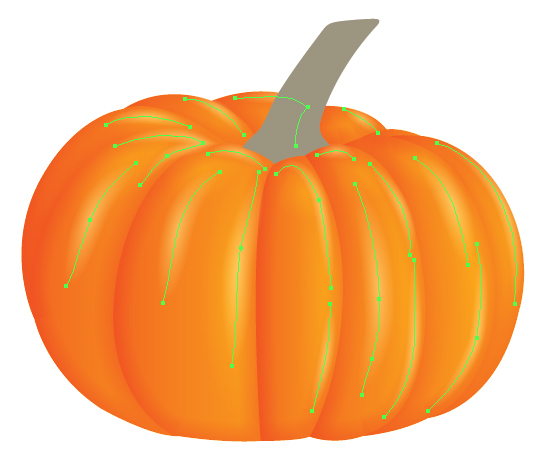
Using the circular blend brush you’ve created and the Pen Tool (P) for maximum control, you can create highlights on the pumpkin body by using an orange stroke color (R=241, G=90, B=41) set to Blending Mode Color Dodge and Opacity 100%. Don’t worry about the strokes going beyond the pumpkin body base, as we’ll resolve that later. Group the strokes (Command + G) when done.
Step 8
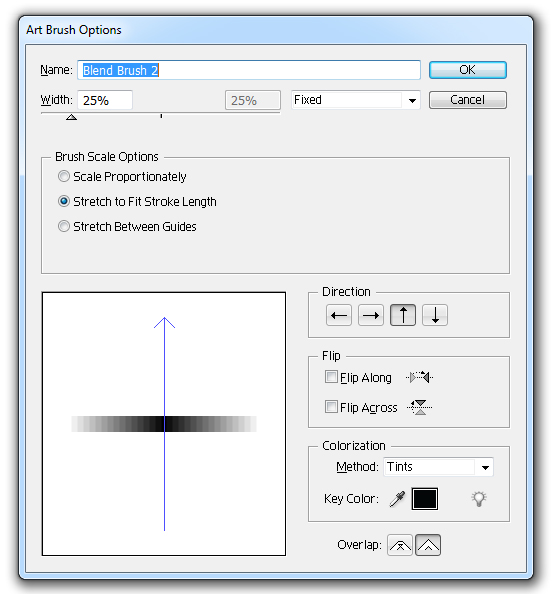
Now to create the second Blend based Art Brush. This time we’ll use the Rectangle Tool (M) to create two shapes of the same height. Again the larger one at the bottom with Opacity 0% and the smaller one at Opacity 100%.

When you create the New Art Brush, make sure the Direction of the brush goes vertical, as shown below.
Step 9
With the duplicated group of strokes created in Step 4, apply our square Blend based Art Brush with an orange stroke color (R=247, G=148, B=30) and the Corners set to “Round Join.” Set the group to Blending Mode Color Burn and Opacity 30%, then place them below the highlight strokes from Step 7.
It’s important to apply the Blending Mode and Opacity to the Group, rather than the strokes. The reason being is that some of the strokes overlap. If you applied the Blending Mode and Opacity to the strokes, these overlapping areas would appear darker than the rest. Applying it to the Group will prevent this from happening because it sees all the strokes within as an entire element.

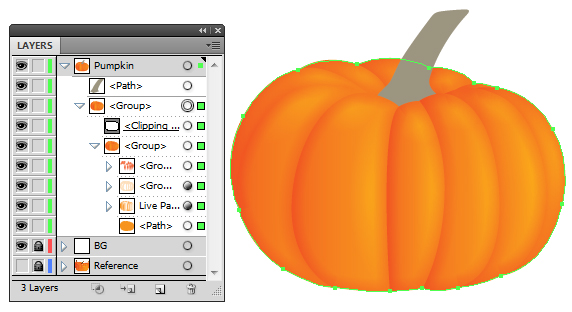
Step 10
Duplicate the original base layer for the pumpkin body. Apart from your duplicate, Group the remaining pumpkin body elements (Command + G). Bring the pumpkin body duplicate above the Group, then select both, and create a Clipping Mask (Command + 7). This will hide the blend brush strokes that overlap the base layer.
Step 11
Let’s get back to using the circle blend brush. I’m going to create further highlights on the pumpkin, which when I’ve finished and Grouped them (Command + G), I’ll drag and drop them into the Clipping Mask group. These highlights will have a brown stroke color (R=169, G=124, B=80) and be set to Blending Mode Screen with Opacity 100%.
Step 12
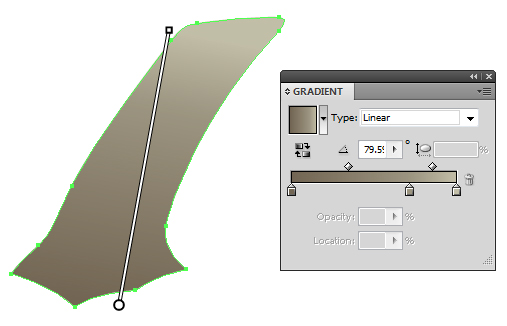
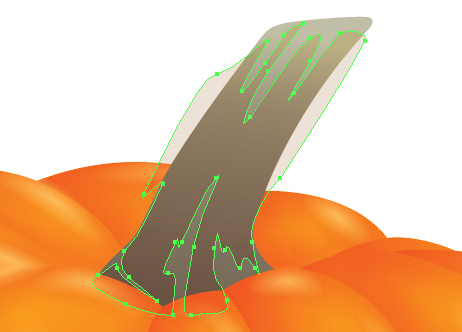
I’m going to begin working on the stalk. First, I’m going to duplicate the stalk base (which will be used later for a Clipping Mask) and then apply a linear gradient to the stalk. The colors used go from a dark olive green (R=114, G=102, B=83), to mid olive green (R=154, G=147, B=127), to a light olive green (R=194, G=190, B=167).
Now using the stock image, draw a shape with the Pen Tool (P) that goes over the darker areas of the stalk. This will be with a brown fill (R=169, G=124, B=80) set to Blending Mode Color Burn with Opacity 30%.
Step 13
Within the Default RGB brush palette you should have the art brush “Chalk – Scribble.” Use the Paintbrush Tool (B) to draw strokes along the stalk to give it an organic looking texture. Use the brown stroke color (R=169, G=124, B=80) set to Blending Mode Color Burn and Opacity 20%. Group the strokes when done (Command + G).
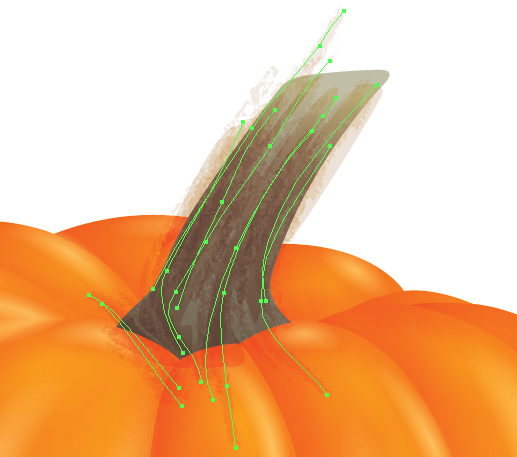
Now using the same color and brush, add lighter/highlighting strokes to the stalk, set to Blending Mode Screen and Opacity 20%. Group these strokes when done (Command + G).
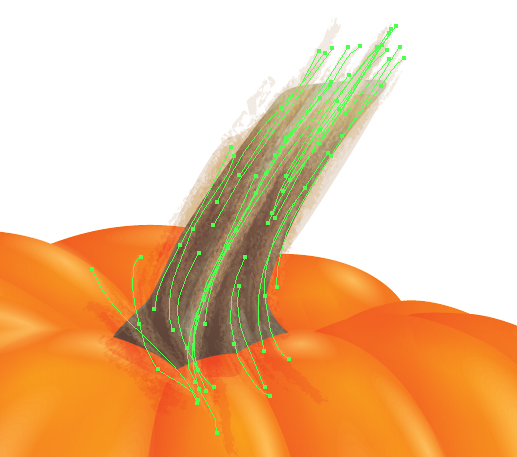
Finish off the texture by adding some even lighter strokes towards the top, set to Blending Mode Screen and Opacity 50%. Guess what? Group these strokes when done as well (Command + G).
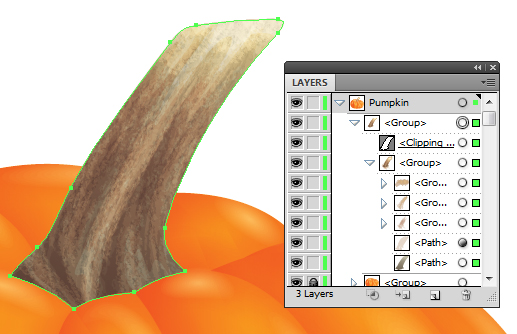
Step 14
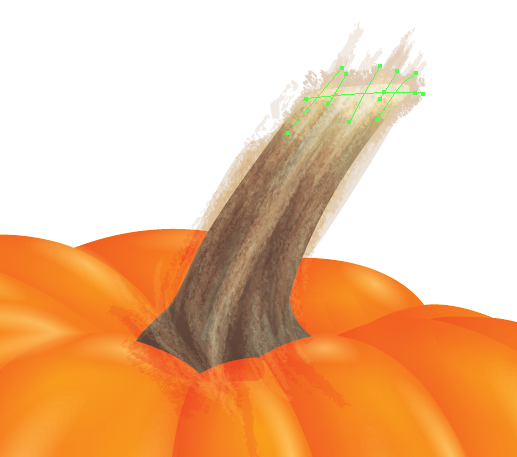
As we’ve done previously, Group up all the stalk elements (Command + G), and then use the duplicated base to create a Clipping Mask (Command + 7) to hide the overlapping elements.
Step 15
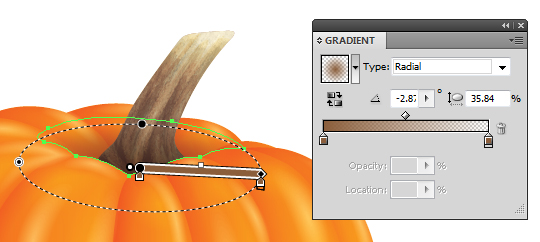
I’m going to darken the pumpkin body behind the stalk by adding a brown transparent radial gradient (R=169, G=124, B=80) set to Blending Mode Multiply and Opacity 100%. This will be placed within the pumpkin body Clipping Mask group. Use the Gradient Tool (G) to shift the position of the gradient source.
Step 16
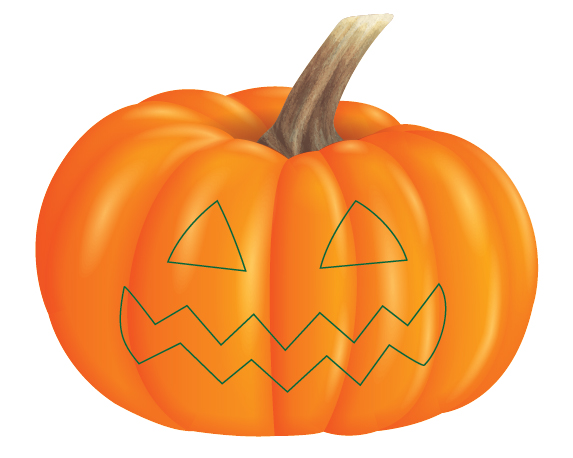
Now to begin the carving process! Create a New Layer and rename it “Face.” This will make it easier to simply hide the face if you require a pumpkin icon without the face.
Using the Pen Tool (P), draw out the face you wish your pumpkin to have. I’ve added a pretty simple face with two slightly curved triangle eyes and a zigzagged looking mouth.
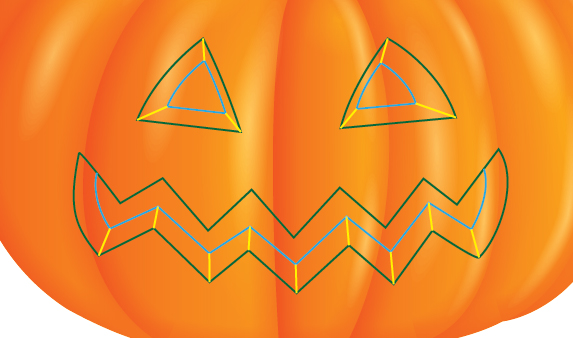
Now I’m going to draw in the lines for the rest of the carving to give the carving a 3D effect. For the eyes I’ve duplicated the original shape for the eyes and made them smaller. Group the strokes when done (Command + G) and then duplicate them for later use.
Step 17
With one group of strokes, use the Live Paint Bucket (K) to fill in the shapes. Remembering the light is coming from the right, make sure the right facing shapes are lighter than the others. The colors I have used are light brown (R=194, G=181, B=155) for the lighter shapes, mid brown (R=155, G=133, B=155) for the shaded shapes, and a deep dark brown (R=58, G=52, B=39). You can also set the stroke to null.

Step 18
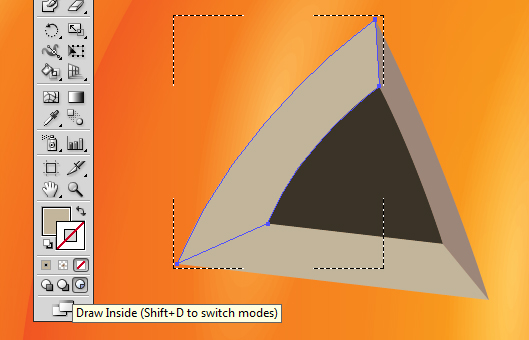
Select the Live Paint Group in the “Face” layer folder and go to Object > Expand so the group is reduced to the shapes you’ve filled.
Select a shape using the Direct Selection Tool (V), and then on the Toolbar select Draw Inside (Shift + D). This will create an automatic Clipping Mask when you draw any elements within the shape!
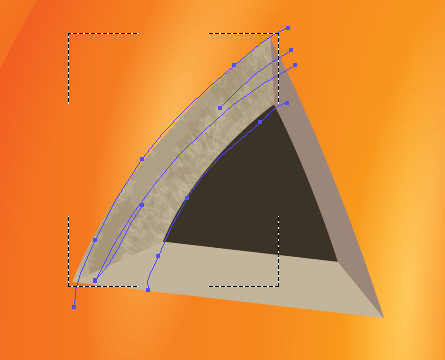
Using the “Chalk – Scribble” art brush and the Paintbrush Tool (B), add texture within the shape using the light brown shade set to Blending Mode Multiply and Opacity 20%. Repeat this for each one of the light and mid brown shapes.
Step 19
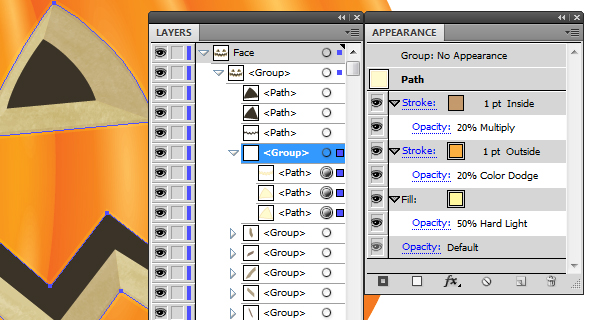
Within the group with the duplicated lines for the face, duplicate the shapes for the eyes and the mouth. I’m going to bring these into the group below the deep dark brown shapes, but above the Draw Inside shapes, and apply the below settings in the Appearance panel. This will help give an outline around the outside of the features and darken the inside as well, giving the carved 3D effect a slight yellow tinge.
Step 20
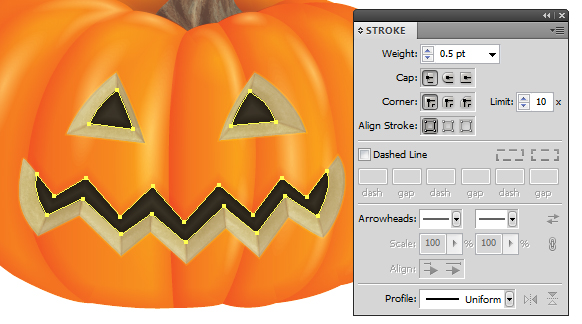
I’m going to use the squared blend art brush on the lines from the duplicated line group to help define the edges of the 3D effect more. This will be using the below settings, as well as setting the Stroke color to brown (R=169, G=124, B=80), and set to Blending Mode Multiply and Opacity 30%.
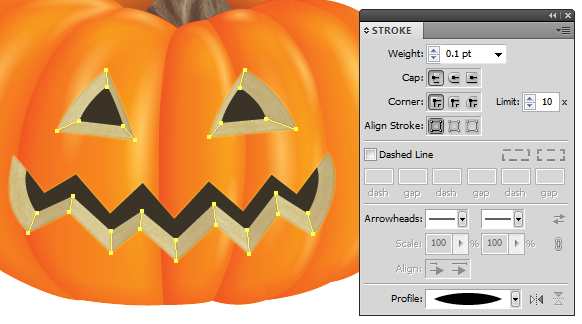
Now use the same brush applied to the small shapes of the face, using the dark olive as a stroke color (R=114, G=102, B=83) set to Blending Mode Color Burn and Opacity 30%.
Step 21
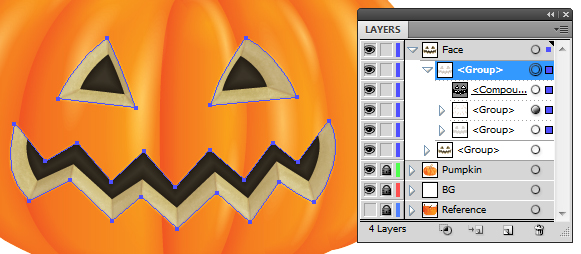
Using the larger shapes of the face, I’m going to select them and make a Compound Path (Command + 8), and use this to create a Clipping Mask (Command + 7) of all the other elements.
Conclusion
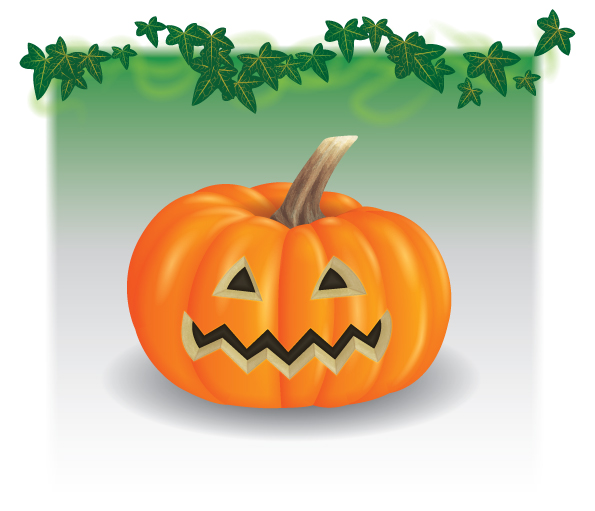
Now we have our final jack o’ lantern using blend based art brushes! I’ve went on to add a gradient for the background and used the squared blend art brush with a white stroke to give a blurred/feathered edge effect. I’ve also used a leaf art brush and the circle blend art brush at the top.
Hope you’ve had fun with this tutorial and you have a great Halloween this month!
{excerpt}
Read More