In today’s tutorial I’m going to show you how to create some line art style stationery art brushes. You’ll then learn to combine them with the Live Paint Bucket to create a typography piece.
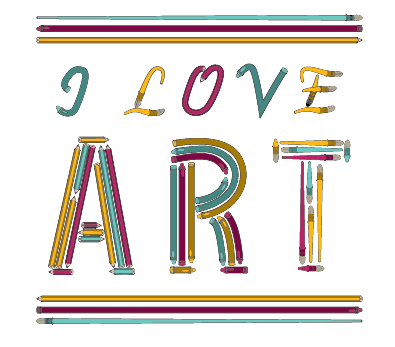
Final Image Preview
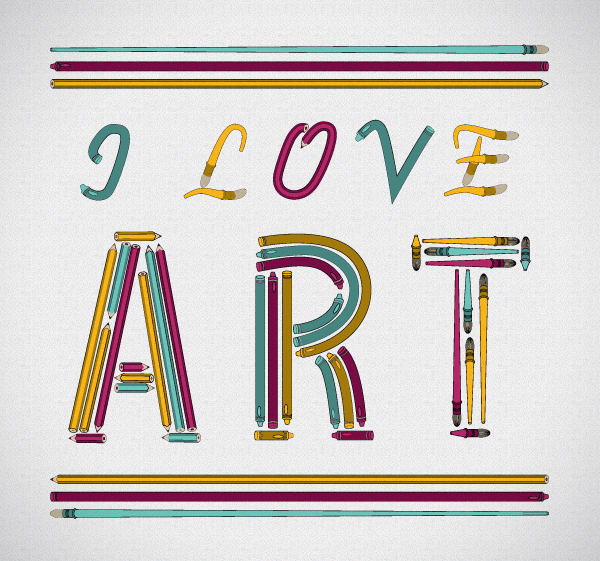
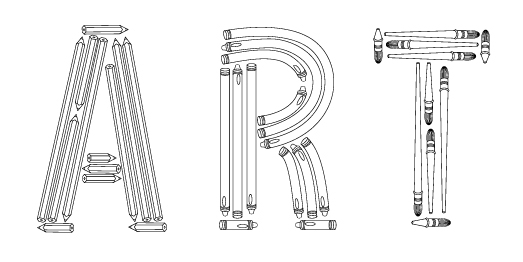
You can find the source files in the directory labeled ‘source’ that came in the files that you downloaded. You may wish to look through them briefly before we begin. A preview of the final image is below.
Introduction
Back in June I put together a art tools premium pack of various elements. It included a variety of stationery line art style art brushes, which can be used for a variety of creative projects. They were so much fun to use, I wanted to show you how you can use them in a project.
Creating the Pencil Art Brush
Step 1
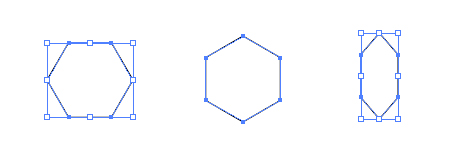
Using the Polygon tool, hold down Alt + Shift and create a hexagon with a black stroke and null fill. Using the Free Transform Tool (E), rotate it 90 degrees and then reduce its width by about a half as shown below.
Step 2
Copy (Command + C) and Paste in Front (Command + F) the hexagon and then move it to the right. Using the Direct Selection Tool (V), select the two points on the left and delete them. Use the Pen Tool (P) to connect the points on the side to the original hexagon.
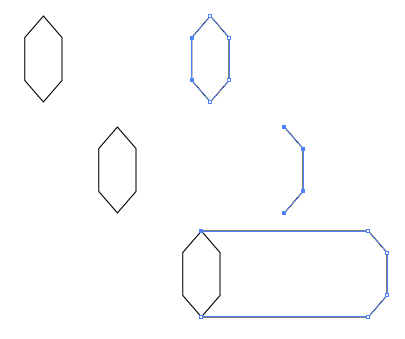
Then add lines for the end of the pencil. If you’ve got Smart Guides (Command + U) enabled, you’ll be able to find the mid-point between the horizontal lines.
Step 3
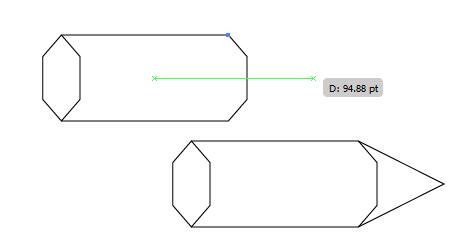
Now you have the basic shape for the pencil, I’m going to add points along the duplicated half hexagon and then use the Convert Anchor Point Tool (Shift + C) to modify the handle bars on the points. This way I can create a curve and then move the points to create the look of a sharpened pencil.
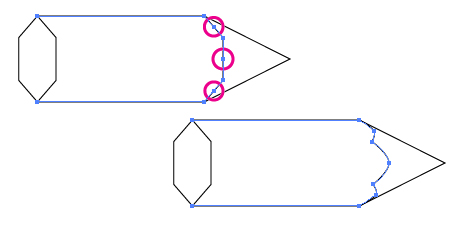
Then use the Line Segment Tool (\) to draw two horizontal lines to give the pencil a more 3D look.
Step 4
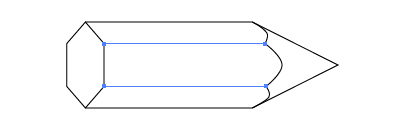
Use the Ellipse Tool to create an ellipse for the lead in the pencil and then duplicate it, then move it to the end of the pencil. Using the Direct Selection Tool (V), select the point on the left and delete it.
Step 5
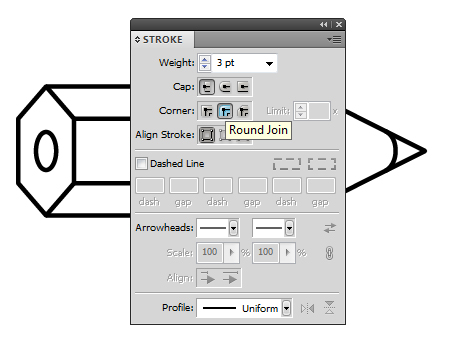
I’ve changed the Stroke Weight on the pencil to “3pt,” and when you zoom in you can see the tips of the hexagon are not aligned to the pencil.
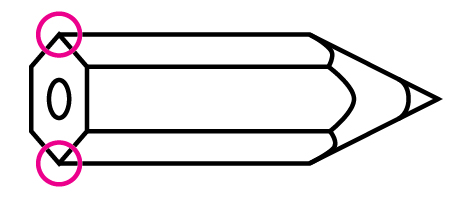
So I’m going to Select All (Command + A) of the pencil and change the Corners to Round Joints.
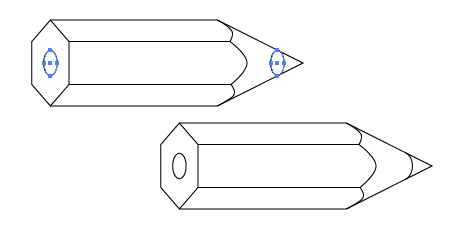
Step 6
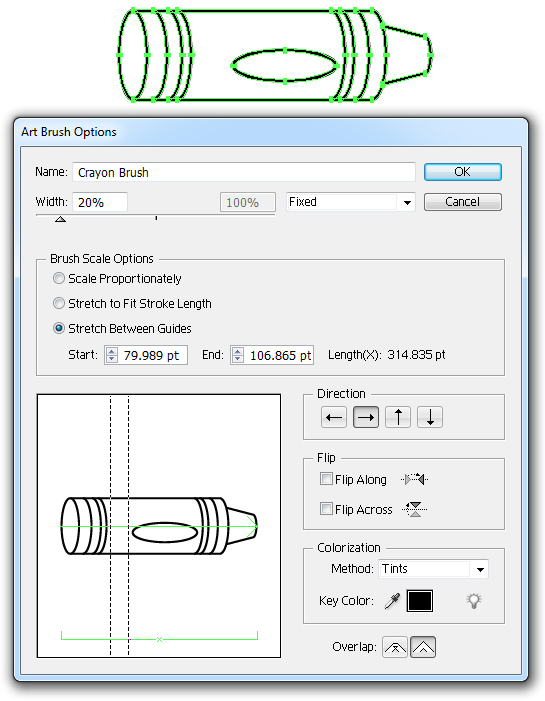
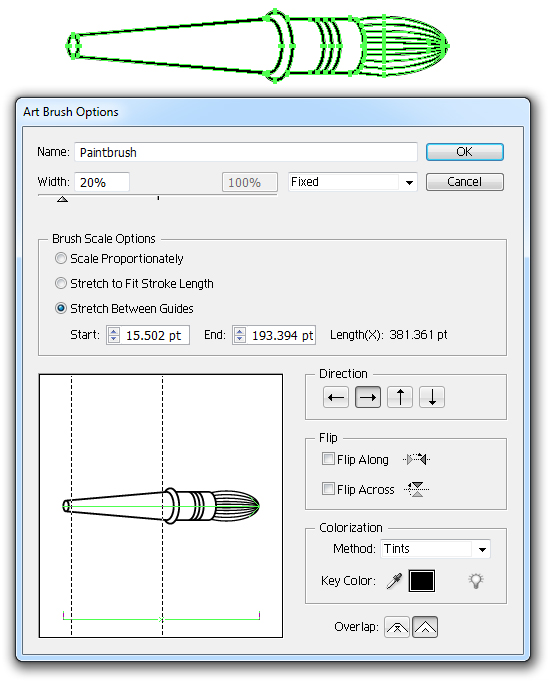
Expand the lines by going to Object > Expand and then Group them (Command + G). In the Brush Palette select New Brush and then New Art Brush. I’ve reduced the size of the brush to “20%” and then Stretch Between Guides and moved the lines to the center section of the pencil. This is so when I use the brush, it will maintain the scale of the bottom and tip of the pencil, but stretch the center portion of the pencil along the stroke. I’ve also changed the Colorization mode to Tints.
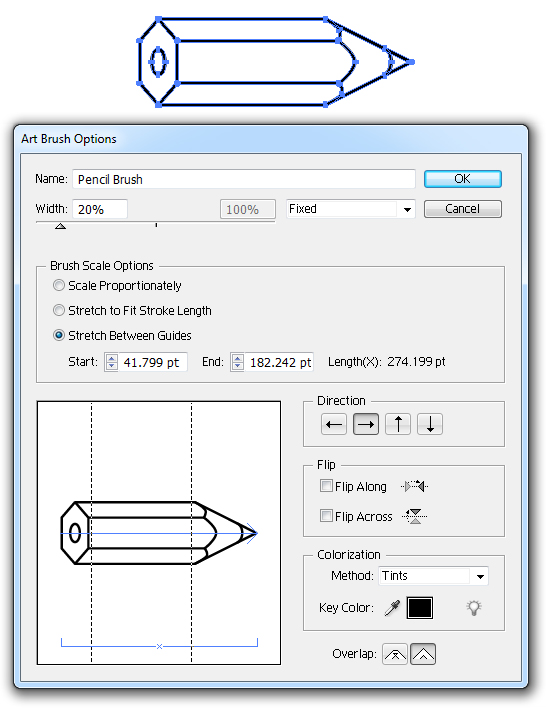
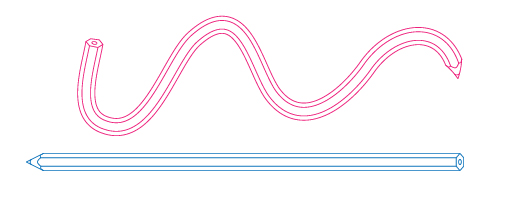
Now I have my first stationery art brush.
Creating the Crayon Art Brush
Step 1
Use the Ellipse Tool (L) with a 3pt Stroke Weight to draw a circle the same height as the pencil. Then use the Free Transform Tool (E) to reduce the circle’s width in half.
Step 2
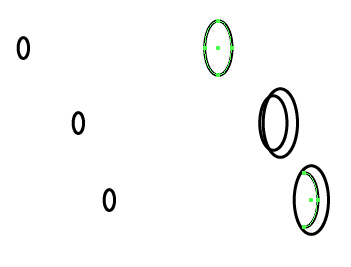
Duplicate the ellipse and move it to the right. Use the Direct Selection Tool (V) to select the point on the left of the duplicated ellipse and delete it. Then duplicate the arc seven times as shown.
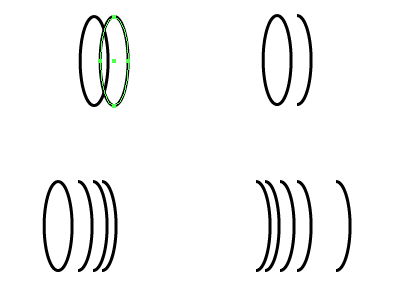
Step 3
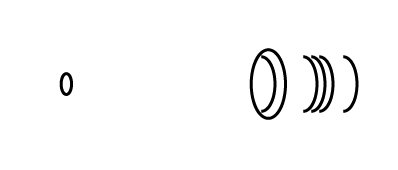
Use the Free Transform Tool (E) to reduce the size of the furthest arc on the right, as this will be the tip of the crayon.
Connect the arcs with the Pen Tool (P) as shown.
Step 4
Use the Ellipse Tool (L) to draw an ellipse for the label on the crayon.
Step 5
Object > Expand the lines and then Group them (Command + G). As before, create a New Art Brush with the same settings.
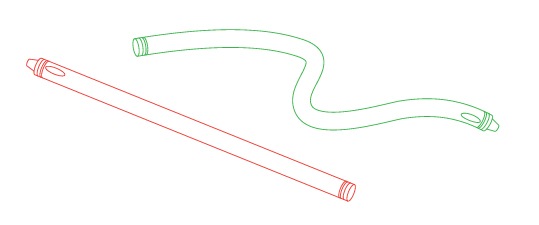
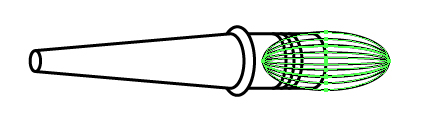
Your final crayon brush should look like the following in use:
Creating the Paintbrush Art Brush
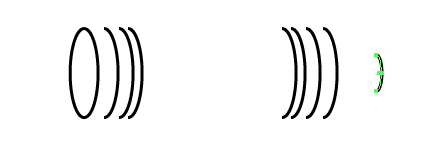
Step 1
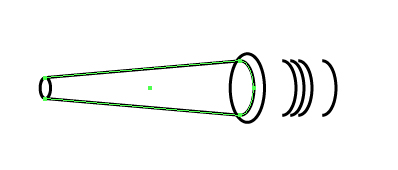
In a similar process, create an ellipse with the Ellipse Tool (L), duplicate it and remove one of the points as shown below:
Then duplicate the arc four times.
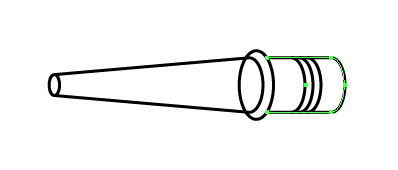
Step 2
Connect the stray points with the Pen Tool (P).
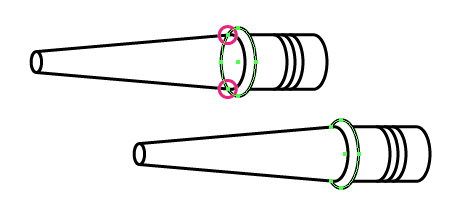
Step 3
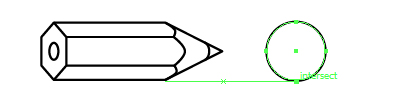
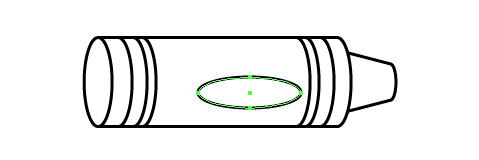
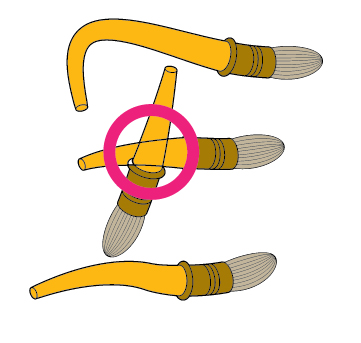
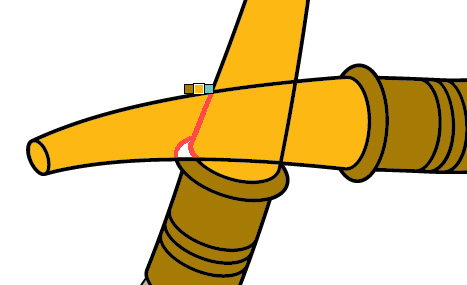
With the complete ellipse in the middle of the paintbrush, add points to where the ellipse intercepts the handle of the paintbrush. Then remove the point in the center of those points.
Step 4
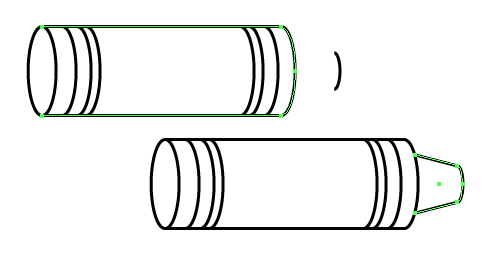
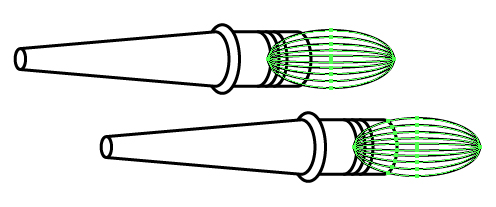
Draw an ellipse on the end of the brush and use the Free Transform Tool (E) to reduce its height to the height of the end of the brush.
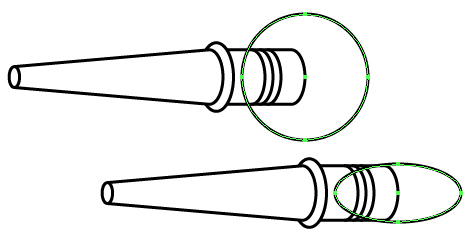
Duplicate the ellipse and then reduce its height equally by holding Alt while you resize with the Free Transform Tool (E). Do this several times until you get something that will look like the bristles for the paintbrush.
Step 5
I’m going to move the ellipses more to the right to give the impression the bristles are being crammed in the end of the brush. Then as you did with the handle, add points to the lines of the bristles which intercept the handle.
Then use the Direct Selection Tool (V) to select the center of these new points and delete them. I’ve then reduced the Stroke Weight of these shapes to 2pt, while maintaining the handle Stroke Weight at 3pt.
Step 6
Expand the lines, Group them (Command + G), and then as before create a New Art Brush.
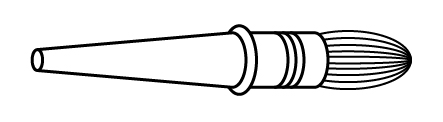
You should now have a paintbrush art brush!

Creating the Stationery Typography
Step 1
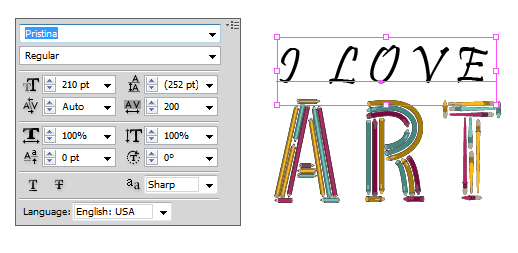
I’m going to use the brushes to make up the letters of “I LOVE ART”. To keep them looking tidy, I’m going to base them on a font. I’ll be using two typefaces for this, which should have been automatically installed when you installed Illustrator. These are “Myriad Pro” and “Pristina”.
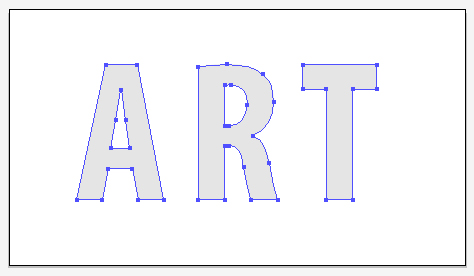
Firstly I’m going to use the Type Tool (T) with the below settings to type out “ART”.

Then I’ll Expand the text and reduce the Opacity to 10%.
Step 2
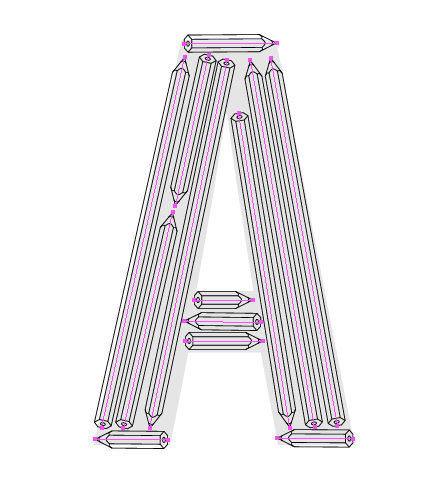
Using the Line Segment Tool (\), use the pencil art brush to create the “A”. For this I’ll use a 1pt Stroke Weight and black stroke color.
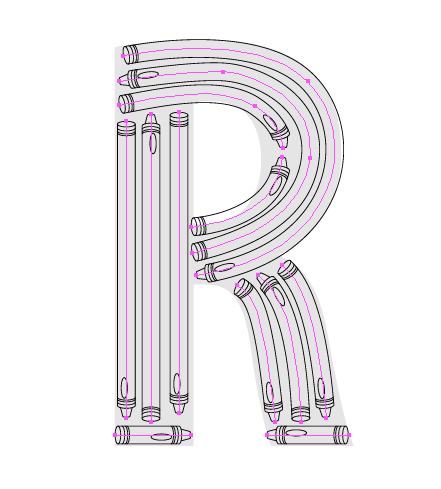
I’ll use the Pen Tool (P) to create the curves for the “R” and the Line Segment Tool (\) for the rest with the crayon art brush.
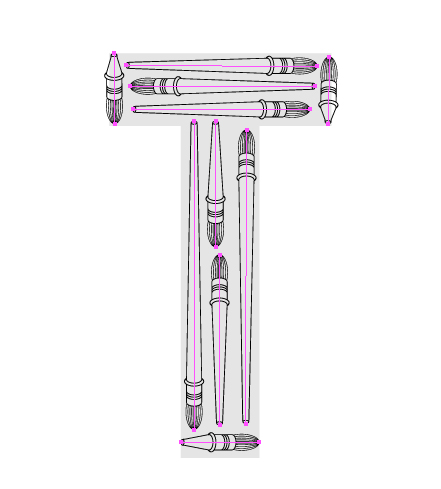
Then make up the “T” with the Line Segment Tool (\) with the paintbrush art brush. Maintaining the same style as the others.
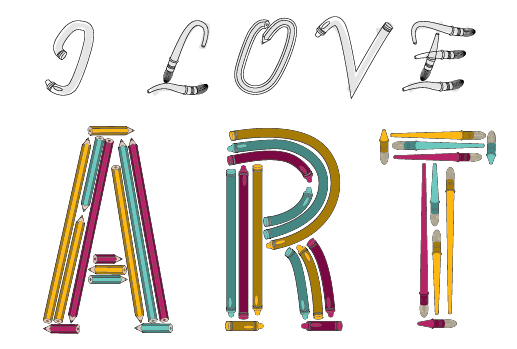
So this is what I have once I hide the guide letters:
Step 3
Select All (Command + A) the strokes and Object > Expand them.
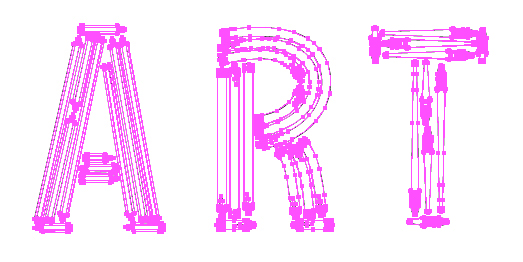
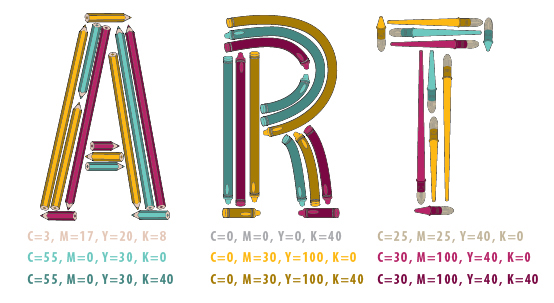
Using the Live Paint Bucket (K), fill in the sections of the elements. I’ve kept the line art to black.
You can find out the colors I used from this graphic:
Step 4
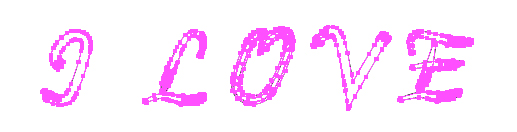
Then above “ART” I’ve added “I LOVE” in the script typeface “Pristina,” as it doesn’t have overly complex curves which may distort the brush.
Expand the text and reduce the Opacity to 10% as before. I’ve then used it as a guide for the art brushes.
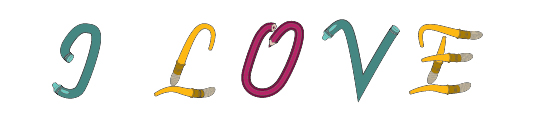
Step 5
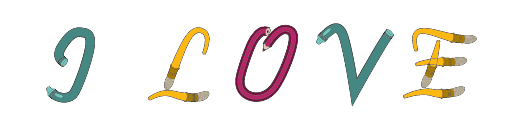
Select All (Command + A) of the brushes and Expand them.
As before, use the same colors to fill the elements. I’ve kept the same hues for each letter so it’s easier on the eyes.
Step 6
You’ll notice on the “E” that the center of the letter crosses over. As you Expanded the lines when creating the brush originally, this will mean you can easily edit the color of the line art.
So zoom into the letter and use the Live Paint Bucket (K) to recolor the lines, which should be hidden behind the overlapping brush.
Step 7
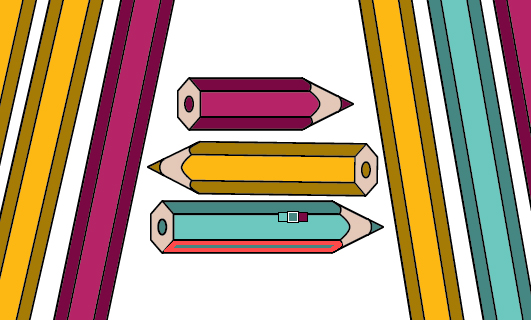
To frame the typography, I’m going to use the Line Segment Tool (\) to add three lines on the top of the piece and bottom with each one of the art brushes.
Then Expand the lines and use the Live Paint Bucket (K) to color it.
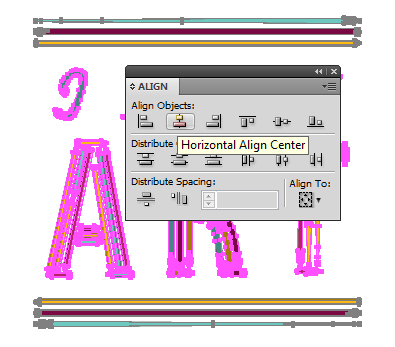
Step 8
Make sure that the letters “I LOVE” are in one Group (Command + G), as is “ART” and then Select All (Command + A) of the elements. Use the Align palette and select “Horizontal Align Center” to ensure it’s all centralized.
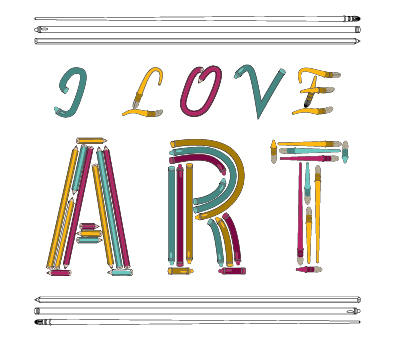
Conclusion
After I created my stationery themed typography, I just added a background with help of a gradient and a vector noise pattern to give it a subtle texture. I hope you like the end result!
{excerpt}
Read More