In this Quick Tip, you will learn how to use the Rectangle Grid Tool, the Live Paint Bucket and 3D Extrude and Bevel tools to make a pixel style cube image. This tutorial has a Vectortuts theme, but you can of course create anything you like. Take inspiration from your favorite video games to make a quick and easy pixel cube. Let’s get started!
Step 1
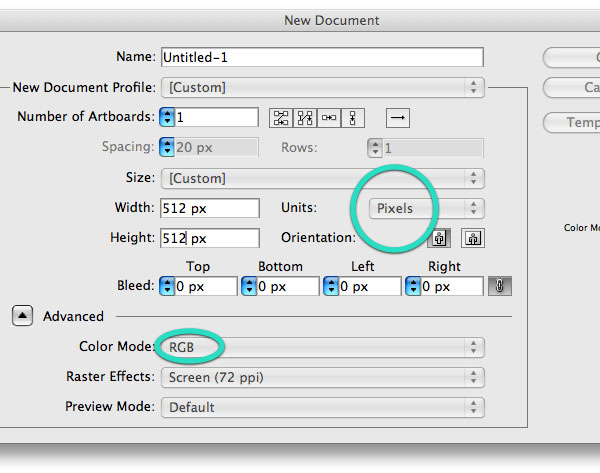
Make a new RGB document of any size. I’ve chosen 512px. Set the Units to Pixels.
Step 2
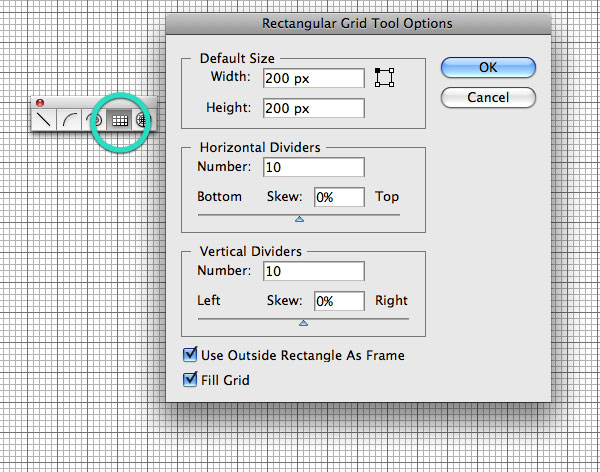
Option + Click onto the artboard with the Rectangular Grid Tool. You can find the tool under the Pen Tool grouped with the Line Segment Tool. Set the Width and Height to 200px and the dividers to 10. Click OK.
Step 3
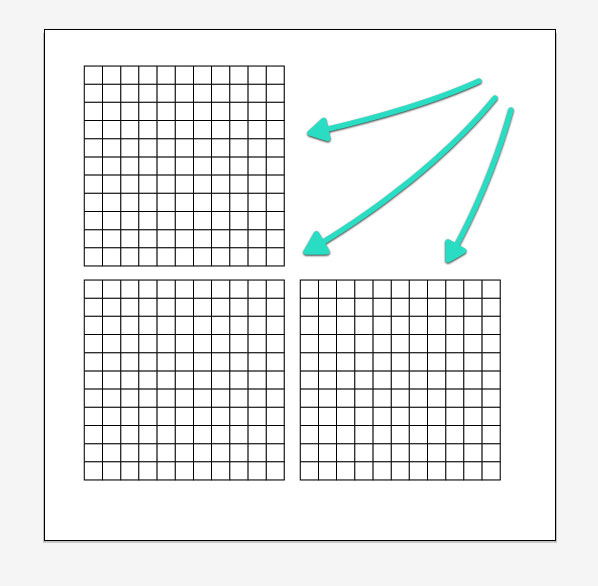
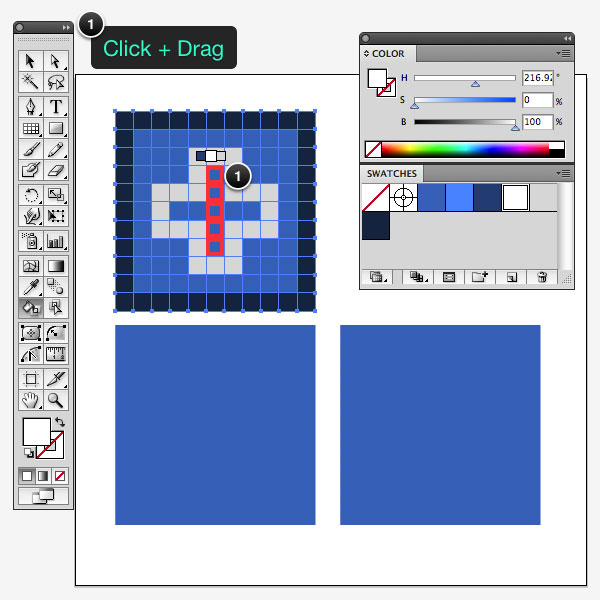
Select the grid with the Selection Tool (V) and Hold down Option and Drag to make two copies of the grid.
Step 4
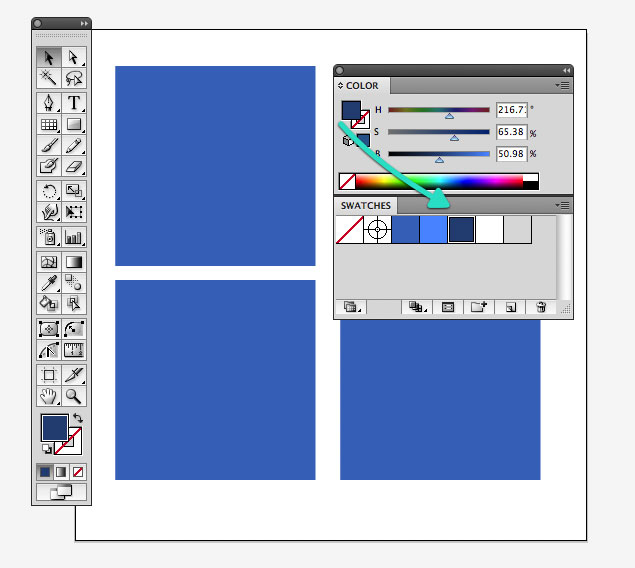
I’m going to make a cube based on the theme of Vectortuts, so I’ve selected a few shades on blue and saved them to the Swatches Palette. If you use the HSB color sliders, you can chose a central color and change the Brightness (B) and Saturation (S) without changing the Hue (H) of the color.
Step 5
Select one of the grids, and pick the Live Paint Bucket (K). You will notice that it has a few swatches of color under it, these are the colors in your swatches. You can shuffle through the swatches with the arrow keys. When you’re ready to color a block, click. The grid will turn into a Live Paint Group.

Step 6
Start to draw the designs you want for the sides of the cube. To make it easier, you can Click + Drag to color more than one block. If you’re unsure of the design you want, roughly draw out an 11 by 11 cube grid on paper to plan it out.
Step 7
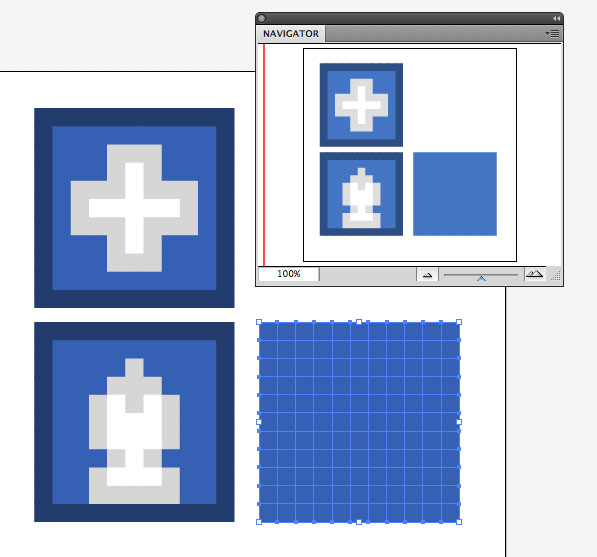
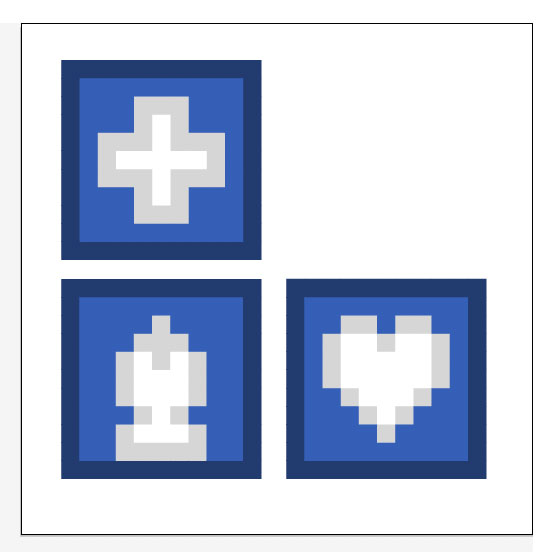
Once you have completed the designs, select the Rectangle Tool (M) and Option Click onto the artboard to make a 200px by 200px Rectangle. Click OK.

Step 8
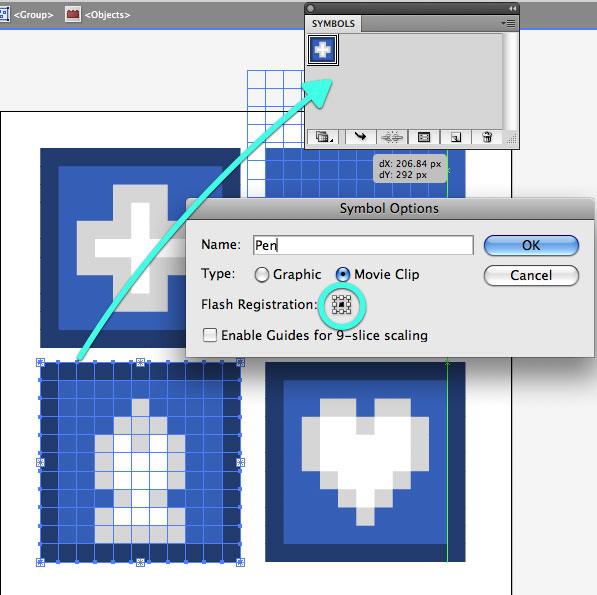
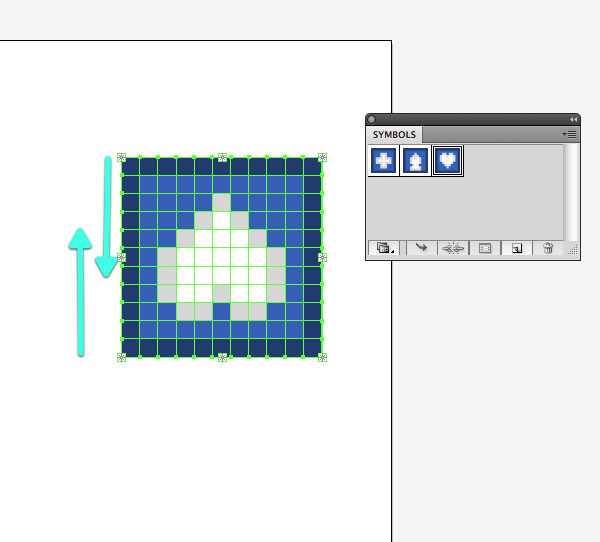
Drag each of the design cubes into the Symbols Panel. There’s no difference between Movie Clip and Graphic for this exercise, so it’s ok to have either of them selected. I like to click the Middle Point as the Registration to make scaling easier if I need to use it later.
Step 9
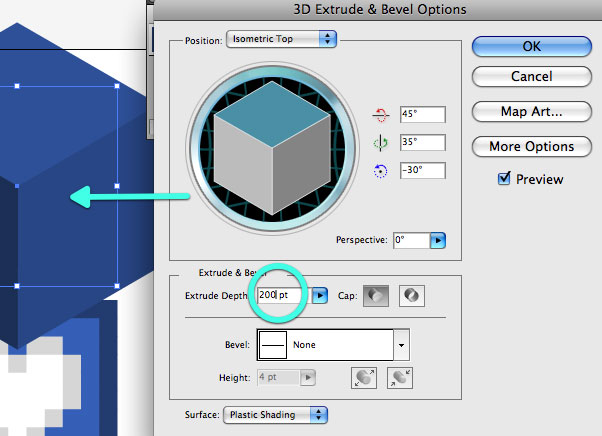
Select the new square and go to Effect > 3D > Extrude & Bevel. From the drop down menu, select Isometric Top as the position and set 200pt as the Extrude Depth. Click the Map Art Button to open the Map Art Settings.
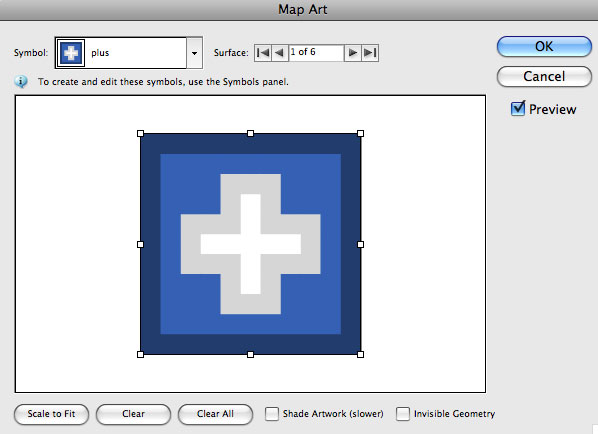
In the Map Art options, you will see a Symbol drop down menu and a surface selector. Scroll through the surfaces and apply the artwork of your choice. If you look at the transformed cube on the artboard, you will notice that it has red guidelines to indicate which surface is selected. Use this to find the surface you want to apply artwork to. Set each surface and click OK.
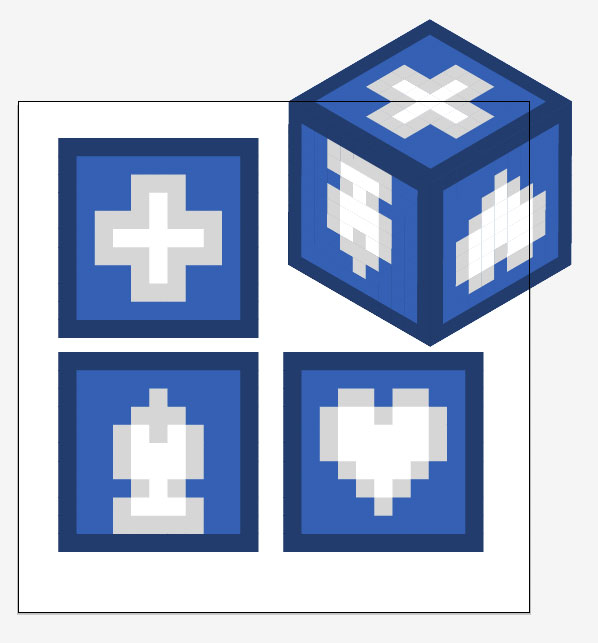
Step 10
Sometimes when you’re creating a 3D object in Adobe Illustrator, you may notice that the artwork that you’ve mapped to a surface is upside down. This is easy to fix. Open the Symbols Panel and double click on the symbols that need to change, this will take you into the symbol editing window. In this case I need to flip the Pen and the Heart symbols.
Step 11
To refresh the effect, select the cube and open the Appearance Panel and click on the Extrude & Bevel effect and the option dialogue will open again. There’s nothing to do here, just click OK. This will refresh the symbols and the cube will be fixed.
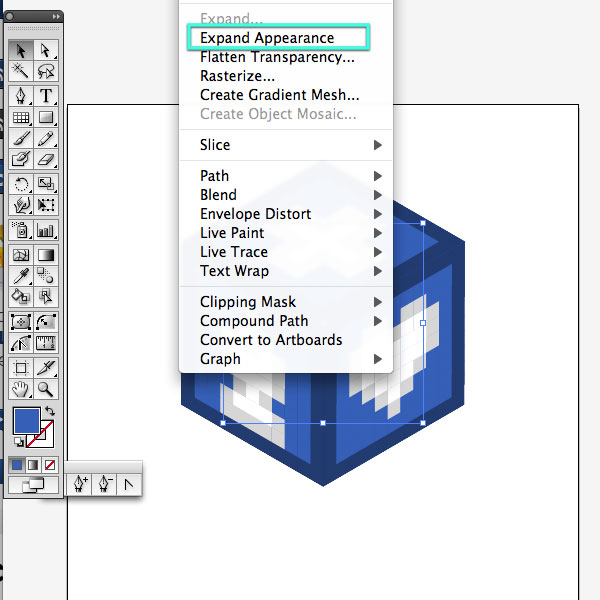
Step 12
Delete or move the symbols you previously made from the artboard and position the 3D object in the middle of the artboard. Expand the Appearance (Object > Expand Appearance). Ungroup the cube (Command + Shift + G) so the three sides can be selected.
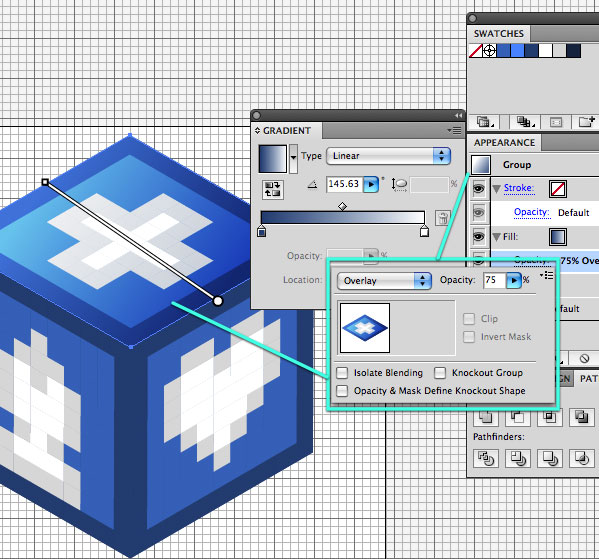
Step 13
In this part we will be adding some lighting effects. This is a handy tip I have been using with my illustrations lately. Click the top face of the cube. If it’s not grouped together, do that now. (Select the top face of the cube, and nothing else, then press Command + G). Once it is grouped, you can apply a new Appearance to it. Select the group, add a new fill in the Appearance Panel (Click the Fill button at the bottom of the panel) and apply a gradient fill from a dark version of your main color to white. Click on the Opacity settings and select Overlay as the blending mode and reduce the opacity to something that looks nice (this will be different depending on the color you’re using.) Repeat the same for the Left side panel.
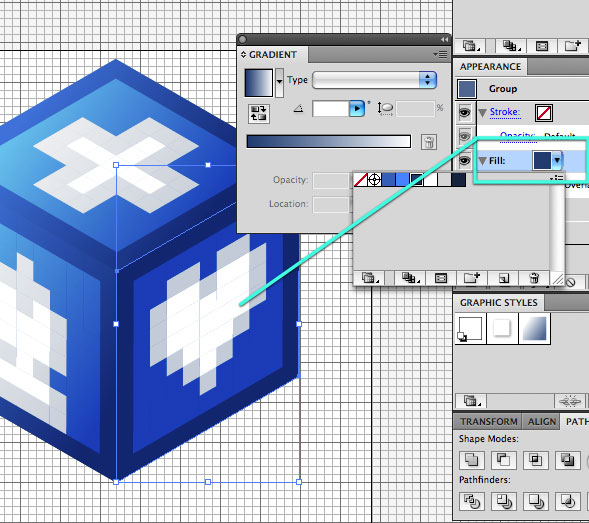
Step 14
For the back there will be no light source, so go back into the Appearance Panel and set a solid fill of the dark color in the gradient and change the opacity to something that looks nice.
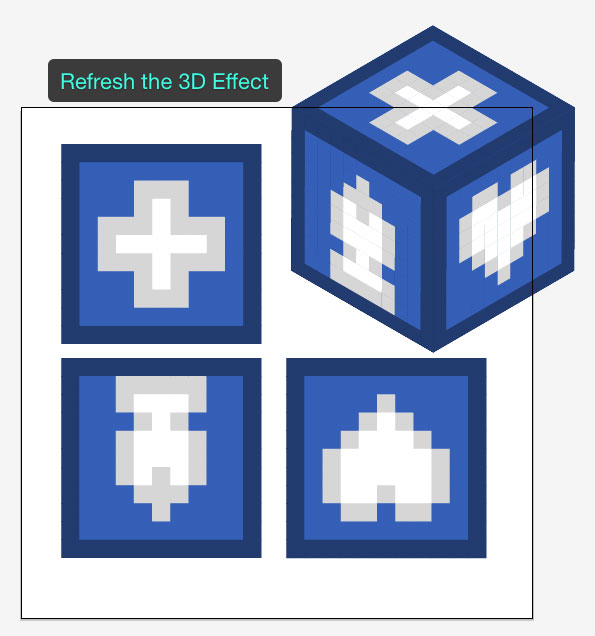
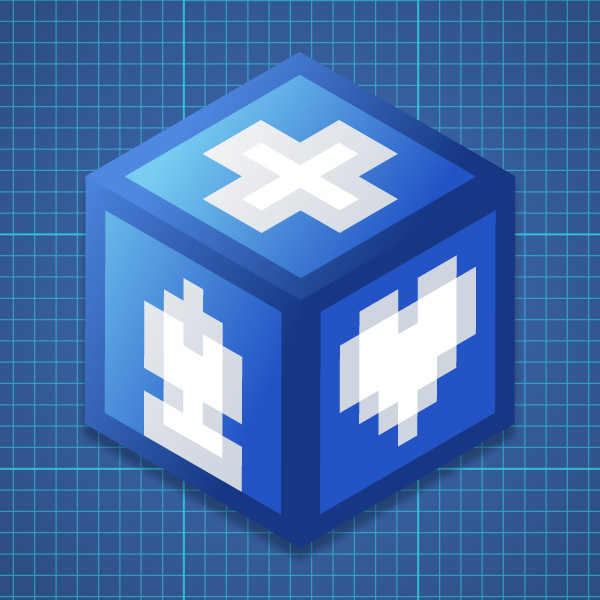
Once you’re finished, you should have something that looks like this.

Conclusion
I grouped the entire shape and applied a drop shadow in the Appearance Panel. I’ve also added a background with a radial gradient, and lines with the Rectangle Grid Tool. Have a play around with the different kinds of images you can make. Take inspiration from oldskool video games like Super Mario Brothers or even new games like Minecraft to come up with fun ways to use this tut. Have fun!
{excerpt}
Read More