Hey guys, in this tutorial I’d like to show you how you can create a cool looking transition using Card Dance. This built in plug-in is often forgotten, but generates some pretty impressive results with the right settings.
Tutorial
Step 1
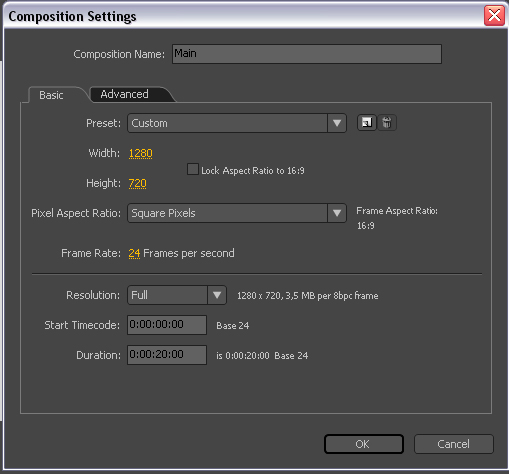
Create a new composition clicking by Menu->Composition->New Composition. Name it as Main, change the resolution to 1280×720 and set the duration to 20 seconds.
Step 1
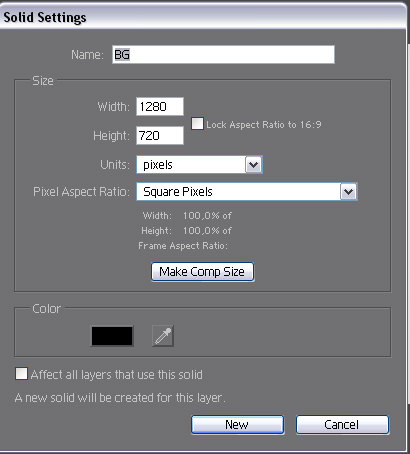
Create a new solid clicking by Menu->Layer->New->Solid. Change the color to Black. Make it comp size (1280*720) and name it as ‘BG’
Step 2
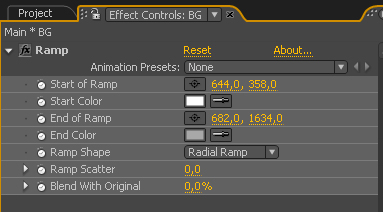
With this layer selected let’s add a ramp effect.(as I mentioned this before.You should use the effect&presets window where you can easily type in and find the various presets). Let’s change the start color to #FFFFFF and the End color to #A6A6A6 and also change the ramp shape to Radial Ramp.
Step 4
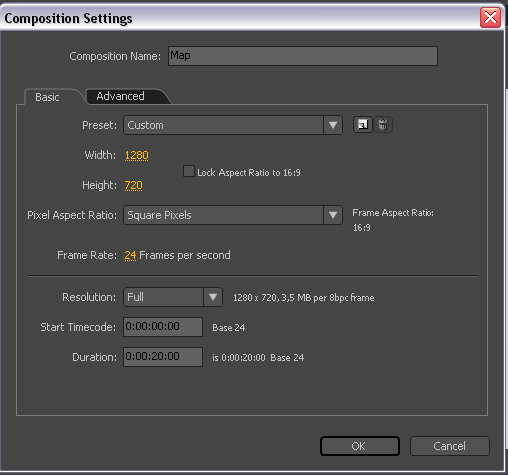
We have to create a new composition with the exactly same properties as the first one but in this case we need to change the name to Map.
Step 5
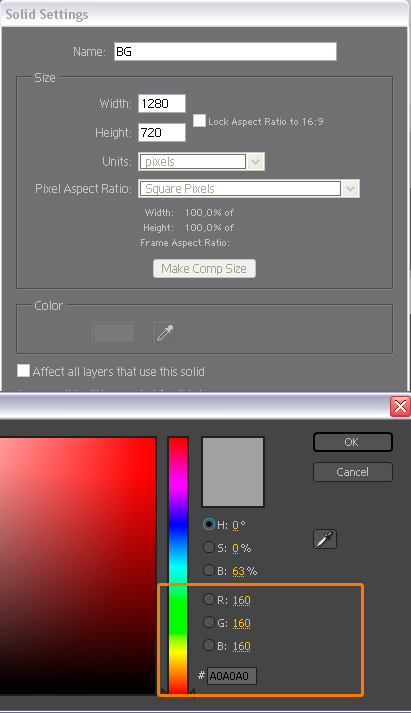
Create a new solid clicking by Menu->Layer->New->Solid. Change the color to Black. Make it comp size (1280*720) and name it as ‘ BG’.It’s a 50% grey background and as you can see I just set the RGB values to 160.It’s a very important step because if you are using a different color then the whole effect won’t work.
Step 6
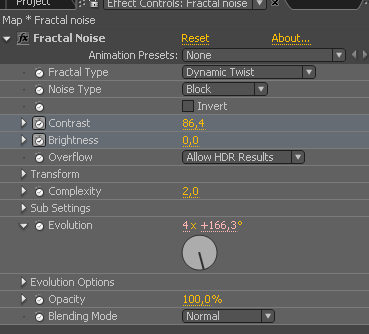
Okay so in the next step I just duplicated the BG layer, rename it to Fractal Noise and add a fractal noise effect to it.Let’s break down the effect. I used a simple expression in the Evolution properties so just alt+click on the stopwatch and type in time*150.So this part is optional because in here you can define the transition style.So where the color is 50% grey then the logo or your graphical object won’t steps into a reaction with Card dance so you won’t see any changes.Where the color is white then your logo will be 100% transparent and where the color is between 50% grey and white then you will see an abstract shape depend on your Map settings and your Card Dance settings.
Step 7
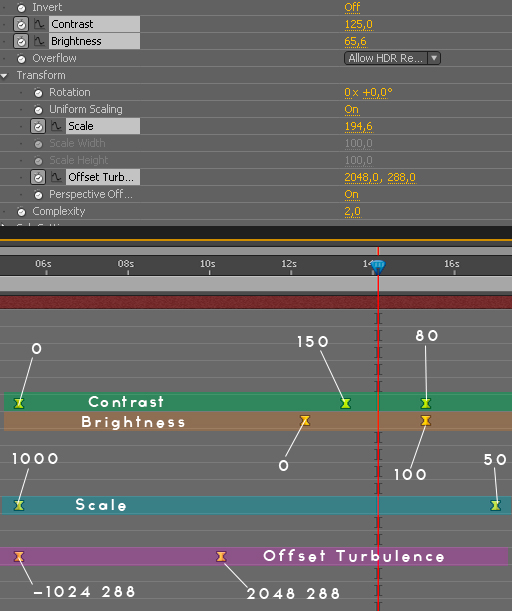
Now here’s the Fractal noise animation break down.You don’t have to follow my properties in100% fell free to modify them.
Step 8
Okay so we done with the custom Map part so we can close this Map composition and go back to the Main composition and grab the Map composition and put it above the BG layer and turn it off.

Step 9
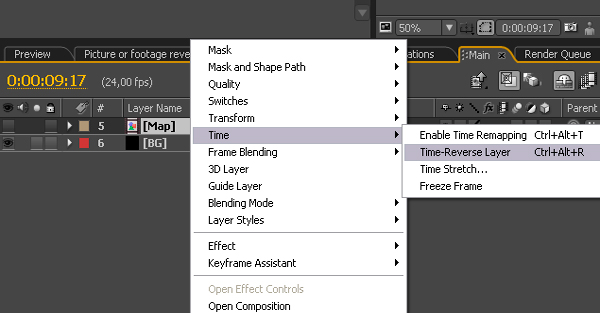
Depends on what kind of animation wants to create you can easily invert the Map composition’s fractal noise animation if you are right click on the Map composition and select Time-Reverse Layer.
Step 10
We need to import the Aetuts+ logo(or your own logo, picture, footage) and in the Effect&presets panel please type in:Card Dance.Okay so in the Rows and Columns section I change the Rows to 18 and the Columns to 24 and set the Gradient Layer 1 to Map.
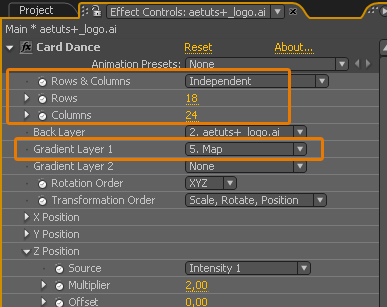
Step 11
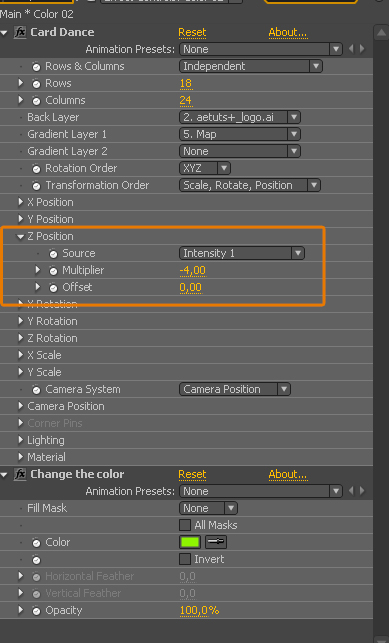
This is a very optional part. In here you can change the appearance of your effect.You can play with the settings or you can follow my properties although one thing to keep in mind.Always change the source settings from none to Intensity 1 (because we’re using the Gradient Layer 1).
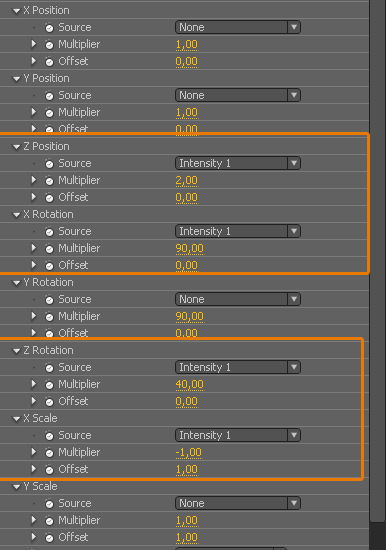
Step 12
Now let’s duplicate the Aetuts+ logo layer couple times and rename those layers to color 1 and 2.
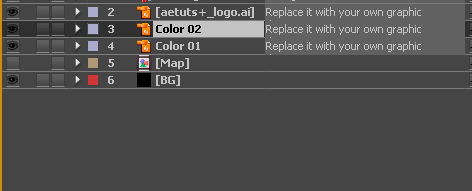
Step 13
In the first duplicate I add a fill effect to it and I changed the color to #F522F3 and set the Z position to -2 which means we’ve just push back the purple layer so this will gives us a much more better 3D looking animation.
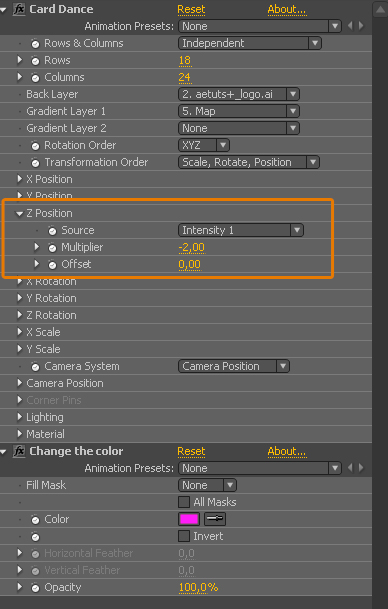
Step 14
Repeat this step with the second duplicate as well. Let’s change the Z position Multiplier to -4 and the fill color to #B2F522. You can duplicate your logo once again if you want, add different colors but make sure you are allways change the Z position values for example: 3. duplicate to -6, 4. duplicate to -8 and so on and so forth.
Step 15
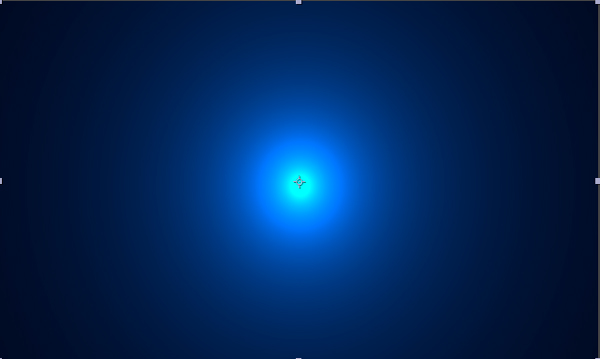
I added this simple flare picture. I put at the top all of the layers and set the blending mode to screen. You can find this flare in the assets folder after you download the project file or if you’re not a Premium Member yet then you can purchase the whole thing in my Videohive profile.Of course it’s not a necessary part it’s just gives an extra detail to the whole effect.
Step 16
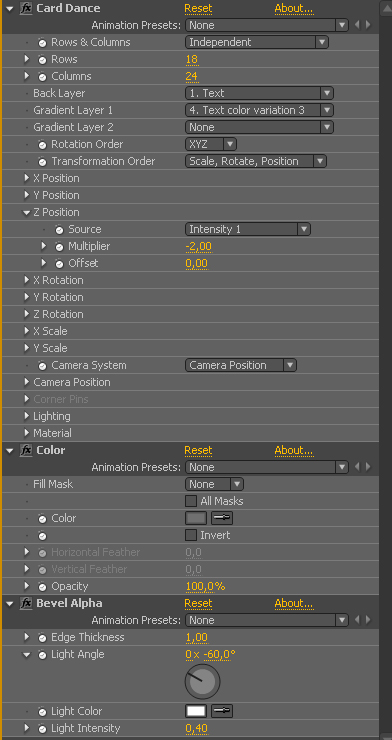
In the text part I just used the horizontal type tool to create a text and I just pre-composed this and add the following properties and duplicated it couple times as we did it before.
Step 17
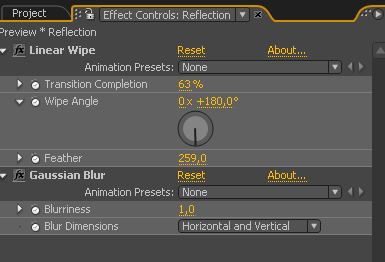
So if you want a simple reflection to your picture or footage as I did in the preview video then you have to duplicate your logo, rename it to reflection, turn the 3D switch on and rotate the layer to 180 and set the following effects to it.
Step 18
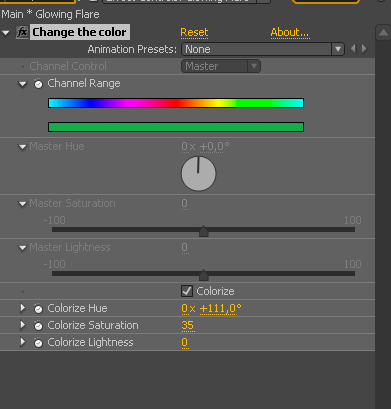
Before I forget you can change the flare layer’s color with the Hue/Saturation plug-ins. So you have to add this to the flare layer and you good to go.
Step 19
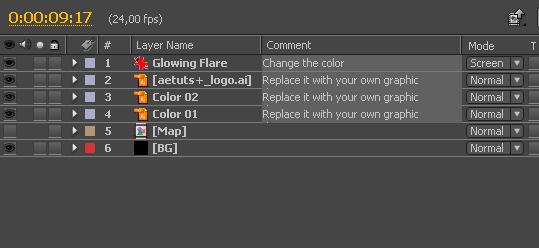
I like to show you my final layer order.If you download the project file then you will find some examples wich you can modify,change whatever you want.(I comp where you can reveal a Text. Another comp where you can reveal a video clip or a picture… etc etc)
Conclusion
So as you can see this is not an overcomplicated and difficult technique. You can create a lot of great things with this stuff and I hope this will helps you to create much more dramatic, cool animations in the future. If you have a tutorial request or did you get stuck in the tutorial then you can contact me VIA email: [email protected] or you can subscribe my youtube channel: sparxs89. Once again my name is Tibor Miklos and thanks a lot for your attention.
{excerpt}
Read More