In the following tutorial you will learn how to create a transparent ruler. The grid and the snap to grid will come in handy as we are about to create several paths with accurate dimensions. Using multiple fills and stroke with various blending modes and opacity percentages we will create the overall ruler illustration. For the final details we will use a built in brush and some basic effects.
Step 1
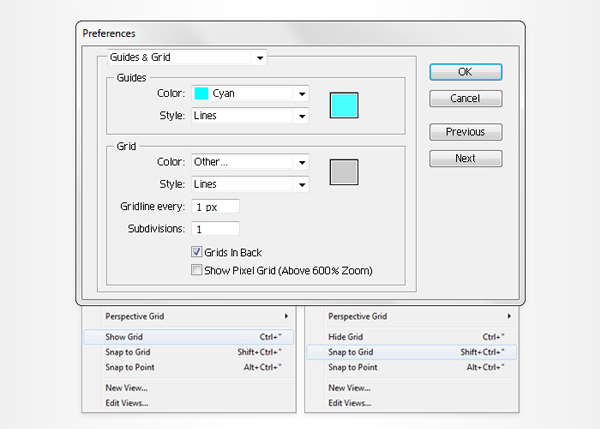
Create a 700 by 300px, RGB document. First, turn on the Grid (View > Grid) and the Snap to Grid (View > Snap to Grid). Next, you’ll need a grid every 1px. Go to Edit > Preferences > Guides > Grid, enter 1 in the Gridline every box and 1 in the Subdivisions box. You can also open the Info panel (Window > Info) for a live preview with the size and position of your shapes. Do not forget to replace the unit of measurement to pixels from Edit > Preferences > Unit > General. Al these options will significantly increase your work speed.
Step 2
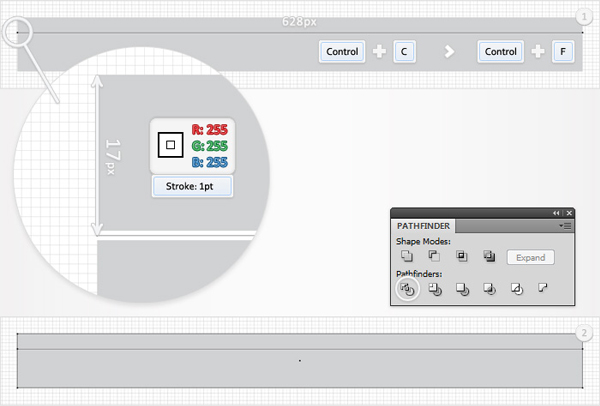
Pick the Rectangle Tool (M) and click on your artboard. Enter 628 in the width box and 60 in the height box then click OK. Fill the resulting shape with R=209 G=211 B=212 then make a copy in front (Control + C > Control + F). Turn of the visibility for this copy, you will need it later.

Step 3
Grab the Pen Tool (P), draw a 628px, horizontal path and place it as shown in the first image. Fill it with none and add a 1pt, white stroke. Again, make a copy of this path (Control + C > Control + F) and make it invisible. Now, select the two visible shapes and click on the Divide button from the Pathfinder panel. You should get a group with two new shapes. Select it from the Layers panel and ungroup it (Shift + Control + G).
Step 4
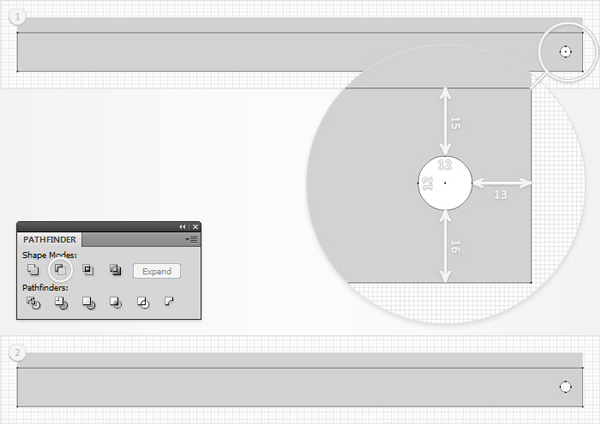
Pick the Ellipse Tool (L), create a 12 by 12px shape and place it as shown in the first image. Make a copy of this circle and make it invisible, you will need it later. Select the visible circle along with the bottom, grey shape (created in the previous step) and click on the Minus Front button from the Pathfinder panel.
Step 5
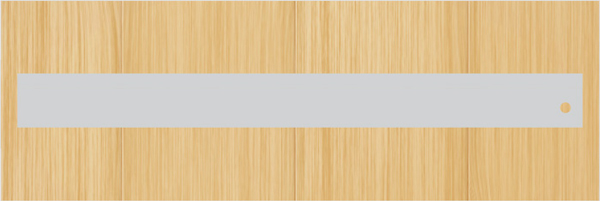
Now, let’s add a nice background for this ruler. You can use this wood wallpaper that Laszlo Prekop was kind enough to offer. Save it to your hard drive then drag it into your illustrator file. Send it in the bottom of the Layers panel (Shift + Control + Left Square Bracket) then lock it to make sure that you won’t select or move it accidentally.
Step 6
Pick the Pen Tool (P), draw a new 628px path and place it as shown in the first image. Fill it with none and use the "Chalk-Scribble" brush for the stroke. You should have it in your Brushes panel. If you don’t here is how you can find it: open the fly-out menu of the Brushes panel and go to Open Brush Library > Artistic > Artistic_ChalkCharcoalPencil. Make it white then lower its opacity to 10%.
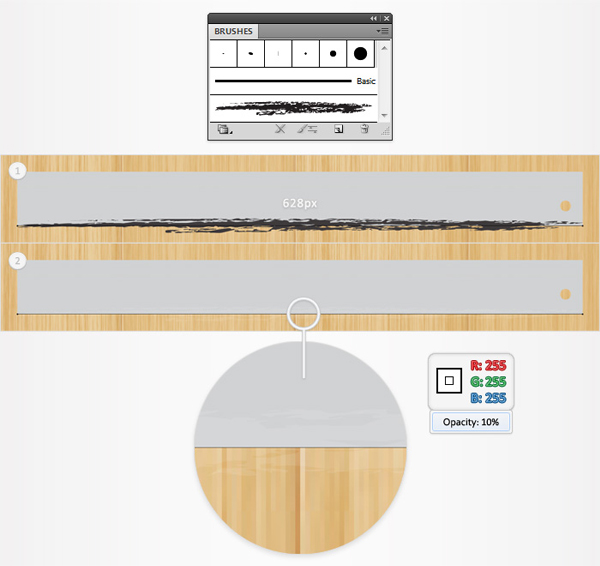
Step 7
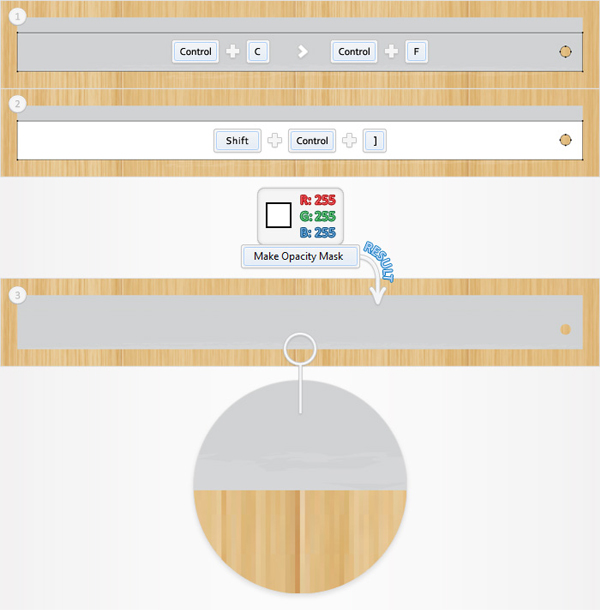
Reselect the bottom, grey shape and make a copy in front (Control + C > Control + F). Fill it with white and bring it to front (Shift + Control + ] ) then select it along with the white brush and go to the Transparency panel. Open the fly-out menu and click on Make Opacity Mask. This will mask the bottom half of your brush.
Step 8
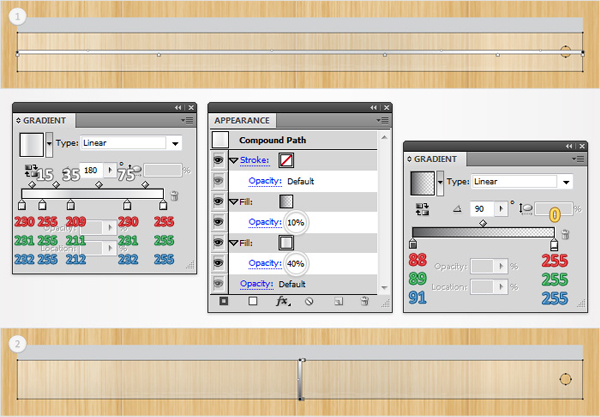
Now, let’s add some new colors for the grey shapes. Select the bottom shape and fill it with the left linear gradient shown below then go to the Appearance panel. Select the exiting fill and lower its opacity to 40% then open the fly-out menu of the Appearance panel and click on Add New Fill. Obviously, this will add a second fill for your shape. Select it from the Appearance panel, lower the opacity to 10% and use the right linear gradient shown below.
Pay extra attention at the gradient images. The white numbers stand for opacity location while the yellow numbers stand for opacity percentage. This means that you need to select the gradient sliders and set the opacity and location percentages as shown in the following image.
Step 9
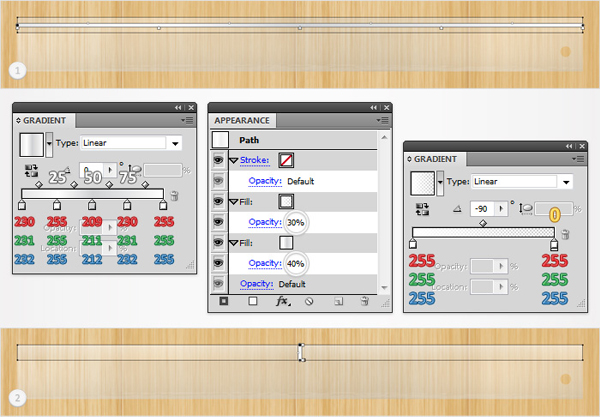
Let’s move to the top shape. First, replace the flat grey with the left linear gradient then add a second fill and use the right linear gradient. Reselect the first fill and lower its opacity to 40% then select the second fill and lower the opacity to 30%. Don’t forget to set the opacity and location percentages as shown in the following image.
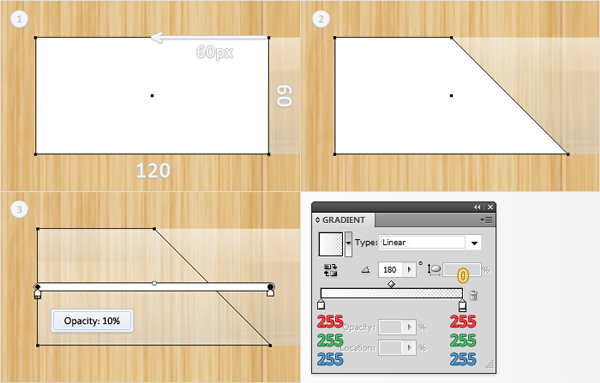
Step 10
Focus on the left area of the existing shapes. Pick the Rectangle Tool (M), create a 120 by 60px shape and place it as shown in the first image. Pick the Direct Selection Tool (A), select the top, right anchor point and move it 60px to the left. Now, your shape should look like in the second image. Fill it with the linear gradient shown in the final image then lower its opacity to 10%.
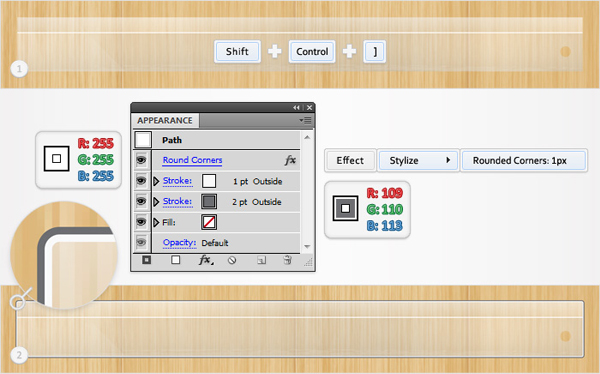
Step 11
Turn back to visible for the copy made in the third step and bring it to front (Shift + Control + Right Square Bracket). Turn back to visible the copy made in the second step and bring it to front (Shift + Control + Right Square Bracket). Fill it with none and add a 2pt, aligned to outside stroke.
Set its color at R=109 G=110 B=113 then open the fly-out menu of the Appearance panel and click on Add New Stoke. This will add a second stroke for your shape. Select if from the Appearance panel, make it white and set the size at 1pt. Reselect the entire path and go to Effect > Stylize > Rounded Corners. Enter a 1px radius then click OK.
Step 12
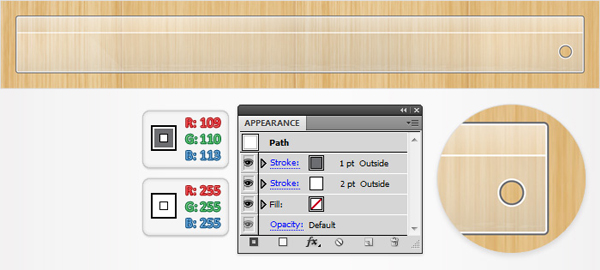
Turn back to visible for the copy made in the fourth step and bring it to front (Shift + Control + Right Square Bracket ). Fill it with none and add a 2pt, white stroke. Align it to outside then add a second stroke. Set the color at R=109 G=110 B=113 and the size at 1pt then make sure that it’s aligned it to outside.
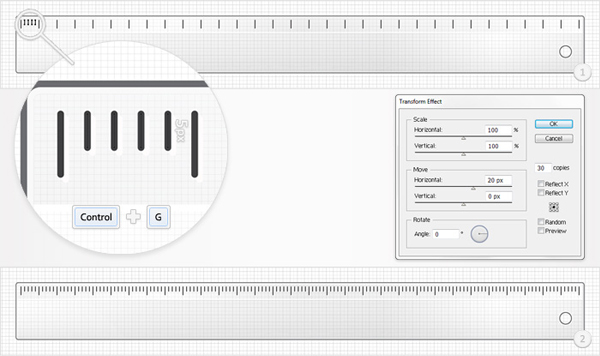
Step 13
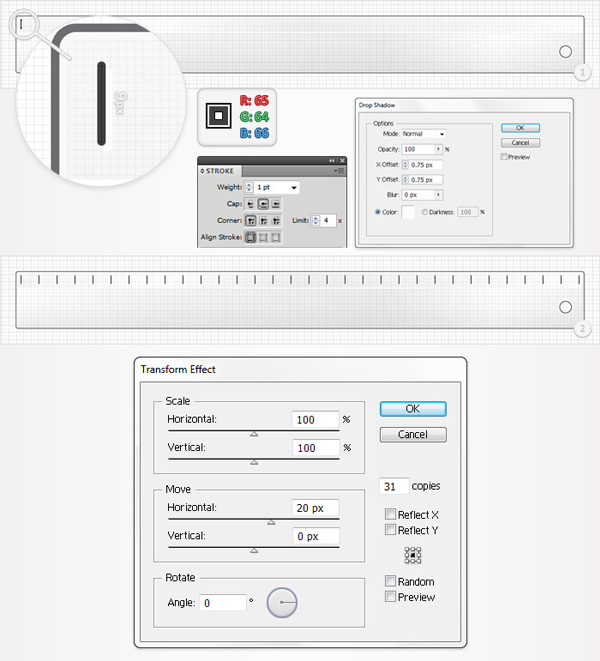
Turn off the visibility for the background image. Pick the Pen Tool (P), draw a 9px, vertical path and place it as shown in the first image. Have a closer look at the grid in the zoomed image to understand the exact location. Fill it with none, add a 1pt stroke and set its color at R=65 G=64 B=66. Next, go to the Stroke panel (Window > Stroke), check the Round Cap button then go to Effect > Stylize > Drop Shadow. Enter the data shown below, click OK then go to Effect > Distort & Transform > Transform. Enter the data shown in the following image then click OK.
Step 14
Continue with the Pen Tool (P) and draw four new, vertical paths. Make them 5px tall and use the stroke properties shown in the previous step. Add the same Drop Shadow effect then group these fresh paths (Control + G). Finally, select this group and go to Effect > Distort & Transform >Transform. Enter the data shown in the following image then click OK.
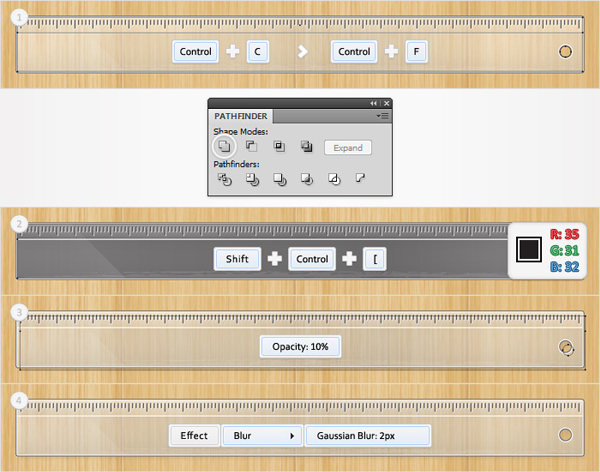
Step 15
Turn back to visible for the background image. Reselect the two, large shapes and duplicate them (Control + C > Control + F). Select these copies and click on the Unite button from the Pathfinder panel. Fill the resulting shape with R=35 G=31 B=32 and send it in the bottom of the Layers panel, right above the background image. Lower its opacity to 10%, hit the right arrow once and the down arrow twice then go to Effect > Blur > Gaussian Blur. Enter a 2px radius then click OK.
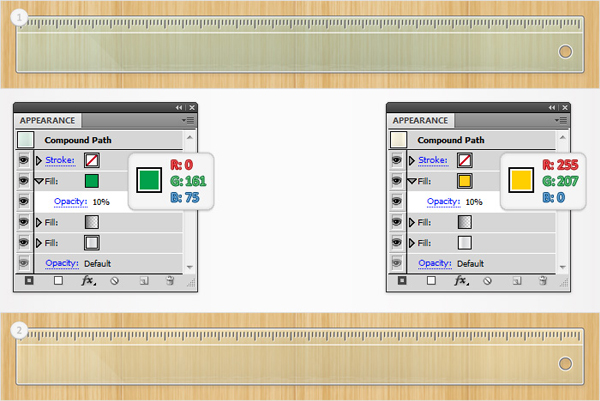
Step 16
Finally, you can add some new colors for your ruler. Reselect the two, large shapes that make up the overall ruler and add a third fill. Lower its opacity to 10% then use a simple, flat color.
Conclusion
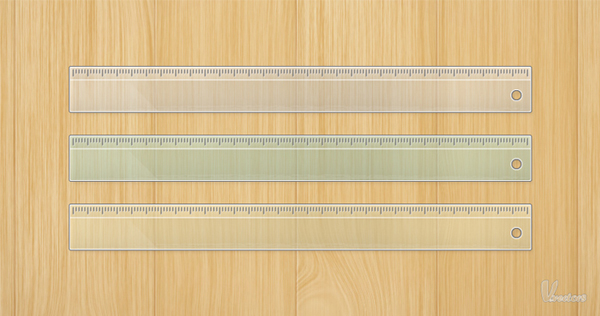
Here is how your final illustration should look like. Naturally, you can use various colors for your ruler. There are countless possibilities, see what you can come up with!
{excerpt}
Read More