This work is made with the help of Iaroslav Lazunov. This tutorial is for Intermediate illustrator users. In it you’ll learn how to create a realistic, vector, retro phone, using Brushes, Blends, 3D renders and other tools of Adobe Illustrator. The skills you will learn can easily be transferred to creating various objects. So let’s get started!
Step 1
First, draw an isosceles trapezium by using the Rectangle Tool (M) and the Direct Selection Tool (A). Fill it with red. Then go to File > Scripts > Round Any Corner. This script may be downloaded from here. This script allows you to add two anchor points to any of them in order to make the path smoother. You need to achieve the following result. If you do not know how to install it, you can see our illustrator scripts post for more information.
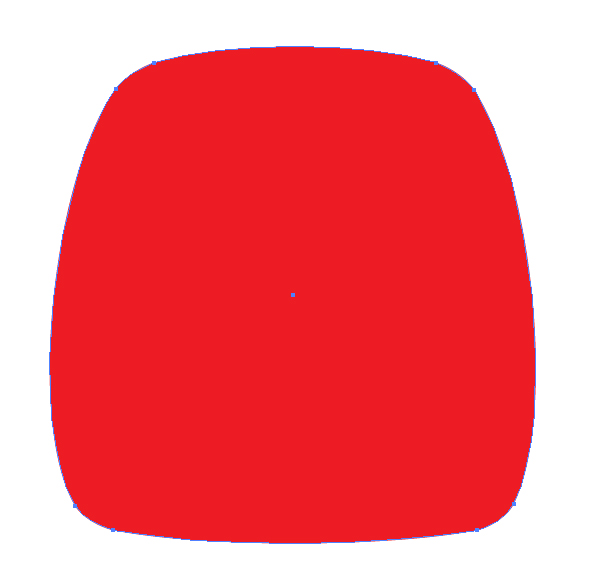
Pay attention that you may not convert all the anchor points of the trapezium to smooth, because it would lead to bending the lines of the trapezium.
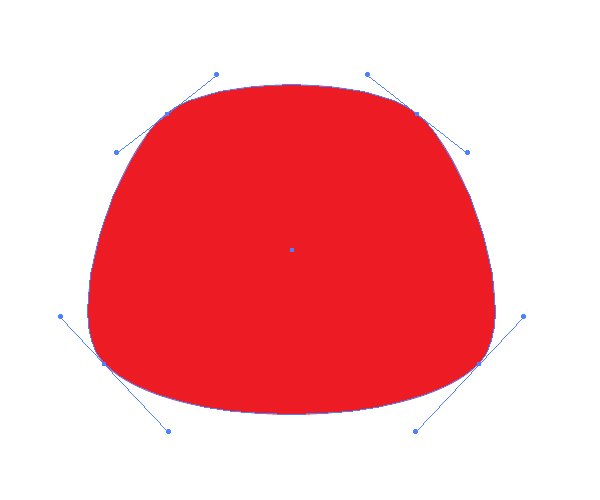
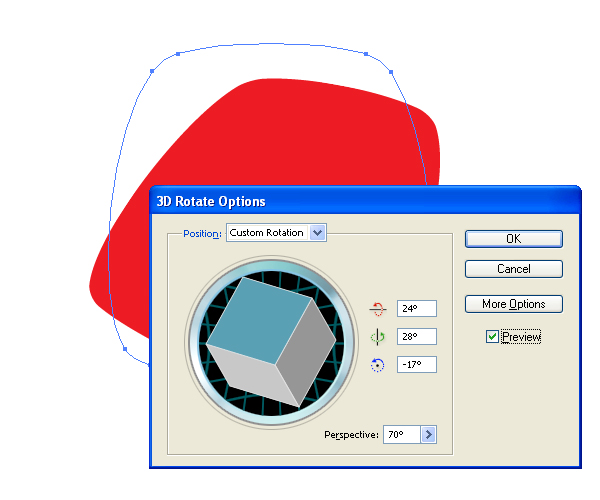
Then go to Effect > 3D > Rotate and set there the values of angles and a perspective which you can see on the diagram below.
Step 2
Take the Ellipse Tool (L) and create a circle. Then copy it and paste it (Command + C then Command + V).
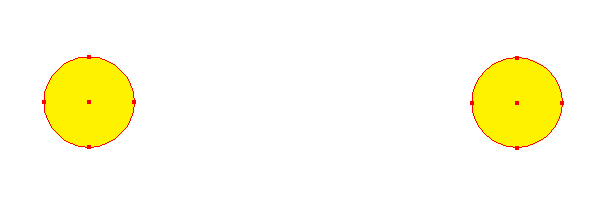
Then go to Object > Blend > Blend options and set there the Spacing to Specified steps and the quantity of steps to 8. See the diagram below.
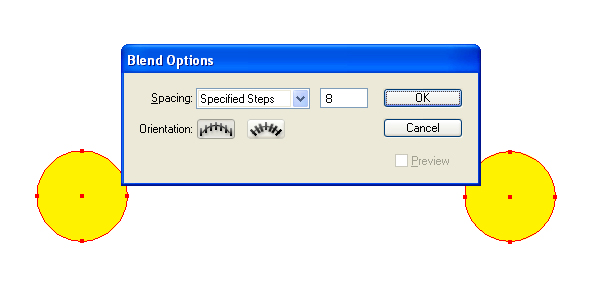
Then go to Object > Blend > Make (Command + Alt + B).

As you see, you have received the 8 circles between the 2 end ones. The complete quantity of circles is 10. Then draw the big circle, then set both the Stroke of it and the filling of it to None.
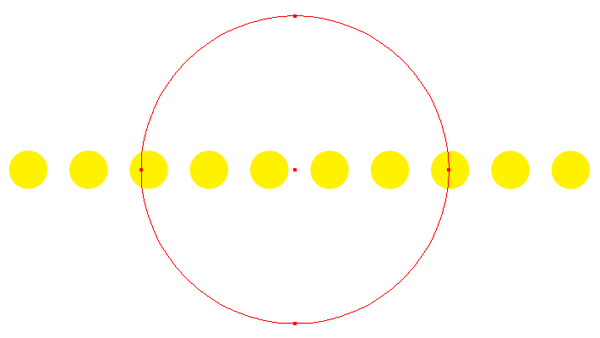
Select this big circle and the blend, then go to Object > Blend > Replace spline. This command distributes the blend objects along the necessary path. You can use it whenever you want.
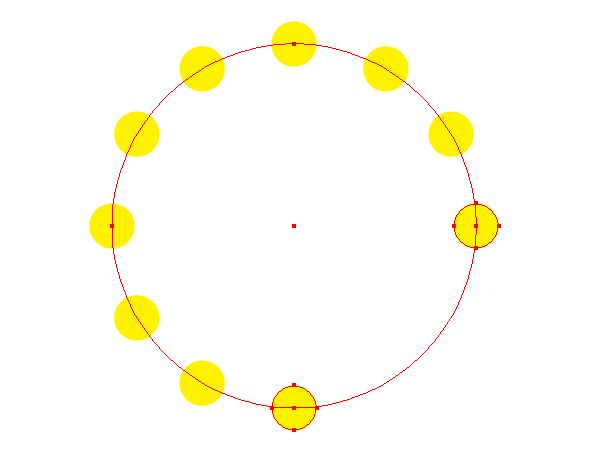
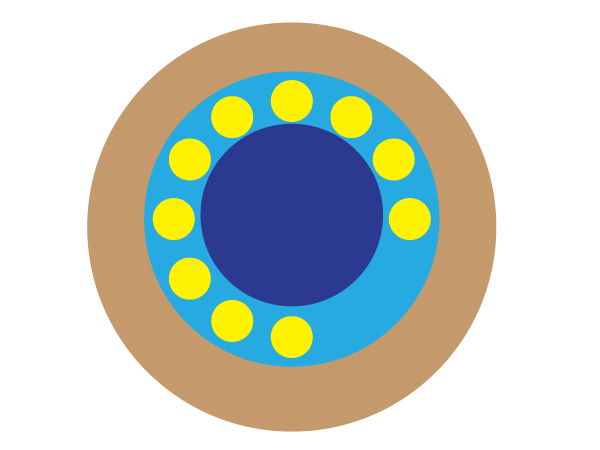
Create a dial-plate by using the Ellipse Tool (L) and place the blend of ten circles over it.
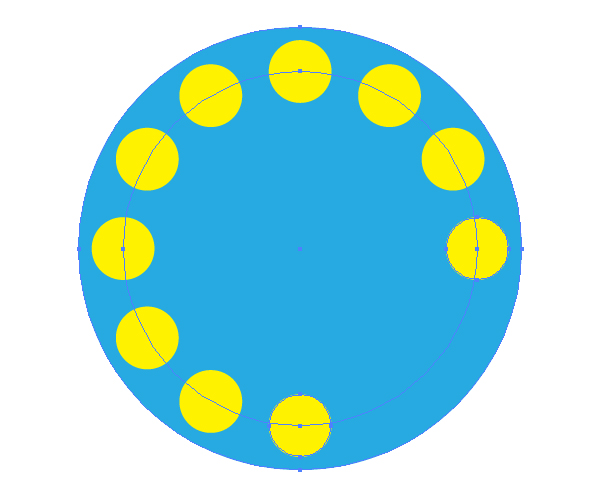
Draw two other circles that are shown on the diagram. The dark blue circle must be moved slightly upward, and the brown circle (named further “the Main circle”) must be moved slightly downward as shown.
Step 3
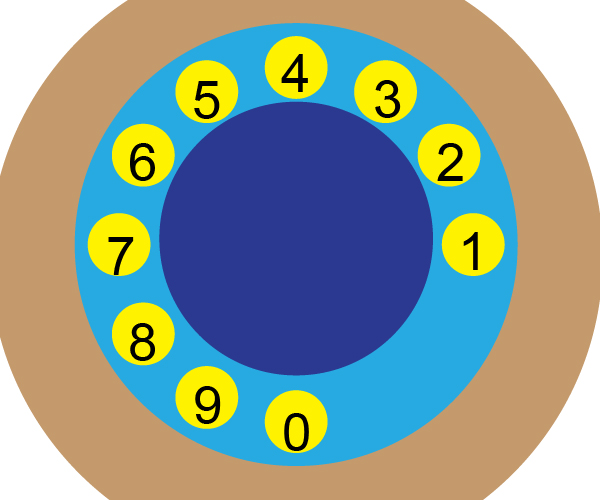
Take the Type Tool (T) and print all the ciphers.
Then go to Effect > 3D > Rotate and set the values of angles and a perspective that you had set in the Step 1.
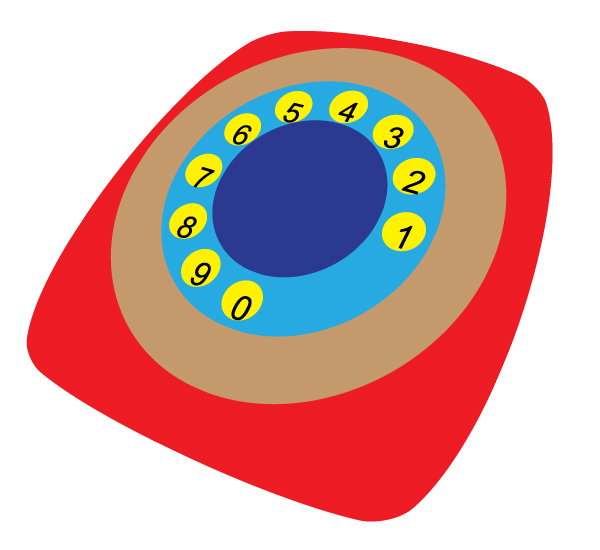
Let’s name this surface as the “Main” surface of the telephone.
Step 4
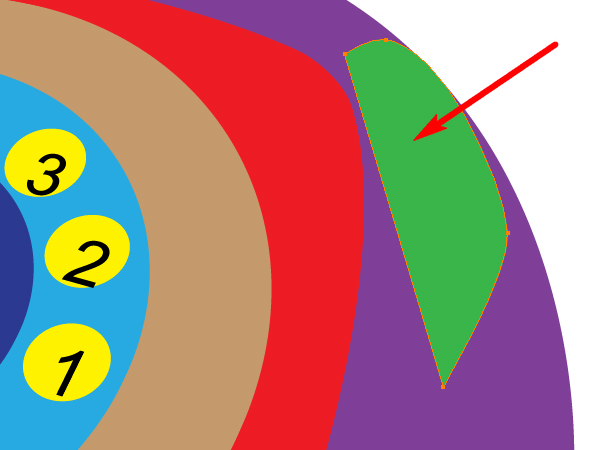
Now you need to create the (violet) path of the telephone’s bottom. Do it by using the Pen Tool (P).
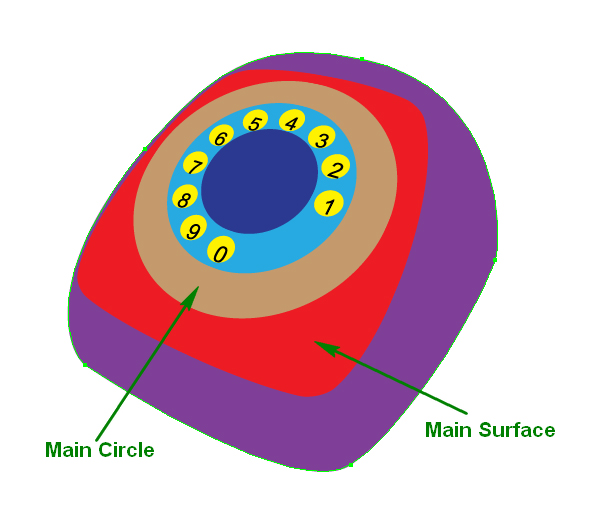
Create the next (green) path that will represent a cavity for the telephone receiver.
Step 5
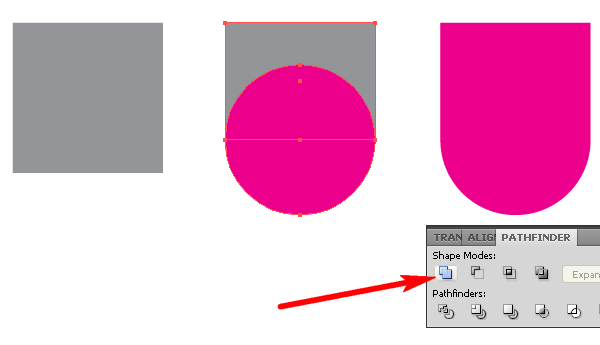
Let’s create 3D receiver form. First draw the following path by using the Rectangle Tool (M), the Ellipse Tool (L) and by using the Unite button in the Pathfinder box in order to unite two different paths for creating only one path from them.
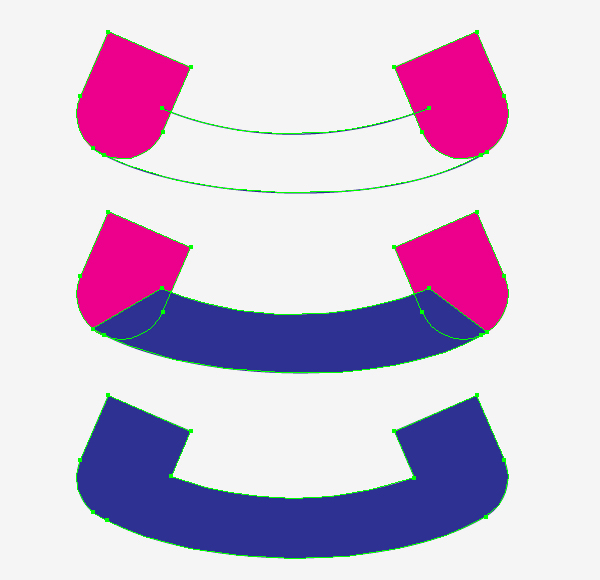
Then create the following forms the same way.
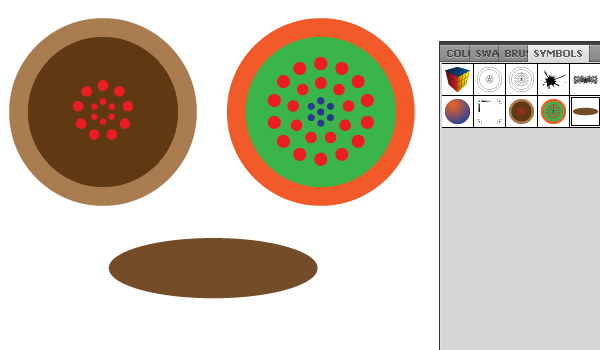
Take the Ellipse Tool (L) and the Blend Tool (W) and create the following paths for the end parts of a receiver. Use the technique we used in Step 2 for creating ten circles.
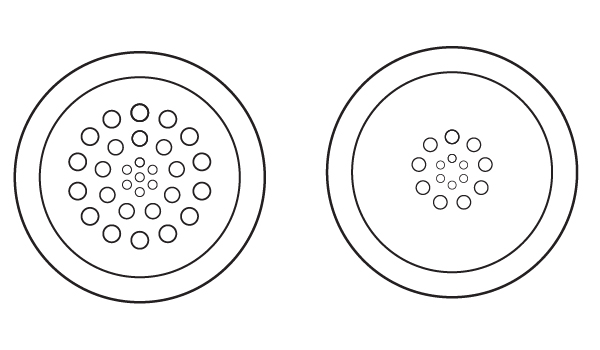
Recolor them. Then create the following elliptical path, which is shown on the diagram below.

Take all these paths and drag them into the Symbols palette. You must have three symbols for the end parts of a receiver and for a receiver itself (elliptical path).
Step 6
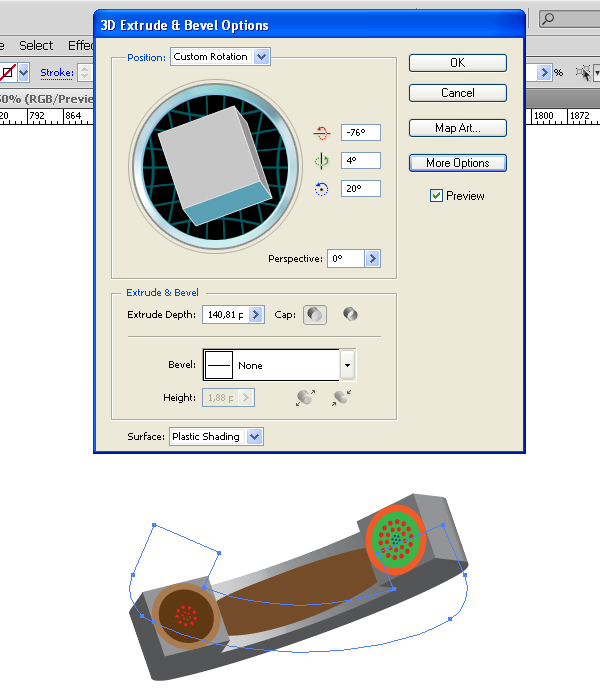
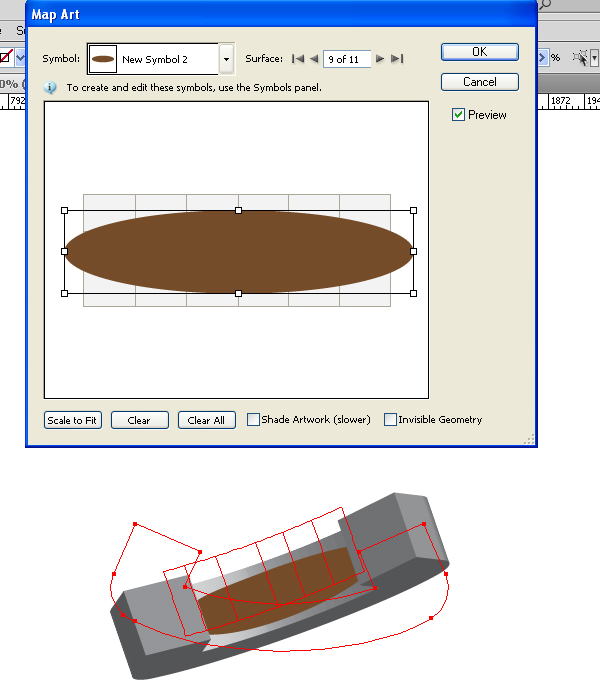
Select a receiver path and go to Effect > 3D > Extrude & Bevel. Set there the following values (shown below) in order to form a receiver. Now surface this 3D object with Map Artwork by using the symbols, which have just been created. See the helping diagrams below.
Step 7
Set Invisible geometry option in the Map Artwork dialog box, and scale it to fit the necessary symbols to the end parts of the receiver.
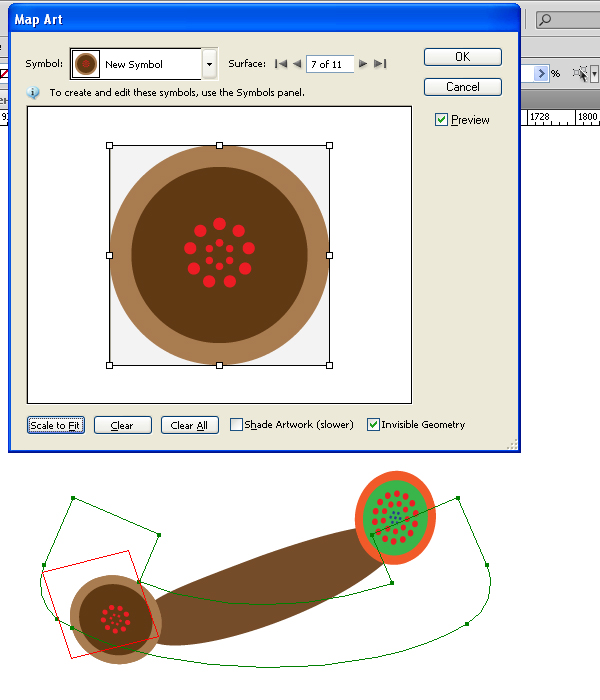
Now go to Object > Expand Appearance.
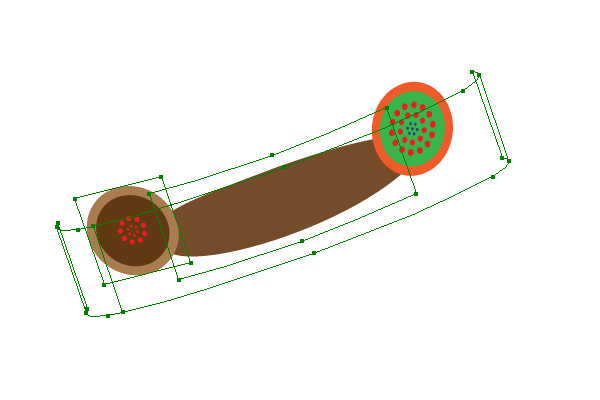
Go to Object > Clipping Mask > Release. Then go to Object > Path > Clean Up, and delete all the items in the dialog box.
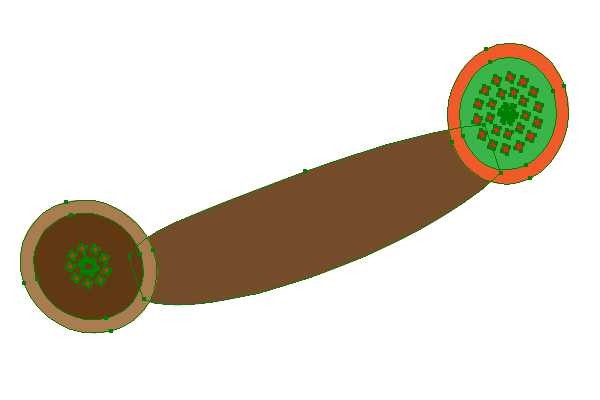
Then create elliptical paths with axes lying along the guidelines. These ellipses will represent the borders of a receiver itself.
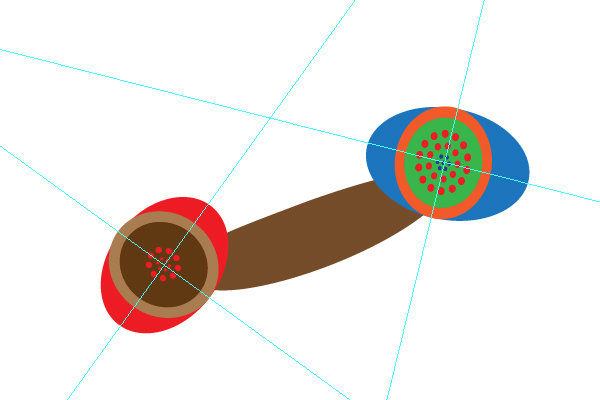
Take the Ellipse Tool (L) and create the following elliptical path filled with the Radial gradient as shown.
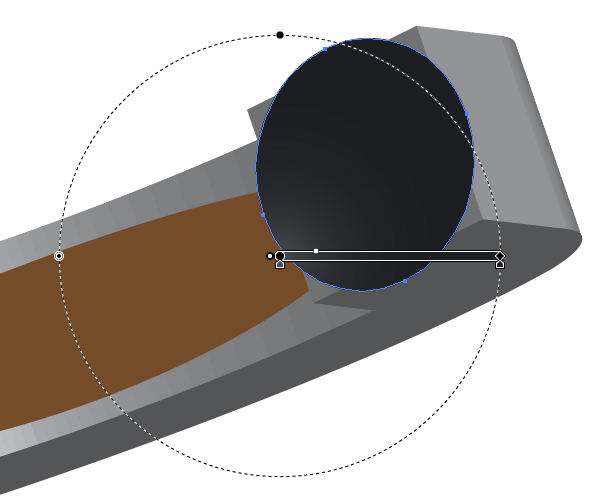
Place the group of holes for an ear part of the receiver on the ellipse that has just been made. Now fill them with black.
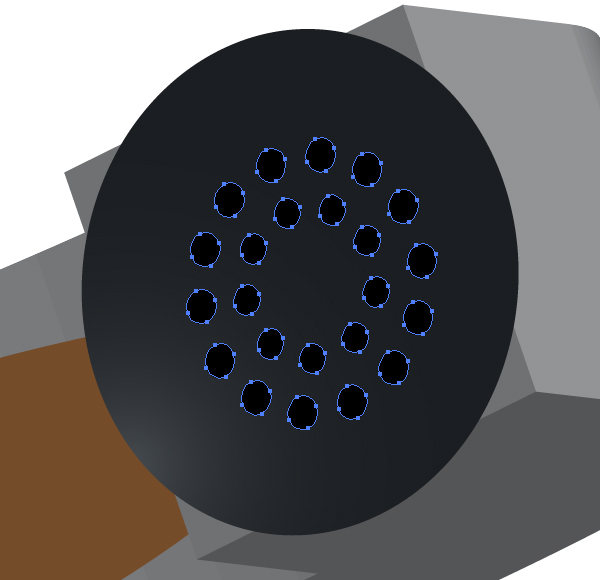
Create another ellipse. Locate it between the group of holes and the first ellipse made in this step. Fill it with a Linear gradient that goes from light gray to dark gray in color.
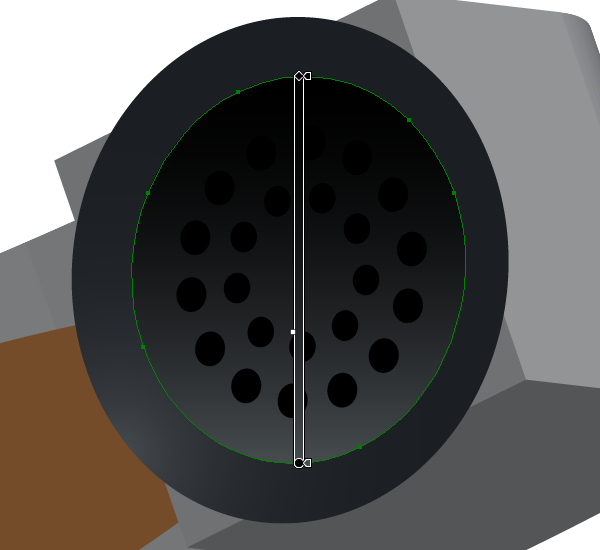
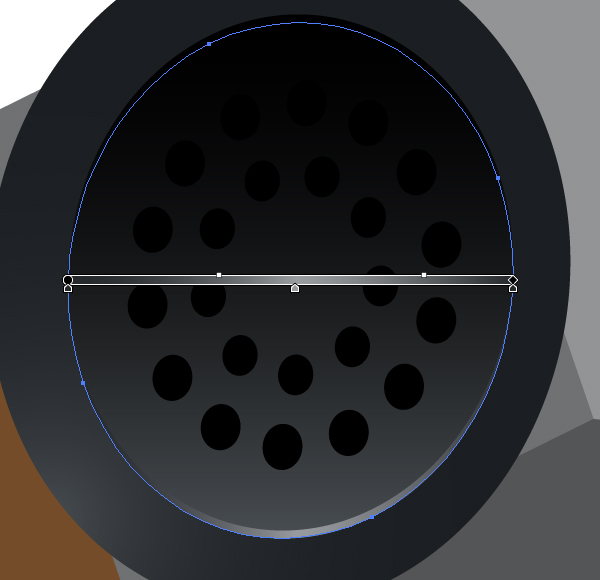
Copy this ellipse and paste it in front (Command + C then Command + F). Then go to Object > Arrange > Send Backward. Fill this new ellipse with the Linear gradient, which you can see on the diagram below and move it some pixels down.
Step 8
Create the ellipses and fill them from light to dark colors.
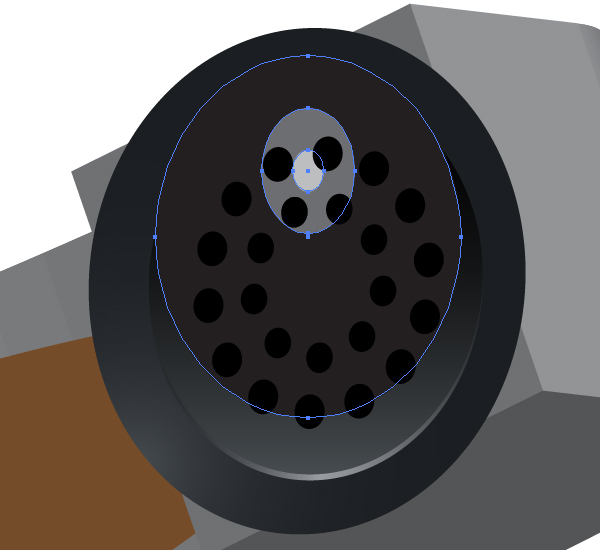
Then go to Object > Blend > Make (Command + Alt + B).
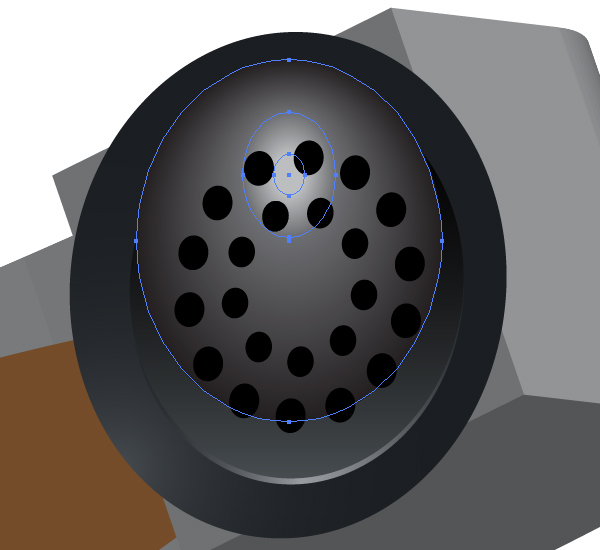
Create a path with no Stroke and no fill color. This path must touch the inner ellipse, which has been made earlier. For this, first select the ellipse (made earlier), copy it and paste in front (Command + C then Command + F). Set the Stroke and fill color to None for it. Now draw a path that is intersected with the ellipse. Set the Stroke and fill color to None for this path too.
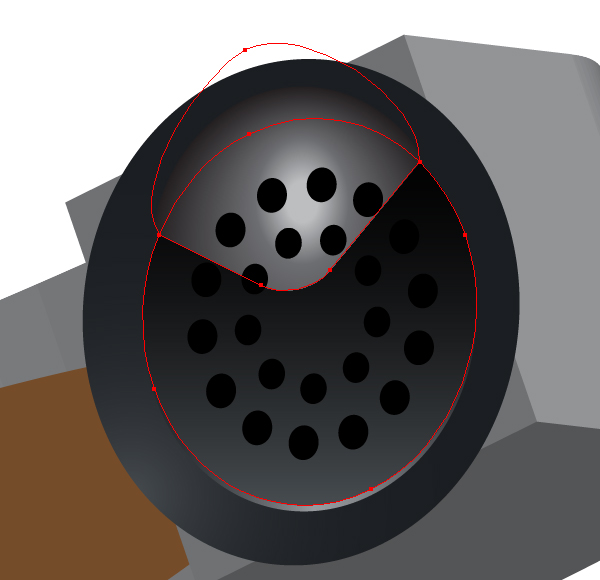
Then go to the Pathfinder palette and click the Intersect button.
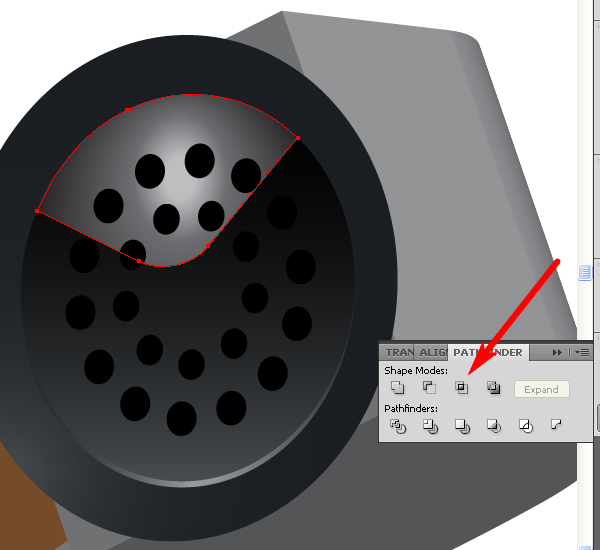
Select this path and blend, then go to Object > Clipping Mask > Make (Command + 7).
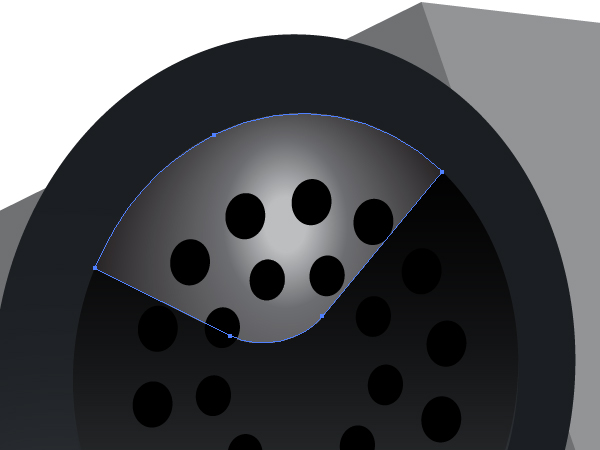
Step 9
Let’s create a new path filled with the linear gradient. This path must be placed under the round part of an end of the receiver.
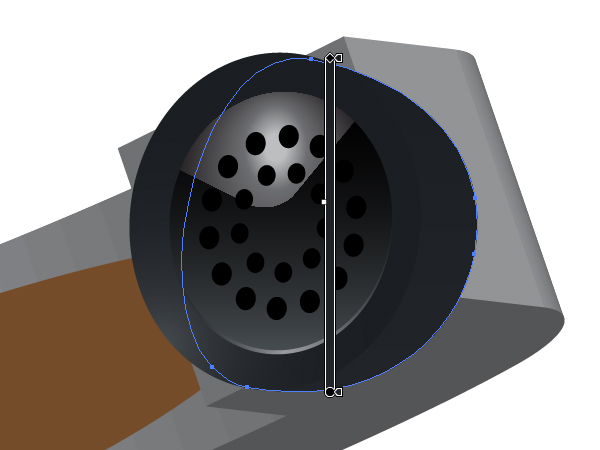
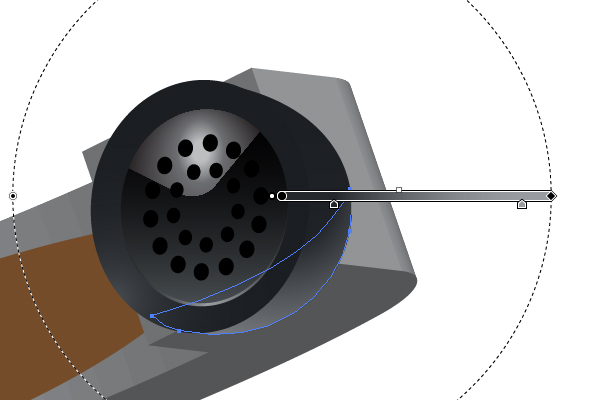
Now create a new path touched by the first one just created and filled with the Radial gradient.
Step 10
Now you need to make the second end part of the receiver. Create an ellipse and fill it with a linear gradient as shown.
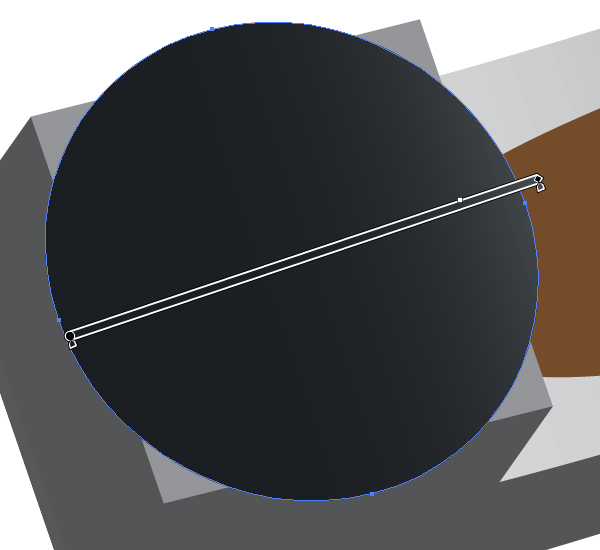
Now create the second elliptical path and fill it with the linear gradient too.
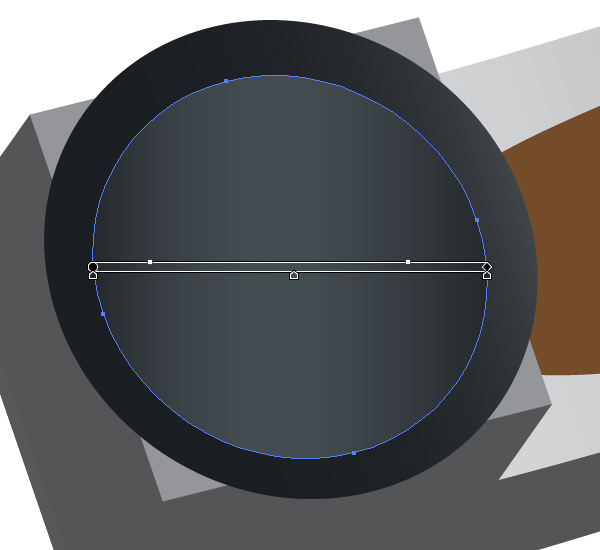
Copy the path and paste in front (Command + C then Command + F), move it and fill it with the next linear gradient.
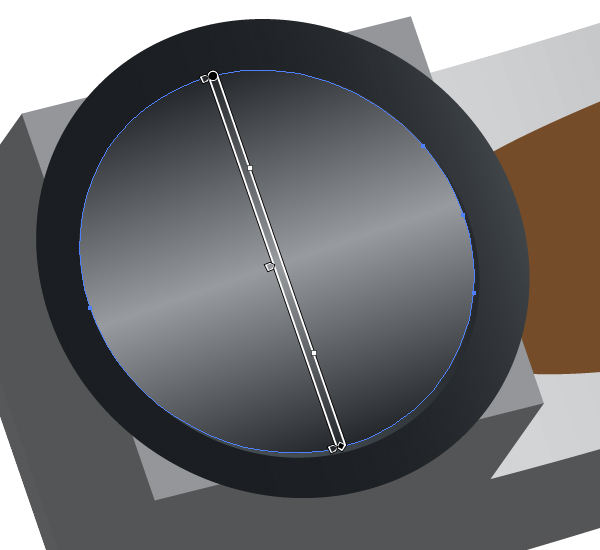
Create another path and fill it with the radial gradient now.
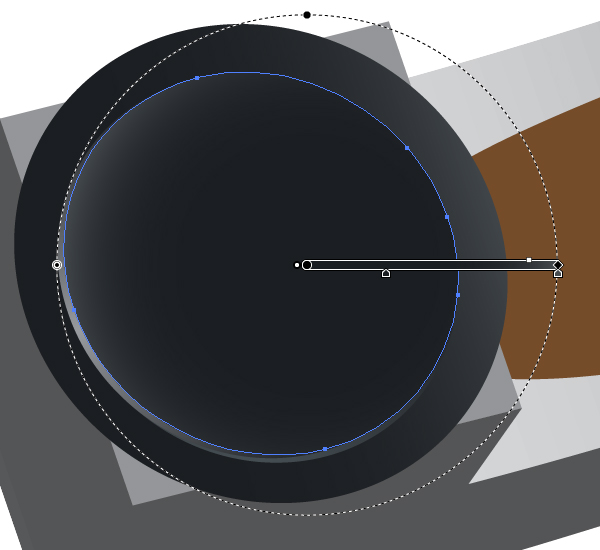
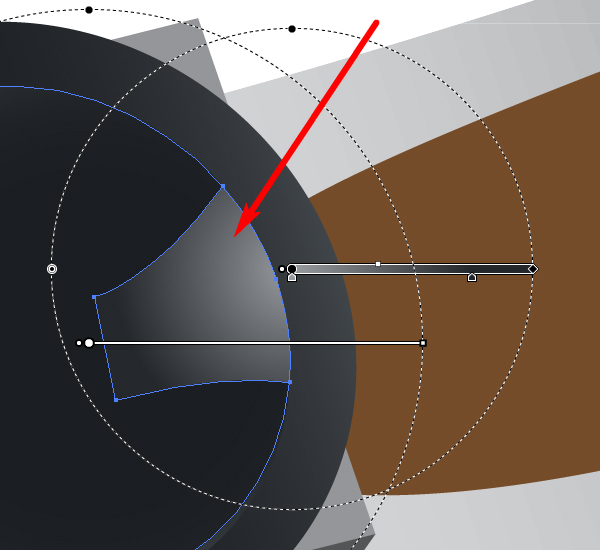
Create the next path filled with the radial gradient. This path must touch the preceding one. It is pointed by an arrow on the diagram.
Create the following ellipse in the center of a receiver’s end part and fill it with the linear gradient.
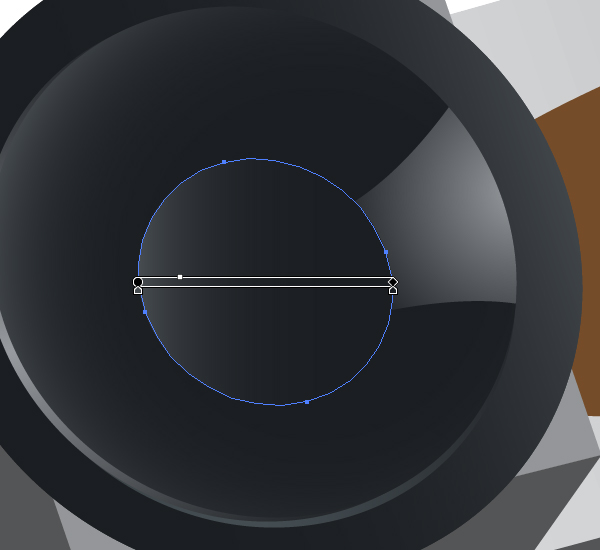
Then place the black holes in it.
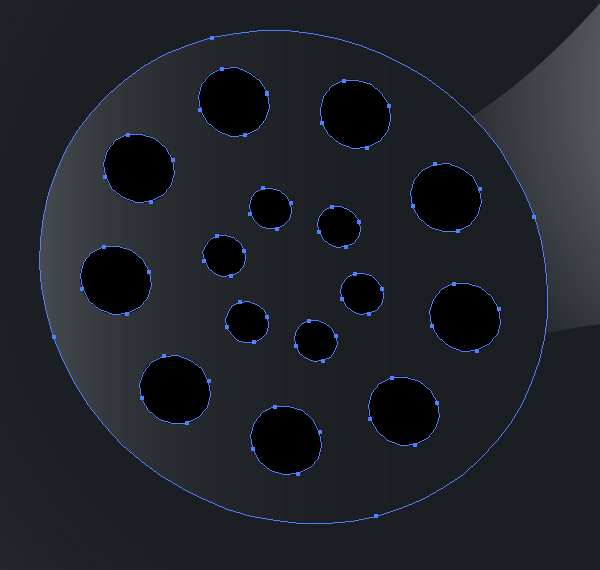
Create the following path lying under the end part of the receiver and fill it with the linear gradient.
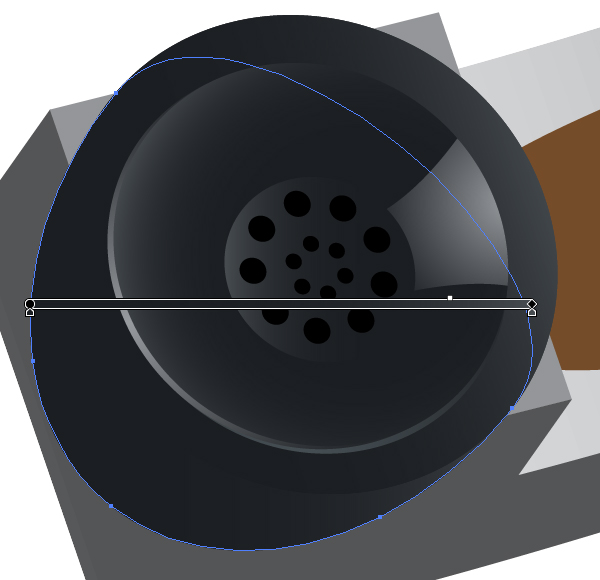
Step 11
Draw the path for the inner part of the receiver. Fill it with the linear gradient.
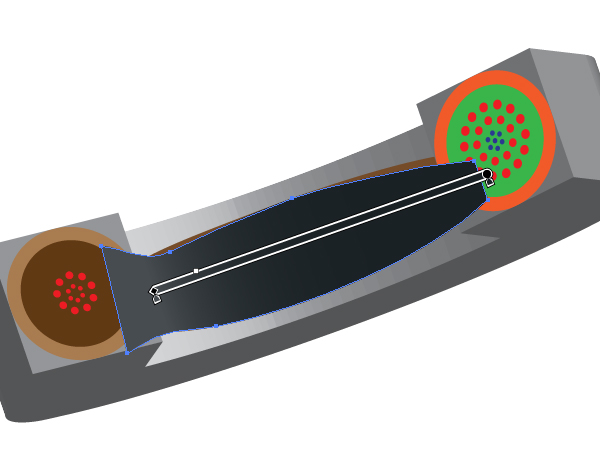
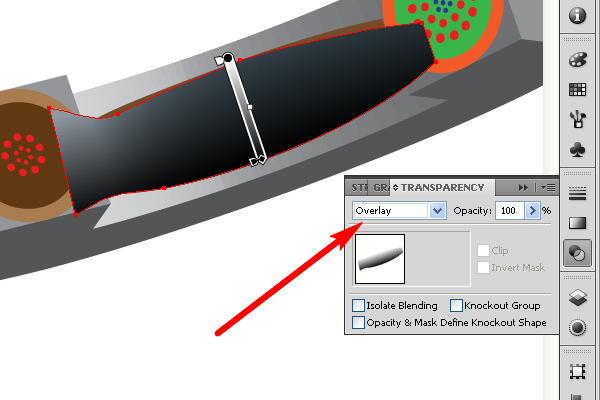
Copy the path and paste it in front (Command + C then Command + F). Fill it with the linear gradient. Then go to Transparency palette and set there the Overlay Blending mode in order to create the complex distribution of light on the receiver.
Take the Ellipse Tool (L) and create an ellipse filled with black. Then drag and drop it into the Brushes palette. Select the Art Brush option in the dialog box.
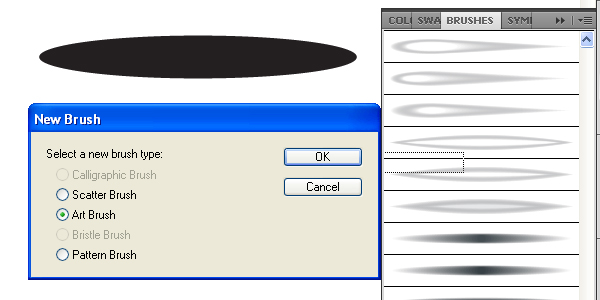
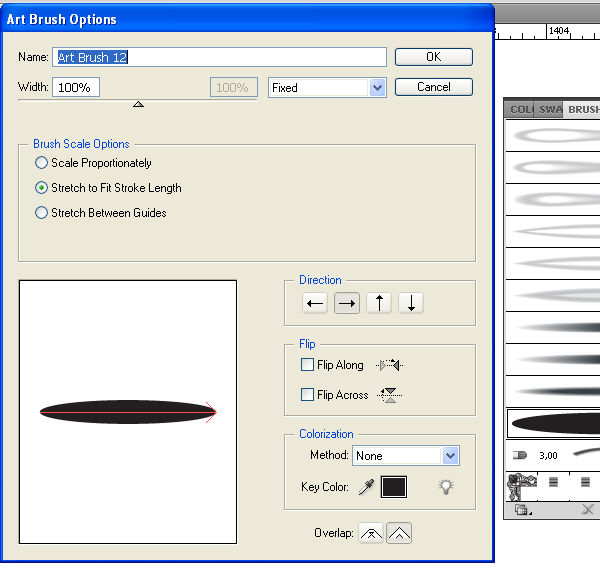
Set the items for the brush as you can see them on the diagram below.
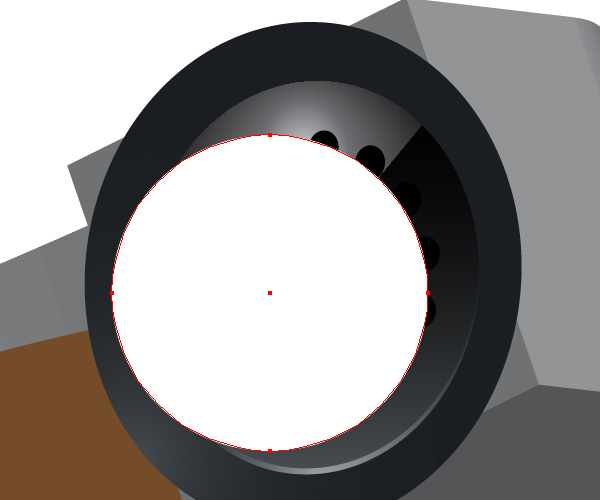
Now draw the circle on the top part of the receiver.
Set the fill color to None. Take the Scissors Tool (C) and click on the circle path points shown below to divide the path.
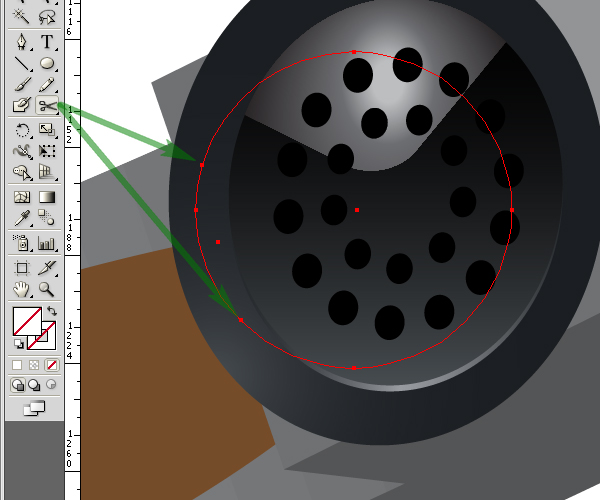
Now delete the biggest part of the circle.
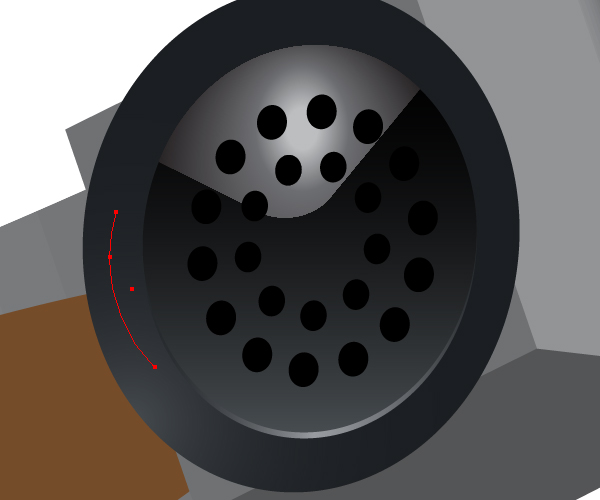
Go to the Brushes palette and click on the elliptical brush that has just been made. Then go to Object > Expand Appearance.
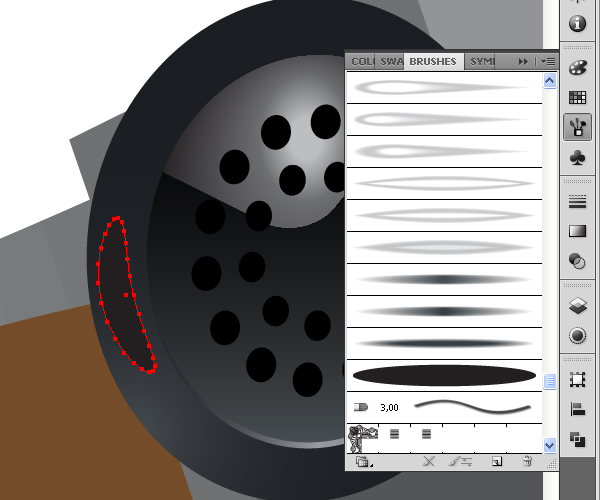
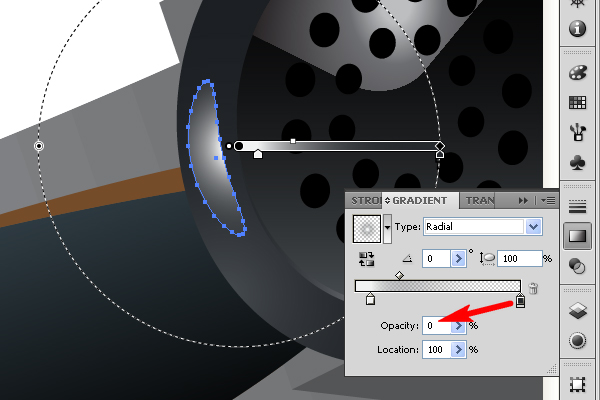
Fill this path with a radial gradient that goes from white to black in color and from 100% to 0% of Opacity correspondingly.
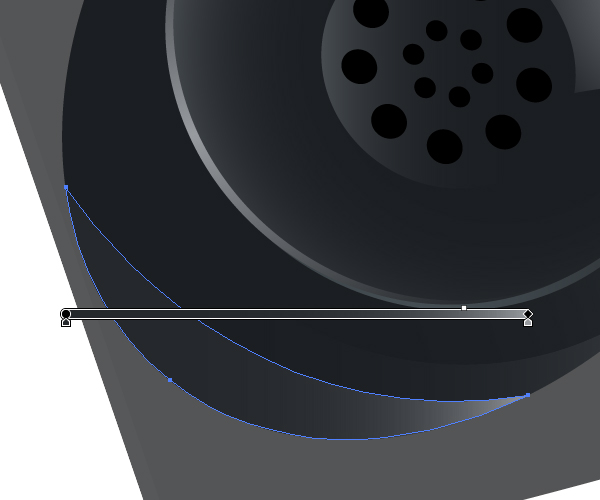
Draw another path on the bottom part of the receiver and fill it with the linear gradient.
Now Delete (or make invisible) the 3D model receiver.
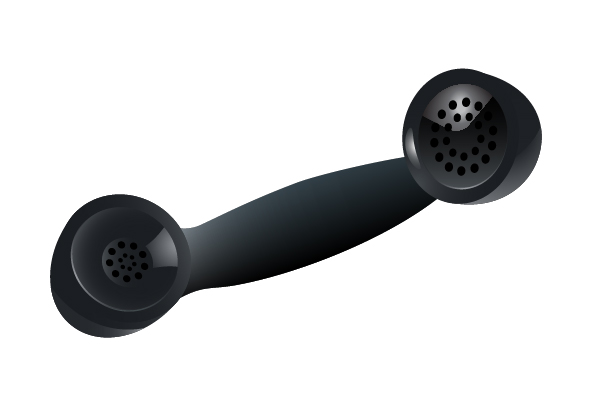
Step 12
Take a telephone box.
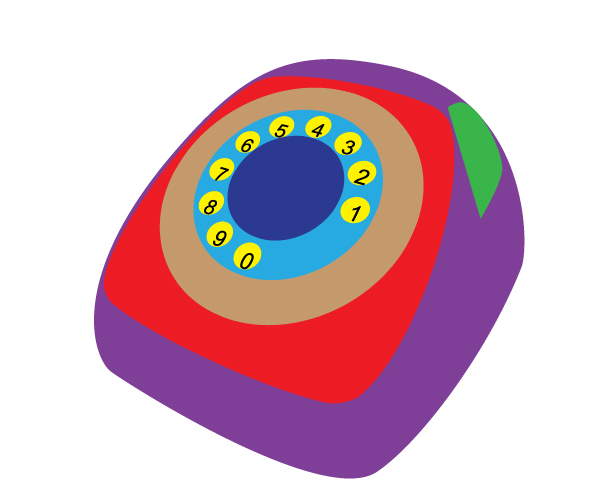
And recolor all the paths of it to usual colors and to gradients. In order to do this you need first to expand all necessary paths. Go to Object > Expand Appearance for this.
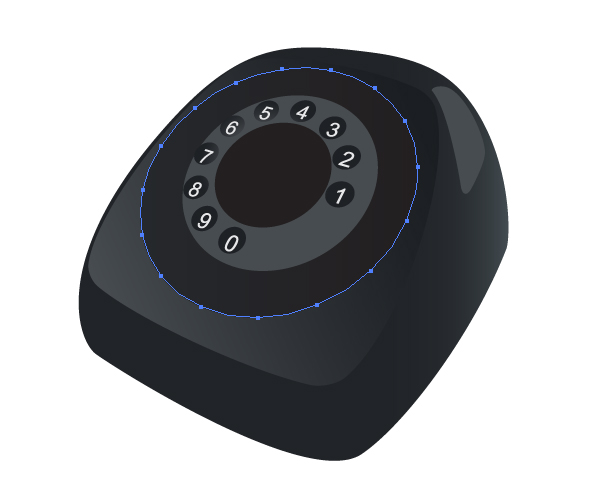
The paths filled with the linear gradients are shown on the diagrams below.
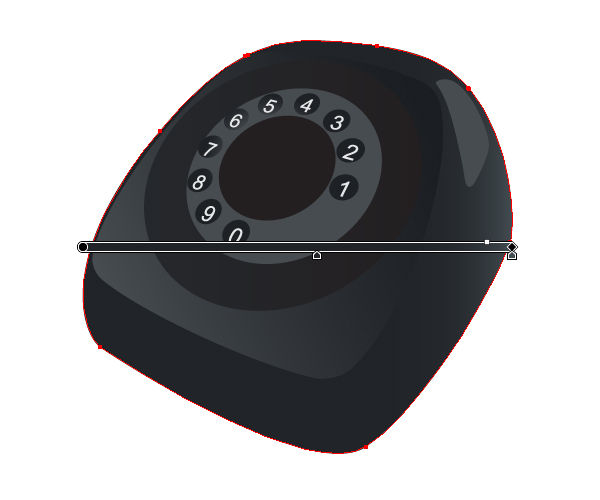
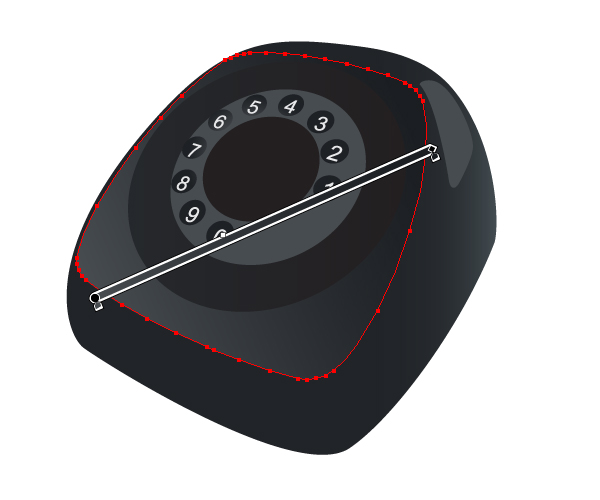
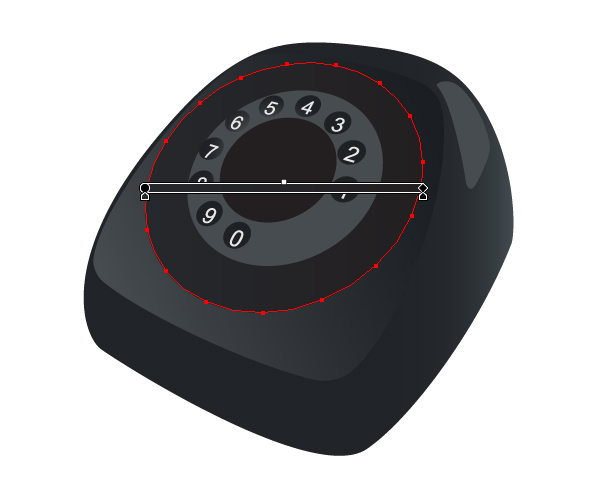
The paths filled with the radial gradients are shown by one of them on the following picture.
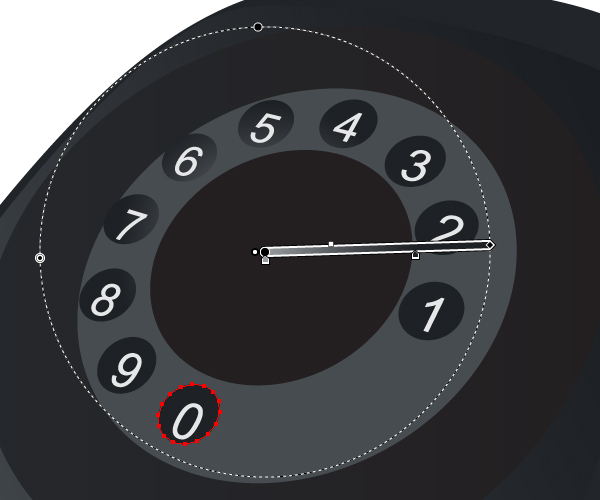
All the other paths are filled with usual colors.
Step 13
On the top of the telephone box draw the following path filled with the linear gradient.
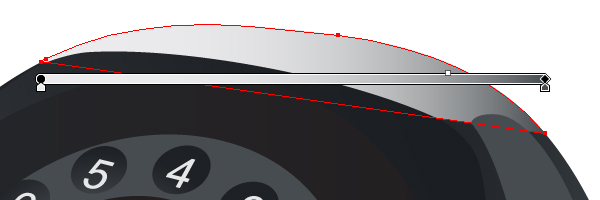
In the receiver cavity draw the following path, which can be created by scaling the copy of the receiver cavity. Fill it with the linear gradient.
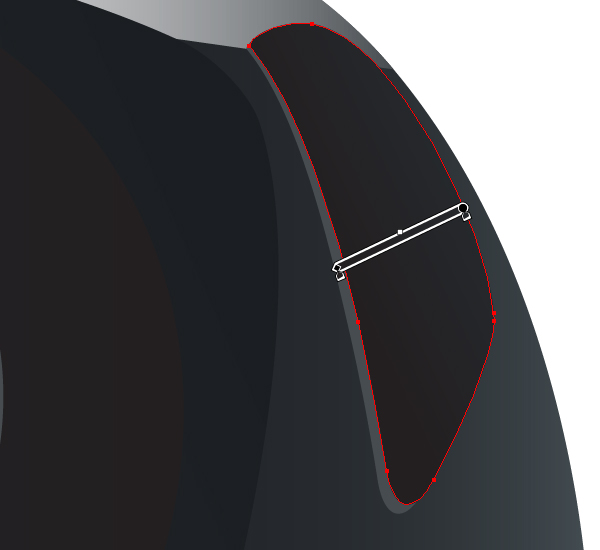
Create the following path filled with a dark color.
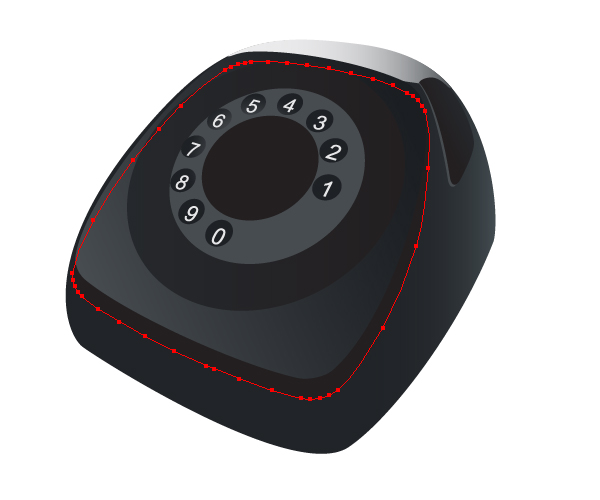
Step 14
Take the Rectangle Tool (M) and draw a rectangle filled with a dark gray color. It must be located under the “Main” surface of the telephone.
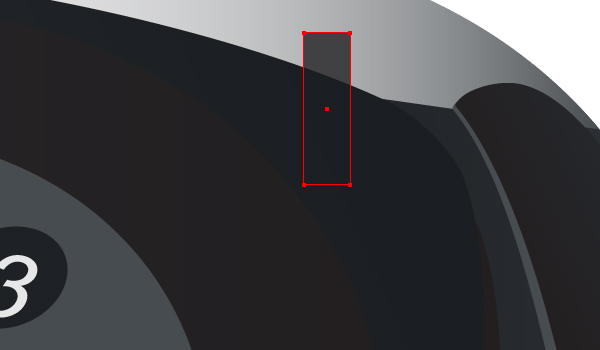
Copy the rectangle and paste it in front (Command + C then Command + F). Then go to Object > Transform > Shear and move the resulted path in order to touch the first rectangle. Fill the second sheared rectangle with the linear gradient.
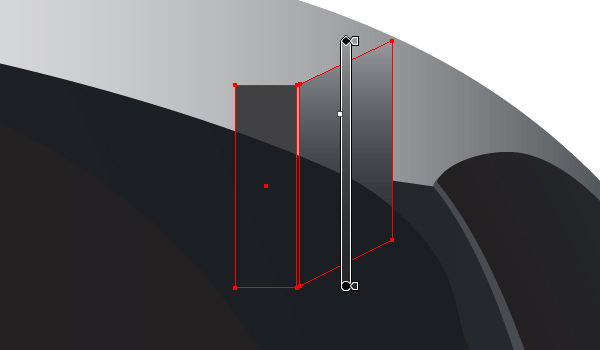
Create the third rectangle by the same way.
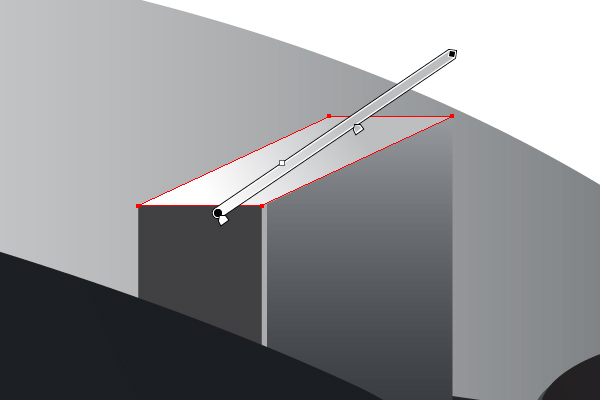
Take the Pen Tool (P) and create the path uniting all three rectangles. Go to Object > Arrange > Send Backward and fill it with a light gray color.
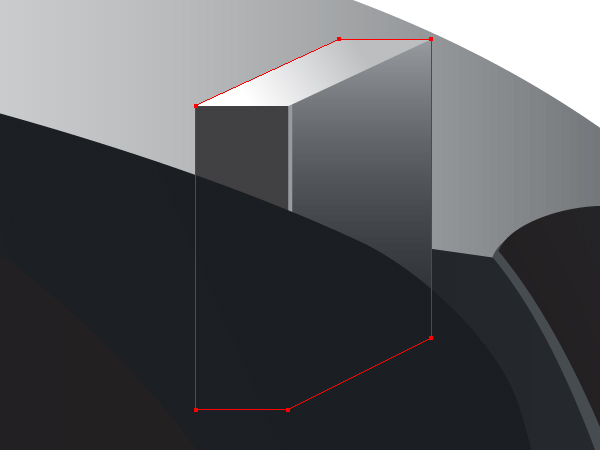
Step 15
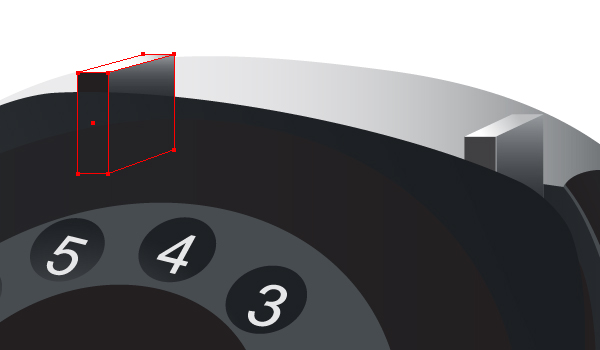
Create the second part of a telephone’s lever.
Step 16
Now we need to create the Art Brush. First create the following two paths.
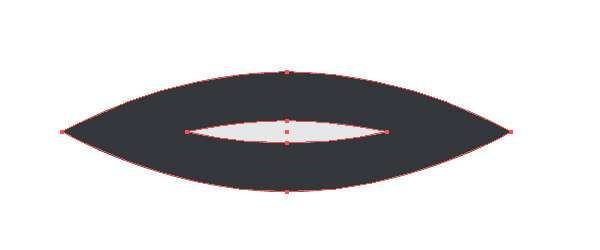
Then decrease the Opacity of the biggest path.
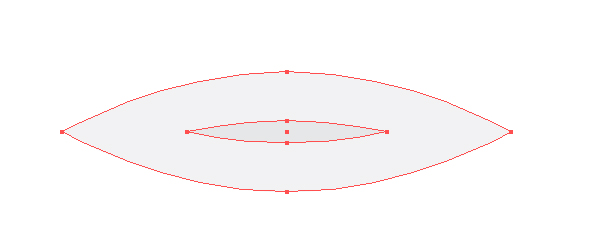
Then go to Object > Blend > Make. This blend must be colored smoothly.
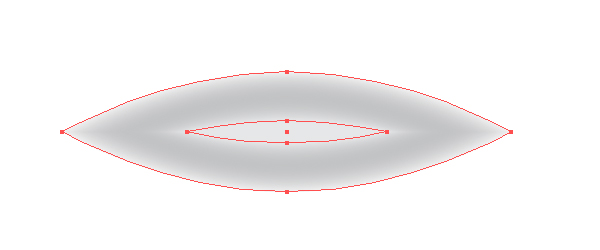
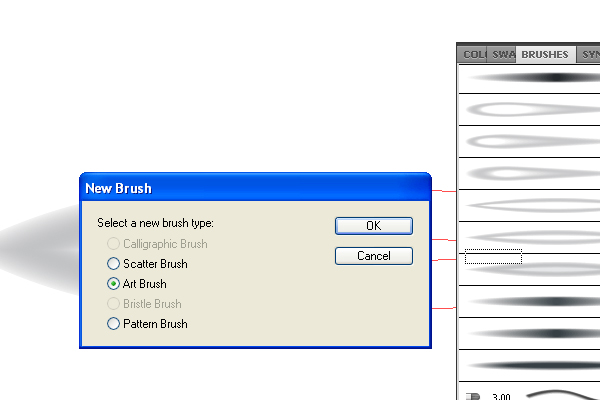
Then drag this blend into the Brushes palette and drop it there. Select the Art Brush type in the Options window.
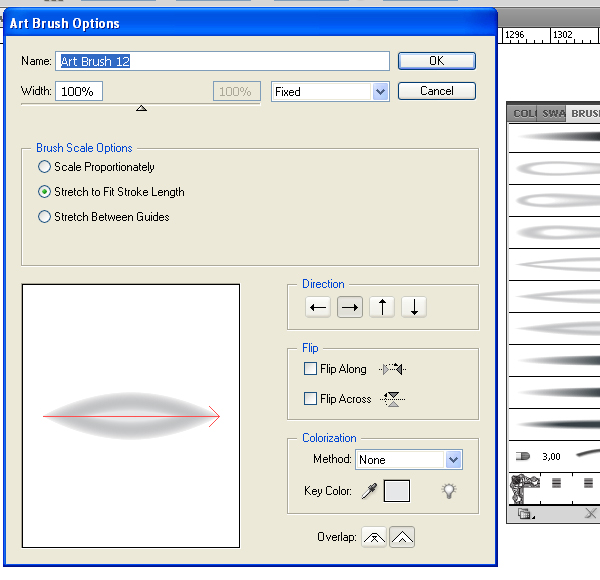
Set the brush options as shown.
Further we should name such brushes the “Blend” brushes or the “Blend Art” brushes. Such naming will show that brushes are made from Blends. Take the Pen Tool (P) and draw the following path on the Main surface of the telephone.
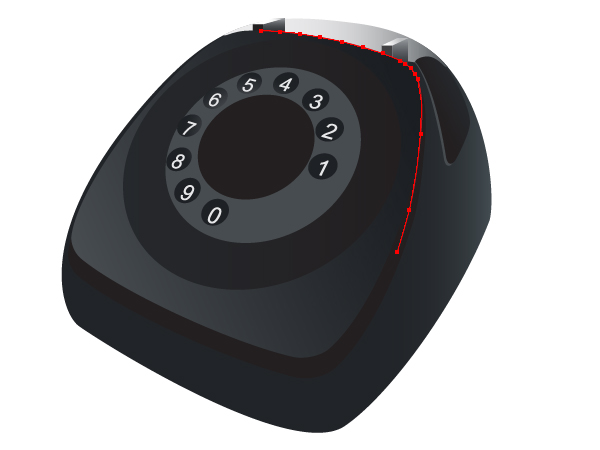
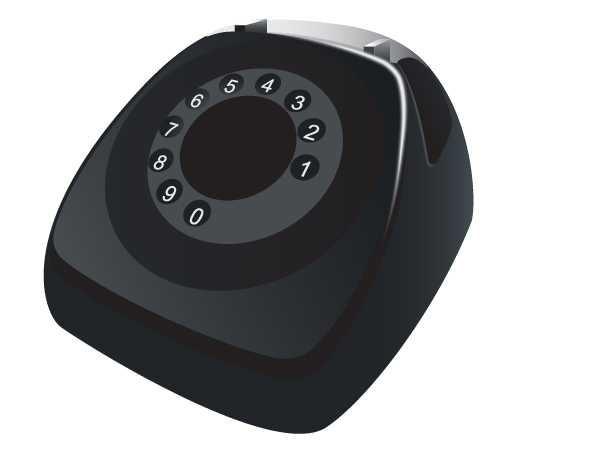
Then go to the Brushes palette and click on the brush that has just been created to make a light spot.
Step 17
Let’s create the second Blend Brush. First, make the following Blend from the elliptical paths.
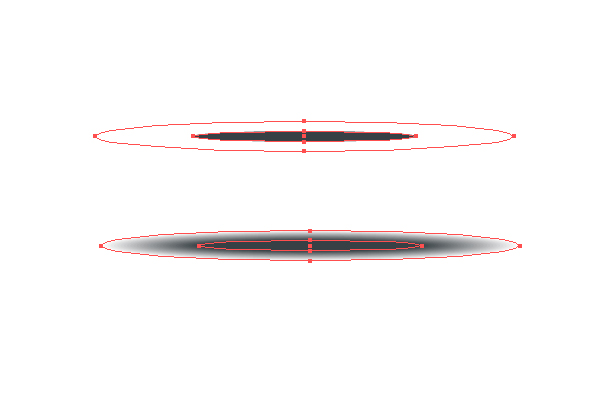
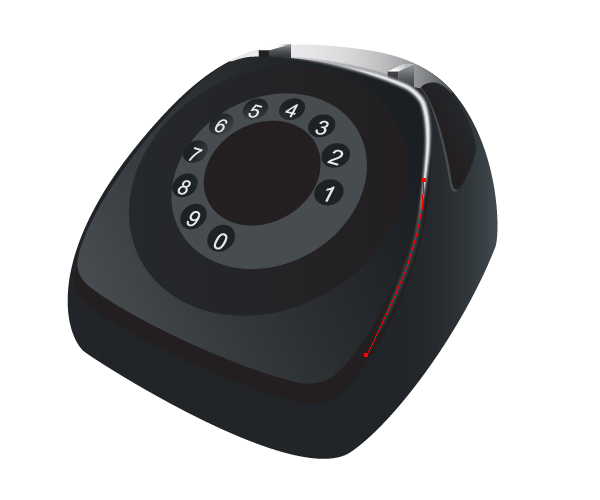
Now drag this blend into the Brushes palette and drop it there. Select the Art Brush type in the Options window. Set the brush options. Take the Pen Tool (P) and draw the next path on the “Main” surface of the telephone. Then go to the Brushes palette and click on the brush that has just been created.
Step 18
Now create the next path disjoint with the “Main” circle of the telephone and fill it with the linear gradient.
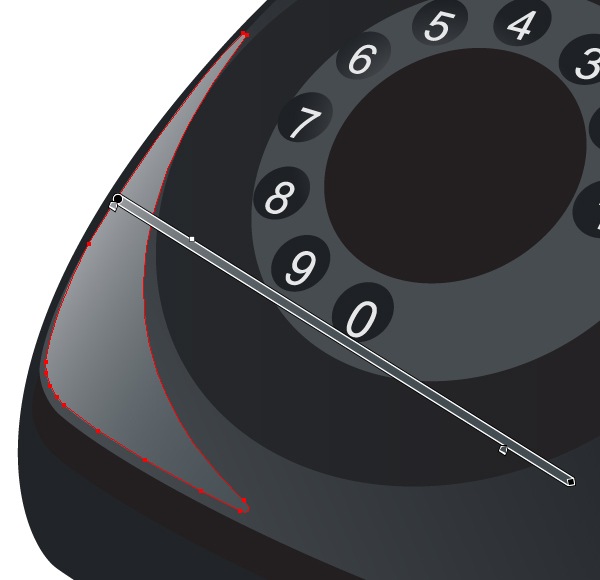
Make the following path filled with the linear gradient too.

Create the path over the “Main” circle and fill it with the linear gradient.
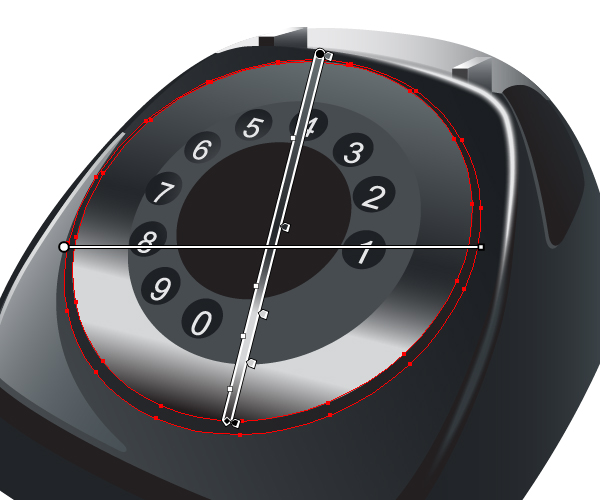
Now create a new path again and fill it with the linear gradient too.
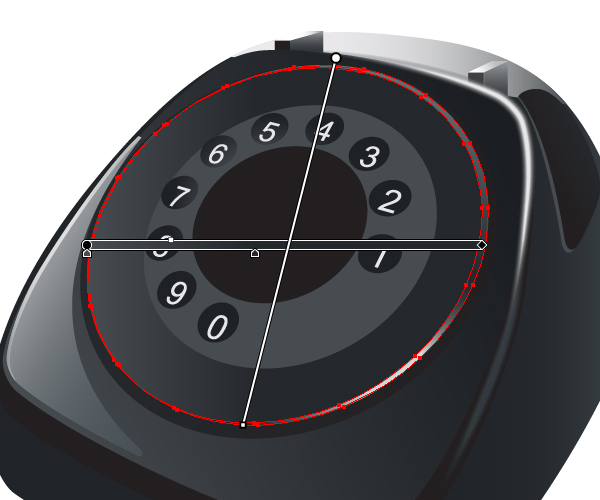
The results should look something like the following.

Step 19
Create the following path filled with the radial gradient. It must be placed under the telephone’s disc (with 10 holes).
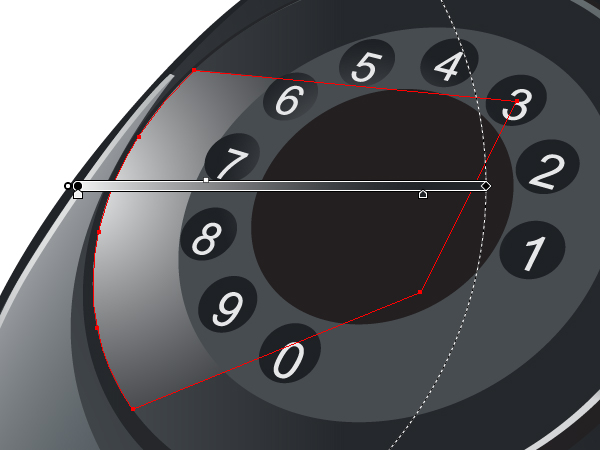
Create the following path in the center of the telephone. Fill it with the linear gradient.
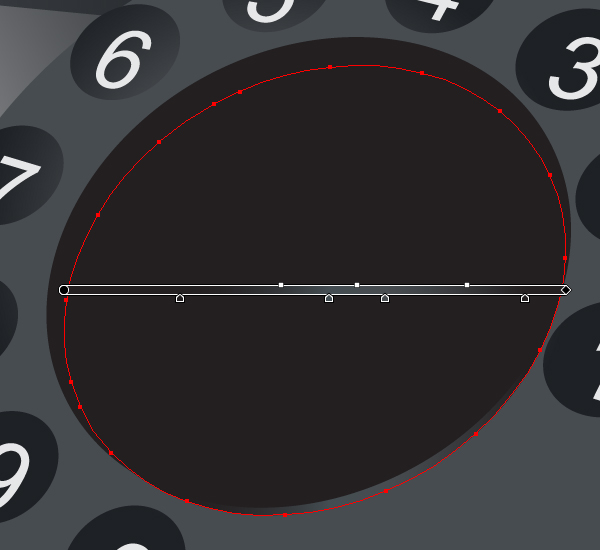
Now create another path filled with the linear gradient.
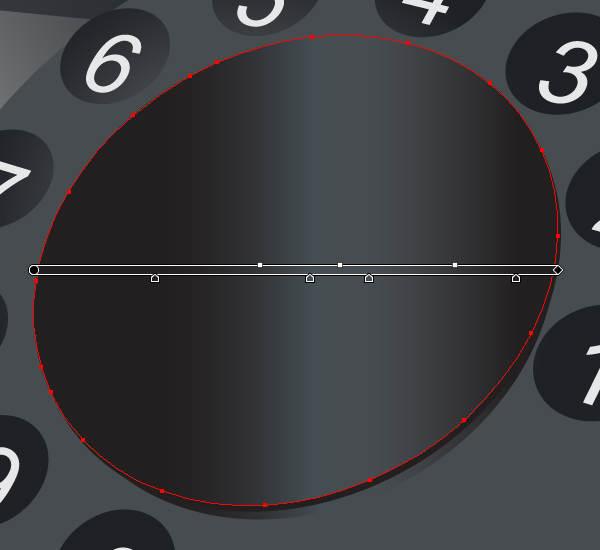
After that create a new path filled with the radial gradient.
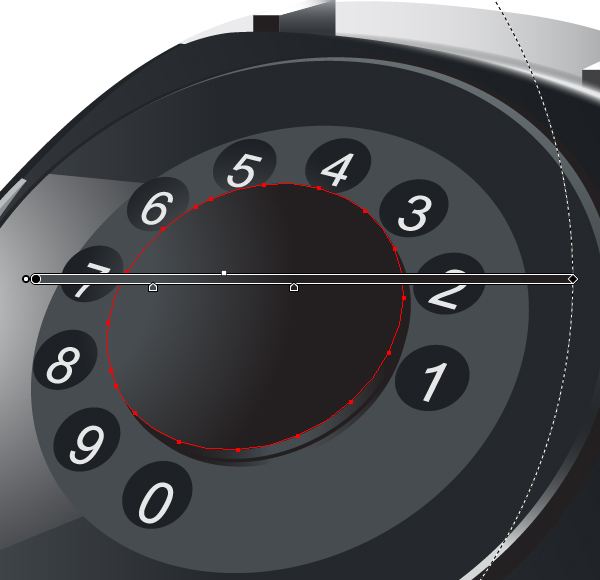
Step 20
Draw the path filled with the radial gradient in the receiver cavity of the telephone.
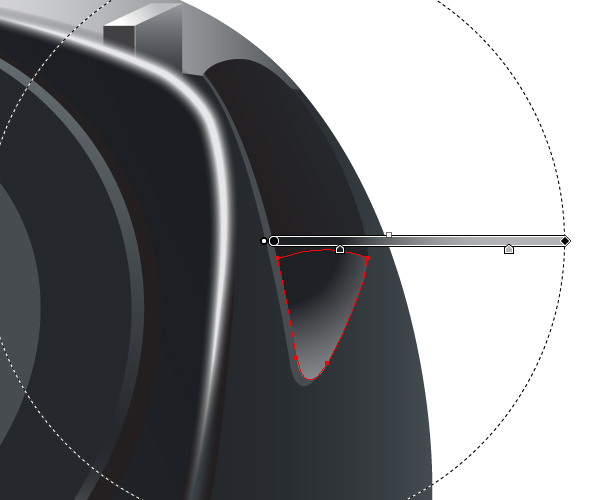
Draw the next path in the top part of the path just created and fill it with the linear gradient.
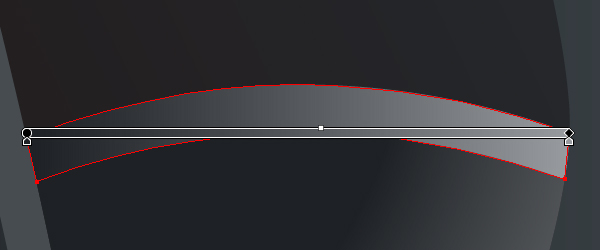
The results should look like the image below.
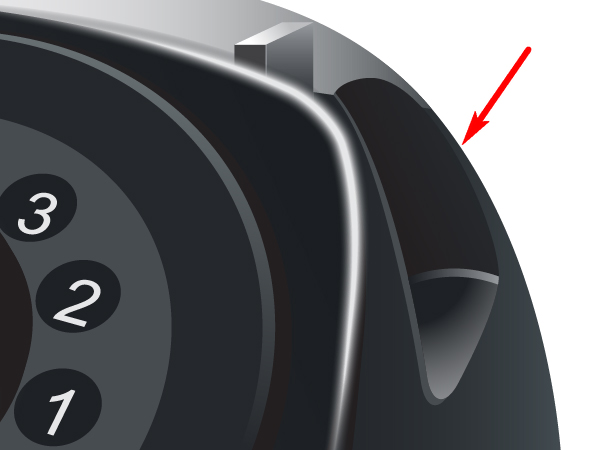
Step 21
Draw the path in the center of the telephone’s disc and fill it with the linear gradient.
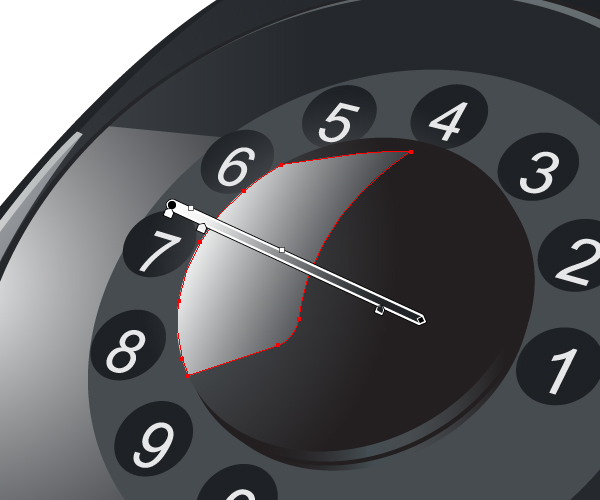
Step 22
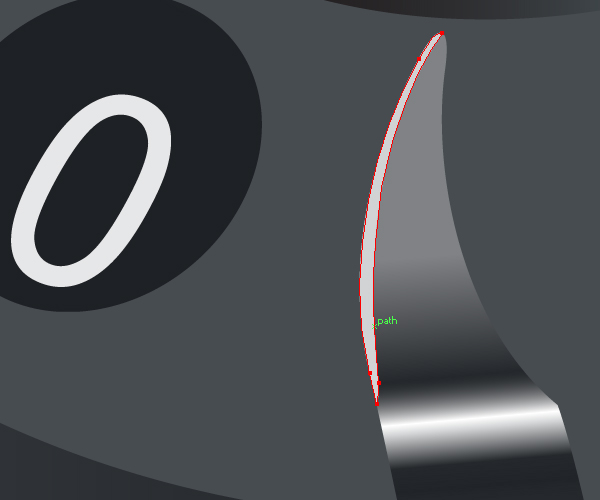
Draw the lever on the telephone’s disc (with digits) and fill it with the linear gradient. See the diagram below.
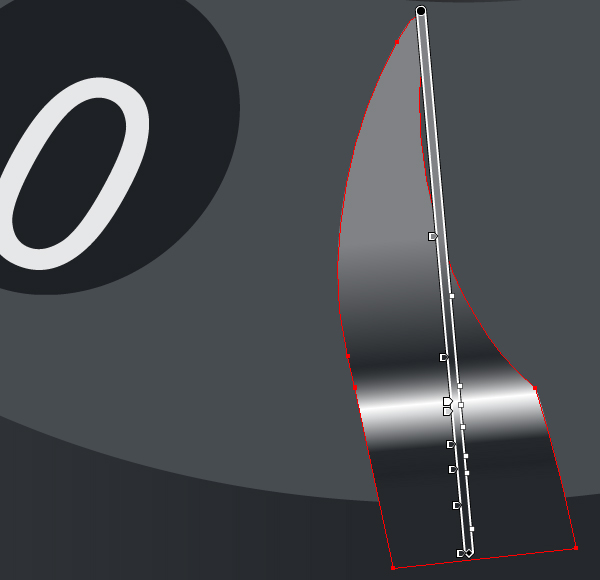
Then create a path on the left side of the lever and fill it with a gray color.
Step 23
Create the next Blend Art Brush as you had done earlier. The helping diagram is below.
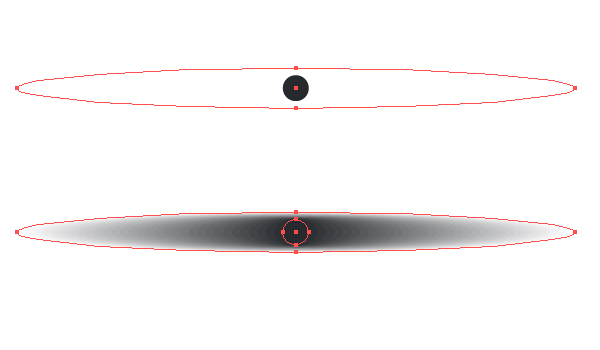
Illustrate the following path under the “Main” surface and apply the brush to it.
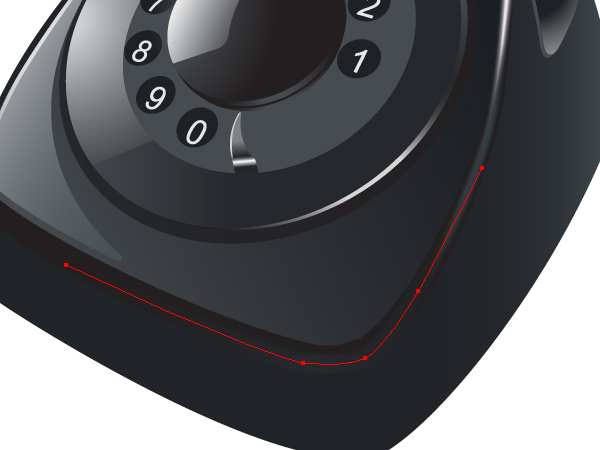
Step 24
Create the following Blend Art Brush as you have done before. The helping diagrams are below.
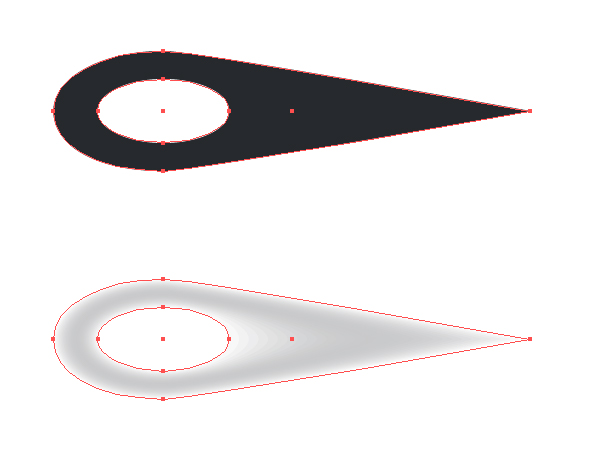
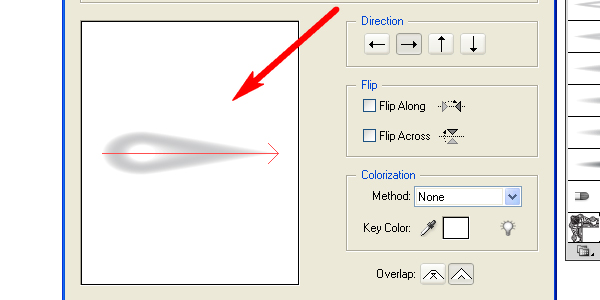
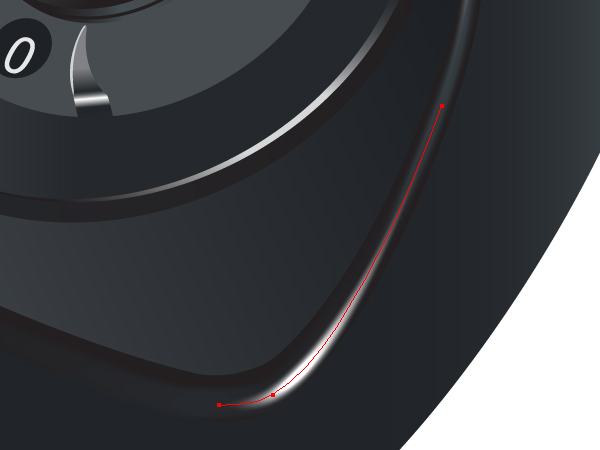
Illustrate the next path under the “Main” surface and apply the brush to it.
Step 25
Illustrate the next Blend by creating the paths that are shown in diagrams below.
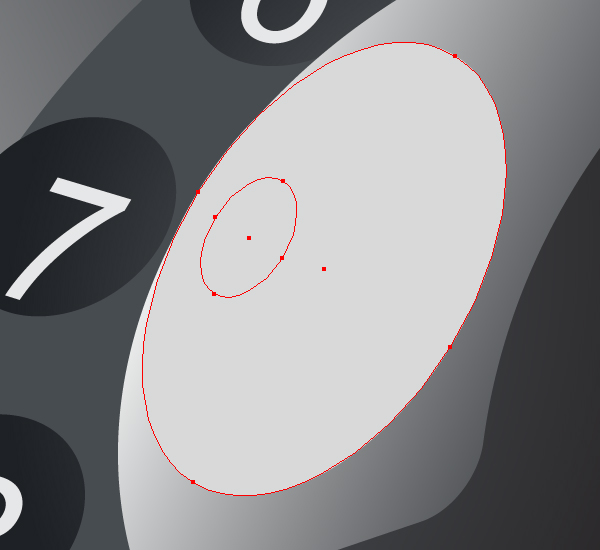
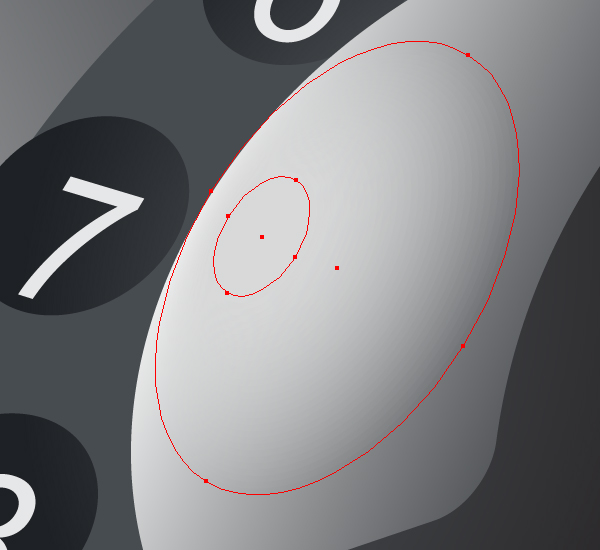
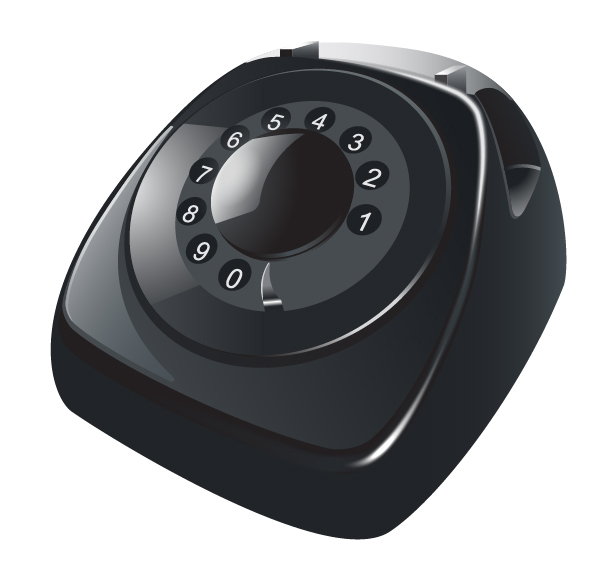
After that, the results should look like the following:
Step 26
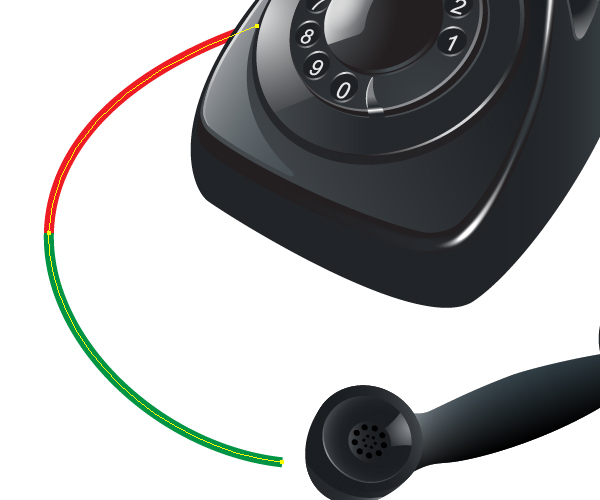
Let’s create a cord path that consists of two different parts: the red one and the green one (the colors of the parts are set to None, but they are shown only for your convenience and have not other relevance in the work). Pay attention that the top part end lies under the telephone, while the bottom part end lies about the receiver.
Create two paths on the one of the cord parts as shown.
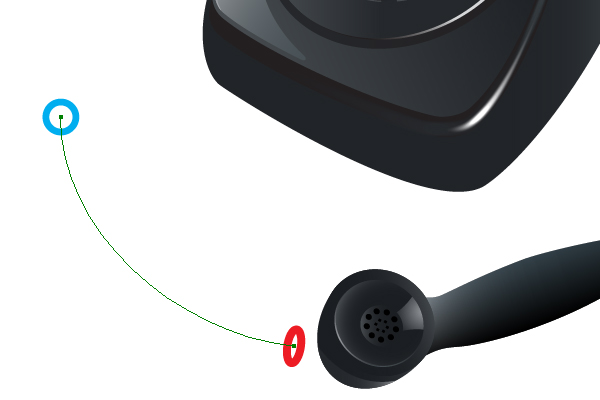
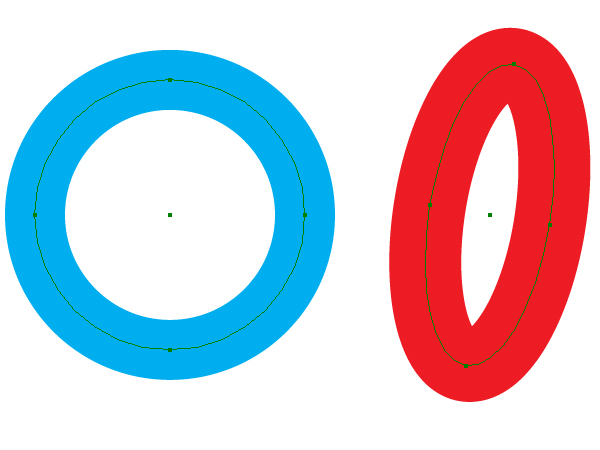
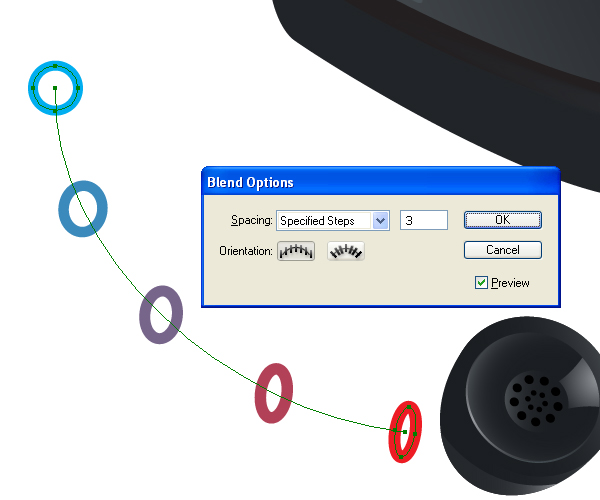
Select these two paths and the part of the cord path, then go to Object > Blend > Make. Go to Object > Blend > Blend options. Set there the Spacing to Specified steps and the quantity of steps to the number you want. Orientation should be set to Align to Page. The results should look something like the following:
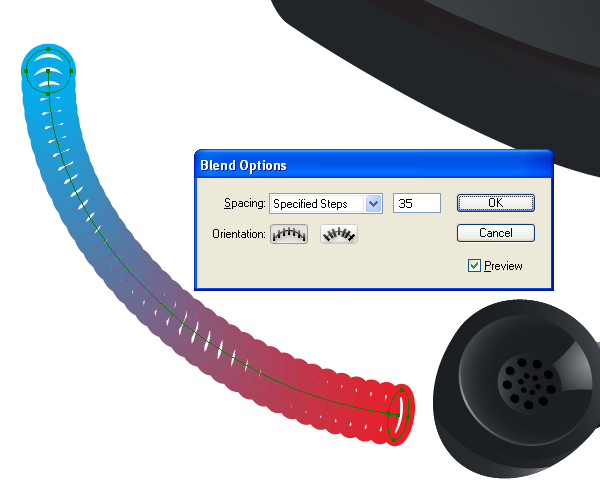
Increase the quantity of steps in the Blend options dialog box in order to receive the twisted cord geometry.
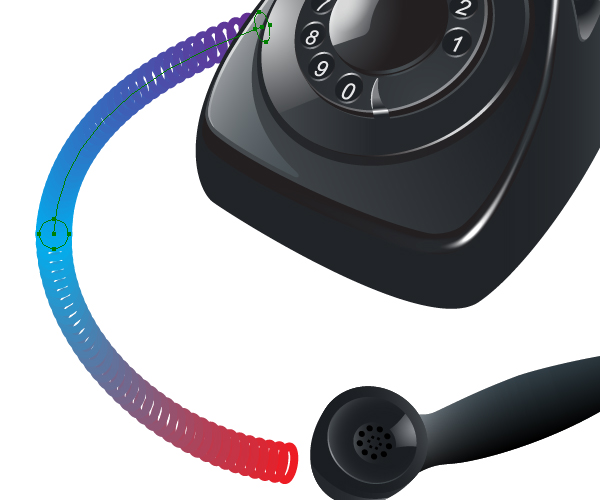
Repeat this over the top part of the cord path.
Now select two blends and go to Object > Expand twice. Then go to Object > Ungroup. You will receive the blends made from Compound paths. Now select the end compound path located at the end of cord part and fill it with the radial gradient.
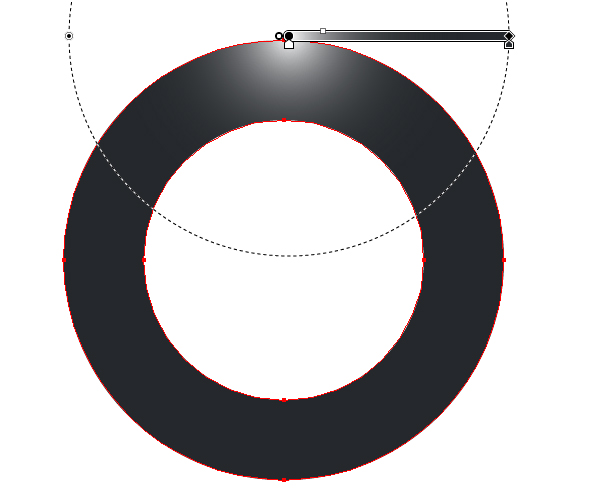
Second, take another end compound path and fill it with the radial gradient too. Pay attention to the displacement of the light spot (shown by the arrow).
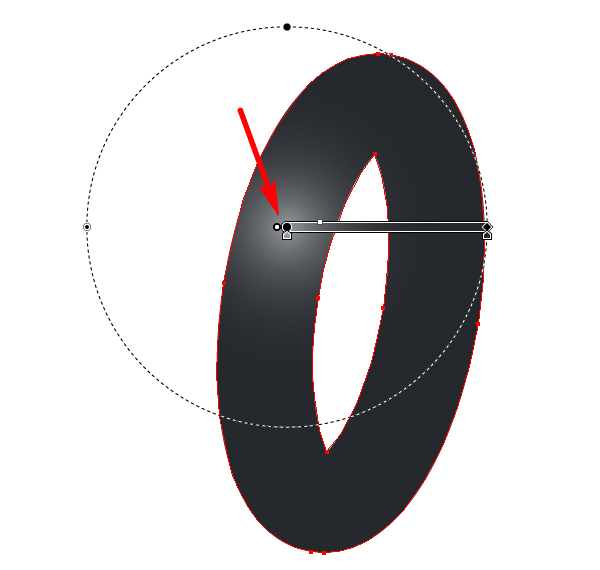
The results should look like the following.

Attach the cord to the receiver by creating the following path and filling it with a radial gradient.
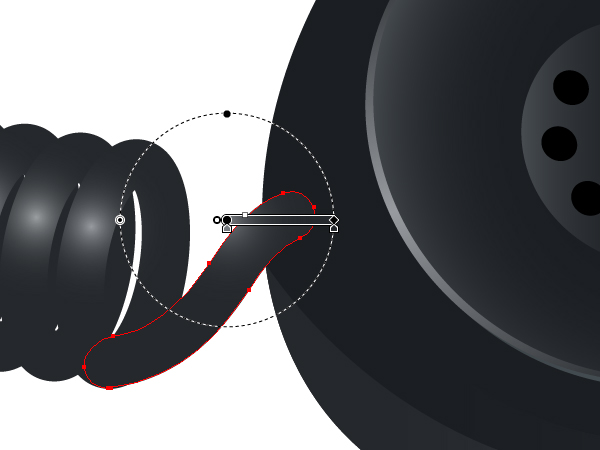
Step 27
Now illustrate the path that is shown in the figure below. Fill it with black. This path must point at the top part of the receiver.
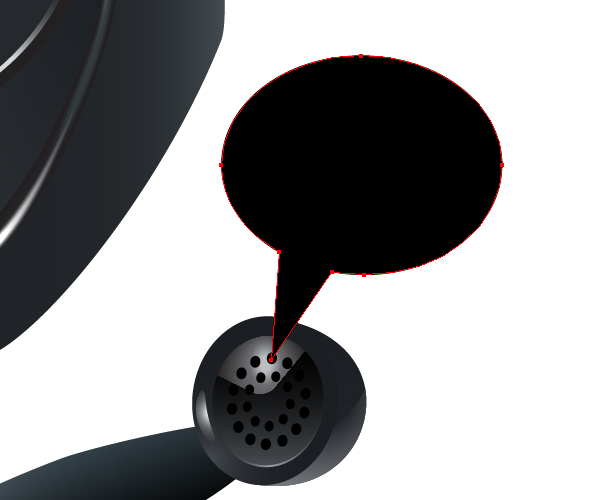
Copy it and paste it in front (Command + C then Command + F). Move the copy and fill it with a linear gradient.
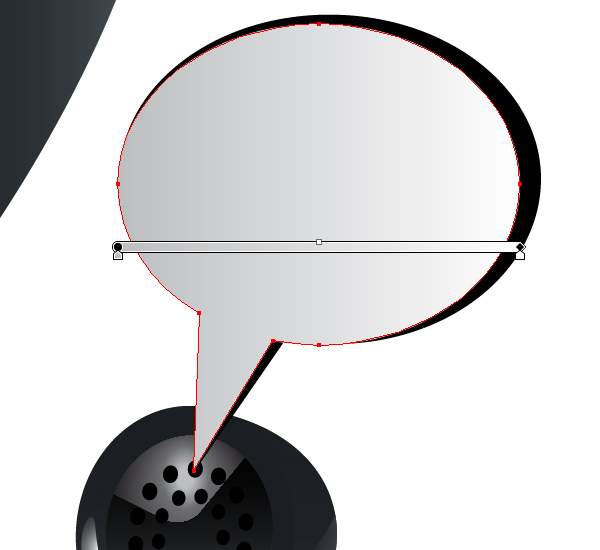
Take the Type Tool (T) and write the text “Contact us” in the center of the path.

Step 28
Create the shadow of the receiver. First, create the following paths: the biggest one is filled with gray, the smallest one is filled with black (the receiver is invisible on the following diagrams).
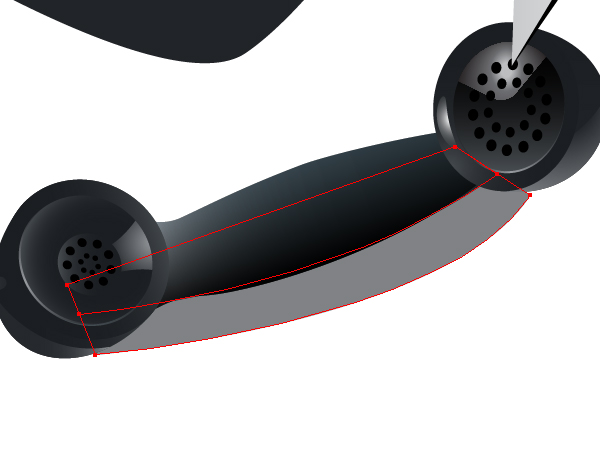
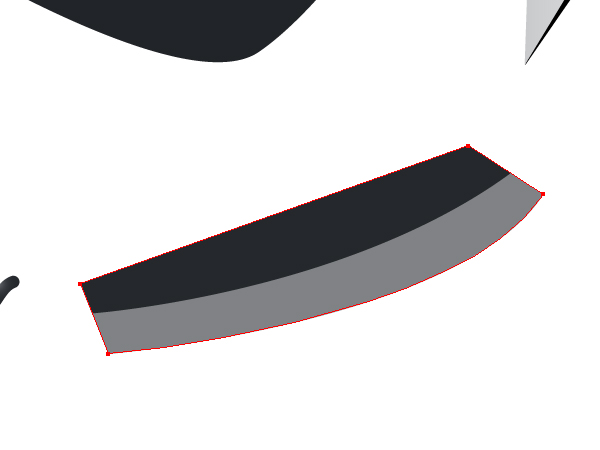
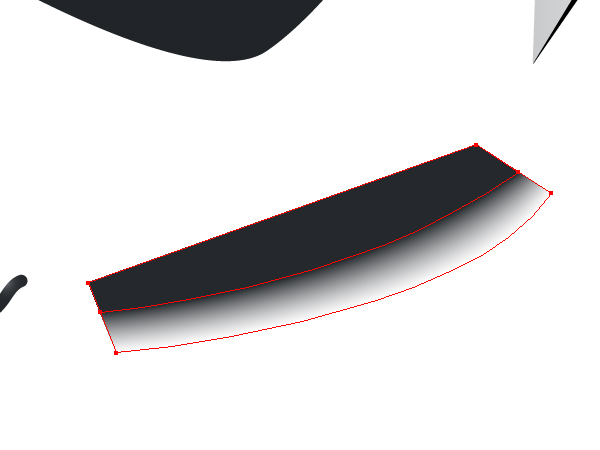
Set the Opacity to the biggest path to 0%. And go to Object > Blend > Make (set the Spacing to Smooth Color).

Step 29
Create the shadow of the bottom part of the receiver the same way.
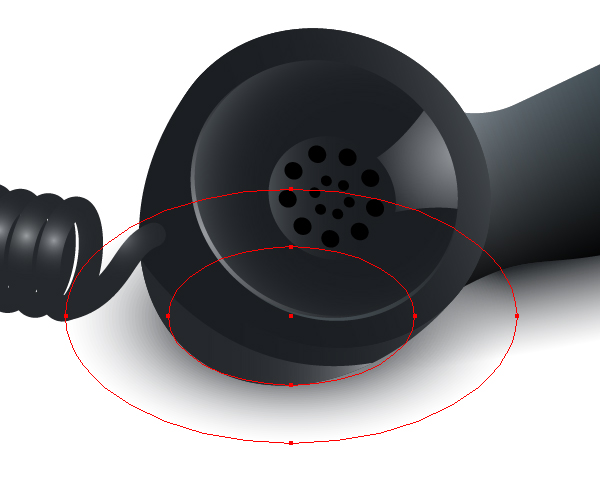
Create the shadow of the top part of the receiver the same way.
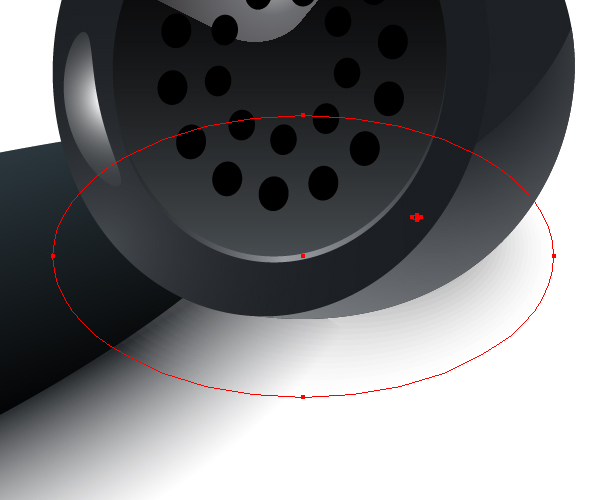
Step 30
Create the shadow of the telephone itself.
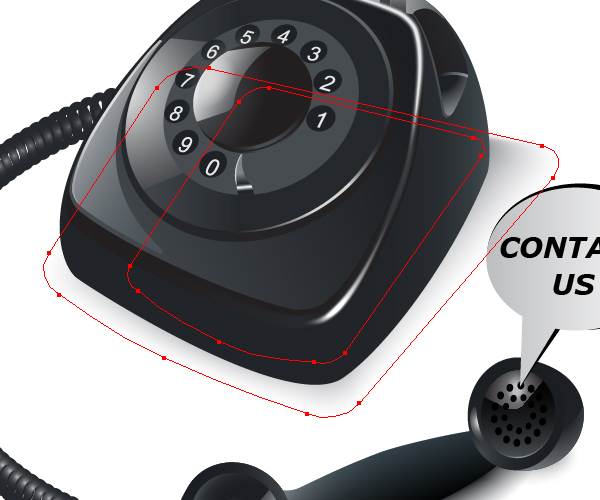
Now select the cord (without the path attached to the receiver) copy it and paste it in front (Command + C then Command + F). Now go to Object > Expand.
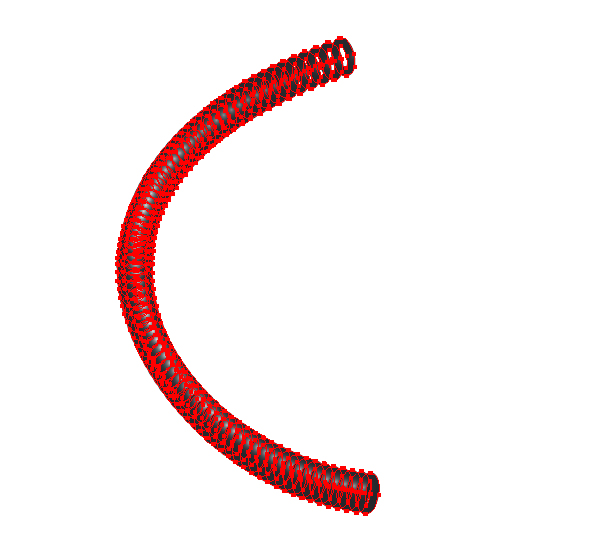
Then go to Pathfinder palette and click there on the Unite button.
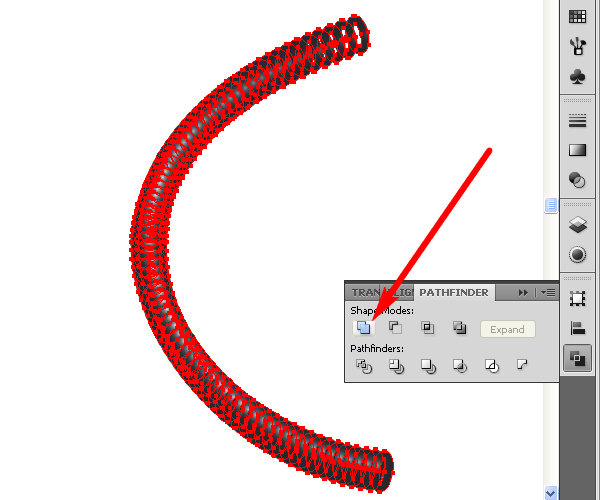
You should have the following results:
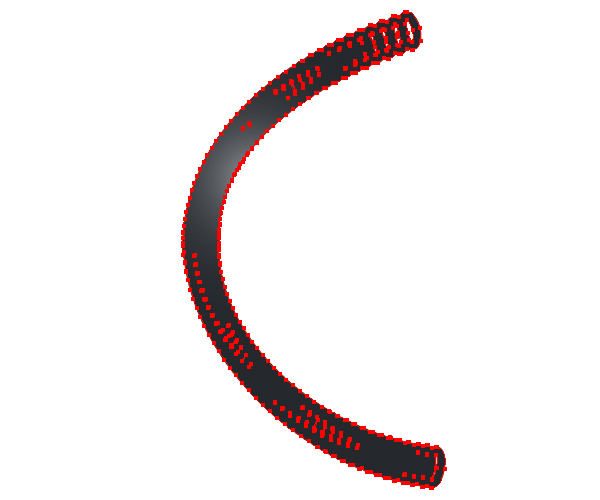
Now go to Object > Compound Path > Release. And after that go to the Pathfinder palette again and click on the Unite button.

Fill it with the linear gradient that from light gray to dark gray. Decrease the Opacity value for the light gray color stop.
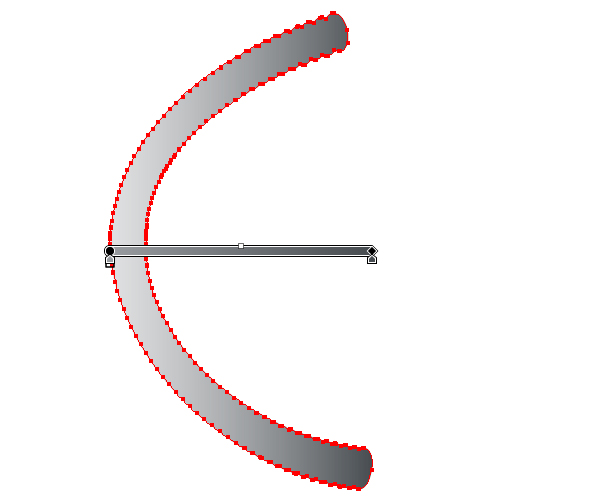
Go to Object > Arrange > Send Backward.

Conclusion
You have just made a retro phone. I hope you enjoyed this tutorial.

{excerpt}
Read More