Hello everyone! Today We’re gonna create a really nice title opening with Trapcode Particular. Few days ago I saw this great promo by this talented gentleman named InlifeThrill and I thought this could be awesome as a tutorial so I tried to create a similar animation from scratch.This time we won’t use Optical flares but you can improve this effect with your own lens flare plugins or you can purchase the animation by InlifeThrill. Let’s get started!
Step 1
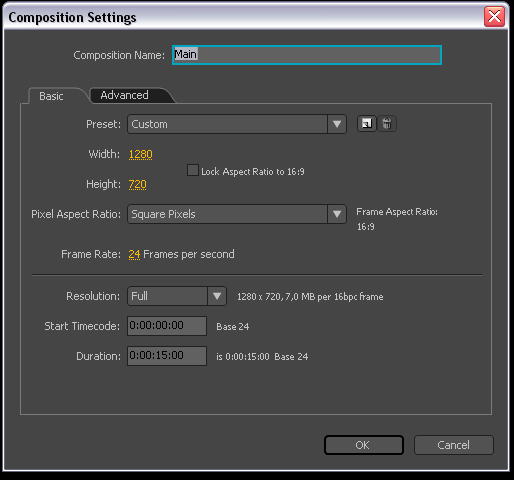
I create a composition by clicking Menu-> Composition->New Composition. Make it 1280*720 square pixels 15 seconds long, name it as ‘Main’.
Step 2
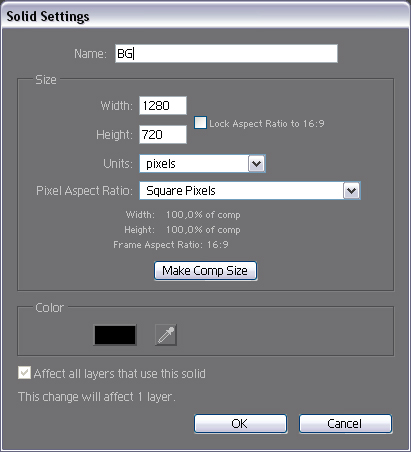
Create a new solid clicking by Menu->Layer->New->Solid. Change the color to Black. Make it comp size (1280*720) and name it as ‘BG’.
Step 3
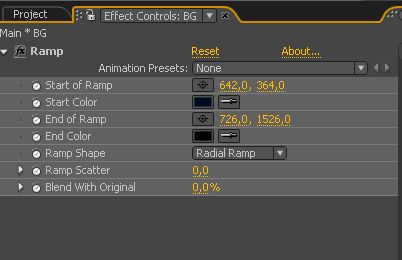
Go to Effect->Generate->Ramp and set the following properties.Set the Start color to #001326 and the End Color to #000000
Step 4
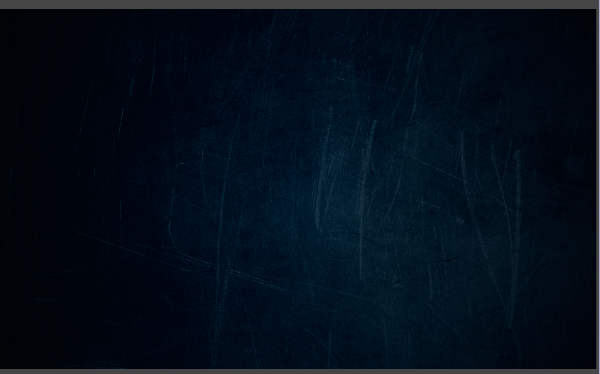
I used this texture to create a much more dramatic look.
Step 5
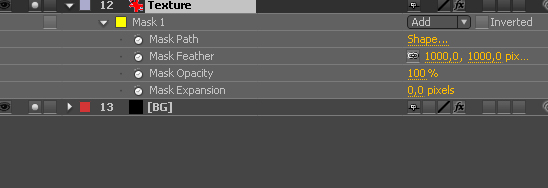
I also add an eliptical mask to the texture with the Ellipse Tool with the following properties.
Step 6
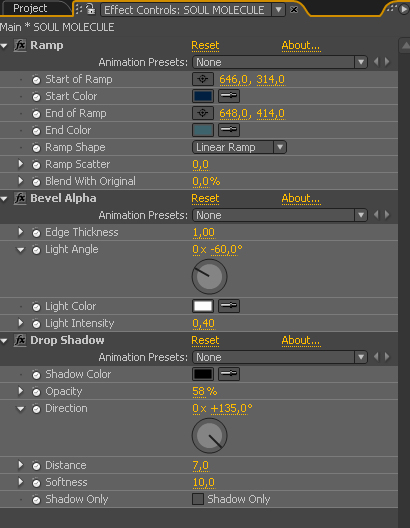
I used the Horizontal Type Tool (ctrl+t) to create the Soul Molecule text. I used Arial as a font and some default plugin to achieve a little 3D looking text. In Ramp I set the Start color in Ramp to #112542 and the End color to #4C646C.
Step 7
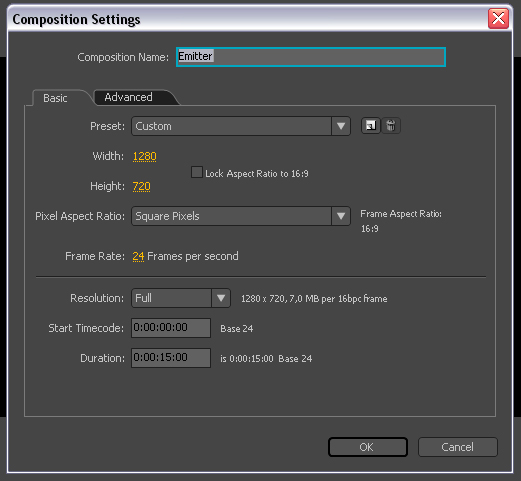
We will use a custom Emitter type (Layerd Grid) in Particular so I have to create a new composition by clicking Menu-> Composition->New Composition. Make it 1280*720 square pixels 15 seconds long, name it as ‘Emitter’.
Step 8
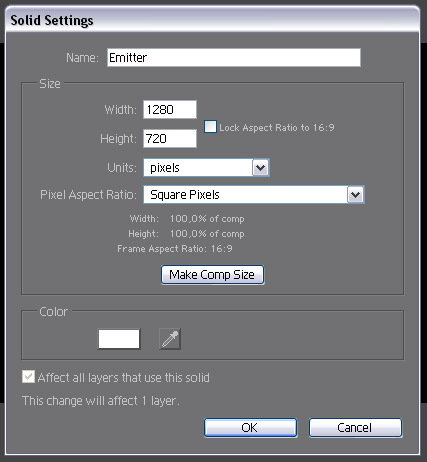
Create a new solid clicking by Menu->Layer->New->Adjustment Layer and name it as ‘Emitter’.
Step 9
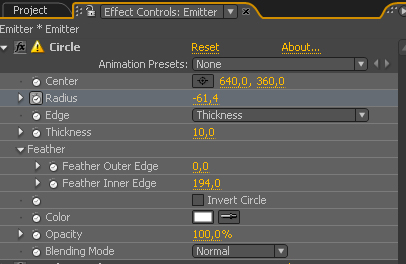
Go to Effect->Generate->Circle and set the following settings. As you can see I animated the Radius so in the first frame of the composition I set the Radius to -61 and around 10 seconds I set this value to 872. This is an optional part so you can create faster or longer animations. If you done everything right then you will see a simple circle animation.
Step 10
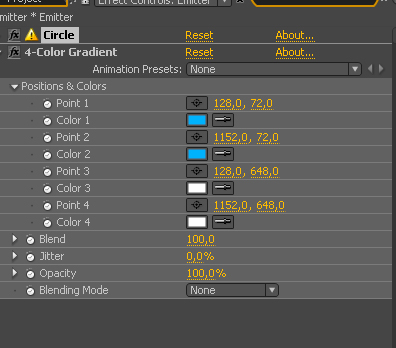
In this step Im just colorized the circle animation with the following colors color1 and 2 #59B0F9 and color3 and 2 #FFFFFF.
Step 11
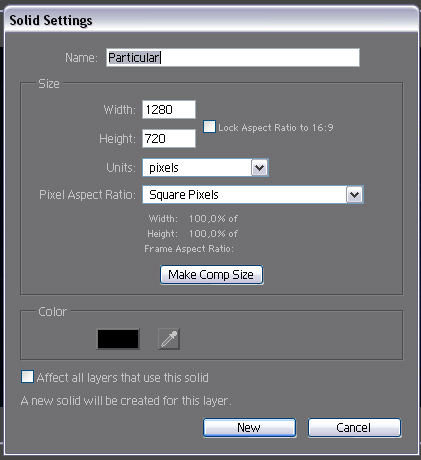
Now let’s go back to the Main composition and let’s create a new solid clicking by Menu->Layer->New->Adjustment Layer and name it as ‘Particular’.
Step 12
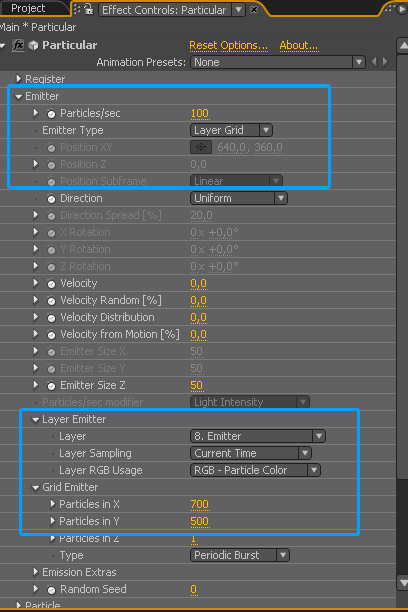
Let’s add particular(Effect->Trapcode->Particular) and under the Emitter section let’s change the following properties.
Step 13
Under the particle section let’s change the following properties.
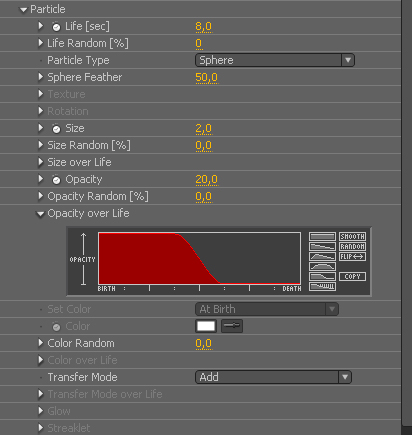
Step 14
Under the Turbulence Field section let’s change the Affect size and Affect Position.
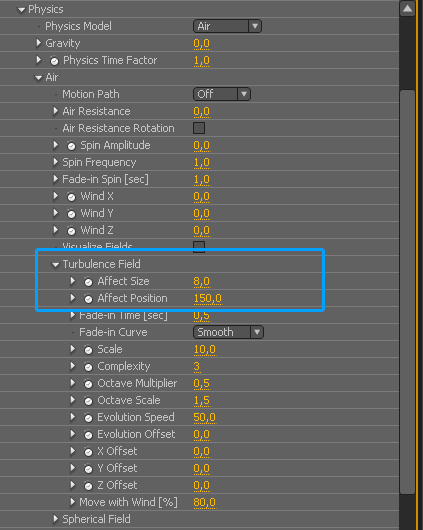
Step 15
If you working with Particular or Form then allways a good idea to add a little glow(Effect->Stylize->Glow) to the particles.
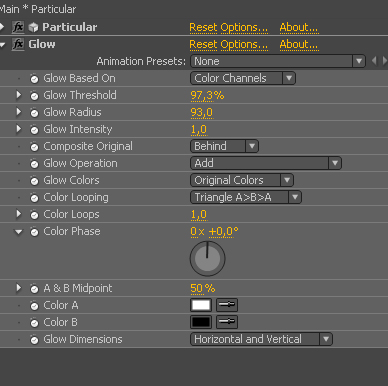
Step 16
When you are using glow then allways a good idea to change the color depth to 16BPC (alt+click on the icon).
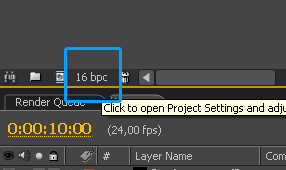
Step 17
We have to create the small particles as well so I just duplicate the particular layer and rename it to small particles and let’s change some particular properties.First let’s see the Emitter section.
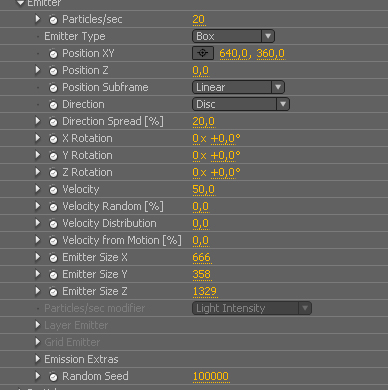
Step 18
Let’s set the following properties under the particle section.
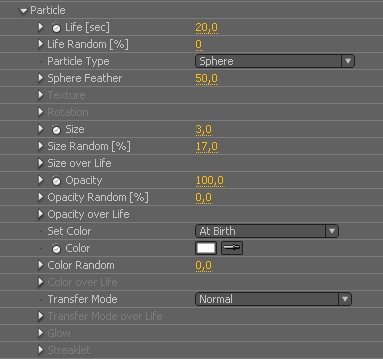
Step 19
Let’s add a little Fast Blur(Effect->Blur&Sharpen->Fast Blur) and select the small particles layer hit the "t" key on the keyboard and lower the opacity to 40%.
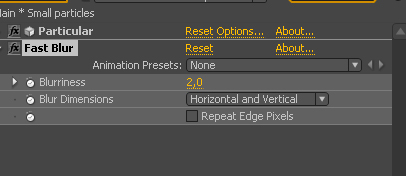
Step 20
.Let’s create a new adjustment layer clicking by Menu->Layer->New->Adjustment Layer and name it as ‘Color Correction’.
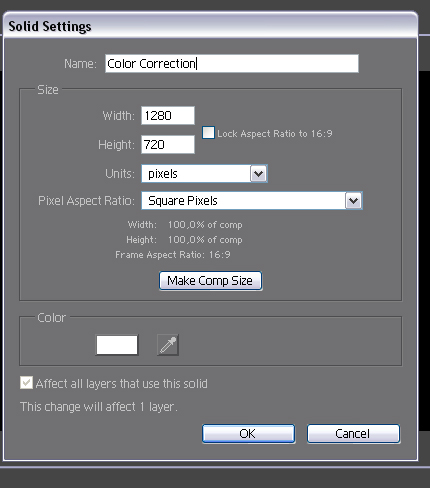
Step 21
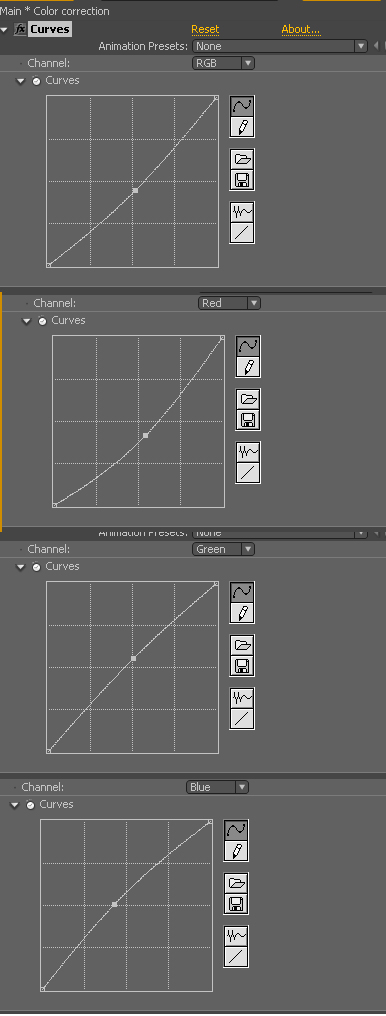
Now let’s add Curves (Effect->Color Correction->Curves) and change the following properties.
Step 22
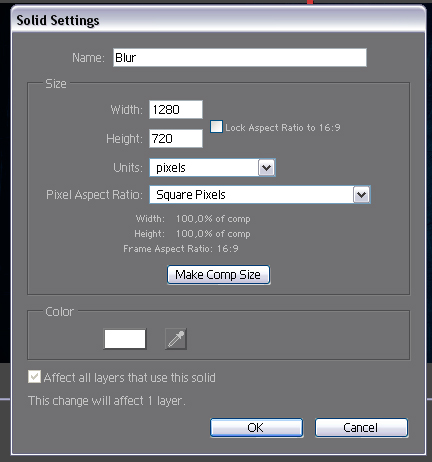
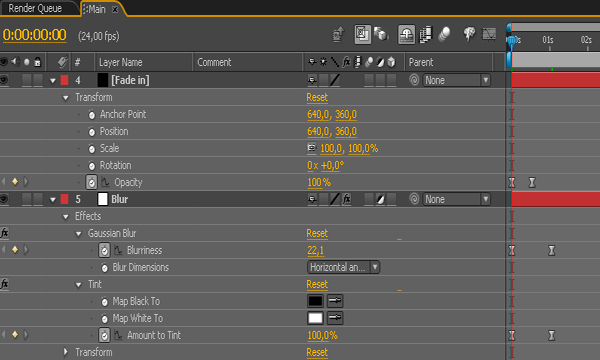
Now here comes the finishing touches.Let’s create a new adjustment layer clicking by Menu->Layer->New->Adjustment Layer and name it as ‘Blur’. This is not the part of the particle effect, this is just the desaturated style fade in animation at the first few frame in the video.
Step 23
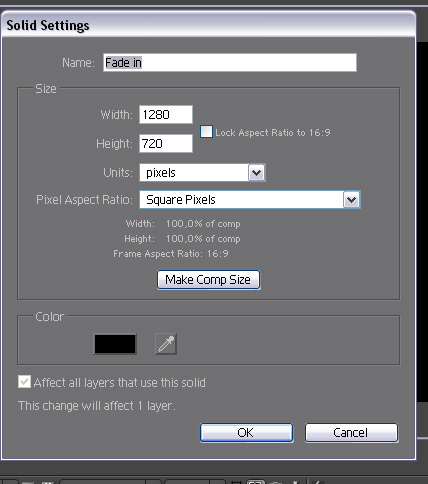
Create a new solid clicking by Menu->Layer->New->Solid. Change the color to Black. Make it comp size (1280*720) and name it as ‘Fade in’.
Step 24
So that’s how I animated the fade in effect.
Step 25
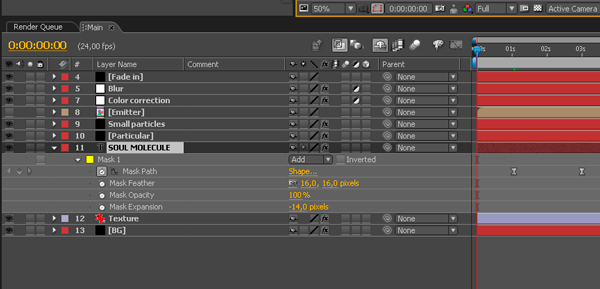
Before I forget we have to reveal the Soul Molecule text so I just select the Ellipse tool and create an eliptical mask on the text and I just animate the Mask path so now it’s looks like the abstract wave effect are reveals the text.
Step 26
So actually this is what Im talking about.
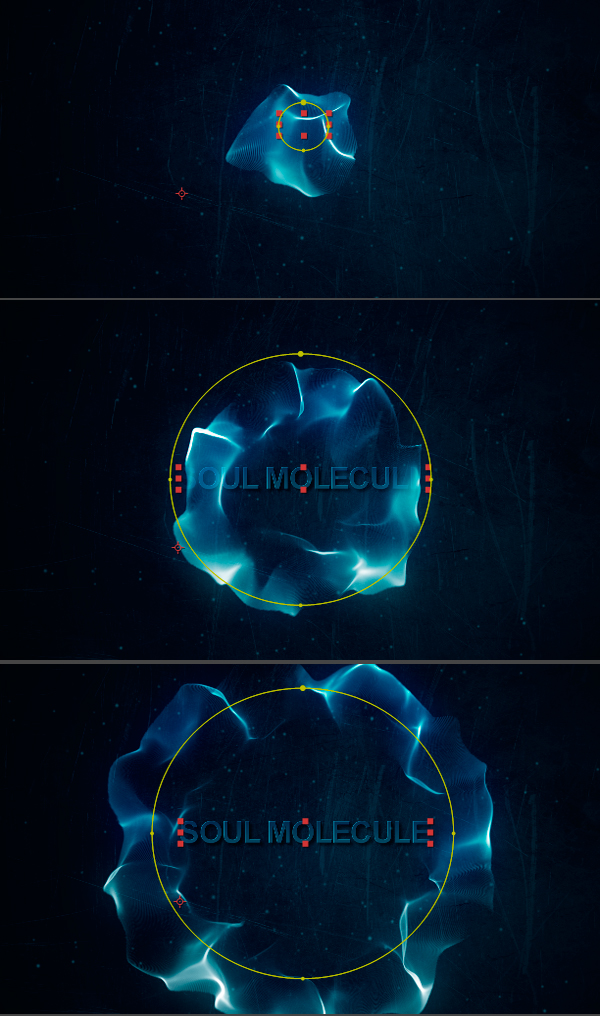
As you can see this is a pretty useful technique so use your imagination(Change the colors, the emitter type to layer and so on and so forth) and try to create something ground breaking and don’t forget to share your ideas,videos with us. Once again my name is Tibor Miklos I hope you enjoyed the tutorial. Thanks a lot for your attention.